

Page 1
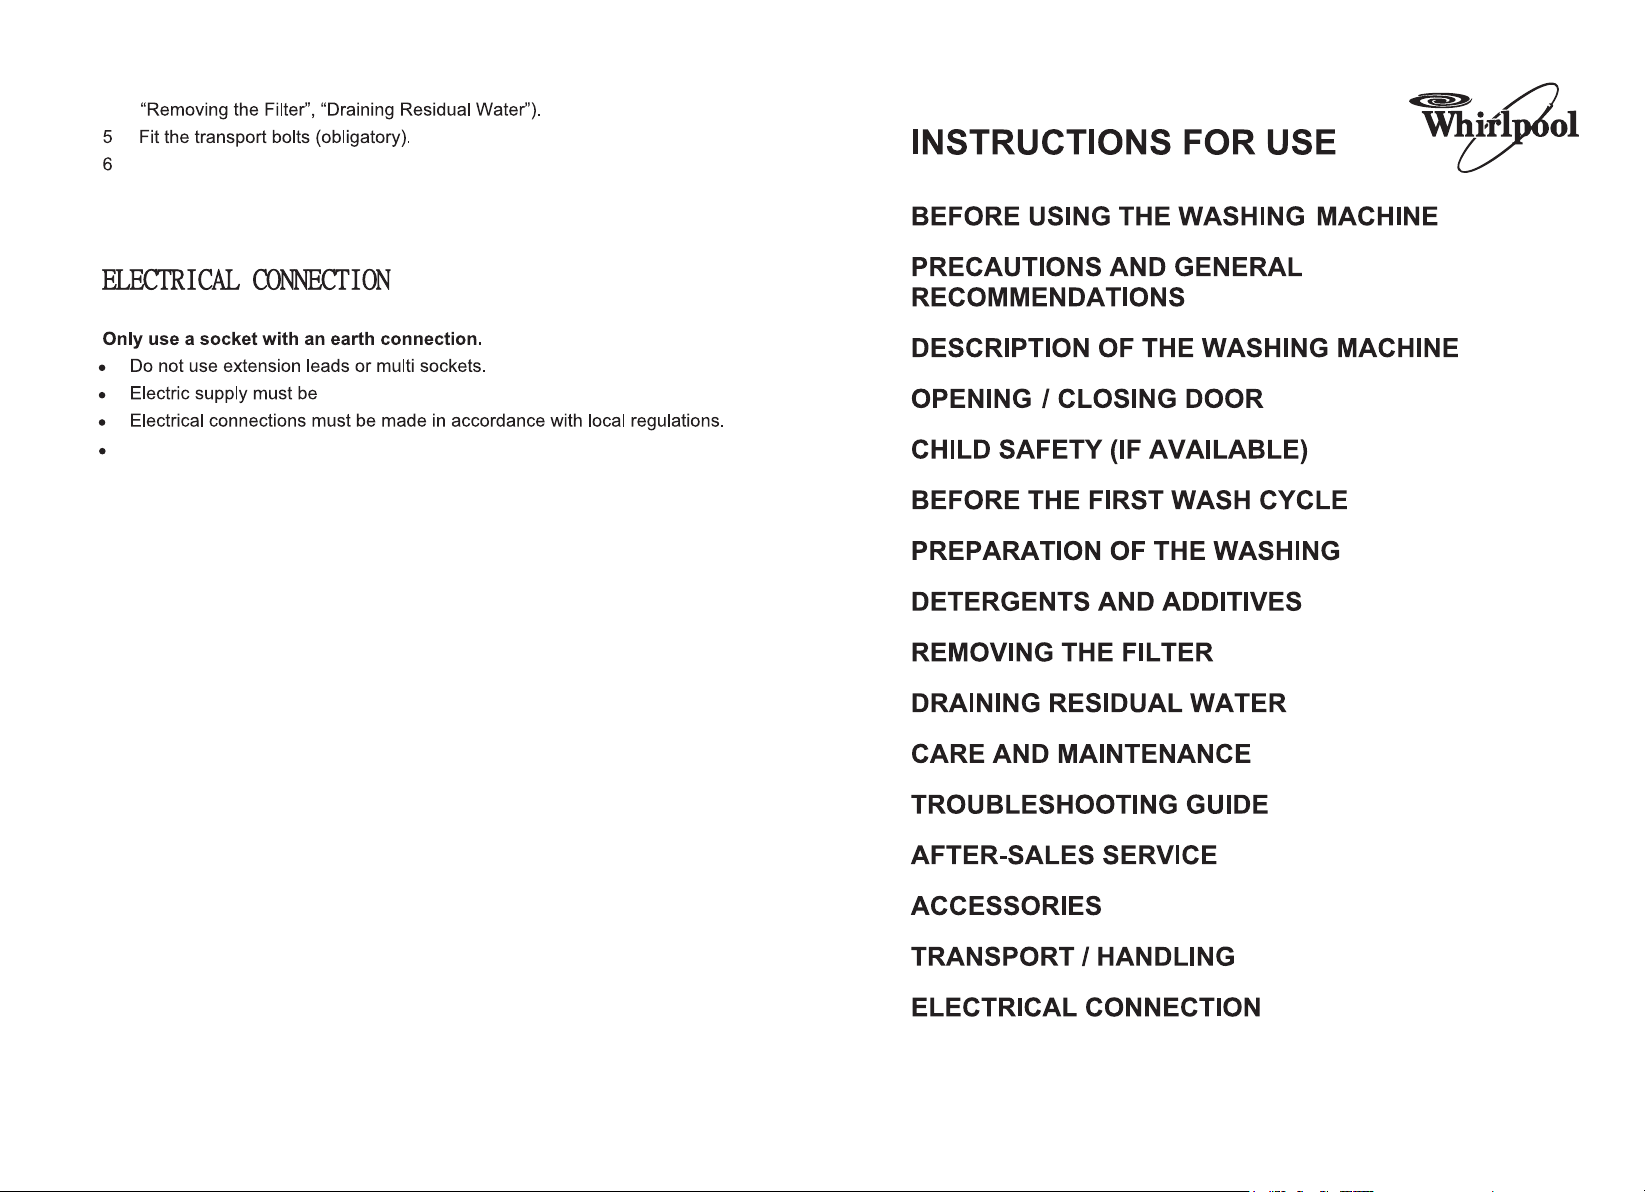
Depending on the model, , the machine’s weight will range from 60 kg to
75 kg. Two persons are required to move it.
adequate for the machine’s 10 A Current Rating.
The electrical power cable must be replaced exclusively by a licensed electrician.
Whirlpool is a registered trademark of Whirlpool USA
W10312331B
Page 2
Thank you for your choosing a Whirlpool washing machine.
Before operating your new washing machine, please read this instruction
carefully, and keep it for future reference.
Please make sure the socket is grounded securely, the water source
connection is reliable. The manufacturer declines all liability and warranty for
damage to property or injury to persons or animals due to non-compliance
with the directions given in this instruction.
ensure
Ensure
Ensure that the ventilation openings in the base of the washing machine
(if available on your model) are not obstructed by a carpet or other material.
Single inlet -
Dual inlet -
1
only
and cold
reused. They should be discarded.
2
Page 3
ing
the
that
that
The symbol on the product, or on the documents accompanying the product,
indicates that this appliance may not be treated as household waste. Instead it
shall be handed over to the applicable collection point for the recycling of electrical
and electronic equipment. Disposal must be carried out in accordance with local
environmental regulations for waste disposal. For more detailed information about
treatment, recovery and recycling of this product, please contact your local city
office, your household waste disposal service or the shop where you purchased
the product.
Type 1: Type 2:
2 5
3
en
from the mains supply,
,
the
54
4
Page 4
Clean the outside of the washing machine with a damp cloth. Do not use abrasive
detergents.
Never open the door forcibly or use it as a step.
This appliance is not intended for use by persons (including children) with reduced
physical, sensory or mental capabilities, or lack of experience and knowledge, unless
they have been given supervision or instruction concerning use of the appliance by a
person responsible for their safety.
Childen should be supervised to ensure that they do not play with the appliance.
Children must not be allowed to play with the appliance or to climb into the drum (see
also the following chapter “Child Safety”).
If necessary, the power cable may be replaced with an identical one obtained from our
After-Sales Service. The power cable must only be replaced by a qualified technician.
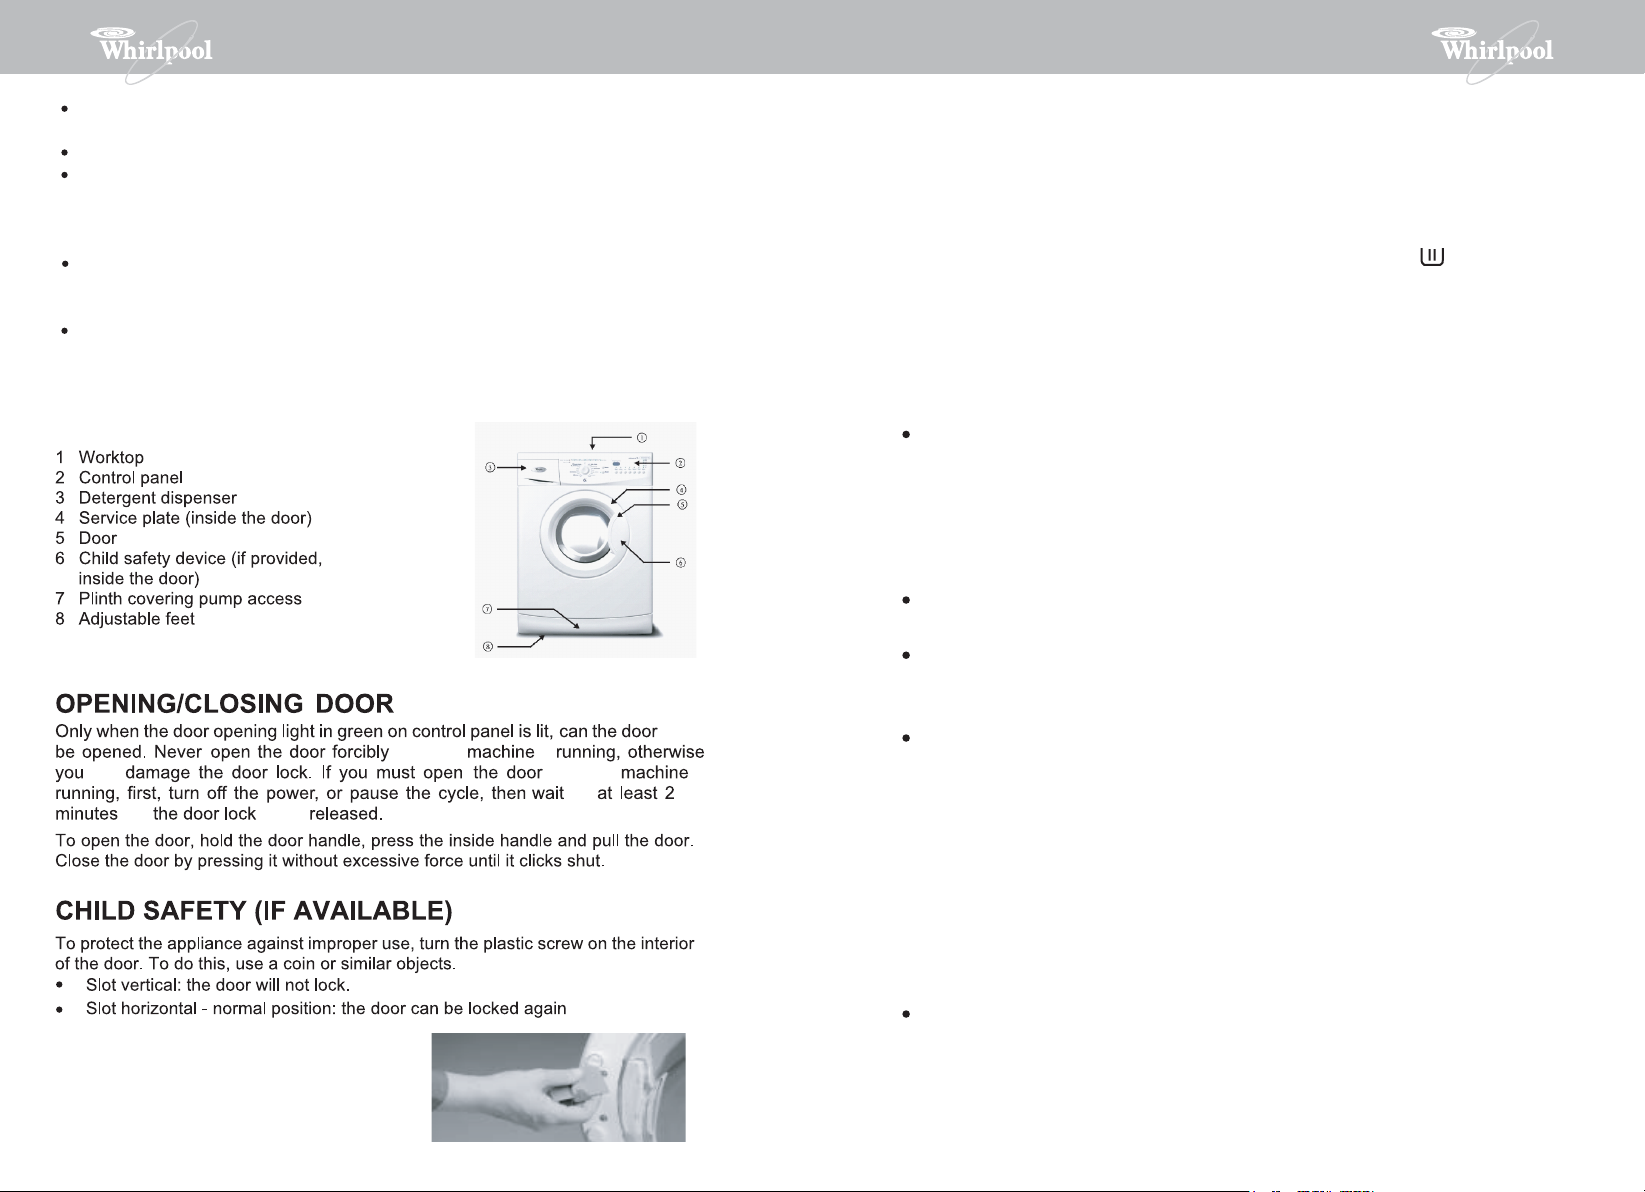
DESCRIPTION OF THE WASHING MACHINE
Control panel layout and
appearance will depend on the model.
can
for
while the
to be
is
while the
for
is
BEFORE THE FIRST WASH CYCLE
To remove any residual water used during testing by the manufacturer, we
recommend that you carry out a short wash cycle without laundry.
1 Open the tap.
2 Close the door.
3 Pour a little detergent (about 30 ml) into the main wash chamber of the deter-
gent dispenser .
4. Select and start a short programme (see separate quick reference guide).
PREPARATION OF THE WASHING
1. Sort the laundry according to...
Type of fabric / care label symbol
Cottons, mixed fibres, easy care/synthetics, wool, handwash items.
The wool wash cycle of this machine has been tested and approved by The
Woolmark Company for the washing of Woolmark garments labelled as “machine
wash” provided that the garments are washed according to the instructions on the
garment label and those issued by the manufacturer of this washing machine.
Colour
Separate coloured and white items. Wash new coloured articles separately.
Loading
Wash items of different sizes in the same load to improve washing efficiency and
distribution in the drum.
Delicates
Wash small items (e.g. nylon stockings, belts etc.) and items with hooks (e.g. bras)
in a cloth bag or pillow case with zip. Always remove curtain rings or wash curtains
with the rings inside a cotton bag.
2. Empty all pockets
Coins, safety pins etc. can damage your laundry as well as the appliance drum and
tub.
3. Fasteners
Close zips and fasten buttons or hooks; loose belts or ribbons should be tied
together.
Stain removal
Blood, milk, eggs etc. are generally removed by the automatic enzyme phase of the
programme.
5 6
Page 5
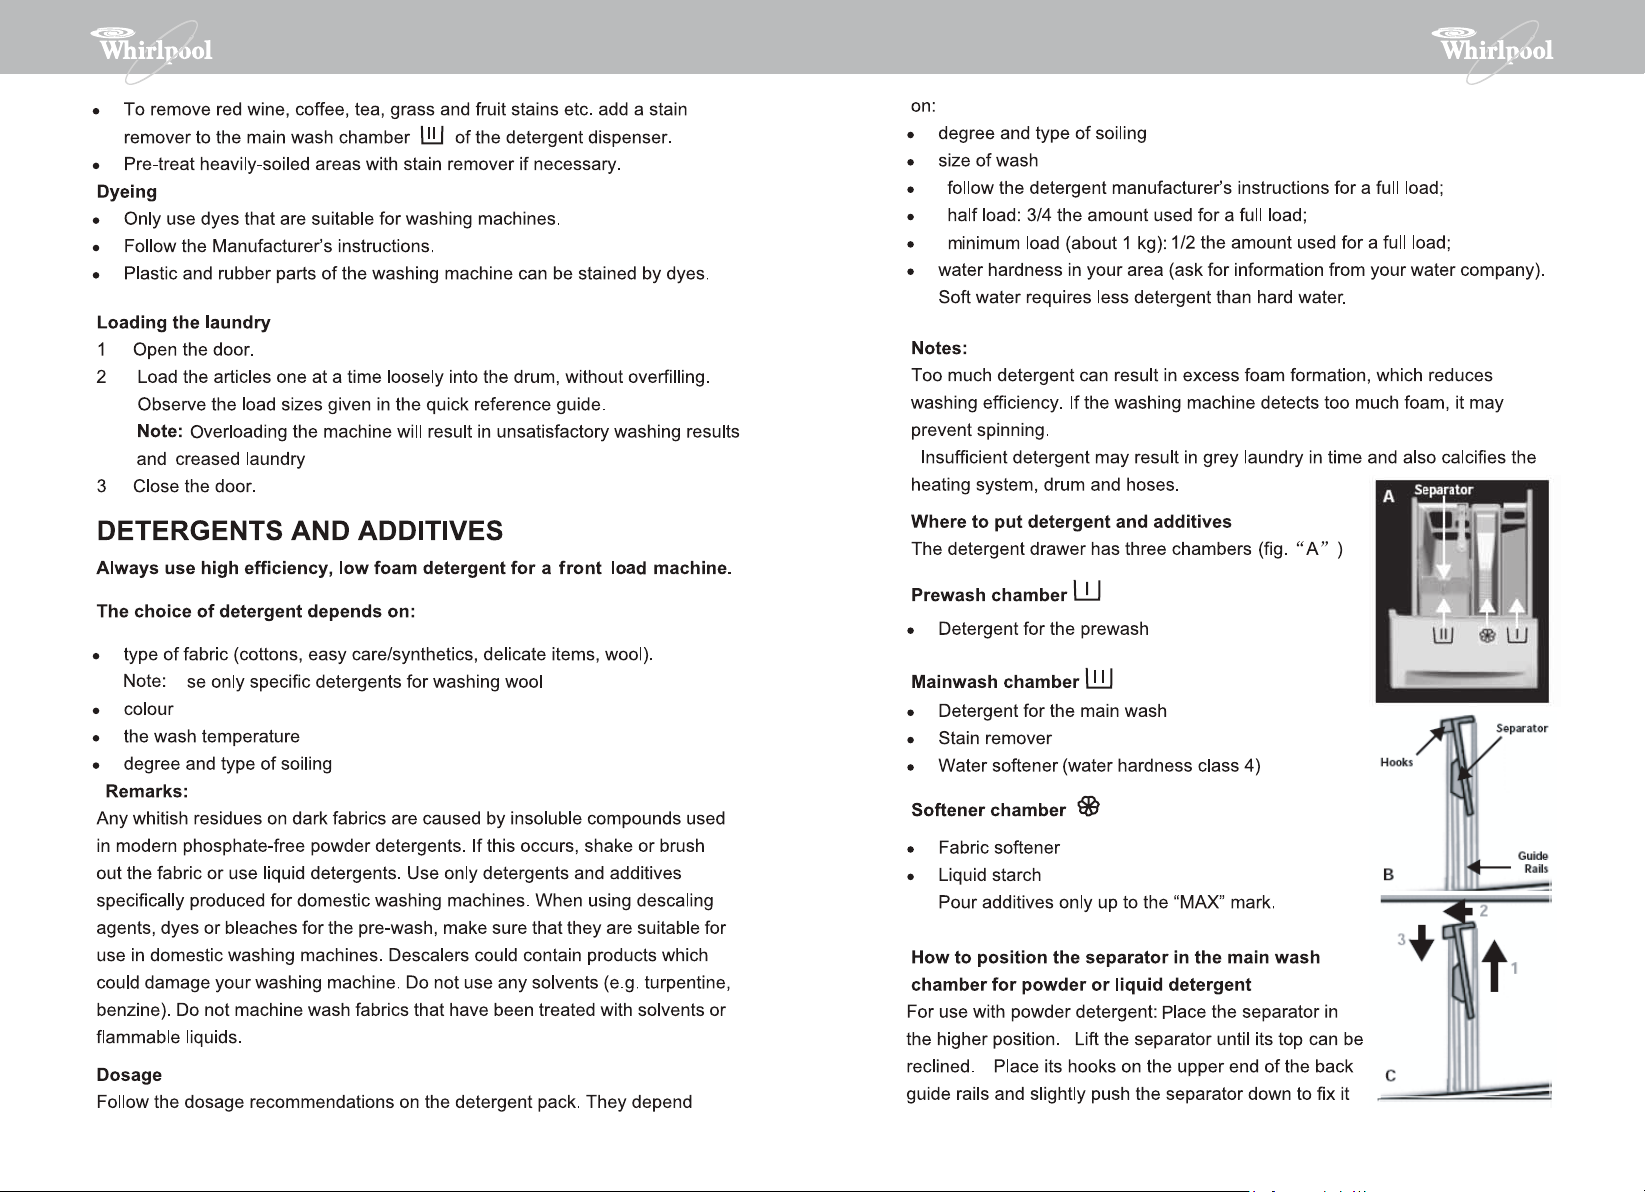
.
/ soak
U
7 8
Page 6
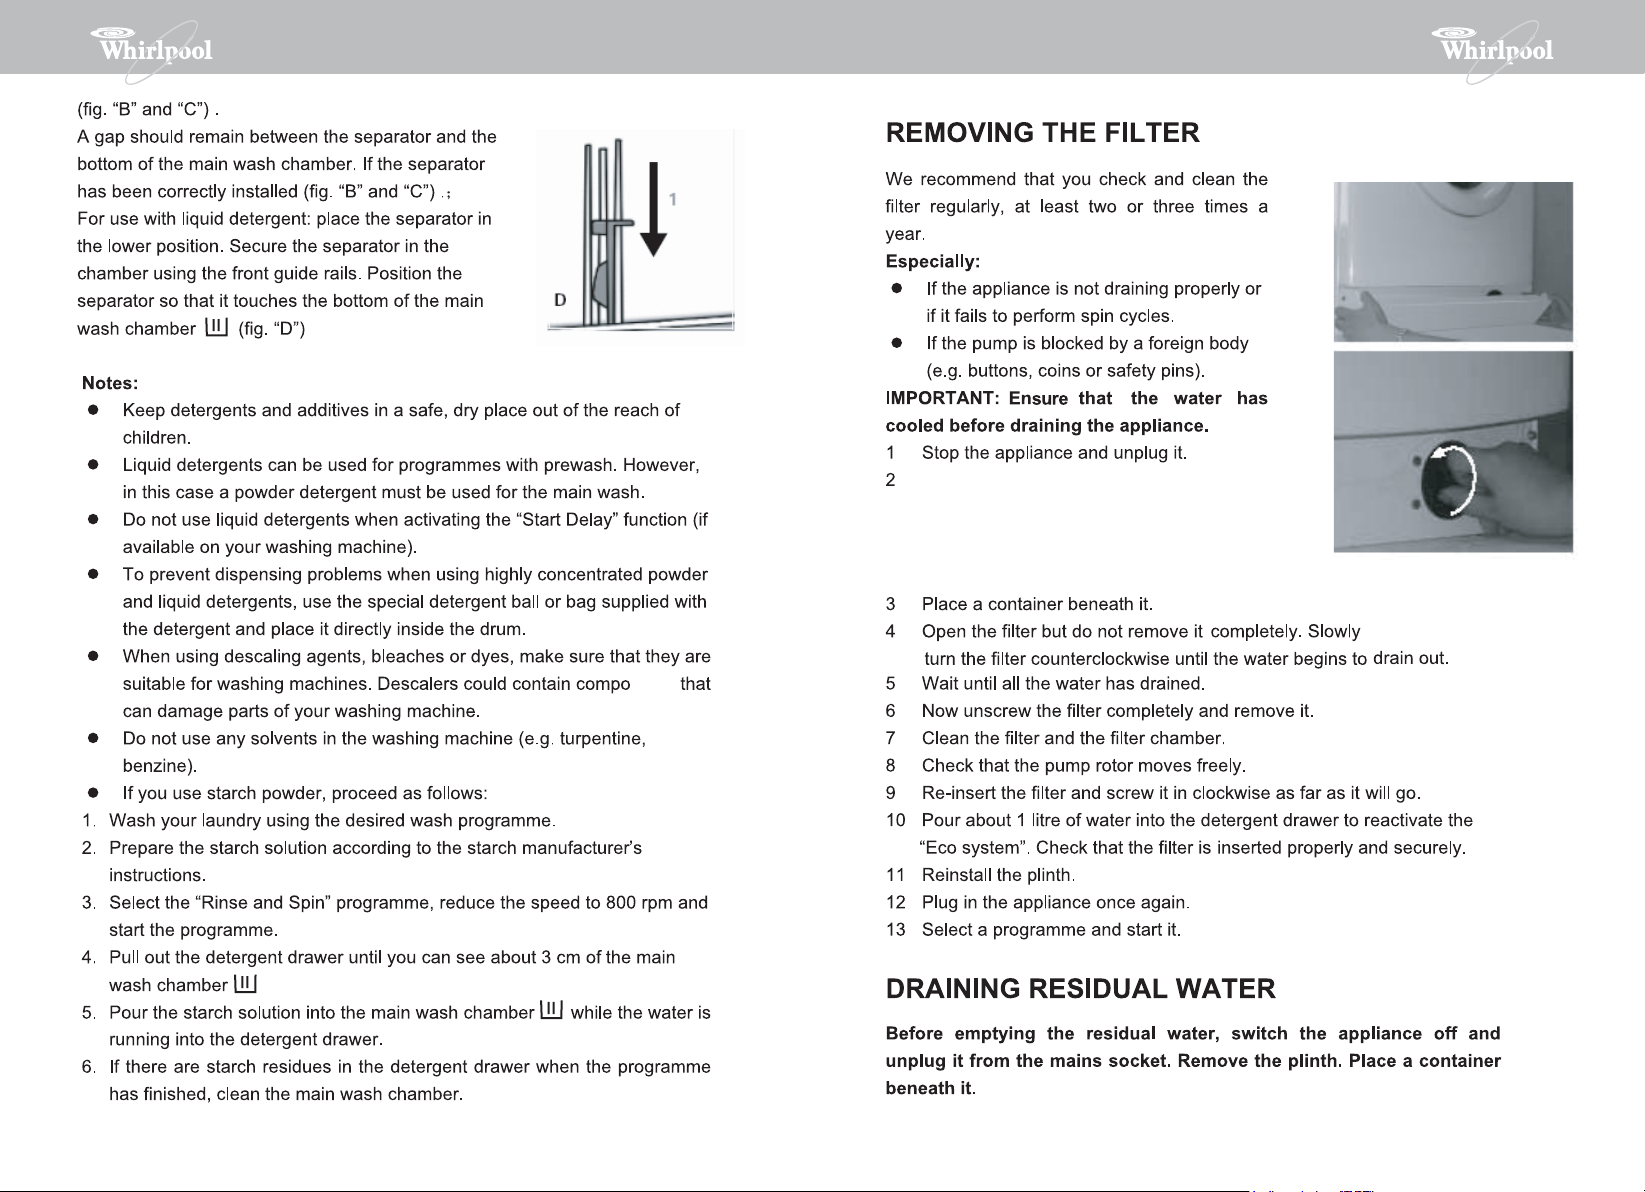
unds
Depending on the model, remove the plinth
by holding it tightly on both sides, pushing it
downward and tilting it to the front. Or, push
down on the tabs provided on both the sides
and remove it.
9 10
Page 7
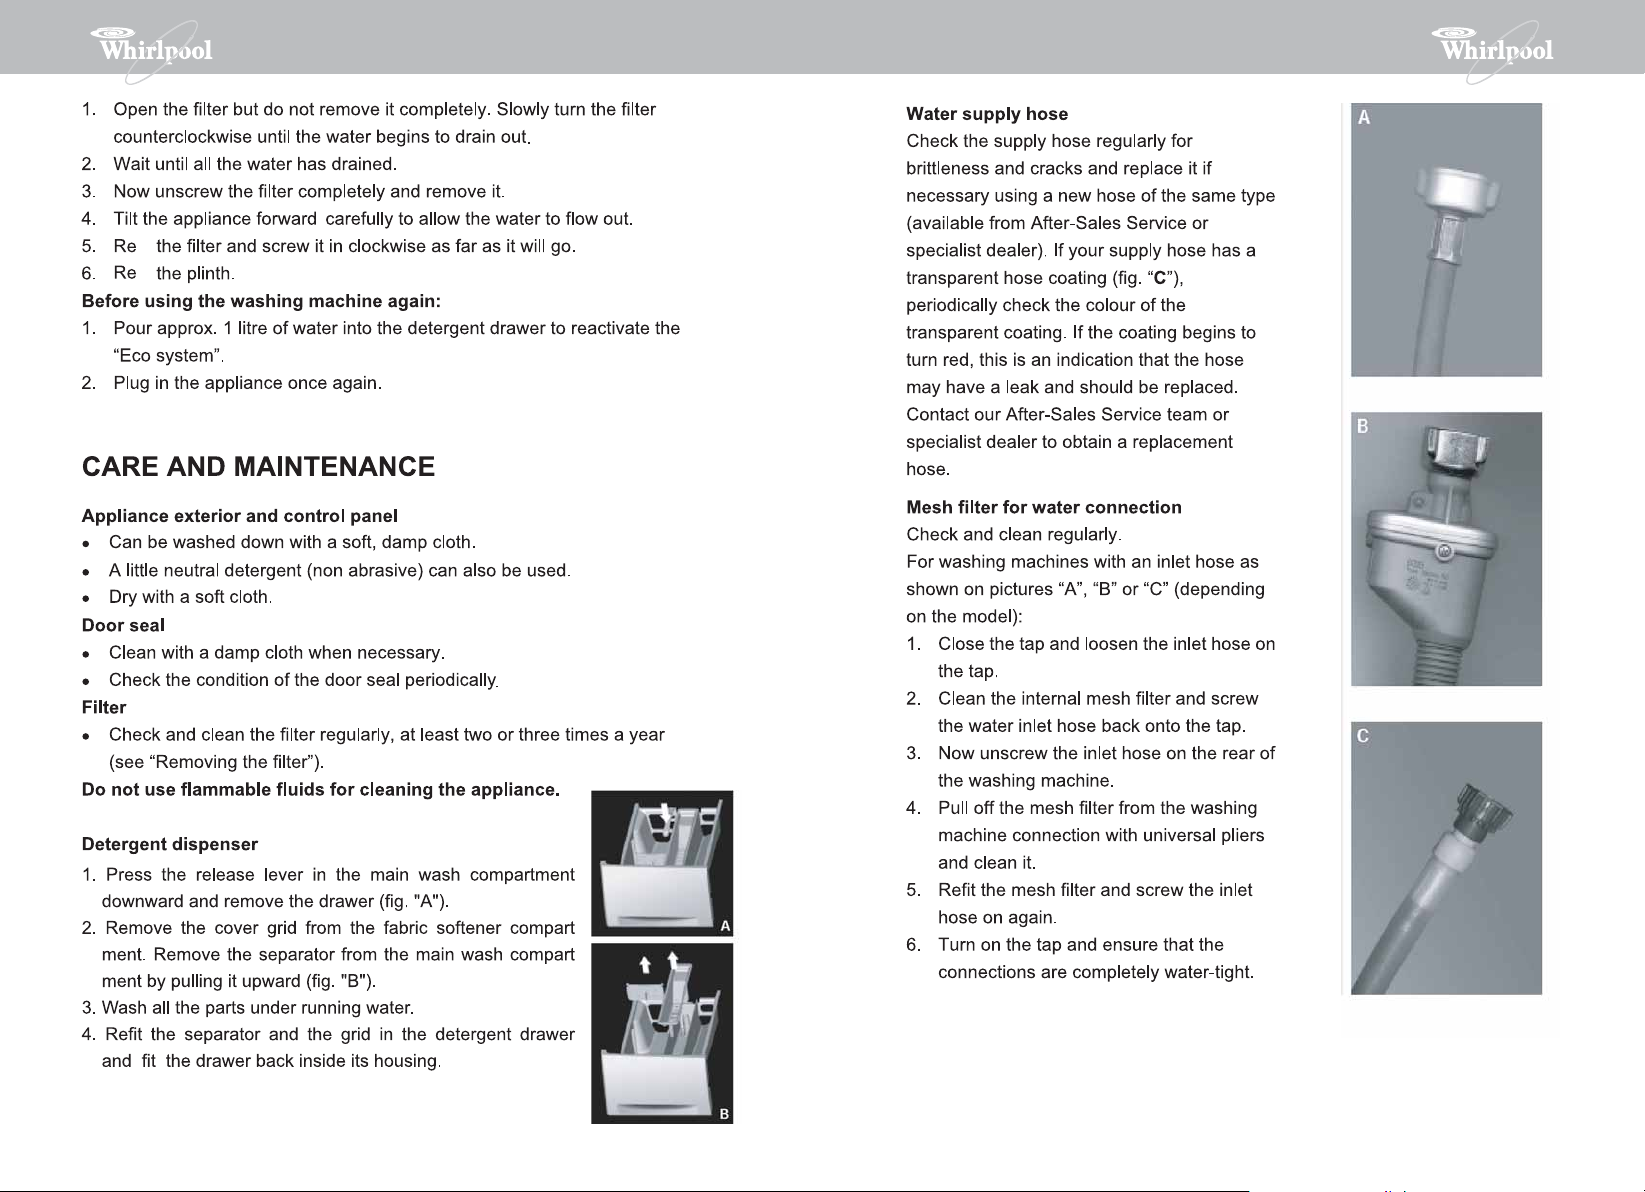
fit
fit
11 12
Page 8
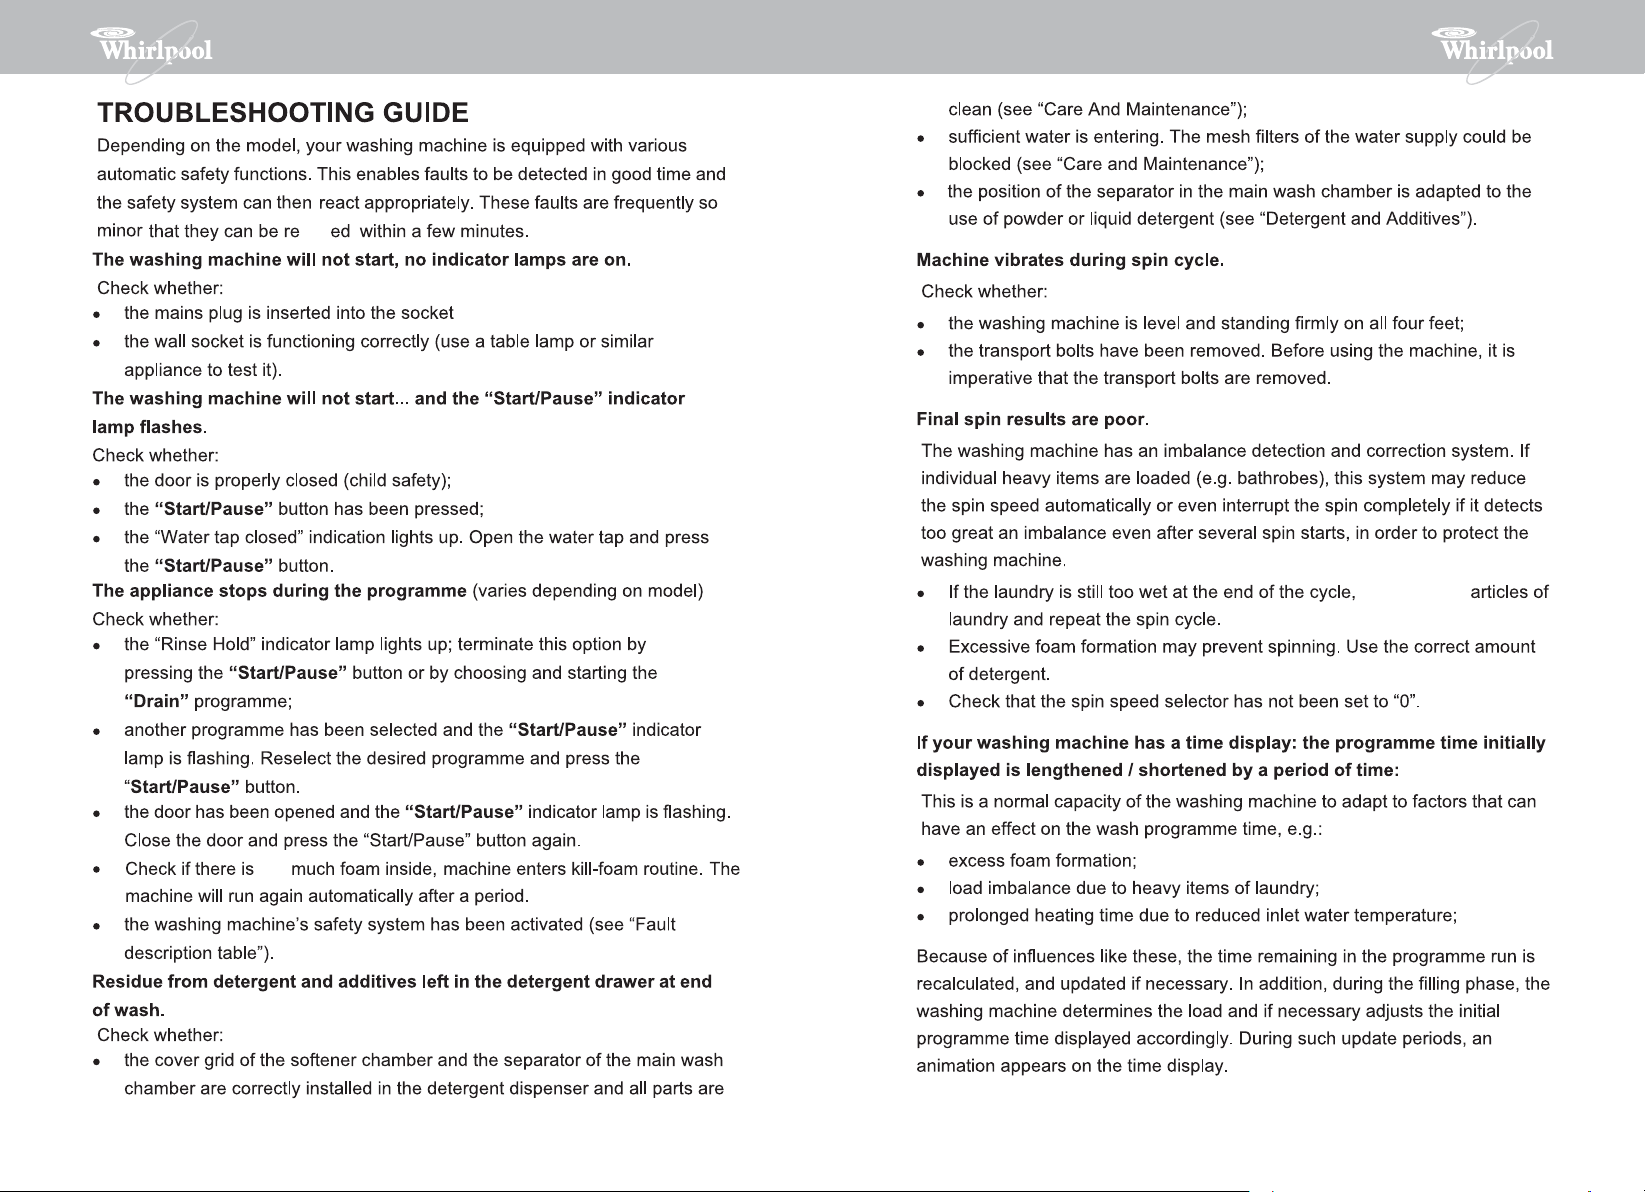
solv
and the power switched þONÿ
remove some
too
13 14
Page 9
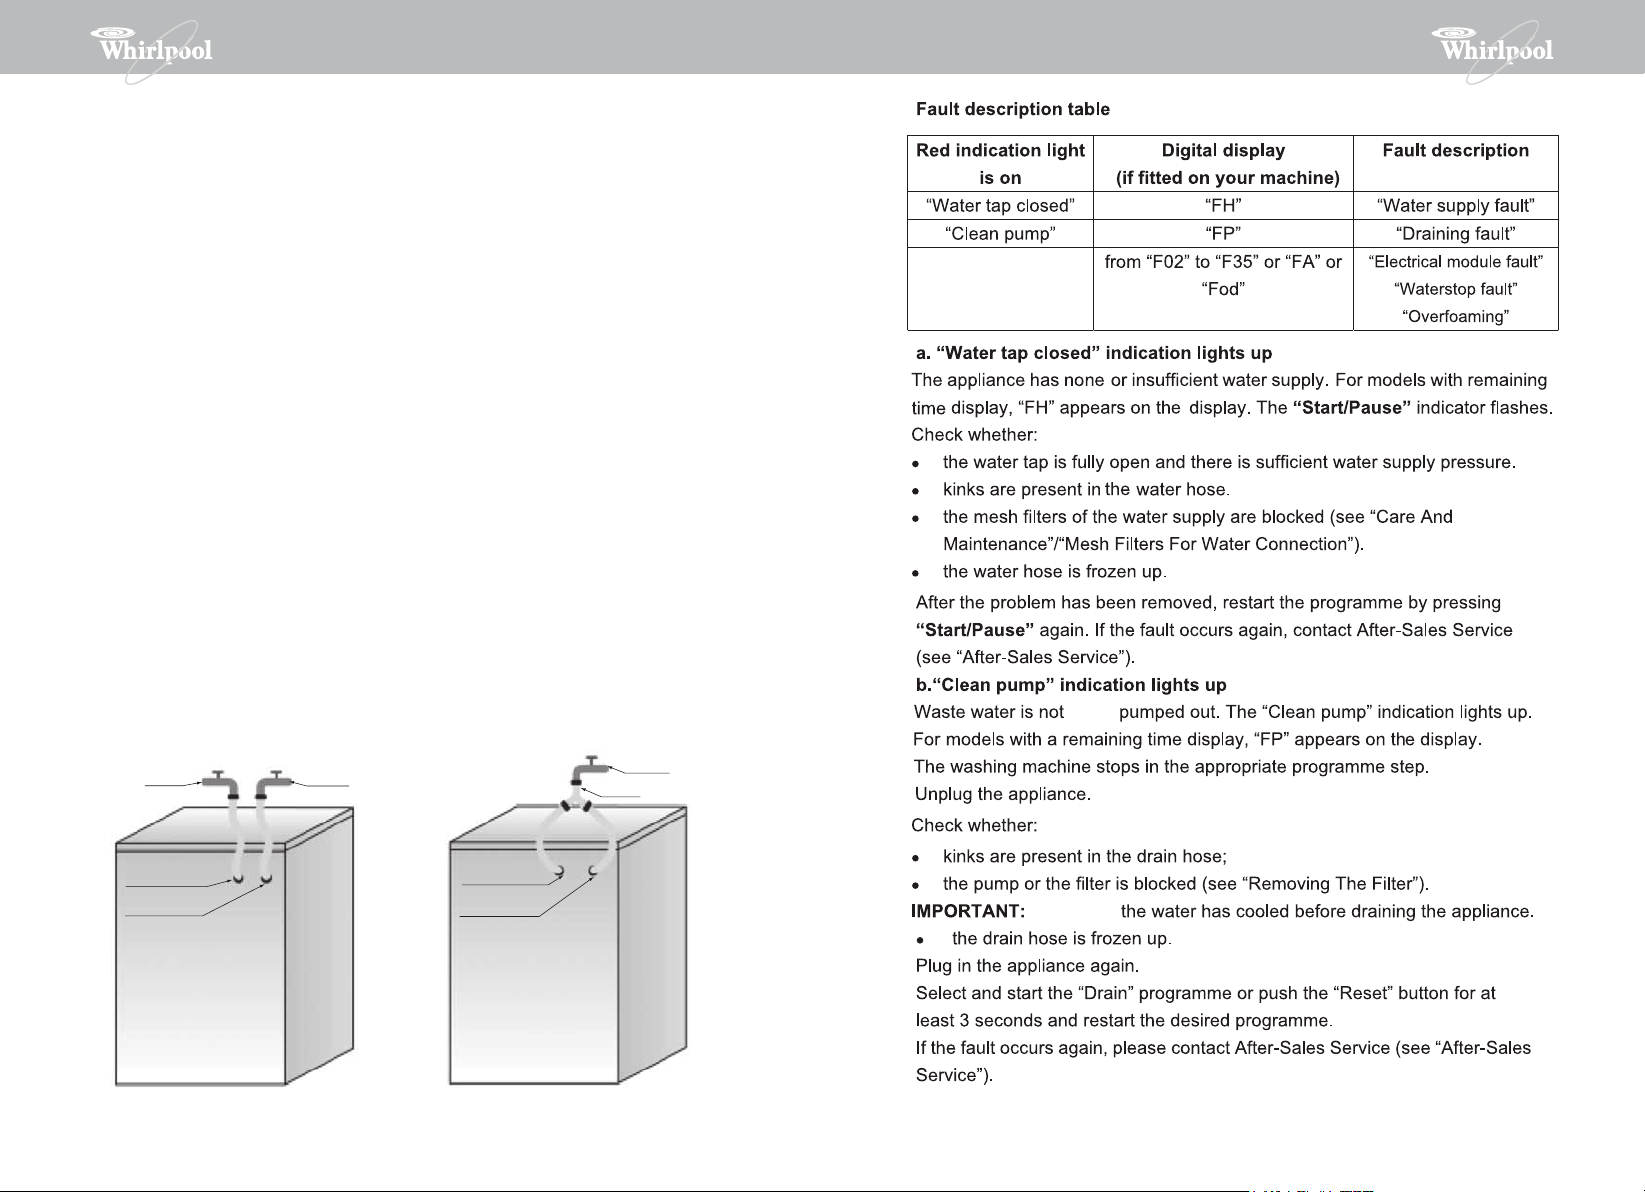
Hot / Cold fill fault - For Models with Dual Inlets
If you wish to connect hot and cold water supply (Fig.1):
1. Fix the red marked inlet hose to the hot water tap and to the inlet valve with the red
filter on the rear side of machine.
2. Fix the other inlet hose to the cold water tap and to the inlet valve with the blue filter
on the rear side of the machine.
Make sure:
a) The connections are tightly fixed
b) Do not invert their position (for example: cold fill into hot inlet valve and vice versa).
If you wish to connect only the cold fill follow the below instructions (Fig. 2):
1. You will need a Y-piece connector. This can be purchased from local hardware or plumb
ing supplier.
2. Fix the Y-piece connector to the cold fill tap.
3. Connect the two inlet valves present on the rear part of the machine to the Y-piece
connector using the hoses provided.
Ensure that:
All connections are tightly fixed.
Do not allow children to operate, crawl on, be near or inside your washer.
Note that during the wash cycles, the surface temperature of the porthole door may
increase.
Close supervision of children is necessary when the appliance is used near children.
being
Hot fill
Red inlet valve
Blue inlet valve
Fig.1
Cold fill
Red inlet valve
Blue inlet valve
Fig.2
Cold fill
Y-piece
Ensure that
15 16
Page 10
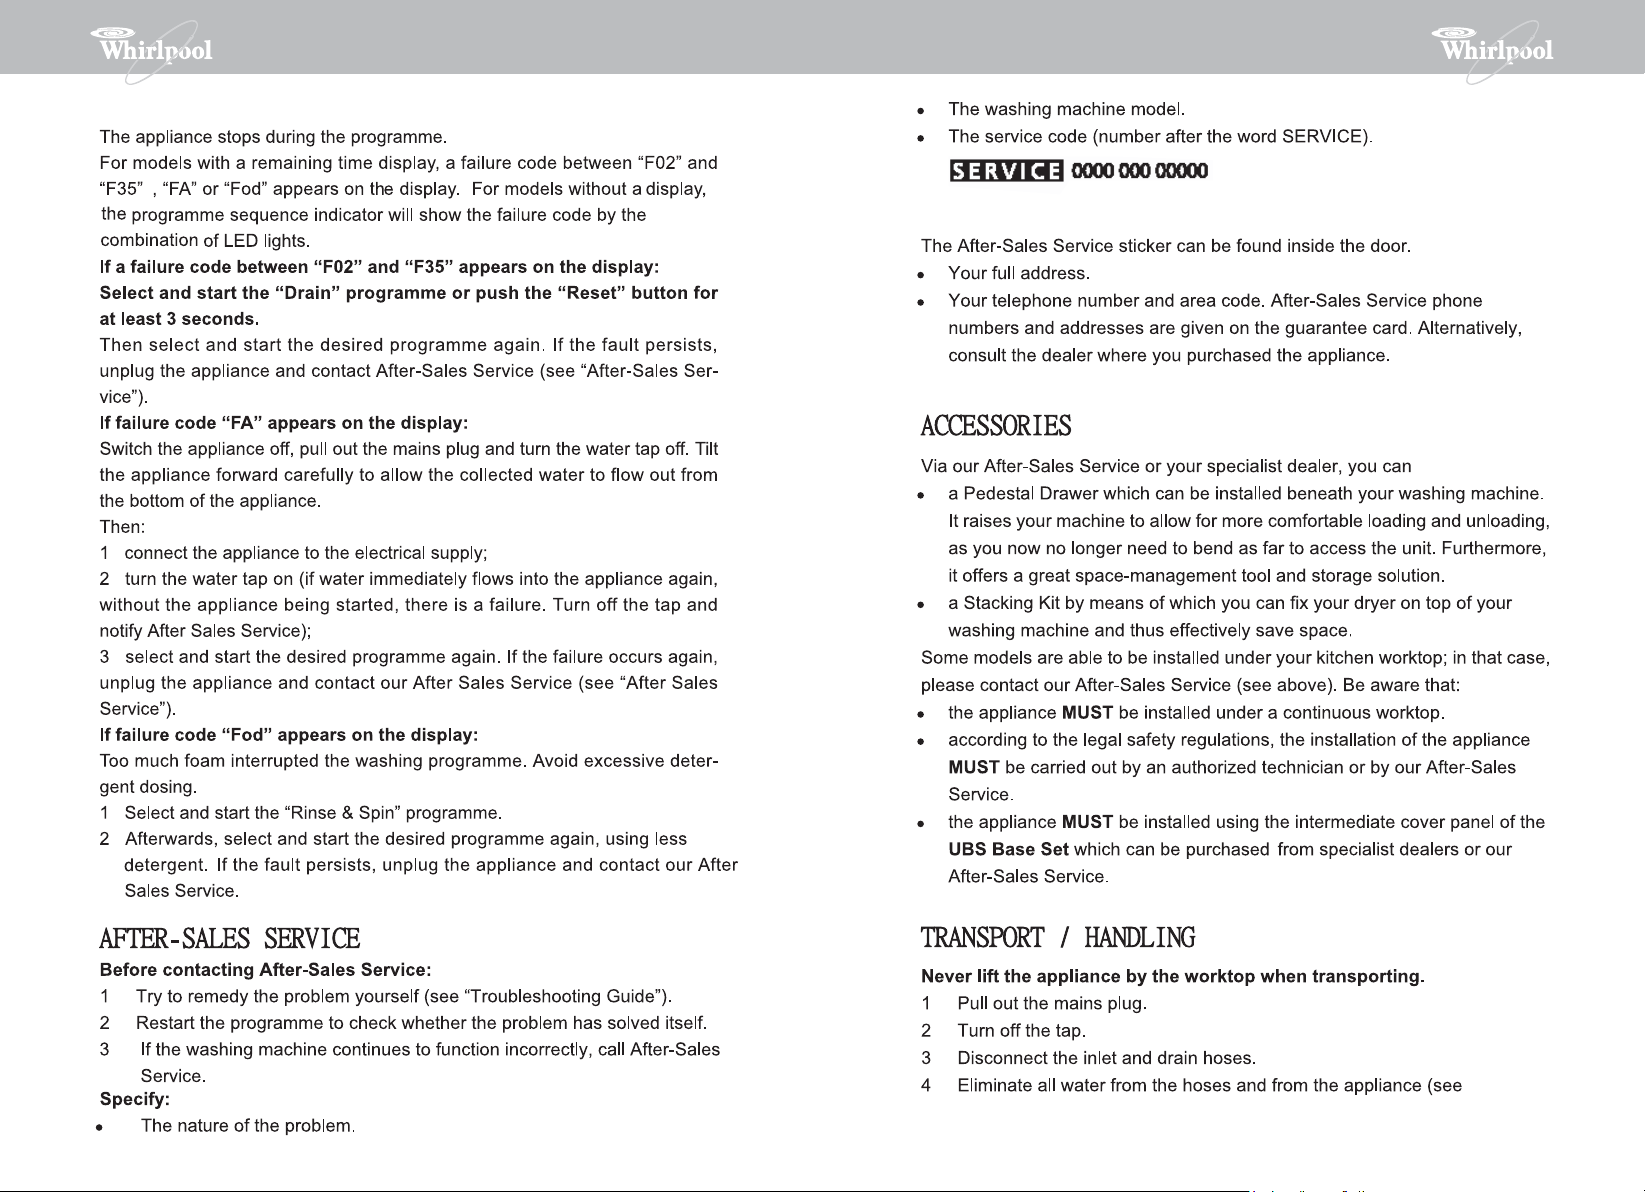
C. Error code
purchase:
17 18
 Loading...