

Whirlpool WBE33522 A NFCX, WBE3352 A NFCWF, WBE3352 A NFCXF, WBE3352 A NFCX, KGN317PROFRESHA IN PRODUCT SHEET

A. Control panel
B. Refrigerator Compartment
1. Filter in fan
2. Lighting
3. Shelves / Shelf area
4. Multi-flow cold air system
5. Cooler compartment (best for meat and fish) or "Zero
Degrees" box (to keep foods fresher for longer)
6. Rating plate with commercial name
7. Fruits and vegetables crisper
8. Crisper divider
9. Reversibility kit
10. Egg tray
11. Separator
12. Door trays
C. Freezer Compartment
13. Storage baskets for frozen food items
14. Shelves
15. Middle basket (freezing zone)
16. Ice tray and/or cold accumulator
17. Door seals
18. The freezer door trays for pizza or other frozen
products with a short storage time (2** storage
compartment)
Anti-bacterial protection (depending on the model):
- Antibacterial filter in the fan (1)
- Antibacterial additives in the Crisper (7)
- Door seals are made of material able to inhibit bacterial
growth (17).
Notes:
- Depending on the model the number and type of
accessories may vary.
- In case of power failure the cold accumulator helps to
keep optimal storage temperature longer.
- All shelves and door trays are removable.
- The internal temperatures of the appliance depend on
the ambient temperature, frequency of opening the
doors, as well as location of the appliance. Temperature
setting must consider these factors.
- The appliance accessories are not suitable for washing in
dishwasher.
- After inserting food, ensure that the freezer
compartment door closes properly.
TO INCREASE STORAGE
The freezer compartment can be used without the
baskets to increase storage and for large products.
You can place the food products directly on the racks.
HYDROSENSE SHELVES
(depending of the model)
The special contour of the HydroSense shelves creates a
barrier that contain spills and simplifies cleanup,
preventing liquids from leaking onto shelves below.
HOW TO START THE APPLIANCE
Fit the spacers (if supplied) on the
upper part of the condenser at the
rear of the appliance. After plugging
the appliance to the mains, it starts
the operation automatically.
After starting the appliance, wait at least 4-6 hours before
placing food into the appliance .
Particular control elements are activated:
• The indicator LEDs on the control panels light up for 2
seconds.
• Activation of a beep for 1 second.
Note:
• If food is placed in the refrigerator before the appliance
has cooled completely, it may deteriorate.
CONTROL PANEL DESCRIPTION
(1) Cavity selection "Fridge / Freezer" pushbutton
(2) Green LED ON/OFF informing of:
- freezer cabinet temp. setting (green LED light ON)
- fridge cabinet temp. setting - (green LED light OFF)
(3) Temperature selection button "Temp.°C".
(4) (5) (6) Green LEDs indicating temperature settings.
(7) "Reset alarm" pushbutton.
(8) Internal light switch
Temperature Adjustment between
cabinets is made with the "Fridge /
Freezer" button (1). When the LED (2)
is OFF the user can select temperature in
the fridge.
The temperature in the refrigerator compartment
may be set by the temperature setting pushbutton (3) on
the control panel.
On the left there are described the 5
set points for the fridge
compartment. At each short
pressure of the "Fridge / Freezer"
button (1), the setpoint will change
(cyclically). The medium temp. is the
recommended temperature settings.
high temp.
med-high temp.
medium temp.
med-low temp.
low temp.
Description:
LED OFF
LED ON
UKR CAROBGRUSHSKCZPLFINDKNSGRIPENLFGBD
PRODUCT SHEET
GB
UKR CAROBGRUSHSKCZPLFINDKNSGRIPENLFGBD
To adjust the temperature in the
freezer compartment, use the "Fridge
/ Freezer" button (1) to control the
temperature in the freezer cabinet. The
green LED (2) turns ON.
The temperature in the freezer compartment may
be set by the temperature setting pushbutton (3) on the
control panel.
On the left are described the 5 set
points for the freezer compartment
and fast freezing.
At each short pressure of the
"Fridge / Freezer" button (1), the
setpoint will change (cyclically).
The medium temp. is the
recommended temperature settings.
After setting the "Fast Freezing" (automatically disabled
after 24 hours) the freezer temperature is set to previous
displayed setpoints. When the product is disconnected
from the power supply and then reconnected, the
control unit remembers previously set temperatures for
freezer and refrigerator.
FAN WITH A BUTTON
The fan improves temperature distribution inside the
refrigerator compartment, allowing better preservation
of stored food.
By default, the fan is ACTIVE.
It is advisable to keep the fan active, so that the "Fresh
Control" / "ProFresh" function can work and also when
the ambient air temperature is over 27 ÷ 28°C or if you
perceive drops of water on the glass shelves or in the
severe humidity conditions.
Note
Do not obstruct the air intake area with food
items.
When "Fresh Control" / "ProFresh" is disabled
remember to turn off the fan when there is a lower
ambient air temperature.
To turn off the fan press the button (1a).
If the appliance has the fan it can be equipped with the
antibacterial filter.
Remove it from the box (found in the crisper drawer
(item 7) and insert into the cover of fan (item 1b).
The replacement procedure is attached with the filter.
“ZERO DEGREES” BOX
(depending on the model)
The "Zero Degrees" box is
specifically designed to maintain a
low temperature and a suitable
humidity level, in order to keep
foods fresher for longer (e.g.
meat, fish, fruit and winter
vegetables).
Activating and deactivating the box
The temperature inside the box, when active, is
approximately 0°.
The following factors are vital for the "Zero Degrees" box
to work properly:
- the refrigerator compartment must be switched on
- the temperature of the refrigerator compartment must
be between +2°C and +5°C
- the box must be inserted to enable activation
- no special functions must have been selected (Standby,
Cooling-Off, Vacation – where applicable).
If one of these special functions has been selected, the
"Zero Degrees" box must be deactivated manually, and
any fresh food inside it removed. If manual deactivation
does not take place, the box will be deactivated
automatically after 8 hours.
Note:
- if the symbol does not light up when the box is
activated, check that the box is properly inserted; if the
problem persists, contact your nearest authorized
After-sales Service
- if the box is active and the drawer open, the symbol on
the control panel may be deactivated automatically. If
the drawer is inserted, the symbol will become active
again
- irrespective of the state of the box, a slight noise may
be heard: this is normal and is not a cause for concern.
- when the box is not active, the temperature inside it
depends on the general temperature inside the
refrigerator compartment. In this case, we recommend
it is used to store fruit and vegetables which are not
sensitive to cold temperatures (fruits of the forest,
apples, apricots, carrots, spinach, lettuce, etc.).
Important: when the function is activated and there are
foodstuffs with a high water content, condensation may
form on shelves. In this case, disable the function
temporarily.
Removing the "Zero Degrees" box:
The "Zero Degrees" box can be removed to create more
space inside the refrigerator. In this case proceed as
follows:
- switch off the box
- pull out the drawer and the white plastic shelf
underneath the box.
Note: the upper shelf and the side supports cannot be
removed.
To restore "Zero Degrees" box operation, make sure you
replace the white plastic shelf underneath the box before
inserting the drawer and reactivating the function. To
optimise energy consumption, we recommend you
deactivate the "Zero Degrees" box and remove it.
Clean the box and all its parts regularly, using a cloth and
a solution of warm water and neutral detergent
PRODUCT SHEET
GB
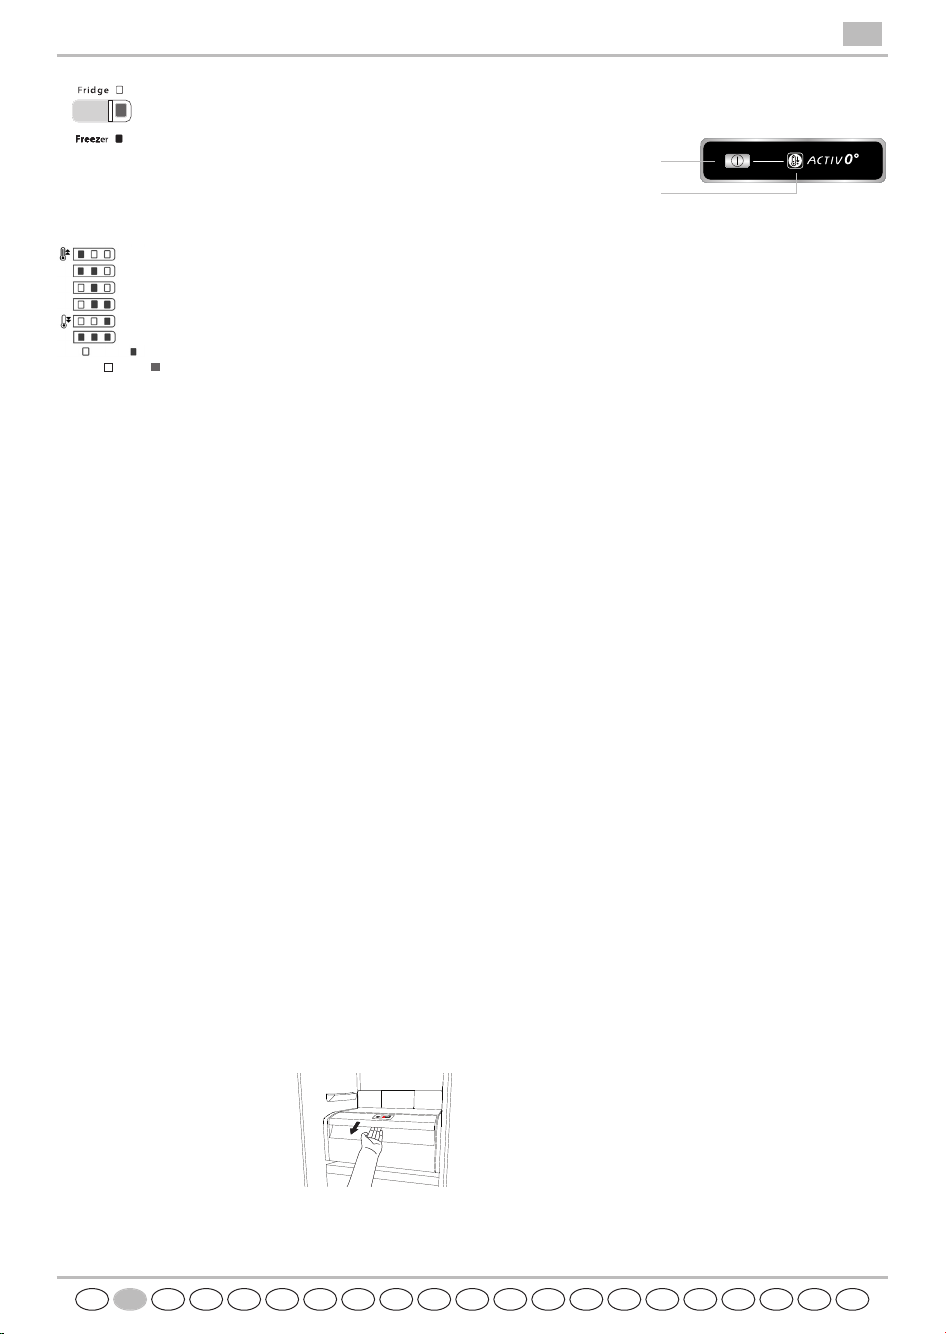
To activate/deactivate the box, press
the button as illustrated in the figure.
When the box has been
activated, the symbol lights up.
high temp.
med-high temp.
medium temp.
med-low temp.
low temp.
fast freezing (Freezer)
Description:
LED OFF
LED ON
 Loading...