How it Works
Log In / Sign Up
Buy Points
How it Works
FAQ
Contact Us
Questions and Suggestions
Users
Whirlpool
Loading...
W
W10526072A
W10526085A
W10526974A
W10529641A
W10529643A - SP
W10531342A
W10531851A
W10533016A
W10536160
W10536161
W10536162
W10536338
W10536339
W10541636B
W10545080A
W10545082A
W10545083A
W10545084A
W10545086A
W10545225B
W10545672A
W10550271B
W10550272B - SP
W10550273A
W10550275B
W10550276B - SP
W10551731A
W10554129C
W10554130C - SP
W10560163B
W10560164A-SP
W10560171B
W10560172B - SP
W10562346B
W10562347B-SP
W10563341A
W10573709B
W10573710B
W10596243B
W10596244B
2
W10606694A
W10607415B
W10607420A-SP
W10620402A
W10623830
w10632081a
W10632883A
W10655450
W10656458B
W10656459B
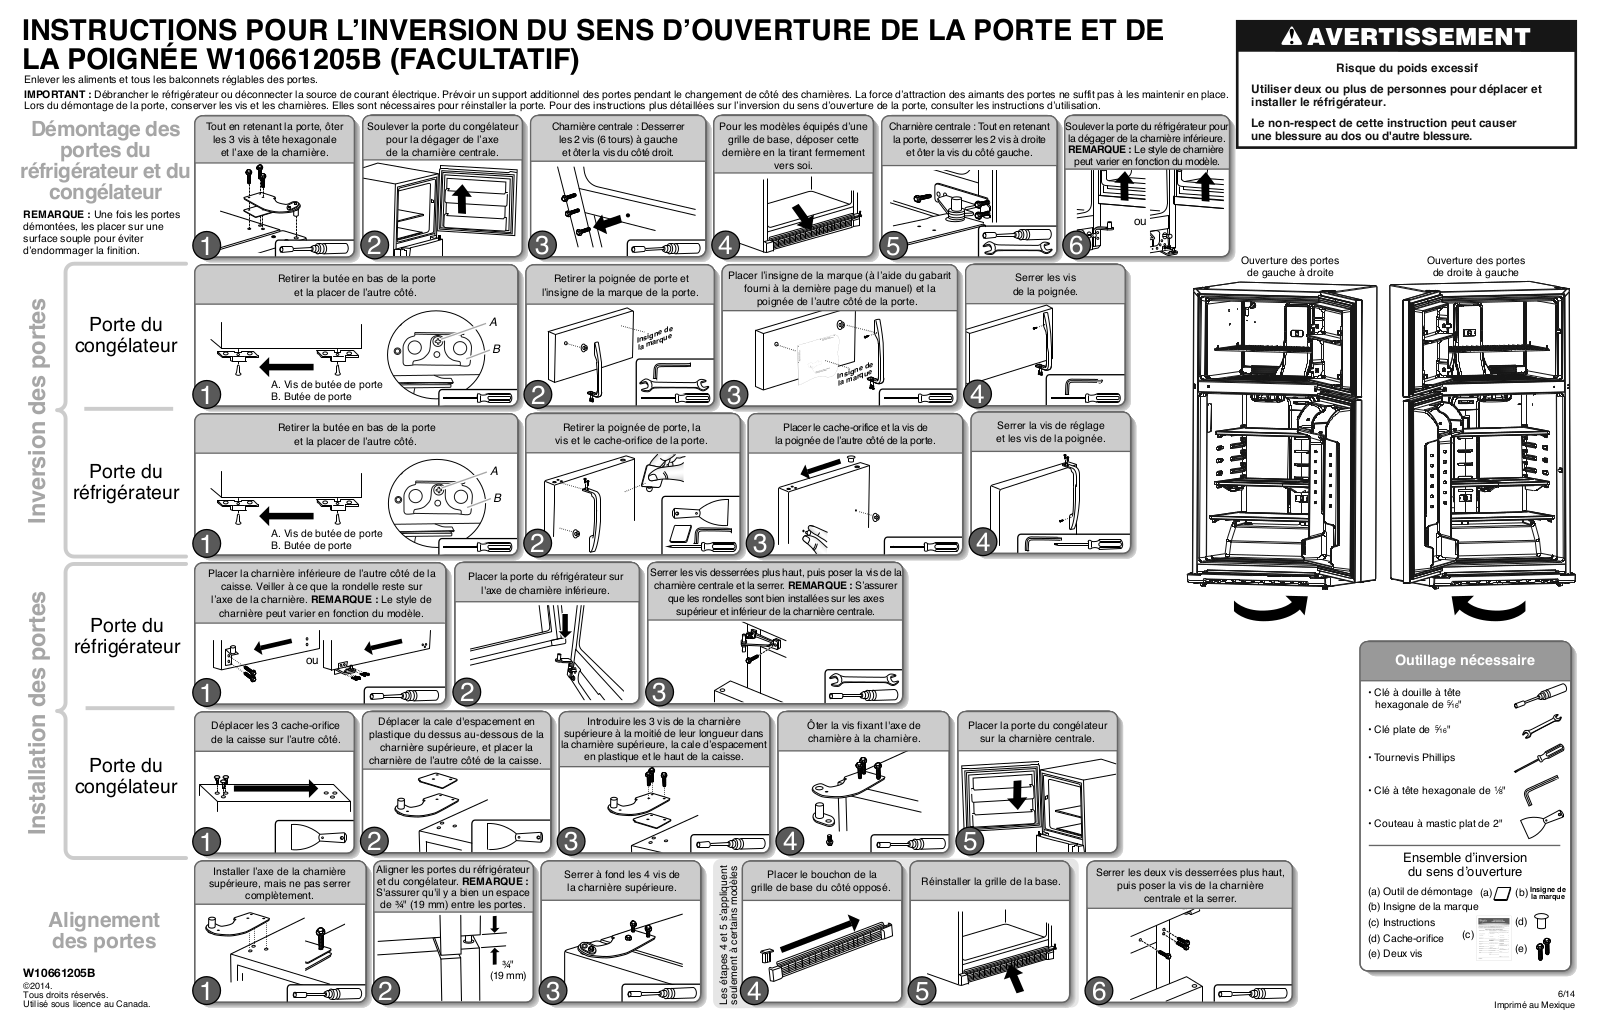
W10661205B
W10663951B
W10663960B
W10669285A
W10678945D
W10678948D - SP
W10682797A
W10682798-SP
W10692945
W10704365
W10706358A
W10726970
W10726971
W10746870A
W10748893C
W10748900C
W10752684
W10752685
W10782871
W10782873
W10782874
W10791228
W10791229
W10836364B
W10869845
W10882520
W10915234
W10915235
W11028050
W11085352E
W11085354C
W11114976B
W11123003
W11123004
W1114
2
W11173682
W11173684
W11173686
W11173692
W11173695
W11173701
W111 - KILL
5
W11 CM145
25
W11 ME150
48
W11 MS180
37
W11 MW161
49
W11 MW161 UK
W11 OM1 4MS2 P
20
W11 OS1 4S2 P
24
W11 SVD140
32
Loading...
Loading...
Nothing found
W10661205B
Installation Instructions
2 pgs
3.04 Mb
0
Table of contents
Loading...
Whirlpool W10661205B Installation Instructions
...
Whirlpool Installation Instructions
Download
Specifications and Main Features
Frequently Asked Questions
User Manual
Download
Loading...
+
hidden pages
Unhide
You need points to download manuals.
1 point = 1 manual.
You can buy points or you can get point for every manual you upload.
Buy points
Upload your manuals