

Whirlpool W10607415B, W10607420A-SP User Manual
Top-Loading
Guide d’utilisation et
High Efficiency
Low-Water Washer
Use and Care Guide
Para una versión de estas instrucciones en español, visite www.whirlpool.com
Table of Contents
WASHER SAFETY .............................................................2
WHAT’S NEW UNDER THE LID? .....................................3
CONTROL PANEL AND FEATURES ................................4
CYCLE GUIDE ................................................................... 6
USING YOUR WASHER ....................................................7
WASHER MAINTENANCE ...................................................10
TROUBLESHOOTING ........................................................... 12
WARRANTY ...............................................................................17
ASSISTANCE OR SERVICE ........................ BACK COVER
d’entretien de la laveuse
haute efficacité à faible
consommation d’eau
avec chargement par
le dessus
Table des matières
SÉCURITÉ DE LA LAVEUSE ..........................................18
QUOI DE NEUF SOUS LE COUVERCLE? .....................19
TABLEAU DE COMMANDE ET
CARACTÉRISTIQUES ..................................................... 20
GUIDE DE PROGRAMMES ............................................21
UTILISATION DE LA LAVEUSE ......................................23
ENTRETIEN DE LA LAVEUSE ........................................26
DÉPANNAGE ...................................................................28
GARANTIE ............................................................................... 34
ASSISTANCE OU SERVICE. .....COUVERTURE ARRIÈRE
W10607415B
W10607420A-SP
Designed to use only HE High Efciency
detergents.
Conçue pour l’utilisation d’un détergent haute
efcacité seulement.
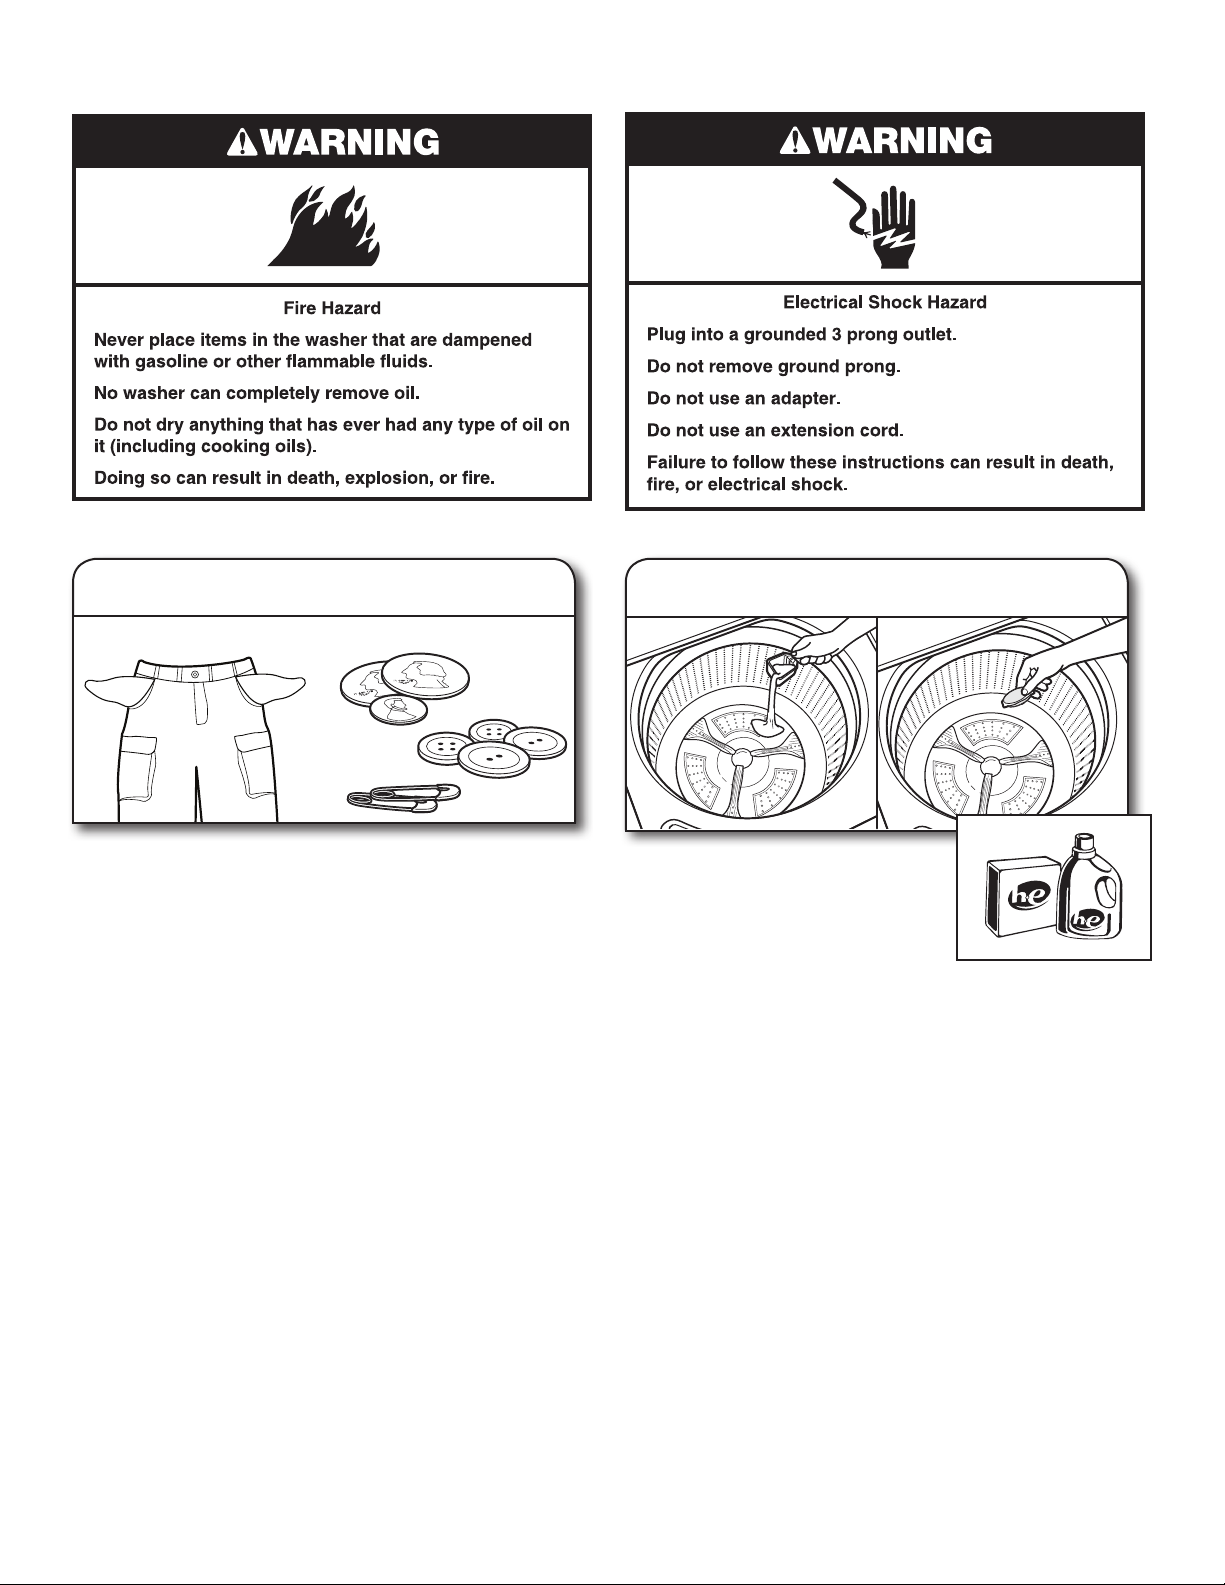
Washer Safety
2
What’s New Under the Lid?
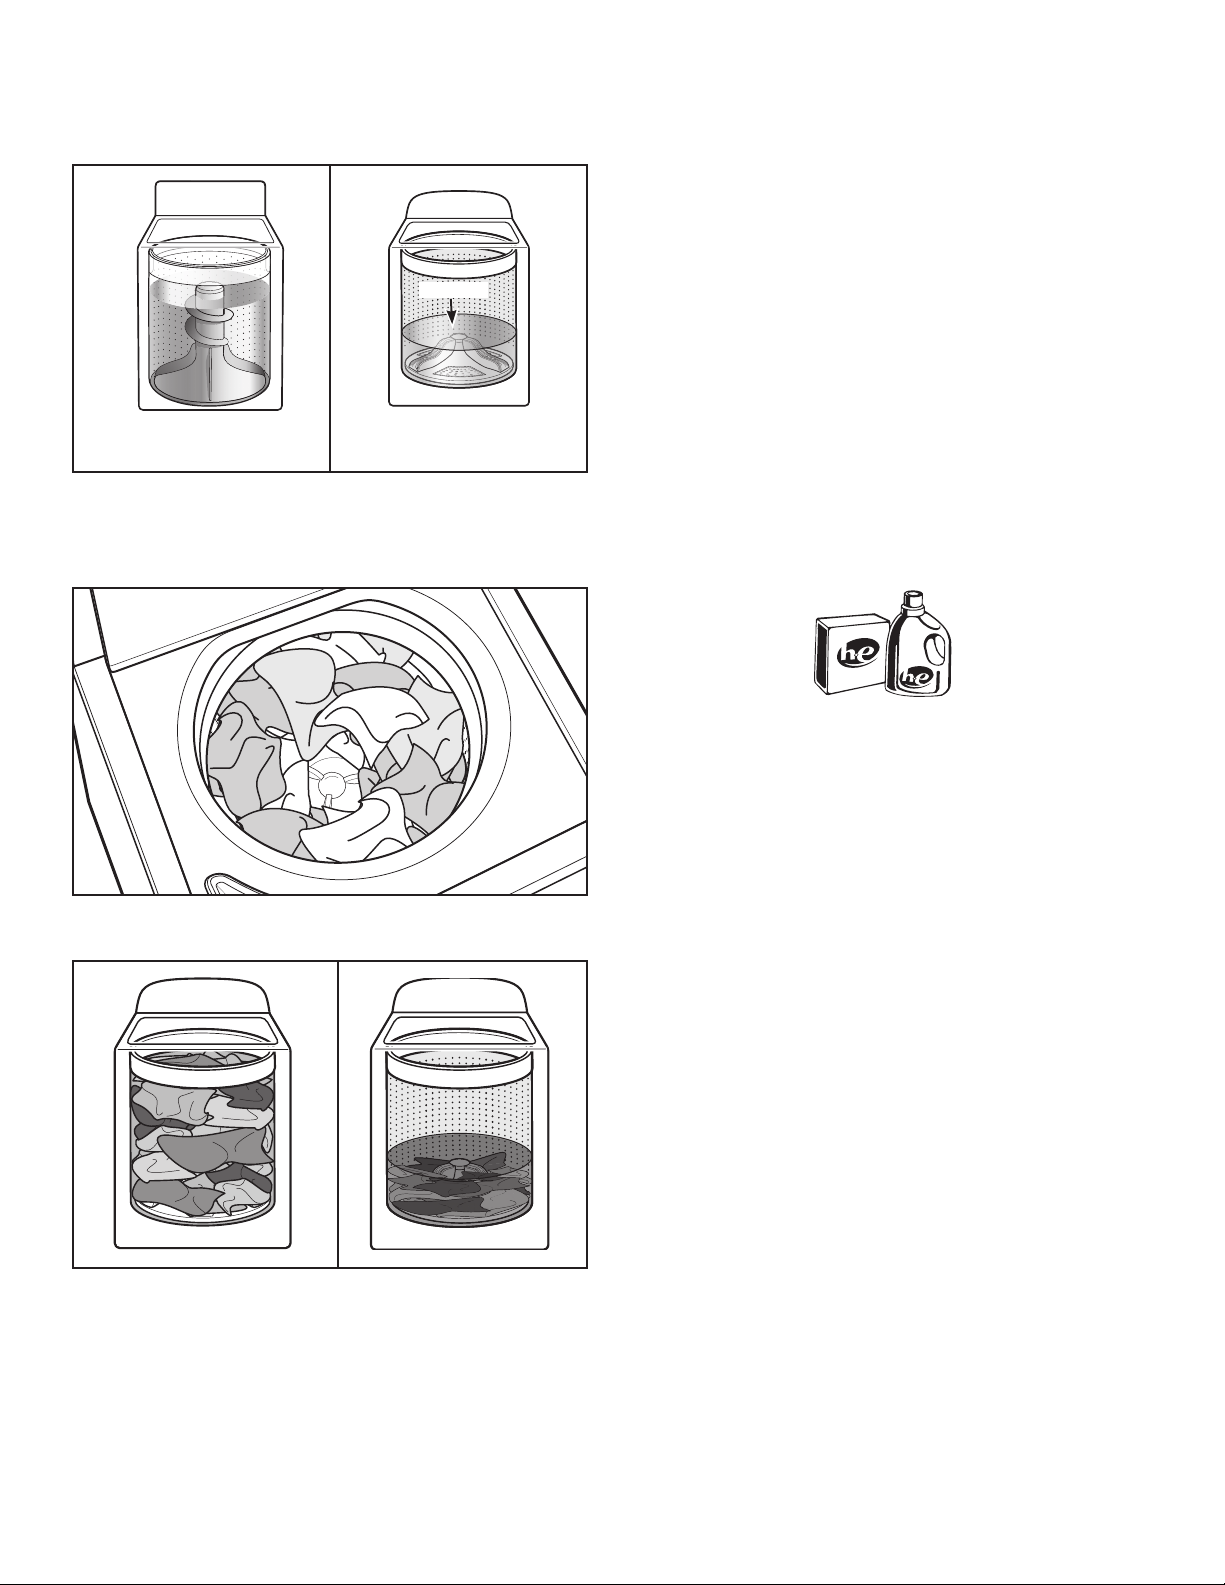
Cleaning with Less Water
Washplate
Traditional agitator-style
washer
The most striking difference in your new washer is the
low-water washplate wash system. The washer automatically
adjusts the water level to the load size—no water level selector
is needed.
Washer with low-water
washplate wash system
Automatic Load Size Sensing
Once you start the cycle, the lid will lock, and the washer will
begin the sensing process to determine the correct water level
for the load. This may take several minutes before water is
added. You will nd a step-by-step description in the “Cycle
Status Lights” section.
You will hear the motor turn the basket in short pulses to
thoroughly wet the load. This low-water wash method
uses less water and energy compared to a traditional
agitator-style washer.
Choosing the Right Detergent
Use only High Efciency detergents. The package will be
marked “HE” or “High Efciency.” Low-water washing creates
excessive sudsing with a regular non-HE detergent. Using
regular detergent will likely result in longer cycle times and
reduced rinsing performance. It may also result in component
failures and noticeable mold or mildew. HE detergents are made
to produce the right amount of suds for the best performance.
Follow the manufacturer’s instructions to determine the amount
of detergent to use.
For best performance, it is recommended to load items in loose
heaps evenly around the washplate.
As the washer dampens and moves the load, the level of the
items will settle in the basket. This is normal, and does not
indicate that more items should be added.
IMPORTANT: You will not see a washer basket full of water
as with your past agitator-style washer. It is normal for some
of the load to be above the water line.
Use only High Efciency (HE) detergent.
Concentrated Cleaning
Low-water cleaning means concentrated cleaning. Rather
than diluting detergent as done in an agitator-style washer,
this washer delivers the detergent directly to the soils.
Normal Sounds You Can Expect
At different stages of the wash cycle, you may hear sounds and
noises that are different from those of your previous washer.
For example, you may hear a clicking and hum at the beginning
of the cycle, as the lid lock goes through a self-test. There
will be different kinds of humming and whirring sounds as the
washplate moves the load and as basket is decelerating to
a stop. And sometimes, you may hear nothing at all, as the
washer determines the correct water level for your load or
allows time for clothes to soak.
3
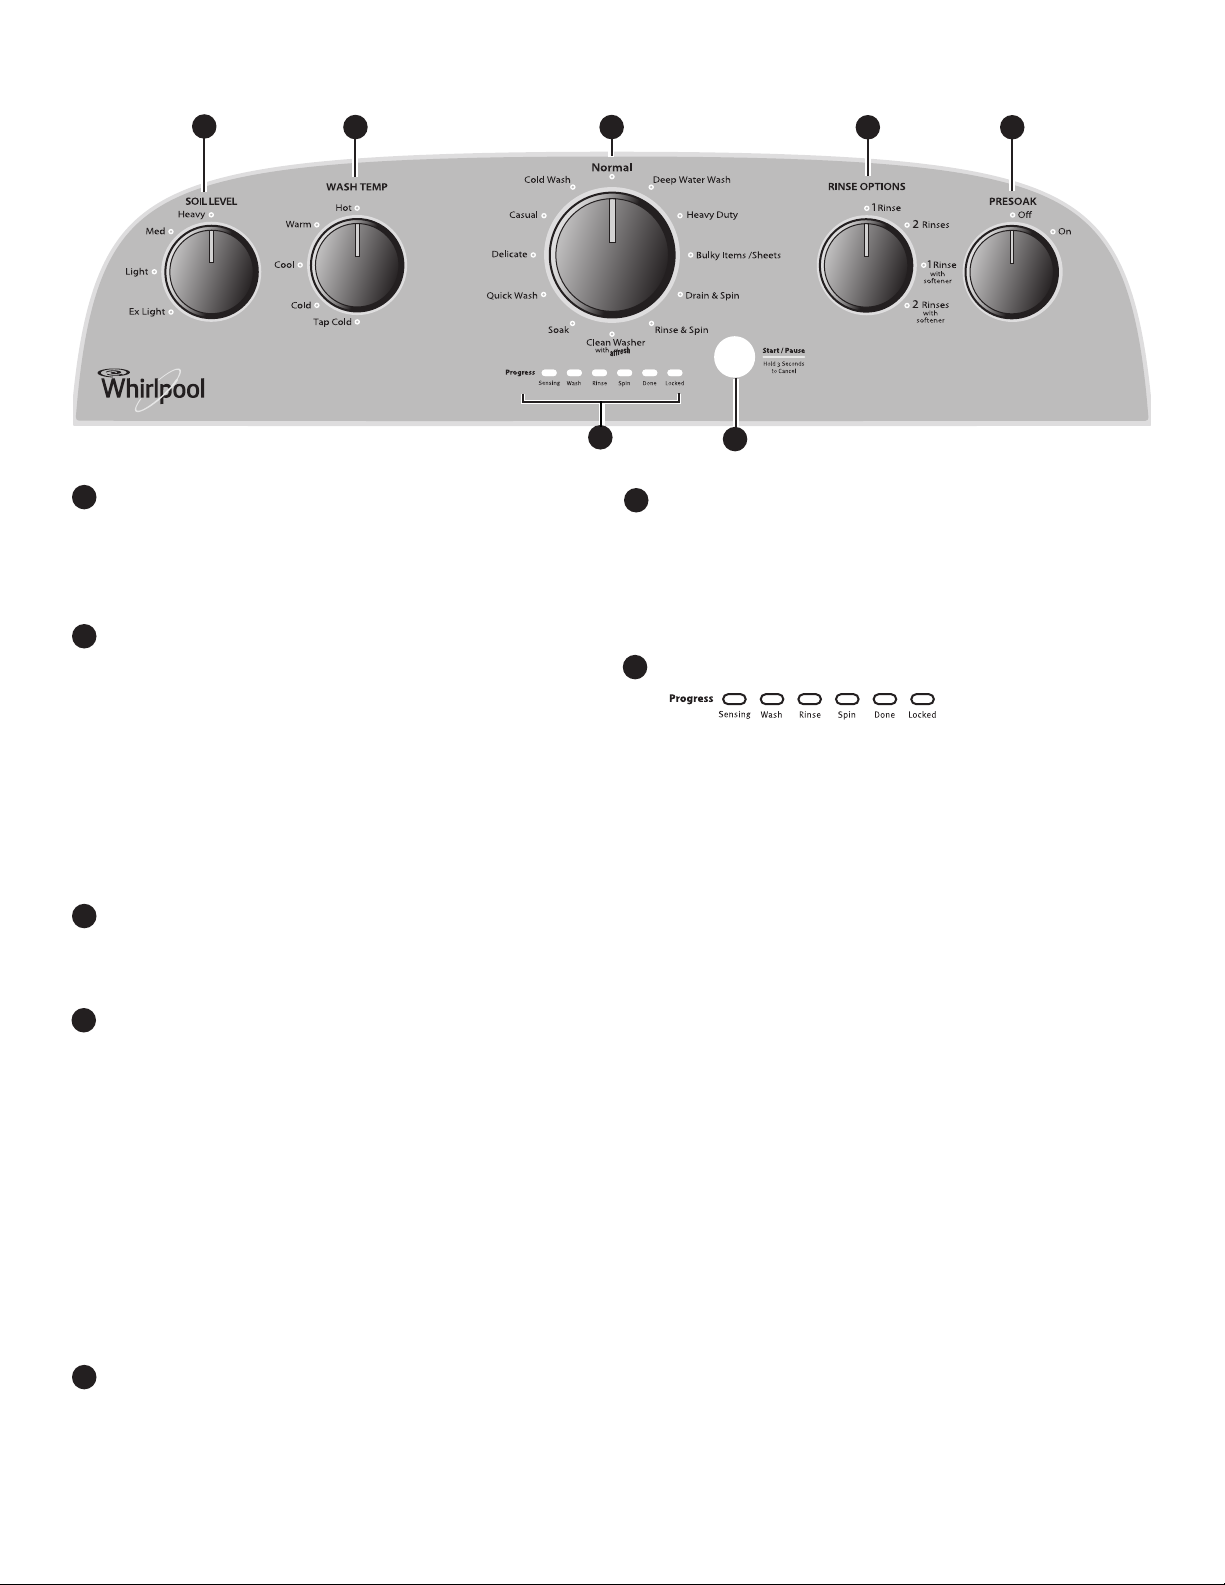
Control Panel and Features
1
2 3
4 5
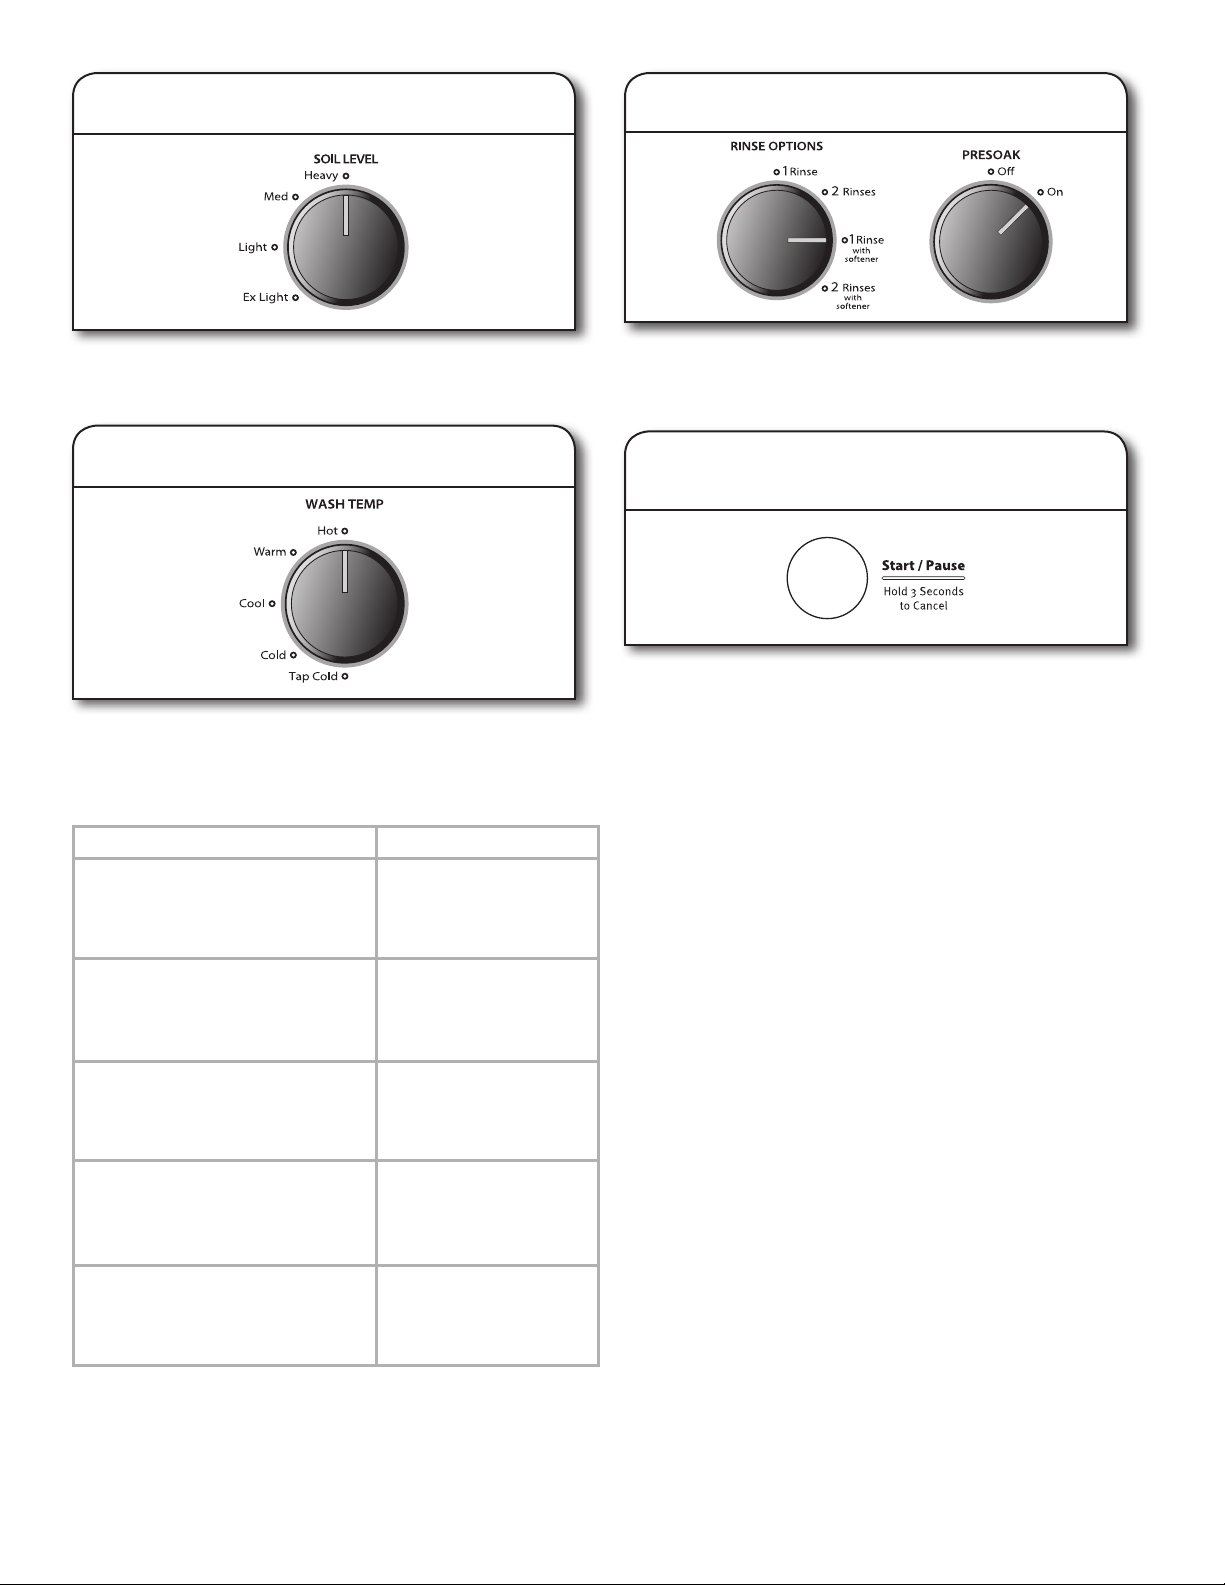
1
SOIL LEVEL
Select the most suitable setting for your load. For heavily
soiled fabrics, select Heavy Soil Level for more wash time.
For lightly soiled fabrics, select Ex Light Soil Level for less
wash time. Lighter soil level setting will help reduce tangling
and wrinkling.
2
WASH TEMP
Wash Temp senses and maintains uniform water
temperatures by regulating incoming hot and cold water.
Select a wash temperature based on the type of fabric
and soils being washed. For best results and following the
garment label instructions, use the warmest wash water safe
for your fabric.
■ On some models and cycles, warm and hot water may
be cooler than your previous washer.
■ Even in a cold and cool water wash, some warm water
may be added to the washer to maintain a minimum
temperature.
3
WASH CYCLE KNOB
Use the Wash Cycle knob to select available cycles on
your washer. See “Cycle Guide” for detailed descriptions
of cycles.
4
RINSE OPTIONS
The following options may be added to most cycle.
See “Cycle Guide” for additional details.
1 RINSE
This option is used to limit a cycle to one rinse.
2 RINSES
This option can be used to automatically add a
second rinse to most cycles.
1 RINSE with SOFTENER
This option must be selected if using fabric softener
during a cycle. It ensures that the water levels are correct
for optimal fabric softener distribution.
2 RINSES with SOFTENER
This option turns on both the Fabric Softener and
the 2 Rinses option.
PRESOAK
5
Use this option to add an extra soak period to any cycle to
help loosen tough stains. The washer will ll and then pause
to soak, and then begin the selected cycle.
7
6
START/PAUSE BUTTON
Press to start the selected cycle; press again to pause
the cycle and unlock the lid.
NOTE: If the washer is spinning, it may take several
minutes to unlock the lid.
Press and hold 3 seconds to cancel a cycle and drain the
water from the washer.
7
CYCLE STATUS LIGHTS INDICATOR
The Cycle Status Lights show the progress of a cycle.
At each stage of the process, you may notice sounds or
pauses that are different from traditional washers.
SENSING
When the Start/Pause button is pressed, the washer will
Once the lid has locked the second time, the washer
NOTE: Avoid opening lid during sensing. The sensing
WASH
You will hear the motor and washplate moving the load.
6
rst perform a self-test on the lid lock mechanism. You
will hear a click, the basket will make a slight turn, and the
lid will unlock briey before locking again.
will use short, slow spins to estimate the load size.
These sensing spins may take 2 to 3 minutes before
water is added to the load and you may hear the hum
of these spins. If the sensing light is on, then washer is
working properly. You will hear the motor turn the basket
in short pulses to thoroughly wet the load. The washer
will then move the load briey, pause to allow water
to soak in to the load, and resume adding water. This
process may repeat until the correct amount of water
has been added for the load.
process will start over when the washer is restarted.
The sensing light may also come on during the Soak
and Wash portions of the cycle. This is normal.
Unlike traditional washers, the load is not covered with
water. Low-water cleaning means concentrated cleaning.
Rather than diluting detergent as done in an agitator-style
washer, this washer delivers the detergent directly to the
soils. The motor sounds may change at different stages
in the cycle. The wash time is determined by the selected
soil level.
4

RINSE
You will hear sounds similar to the wash cycle as the
washer rinses and moves the load.
SPIN
The washer spins the load at increasing speeds for proper
water removal, based on the selected cycle and spin
speed.
DONE
Once the cycle is complete, this light will come on.
Remove the load promptly for best results.
LOCKED
To allow for proper load sensing and
spinning, the lid will lock and the
Locked light will turn on. This light
indicates that the lid is locked and
cannot be opened.
If you need to open the lid, press
START/PAUSE. The lid will unlock once
the washer movement has stopped.
This may take several minutes if the
load was spinning at high speed.
NOTE: Holding the START/PAUSE Button
will cancel the cycle and cause the washer
to drain.
Press START/PAUSE again to resume the
cycle. Avoid opening the lid during sensing.
The sensing process will start over when
the washer is restarted.
5

Cycle Guide
For best fabric care, choose the cycle that best ts the load being washed.
Recommended settings for best performance are shown in Bold.
Not all cycles and options are available on each cycle. Not all settings and options are available on each cycle.
Items to wash: Cycle: Wash Temp*: Spin
Speed**:
Large items such
as sheets, sleeping
bags, small
comforters, jackets,
small washable rugs
Sturdy fabrics,
colorfast items,
towels, jeans
Casual and mixed
loads, jeans, towels,
sturdy fabrics
Cottons, linens, and
mixed item loads
Bright or darkly
colored cottons,
linens, casual and
mixed loads
No-iron fabrics,
cottons, perm
press, synthetics
Machine-wash silks,
hand-wash fabrics
Small loads,
cottons, polyester,
perm press
Heavily soiled
fabrics
Hand-washed items
or dripping wet
items
Swimsuits and
items requiring
rinsing without
detergent
No clothes in
washer
*All rinses are cold.
**Spin speed is integrated into the cycle and can not be selected.
Bulky Items/
Sheets
Heavy Duty Hot
Deep Water
Wash
Normal Hot
Cold Wash Cold High Cold water with an additional wash action gently lifts
Casual Hot
Delicate Hot
Quick Wash Hot
Soak Hot
Drain &
Spin
Rinse &
Spin
Clean Washer
with
®
affresh
Hot
Warm
Cool
Cold
Tap Cold
Warm
Cool
Cold
Tap Cold
Hot
Warm
Cool
Cold
Tap Cold
Warm
Cool
Cold
Tap Cold
Warm
Cool
Cold
Tap Cold
Warm
Cool
Cold
Tap Cold
Warm
Cool
Cold
Tap Cold
No Spin Use this cycle to soak small spots of set in stains on fabrics.
Warm
Cool
Cold
Tap Cold
N/A High This cycle uses a spin to shorten drying times for heavy
Cold rinse only High Combines a rinse and high speed spin for loads requiring
Hot
Warm
Cool
Cold
Tap Cold
6
Cycle Details:
Low Use this cycle to wash large items such as jackets and small
comforters. The washer will ll with enough water to wet
down the load before the wash portion of the cycle begins,
and uses a higher water level than other cycles.
High Provides maximum wash time and action for tough stains
and soils. Use this cycle for heavily soiled or sturdy items.
Water-level sensing process may take longer for some items
than for others because they will absorb more water than
other fabric types.
High Provides additional water and alternating wash action for
heavily soiled mixed loads. Water-level sensing process may
take longer for some items than for others because they will
absorb more water than other fabric types.
High Use this cycle for normally soiled cottons and mixed fabric
loads.
stains while caring for fabrics. Settings may be adjusted as
desired, but must use only cold water settings.
Low Use this cycle to wash loads of no-iron fabrics such as sport
shirts, blouses, casual business clothes, permanent press,
and blends.
Low Use this cycle to wash lightly soiled items indicating
“Machine Washable Silks” or “Gentle” cycle on the care
label. Place small items in mesh garment bags before
washing. This cycle uses a higher, preset water level.
High Use this cycle to wash small, lightly soiled loads of 2-3 items
that are needed in a hurry.
The washer will use intermittent agitation and soaking. After
time has expired, water will drain, but the washer will not
spin. Cycle is complete.
fabrics or special-care items washed by hand. Use this
cycle to drain washer after cancelling a cycle or completing
a cycle after a power failure.
an additional rinse cycle or to complete a load after power
interruption. Also use for loads that require rinsing only.
Low Use this cycle every 30 washes to keep the inside of your
washer fresh and clean. This cycle uses a higher water level.
Use with affresh® Washer Cleaner tablet or liquid chlorine
bleach to thoroughly clean the inside of your washer. This
cycle should not be interrupted. See “Washer Care.”
IMPORTANT: Do not place garments or other items in the
washer during the Clean Washer with affresh® cycle. Use
this cycle with an empty wash tub.
Using Your Washer
1. Sort and prepare your laundry
• Empty pockets. Loose change, buttons, or any small
object can pass under the washplate and become trapped,
causing unexpected sounds.
• Sort items by recommended cycle, water temperature, and
colorfastness.
• Separate heavily soiled items from lightly soiled.
• Separate delicate items from sturdy fabrics.
• Do not dry items if stains remain after washing, because
heat can set stains into fabric.
• Treat stains promptly.
• Close zippers, fasten hooks, tie strings and sashes, and
remove non-washable trim and ornaments.
• Mend rips and tears to avoid further damage to items
during washing.
Helpful Tips:
• When washing water-proof or water-resistant items, load
evenly. See “Cycle Guide” for tips and more information on
using the Bulky Items cycle.
• Use mesh item bags to help avoid tangling when washing
delicate or small items.
• Turn knits inside out to avoid pilling. Separate lint-takers
from lint-givers. Synthetics, knits, and corduroy fabrics will
pick up lint from towels, rugs, and chenille fabrics.
Always read and follow fabric care label instructions to avoid
damage to your items.
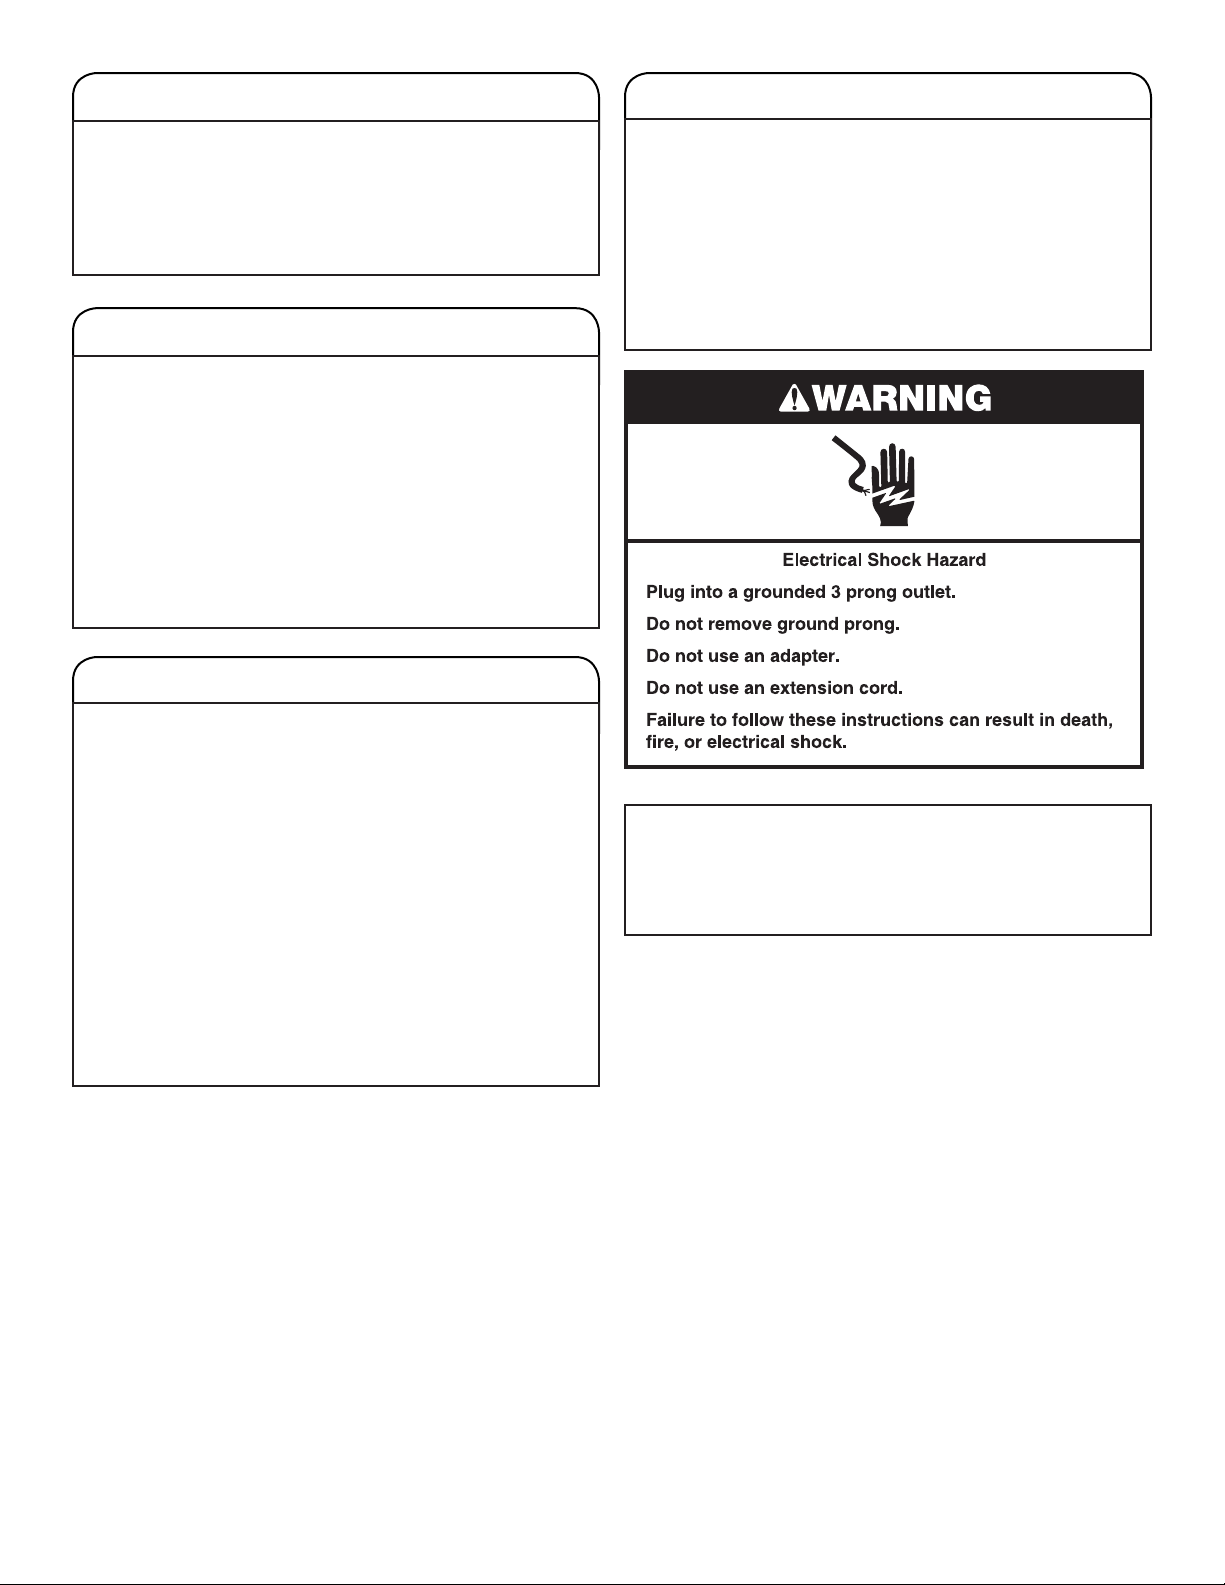
2. Add laundry products
Add a measured amount of HE
detergent or single-dose laundry
packet into the basket.
If using Oxi-type boosters, color-safe
bleach, or fabric softener crystals, add
to the bottom of the washer basket
before adding clothes.
IMPORTANT: Use only High Efciency detergents. The
package will be marked “HE” or “High Efciency.” Low-water
washing creates excessive sudsing with a regular non-HE
detergent. Using regular detergent will likely result in longer
cycle times and reduced rinsing performance. It may also
result in component failures and noticeable mold or mildew.
HE detergents are made to produce the right amount of suds
for the best performance.
NOTE: Follow the manufacturer’s instructions to determine
the amount of laundry products to use.
7

3. Load laundry into washer
For best performance, load items
in loose heaps evenly around the
washplate. Try mixing different sized
items to reduce tangling.
IMPORTANT: Items need to move
freely for best cleaning and to reduce
wrinkling and tangling.
4. Add liquid chlorine bleach
to dispenser, if desired
5. Add fabric softener, if desired
To dispense fabric softener in the rinse cycle,
this washer has been designed to allow the use of the Downy
Ball®† dispenser. Pour a measured amount of Downy® liquid
fabric softener into the Downy Ball® dispenser, pull the ring
tightly to seal it, and place on top of load. Always follow
manufacturer’s directions for correct amount of fabric softener
based on your load size. Then select 1 Rinse with Softener
option. The Downy Ball® dispenser will automatically release
the fabric softener during the rinse cycle. For questions on
using the Downy Ball® dispenser call 1-800-688-7638 or visit
www.downy.com.
IMPORTANT: Rinse option must be selected to 1 Rinse
with Softener or 2 Rinses with Softener to ensure proper
distribution at correct time in cycle. Do not overll or dilute.
Adding Liquid Fabric Softener Manually to Wash Load
During the nal rinse, wait until the washer has completed
lling, press the START/Pause button to pause the washer.
Lift the lid and add the measured recommended amount of
liquid fabric softener. Do not use more than the recommended
amount. Close the lid and press the START/Pause button again
to start the washer.
Liquid
Chlorine Bleach
Do not overll, dilute, or use more than 1 cup (250 mL). Do
not use color-safe bleach or Oxi products in the same cycle
with liquid chlorine bleach.
8
6. Select cycle
Turn cycle knob to choose your wash cycle.
†®Downy and Downy Ball are registered trademark of The Proctor & Gamble Company.
7. Select SOIL LEVEL
9. Select cycle options, if desired
Once you select a cycle, select the soil level by turning the
Soil Level knob to the desired setting.
8. Select WASH TEMP
Once you select a cycle, select the wash temperature by
turning the Wash Temp knob to the desired setting.
Always read and follow fabric care label instructions to avoid
damage to your items.
Wash Temp Suggested Fabrics
Hot
Some cold water is added to save
energy. This will be cooler than
your hot water heater setting.
Warm
Some cold water will be added, so
this will be cooler than what your
previous washer provided.
Whites and pastels
Durable items
Heavy soils
Bright colors
Moderate to light soils
If you would like to add an extra rinse, fabric softener or
extra soak period to any cycle, turn the knob to desired
setting.
10. Press START/Pause
to begin wash cycle
Press the START/Pause button to start the wash cycle. When
the cycle has nished, the DONE indicator will light. Promptly
remove items after cycle has completed to avoid odor, reduce
wrinkling, and rusting of metal hooks, zippers, and snaps.
Unlocking the lid to add items
If you need to open the lid to add 1 or 2 missed items:
Press START/Pause; the lid will unlock once the washer
movement has stopped. This may take several minutes
if the load was spinning at high speed. Then close lid
and press START/Pause again to restart the cycle.
If lid is left open for more than 10 minutes the water will
pump out automatically.
Cool
Warm water is added to assist in
soil removal and to help dissolve
detergents.
Cold
Warm water may be added to
assist in soil removal and to help
dissolve detergents.
Tap Cold
This is the temperature from your
faucet.
Colors that bleed
or fade
Light soils
Dark colors that
bleed or fade
Light soils
Dark colors that
bleed or fade
Light soils
9

Washer Maintenance
WATER INLET HOSES
Replace inlet hoses after 5 years of use to reduce the risk
of hose failure. Periodically inspect and replace inlet hoses
if bulges, kinks, cuts, wear, or leaks are found.
When replacing your inlet hoses, mark the date of
replacement on the label with a permanent marker.
NOTE: This washer does not include inlet hoses. See
the Installation Instructions for more information.
WASHER CARE
Recommendations to Help Keep Your Washer Clean
and Performing at its Best
1. Always use High Efciency (HE) detergents and follow the
HE detergent manufacturer’s instructions regarding the
amount of HE detergent to use. Never use more than the
recommended amount because that may increase the
rate at which detergent and soil residue accumulate inside
your washer, which in turn may result in undesirable odor.
2. Use warm and hot wash water settings sometimes (not
exclusively cold water washes), because they do a better
job of controlling the rate at which soils and detergent
accumulate.
3. Always leave the washer lid open between uses to help
dry out the washer and prevent the buildup of odorcausing residue.
Cleaning Your Top Loading Washer
Read these instructions completely before beginning the
routine cleaning processes recommended below. This
Washer Maintenance Procedure should be performed,
at a minimum, once per month or every 30 wash cycles,
whichever occurs sooner, to control the rate at which soils
and detergent may otherwise accumulate in your washer.
Cleaning the Inside of the Washer
To keep your washer odor-free, follow the usage instructions
provided above, and use this recommended monthly
cleaning procedure:
Clean Washer Cycle
This washer has a special cycle that uses higher water
volumes in combination with affresh® Washer Cleaner
or liquid chlorine bleach to clean the inside of the washer.
Begin procedure
1. affresh® Washer Cleaner Cycle Procedure
(Recommended for Best Performance):
a. Open the washer lid and remove any clothing or items.
b. Place an affresh® Washer Cleaner tablet in the bottom
of the washer basket.
c. Do not place an affresh® Washer Cleaner tablet
in the detergent dispenser.
d. Do not add any detergent or other chemical to the
washer when following this procedure.
e. Close the washer lid.
f. Select the CLEAN WASHER cycle.
g. Press the START/Pause/Unlock button to begin the
cycle. The Clean Washer Cycle Operation is described
below.
NOTE: For best results, do not interrupt cycle. If cycle
must be interrupted, press POWER/CANCEL. (For models
with no Power/Cancel button, press and hold START/
Pause/Unlock for three seconds). After the Clean Washer
cycle has stopped, run a RINSE & SPIN cycle to rinse
cleaner from washer.
WASHER CARE (cont.)
2. Chlorine Bleach Procedure (Alternative):
a. Open the washer lid and remove any clothing
or items.
b. Add 1 cup (236 mL) of liquid chlorine bleach
to the bleach compartment.
NOTE: Use of more liquid chlorine bleach than is
recommended above could cause washer damage
over time.
c. Close the washer lid.
d. Do not add any detergent or other chemical
to the washer when following this procedure.
e. Select the CLEAN WASHER cycle.
f. Press the START/Pause/Unlock button to begin the
cycle. The Clean Washer Cycle Operation is described
below.
NOTE: For best results, do not interrupt cycle. If cycle
must be interrupted, press POWER/CANCEL. (For models
with no Power/Cancel button, press and hold START/
Pause/Unlock for three seconds). After the Clean Washer
cycle has stopped, run a RINSE & SPIN cycle to rinse
cleaner from washer.
Description of Clean Washer Cycle Operation:
1. This cycle will ll to a water level higher than in normal
wash cycles to provide rinsing at a level above the water
line for normal wash cycle.
2. During this cycle, there will be some agitation and
spinning to increase the removal of soils.
After this cycle is complete, leave the lid open to allow
for better ventilation and drying of the washer interior.
Cleaning the Dispensers
After a period of using your washer, you may nd some
residue buildup in the washer’s dispensers. To remove
residue from the dispensers, wipe them with a damp cloth
and towel dry. Do not attempt to remove the dispensers or
trim for cleaning. The dispensers and trim are not removable.
If your model has a dispenser drawer, however, remove the
drawer and clean it before or after you run the Clean Washer
cycle. Use an all-purpose surface cleaner, if needed.
Cleaning the Outside of the Washer
Use a soft, damp cloth or sponge to wipe away any spills.
Use only mild soaps or cleaners when cleaning external
washer surfaces.
IMPORTANT: To avoid damaging the washer’s nish, do not
use abrasive products.
10
NON-USE AND VACATION CARE
REINSTALLING/USING WASHER AGAIN
Operate your washer only when you are home. If moving,
or not using your washer for a period of time, follow these
steps:
1. Unplug or disconnect power to washer.
2. Turn off water supply to washer, to avoid ooding due
to water pressure surge.
WINTER STORAGE CARE
IMPORTANT: To avoid damage, install and store washer
where it will not freeze. Because some water may stay in
hoses, freezing can damage washer. If storing or moving
during freezing weather, winterize your washer.
To winterize washer:
1. Shut off both water faucets; disconnect and drain water
inlet hoses.
2. Put 1 qt. (1 L) of R.V.-type antifreeze in basket and run
washer on RINSE & SPIN cycle for about 30 seconds
to mix antifreeze and remaining water.
3. Unplug washer or disconnect power.
TRANSPORTING YOUR WASHER
To reinstall washer after non-use, vacation, winter storage,
or moving:
1. Refer to Installation Instructions to locate, level, and
connect washer.
2. Before using again, run washer through the following
recommended procedure:
To use washer again:
1. Flush water pipes and hoses. Reconnect water inlet
hoses. Turn on both water faucets.
1. Shut off both water faucets. Disconnect and drain water
inlet hoses.
2. If washer will be moved during freezing weather, follow
WINTER STORAGE CARE directions before moving.
3. Disconnect drain hose from drain system and drain any
remaining water into a pan or bucket. Disconnect drain
hose from back of washer.
4. Unplug power cord.
5. Place inlet hoses and drain hose inside washer basket.
6. Drape power cord over edge and into washer basket.
7. Place packing tray from original shipping materials
back inside washer. If you do not have packing tray,
place heavy blankets or towels into basket opening.
Close lid and place tape over lid and down front of
washer. Keep lid taped until washer is placed in new
location. Transport washer in upright position.
2. Plug in washer or reconnect power.
3. Run washer through BULKY ITEMS/SHEETS cycle to
clean washer and remove antifreeze, if used. Use only
HE High Efciency detergent. Use 1/2 the manufacturer’s
recommended amount for a medium-size load.
11
 Loading...