

Whirlpool W10315283RP Installation
DOOR REVERSAL KIT
TROUSSE POUR L’INVERSION DE LA PORTE
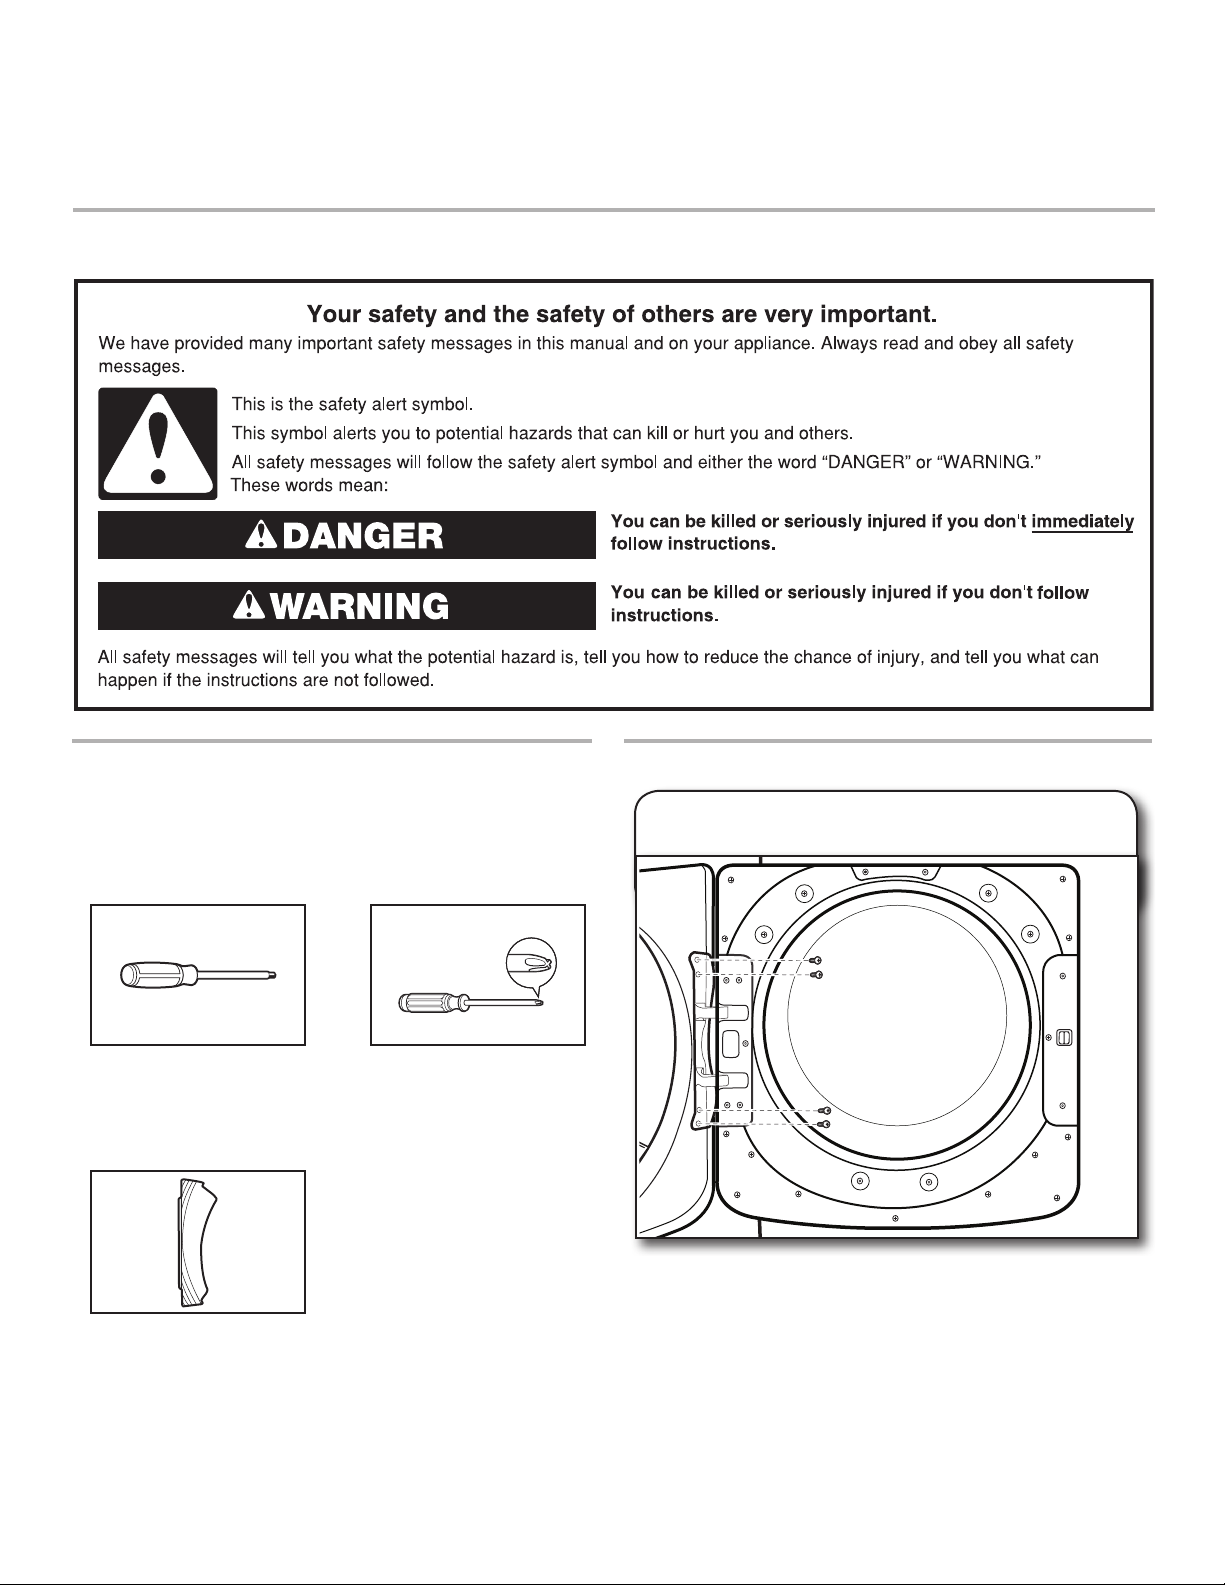
DRYER SAFETY
TOOLS AND PARTS
Tools and Parts
Gather required tools and parts before starting installation.
Tools needed:
Min. 8" long Torx®† T25
screwdriver
Parts included:
Cover strip
#2 Phillips screwdriver
INSTALLATION INSTRUCTIONS
1. Remove door from dryer
Using a Torx®† T25 screwdriver, remove the 4 screws securing
the door hinge to the dryer and lift up and out to remove the
door. Place the door on a soft towel or other non-scratch
surface. Reinstall the 4 screws.
† ® TORX is a registered trademark of Saturn Fasteners, Inc.
W10315279B
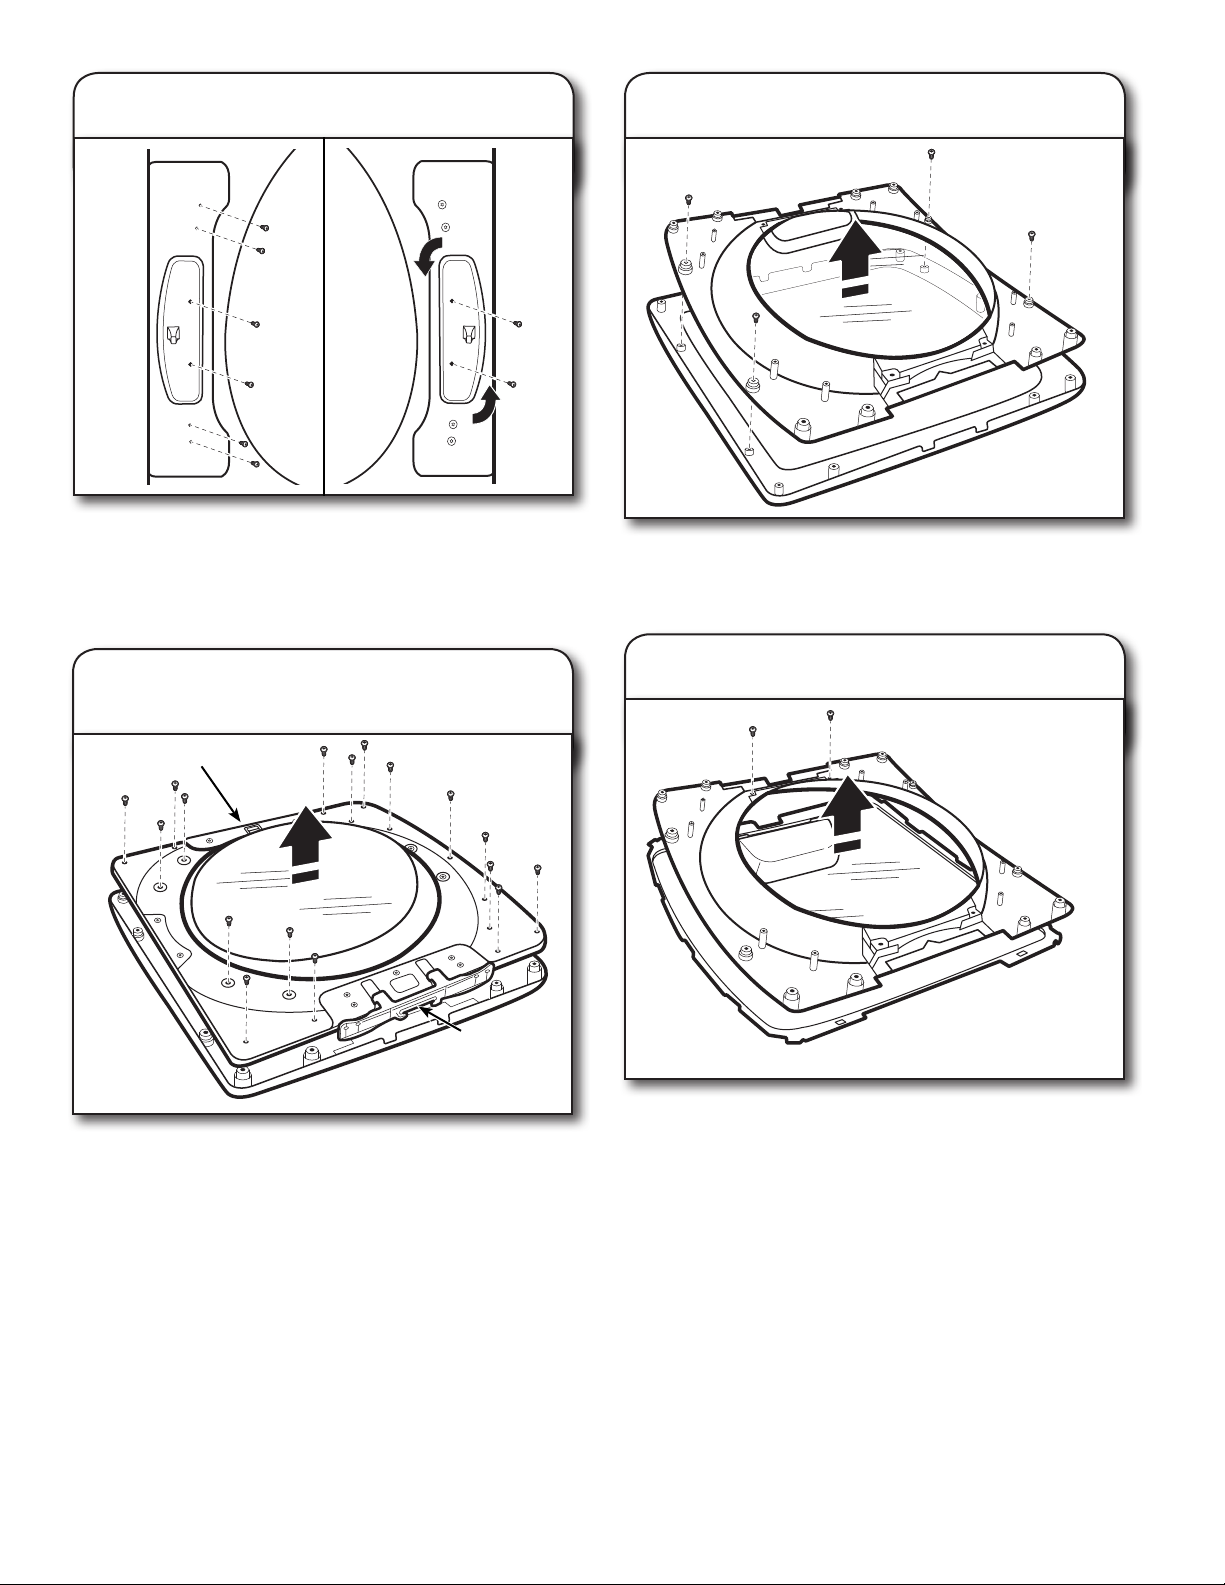
2. Move the door strike
Using a Torx®† T25 screwdriver, remove the 2 screws securing
the door strike to the door frame of the dryer. Remove the 4
screws above and below the door strike and set aside for later
use. Rotate the strike 180° and attach to the opposite side of
dryer door frame, as shown.
4. Remove outer door trim
Using a Phillips screwdriver, remove the 4 screws attaching
the outer door trim to the outer door liner/window assembly
and remove trim.
3. Remove inner door from
outer door
Release tab
Release tab
Position the door with the inside of the door facing up.
Using a Phillips screwdriver, remove the 17 screws securing
the inner door to the outer door. Lift off the inner door and
set aside.
NOTE: There is a small release tab on each side of the door.
If the inner and outer door do not separate easily, slide a
credit card, putty knife, or similar at object between the inner
and outer doors at the locations shown to release the tab.
5. Remove door handle screws
Using a Phillips screwdriver, remove the 2 screws attaching
the outer window and door handle to the outer door liner and
remove.
† ® TORX is a registered trademark of Saturn Fasteners, Inc.
2

6. Remove cover strip
8. Rotate outer window and reattach
door handle
Using a Phillips screwdriver, remove the 2 screws attaching
the cover strip to the outer door liner and remove.
7. Install cover strip from kit
Using the 2 screws removed earlier, install the new cover strip
(included with kit) on the opposite side.
Rotate the outer window and door handle 180° and lower
outer door liner back onto the outer window, securing the
door handle with the 2 screws removed earlier.
9. Reattach outer door trim
Reattach the outer door trim to the outer door assembly and
secure using the 4 screws removed earlier.
3
 Loading...