

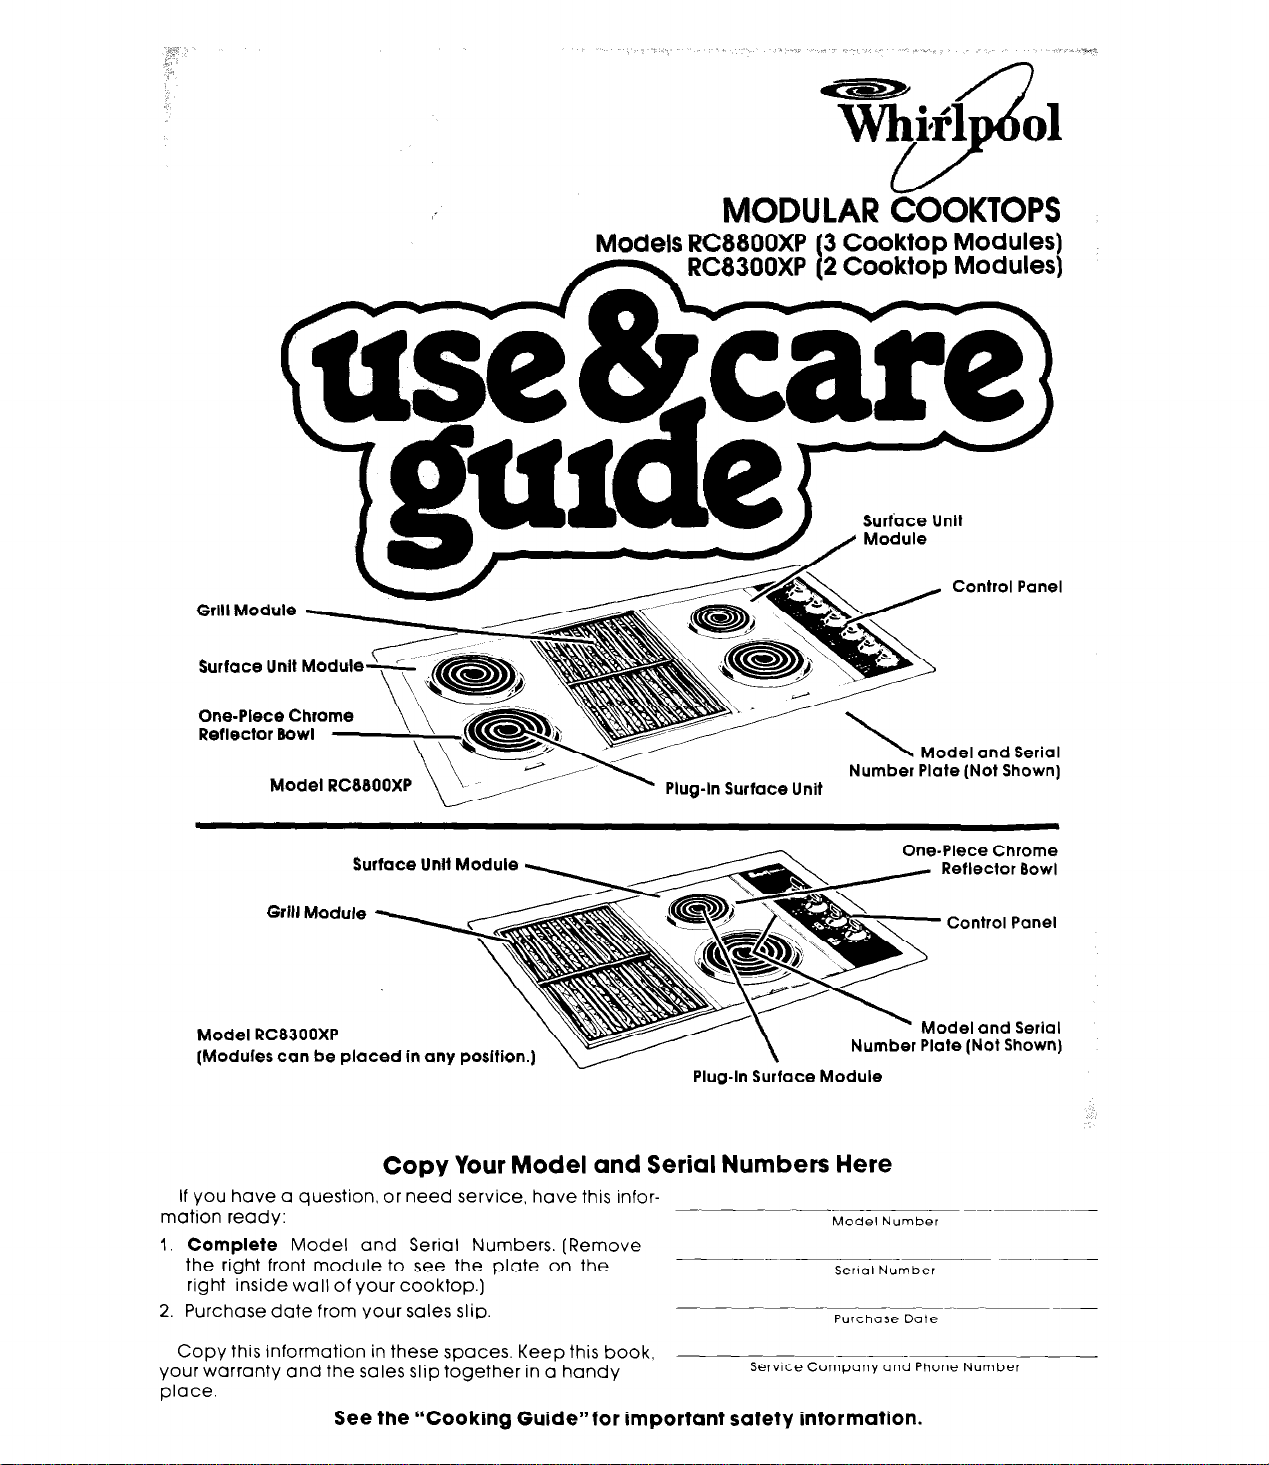
Whirlpool RC88OOXP User Manual
Grltl Module
MO~LAR COOKTOPS
Models RC88OOXP (3 Caoktop Modules)
RC8300XP (2 Cooktop Modules)
Surface Unlt
Control Panel
Surface Untt
One-Piece Chrome
Reflector Bowl
Model RC8300XP
(Modules can be
Modute
Model RCWOOXP
Surface Untl Module
Grit1 Module
placed
in any posltlon.)
Copy Your Model and Serial Numbers Here
If you have a question, or need service, have this infor-
mation ready:
I. Complete
the right front module to see the plate on the
right inside wall of your cooktop.)
2. Purchase date from your sales slip.
Model and Serial Numbers. (Remove
Model and Serial
er Plate (Not Shown)
Plug-In Surface Unit
One-Piece Chrome
Reflector Bowl
Control Panel
Model and Serial
Plug-In Surface Module
Model Number
Serral Number
Copy this information in these spaces. Keep this book,
your warranty and the sales slip together in a handy
place.
See the “Cooking Guide”for important safety information.
Service Company and Phone Number
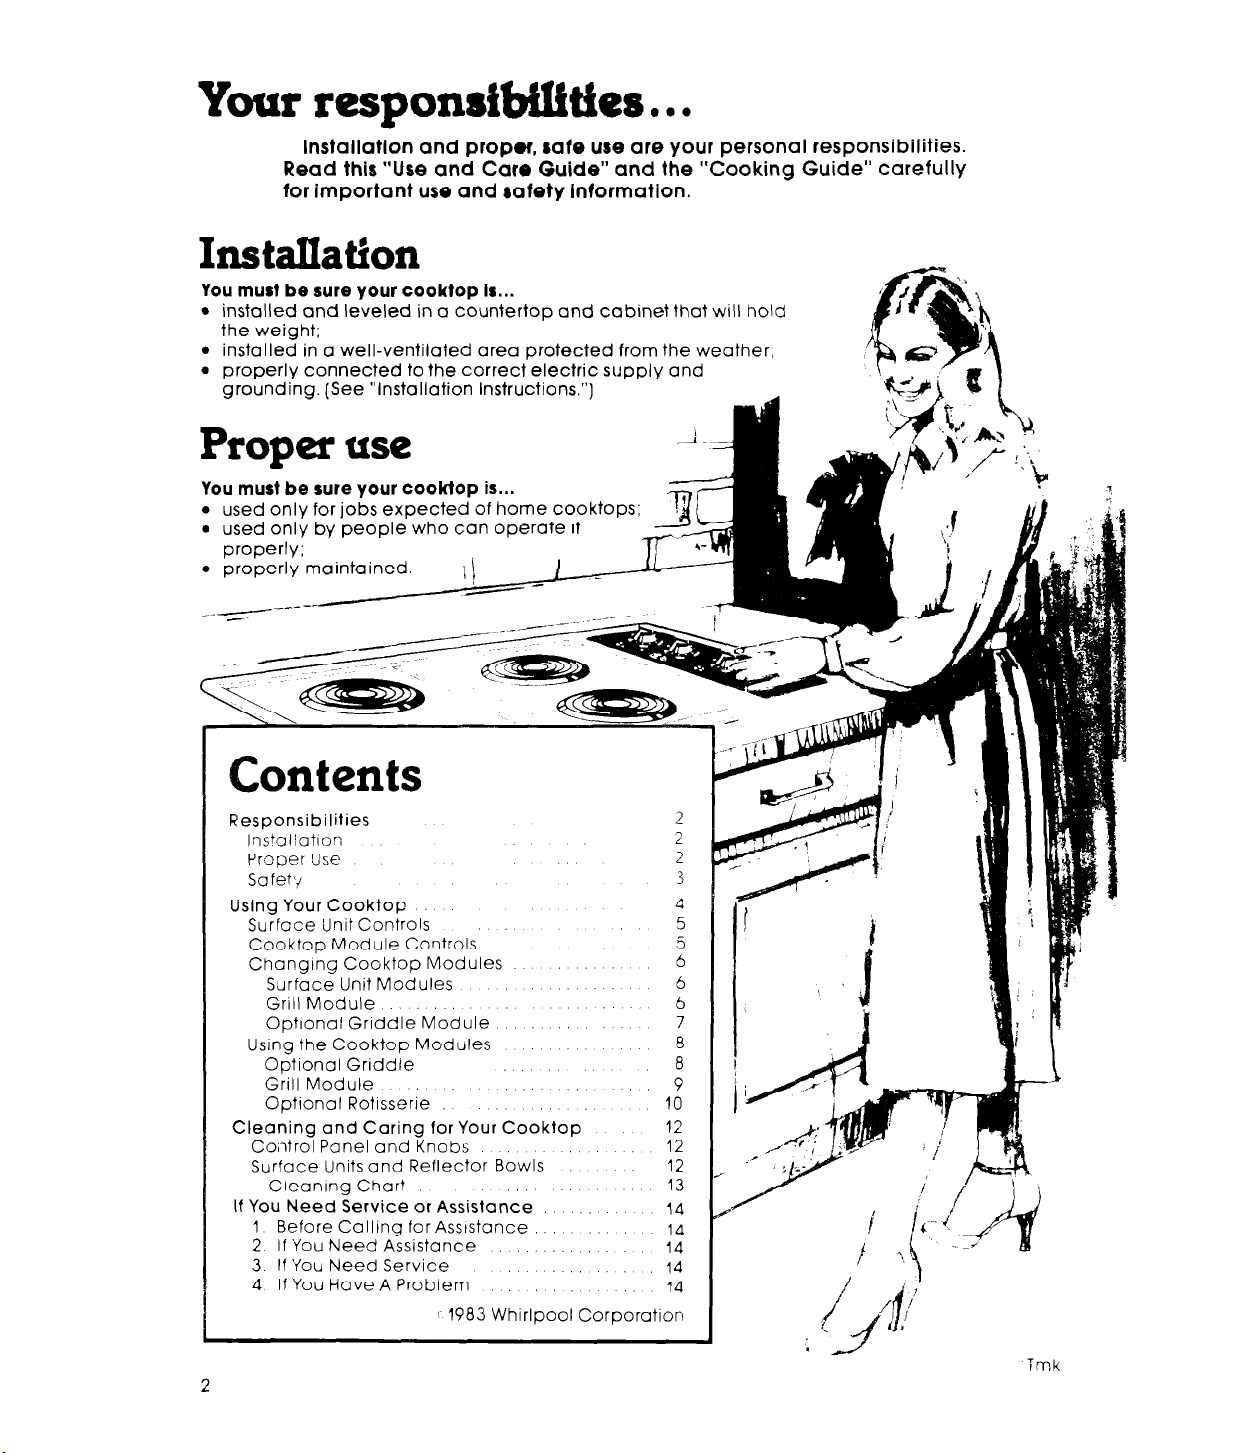
Your responstbilitfrs
lnstallatlon and proper, rafe use are your personal responsibilities.
Read this “Use and Care Guide” and the “Cooking Guide” carefully
for Important use and tafety Informatlon.
l l
.
You must
l
installed and leveled in a countertop and cabinet that will hold
the weight;
l
installed in a well-ventilated area protected from the weather,
l
properly connected to the correct electric supply and
grounding. (See “Installation
be
sure your cooktop is...
Instructions.“]
Proper use
You
must be sure your cooktop
l
used only for jobs expected of home cooktops;
l
used only by people who can operate it
oroi3erlv;
l
properly maintained.
~-
II
*-
is...
Contents
Responsibilities
Instaliatlor;
Proper ?Ise
Safetx!
Using Your Cooktop
Surface Unit Controls
Cooktop Module Controls
Changtng Cooktop Modules
Surface Unit Modules
Grill Module
OptIonal Griddle Module
Using the Cooktop Modules
Optlonal Griddle
Grill Module 9
Optional Rotisserie IO
Cleaning and Caring for Your Cooktop
Cohtrol Panel and Knobs
Surface Units and Reflector Bowls
Cieanlng Chart
If You Need Service or Assistance
1 Before Calltng for Asststance
2 If ‘You Need Assistance
3 If ‘You Need Service
4 If You Have A Problem
1 1983 Whirlpool Corporation
: 12
2
2
2
3
4
5
5
6
6
6
7
8
a
12
12
13
14
14
14
14
14
imk
2
3
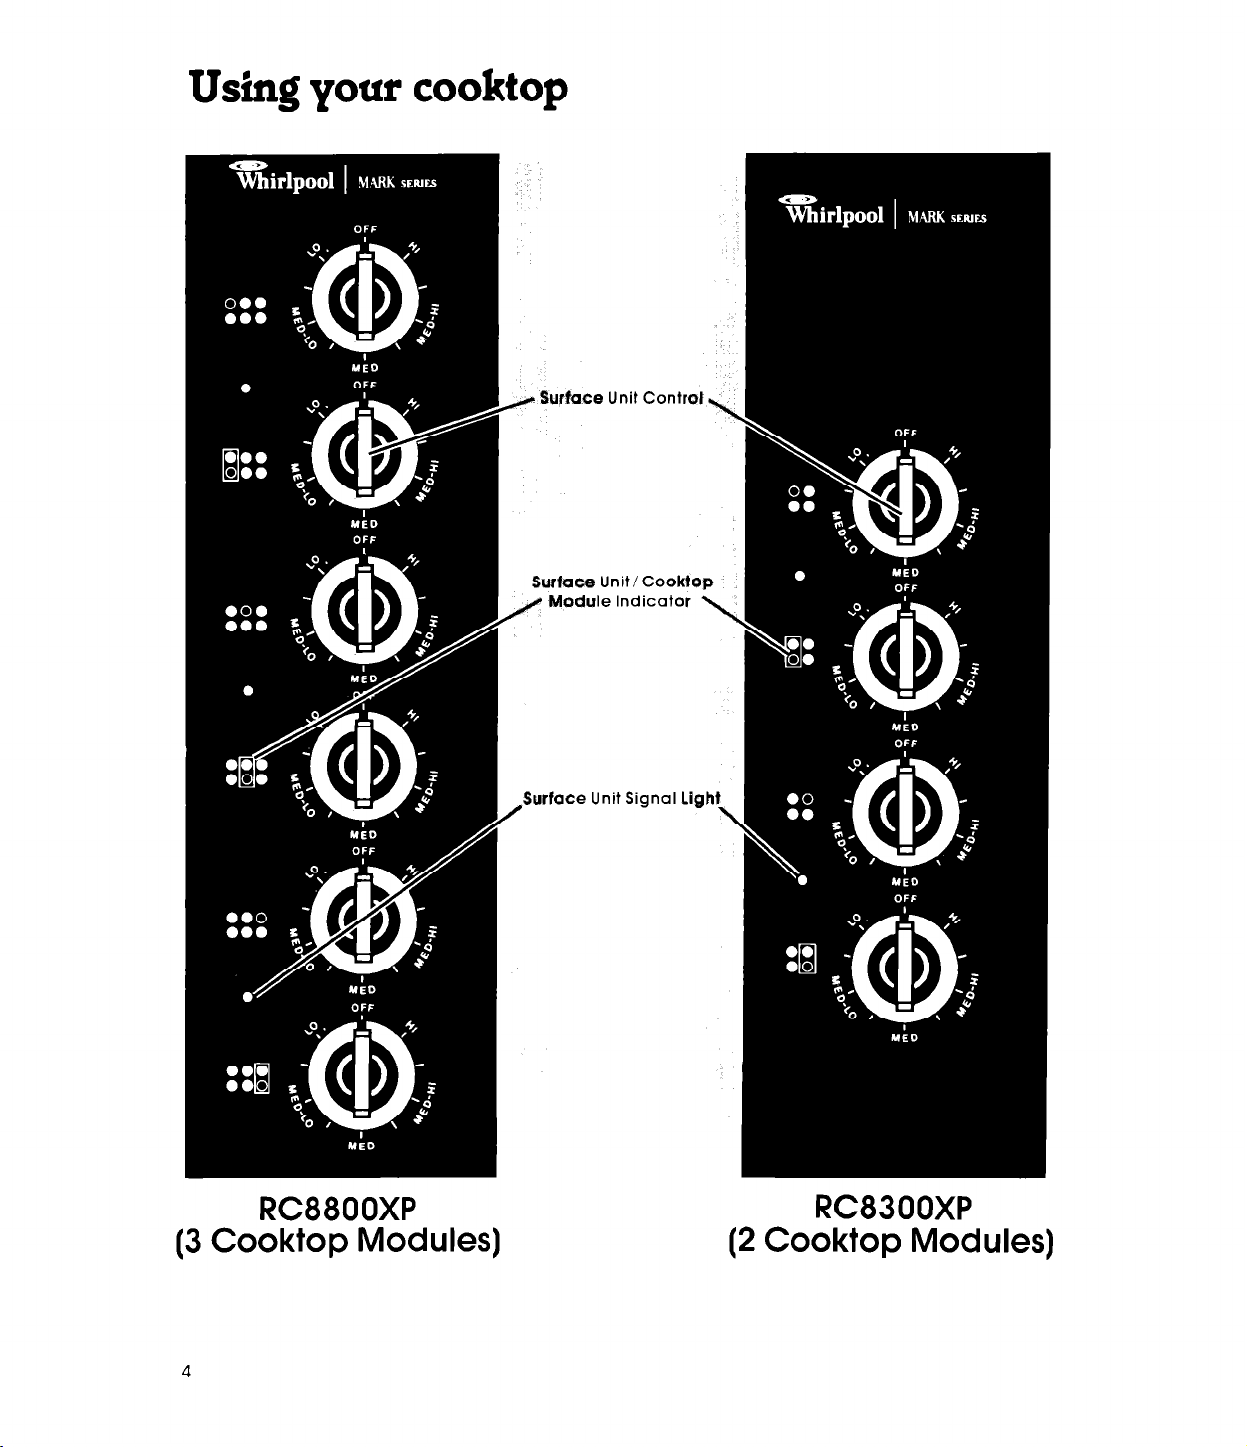
Using your cooktop
, Surfi
surf0
NM0
ce Uni
ldule II
7it C
:ontrc
ItIC
ookt
7dic :ator
RC880OXP
(3 Cooktop Modules]
4
/
Surfac
:e Unit
Sign
ial Li
RC8300XP
(2 Cooktop Modules)
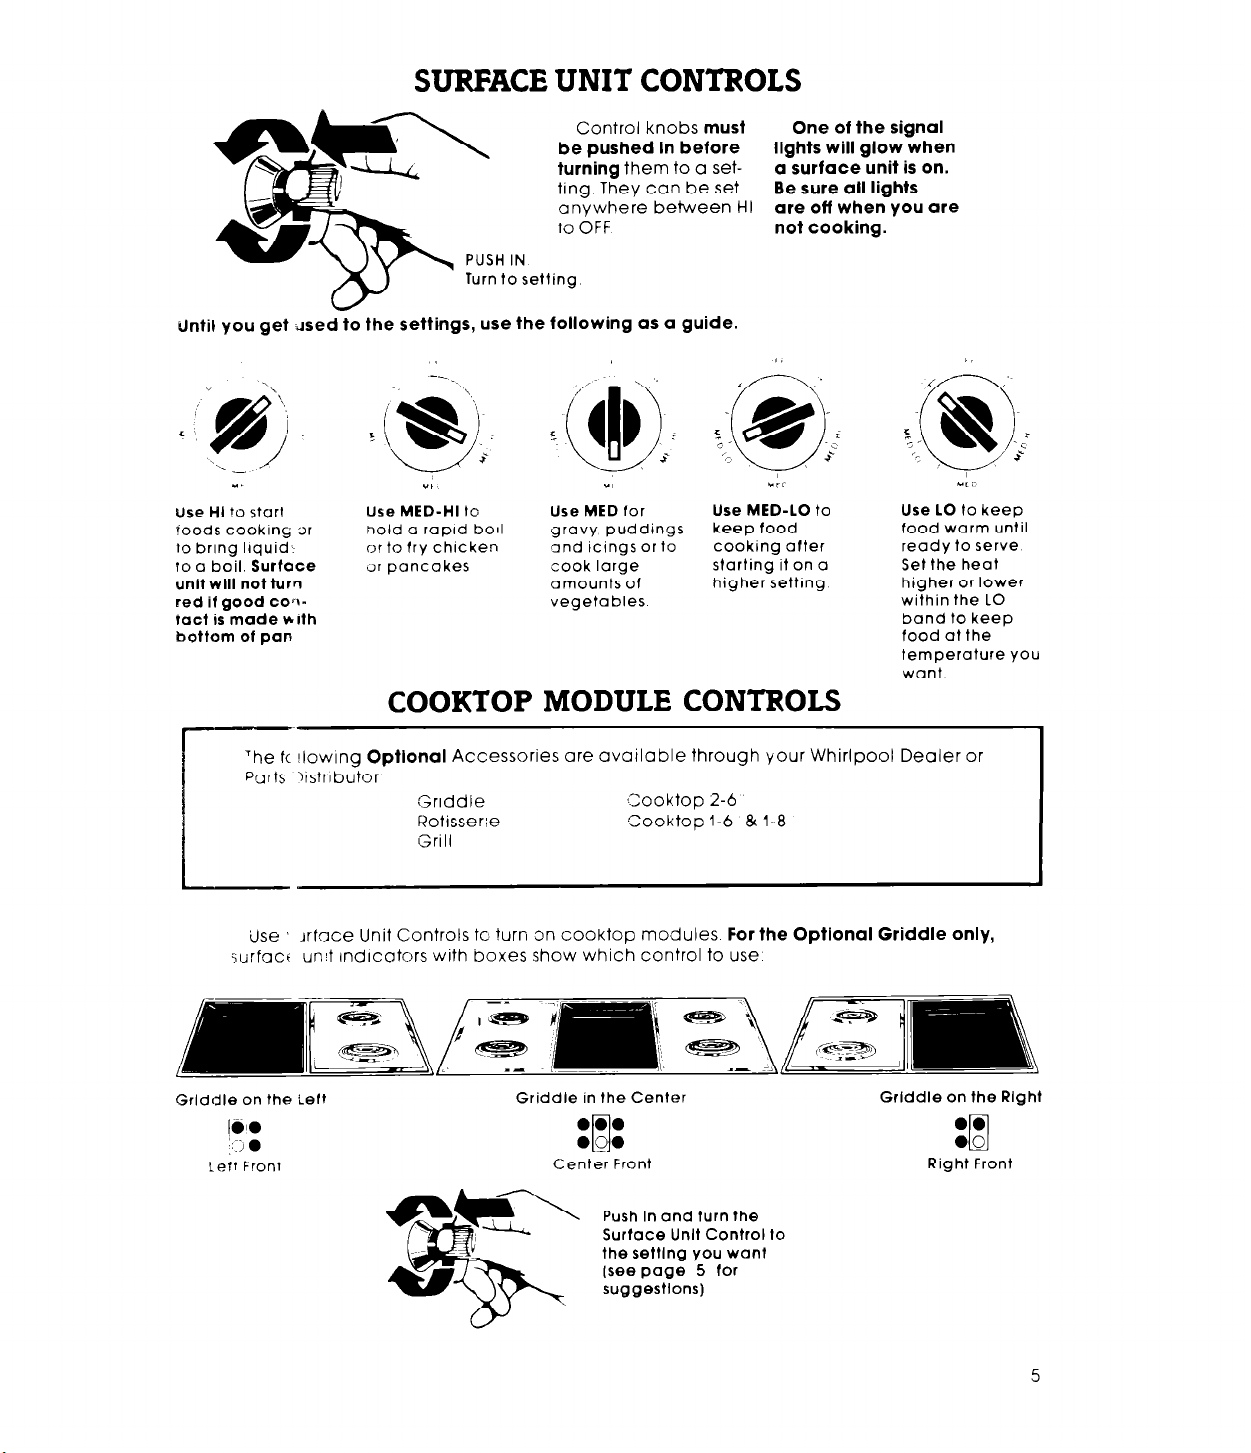
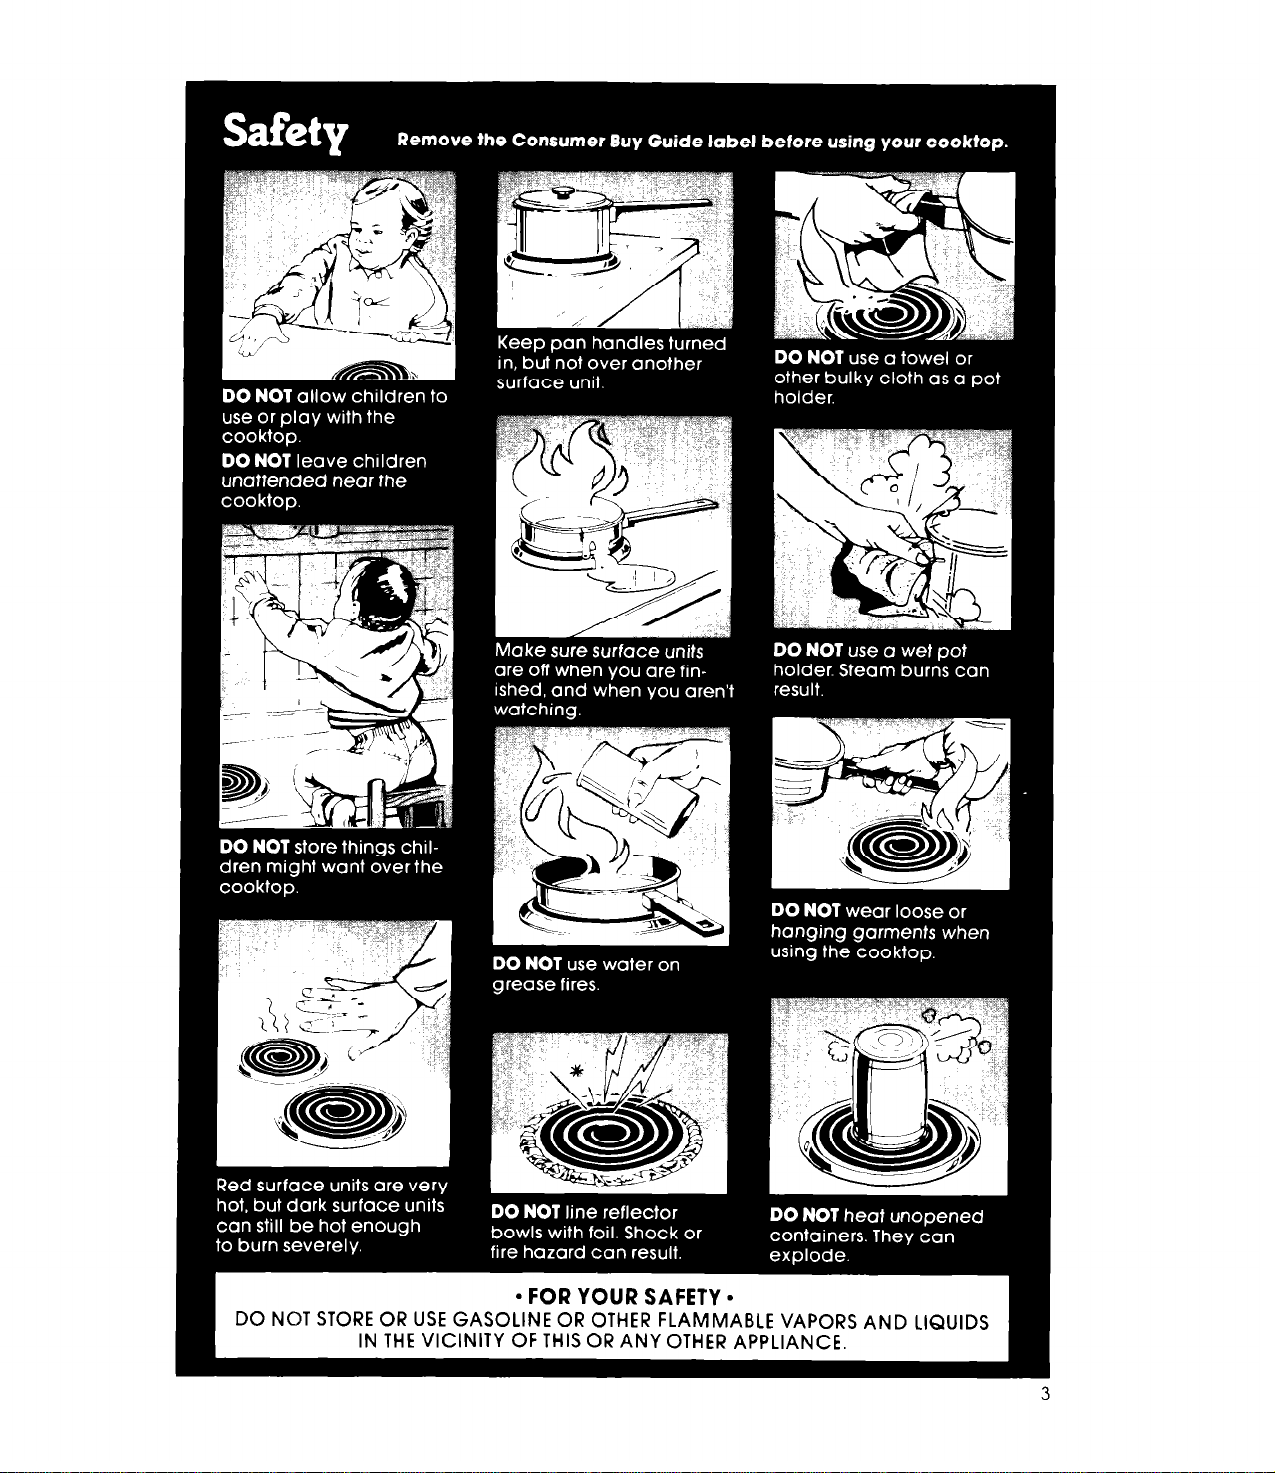
SURFACE UNIT CONTROLS
Control knobs must
be pushed in before
turning them to a setting. They can be set
anvwhere between HI
PUSH IN
Turn to setting
‘il you get dsed to the settings, use the following as a guide.
ilnl
”
Use HI !o start
?oods cooking 3r
lo bring Ilquid:
to a boil. Surface
unit will
red if
not turrl
good CO~I-
VI
Use MED-HI lo
hold
a rapld boll
or to fry chlcken
31 pancakes
“8
Use
MED
gravy puddings
gnd icings or to
cook lorge
amounts of
vegetables
for
tact is made with
bottom
of pan
COOKTOPMODULECONTROLS
One of the signal
lights will glow when
a surface unit is on.
Be sure all lights
are off when you are
not cooking.
Use MED-LO
keep food
cooking after
starting it on a
higher settrng
to
Use LO
to keep
food warm until
reody to serve
Set the heot
higher or lower
within the LO
band to keep
food at the
temperature you
want
‘he fc !lowlng Optlonal Accessories are available through your Whirlpool Dealer or
Parts listrlbutor,
Use Artace Unit Controls to ?urn on
surfaci
Grlddle on the Left
1610
:::i 0
!eft Front
unit
Griddle
Kotisser:e
~Cooktop 2-6
Cooktop I-6 & 1-8
Grill
cooktop modules.
For the Optional Griddle only,
Indicators with boxes show which control to use
Griddle in the Center
0.0
l QO
rl
Center Front
the setting you want
[seepage 5 for
Grlddle on the Right
Right Front
5
 Loading...