

Use And Care
GUIDE
A Note to You ......................... 2
Washer Safety ........................ 3
Parts and Features................. 4
Operating Your Washer
(models with separate
Water Level and
Temperature Selectors)...... 5
(models with
Temperature Selector
in Cycle Control Knob)........ 9
Stopping/restarting your
washer .............................. 11
Understanding what
happens in each cycle...... 12
Understanding normal
washer sounds ................. 12
Adding liquid chlorine
bleach............................... 13
Adding liquid fabric
softener............................. 13
Caring for Your Washer....... 14
Laundry Tips ........................ 15
Removing Stains.................. 19
Troubleshooting................... 22
Requesting Assistance or
Service in the U.S.A. ............ 24
Requesting Assistance or
Service in Canada ................ 25
Warranty ............................... 26
3949064 A
ONE SPEED AUTOMATIC WASHERS

A Note to You
Thank you for buying this appliance.
You have purchased a quality,
have gone into its manufacturing. Use this Use and Care Guide to safely and efficiently
operate and maintain your appliance. Complete and mail the Ownership Registration Card
provided with your appliance. This will help us notify you about any new information on your
appliance.
Please record your model’s information.
Whenever you call to request service on
your appliance, you need to know your
complete model number and serial number.
You can find this information on the model
and serial number plate (see diagram on
page 4 for location of plate).
Please also record the purchase date of
your appliance and your dealer’s name,
address, and telephone number.
Keep this book and the sales slip together in a safe place for future reference.
world-class
home appliance. Years of engineering experience
Model Number __________________________
Serial Number __________________________
Purchase Date __________________________
Dealer Name ___________________________
Dealer Address _________________________
Dealer Phone ___________________________
In the U.S.A., call our Consumer
Assistance Center toll-free.
1-800-253-1301
In Canada, contact your dealer or nearest Inglis Limited
Appliance Service Branch.
2

Washer Safety
Your safety is important to us.
This guide contains safety statements
under warning symbols. Please pay special
attention to these symbols and follow any
instructions given. Here is a brief explanation of the symbol.
This symbol alerts you to
hazards such as fire,
electrical shock, or other
injuries.
IMPORTANT SAFETY INSTRUCTIONS
WARNING – To reduce the risk of fire, electric shock, or injury to
persons when using the washer, follow basic precautions, including
the following:
•Read all instructions before using
the washer.
•Do not wash articles that have
been previously cleaned in,
washed in, soaked in, or spotted
with gasoline, dry-cleaning
solvents, or other flammable or
explosive substances as they
give off vapors that could ignite
or explode.
•Do not add gasoline, dry-cleaning
solvents, or other flammable or
explosive substances to the wash
water. These substances give
off vapors that could ignite or
explode.
•Under certain conditions, hydro-
gen gas may be produced in a
hot water system that has not
been used for 2 weeks or more.
HYDROGEN GAS IS EXPLOSIVE. If the hot water system has
not been used for such a period,
before using the washing machine, turn on all hot water faucets and let the water flow from
each for several minutes. This will
release any accumulated hydrogen gas. As the gas is flammable,
do not smoke or use an open
flame during this time.
•Do not allow children to play on
or in the washer. Close supervision of children is necessary
when the washer is used near
children.
•Before the washer is removed
from service or discarded, remove the door.
•Do not reach into the washer if
the tub or agitator is moving.
•Do not install or store the washer
where it will be exposed to the
weather.
•Do not tamper with controls.
•Do not repair or replace any part
of the washer or attempt any
servicing unless specifically
recommended in this Use and
Care Guide or in published
user-repair instructions that you
understand and have the skills to
carry out.
•See Installation Instructions for
grounding requirements.
– SAVE THESE INSTRUCTIONS –
3

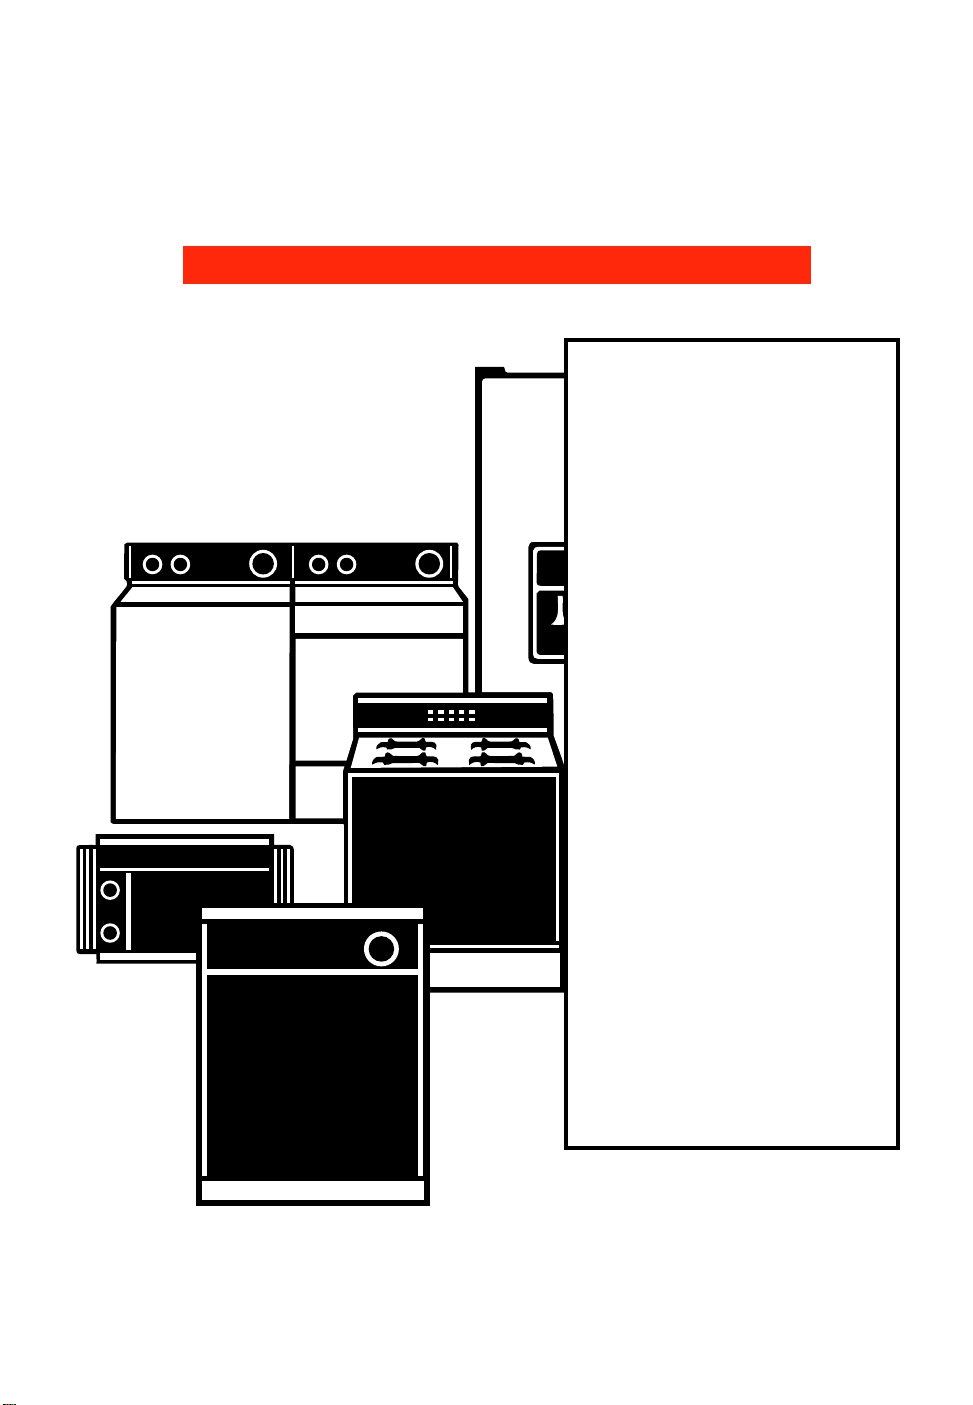
Parts and Features
The parts and features of your washer are illustrated on this page. Become familiar with all
parts and features before using your washer. Page references are included next to some
features. Refer to those pages for more information about the features.
NOTE:
• The drawings in this book may vary from your washer model. They are designed to
show the different features of all models covered by this book. Your model may not
include all features.
Water level
selector
†
(p. 6)
Temperature selector
(p. 6)
PUSH STOP
•
PULL START
WATERWATER
SAVER
2 SPEED • 8 CYCLE2 SPEED • 8 CYCLE
WASHWASH
TEMPERATURE
RINSERINSE
HOTHOT
LOAD SIZELOAD SIZE
COLDCOLD
MEDIUMMEDIUM
LARGELARGE
HOTHOT
SMALLSMALL
WARMWARM
EXEX
LARGELARGE
1/2 HP MOTOR 1/2 HP MOTOR
•
SELF CLEANING FILTER SELF CLEANING FILTER
•
REGULAR
WARMWARM
COLDCOLD
NORMAL
COLDCOLD
HEAVY
COLDCOLD
SUPER WASHSUPER WASH
†
HEAVY DUTYHEAVY DUTY
SUPER CAPACITYSUPER CAPACITY
PERMANENTPERMANENT
PRESSPRESS
OFF
NORMAL
10
LIGHT
6
COOLCOOL
DEEPDEEP
DOWNDOWN
RINSERINSE
6
10
14
OFF
4
NORMAL
8
LIGHT
6
OFF
KNITS/DELICATES
OFF
14
SOAK
WHIRLPOOL CORPORATIONWHIRLPOOL CORPORATION
CUSTOMER ASSISTANCE CENTERCUSTOMER ASSISTANCE CENTER
1-800-253-1301
Cycle control knob
(may include temperature
selections)
(pp. 6-11)
Liquid chlorine
bleach dispenser
†
(p. 13)
Model and serial
number plate
(under lid)
Basket
Tub
Self-cleaning lint filter
†
(bottom of washer basket)
(p. 8)
†
On some models
4
Operating Your Washer
To obtain the best washing results, you must operate your washer properly. This section
gives you this important information. Page references are included for more information.
NOTES:
• Pages 5-8 detail using models with sepa-
rate Water Temperature and Water Level
Selectors.
• Pages 9-11 detail using models with
the Temperature Selector in the Cycle
Control Knob.
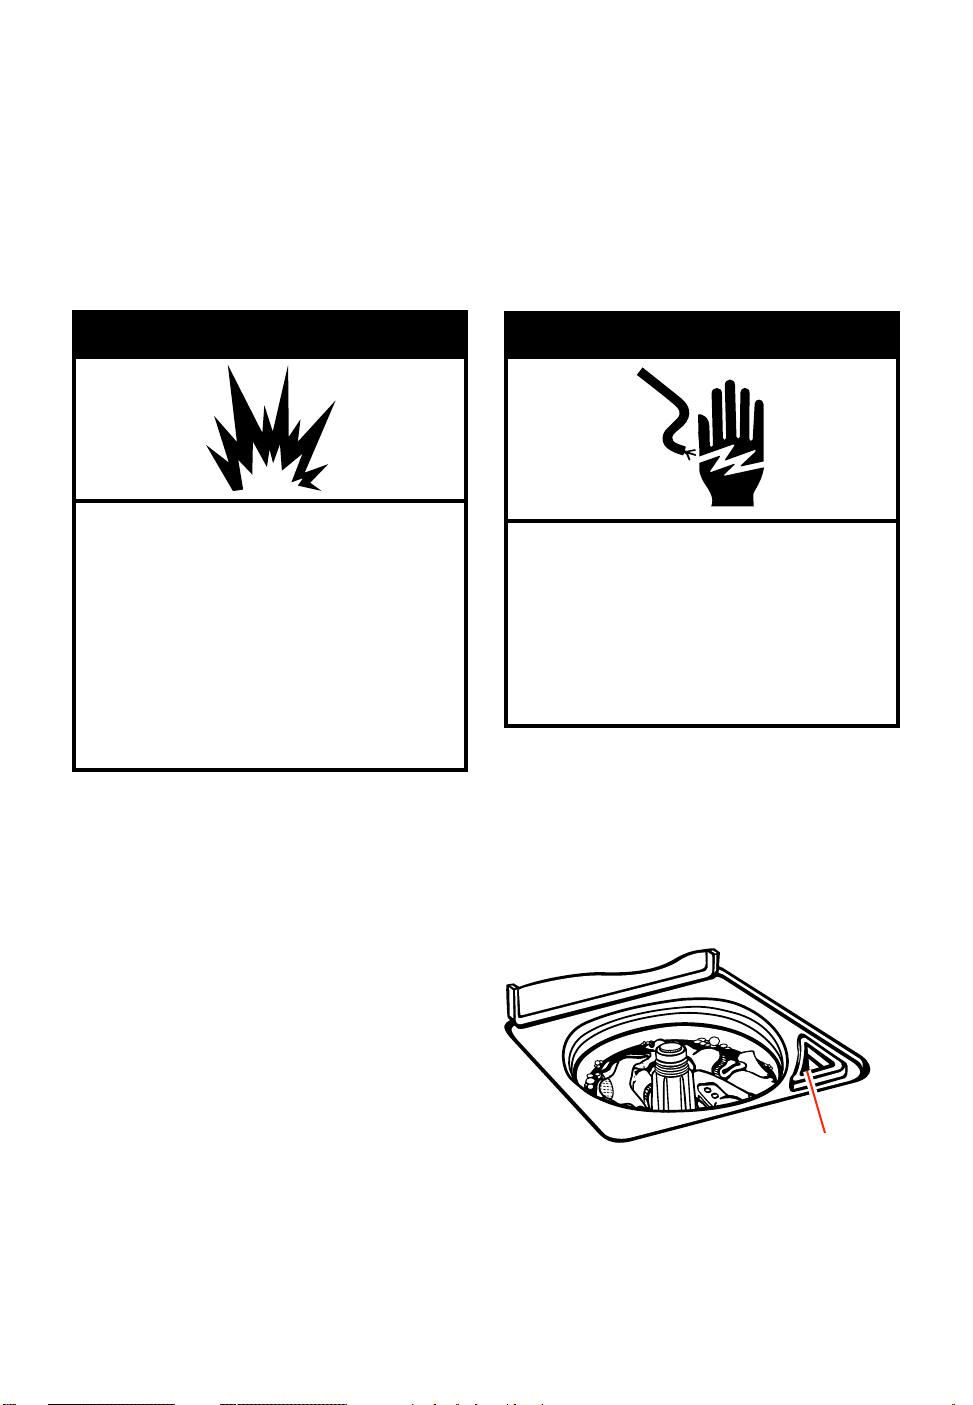
wWARNING
Explosion Hazard
Never place items in the washer that
are dampened with gasoline or other
flammable fluids.
Do not wash or dry items soiled with
vegetable or cooking oils because
they may contain some oil after
laundering.
Doing so can result in death,
explosion, or fire.
Starting Your Washer
(models with separate Water
Level and Temperature
Selectors)
1. Add measured detergent to the
washer. Then place a sorted load of
clothes in the washer.
• Sort and load clothes as described on
pages 15-16. You may load clothes to
the top row of basket holes.
• If desired, you may also add color
safe bleach.
2. (OPTIONAL STEP) If desired, add
measured liquid chlorine bleach to the
dispenser (see page 13).
• Use only liquid chlorine bleach in the
bleach dispenser.
3. Close the washer lid.
wWARNING
Electrical Shock Hazard
Plug into a grounded 3 prong outlet.
Do not remove ground prong.
Do not use an adapter.
Failure to follow these instructions
can result in death or electrical
shock.
Liquid chlorine bleach
dispenser
continued on next page
5

OPERATING YOUR WASHER
4. Select a setting with the Water Level
Selector that corresponds with the
size of your wash load and the type of
fabric being washed.
• To change the water level setting after
the washer has started to fill, move the
Selector to the desired new setting.
• See pages 15 and 16 for loading tips.
5. Select a wash-rinse temperature with
the Water Temperature Selector. Match
the water temperature with the type of
fabric and soils being washed. See
page 17 for water temperature guidelines.
MEDIUM
SMALL
HOT
COLD
WATER LEVEL
WARM
COLD
TEMPERATURE
WASH
RINSE
LARGE
COLD
COLD
EXTRA
LARGE
WARM
WARM
6. Push in the Cycle Control Knob and
turn it clockwise to the wash cycle
you want. See page 7.
7. Pull out the Cycle Control Knob to
start the washer.
8. (OPTIONAL STEP) If desired, add
measured and diluted liquid fabric
softener to the final rinse cycle.
See page 13.
6
OPERATING YOUR WASHER
Selecting a cycle and time
Use the information in this section to help
you make the best cycle selections for your
wash loads. Each cycle is designed for
different types of fabrics and soil levels.
• The washer pauses briefly throughout
each cycle. These pauses are normal for
washer operation.
• Page 12 describes what happens during a
wash cycle.
HEAVY DUTY EXTRA LARGE CAPACITY
NORMAL
LIGHT SOIL
REGULAR SOIL
HEAVY SOIL
OFF
RINSE
6
8
12
SOAK
Cycle Control Knob with separate
water temperature selector
Normal cycle
The Normal cycle features longer spins to
shorten drying time. Use this cycle for
cleaning cotton and linen fabrics. Select
6 (Light), 8 (Regular), or 12 (Heavy) minutes
of wash time, depending on whether your
load is heavily, moderately, or lightly soiled.
Permanent Press
The Permanent Press cycle features a cooldown rinse, and shorter spins to reduce
wrinkling. Use this 8-minute cycle for cleaning permanent press and some synthetic
fabrics that are lightly to moderately soiled.
PLUS
SPIN
OFF
8
OFF
SPIN
RINSE
20
PAUSE
8
RINSE
SPIN
OFF
PERMANENT
PRESS
FABRICARE
Soak cycle
The Soak cycle features brief periods of
agitation and soak time to help remove
heavy soils and stains that need
pretreatment.
• Use warm water when soaking laundry. Hot
water can set stains. See pages 19-21 for
stain removal information.
• Use the amount of detergent or presoak
additive recommended by the manufacturer.
• After the Soak cycle ends, add detergent
and set a new wash cycle.
Fabricare cycle
The Fabricare cycle features a brief wash
cycle that includes a 2-minute soak and
shorter spins for gentle soil removal. Use
this 8-minute cycle to clean delicate items
and washable knits that are lightly to moderately soiled.
7

OPERATING YOUR WASHER
Using rinse and spin
When using extra detergent for heavily
soiled clothes, or washing special-care
items, you may find an extra rinse and spin
is needed.
1. For an additional rinse, push in the Cycle
Control Knob and turn it clockwise to
RINSE, as shown.
2. Pull out the Cycle Control Knob. The
washer fills, agitates, drains, and spins.
Using drain and spin
A drain and spin may help shorten drying
time for some heavy fabrics or special-care
items by removing excess water.
1. Push in the Cycle Control Knob and turn
it clockwise to SPIN, as shown.
2. Pull out the Cycle Control Knob. The
washer drains, then spins.
NORMAL
OFF
NORMAL
RINSE
OFF
SPIN
OFF
RINSE
OFF
FABRICARE
RINSE
OFF
Self-cleaning lint filter
The lint filter at the bottom of the washer
basket cleans itself. During agitation, wash
and rinse water pass over the filter, separating the lint from the water. The lint is then
spun away from the filter and out of the
system during the spin part of the cycle.
If your washer drains into a tub, remove
any lint collected in the tub or strainer.
8
OFF
Self-cleaning
lint filter
OFF
Basket
interior
SPIN
OFF
FABRICARE
SPIN

Starting your washer
(models with Water
Temperature Selector in
Cycle Control Knob)
1. Add measured detergent to the
washer. Then place a sorted load of
clothes in the washer.
• Sort and load clothes as described on
pages 15-16. You may load clothes to
the top row of basket holes.
• If desired, you may also add color
safe bleach.
2. Close the washer lid.
3. Push in the Cycle Control Knob and
turn it clockwise to the wash cycle
you want. See pages 10.
OPERATING YOUR WASHER
4. Pull out the Cycle Control Knob to
start the washer.
5. (OPTIONAL STEP) If desired, add
measured liquid chlorine bleach
after the washer starts agitating.
See page 13.
6. (OPTIONAL STEP) If desired, add
measured liquid fabric softener to the
final rinse water. See page 13.
9

OPERATING YOUR WASHER
Selecting a cycle, time, and temperature
Use the information in this section to help
you make the best cycle selections for your
wash loads. Each cycle is designed for
different types of fabrics and soil levels.
• The washer pauses briefly throughout
each cycle. These pauses are normal for
washer operation.
• Page 12 describes what happens during a
wash cycle.
NORMAL
10
COLD
14
WARM
PULL START PUSH STOP
Water temperature selector in Cycle Control Knob
Normal cycle
The Normal cycle features either WARM or
COLD water and longer spins to shorten
drying time. Select the 14-minute WARM
cycle to clean large loads of sturdily constructed fabrics that are heavily soiled.
Select the 10-minute COLD cycle to clean
cotton and linen fabrics that are moderately
to heavily soiled.
Rinse
Spin
OFF
Cycle options
You may select a different wash time by first
selecting the water temperature (Warm or
Cold) and then turning to the new wash
time. For example, for 14 minutes of wash
time with Cold water:
1. Push in the Cycle Control Knob and turn
it clockwise to Cold.
2. Pull out the Cycle Control Knob and allow
your washer to fill.
3. When your washer has filled, push in and
turn the Cycle Control Knob to Heavy, 14
minutes of wash time.
4. Pull out the Cycle Control Knob.
10

Using rinse and spin
(models with Water
Temperature Selector in
Cycle Control Knob)
When using extra detergent for heavily
soiled clothes, or washing special-care
items, you may find an extra rinse and spin
is needed.
1. For an additional rinse, push in the Cycle
Control Knob and turn it clockwise to
Rinse, as shown.
2. Pull out the Cycle Control Knob. The
washer fills, agitates, drains, and spins.
OPERATING YOUR WASHER
Rinse
OFF
Using drain and spin
(models with Water
Temperature Selector in
Cycle Control Knob)
A drain and spin may help shorten drying
times for some heavy fabrics or special-care
items by removing excess water.
1. Push in the Cycle Control Knob and turn
it clockwise to Spin, as shown.
2. Pull out the Cycle Control Knob. The
washer drains, then spins.
Stopping/restarting your washer
• To stop the washer at any time, push in
the Cycle Control Knob.
• To restart the washer, close the lid
(if necessary) and pull out the Cycle
Control Knob.
Spin
OFF
11
OPERATING YOUR WASHER
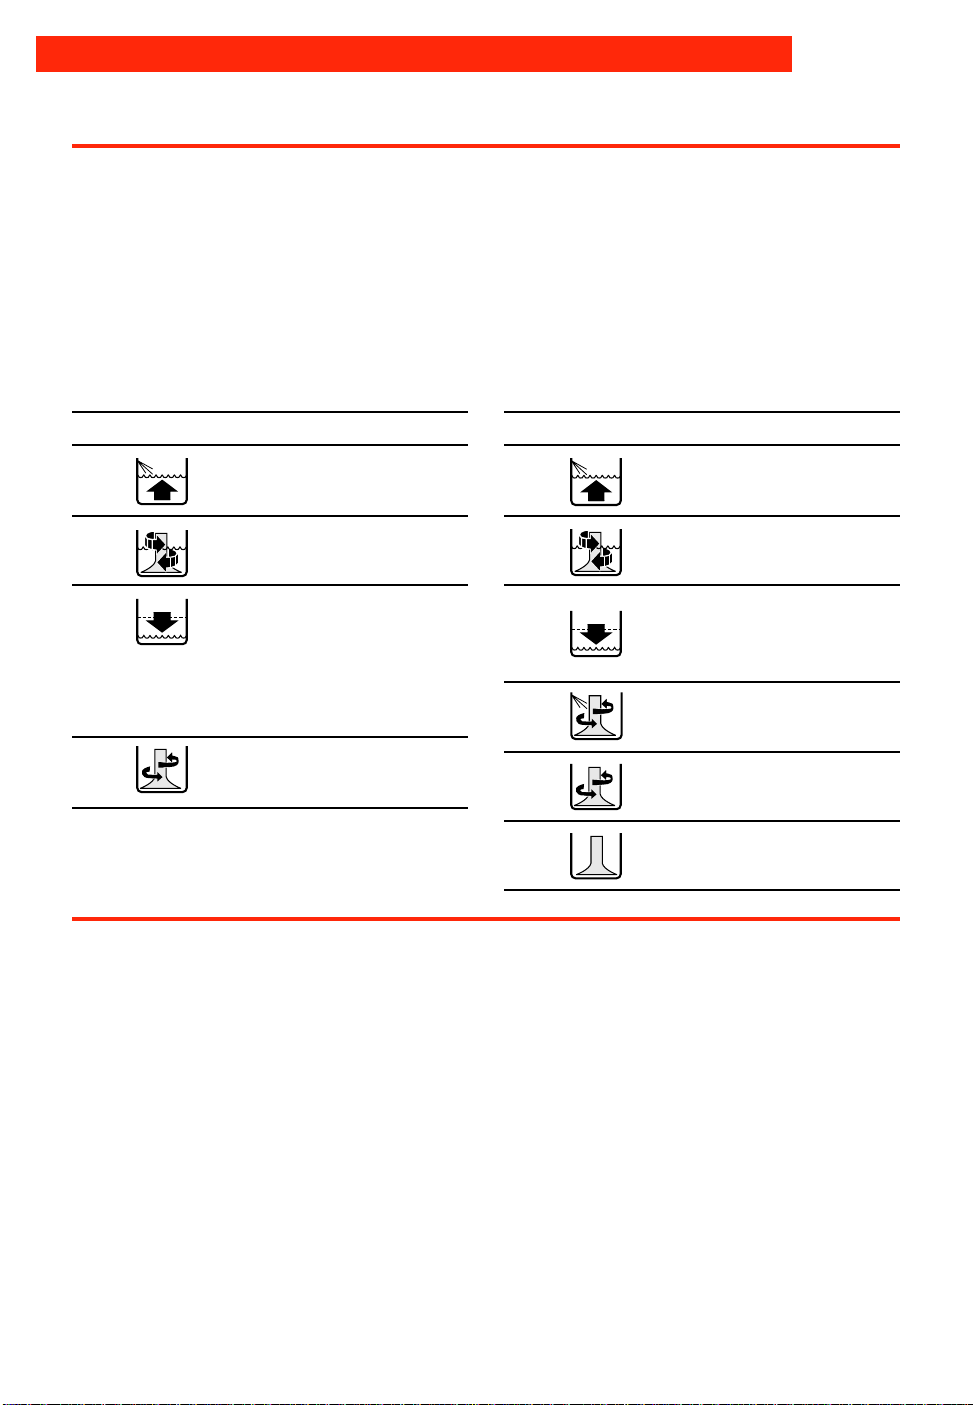
Understanding what happens in each cycle
When the Cycle Control Knob is set to a
number and pulled out, the washer fills
before agitation and timing start. The washer
begins agitating immediately after filling;
agitation occurs with the washer lid up
or down.
After agitation starts, the Cycle Control
Knob turns clockwise until it points to an
OFF area and the cycle ends.
WASH RINSE
NOTE:
• The washer pauses briefly throughout
each cycle. These pauses are normal for
washer operation.
Fill
▼
Wash selected time
▼
†
Drain
No agitation
†
On some models, the Permanent Press
cycle partially drains, fills, agitates briefly,
and drains.
▼
Spin
▼
Spin-Spray rinse
Fill
▼
Rinse
▼
Drain
No agitation
▼
▼
Spin
▼
Off
Understanding normal washer sounds
Your new washer may make sounds that
your old one didn’t. Because the sounds are
unfamiliar, you may be concerned about
them. Don’t be; most of them are normal.
The following describes some of the
sounds you may hear and what causes
them.
During washing
When you select a small load size setting
for a small wash load, the water level in your
washer is lower. With this lower water level,
you may hear a clicking sound from the
upper portion of the agitator.
During drain
The rate that water is drained from your
washer depends on your installation. If water
is drained quickly from the washer, you may
hear air being pulled through the pump. This
happens during the end of draining.
After drain and before spin
When the cycle changes from draining to
spinning, you may hear gears engaging.
12

OPERATING YOUR WASHER
Using the liquid chlorine bleach dispenser
(on some models)
Always measure liquid chlorine bleach. Do
not guess. Never use more than 1 cup
(250 mL) for a full load. Use less with lower
water level settings. Follow manufacturer’s
directions for safe use. Use a cup with a
pouring spout to avoid spilling.
1. Load the washer.
2. Pour measured chlorine bleach carefully
into the dispenser. Do not let bleach
splash, drip, or run down into washer
basket. Undiluted bleach will damage any
fabric it touches.
3. Start the washer. Bleach will be diluted
and dispensed automatically during wash
part of cycle.
NOTE: Do not use this dispenser to add
powdered chlorine or color safe bleach to
your wash load. The dispenser is for liquid
chlorine bleach use only.
Adding liquid chlorine bleach
(on models with no bleach
dispenser)
Always measure liquid chlorine bleach. Do
not guess. Never use more than 1 cup
(250 mL) for a full load. Follow manufacturer’s directions for safe use. Use a cup
with a pouring spout to avoid spilling.
1. Let the washer fill and begin agitating
the load.
2. Add bleach to wash cycle so it can be
removed in the rinse cycle. Pour bleach
around agitator, not directly on load.
• Follow directions on care labels. Do not
use chlorine bleach on wool, silk,
spandex, acetates, or some flameretardant fabrics.
• When soaking with chlorine bleach, add
detergent to soak water.
NOTE: Undiluted bleach will damage any
fabric it touches. The damage appears as
rips, holes, tears, or color loss and may not
show up until several washings later.
Adding liquid fabric softener
• Always dilute fabric softener with 1⁄2 to
1 cup (125 to 250 mL) warm water.
Undiluted fabric softener can stain fabrics.
• Add diluted fabric softener only in the
final rinse.
• Fabric softener should not be mixed with
other laundry products because greasy
stains may form. If stains form, remove by
wetting the stain and rubbing with liquid
detergent or a bar of soap. Rewash the
stained item.
• Too much fabric softener can make some
items (diapers and towels) nonabsorbent.
If this happens, use less fabric softener or
do not use it every time.
13
Caring for Your Washer
Proper care of your washer can extend its life. This section explains how to care for your
washer properly and safely.
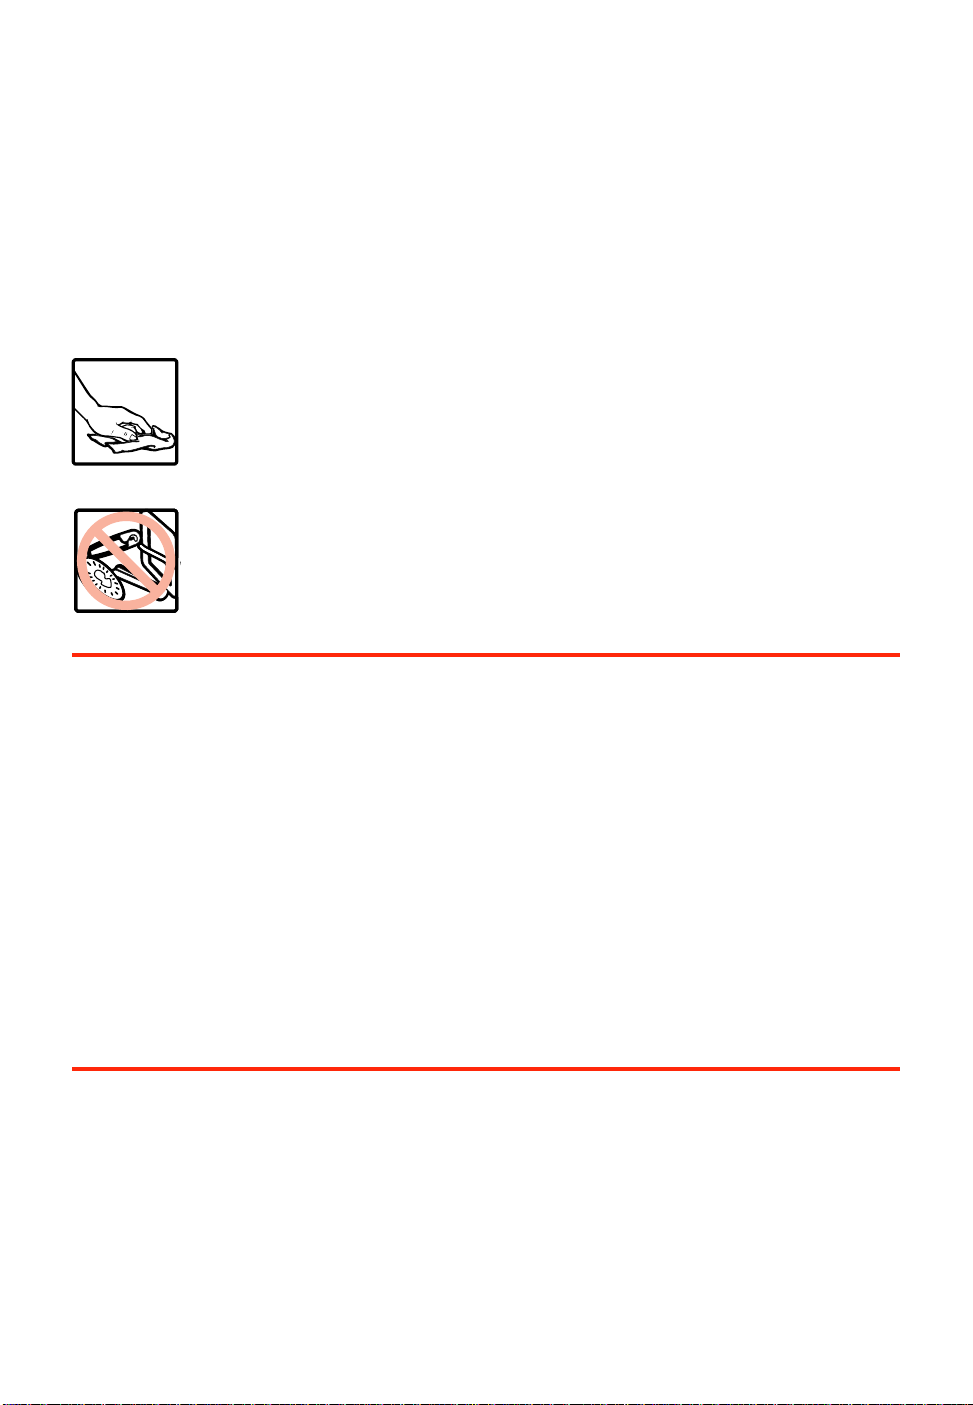
Cleaning your washer
Exterior
Wipe up detergent, bleach, and other spills
with a soft, damp cloth or
sponge as they occur. Occasionally wipe the outside of
the washer to keep it looking
like new.
Do not put sharp or metal objects in your
washer. They can damage the
finish. Check all pockets for
pins, clips, money, bolts, nuts,
etc. Do not lay these objects
on your washer after emptying
pockets.
Winter storage or moving care
Install and store your washer where it will
not freeze. Because some water may stay in
the hoses, freezing can damage your
washer. If storing or moving your washer
during freezing weather, winterize it.
To winterize washer:
1. Shut off both water faucets.
2. Disconnect and drain water inlet hoses.
3. Put 1 quart (1L) of R.V.-type antifreeze in
the basket.
4. Run washer on a drain and spin setting
(see pages 8 and 11) for about 30 seconds
to mix the antifreeze and water.
5. Unplug the power supply cord.
Interior
Clean interior with 1 cup (250 mL) of chlorine bleach mixed with 2 cups (500 mL) of
detergent. Run washer through a complete
cycle using hot water. Repeat process if
necessary.
NOTE: Remove hard water deposits using
only cleaners labeled as washer safe.
To use washer again:
1. Flush water pipes and hoses.
2. Reconnect water inlet hoses.
3. Turn on both water faucets.
4. Reconnect power supply cord.
5. Run the washer through a complete cycle
with 1 cup (250 mL) of detergent to clean
out antifreeze.
Non-use or vacation care
Operate your washer only when you are at
home. If you will be on vacation or not using
your washer for an extended period of time,
you should:
• Unplug the power supply cord or turn off
electrical power to the washer.
14
• Turn off the water supply to the washer.
This helps avoid accidental flooding
(due to a water pressure surge) while
you are away.

Laundry Tips
This section reviews proper laundering techniques and gives you additional washing
information.
Preparing clothes for washing
• Close zippers, snaps, and hooks to avoid
snagging other items. Remove
pins, buckles, and other hard
objects to avoid scratching the
washer interior. Remove nonwashable trim and ornaments.
• Empty pockets and turn them inside out.
• Turn down cuffs, brush away lint and dirt.
• Turn synthetic knits inside out to avoid pilling.
Sorting
• Separate heavily soiled items from lightly
soiled ones, even if they would
normally be washed together.
Separate lint givers (towels,
chenille) from lint takers
(corduroy, synthetics, permanent press). When possible, turn lint givers
inside out.
• Tie strings and sashes so they will not
tangle.
• Mend tears, loose hems, and seams.
• Treat spots and stains. (See “Removing
Stains” on pages 19-21.)
• Stained or wet garments should be
washed promptly for best results.
• Separate dark colours from light colours,
colourfast items from noncolourfast items.
• Sort by fabric and construction (sturdy
cottons, knits, delicate items).
Loading
• Drop items into washer loosely. Fill to the
top of the basket (top row of
holes). Do not wrap items
around the agitator. Items
should move easily through
wash water for best cleaning
and wrinkle-free results. Items should sink
and reappear later.
• Load washer properly and select correct
load size setting. Overloading or packing
the machine, and selecting a setting too
small for the wash load can:
– cause poor cleaning.
– increase wrinkling.
– create excessive lint.
– wear out items faster (because of pilling).
• Load by the amount of space items take
up, not by their weight.
• Mix large and small items in each load.
Load evenly to maintain
washer balance. An offbalance load can make the
washer vibrate during spin.
• Use a large load size setting to reduce
wrinkling with permanent press clothes and
some synthetic knits. These items should
have more room to move in the water than
heavy items (towels, jeans).
• Reduce wash time when using a small
load size setting. Loads with only a few
small items need less wash time.
15

LAUNDRY TIPS
Loading suggestions
For these suggested full-sized loads, set the Load Size Selector to the highest water level
setting.
EXTRA LARGE CAPACITY WASHERS
Heavy Work
Clothes
2 pair pants
3 shirts
3 pair jeans
1 coverall
Knits
2 slacks
2 blouses
4 shirts
4 tops
2 dresses
Permanent
Press
1 double sheet
1 tablecloth
1 dress
1 blouse
2 slacks
3 shirts
2 pillowcases
Mixed Load
2 double or
1 king size sheet(s)
4 pillowcases
6 T-shirts
6 pair shorts
2 shirts
2 blouses
6 handkerchiefs
Towels
8 bath towels
8 hand towels
10 wash cloths
1 bath mat
Delicates
2 camisoles
4 slips
4 panties
2 bras
2 nighties
Saving energy
• Use warm or cold wash water for most
loads. Use hot water only when washing
heavy, greasy soils or whites.
• Use cold rinses.
• Wash full loads.
• Use lower water levels when washing
small loads.
• Avoid rewashing. Use enough detergent
and pretreat stains or heavy soils. Use the
cycles and wash times recommended for
the fabric and soil.
• Use your washer during off-peak hours –
usually early morning and late evening.
(Ask your power company.)
16

Water guidelines
Selecting water temperatures
LAUNDRY TIPS
WASH WATER
TEMPERATURE
HOT
130°F (54°C)
or above
WARM
90-110°F
(32-44°C)
COLD
70-90°F
(21-32°C)
†
The washer features cold rinses for all wash temperatures. In addition, warm rinses are
available with warm washes on some models. Warm rinse water provides better water
extraction than cold rinse water and shortens drying times. However, warm rinse water
may increase wrinkling when line drying. In cold climates, warm rinse water also provides
a more comfortable temperature for handling the wash load.
Checking hot water
temperature
Your hot water should be 130°F (54°C) or
above. If you do not know your hot water
temperature, you can check it easily. You
may need to raise the temperature of your
water heater. To check your hot water:
1. Fill a pan with the hottest water available
from the faucet that fills your washer.
NOTE: If you do not have a faucet at your
washer site, collect the water from the
faucet closest to your washer.
2. Place a candy thermometer or cooking
thermometer in the water to check the
temperature.
†
SUGGESTED FABRICS
• Work clothes
• Sturdy whites/colorfast
pastels
• Diapers
• Dark/noncolorfast colors
• Permanent press items
• Nylon, polyester, acrylics,
silks, woolens
• Knits/delicate fabrics
• Extra-sensitive colors
• Noncolorfast items
• Hand washables
COMMENTS
• Best cleaning for heavily soiled items
• Removes oils, perspiration, greasy
soils, and stains
• Prevents graying or yellowing
• Best for moderately soiled to lightly
soiled items
• Safe for most fabric finishes
• Less fading and dye bleeding
• Reduces wrinkling
• Best for very lightly soiled items
• Saves hot water
• Best rinse water temperature
Water hardness
Many poor washing results can be traced to
the hardness of the wash water. To check
your water hardness:
• City water – ask the city water company.
• Well water – ask the local water authority.
Ask for the mineral content in grains/gallon
or parts/million. If your water is more than
8 grains/gallon or more than 137 parts/
million, you should consider:
• Installing a water softener.
• Using more detergent.
• Using a packaged water conditioner.
• Not using soap.
NOTE: In wash water temperatures colder
than 70°F (21°C), detergents do not dissolve
well. Also, soils may be difficult to remove,
and some fabrics may retain wear wrinkles
and may have increased pilling.
17

LAUNDRY TIPS
Washing special-care items
Most garments and household textiles have care labels with laundering instructions. Always
follow care label directions when they are available. Below are general washing instruc-
tions for some special washables.
ITEM
Blankets
(electric or woolen)
Curtains, drapes,
slipcovers
Diapers
Elastic, spandex
Flame-retardant
clothing
Knits, washable
Pillows, stuffed
toys
Plastic, rubber
items
Quilts, bedspreads
Scatter rugs
Snowsuits, jackets
CARE INSTRUCTIONS
Pretreat spots and stains. Select wash cycle according to the type
of blanket being washed. An extra rinse may be necessary (see
pages 8 and 11 for rinse and spin information). Check care label to
see if manufacturer recommends machine washing.
Wash small loads. Crowding may cause wrinkling. Replace
slipcovers while still slightly damp. They will dry to fit tightly.
NOTE: Sun-damaged curtains and draperies will tear whether
hand or machine washed.
When using chlorine bleach for soaking, add extra detergent to
the load. Avoid overuse of fabric softeners – absorbency will be
reduced.
Elastic picks up oil from the body. Oil can damage elastic. Wash
often to reduce the damage. Use warm water and sufficient
detergent to remove oils. Do not use chlorine bleach.
Items will be clearly labeled as flame-retardant. Follow
manufacturer’s instructions to retain flame-retardant qualities.
Knits are comfortable to wear because they stretch. However,
this means that knits are more likely to be stretched and damaged when washed (especially bulky knits). Knits made of
synthetic fabrics such as polyester, nylon, and acrylic tend to
keep their original shape more than knits made of cotton
or ramie.
Washing feather pillows is not recommended unless they will be
dried in a dryer.
Treat as delicate items. Wash in warm water. Wash small items
in a mesh bag.
Do not wash cotton-filled comforters unless they are quilted or
stitched. Tucked cotton batting tends to slip and become lumpy.
An extra rinse may be necessary.
Shake or vacuum rugs to remove loose dirt. Wash more than one
rug at a time. If washing only one rug, add bath towels to balance
the load.
Wash only one or two items at a time. You may need to stop the
washer occasionally to press air from the items being washed.
An extra rinse may be necessary.
18

Removing Stains
Stained, heavily soiled, or greasy items may need to be prewashed or soaked for best
results. Soaking helps remove protein-type stains like blood, milk, or grass. Prewashing helps
loosen soil before washing.
Stain removal rules
• Use warm water for soaking or prewashing
stained laundry. Hot water can set stains.
• Most stains are easier to remove when
they are fresh. Old or set stains may not
come out. Follow package directions for
pretreatment products.
• Before treating any stain, find out what
kind of stain it is, how old the stain is, what
kind of fabric it is, and if the fabric is
colorfast. (Check the care label.)
• Washing and drying can set some stains.
• Start with cold or warm water. Hot water
can set some stains.
Stain removal guide
• When bleach is recommended, use a
bleach that is safe for the fabric.
• Test stain removers on an inside seam or
hidden corner of the item to see if the color
is removed.
• Put the stained area face down on a paper
towel or white cloth. Apply the stain
remover to the back of the stain. This
forces the stain off the fabric instead of
through it.
• Meat tenderizer or enzyme presoaks help
break down some protein stains so they
are easier to remove.
STAIN
Alcoholic
beverage
Blood
Chewing
gum
Chocolate
or coffee
Crayon and
candle wax
Cream,
milk, or
ice cream
TO REMOVE
These stains turn brown with age, so treat immediately. Sponge or soak
fresh stains with cold water. Wash. If stain remains, soak 15 minutes in a
solution of lukewarm water, liquid detergent, and a few drops of white
vinegar. Rinse. Wash.
Rinse immediately or soak in cold water with enzyme presoak for 30
minutes or longer. Rinse. Rub detergent into any remaining stains. Rinse.
If stain remains, put a few drops of 3% hydrogen peroxide on stain for 3-5
minutes. Rinse thoroughly. Wash.
Use ice to make gum hard. Scrape off what you can. Sponge with a
nonflammable fabric cleaner. Let dry. Wash.
Sponge immediately with a nonflammable fabric cleaner or apply a prewash
soil and stain remover. Rinse. Wash. If stain remains, apply a liquid detergent to stain or soak in warm water with an enzyme presoak. Rewash.
Scrape off excess with a dull knife. Place fabric between two blotters or
facial tissue. Press with warm iron. Remove color stain with nonflammable
fabric cleaner. Hand wash until stain is gone. If full load is crayon stained,
take to cleaners or coin-operated dry cleaning machine.
Sponge with a nonflammable fabric cleaner or a prewash soil and stain
remover. Rinse. Wash. Repeat if necessary. If stain remains, apply a few
drops of liquid detergent and a few drops of ammonia. Blot dry and rinse.
If stain remains, soak in an enzyme presoak. Wash.
continued on next page
19

REMOVING STAINS
STAIN
Deodorants
and antiperspirants
Fat, grease,
or oil
Fruit stains
Grass or
green
vegetables
Ink or
ballpoint
pen ink
Iron or rust
TO REMOVE
Light stain: Treat with liquid detergent or your regular laundry detergent.
Wash in hottest water safe for fabric.
Heavy stain: Place face down on towel and treat with a paste of ammo-
nia and color safe bleach. Let stand for 30 minutes. Wash in hottest water
safe for fabric.
wWARNING
Fire Hazard
Do not wash or dry items soiled with vegetable or cooking oils
because they may contain some oil after laundering.
Doing so can result in death or fire.
Items soiled with vegetable or cooking oil should not be washed or dried.
For other types of greasy stains, use one of the methods below:
• Use pretreatment stain remover. Follow label directions. Wash in hottest
water safe for fabric.
• Use talcum powder to absorb as much grease as possible. Sponge with
a nonflammable fabric cleaner. Rinse. Wash.
• Treat with liquid detergent or rub a detergent paste on the stain. Wash
using hottest water safe for fabric.
Fresh stains: Soak immediately in cool water. Wash. If stain remains,
cover area with a paste made of color safe bleach, a few drops of hot
water, and a few drops of ammonia. Wait 15-30 minutes. Wash.
Old stains: Sponge with white vinegar. Rinse. Repeat procedure for
fresh stains.
Soak in warm or cold water with an enzyme presoak for at least 30 minutes, or sponge with denatured alcohol. Wash in water temperature and
bleach safe for the fabric. For colored fabrics, check colorfastness before
applying alcohol. For acetate, sponge with a nonflammable fabric cleaner.
If stain remains, bleach with 3% hydrogen peroxide. Rinse. Rewash.
Spray stain with an aerosol hair spray or rubbing alcohol. Sponge stain
continuously until all bleeding stops. Let dry. Repeat if necessary. Wash.
If stain remains, bleach if safe for fabric. (India and other indelible inks are
almost impossible to remove completely.)
Colored or noncolorfast items: Apply lemon juice and salt. Place in the
sun to dry. Rinse thoroughly. Repeat if necessary.
White or colorfast items: Try a rust remover. Test first on inside seam or
hem. Some rust removers are not washer safe. Follow package directions.
20

REMOVING STAINS
STAIN
Ketchup
or tomato
products
Lipstick
Meat juice,
egg
Mildew
Mustard
Paint
Perspiration
Scorch
Soft drinks
TO REMOVE
Sponge immediately with a nonflammable fabric cleaner or apply a
prewash soil and stain remover. Rinse. Wash. If stain remains, apply a
liquid detergent to stain or soak in warm water with an enzyme presoak.
Rewash.
Apply nonflammable fabric cleaner or prewash soil and stain remover.
Blot with absorbent material. Repeat if necessary. Rinse. If stain still
remains, rub with liquid detergent. Wash.
Scrape off excess with a dull knife. Soak in cold or warm water with
enzyme presoak at least 30 minutes, or treat stains with a nonflammable
fabric cleaner. Wash.
Wash in hottest water safe for fabric. If stain remains, soak in warm water
and a color safe bleach for 15-30 minutes. Rewash. (Old mildew stains
are almost impossible to remove. Mildew fungus destroys or weakens
fabrics.) An alternative to bleach is to treat with salt and lemon juice and
dry in direct sunlight. Rinse and rewash. Mildew may form if wet or damp
laundry remains in your washer for extended periods of time. To prevent
mildew, promptly dry laundry after washing.
Treat immediately. Scrape off excess mustard. Sponge with a nonflammable fabric cleaner or a prewash soil and stain remover. Rinse. Work
liquid detergent and a few drops of vinegar into stain. Rinse. If stain
remains, apply 3% hydrogen peroxide. Rinse and wash.
Hand wash paint-stained items.
Water base: Treat stains while still wet. (These paints cannot be removed
after they have dried.) Rinse in warm water to flush out paint. Sponge with
a nonflammable fabric cleaner. Rinse. Wash.
Oil base: Scrape off fresh paint. Sponge with a nonflammable fabric
cleaner. While stain is still wet with solvent, rub liquid detergent into it.
Wash with hottest water safe for fabric.
Remove stains before ironing. Perspiration stains may weaken fabric.
Wash or sponge stain thoroughly with detergent and warm water. If
perspiration has changed the color of the fabric, use one of the following
treatments:
Fresh stains: Apply ammonia to stain. Rinse. Launder to remove
ammonia odor.
Old stains: Apply white vinegar to stain. Rinse. Launder to remove
vinegar odor.
Severe scorch cannot be removed. Wet stain with 3% hydrogen peroxide.
Cover with a dry cloth and press with an iron as hot as is safe for fabric.
Rinse well. Wash.
OR
Wet with lemon juice and spread in the sun to dry. Wash.
Sponge immediately with cold water and alcohol. Heat and detergent may
set stain.
21

Troubleshooting
Most laundering problems are easily solved if you understand the cause. Check the following
list for common laundry problems and the next page for common washer problems. If you
need further assistance, see page 24.
Common laundry problems
PROBLEM
Brown, yellow
stains
Dye transfer
Gray whites,
dingy colors
Greasy looking
spots
Lint
Load too wet
after spin
Shrinking
CAUSE
• Chlorine staining
• Iron in water heater or pipes; iron and manganese in water
• Improper sorting
• Load not immediately removed from washer after end of cycle
• Improper sorting
• Water temperature too low
• Not enough detergent
• Using soap in very hard water (use detergent in hard water)
• Fabric softener poured directly on clothes
• Not enough detergent
• Improper sorting
• Paper or tissue in pockets
• Pilling being mistaken for lint
• Not enough detergent
• Cycle stopped before spinning is complete
• Fabric type (some knits stretch during manufacturing –
laundering returns fabric to original size)
• Care label directions not followed
Snags, rips,
and holes
Stiff, rough
fabrics
Twisting/
Tangling
Wrinkling
Yellow areas
(from body oils)
22
• Items damaged before washing
• Misuse of chlorine bleach (do not pour directly on clothes)
• Sharp items not removed from pockets; fasteners not fastened
• Using soap in very hard water (use detergent in hard water)
• Not enough detergent
• Line drying
• Overloading
• Clothes wrapped around agitator
• Overloading (leave more room for permanent press and knits)
• Load not immediately removed from washer after cycle
• Cycle selection incorrect
• Water temperature too low
• Not enough detergent

Common washer problems
Before calling for service, check these:
Is the lid closed?
▼
Is the Cycle Control Knob set and pulled out?
▼
Is the power cord firmly plugged into a live outlet with proper voltage?
▼
TROUBLESHOOTING
Have you blown a household fuse or tripped a circuit breaker?
▼
Are both the hot and cold water faucets turned on?
▼
Are the water hoses kinked or clogged?
▼
Is the drain hose higher than the water level in the washer? It must be higher
for proper operation.
▼
Is the washer making noises (see page 12), or vibrating?
Is the wash load properly distributed around the agitator?
NOTE: Washer stops briefly during a wash cycle. These pauses are normal.
If none of these items was causing your problem, see “Requesting Assistance or Service” on
pages 24 and 25.
23

Requesting Assistance or Service in the U.S.A.
Before calling for assistance or service, please check “Troubleshooting” on pages 22-23. It
may save you the cost of a service call. If you still need help, follow the instructions below.
1. If you need assistance† …
Call our toll-free number. Dial toll-free from
anywhere in the U.S.A.:
1-800-253-1301
and talk with one of our
trained consultants. The
consultant can instruct you in
how to obtain satisfactory operation from
your appliance or, if service is necessary,
recommend a qualified service company in
your area.
2. If you need service† …
Contact the dealer from whom you purchased
the appliance or the authorized
servicer in your area. For help
SERVICE
†
When asking for help or service:
Please provide a detailed description of the problem, your appliance’s complete model and
serial numbers, and the purchase date. (See page 2.) This information will help us respond
properly to your request.
finding an authorized servicer in
your area, call our toll-free tele-
phone number in Step 1.
3. If you need
replacement parts …
To locate replacement parts in your area,
refer to step 2 or call our Consumer Assistance Center number in step 1.
4. If you are not satisfied
with how the problem
was solved …
• Contact the Major Appliance Consumer
Action Program (MACAP). MACAP is a
group of independent consumer experts
that voices consumer views at the highest
levels of the major appliance industry.
• Contact MACAP only when the dealer,
authorized servicer, and Whirlpool have
failed to resolve your problem.
Major Appliance Consumer Action Program
20 North Wacker Drive
Chicago, IL 60606
•
MACAP will in turn inform us of your action.
24

Requesting Assistance or Service in Canada
Before calling for assistance or service, please check “Troubleshooting” on pages 22 and 23.
It may save you the cost of a service call. If you still need help, follow the instructions below.
1. If the problem is not due to
one of the items listed in
“Troubleshooting”…
Contact the dealer from whom you purchased
your appliance or your nearest
Inglis Limited Appliance Service
Branch. Please include a daytime phone number in your
correspondence.
Inglis Limited** Appliance Service – Consumer Services
Direct service branches:
BRITISH COLUMBIA
ALBERTA
ONTARIO
MANITOBA
QUEBEC
NOVA SCOTIA
SASKATCHEWAN
Vancouver
Edmonton
Toronto
(Mississauga)
Ottawa
Winnipeg
Montreal
(Laval)
Brossard
Quebec City
Sherbrooke
(Rock Forest)
Dartmouth
Regina
Saskatoon
For service in areas other than those listed, contact your Appliance Dealer.
Inglis Limited Appliance Service
3627 E. 4th Avenue
Inglis Limited Appliance Service
11653 163rd Street
Inglis Limited Appliance Service
5945 Ambler Drive
Inglis Limited Appliance Service
29 Capital Drive
Inglis Limited Appliance Service
1683 Church Avenue
Inglis Limited Appliance Service
2750 Francis-Hughes
Inglis Limited Appliance Service
9705 F. Ignace Street
Inglis Limited Appliance Service
5275 Wilfrid-Hamel Blvd., Suite 140
Inglis Limited Appliance Service
3475 Industrial Blvd.
Inglis Limited Appliance Service
900 Windmill Road, Unit #109
Inglis Limited Appliance Service
Inglis Limited Appliance Service
2. If you need service …
Contact your nearest Inglis Limited Appli-
ance Service Branch or
authorized servicing outlet.
NOTE: When asking for help
or service, please provide a
detailed description of the
problem, your appliance’s complete model
and serial numbers, and the purchase date.
(See page 2.) This information will help us
respond properly to your request.
(604) 291-6426
1-800-665-6788
(403) 453-3900
1-800-661-6291
(905) 821-3900
1-800-807-6777
(613) 225-0510
1-800-267-3456
(204) 694-5308
1-800-665-1683
(514) 382-8110
1-800-361-3032
(514) 397-1840
1-800-361-0950
(418) 871-5251
1-800-463-1523
(819) 564-6565
1-800-567-6966
(902) 468-6634
1-800-565-1598
1-800-665-1683
1-800-665-1683
**Registered Trademark of Inglis Limited.
25

Automatic Washer
Warranty
U.S.A.
LENGTH OF WARRANTY
FULL ONE-YEAR
WARRANTY
FROM DATE OF PURCHASE
LIMITED FIVE-YEAR
WARRANTY
FROM DATE OF PURCHASE
LIMITED TEN-YEAR
WARRANTY
FROM DATE OF PURCHASE
NOT COVERED BY WARRANTY
A. Service calls to:
1. Correct the installation of your washer.
2. Instruct you how to use your washer.
3. Replace house fuses or correct house wiring or plumbing.
B. Repairs when your washer is used in other than normal, single-family household use.
C. Pickup and delivery. Your washer is designed to be repaired in the home.
D. Damage to your washer caused by accident, misuse, fire, flood, acts of God, or use of
products not approved by us.
E. Any labor costs during the limited warranties.
F. Replacement parts or repair labour costs for units operated outside the U.S.
G.Repairs to parts or systems caused by unauthorized modifications made to the
appliance.
H. Travel or transportation expenses for customers who reside in remote areas.
COVERED BY WARRANTY
Replacement parts and repair labor to correct defects
in materials or workmanship. Service must be provided
by an authorized servicing outlet.
Replacement parts for any top and lid rust.
Replacement of outer tub should it crack, or fail to
contain water, due to defective materials or workmanship.
Replacement parts for any part of gearcase assembly if
defective in materials or workmanship.
4/96
This is the only warranty covering this appliance given by the manufacturer.
The provisions of this warranty are in addition to, and not a modification of, or subtraction from, the statutory warranties and the other rights and remedies contained in any
applicable legislation.
If you need service, first see “Troubleshooting.” After checking “Troubleshooting,” additional
help can be found by checking the “Requesting Assistance or Service” section or by calling
our Consumer Assistance Center telephone number, 1-800-253-1301, from anywhere in the
U.S.A.
3949064 A
© 1996 Whirlpool Corporation Printed in U.S.A.
26
Trademark/Registered Trademark of Whirlpool Corporation, U.S.A.,
*
4/96

NOTES
27

NOTES
28

GUIDE
d’utilisation et d’entretien
Félicitations!........................... 2
Sécurité............................ 3 et 4
Pièces et caractéristiques..... 5
Fonctionnement de
la laveuse................................ 6
(modèles avec boutons
de sélection distincts
pour niveau d’eau et
température) ....................... 6
(modèles avec sélecteur de
température combiné avec
le bouton de sélection de
programme) ...................... 10
Arrêt et remise en marche
de la laveuse .................... 13
Comprehénsion de
la fonction de chaque
programme ....................... 14
Compréhension des bruits
normaux de la laveuse ..... 15
Addition de liquide de
blanchiment chloré ........... 15
Addition d’assouplissant
liquide de tissu.................. 16
Entretien de la laveuse ........ 17
Conseils pour le lavage....... 19
Élimination des taches ........ 24
Diagnostic............................. 28
Demande d’assistance
ou de service ........................ 31
Garantie ................................ 32
3949064 A
LAVEUSES AUTOMATIQUES À UNE VITESSE

Félicitations!
Félicitations pour l’achat de votre nouvelle laveuse automatique. Je suis persuadé que notre
produit satisfera pour vous les mêmes critères de qualité, performance et fiabilité qui ont
établi notre réputation.
Veuillez prendre le temps de lire ce guide. Il contient de nombreuses idées et des
renseignements utiles qui vous aideront à tirer le meilleur parti de ce produit pendant de
nombreuses années.
Nous vous remercions d’avoir choisi l’un de nos produits de qualité. Vous avez fait un excellent choix.
Sincèrement,
Dan Clifford
Directeur général
Inglis Limitée
Veuillez inscrire ici l’information identifiant le modèle de
l’appareil.
Lors de toute communication avec le service
d’entretien au sujet de cet appareil ménager,
vous devrez nous communiquer le numéro
de modèle complet et le numéro de série.
On trouve cette information sur la plaque
signalétique (voir l’emplacement de la
plaque signalétique sur le schéma de la
page 5).
Veuillez noter la date d’achat de l’appareil
et les nom, adresse et numéro de téléphone
du marchand.
Conservez cette brochure et la facture d’achat ensemble en lieu sûr pour
consultation ultérieure.
Numéro de modèle ______________________
Numéro de série ________________________
Date d’achat____________________________
Nom du marchand_______________________
Adresse du marchand ___________________
Téléphone du marchand__________________
2

Règles de sécurité
Nous nous soucions de
votre sécurité.
Ce guide comporte des symboles et des
mentions concernant la sécurité. Veuillez
accorder une attention particulière à ces
symboles et observer toutes les instructions.
On présente ici une brève explication du
symbole.
Ce symbole vous avertit de
dangers tels que incendie,
choc électrique ou autres
blessures.
IMPORTANTES INSTRUCTIONS DE SÉCURITÉ
AVERTISSEMENT – Pour réduire le risque d’incendie, de choc
électrique ou blessures lors de l’utilisation de la laveuse, il convient
d’observer certaines précautions élémentaires dont les suivantes :
•Lire toutes les instructions avant
d’utiliser la laveuse.
•Ne pas laver des articles dans la
laveuse qui ont déjà été nettoyés, lavés, imbibés ou tachés
d’essence, de solvants pour
nettoyage à sec, d’autres substances inflammables, ou des
substances explosives
puisqu’elles dégagent des
vapeurs qui peuvent provoquer
un incendie ou explosion.
•Ne pas ajouter d’essence, des
solvants pour nettoyage à sec
ou d’autres substances inflammables ou explosives à l’eau de
lavage. Ces substances peuvent
dégager des vapeurs qui peuvent
provoquer un incendie ou
explosion.
•Sous certaines conditions, de
l’hydrogène peut s’être accumulé dans le chauffe-eau s’il
n’est pas utilisé pendant deux
semaines ou plus. L’HYDROGÈNE EST EXPLOSIBLE. Si le
chauffe-eau n’a pas été utilisé
pendant une telle période, laisser
couler l’eau de tous les robinets
d’eau chaude pendant plusieurs
minutes, avant d’utiliser la
laveuse. Ceci permettra
l’évacuation du gaz. Puisque le
gaz est inflammable, ne pas fumer
ou utiliser une flamme nue près
des robinets ouverts.
•Ne pas permettre à des enfants
de jouer avec ou de monter sur
ou à l’intérieur de la laveuse. Une
surveillance étroite est nécessaire
lorsque la laveuse est utilisée
près d’eux.
•Avant que la laveuse soit enlevée
ou jetée, enlever la porte.
•Ne pas mettre la main dans la
laveuse si la cuve ou l’agitateur
est en mouvement.
•Ne pas installer ou entreposer la
laveuse ou elle sera exposée aux
intempéries.
suite à la page suivante
3

RÈGLES DE SÉCURITÉ
•Ne pas jouer avec les
commandes.
•Ne pas réparer ni remplacer une
pièce de la laveuse ou essayer
d’en faire l'entretien à moins
d’une recommandation spécifique
dans le Guide d’utilisation et
d’entretien, ou publiée dans les
instructions de réparation par
– CONSERVEZ CES INSTRUCTIONS –
l’utilisateur que vous comprenez
et pouvez exécuter avec
compétence.
•Voir les instructions d’installation
pour relier la laveuse à la terre.
4

Pièces et caractéristiques
Les pièces et caractéristiques de la laveuse sont illustrées dans cette section. Il est bon
de connaître toutes les pièces et caractéristiques avant d’utiliser la laveuse. Les pages de
référence sont indiquées près de la description de certaines caractéristiques. On trouve
à ces pages une description plus détaillée au sujet de ces caractéristiques.
REMARQUE :
• Les illustrations de ce guide peuvent varier selon le modèle de votre laveuse. Ces
illustrations sont destinées à montrer les différentes caractéristiques de tous les
modèles couverts par ce guide. Le modèle que vous avez acheté peut ne pas
comporter toutes les caractéristiques.
Sélecteur de
charge/niveau
†
d’eau
(p. 7)
Sélecteur de
température
(p. 7)
WATER
LOAD SIZELOAD SIZE
SAVER
MEDIUMMEDIUM
LARGELARGE
SMALLSMALL
EXEX
LARGELARGE
SELF CLEANING FILTER SELF CLEANING FILTER
•
2 SPEED • 8 CYCLE2 SPEED • 8 CYCLE
†
Bouton de sélection
des programmes
(parfois combiné avec le
HEAVY DUTYHEAVY DUTY
SUPER CAPACITYSUPER CAPACITY
PERMANENTPERMANENT
PRESSPRESS
PUSH STOP PUSH STOP
•
PULL START PULL START
OFF
NORMAL
10
LIGHT
6
REGULAR
COOLCOOL
DEEPDEEP
DOWNDOWN
WASHWASH
TEMPERATURE
RINSERINSE
WARMWARM
HOTHOT
COLDCOLD
COLDCOLD
HOTHOT
WARMWARM
1/2 HP MOTOR 1/2 HP MOTOR
•
RINSERINSE
6
10
NORMAL
COLDCOLD
14
HEAVY
COLDCOLD
OFF
4
NORMAL
8
SUPER WASH
LIGHT
6
OFF
KNITS/DELICATES
OFF
14
SOAK
WHIRLPOOL CORPORATIONWHIRLPOOL CORPORATION
CUSTOMER ASSISTANCE CENTERCUSTOMER ASSISTANCE CENTER
1-800-253-1301
sélecteur de température)
(pp. 7 à 13)
Distributeur de liquide
de blanchiment chloré
†
(p. 15)
Plaque
signalétique
(numéros de
modèle et de série)
(sous le couvercle)
Panier
Cuve
Filtre à charpie
autonettoyant
(au fond du
panier)
(p. 10)
†
Sur certains modéles
†
5

Fonctionnement de la laveuse
Pour obtenir les meilleurs résultats, vous devez utiliser votre laveuse correctement. Cette
section vous fournit cette information importante. Les pages de référence sont incluses pour
plus de renseignements.
REMARQUE :
• On décrit aux pages 6 à 9 l’utilisation des
modèles comportant des boutons de
sélection distincts pour température et
niveau d’eau.
• On décrit aux pages 10 à 13 l’utilisation
des modèles comportant un unique bouton
de sélection pour température et
programme de lavage.
wAVERTISSEMENT
Risque d’explosion
Ne jamais mettre des articles
humectés d’essence ou autres
fluides inflammables dans la laveuse.
Ne pas laver ou faire sécher des
articles salis d’huile de légumes ou
de cuisine parce qu’un peu d’huile
peut rester sur les articles après
avoir été lavés.
Le non-respect de ces instructions
peut être la cause d’un accident
mortel, une explosion ou un incendie.
wAVERTISSEMENT
Risque de choc électrique
Brancher l’appareil uniquement sur
une prise à 3 broches reliée à la terre.
Ne pas enlever la broche reliée à
la terre.
Ne pas utiliser un adaptateur.
Le non-respect de ces instructions
peut être la cause d’un accident
mortel ou d’un choc électrique.
Mise en marche de la laveuse
(modèles avec boutons de
sélection distincts pour
niveau d’eau et température)
1. Verser dans la laveuse la quantité
nécessaire mesurée de détergent.
Introduire ensuite la charge de linge
trié dans la laveuse.
• Trier et charger le linge selon la descrip-
tion aux pages 19 et 20.
• Si désiré, vous pouvez aussi ajouter un
agent de blanchiment sans danger pour
les couleurs.
Distributeur d’agent
de blanchiment
liquide
6

FONCTIONNEMENT DE LA LAVEUSE
2. (ÉTAPE FACULTATIVE) Si désiré, verser
la quantité mesurée d’eau de Javel dans
le distributeur d’agent liquide chloré de
blanchiment. (Voir page 15.)
• Utiliser seulement un agent liquide de
blanchiment dans le distributeur d’eau
de Javel.
3. Fermer le couvercle de la laveuse.
4. Tourner le sélecteur de charge (Water
Level) au réglage qui correspond à la
quantité de la charge de linge à laver
et du genre de tissu à laver.
• Pour changer le réglage de la charge de
linge après que la laveuse a commencé
à se remplir, tourner le bouton sélecteur
au nouveau réglage désiré.
• Voir aux pages 19 et 20 les conseils
pour le chargement.
MEDIUM
SMALL
LARGE
EXTRA
LARGE
WATER LEVEL
5. Choisir une température de lavage-
rinçage à l’aide du sélecteur de
température de l’eau. Faire
correspondre la température de l’eau
au type de tissu à laver et aux saletés
à éliminer. Voir page 21 pour les direc-
tives de température de l’eau.
6. Appuyer sur le bouton de réglage des
programmes et le tourner dans le sens
haraire au programme de lavage que
vous désirez. Voir pages 8 et 9.
7. Retirer le bouton de sélection des
programmes pour commander la
mise en marche de la machine.
8. (ÉTAPE FACULTATIVE) Si désiré,
ajouter un assouplissant liquide
mesuré de tissu et dilué au
programme de rinçage final.
Voir page 16.
WARM
COLD
HOT
COLD
TEMPERATURE
WASH
RINSE
COLD
COLD
WARM
WARM
7

FONCTIONNEMENT DE LA LAVEUSE
Sélection d’un programme et de la durée
de lavage
Utiliser ces renseignements pour faire les
meilleures sélections possibles de
programmes pour les charges de linge à
laver. Chaque programme est destiné à
différents types de tissus et de saletés.
• La laveuse fait de brèves pauses au cours
de chaque programme. Ces pauses sont
normales pour le fonctionnement de la
laveuse.
• Se référer aussi à la page 14 pour mieux
comprendre cu qui arrive durant un
programme de lavage.
HEAVY DUTY EXTRA LARGE CAPACITY
NORMAL
LIGHT SOIL
REGULAR SOIL
HEAVY SOIL
OFF
RINSE
6
8
12
SOAK
Bouton de sélection de programme, avec
sélecteur distinct de température de l’eau
Programme Normal (Normal)
Le programme Normal comprend un
essorage prolongé pour diminuer le temps
de séchage. Utiliser ce programme pour
nettoyer les tissus en coton et en toile.
Choisir 6 (light-Léger), 8 (Regular-Régulier),
ou 12 (Heavy-Intensif) minutes de lavage,
selon que votre charge est légèrement à
modérément très sale.
Programme pressage permanent (Permanent Press)
Le programme pressage permanent
comporte un rinçage à basse vitesse à
refroidissement et diminue le temps
d’essorage pour réduire le froissement.
Utilise le programme de 8 minutes pour
nettoyer les tissus de pressage permanent
et certains tissus synthétiques.
PLUS
SPIN
OFF
8
OFF
SPIN
RINSE
20
PAUSE
8
RINSE
SPIN
OFF
PERMANENT
PRESS
FABRICARE
Programme de trempage
(Soak)
Le programme de trempage comporte de
brèves périodes d’agitation et de trempage
pour aider à enlever les grosses saletés et
les taches qui nécessitent un prétraitement.
• Utiliser de l’eau tiède pour le trempage du
linge. L’eau chaude peut provoquer une
fixation des taches. Voir aux pages 24 à
27 l’information concernant l’élimination
des taches.
• Utiliser la quantité de détergent ou l’additif
de prétrempage recommandé par le
fabricant
• Après la fin du programme de trempage,
ajouter le détergent et régler un nouveau
programme de lavage.
8

FONCTIONNEMENT DE LA LAVEUSE
Programme Fabricare
(Fabricare)
Le programme Fabricare comporte une
brève période de lavage, une période de
trempage de 2 minutes, et une plus courte
période d’essorage, pour l’élimination en
douceur des saletés. Utiliser ce programme
de lavage de 8 minutes pour le nettoyage
d’articles délicats et tricots lavables
légèrement à modérément sales.
Utilisation de la fonction rinçage et
essorage
Lors de l’utilisation d’une plus grande
quantité de détergent pour le lavage du linge
très sale ou pour le lavage d’articles de
soins spéciaux, vous constaterez qu’un
rinçage et un essorage additionnels sont
nécessaires.
1. Pour ajouter un rinçage additionnel,
appuyer sur le bouton sélecteur des
programmes et le tourner dans le sens
haraire jusqu’à RINSE (RINÇAGE), tel
qu’illustré.
2. Retirer le bouton sélecteur des
programmes. La machine se remplit
jusqu’au niveau correspondant à la
charge, et exécute les opérations
d’agitation, de vidange et d’essorage.
NORMAL
OFF
RINSE
OFF
OFF
RINSE
OFF
FABRICARE
RINSE
Utilisation de la fonction vidange et
essorage
Une vidange et un essorage peuvent aider à
réduire le temps de séchage pour certains
tissus épais ou des articles de soins
spéciaux en enlevant l’excès d’eau.
1. Appuyer sur le bouton sélecteur des
programmes et le tourner dans le sens
horaire jusqu’à SPIN (ESSORAGE), tel
qu’illustré.
2. Retirer le bouton sélecteur des
programmes. La laveuse exécute
l’opération de vidange, ensuite celle
d’essorage.
NORMAL
OFF
SPIN
OFF
SPIN
OFF
SPIN
OFF
FABRICARE
9

FONCTIONNEMENT DE LA LAVEUSE
Filtre à charpie autonettoyant
Le filtre à charpie au fond du panier de la
laveuse se nettoie de lui-même. Au cours de
l’agitation, l’eau de lavage et de rinçage
passe sur le filtre qui retient les fibres
textiles et les sépare de l’eau. Les fibres
accumulées sont ensuite séparées du filtre
et rejetées à l’égout au cours de la période
de centrifugation de programme.
Si l’eau de lavage est rejetée dans un bac
de buanderie, enlever la charpie qui
s’accumule dans le bac ou sur la crépine.
Filtre à charpie
Mise en marche de la laveuse
(modèles avec sélecteur de
température combiné avec
le bouton de sélection
de programme)
1. Verser dans la laveuse la quantité
décessaire mesurée de détergent.
Introduire ensuite la charge de linge
trié dans la laveuse.
• Trier et charger le linge selon la descrip-
tion aux pages 19 et 20.
• Si désiré, vous pouvez aussi ajouter un
agent de blanchiment sans danger pour
les couleurs.
2. Fermer le couvercle de la laveuse.
3. Appuyer sur le bouton de sélection du
programme et le faire tourner dans le
sens horaire. Voir pages 11 et 12.
Panier
intérieur
4. Tirer sur le bouton de sélection du
programme pour commmander la mise
en marche de la laveuse.
5. (ÉTAPE FACULTATIVE) Si désiré,
ajouter un agent de blanchiment
chloré liquide mesuré, après la mise
en marche de l’agitation de la laveuse.
Voir page 15.
6. (ÉTAPE FACULTATIVE) Si désiré, ajouter
un assouplissant liquide mesuré de tissu
à l’eau de rinçage. Voir page 16.
10

FONCTIONNEMENT DE LA LAVEUSE
Sélection du programme, temps, et
température.
Utiliser ces renseignements pour faire les
meilleures sélections possibles de
programmes pour les charges de linge à
laver. Chaque programme est destiné à
différents types de tissus et de saletés.
• La laveuse fait de brèves pauses au cours
de chaque programme. Ces pauses sont
normales pour le fonctionnement de la
laveuse.
• Se référer aussi à la page 14 pour mieux
comprendre cu qui arrive durant un
programme de lavage.
NORMAL
10
COLD
14
WARM
PULL START PUSH STOP
Sélecteur de température de l’eau combiné
avec le bouton de sélection de programme
Programme normal
Le programme normal figure l’eau CHAUDE
ou FROIDE et les temps d’essorage pour
écourter les temps de séchage. Choisir le
programme CHAUD de 14 minutes pour
nettoyer les charges grands des tissus
robuste qui sont très salés. Choisir le
programme FROID de 10 minutes pour
nettoyer les tissus au coton et lin qui sont
raisonnablement à trés salés.
Rinse
Spin
OFF
Options des programmes
On peut sélectionner des temps de lavage
différents; dans ce cas, sélectionner la
température de l’eau de lavage (tiède ou
froide), puis sélectionner le nouveau temps
de lavage. Par exemple, pour 14 minutes de
lavage à l’eau froide :
1. Enfoncer le bouton de sélection de
programme et le faire tourner dans le
sens horaire jusqu’à la position COLD
(froide).
2. Tirer le bouton de sélection de
programme et laisser la laveuse se
remplir.
3. Lorsque la laveuse s’est remplie,
enfoncer le bouton de sélection de
programme et le faire tourner jusqu’à
Heavy (intensif) pour sélectionner une
période de lavage de 14 minutes.
4. Tirer le bouton de sélection de
programme.
11

FONCTIONNEMENT DE LA LAVEUSE
Utilisation de la fonction rinçage et
essorage
(modèles avec sélecteur de
température combiné avec
le bouton de sélection de
programme)
Lors de l’utilisation d’une plus grande
quantité de détergent pour le lavage du linge
très sale ou pour le lavage d’articles de
soins spéciaux, vous constaterez qu’un
rinçage et un essorage additionnels sont
nécessaires.
1. Pour ajouter un rinçage additionnel,
appuyer sur le bouton sélecteur des
programmes et le tourner dans le sens
haraire jusqu’à Rinse (Rinçage), tel
qu’illustré.
2. Retirer le bouton sélecteur des
programmes. La machine se remplit
jusqu’au niveau correspondant à la
charge, et exécute les opérations
d’agitation, de vidange et d’essorage.
Rinse
OFF
12

FONCTIONNEMENT DE LA LAVEUSE
Utilisation de la fonction vidange et
essorage
(modèles avec sélecteur de
température combiné avec
le bouton de sélection de
programme)
Une vidange et un essorage peuvent aider
à réduire le temps de séchage pour certains
tissus épais ou des articles de soins
spéciaux en enlevant l’excès d’eau.
1. Appuyer sur le bouton sélecteur des
programmes et le tourner dans le sens
horaire jusqu’à Spin (Essorage), tel
qu’illustré.
2. Retirer le bouton sélecteur des
programmes. La laveuse exécute
l’opération de vidange, ensuite celle
d’essorage.
Spin
OFF
Arrêt et remise en marche de la laveuse
• Pour arrêter la machine à un instant
quelconque, appuyer sur le bouton de
réglage des programmes.
• Pour remettre la machine en marche,
fermer le couvercle (si nécessaire) et tirer
sur le bouton de réglage des programmes.
13

FONCTIONNEMENT DE LA LAVEUSE
Compréhension de la fonction de chaque
programme
Lorsqu’on tire le bouton de sélection du
programme après avoir placé l’index du
bouton à la position désirée, la laveuse se
remplit d’eau jusqu’au niveau choisi
(correspondant au volume de la charge de
linge) avant de se mettre en marche (agitation et chronométrage). L’agitation commence immédiatement après le remplissage,
que le couvercle soit ouvert ou fermé.
Après le commencement de l’agitation, le
bouton tourne dans le sens horaire jusqu’à
la position OFF (arrêt), qui correspond à la
fin du programme.
REMARQUE :
• La laveuse effectue de brèves pauses au
cours de chaque programme. Ceci est
normal.
RINÇAGELAVAGE
Remplissage
▼
Lavage : durée choisie
▼
Vidange
Sans agitation
†
Sur certains modéles, pour le programme
Pressage permanent, vidange partielle,
remplissage, brève agitation et vidange.
Centrifugation
†
▼
▼
Remplissage
▼
Rinçage
▼
Vidange - sans agitation
▼
Centrifugation - rinçage
par arrosage
▼
Centrifugation
▼
Arrêt
14

FONCTIONNEMENT DE LA LAVEUSE
Compréhension des bruits normaux de la
laveuse
Votre nouvelle laveuse peut émettre des
bruits que votre ancienne ne faisait pas.
Comme les bruits ne sont pas familiers, vous
vous inquiéterez peut-être. Mais, ne vous en
faites pas, car ces bruits sont normaux.
Les renseignements suivants décrivent
certains des bruits que vous pouvez
entendre et leur cause.
Pendant le lavage
Lorsque vous choisissez le réglage pour une
petite charge à laver, votre laveuse a un
niveau d’eau plus bas. Avec ce niveau d’eau
plus bas, on peut entendre un cliquetis de la
portion supérieure de l’agitateur.
Durant la vidange
Le taux de vidange de l’eau de votre
laveuse dépend de votre installation. Si l’eau
est vidée rapidement de la laveuse, vous
pouvez entendre de l’air attiré par la pompe.
Le bruit survient pendant la fin de la
vidange.
Après la vidange et avant
l’essorage
Lorsque le programme passe de vidange à
essorage, vous pouvez entendre les
engrenages qui s’enclenchent.
Addition de liquide de blanchiment chloré
(sur certains modéles)
Utiliser le distributeur d’agent de blanchiment
de la laveuse pour ajouter un agent liquide
de blanchiment à la charge de linge. Mesurer
toujours l’agent de blanchiment liquide. Ne
pas verser une quantité approximative. Ne
jamais utiliser plus de 250 mL (1 tasse) pour
une charge complète. Réduire la quantité
selon le réglage du niveau d’eau. Suivre les
instructions du fabricant pour une utilisation
sans danger. Utiliser une tasse avec un bec
verseur pour éviter de renverser le liquide.
1. Charger la laveuse.
2. Verser prudemment dans le distributeur
l’agent de blanchiment déjà mesuré. Ne
pas laisser l’agent de blanchiment
éclabousser, dégoutter ou couler dans le
panier de la laveuse. Un agent de blanchiment non dilué endommagera tous les
tissus avec lesquels il entrera en contact.
3. Mettre la laveuse en marche. L’agent de
blanchiment sera automatiquement dilué
pendant le lavage.
REMARQUE : Ne pas utiliser ce distributeur
pour ajouter un agent de blanchiment chloré
en poudre ou sans danger pour les couleurs
à votre charge de lavage. Le distributeur est
conçu pour l’utilisation seulement d’un agent
liquide de blanchiment chloré.
15

FONCTIONNEMENT DE LA LAVEUSE
Addition de liquide de blanchiment chloré
(sur certains modéles)
Toujours mesurer l’eau de Javel. Ne pas
verser une quantité approximative. Ne
jamais utiliser plus de 250 mL (1 tasse) pour
une charge compléte. Suivre les instructions
du fabricant pour une utilisation sans
danger. Utiliser une tasse avec un bec
verseur pour éviter de renverser le liquide.
1. Laisser la laveuse se remplir et com-
mencer l’agitation de la charge.
2. Ajouter l’eau de Javel au programme de
lavage de sorte qu’elle peut être éliminée
au programme de rinçage. Verser l’eau
de Javel autour de l’agitateur et non
directement sur la charge.
• Suivre le mode d’emploi sur les étiquettes
du linge. Ne pas utiliser d’eau de Javel sur
les articles en laine, soie, étirables, les
acétates ou certains tissus ignifuges.
• Lors du trempage avec de l’eau de Javel,
ajouter le détergent à l’eau de trempage.
REMARQUE : Un liquide de blanchiment
non dilué peut endommager tous les tissus
avec lesquels il entre en contact. Il en
résulte des dégâts comme des déchirures,
des trous, des usures ou des pertes de
couleur, qui peuvent ne pas paraître avant
plusieurs lavages subséquents.
Addition d’assouplissant liquide de tissu
• Toujours diluer les assouplissants de tissu
avec 125 mL (1⁄2 tasse) à 250 mL (1 tasse)
d’eau tiède. L’assouplisseur de tissu non
dilué peut tacher les tissus.
• Ajouter l’assouplissant dilué de tissu
seulement au rinçage final.
• Les assouplissants de tissu ne doivent pas
être mélangés avec d’autres produits de
lessive parce que des taches de graisse
peuvent se former. Si des taches se
forment, les enlever en mouillant la tache
et en frottant avec un détergent liquide ou
un pain de savon. Laver de nouveau
l’article taché.
• Une trop grande quantité d’assouplissant
de tissu peut rendre certains articles
(couches et serviettes) non absorbants.
Dans ce cas, utiliser moins d’assouplissant
de tissu, ou ne pas l’employer chaque fois.
16

Entretien de la laveuse
Un entretien convenable de la laveuse en augmentera la longévité. Cette section explique
comment assurer l’entretien convenable et en toute sécurité de la laveuse.
Nettoyage de la laveuse
Extérieur
Essuyer immédiatement les résidus de
détergent, agent de
blanchiment et autres produits
renversés, avec une éponge
ou un linge doux humide.
Essuyer occasionnellement les
surfaces externes de la laveuse pour
maintenir son aspect neuf.
Ne pas introduire d’objets métalliques ou
acérés dans la laveuse. De
tels objets peuvent
endommager les surfaces.
Avant d’introduire les
vêtements dans la laveuse,
enlever de leurs poches les épingles,
trombones, pièces de monnaie, vis, écrous,
etc. Ne pas laisser ces objets sur la laveuse
après avoir vidé les poches des vêtements.
Intérieur
Pour nettoyer les surfaces intérieures,
verser dans la laveuse 250 mL (1 tasse)
d’agent de blanchiment chloré et mélanger
avec 500 mL (2 tasses) de détergent. Faire
exécuter à la laveuse un programme
complet de lavage à l’eau chaude. Répéter
cette opération si nécessaire.
REMARQUE : Pour éliminer les dépôts
imputables à la dureté de l’eau, utiliser un
produit de nettoyage sans danger pour la
laveuse (ceci doit être indiqué sur
l’étiquette).
Préparation avant un déménagement ou un
entreposage hivernal
Installer et remiser la laveuse à un emplacement où elle ne sera pas exposée au gel.
Comme il peut rester un résidu d’eau dans
les tuyaux, le gel pourrait endommager la
laveuse. Si la laveuse doit faire l’objet d’un
déménagement ou être remisée au cours
d’une période hivernale, exécuter les
opérations de préparation suivantes.
Préparation de la laveuse pour l’hiver :
1. Fermer les deux robinets d’arrivée d’eau.
2. Déconnecter et vider les tuyaux d’arrivée
d’eau.
3. Verser dans la cuve 1 L (1 pinte) d’antigel
pour véhicule récréatif.
4. Appuyer sur le bouton de sélection du
programme et faire tourner le bouton pour
sélectionner une opération de vidange
(voir pages 9 et 12). Laisser la laveuse
fonctionner pendant environ 30 secondes
pour que l’antigel se mélange à l’eau.
5. Débrancher le cordon d’alimentation
électrique.
Avant de réutiliser la laveuse :
1. Rincer les tuyaux d’arrivée d’eau.
2. Reconnecter les tuyaux d’arrivée d’eau.
3. Ouvrir les deux robinets d’arrivée d’eau.
4. Rebrancher le cordon d’alimentation
électrique.
5. Faire exécuter à la laveuse un pro-
gramme de lavage complet avec 250 mL
(1 tasse) de détergent, pour éliminer
l’antigel.
17

ENTRETIEN DE LA LAVEUSE
Période d’inutilisation ou période de
vacances
On doit faire fonctionner la laveuse
seulement lorsqu’on est présent sur place.
Si les utilisateurs doivent partir en vacances
ou ne pas utiliser la laveuse pendant une
période prolongée, il convient d’exécuter les
opérations suivantes :
• Débrancher le cordon d’alimentation
électrique ou ouvrir le disjoncteur qui
alimente la laveuse.
• Fermer les robinets d’arrivée d’eau. Ceci
évitera les risques d’inondation (à
l’occasion d’une surpression) au cours de
la période d’absence.
18

Conseils pour le lavage
Cette section décrit les bonnes techniques de lavage et présente des renseignements
complémentaires.
Préparation du linge
• Fermer les fermetures à glissière, boutons
pression et agrafes pour éviter
d’accrocher d’autres articles.
Enlever épingles, boucles et
autres objets durs pour éviter
d’égratigner l’intérieur de la
laveuse. Enlever les garnitures et
ornements non lavables.
• Vider les poches et les retourner.
• Retourner les poignets; brosser ou
éliminer la charpie et la poussière.
• Retourner les tricots synthétiques pour
éviter le boulochage.
Tri
• Séparer les articles très sales des articles
légèrement sales, même si on
pourrait normalement les laver
ensemble. Séparer les articles
émetteurs de charpie
(serviettes, chenille) des
articles capteurs de charpie (velours,
tissus synthétiques et articles à pressage
permanent). Lorsque c’est possible,
retourner les articles qui tendent à émettre
de la charpie.
• Attacher les cordons et les ceintures pour
qu’ils ne s’emmêlent pas.
• Réparer les déchirures, les ourlets et les
coutures décousus.
• Traiter les taches. (Voir aux pages 24 à 27
les renseignements sur l’élimination des
taches.)
• Pour obtenir les meilleurs résultats, laver
les vêtements tachés ou mouillés dès que
possible.
• Séparer les articles de teinte foncée des
articles de teinte claire, et les articles
grand teint de ceux qui déteignent.
• Séparer les divers types de tissus (coton
épais, tricots, articles délicats).
Chargement
• Introduire les articles dans la laveuse sans
les tasser. Remplir jusqu’au
sommet du panier, mais ne
pas enrouler les articles à
laver autour de l’agitateur.
Pour l’obtention de la meilleure
performance de lavage, sans froissement,
il faut que les articles de la charge de linge
puissent se déplacer librement dans l’eau
de lavage. Les articles doivent s’enfoncer
et réapparaître plus tard.
• Charger convenablement la laveuse et
sélectionner le niveau d’eau correspondant
au volume de la charge. Un chargement
excessif ou un tassement excessif du linge
peut provoquer :
– un lavage médiocre.
– une augmentation du froissement.
– une formation excessive de charpie.
– une usure plus rapide du linge (par
boulochage).
suite à la page suivante
19

CONSEILS POUR LE LAVAGE
• Charger la laveuse en fonction du volume
des articles et non pas de leur poids.
• Mélanger des articles de grande taille et
de petite taille dans chaque
charge. Répartir la charge
uniformément pour équilibrer
la laveuse. Une charge
déséquilibrée peut être la
cause de vibrations au cours de
l’essorage.
• Pour réduire le froissement des articles à
pressage permanent et de certains tricots
synthétiques, sélectionner le niveau d’eau
correspondant à une charge importante.
Ces articles doivent disposer de plus
d’espace pour se déplacer dans l’eau que
les articles lourds (serviettes, jeans).
• Réduire la durée de la période de lavage
dans le cas d’une charge de faible volume.
Une charge qui ne contient que quelques
petits articles se lave plus rapidement.
Suggestions de chargement
Pour ces exemples de charges complètes de la laveuse, régler le sélecteur de charge au
plus haut réglage de charge.
LAVEUSES DE GRANDE CAPACITÉ
Vêtements de
travail lourds
2 pantalons
3 chemises
3 jeans
1 combinaison de
travail
Tricots
2 pantalons
2 chemisiers
4 chemises
4 hauts
2 robes
Pressage
permanent
1 drap double
1 nappe
1 robe
1 chemisier
2 pantalons
3 chemises
2 taies d’oreiller
Charge mixte
2 draps doubles ou
1 drap pour grand lit
4 taies d’oreiller
6 T-shirts
6 shorts
2 chemises
2 chemisiers
6 mouchoirs
Serviettes
8 serviettes de bain
8 serviettes à main
10 débarbouillettes
1 tapis de bain
Articles délicats
2 camisoles
4 jupons
4 culottes
2 soutiens-gorge
2 chemises de
nuit
20

Économie d’énergie
CONSEILS POUR LE LAVAGE
• Utiliser de l’eau de lavage tiède ou froide
pour la plupart des charges de linge.
Utiliser de l’eau chaude seulement pour le
lavage du linge blanc ou d’articles de tissu
épais, graisseux ou très sales.
• Utiliser le rinçage à l’eau froide.
• Laver des charges complètes.
• Utiliser un niveau d’eau moins élevé lors
du lavage de petites charges.
• Éviter de relaver. Utiliser une quantité
suffisante de détergent et prétraiter les
taches ou grosses saletés. Utiliser les
programmes et durées de lavage
recommandés pour le tissu à laver et les
saletés à éliminer.
• Utiliser la laveuse hors des périodes de
pointe de consommation d’électricité généralement tôt le matin et en fin de
soirée (demander à la compagnie
d’électricité quelles sont les périodes
de pointe).
Sélection de la température de l’eau
Guide de sélection des températures
TEMPÉRATURE DE
L’EAU DE LAVAGE
(HOT)
CHAUDE
54°C (130°F)
ou plus
†
UTILISATION SUGGÉRÉE
• Vêtements de travail
• Blancs résistants et couleurs
pastel grand teint
• Couches
COMMENTAIRES
• Les meilleurs résultats de lavage
pour les articles très sales
• Élimination des taches d’huile, de
transpiration, de graisse
• Empêche le linge de prendre une
couleur grisâtre ou jaunâtre
(WARM)
TIÈDE
32 à 44°C
(90 à 110°F)
(COLD)
FROIDE
21 à 32°C
(70 à 90°F)
†
La laveuse exécute les rinçages à l’eau froide pour toutes les températures de lavage. De
plus, le rinçage à l’eau tiède est disponible pour les lavages à l’eau chaude. Une charge
de linge rincée à l’eau tiède s’essore mieux qu’une charge rincée à l’eau froide, mais le
froissement peut augmenter lors du séchage sur une corde à linge. Par temps froid, le
rinçage à l’eau tiède suscite une température plus confortable pour la manipulation de la
charge de linge mouillé.
• Articles de couleurs foncées
ou qui déteignent
• Articles à pressage
permanent
• Nylon, polyester, acrylique,
soie, laine
• Tricots et articles délicats
• Couleurs très délicates
• Articles qui déteignent
• Articles lavables à la main
• Les meilleurs résultats pour les
articles légèrement ou
modérément sales
• Sans risque pour la plupart des
tissus
• Réduit la perte de couleur ou de
teinture
• Réduit les faux plis
• Les meilleurs résultats pour les
articles légèrement sales
• Économie d’eau chaude
• La meilleure température de rinçage
21

CONSEILS POUR LE LAVAGE
Vérification de la température
de l’eau chaude
La température de l’eau chaude devrait être
de 54°C (130°F) ou plus. Lorsqu’on ne
connaît pas la température de l’eau chaude,
il est facile de la vérifier. Il peut être
nécessaire d’augmenter la température
de réglage du chauffe-eau. Pour vérifier
la température de l’eau produite par le
chauffe-eau :
1. Remplir une casserole avec de l’eau la
plus chaude disponible au robinet qui
alimente la laveuse.
REMARQUE : Si un robinet n’est pas
disponible près de la laveuse, puiser l’eau
au robinet le plus proche de la laveuse.
2. Placer un thermomètre à confiserie ou à
viande dans l’eau pour en déterminer la
température.
REMARQUE : Si la température de l’eau
de lavage est inférieure à 21°C (70°F), les
détergents ne se dissolvent pas bien.
L’élimination des saletés peut être plus
difficile, et on peut observer une augmentation du froissement de certains tissus et du
boulochage.
Dureté de l’eau
Les résultats médiocres de lavage peuvent
être attribuables à la dureté de l’eau de
lavage. Pour déterminer la dureté de l’eau :
• Eau municipale – se renseigner auprès de
la compagnie d’eau municipale.
• Eau de puits – téléphoner au service
municipal.
Demander la concentration de matières
minérales en grains par gallon ou en parties
par million. Si la concentration de matières
minérales dans l’eau est de 8 grains ou plus
par gallon, ou plus de 137 parties par
million :
• considérer l’installation d’un adoucisseur
d’eau.
• utiliser plus de détergent.
• utiliser un système de traitement de l’eau.
• ne pas utiliser de savon.
Lavage d’articles de soins spéciaux
La plupart des vêtements et du linge de maison comportent une étiquette d’instructions de
lavage. On doit toujours observer les instructions de l’étiquette, le cas échéant. On
présente dans cette section des instructions générales de lavage de certains articles
spéciaux.
ARTICLE
Couvertures
(électrique et
en laine)
Rideaux, tentures
et housses
22
SOINS SPÉCIAUX
Prétraiter les taches et les marques. Choisir la température de l’eau,
le programme et la durée de lavage selon le type de couverture à
laver. Deux rinçages peuvent être nécessaires. Examiner l’étiquette
pour déterminer si le fabricant recommande le lavage à la machine.
Laver de petites charges. Le tassement provoquera des faux plis.
Réinstaller les housses alors qu’elles sont encore humides. Elles
s’ajusteront bien sous l’effet du rétrécissement.
REMARQUE : Les rideaux et les tentures endommagés par le soleil
se déchireront lorsqu’on les lave à la main ou à la machine.

CONSEILS POUR LE LAVAGE
ARTICLE
Couches
Élastique,
spandex
Articles ignifugés
Tricots
Oreillers, jouets
rembourrés
Articles en
plastique,
caoutchouc
SOINS SPÉCIAUX
Lors de l’emploi d’eau de Javel pour le trempage, ajouter une
quantité additionnelle de détergent à la charge de linge. Éviter
l’emploi excessif d’un assouplissant de tissu – ceci peut réduire la
capacité d’absorption.
Les produits élastiques absorbent les huiles corporelles. Ces huiles
peuvent endommager le matériau élastique. Laver fréquemment
ces articles pour réduire les dommages. Utiliser de l’eau tiède et
suffisamment de détergent pour enlever les huiles. Ne pas utiliser
d’agent de blanchiment chloré.
Certains articles sont clairement étiquetés comme étant ignifugés.
Observer les instructions du fabricant pour conserver les propriétés
de résistance aux flammes.
Les tricots sont confortables à porter parce qu’ils s’étirent.
Cependant, ceci veut dire que les tricots ont plus tendance à
s’élargir et à être endommagés au lavage (particulièrement les
tricots épais). Les tricots en tissu synthétique, comme le polyester,
le nylon et l’acrylique, ont tendance à conserver leur forme originale
mieux que les tricots en coton ou en ramie.
Le lavage des oreillers en duvet n’est pas recommandé, à moins
qu’on puisse les sécher dans une sécheuse.
Traiter ces articles comme des articles délicats. Les laver à l’eau
tiède. Laver les petits articles dans un filet.
Édredons et
couvre-lits
Petits tapis
Combinaisons
matelassées,
vestes, etc.
Ne pas laver les édredrons rembourrés de coton, sauf s’ils sont
piqués ou cousus, car le matériau de rembourrage a tendance à
s’accumuler en une masse. Un rinçage additionnel peut être
nécessaire.
Nettoyer d’abord ces tapis par secouage ou à l’aspirateur. Laver
plusieurs tapis à la fois. Dans le cas du lavage d’un seul tapis,
ajouter des serviettes de bain pour équilibrer la charge.
Laver seulement un ou deux articles à la fois. Il peut être nécessaire
d’arrêter la laveuse occasionnellement pour éliminer les poches
d’air de ces articles. Un rinçage additionnel peut être nécessaire.
23

Élimination des taches
Pour obtenir les meilleurs résultats, il peut être nécessaire de prélaver ou tremper les articles
très sales ou graisseux. Le trempage facilite l’élimination des taches d’origine protéinique
(sang, lait, herbe). Le prélavage facilite l’élimination des saletés avant le lavage.
Règles de détachage
• Utiliser de l’eau tiède pour le trempage ou
le prélavage du linge taché. L’eau chaude
peut provoquer la fixation des taches.
• Il est plus facile d’éliminer la plupart des
taches lorsqu’elles sont fraîches. Les
taches plus anciennes ou fixées peuvent
ne pas disparaître. Observer les instructions imprimées de prétraitement des
produits sur l’emballage.
• Avant de traiter une tache quelconque,
déterminer le type de la tache, l’ancienneté
de la tache, le type de tissu et la qualité de
la teinture du tissu (voir l’étiquette
d’entretien).
• Les opérations de lavage et de séchage
peuvent provoquer la fixation de certaines
taches.
• Commencer avec de l’eau froide ou tiède.
L’eau chaude peut rendre certaines taches
indélébiles.
• Lorsque l’emploi d’un agent de
blanchiment est recommandé, utiliser un
produit de blanchiment sans danger pour
le tissu concerné.
• Tester le détachant sur un ourlet ou à un
endroit dissimulé pour déterminer son effet
sur la couleur.
• Placer la surface tachée sur un essuie-tout
ou un linge blanc. Appliquer le détachant à
l’arrière de la tache. Ceci force la tache à
sortir du tissu, plutôt qu’à le traverser.
• Les produits de prétrempage à base
d’enzymes ou des produits
d’attendrissement des viandes facilitent
la décomposition de certaines taches
protéiniques, et leur élimination.
Guide de détachage
TACHE
Boisson
alcoolisée
Sang
Chocolat
ou café
24
MÉTHODE D’ÉLIMINATION
Ces taches devenant marron en vieillissant, il faut les traiter
immédiatement. Éponger ou imbiber le tissu récemment taché avec de
l’eau froide. Laver. Si la tache persiste, faire tremper pendant 15 minutes
dans une solution d’eau tiède et de détergent liquide avec quelques
gouttes de vinaigre blanc. Rincer. Laver.
Rincer immédiatement ou tremper dans de l’eau froide avec un produit de
prétrempage aux enzymes, pendant 30 minutes ou plus. Rincer. Frotter
pour faire pénétrer le détergent dans toute tache restante. Rincer. Si la
tache persiste, appliquer quelques gouttes d’eau oxygénée à 3% pendant
3 à 5 minutes sur la tache. Bien rincer. Laver.
Éponger immédiatement avec un solvant de nettoyage à sec
ininflammable ou appliquer un produit de prélavage détachant. Rincer.
Laver. Si la tache persiste, appliquer du détergent liquide sur la tache et
faire tremper dans de l’eau tiède contenant un produit de prétrempage
aux enzymes. Laver de nouveau.

ÉLIMINATION DES TACHES
TACHE
Crayons de
couleur et
cire à bougie
Crème, lait ou
crème glacée
Désodorisants
et antisudorifiques
MÉTHODE D’ÉLIMINATION
Utiliser un couteau émoussé pour enlever le maximum de cire. Placer
le tissu entre deux buvards ou mouchoirs en papier et repasser au fer
chaud. Enlever les taches de couleur avec un solvant de nettoyage à
sec ininflammable. Laver à la main jusqu’à ce que la tache ait disparu,
puis laver dans la laveuse avec l’eau la plus chaude ne présentant pas
de danger pour le tissu. Si tout le linge comporte des taches de crayon
de couleur, utiliser les services d’une entreprise de nettoyage à sec ou
les machines de nettoyage à sec d’une buanderie publique.
Éponger avec un solvant de nettoyage à sec ininflammable ou avec un
produit de prélavage détachant. Rincer. Laver. Répéter si nécessaire.
Si la tache persiste, appliquer quelques gouttes de détergent liquide et
quelques gouttes d’ammoniaque. Sécher avec un buvard et rincer. Si
la tache persiste, faire tremper dans un produit de prétrempage aux
enzymes. Laver.
Tache légère : Traiter avec du détergent liquide ou du détergent à
lessive ordinaire. Laver dans l’eau la plus chaude sans danger pour
le tissu.
Tache tenace : Mettre la zone tachée en contact avec une serviette et
traiter avec une pâte d’ammoniaque et produit de blanchiment pour
tous les tissus. Laisser agir pendant 30 minutes. Laver dans l’eau la
plus chaude sans danger pour le tissu.
Graisse ou
huile
wAVERTISSEMENT
Risque d’incendie
Ne pas laver ou faire sécher des articles salis d’huile de
légumes ou de cuisine parce qu’un peu d’huile peut rester
sur les articles après avoir été lavés.
Le résultat peut être un accident mortel, ou un incendie.
Ne pas laver ou sécher les articles tachés d’huile végétale ou de
cuisson. Pour d’autres types de taches de graisse, enlever les taches à
l’aide d’une des méthodes ci-dessous :
• Utiliser un produit de prétraitement détachant. Suivre les instructions
de l’étiquette. Laver dans l’eau la plus chaude sans danger pour
le tissu.
• Utiliser du talc pour absorber autant de graisse que possible. Éponger
avec un solvant de nettoyage à sec ininflammable. Rincer. Laver.
• Traiter avec du détergent liquide ou frotter la tache avec une pâte de
détergent. Laver avec l’eau la plus chaude sans danger pour le tissu.
suite à la page suivante
25

ÉLIMINATION DES TACHES
TACHE
Taches de
fruits
Herbe ou
légumes verts
Encre ou
stylo à bille
Fer ou rouille
MÉTHODE D’ÉLIMINATION
Taches récentes : Faire immédiatement tremper dans de l’eau froide.
Laver. Si la tache persiste, appliquer une pâte constituée de produit de
blanchiment pour tous les tissus, de quelques gouttes d’eau chaude et
de quelques gouttes d’ammoniaque. Laisser agir pendant 15 à 30
minutes. Laver.
Taches anciennes : Éponger avec du vinaigre blanc. Rincer. Répéter
l’opération décrite pour les taches récentes.
Faire tremper pendant au moins 30 minutes dans de l’eau tiède ou
froide contenant un produit de prétrempage aux enzymes, ou éponger
avec de l’alcool dénaturé. Laver à l’eau avec un produit de blanchiment
(température et produit de blanchiment sans danger pour le tissu). Pour
les tissus de couleur, contrôler la tenue de la couleur avant d’appliquer
l’alcool. Pour l’acétate, éponger avec un solvant de nettoyage à sec
ininflammable. Si la tache persiste, traiter avec de l’eau oxygénée à
3%. Rincer. Laver de nouveau.
Traiter la tache avec un produit capillaire en aérosol ou de l’alcool à
friction. Éponger continuellement jusqu’à ce que le solvant cesse
d’entraîner le colorant. Laisser sécher. Répéter si nécessaire. Laver. Si
la tache persiste, traiter avec un produit de blanchiment sans danger
pour le tissu (il est presque impossible d’enlever complètement de
l’encre de Chine et d’autres encres indélébiles).
Pour les articles de couleur ou qui déteignent : Appliquer du jus de
citron et du sel. Faire sécher au soleil. Bien rincer. Répéter si
nécessaire.
Pour les articles blancs ou grand teint : Utiliser un produit antirouille.
Tester d’abord à l’intérieur d’un ourlet. Certains produits antirouille ne
sont pas sans danger pour les laveuses. Suivre les instructions de
l’emballage.
Ketchup ou
produits à
base de
tomate
Rouge à
lèvres
Jus de viande,
oeuf
26
Éponger immédiatement avec un solvant de nettoyage à sec
ininflammable ou appliquer un produit de prélavage détachant. Rincer.
Laver. Si la tache persiste, appliquer du détergent liquide sur la tache
ou faire tremper dans de l’eau tiède avec un produit de prétrempage
aux enzymes. Laver de nouveau.
Appliquer un solvant de nettoyage à sec ininflammable ou un produit de
prélavage détachant. Sécher avec un matériau absorbant. Répéter si
nécessaire. Rincer. Si la tache persiste, frotter avec du détergent
liquide. Laver.
Enlever l’excès à l’aide d’un couteau émoussé. Faire tremper dans de
l’eau froide ou tiède avec un produit de prétrempage aux enzymes,
pendant au moins 30 minutes, ou traiter les taches de graisse avec un
solvant de nettoyage à sec ininflammable. Laver.

ÉLIMINATION DES TACHES
TACHE
Moisissure
Moutarde
Gomme à
mâcher
Peinture
MÉTHODE D’ÉLIMINATION
Laver dans l’eau la plus chaude sans danger pour le tissu. Si la tache
persiste, faire tremper dans de l’eau tiède contenant un produit de
blanchiment pour tous les tissus, pendant 15 à 30 minutes. Laver de
nouveau. (Il est presque impossible d’enlever les vieilles taches de
moisissure. La moisissure détruit ou affaiblit les tissus.) On peut
également traiter la tache avec du sel et du jus de citron, et laisser
sécher au soleil. Rincer et laver de nouveau. De la moisissure peut se
former si du linge humide ou mouillé reste longtemps dans la laveuse.
Pour en empêcher la formation, faire sécher le linge sans attendre
après le lavage.
Traiter immédiatement. Enlever l’excès de moutarde. Éponger avec un
produit de nettoyage ininflammable ou avec un produit de prélavage
détachant. Rincer. Traiter la tache avec du détergent liquide et
quelques gouttes de vinaigre. Rincer. Si la tache persiste, appliquer de
l’eau oxygénée à 3%. Rincer et laver.
Durcir la gomme avec de la glace. Enlever le maximum de gomme.
Éponger avec un solvant de nettoyage à sec ininflammable. Laisser
sécher. Laver.
Laver à la main les articles tachés de peinture.
Peinture à base d’eau : Traiter la tache lorsqu’elle est encore humide.
(Il n’est pas possible d’éliminer ces taches de peinture après qu’elles
ont séché.) Rincer à l’eau tiède pour faire partir la peinture. Éponger
avec un solvant de nettoyage à sec ininflammable. Rincer et laver.
Peinture à base d’huile : Enlever la peinture fraîche. Éponger avec un
solvant de nettoyage à sec ininflammable. Alors que la zone tachée est
encore imbibée de solvant, frotter avec du détergent liquide. Laver dans
l’eau la plus chaude sans danger pour le tissu.
Transpiration
Brûlures
Boissons
gazeuses
Enlever les taches avant de repasser. Les taches de transpiration
peuvent affaiblir le tissu. Laver ou éponger complètement la tache avec
du détergent et de l’eau tiède. Si la transpiration a modifié la couleur du
tissu, faire l’un des traitements suivants :
Taches récentes : Appliquer de l’ammoniaque sur la tache. Rincer.
Lessiver pour enlever l’odeur d’ammoniaque.
Taches anciennes : Appliquer du vinaigre blanc sur la tache. Rincer.
Lessiver pour éliminer l’odeur de vinaigre.
On ne peut pas enlever les brûlures importantes. Mouiller la tache avec
de l’eau oxygénée à 3%. Couvrir avec un linge sec et appliquer un fer à
repasser à la température la plus élevée, sans danger pour le tissu.
Bien rincer. Laver.
OU
Mouiller avec du jus de citron et faire sécher au soleil. Laver.
Éponger immédiatement avec de l’eau froide et de l’alcool. La chaleur
et un détergent peuvent rendre la tache indélébile.
27

Guide de diagnostic
On peut facilement résoudre la plupart des problèmes de lavage si on en connaît la cause.
Étudier la liste suivante des problèmes de buanderie et les problèmes de la laveuse à la
page suivante. Si vous désirez plus d’aide, voir page 31.
Problèmes communs de lavage
PROBLÈME
Taches brunes,
jaunes
Transfert de
couleur
Blancs grisâtres,
couleurs ternes
Taches
graisseuses
Charpie
Linge trop mouillé
après l’essorage
CAUSE
• Tache de chlore
• Présence de fer dans le chauffe-eau ou dans la tuyauterie, et
présence de fer et de manganèse dans l’eau
• Tri incorrect
• Charge pas enlevée de la laveuse immédiatement après la fin du
programme
• Tri incorrect
• Température de l’eau trop basse
• Quantité insuffisante de détergent
• Utilisation de savon dans une eau très dure (utiliser du détergent
dans de l’eau dure)
• Assouplissant de tissu pas dilué ou versé directement sur le linge
• Quantité insuffisante de détergent ou distributeur non utilisé
• Tri incorrect
• Présence de papier ou de mouchoirs en papier dans les poches
• Confusion entre le boulochage et la charpie
• Quantité insuffisante de détergent
• Rinçage à l’eau froide
• Le programme a été arrêté avant que l’essorage soit terminé
Rétrécissement
Accrocs,
déchirures, trous
28
• Type de tissu (certains tricots s’étirent lors de la fabrication – ils
retrouvent leur forme originale au lavage)
• Les instructions de lavage de l’étiquette n’ont pas été observées
• Articles endommagés avant le lavage
• Usage incorrect de l’eau de Javel (ne pas verser directement sur le
linge); distributeur non utilisé
• Articles acérés dans les poches; accessoires de fermeture pas fermés

GUIDE DE DIAGNOSTIC
PROBLÈME
Tissus rigides et
rugueux
Retordage/
emmêlement
Faux plis
Zones jaunes
(huiles corporelles)
CAUSE
• Utilisation de savon dans une eau très dure (dans de l’eau dure,
utiliser du détergent)
• Quantité insuffisante de détergent
• Séchage sur une corde à linge
• Surcharge
• Linge enroulé autour de l’agitateur
• Surcharge (laisser plus d’espace pour les tissus à pressage
permanent et tricots)
• Charge pas enlevée de la laveuse immédiatement après la fin du
programme
• Rinçage à l’eau tiède
• Sélection incorrecte du programme
• Température de l’eau trop basse
• Quantité insuffisante de détergent
29

GUIDE DE DIAGNOSTIC
Quelques problèmes communs aux laveuses
Avant de faire un appel de service, vérifier ce qui suit :
Le couvercle est-il fermé?
▼
Le bouton sélecteur des programmes est-il réglé et retiré?
▼
Le cordon d’alimentation électrique est-il convenablement branché sur une
prise de courant alimentée à la tension convenable?
▼
Le fusible est-il grillé ou le disjoncteur est-il ouvert?
▼
Les robinets d’eau froide et d’eau chaude sont-ils ouverts?
▼
Les tuyaux flexibles d’arrivée d’eau sont-ils obstrués ou écrasés?
▼
Le tuyau flexible d’évacuation est-il plus bas que le niveau de l’eau dans la
laveuse? Il doit être plus haut.
▼
La laveuse émet-elle des bruits ou une vibration (voir page 15)?
La charge à laver est-elle convenablement distribuée autour de l’agitateur?
REMARQUE : La laveuse s’arrête brièvement au cours de l’exécution d’un programme.
Ces pauses sont normales.
Si le problème n’est imputable à aucune des causes ci-dessus, voir la section “Demande
d’assistance ou de service” à la page 31.
30

Demande d’assistance ou
de service
Avant de contacter le service de dépannage, consultez le “Guide de diagnostic” aux pages
28 à 30. Cela pourrait vous économiser le coût de la visite d’un technicien. Si vous avez
encore besoin d’aide, suivre les instructions suivantes.
1. Si la cause du problème n’a
pas été mentionnée à la
section “Guide de
diagnostic”…
Contactez le marchand chez qui vous avez
acheté votre appareil ménager ou la plus
proche succursale de service des appareils
ménagers Inglis Limitée. Dans toute
correspondance, veuillez inclure un numéro
de téléphone où l’on peut vous joindre dans
la journée.
Service d’appareils ménagers – Inglis Limitée**
Service aux consommateurs
Succursales de service direct :
COLOMBIE-BRITANNIQUE
ALBERTA
ONTARIO
MANITOBA
QUÉBEC
NOUVELLE-ÉCOSSE
SASKATCHEWAN
Vancouver
Edmonton
Toronto
(Mississauga)
Ottawa
Winnipeg
Montréal
(Laval)
Brossard
Québec
Sherbrooke
(Rock Forest)
Dartmouth
Regina
Saskatoon
Inglis Limitée, Service d’appareils ménagers
3627 E. 4th Avenue
Inglis Limitée, Service d’appareils ménagers
11653 163rd Street
Inglis Limitée, Service d’appareils ménagers
5945 Ambler Drive
Inglis Limitée Service d’appareils ménagers
29 Capital Drive
Inglis Limitée, Service d’appareils ménagers
1683 Church Avenue
Inglis Limitée, Service d’appareils ménagers
2750, Francis-Hughes
Inglis Limitée, Service d’appareils ménagers
9705, rue F. Ignace
Inglis Limitée, Service d’appareils ménagers
5275, boul. Wilfrid-Hamel, Bureau 140
Inglis Limitée, Service d’appareils ménagers
3475, boul. Industriel
Inglis Limitée, Service d’appareils ménagers
900 Windmill Road, #109
Inglis Limitée, Service d’appareils ménagers
Inglis Limitée, Service d’appareils ménagers
2. Si vous avez besoin de
services de dépannage …
Contactez la plus proche succursale de
service d’Inglis Limitée ou un centre de
service autorisé pour l’entretien de votre
appareil ménager.
REMARQUE : Lorsque vous contactez le
service de dépannage, veuillez inclure une
description détaillée du problème, les
numéros de modèle et de série, et la date
d’achat (voir page 2). Ces renseignements
nous sont nécessaires pour répondre
rapidement à votre demande.
(604) 291-6426
1-800-665-6788
(403) 453-3900
1-800-661-6291
(905) 821-3900
1-800-807-6777
(613) 225-0510
1-800-267-3456
(204) 694-5308
1-800-665-1683
(514) 382-8110
1-800-361-3032
(514) 397-1840
1-800-361-0950
(418) 871-5251
1-800-463-1523
(819) 564-6565
1-800-567-6966
(902) 468-6634
1-800-565-1598
1-800-665-1683
1-800-665-1683
Pour obtenir des services techniques en dehors des centres mentionnés,
contactez votre marchand d’appareils ménagers.
**Marque déposée de Inglis Limitée.
31

CANADA
Garantie de la laveuse
CE QUI EST COUVERT PAR LA GARANTIEDURÉE DE LA GARANTIE
GARANTIE COMPLÈTE
D’UN AN
À COMPTER DE LA
DATE D’ACHAT.
GARANTIE LIMITÉE DE
CINQ ANS
À COMPTER DE LA
DATE D’ACHAT.
GARANTIE LIMITÉE DE
DIX ANS
À COMPTER DE LA
DATE D’ACHAT.
CE QUI N’EST PAS COUVERT PAR LA GARANTIE
A. Les visites d’un technicien pour :
1. Corriger l’installation de la laveuse.
2. Montrer à l’utilisateur comment se servir de la laveuse.
3. Remplacer des fusibles ou corriger le câblage électrique du domicile ou la plomberie
du domicile.
B.
Les réparations lorsque la laveuse est utilisée à des fins autres qu’un usage familial normal.
C. L’enlèvement ou la livraison. La laveuse est conçue pour être réparée à domicile.
D. Les dommages imputables à accident, usage impropre, incendie, inondation, désastre
naturel ou l’utilisation de produits non approuvés par Inglis Limitée.
E. Tous les frais de main-d’oeuvre pendant les périodes de garantie limitée.
F. Le coût des pièces de rechange et la main-d’oeuvre pour les appareils utilisés en
dehors du Canada.
G.Les réparations de pièces ou systèmes imputables à des modifications exécutées sur
l’appareil sans autorisation.
H. Les frais de voyage ou de transport, pour les clients habitant dans des endroits éloignés.
Pièces de rechange et main-d’oeuvre pour corriger les vices
de matériau ou de fabrication. Les travaux doivent être
exécutés par un établissement de service autorisé.
Pièces de rechange en cas de détérioration de la table
supérieure et du couvercle par la rouille.
Remplacement de la cuve externe en cas de fissuration ou
de fuite d’eau imputable à un vice de matériau ou de
fabrication.
Pièces de rechange pour n’importe quelle pièce du
mécanisme en cas de vice de matériau ou de fabrication.
3/96
Cette garantie est la seule garantie accordée par le fabricant pour la protection de cet
appareil.
Les clauses de cette garantie constituent une addition et non pas une modification
ou une réduction des garanties statutaires et autres droits et recours prévus par toute
législation applicable.
Si une intervention de service est nécessaire, consulter d’abord la section “Guide de diagnostic.” Après avoir consulté la section “Guide de diagnostic,” on peut contacter le marchand ou
une succursale de service d’appareils ménagers d’Inglis Limitée pour obtenir une aide
additionelle. (Voir page 31.)
**Inglis Limitée, Administration Centre, 1901 Minnesota Court,
3949064 A
32
Mississauga, Ontario L5N 3A7
Marque déposée de Whirlpool Corporation, É-U., **Inglis limitée, usager autorisé au Canada.
*
Imprimé aux États-Unis
4/96
 Loading...