

Whirlpool R1011, R1012 Installation Instructions And Use & Care Manual
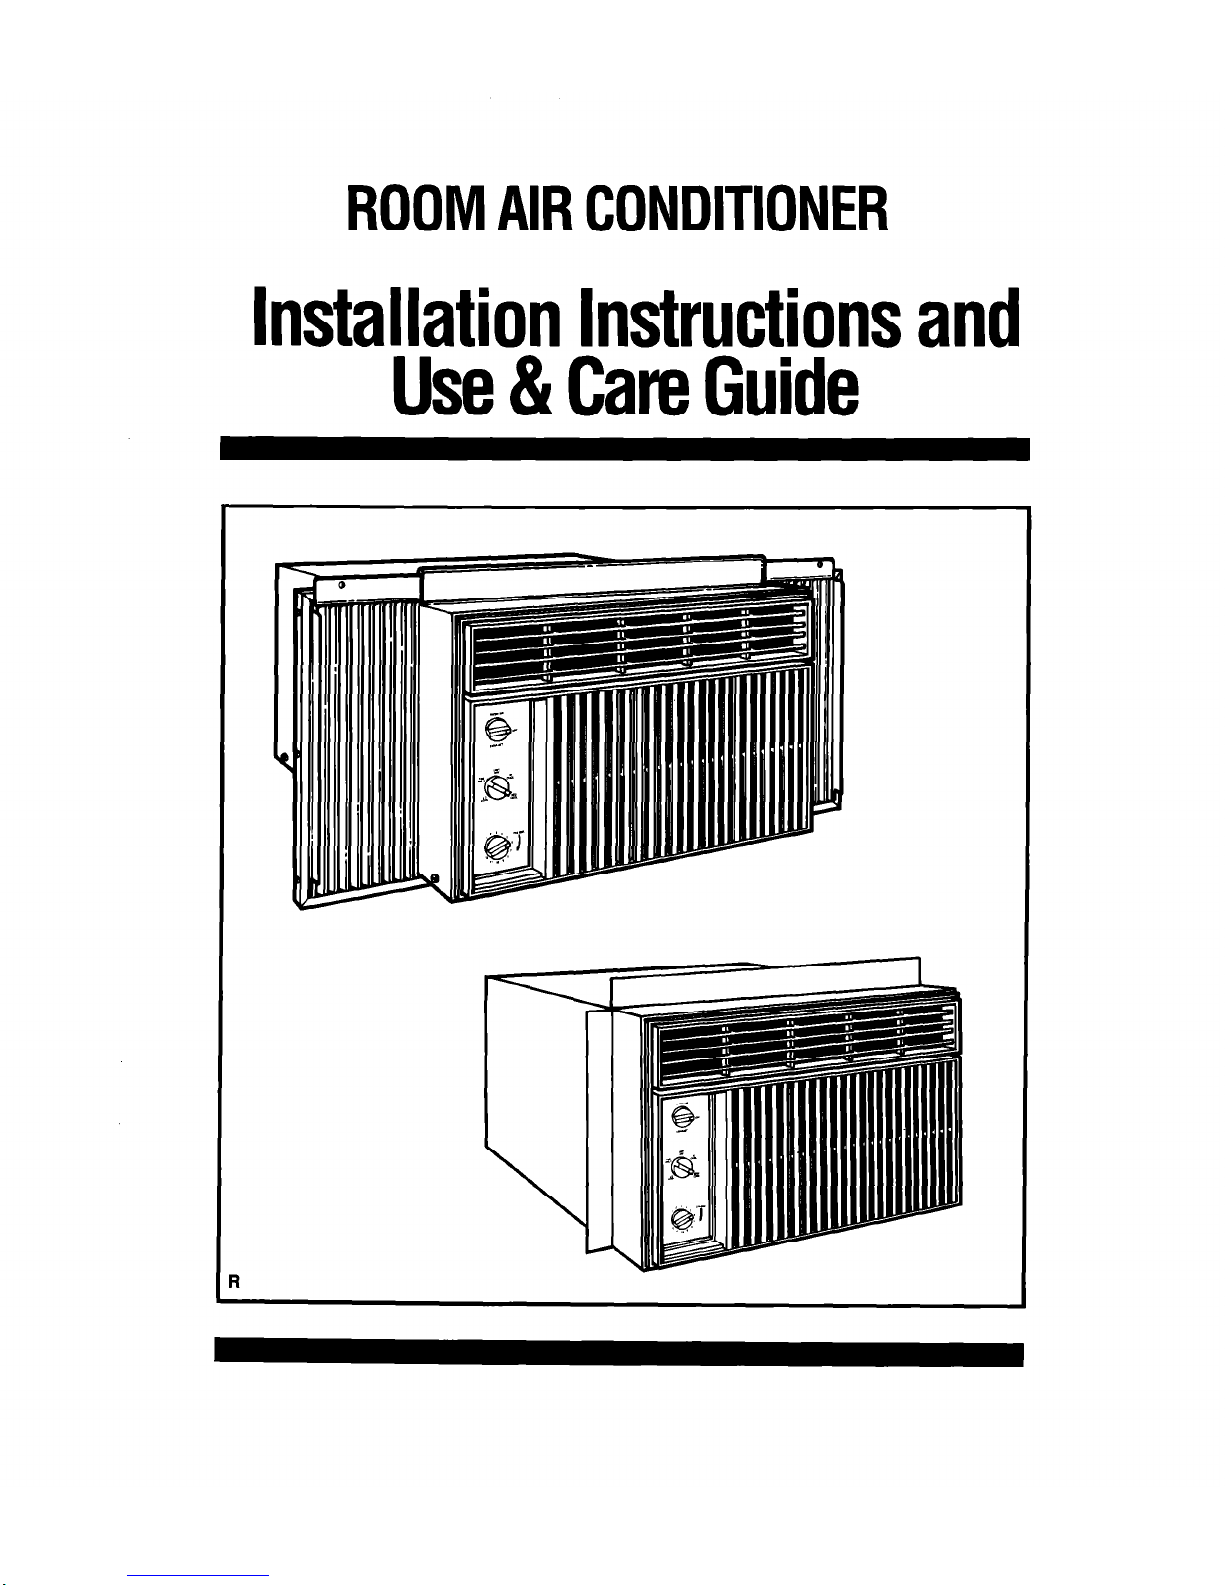
ROOM AIR CONDITIONER
Installation Instructions and
Use & Care Guide
R
Contents
Page
Important Safety Instructions
........................
.2
Electrical Requirements .................................. 3
Installation Instructions
..................................
8
Window installation - A .................................. 9
Window installation - B
................................
12
Through-the-wall installation ........................ 17
Operating Instructions .................................. 20
Starting your air conditioner
........................
.20
The ENERGY SAVER settings
...................
.20
The exhaust control ..................................... .21
Changing air direction
..................................
22
Cleaning Instructions ................................... .22
Cleaning front panel and filter
......................
22
Maintenance Instructions
.............................
23
Annual maintenance .................................... 23
Oiling the fan motor ...................................... 25
Energy saving tips ........................................ 25
If You Need Service Or Assistance
.............
.28
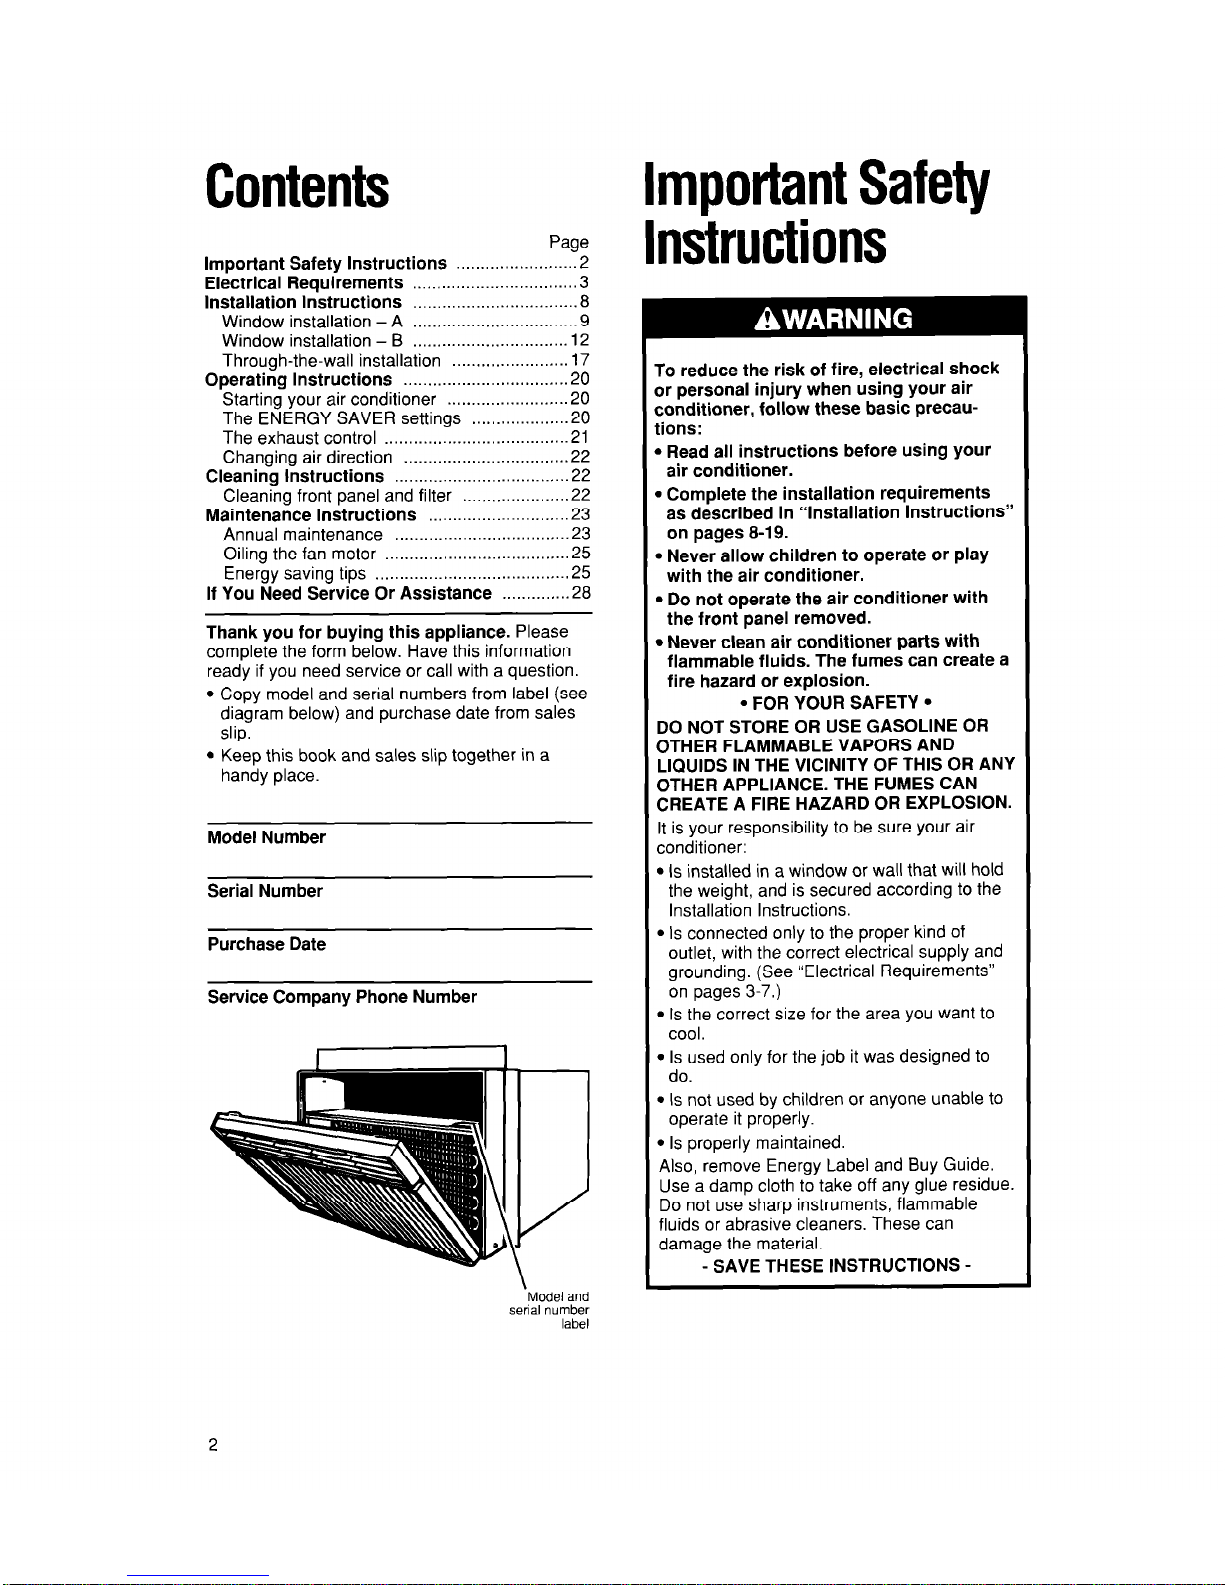
Thank you for buying this appliance. Please
complete the form below. Have this information
ready if you need service or call with a question.
l
Copy model and serial numbers from label (see
diagram below) and purchase date from sales
slip.
l
Keep this book and sales slip together in a
handy place.
Model Number
Serial Number
Purchase Date
Service Company Phone Number
I
seri
Model and
al number
label
Important Safety
Instructions
To reduce the risk of fire, electrical shock
Dr personal injury when using your air
conditioner, follow these basic precautions:
b Read all instructions before using your
air conditioner.
m Complete the installation requirements
as described in “Installation Instructions”
on pages 8-l 9.
l
Never allow children to operate or play
with the air conditioner.
l
Do not operate the air conditioner with
the front panel removed.
. Never clean air conditioner parts with
flammable fluids. The fumes can create a
fire hazard or explosion.
l
FOR YOUR SAFETY ’
DO NOT STORE OR USE GASOLINE OR
OTHER FLAMMABLE VAPORS AND
LIQUIDS IN THE VICINITY OF THIS OR ANY
OTHER APPLIANCE. THE FUMES CAN
CREATE A FIRE HAZARD OR EXPLOSION.
It is your responsibility to be sure your air
conditioner:
l
Is installed in a window or wall that will hold
the weight, and is secured according to the
Installation Instructions.
l
Is connected only to the proper kind of
outlet, with the correct electrical supply and
grounding. (See “Electrical Requirements”
on pages 3-7.)
l
Is the correct size for the area you want to
cool.
l
Is used only for the job it was designed to
do.
l
Is not used by children or anyone unable to
operate it properly.
l
Is properly maintained.
Also, remove Energy Label and Buy Guide.
Use a damp cloth to take off any glue residue.
Do not use sharp instruments, flammable
fluids or abrasive cleaners. These can
damage the material.
- SAVE THESE INSTRUCTIONS -
2
Electrical Requirements
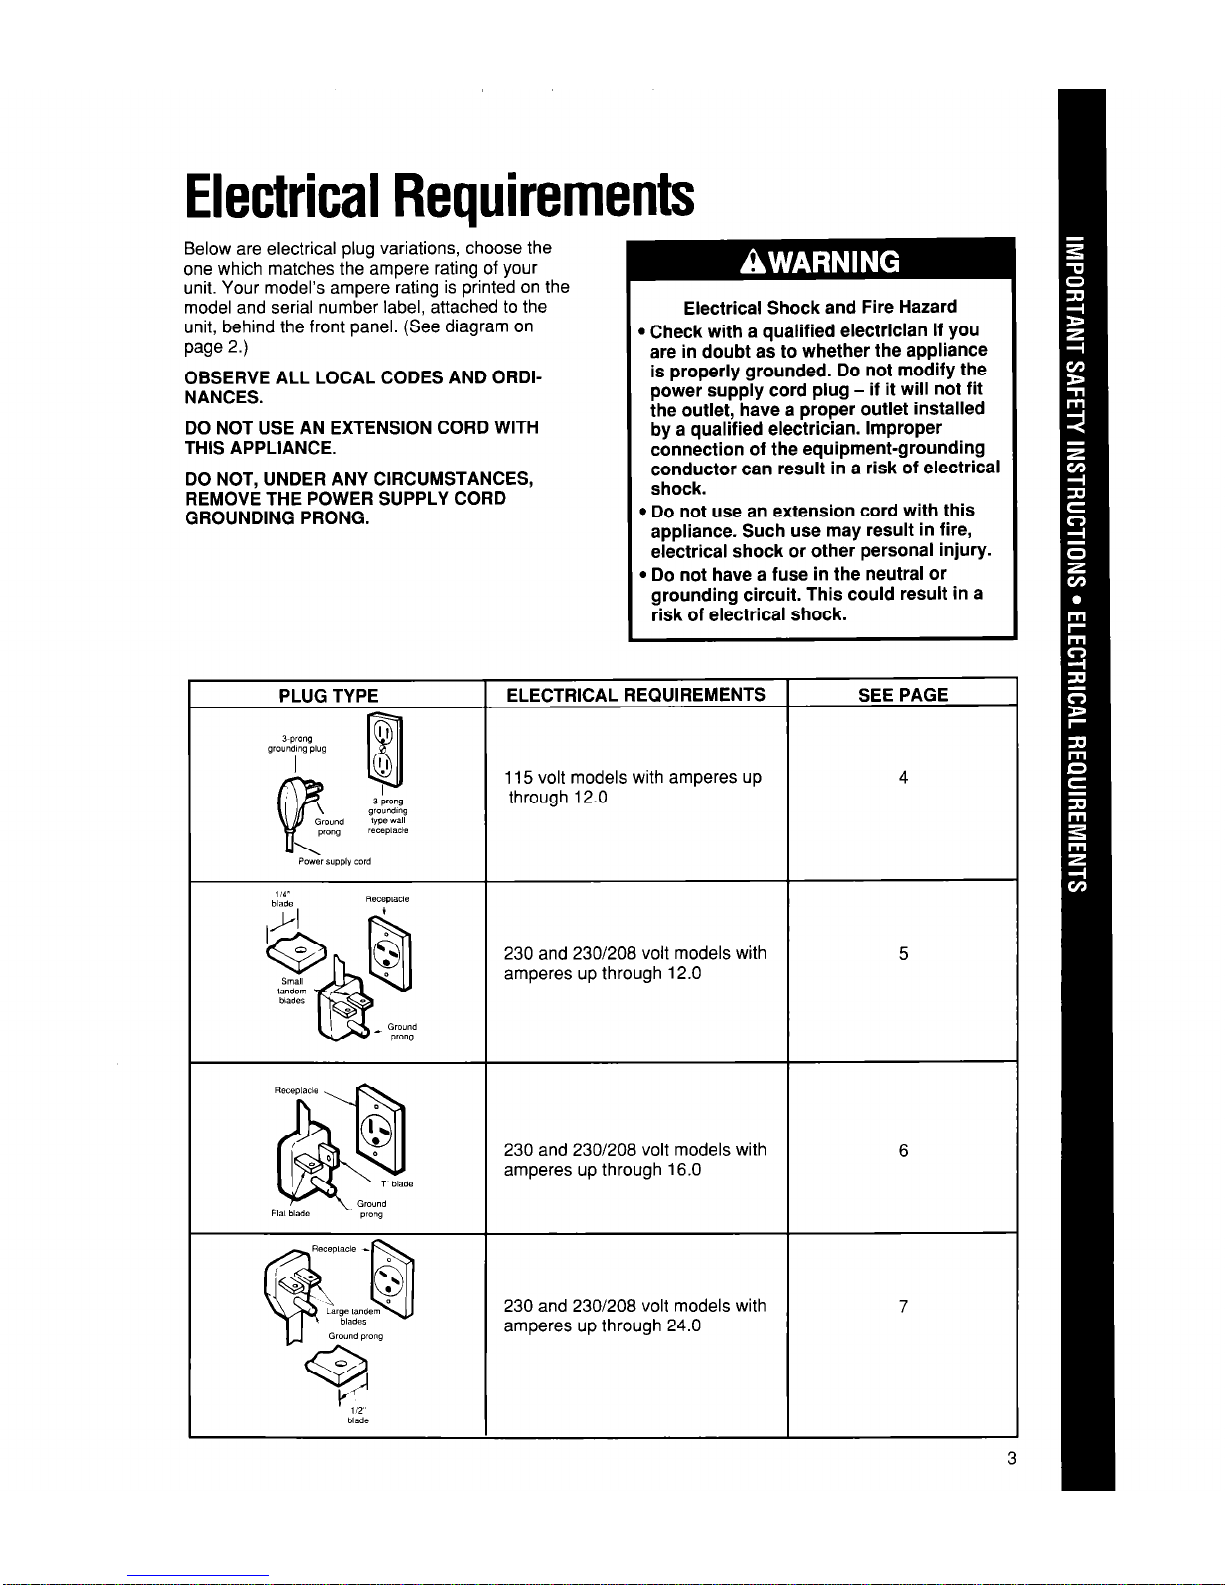
Below are electrical plug variations, choose the
one which matches the ampere rating of your
unit. Your model’s ampere rating is printed on the
model and serial number label, attached to the
unit, behind the front panel. (See diagram on
we
2.1
OBSERVE ALL LOCAL CODES AND ORDINANCES.
DO NOT USE AN EXTENSION CORD WITH
THIS APPLIANCE.
DO NOT, UNDER ANY CIRCUMSTANCES,
REMOVE THE POWER SUPPLY CORD
GROUNDING PRONG.
Electrical Shock and Fire Hazard
) Check with a qualified electrician if you
are in doubt as to whether the appliance
is properly grounded. Do not modify the
power supply cord plug - if it will not fit
the outlet, have a proper outlet installed
by a qualified electrician. Improper
connection of the equipment-grounding
conductor can result in a risk of electrical
shock.
* Do not use an extension cord with this
appliance. Such use may result in fire,
electrical shock or other personal injury.
l
Do not have a fuse in the neutral or
grounding circuit. This could result in a
risk of electrical shock.
ELECTRICAL REQUIREMENTS
SEE PAGE
115 volt models with amperes up
through 12.0
230 and 230/208 volt models with
amperes up through 12.0
230 and 230/208 volt models with
amperes up through 16.0
230 and 230/208 volt models with
amperes up through 24.0
4
5 5
6
7
Electrical Requirements
Continued
115 volt models with amperes
-
up through 12.0
Receptacle wiring
Receptacle wiring should be a minimum of
14 gauge. Use copper wire only. It is the responsibility of the consumer to provide proper and
adequate receptacle wiring, installed by a
qualified electrician. Observe National Electrical
Code and all local governing codes and ordinances.
Electrical requirements
A 115 volt (103.5 min., 126.5 max.), 60 Hz, AC
only, 15 ampere fused electrical supply is
required (time delay fuse or time delay circuit
breaker required). For models with serial plate
amperes of 7.6 through 12, it is required that a
separate circuit, serving only this appliance, be
provided.
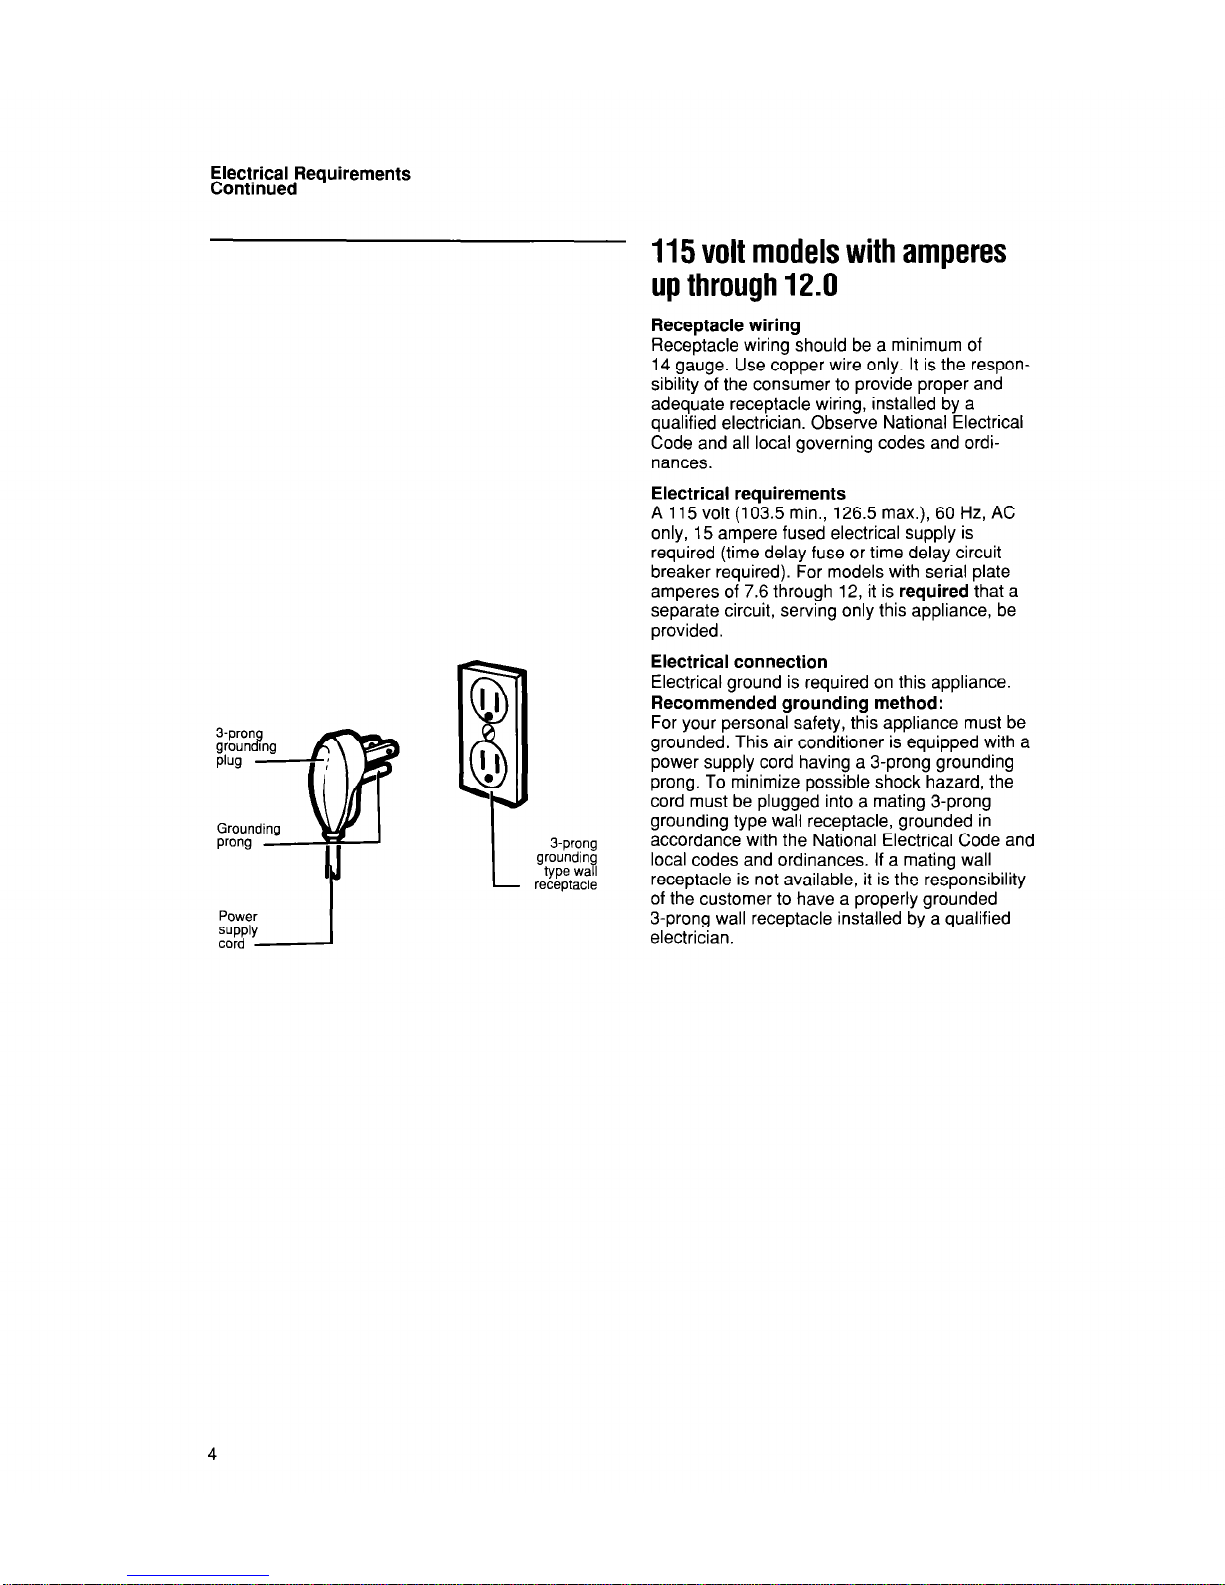
Electrical connection
II
Electrical ground is required on this appliance.
Recommended grounding method:
3prong
For your personal safety, this appliance must be
grounding
grounded. This air conditioner is equipped with a
Plug
%v-
8
!’
power supply cord having a 3-prong grounding
prong. To minimize possible shock hazard, the
cord must be plugged into a mating 3-prong
Grounding
grounding type wall receptacle, grounded in
prong
4
3prong
accordance with the National Electrical Code and
grounding
type wall
local codes and ordinances. If a mating wall
receptacle
receptacle is not available, it is the responsibility
of the customer to have a properly grounded
Power
W$lY
3-prong wall receptacle installed by a qualified
electrician.
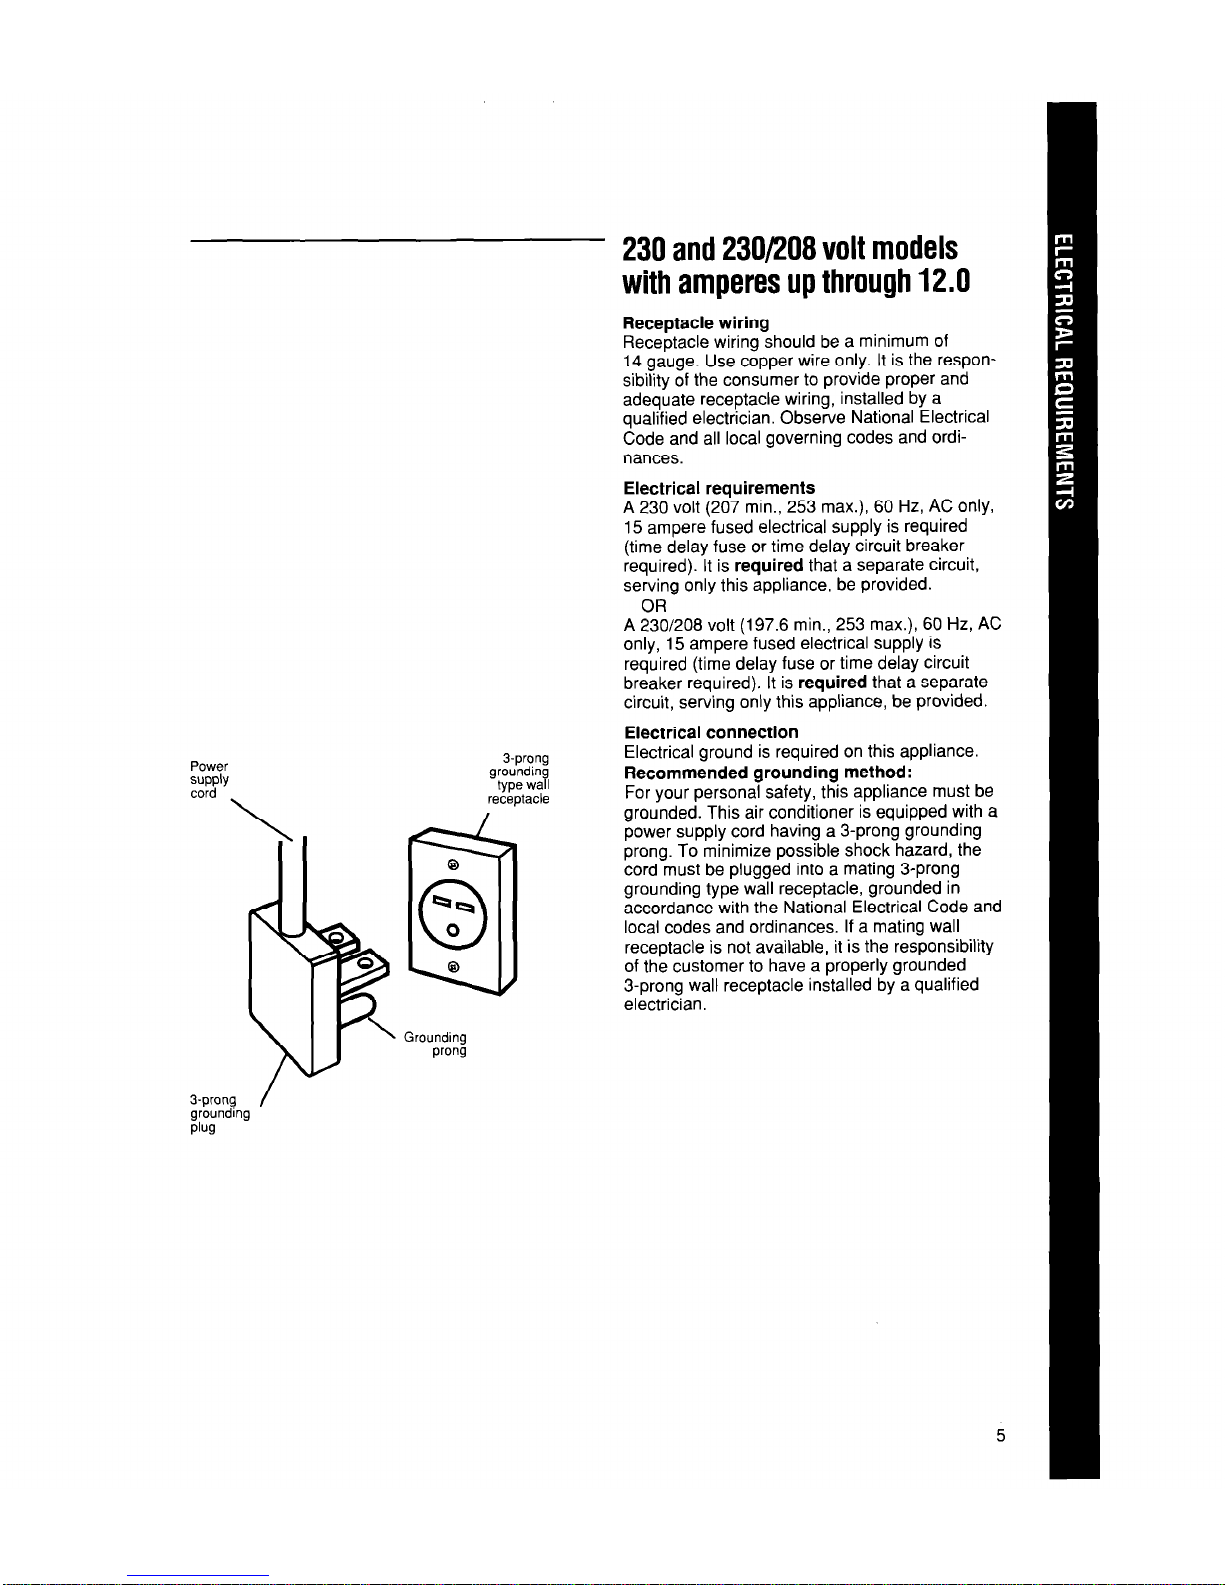
230 and 230/208 volt models
with amperes up through 12.0
Receptacle wiring
Receptacle wiring should be a minimum of
14 gauge. Use copper wire only. It is the responsibility of the consumer to provide proper and
adequate receptacle wiring, installed by a
qualified electrician. Observe National Electrical
Code and all local governing codes and ordinances.
Electrical requirements
A 230 volt (207 min., 253 max.), 60 Hz, AC only,
15 ampere fused electrical supply is required
(time delay fuse or time delay circuit breaker
required). It is required that a separate circuit,
serving only this appliance, be provided.
OR
A 230/208 volt (197.6 min., 253 max.), 60 Hz, AC
only, 15 ampere fused electrical supply is
required (time delay fuse or time delay circuit
breaker required). It is required that a separate
circuit, serving only this appliance, be provided.
Electrical connection
d-prong
grounding
type wall
receptacle
Electrical ground is required on this appliance.
Recommended grounding method:
For your personal safety, this appliance must be
grounded. This air conditioner is equipped with a
power supply cord having a 3-prong grounding
prong. To minimize possible shock hazard, the
cord must be plugged into a mating 3-prong
grounding type wall receptacle, grounded in
accordance with the National Electrical Code and
local codes and ordinances. If a mating wall
receptacle is not available, it is the responsibility
of the customer to have a properly grounded
3-prong wall receptacle installed by a qualified
electrician.
prong
3-prong
grounding
plug
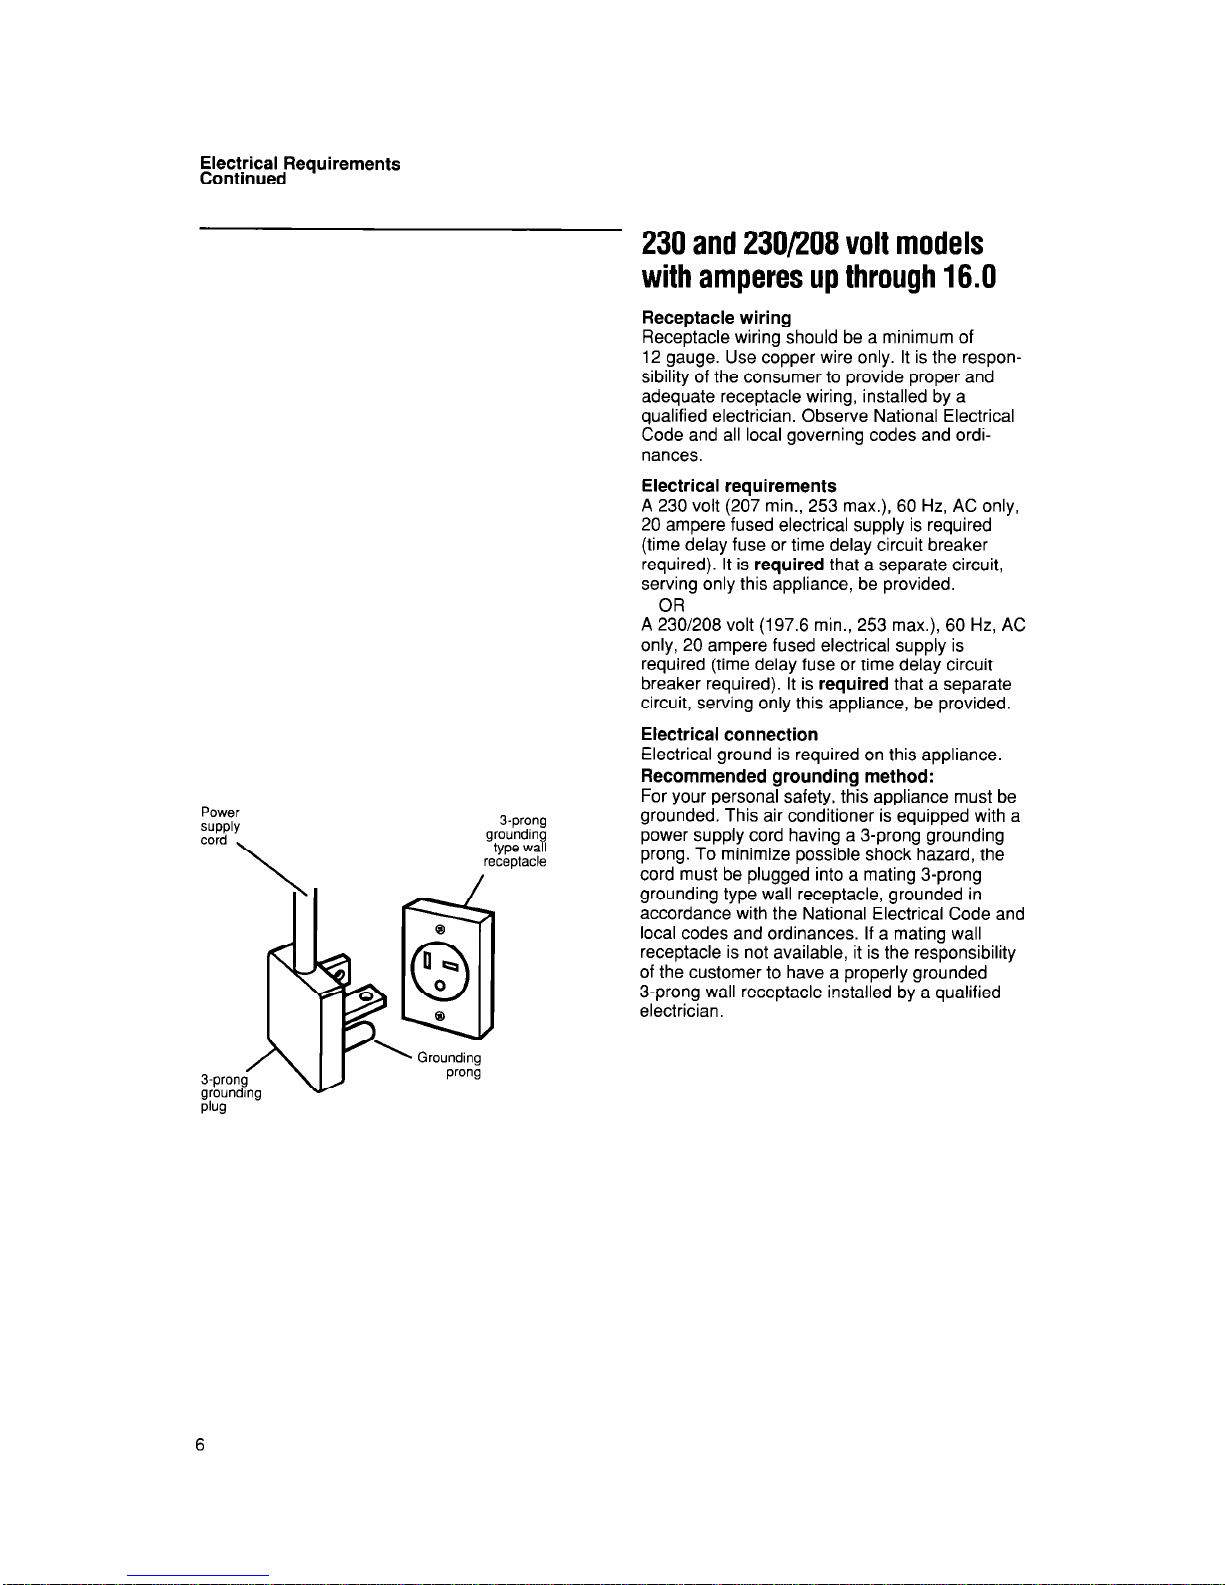
Electrical Requirements
Continued
230 and 230/208 volt models
with amperes up through 16.0
Receptacle wiring
Receptacle wiring should be a minimum of
12 gauge. Use copper wire only. It is the respon-
sibility of the consumer to provide proper and
adequate receptacle wiring, installed by a
qualified electrician. Observe National Electrical
Code and all local governing codes and ordinances.
Electrical requirements
A 230 volt (207 min., 253 max.), 60 Hz, AC only,
20 ampere fused electrical supply is required
(time delay fuse or time delay circuit breaker
required). It is required that a separate circuit,
serving only this appliance, be provided.
OR
A 230/206 volt (197.6 min., 253 max.), 60 Hz, AC
only, 20 ampere fused electrical supply is
required (time delay fuse or time delay circuit
breaker required). It is required that a separate
circuit, serving only this appliance, be provided.
Electrical connection
Power
SuPPlY
3-prong
grounding
type wall
Electrical ground is required on this appliance.
Recommended grounding method:
For your personal safety, this appliance must be
grounded. This air conditioner is equipped with a
power supply cord having a 3-prong grounding
prong. To minimize possible shock hazard, the
cord must be plugged into a mating 3-prong
grounding type wall receptacle, grounded in
accordance with the National Electrical Code and
local codes and ordinances. If a mating wall
receptacle is not available, it is the responsibility
of the customer to have a properly grounded
3-prong wall receptacle installed by a qualified
electrician.
Sprang
grounding
type wall
receptacle
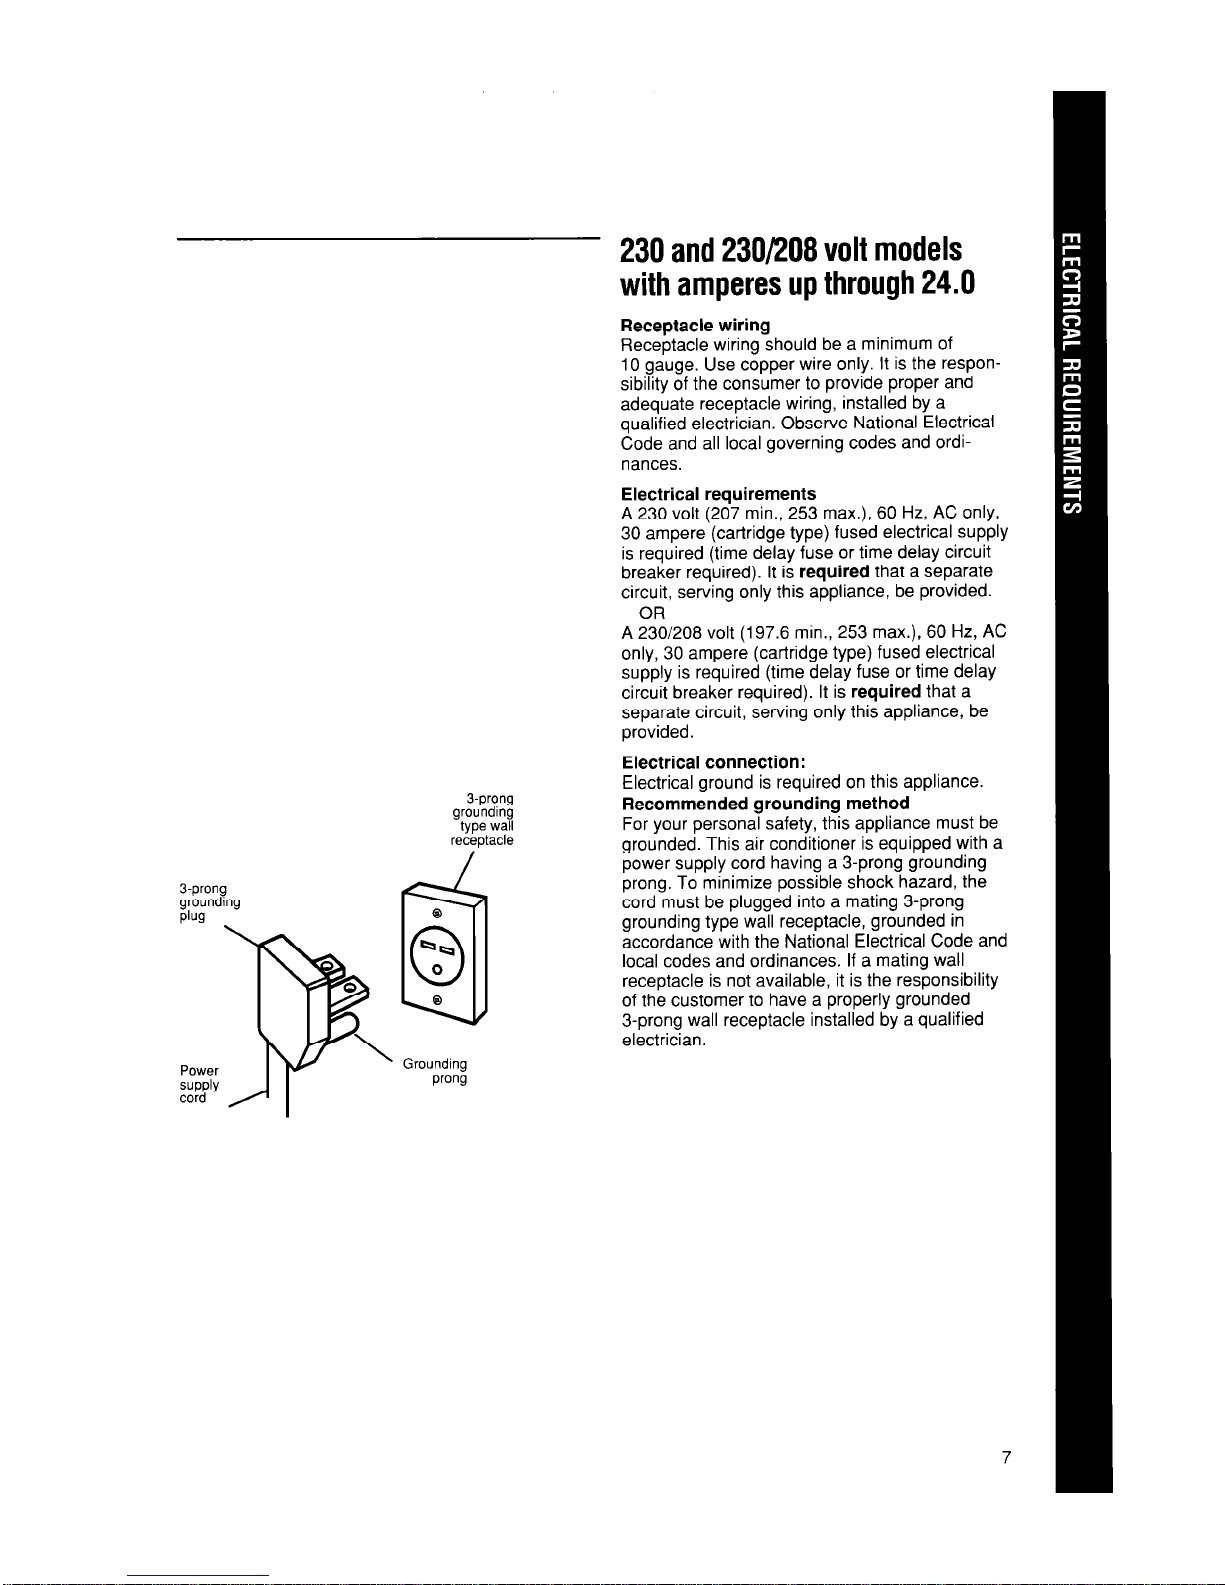
230 and 230/208 volt models
with amperes up through 24.0
Receptacle wiring
Receptacle wiring should be a minimum of
10 gauge. Use copper wire only. It is the responsibility of the consumer to provide proper and
adequate receptacle wiring, installed by a
qualified electrician. Observe National Electrical
Code and all local governing codes and ordi-
nances.
Electrical requirements
A 230 volt (207 min., 253 max.), 60 Hz, AC only,
30 ampere (cartridge type) fused electrical supply
is required (time delay fuse or time delay circuit
breaker required). It is required that a separate
circuit, serving only this appliance, be provided.
OR
A 230/206 volt (197.6 min., 253 max.), 60 Hz, AC
only, 30 ampere (cartridge type) fused electrical
supply is required (time delay fuse or time delay
circuit breaker required). It is required that a
separate circuit, serving only this appliance, be
provided.
Electrical connection:
Electrical ground is required on this appliance.
Recommended grounding method
For your personal safety, this appliance must be
grounded. This air conditioner is equipped with a
power supply cord having a 3-prong grounding
prong. To minimize possible shock hazard, the
cord must be plugged into a mating 3-prong
grounding type wall receptacle, grounded in
accordance with the National Electrical Code and
local codes and ordinances. If a mating wall
receptacle is not available, it is the responsibility
of the customer to have a properly grounded
3-prong wall receptacle installed by a qualified
electrician.
Power
WJdp’Y
7
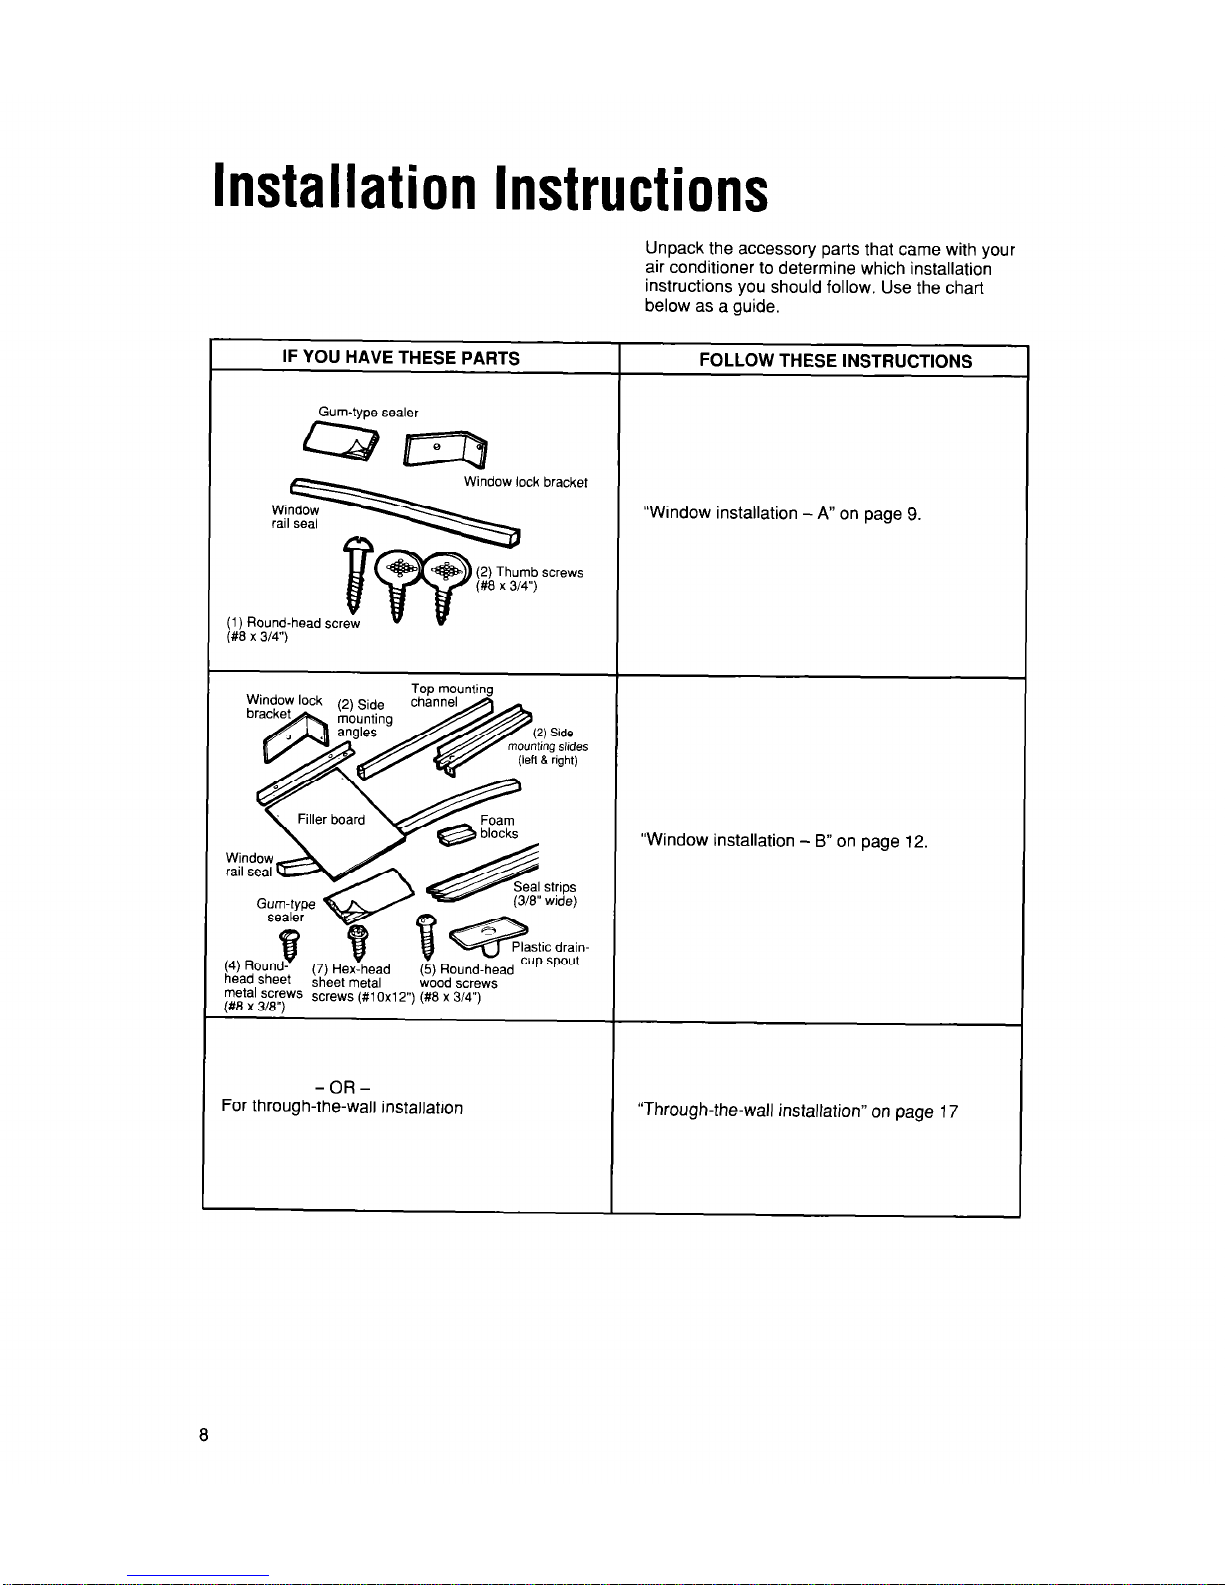
nstallation
nstructions
Unpack the accessory parts that came with your
air conditioner to determine which installation
instructions you should follow. Use the chart
below as a guide.
IF YOU HAVE THESE PARTS
FOLLOW THESE INSTRUCTIONS
Gum-type sealer
Qmil
Window lock
Top mountino
channel >
-
(38” wi&)
tj qy;-&.
(5) Round-head
wood screws
metal screws EPrPlllC ,113 nyj 2”) (#e x 3,d.t)
-OR-
For through-the-wall installation
“Window installation - A” on page 9.
“Window installation - B” on page 12.
“Through-the-wall installation” on page 17
8

Window installation - A
Gum-type sealer
am
To help avoid any installation problems and to
help ensure trouble-free performance of your new
air conditioner, read these installation instruc-
tions, as well as your operating instructions and
electrical requirements before installing your unit.
Personal Injury and Product Damage
Hazard
l
Because this air conditioner weighs about
75 to 125 pounds, it is recommended that
you have someone help you install your
new unit and that you both use proper
lifting techniques.
. Inspect the condition of the window
where the air conditioner will be installed.
Be sure it will support the weight of the
unit.
. This appliance must be installed accord-
ing to all applicable codes and ordinances.
l
Handle the air conditioner with care.
Watch out for the sharp metal fins on the
front and rear coils.
. Be sure your air conditioner does not fall
during installation.
. Do not use the water collected in unit for
drinking purposes. It is not sanitary.
Failure to follow the above precautions
could result in personal injury or product
damage.
1. Unpack accessory parts before installing
your air conditioner. Make sure you have all
the necessary parts. A normal installation can
be made with a screwdriver, small level,
pocket knife, tape measure, a drill and 3/32”
drill bit.
9
 Loading...