

Whirlpool R0158562 Owner's Manual
Instructions R0158562 for Installation of Water Valve Assembly R0175017
1. Disconnect power to refrigerator. Turn off water supply to refrigerator and remove hose coupling to valve.
Catch excess water using a bucket.
2. Unplug electrical supply to water valve assembly. Remove water valve and bracket. Save bracket mounting
screws.
3. Remove 1/4” ice maker and reservoir tubes from valve. Catch excess water using a bucket.
4. Remove 1/4” tube to ice maker fill tube at top rear of refrigerator.
5. Install B5705315 tube (¼” x 51”) to ice maker fill tube at top rear of refrigerator.
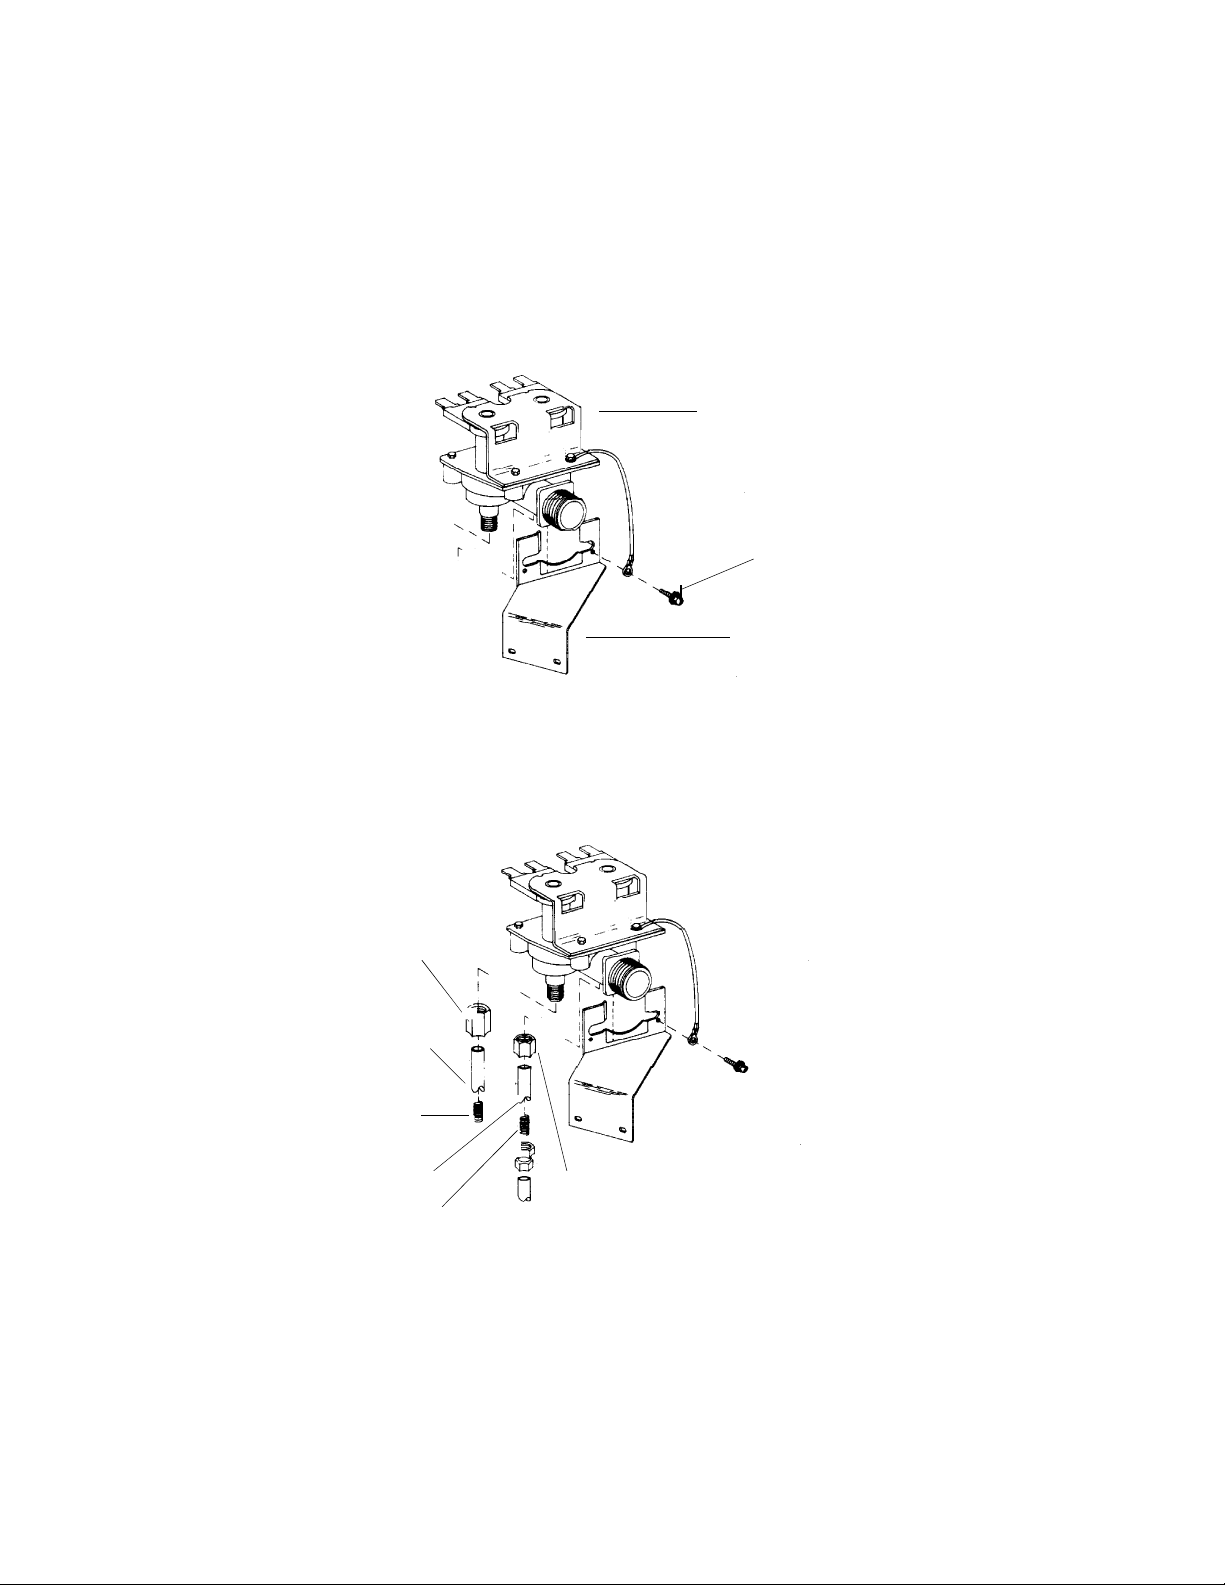
6. Attach water valve bracket (D7701602) to replacement water valve (D7742201). Attach grounding wire to bracket
with grounding screw (M0251017).
Replacement water
valve (D7742201)
Grounding screw
(M0251017)
Water valve bracket
(D7701602)
7. Install anti-kink spring (A1055101) in ¼” ice maker supply tube. Connect ¼” ice maker supply tube to ice maker
side of water valve using nut (M075301).
8. Install anti-kink spring (A1055102) in 5/16” x 12” tube (B8372601). Connect 5/16” x 12” tube to water reservoir
side of water valve using nut (M753012).
Nut (M075301)
1/4” tube (B5705315) to
ice maker fill tube
Anti-kink spring (A1055101)
5/16” x 12” tube (B8372601)
from reservoir side of valve
Anti-kink spring (A1055102)
Nut (M753012)
R0158562 Rev. 2
Page 1 of 2
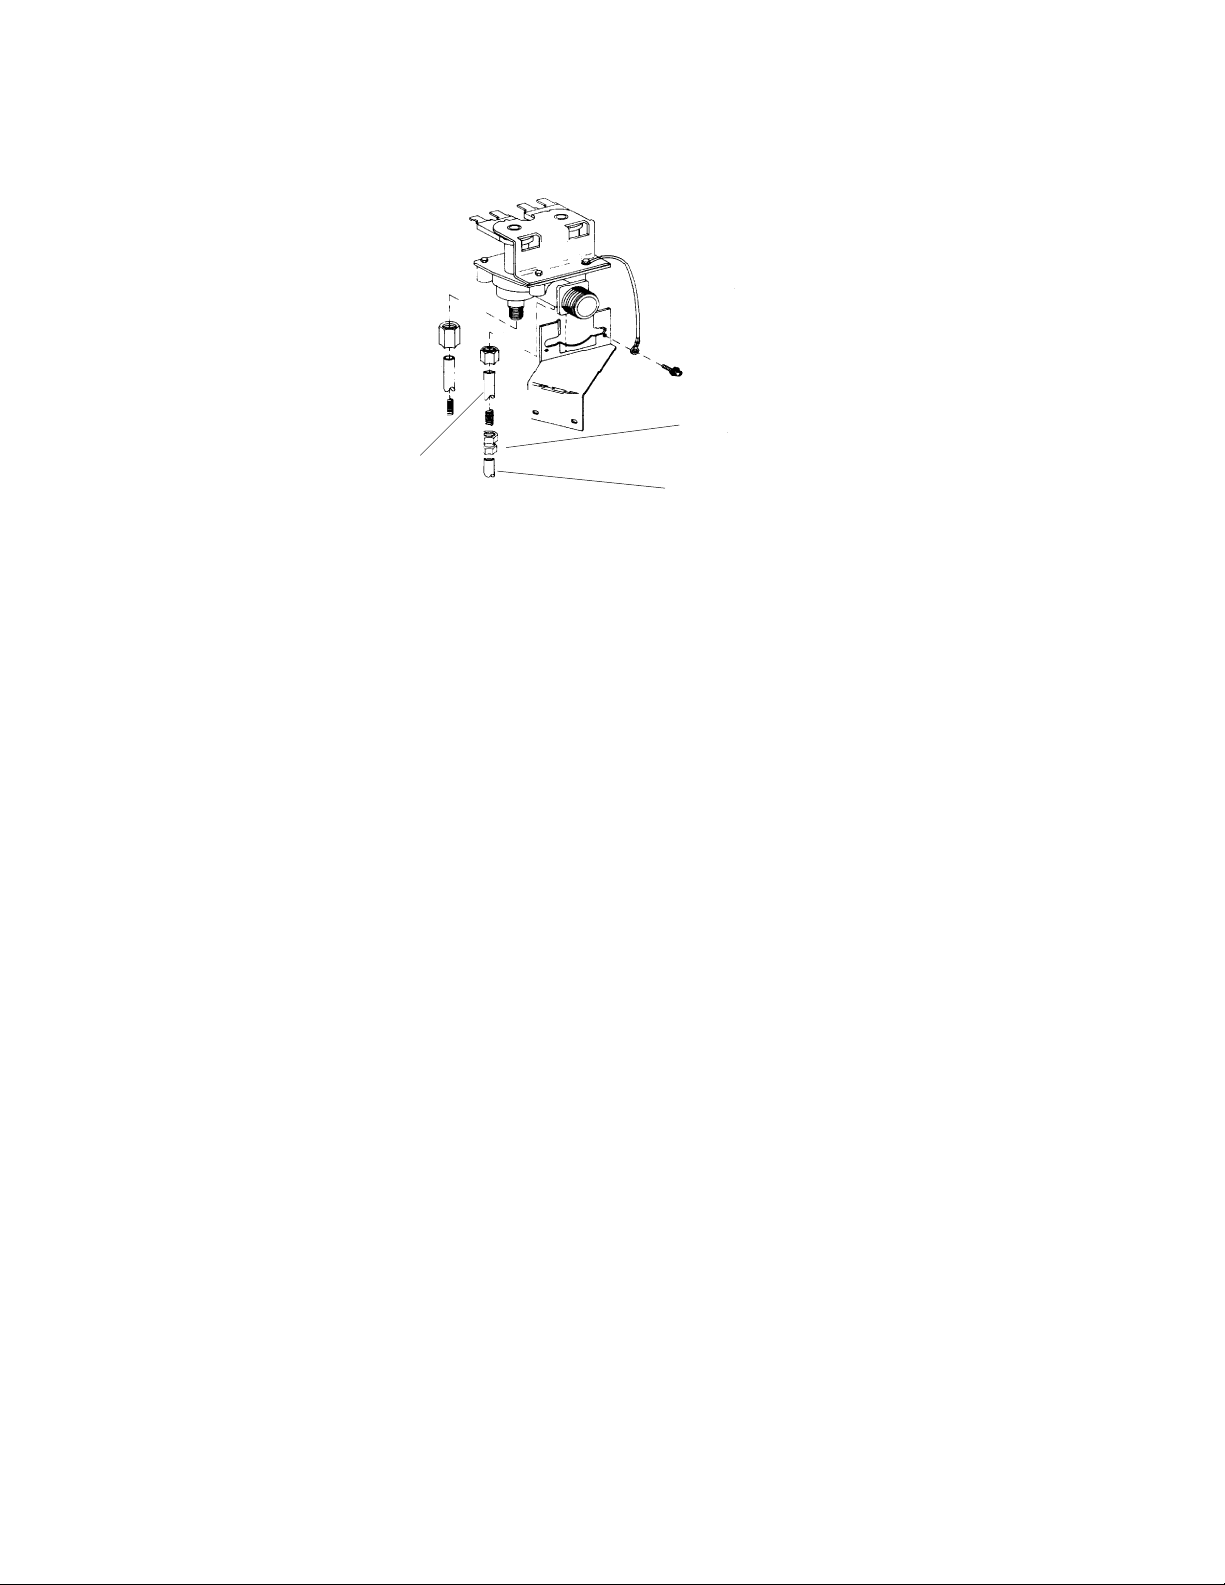
9. Mount replacement water valve bracket in original location using original screws.
10. Use 5/16” O.D. to 1/4” O.D. tube to tube coupling (B5706901) to connect 5/16” tubing to original 1/4” tubing
disconnected from water reservoir side of valve.
5/16” O.D. to 1/4” O.D. tube to tube
coupling (B5706901)
5/16” x 12” tube (B8372601)
from reservoir side of valve
11. Reconnect hose coupling to water valve assembly. Connect electrical connections at water valve terminals.
Turn on water supply to refrigerator. Connect power to refrigerator.
12. Press water dispenser handle in until water flows into glass.
13. Correct any leaks at water valve assembly and coupling.
14. Manually cycle ice maker (see service manual instructions for manufacturing number of product being serviced
to perform this procedure). Ice maker mold must be empty to manually cycle ice maker. Catch water fill in a
container and discard.
15. Correct any leaks at water valve assembly and where 1/4” tube connects to ice maker fill tube, at top rear of
refrigerator.
16. Repeat step 14. Catch water in a container graduated in cc’s.
• Proper fill should be 120 cc’s.
• Adjust fill screw on ice maker head until proper fill is obtained. See service manual for instructions.
17. Replace compressor compartment rear cover.
18. Reinstall refrigerator in proper location. Level refrigerator side to side and front to rear. Do not tilt refrigerator to
rear.
1/4” tube going to water
storage reservoir in refrigerator
R0158562 Rev. 2
Page 2 of 2
 Loading...