How it Works
Log In / Sign Up
Buy Points
How it Works
FAQ
Contact Us
Questions and Suggestions
Users
Whirlpool
Loading...
O
OV7
OV9
OV 9M1 S
OV 9M1 W
OV A00
OV A 01
2
OV A01 S
9
OV A 10
OV A11
OV A11 S
OV B 00
OV B01
2
OV B01 B
6
OV B01 BG
7
OV B01 G
4
OV B01 W
9
OV B02 S
9
OV B 10
OV B11
2
OV B11 B
4
OV B11 BG
5
OV B11 G
4
OV B11 W
4
OV B12 S
2
OV B 31
2
OV B32 B
7
OV B32 G
7
OV B32 S
5
OV B32 W
7
OV B41
OV B41 B
5
OV B41 BG
4
OV B41 G
6
OV B41 W
2
OV C00 S
8
OV C10 S
4
OV C31 S
5
OV C40
2
OV C40 S
5
OV D00 AN
2
OV D00 S
8
OV D00 WF
8
OV D10
OV D10 AN
OV D10 S
3
OV D10 WF
6
OV D30
OV D30 S
OV D40
OV D40 AN
3
OV D40 S
4
oven all models
2
OV F 41
OV G00
OV G005 AN
2
OV G005 S
3
OV G00 S
OV G105 AN
OV G105 S
OV G305 S
OV G40
OV G405 AN
OV M01 AN
5
OV M01 WF
10
OV M11 AN
OV M11 WF
OV M41
OV M41 AN
4
OVN 600
2
OVN 608 S
6
OVN 608 W
6
OVN 610
OVN 618 S
OVN 618 W
2
OVN 640
2
OVN 648 S
2
OVN 648 W
2
OVN 900
2
OVN 908 S
9
OVN 910
OVN 918 S
2
OVN 918 W
OVN 940
2
OVN 948 S
3
OVN 948 W
2
OV T005 AN
3
OV T005 S
3
OV T105 AN
OV T405 AN
OV T405 S
OVU B00
2
OVU B40
2
OVU B41
2
OWFC 3C26
9
OWFC3C26X
4
OWFE 2C28 X
4
P
P MAX 169/1
2
P MAX 169/1 IS
2
P MAX 188/1
2
P MAX 189/1
2
Loading...
Loading...
Nothing found
OV G00
User Manual
92 pgs
14.88 Mb
0
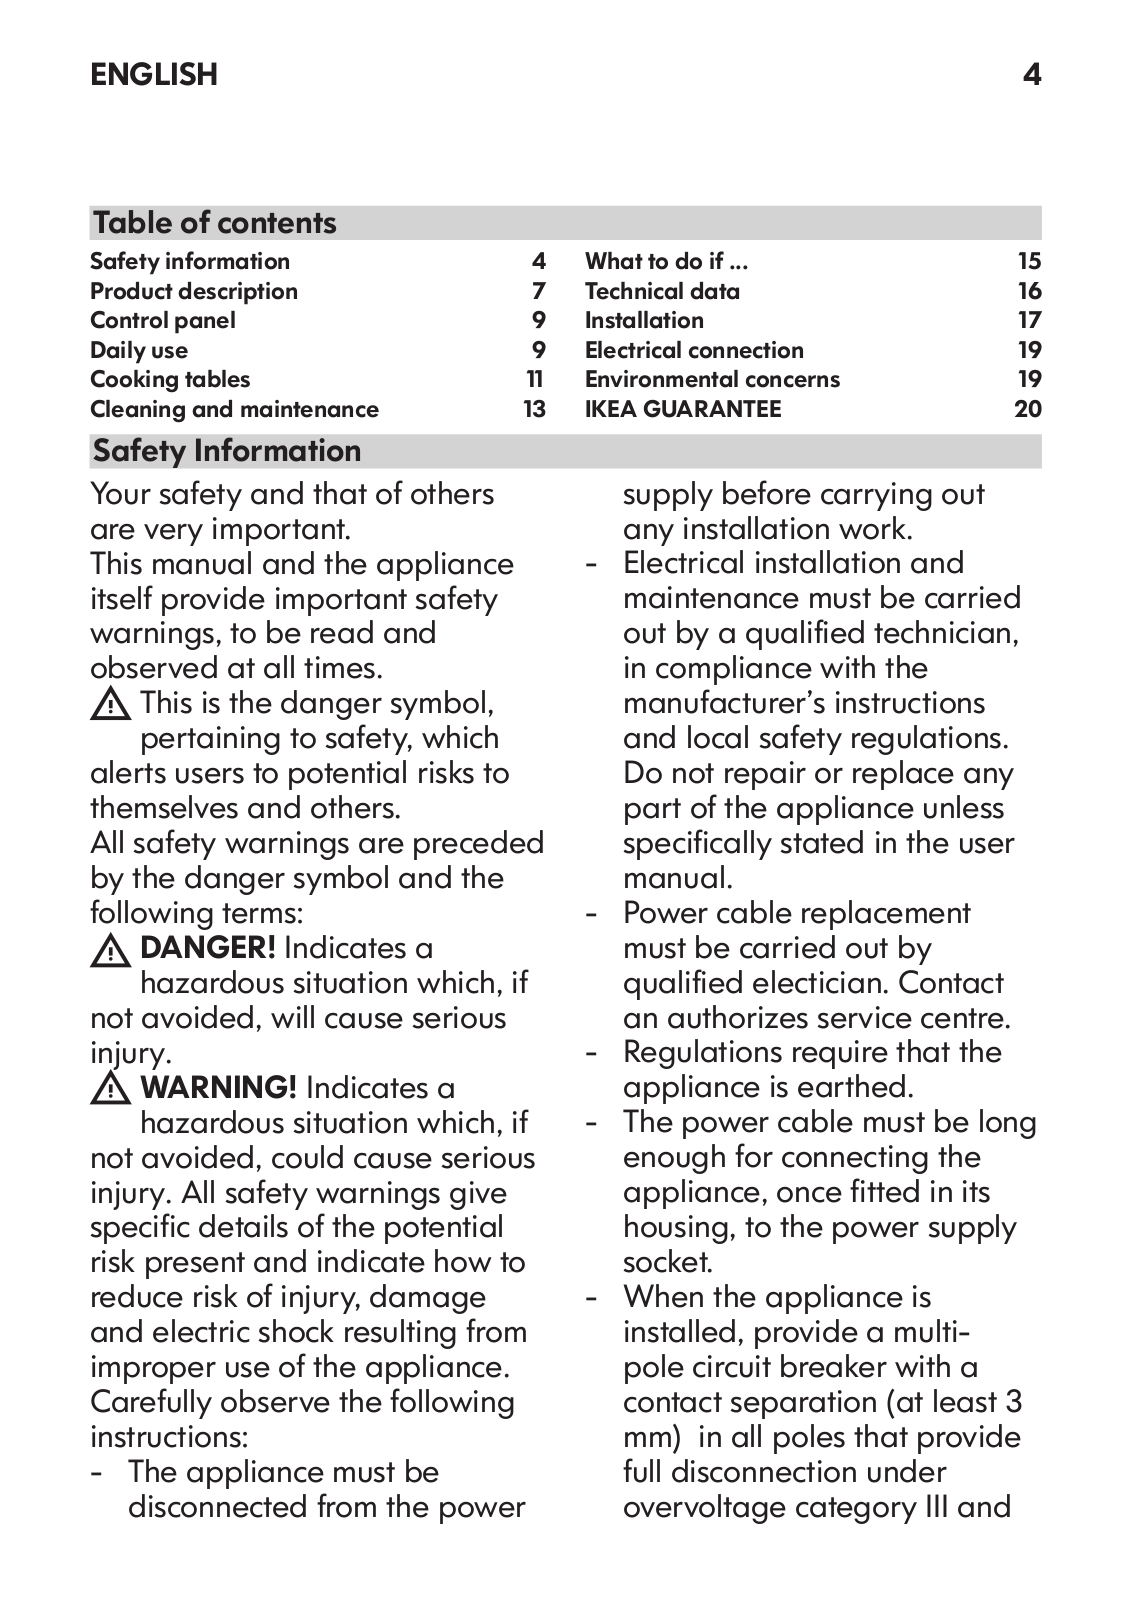
Table of contents
Loading...
Whirlpool OV G00 User Manual
...
Whirlpool User Manual
Download
Specifications and Main Features
Frequently Asked Questions
User Manual
Download
Loading...
+
64
hidden pages
Unhide
You need points to download manuals.
1 point = 1 manual.
You can buy points or you can get point for every manual you upload.
Buy points
Upload your manuals
 Loading...