

Page 1
V-ZUG Ltd
Microwave
Miwell-Combi SL
Operating instructions
Page 2
Thank you for choosing to buy one of our products. Your appliance is made
to high standards and is easy to use. Nevertheless, please take the time to
read these operating instructions in order to familiarize yourself with the
appliance and get the best use out of it.
Please follow the safety precautions.
Modifications
Text, diagrams and data correspond to the technical standard of the
appliance at the time these operating instructions went to press. The right to
make technical modifications for the purpose of the further development of
the appliance is reserved.
Symbols used
Denotes important safety precautions. Failure to observe said
precautions can result in injury or damage to the appliance or
fittings!
A Indicates step-by-step instructions.
– Describes how the appliance reacts to the steps taken.
䡲 Indicates a list.
Denotes useful tips for the user.
Validity
The model number corresponds to the first three digits on the identification
plate. These operating instructions apply to the models:
Type Model no. Size system
MWC-SLZ 946 55-381
MWC-SLZ/60 947 60-381
Variations depending on the model are noted in the text.
© V-ZUG Ltd, CH-6301 Zug, 2010
2
Page 3

Contents
Safety precautions 5
Before using for the first time . . . . . . . . . . . . . . . . . . . . . . . . 5
Correct use . . . . . . . . . . . . . . . . . . . . . . . . . . . . . . . . . . . . . . 6
Children in the home . . . . . . . . . . . . . . . . . . . . . . . . . . . . . . 6
Note on use . . . . . . . . . . . . . . . . . . . . . . . . . . . . . . . . . . . . . 7
Microwave . . . . . . . . . . . . . . . . . . . . . . . . . . . . . . . . . . . . . 10
Note on accessories . . . . . . . . . . . . . . . . . . . . . . . . . . . . . . 12
Appliance description 14
Construction . . . . . . . . . . . . . . . . . . . . . . . . . . . . . . . . . . . . 14
Operating and display elements . . . . . . . . . . . . . . . . . . . . . 15
Accessories . . . . . . . . . . . . . . . . . . . . . . . . . . . . . . . . . . . . 16
Ventilation fan . . . . . . . . . . . . . . . . . . . . . . . . . . . . . . . . . . . 18
Installation . . . . . . . . . . . . . . . . . . . . . . . . . . . . . . . . . . . . . . 18
Operating the appliance 19
Using for the first time . . . . . . . . . . . . . . . . . . . . . . . . . . . . 19
Start protection . . . . . . . . . . . . . . . . . . . . . . . . . . . . . . . . . . 20
Example . . . . . . . . . . . . . . . . . . . . . . . . . . . . . . . . . . . . . . . 20
User settings 22
Childproof lock . . . . . . . . . . . . . . . . . . . . . . . . . . . . . . . . . . 24
Time display . . . . . . . . . . . . . . . . . . . . . . . . . . . . . . . . . . . . 24
Illumination . . . . . . . . . . . . . . . . . . . . . . . . . . . . . . . . . . . . . 25
Acoustic signal . . . . . . . . . . . . . . . . . . . . . . . . . . . . . . . . . . 25
Temperature unit . . . . . . . . . . . . . . . . . . . . . . . . . . . . . . . . . 25
Time format . . . . . . . . . . . . . . . . . . . . . . . . . . . . . . . . . . . . 25
Factory settings . . . . . . . . . . . . . . . . . . . . . . . . . . . . . . . . . 25
Time functions 26
Setting / Changing the time . . . . . . . . . . . . . . . . . . . . . . . . 26
Timer . . . . . . . . . . . . . . . . . . . . . . . . . . . . . . . . . . . . . . . . . 27
Operating time . . . . . . . . . . . . . . . . . . . . . . . . . . . . . . . . . . 28
Delayed start . . . . . . . . . . . . . . . . . . . . . . . . . . . . . . . . . . . 29
3
Page 4

… Contents
Operating modes 32
Power&Favorit . . . . . . . . . . . . . . . . . . . . . . . . . . . . . . . . . . . 34
CombiCrunch . . . . . . . . . . . . . . . . . . . . . . . . . . . . . . . . . . . 34
AutomaticPlus . . . . . . . . . . . . . . . . . . . . . . . . . . . . . . . . . . . 35
Combi mode . . . . . . . . . . . . . . . . . . . . . . . . . . . . . . . . . . . . 37
Tips on settings 38
Optimal use . . . . . . . . . . . . . . . . . . . . . . . . . . . . . . . . . . . . . 38
Heating up . . . . . . . . . . . . . . . . . . . . . . . . . . . . . . . . . . . . . . 39
Defrosting . . . . . . . . . . . . . . . . . . . . . . . . . . . . . . . . . . . . . . 40
Simultaneous defrosting and cooking . . . . . . . . . . . . . . . . . 41
Care and maintenance 46
Cleaning the exterior . . . . . . . . . . . . . . . . . . . . . . . . . . . . . . 46
Cleaning the appliance door . . . . . . . . . . . . . . . . . . . . . . . . 46
Cleaning the cooking space . . . . . . . . . . . . . . . . . . . . . . . . 47
Cleaning the accessories . . . . . . . . . . . . . . . . . . . . . . . . . . 48
Replacing a defective light bulb . . . . . . . . . . . . . . . . . . . . . 48
Trouble-shooting 49
What to do if … . . . . . . . . . . . . . . . . . . . . . . . . . . . . . . . . . . 49
After a power failure . . . . . . . . . . . . . . . . . . . . . . . . . . . . . . 51
Accessories and spare parts 52
Technical data 53
Disposal 54
Notes 55
Index 56
Repair service 59
Quick instructions 60
4
Page 5

Safety precautions
The appliance corresponds to recognised technology standards
and the relevant safety regulations. Proper use of the appliance is
however essential to avoid damage and accidents. Please therefore follow the precautions given in these operating instructions.
In accordance with the requirements of IEC 60335-1:
䡲 This appliance is not intended for use by persons (including children) with
reduced physical, sensory or mental capabilities, or lack of experience and
knowledge, unless supervised or unless they have been given instruction
concerning the use of the appliance by a person responsible for their
safety.
In a serviceable microwave appliance the microwave energy remains
in the appliance and is therefore harmless. Operation is automatically
interrupted on opening the appliance door.
Before using for the first time
䡲 The appliance must be installed and connected up to the power supply in
accordance with the separate installation instructions. The necessary work
should be done by a qualified fitter or electrician.
䡲 Dispose of the packaging material in accordance with local regulations.
䡲 Before using the newly installed appliance for the first time, please follow
the advice in the 'Using for the first time' section.
䡲 Make the desired user settings.
5
Page 6

… Safety precautions
Correct use
䡲 The appliance is designed for use in the home for preparing food. Do not
flambé or prepare food using a lot of fat in the cooking space! No liability
is assumed for any damage caused by improper or incorrect use.
䡲 Never use the appliance for drying animals, fabrics or paper!
䡲 Do not use the appliance as a room heater.
䡲 Any repairs, modifications or manipulations to the appliance, especially to
any electrical parts, may only be carried out by the manufacturer, its
Customer Services or similarly qualified persons. Repairs if carried out
incorrectly may cause serious injury, damage to the appliance and fittings,
as well as affect the functioning of the appliance. If the appliance is not
working properly or in case of a repair order, follow the instructions given
in the 'Repair service' section. Please contact Customer Services if
necessary.
䡲 Use original spare parts only.
䡲 Retain these operating instructions for future reference. If you sell the
appliance or pass it on to a third party, please ensure these operating
instructions accompany the appliance, together with the instructions on
installation. In this way, the new owners can inform themselves about how
to use the appliance correctly and read the pertinent safety precautions.
Children in the home
䡲 Packaging material, e.g. plastic and polystyrene, can be dangerous for
children. Danger of suffocation! Please keep packaging material away from
children.
䡲 The appliance is designed for use by adults who are familiar with these
operating instructions. Children are often unable to recognise the danger
of electrical appliances. Ensure proper supervision and do not allow
children to play with the appliance – there is a danger that children can
hurt themselves.
䡲 Use the childproof locking facility.
6
Page 7

… Safety precautions
Note on use
䡲 If the appliance is visibly damaged, do not use it. Contact our Customer
Services.
䡲 If the appliance is not operating property, disconnect it from the power
supply immediately.
䡲 Ensure the mains cables of other electrical appliances do not get caught
in the door of the appliance, as the electrical cable insulation could get
damaged.
䡲 If the mains cable of the appliance is damaged, it must be replaced by
Customer Services in order to avoid hazard.
䡲 Ensure there are no foreign bodies or pets in the cooking space before
closing the appliance door.
䡲 Objects that could pose a danger if the appliance were accidentally
switched on should not be stored in the cooking space. Do not store food
nor any temperature-sensitive or inflammable materials, e.g. cleaning
agents, oven sprays, etc., in the cooking space.
Caution: Danger of injury!
䡲 Be careful that fingers do not get caught in the door hinges. Otherwise, if
the appliance door is moved, there is a risk of injury. Particular care should
be taken when children are around.
䡲 An open appliance door poses danger of tripping or injury! Do not sit or
rest on the appliance door or use it as a storage surface.
7
Page 8

… Safety precautions
Caution: Burns hazard!
䡲 Accessible parts of the appliance can get hot when in use. Keep children
away!
䡲 The appliance, the appliance door and especially the glass get very hot
when in use.
䡲 Steam may escape from the cooking space when the appliance door is
opened. Do not put your hands into the cooking space if there is steam in
it!
䡲 Overheated fat and oil can easily catch fire. Heating oil in the cooking
space to sear meat is dangerous and should not be done. Never try to
extinguish burning oil or fat with water (danger of explosion)! Extinguish the
flames using a fire blanket and keep all doors and windows closed.
䡲 Do not pour spirits (e.g. brandy, whisky, schnapps, etc.) over hot food –
danger of explosion!
䡲 Accessories get hot in the cooking space. Always wear protective gloves
or use oven cloths.
䡲 If you notice smoke possibly coming from a fire in the appliance or inside
the cooking space, keep the appliance door closed and disconnect the
appliance from the mains supply.
䡲 The appliance will remain hot for some time after it is switched off and cool
down only slowly to room temperature. Allow sufficient time for the
appliance to cool down before, for instance, cleaning it.
䡲 Do not leave the appliance unsupervised when drying herbs, bread, mush-
rooms, etc. If the foodstuff dries out too much, this can pose a fire hazard.
8
Page 9

… Safety precautions
How to avoid damaging the appliance
䡲 The construction of the appliance may not be changed in any way. Do not
apply force to or interfere with the appliance door or the control and safety
devices. The illumination may only be replaced by our Customer Services.
䡲 Always keep the appliance clean. Clean the appliance door with mild
detergent.
䡲 Take care not to damage the appliance door, the door frame and the door
hinges.
䡲 Do not use abrasive cleaning agents or cleaning aids such as steel wool,
knives, glass scrapers, razor blades, etc. to clean the door glass. Scratches on the door glass could cause a breakage.
䡲 Close the appliance door carefully.
䡲 When cleaning the appliance make sure no water can get into the inside
of the appliance. Use only a moderately damp cloth. Do not spray the
inside or outside of the appliance with water. Do not use a steam cleaner.
If water gets inside the appliance, it can cause damage.
9
Page 10

… Safety precautions
Microwave
䡲 Microwave energy is safe when used properly. When the appliance door is
opened, microwave operation is automatically interrupted. In the event of a
malfunction or damage to the appliance, especially to the appliance door,
do not use microwave operation. The appliance must be repaired by
qualified personnel.
䡲 Ensure that nothing is trapped between the appliance door and the frame.
䡲 Do not switch the microwave on until you have put the food in the cooking
space.
Heating foods and liquids
䡲 Do not leave your appliance unattended when heating or cooking food in
containers that are made of plastic, paper or other flammable materials.
The containers can melt or ignite.
䡲 Do not heat beverages or food that contain alcohol. Ignition hazard and
danger of explosion!
䡲 When heating liquids, place a teaspoon in the vessel to prevent delayed
boiling (or superboiling). With delayed boiling, boiling point is reached
without the typical steam bubbles forming. Disturbing an open vessel, even
slightly, can cause the liquid to shoot out – risk of scalding!
䡲 Do not use vessels with a narrow spout.
䡲 Stir liquids halfway through heating and when the time is up allow the
vessel to stand in the cooking space for a short time. Stir the contents once
more and then take the vessel out of the cooking space.
䡲 Infant food in jars or bottles must be heated without the lid, top or teat.
Infant food must be stirred or shaken well after being heated. It is imperative to check the temperature of the food before giving it to the infant – risk
of scalding!
䡲 Do not heat food in tightly sealed containers (tins, bottles, sealed foil, paper
or metal disposable packaging). Remove plastic packaging before
cooking or defrosting foods. Sealed containers can explode. Always open
the containers.
10
Page 11

… Safety precautions
䡲
Sensitive zones of food, e.g. poultry wings or legs may be shielded using
a little alu foil. Aluminium reflects the microwaves, thus preventing the food
from drying out. Make sure there is always at least 2 cm space between
the metal foil and the walls of the cooking compartment walls. Otherwise
arcing can occur which can damage your appliance.
䡲 The cooking time depends on the quantity, nature and initial temperature
of the food, as well the dishes being used. Always start with the shorter
cooking time given to avoid overcooking the food. Otherwise, smaller
quantities or food with a low moisture content can dry out and possibly
ignite. If the food has not reached the right stage of cooking when the time
is up, then extend the cooking time.
䡲 Prick food with a skin or peel such as potatoes, tomatoes, sausages, shell
food, etc. with a fork. Otherwise, the steam that is produced will be unable
to escape and may cause the food to explode.
䡲 Do not cook eggs in the shell. Do not heat up boiled eggs. Eggs can
explode in the microwave. Crack the eggs open and then whisk them.
Pierce the yolks of fried eggs.
11
Page 12

… Safety precautions
Note on accessories
The accessories get very hot during use – burns hazard!
Turntable roller and glass turntable
䡲 Use the appliance at all times and exclusively with the turntable roller and
the glass turntable supplied. Do not use any other such accessories in your
appliance.
䡲 Allow the glass turntable to cool down first before cleaning it or rinsing it
with water.
䡲 Do not cook food directly on the glass turntable.
䡲 Do not place hot food or containers on the glass turntable when it is cold.
䡲 Do not place frozen food or containers on the glass turntable when it is hot.
CombiCrunch plate
䡲 The CombiCrunch plate may not be used in Microwave or Combi mode
together with the wire rack.
䡲 Never use the CombiCrunch plate as a stand for other dishes or
containers.
Low, or high wire rack
䡲 If just using the microwave function, the use of the wire racks is not
recommended.
䡲 In the combi mode, do not place metal objects (aluminium dishes, meat
skewers) directly on the wire rack. Always place a plate between them.
Otherwise, arcing can occur which will damage your appliance.
䡲 Always place the wire rack in the centre of the glass turntable.
12
Page 13

… Safety precautions
Dishes
䡲 Use only heat-resistant, microwave-proof dishes, such as glass, ceramic,
porcelain or temperature-resistant plastics. Microwaves can penetrate
these materials. Microwaves cannot or can only partially penetrate metal
dishes; food in this instance will remain cold.
䡲 Only use dishes with a metal decor, e.g. a gold rim, or aluminium contain-
ers if the manufacturer guarantees their microwave compatibility. This also
applies to products made from recycled paper.
䡲 Ensure dishes do not touch the sides of the cooking space as they rotate.
䡲 Do not use a meat thermometer. In the microwave mode, a meat thermom-
eter can, due to its construction, cause arcing, which will damage your
appliance!
䡲 Porcelain, ceramic and earthenware dishes with cavities – which can fill
with water – can crack. Follow the manufacturers’ instructions!
13
Page 14
Appliance description
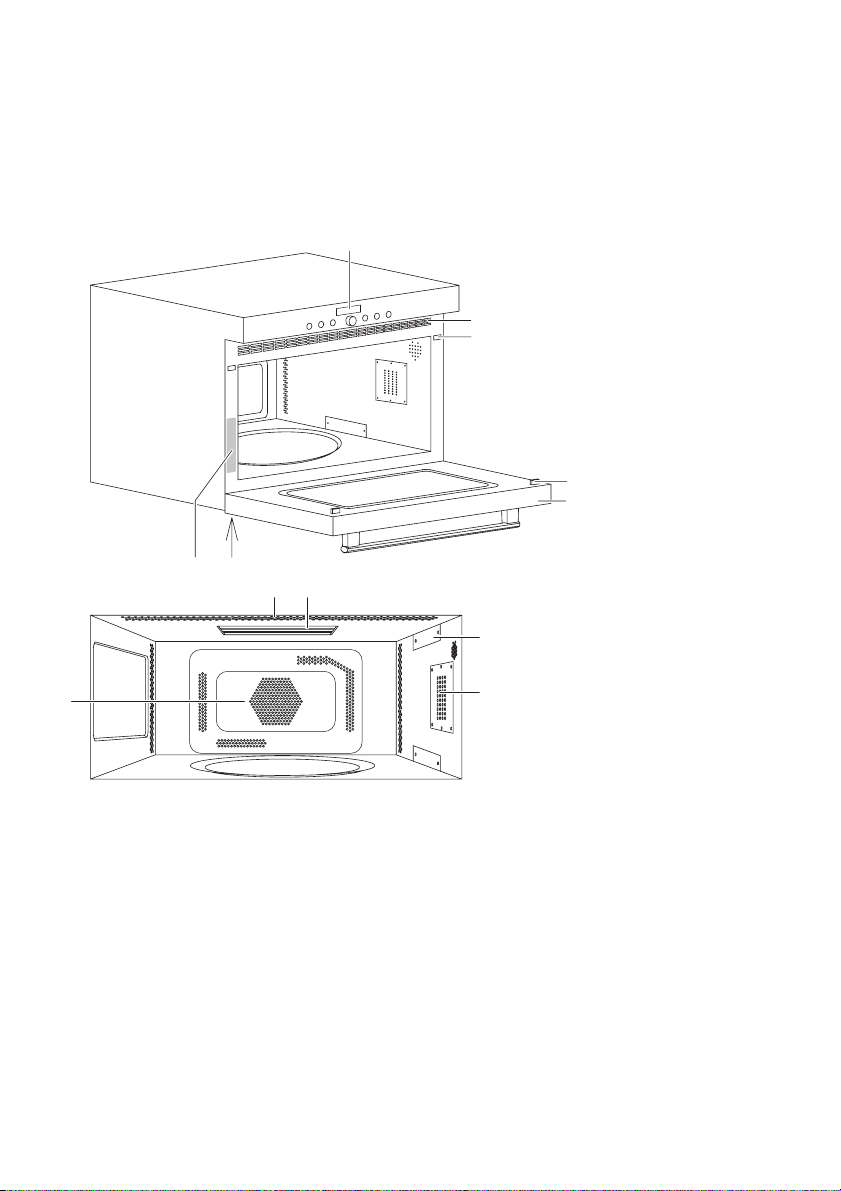
Construction
4
9
84
1
4
3
3
2
7
5
1 Operating and display elements
2 Appliance door
3 Safety lock
4 Ventilation slots
5 Hot air fan
14
6
6 Illumination
7 Microwave inlet
8 Grill
9 Identification plate
Page 15
… Appliance description
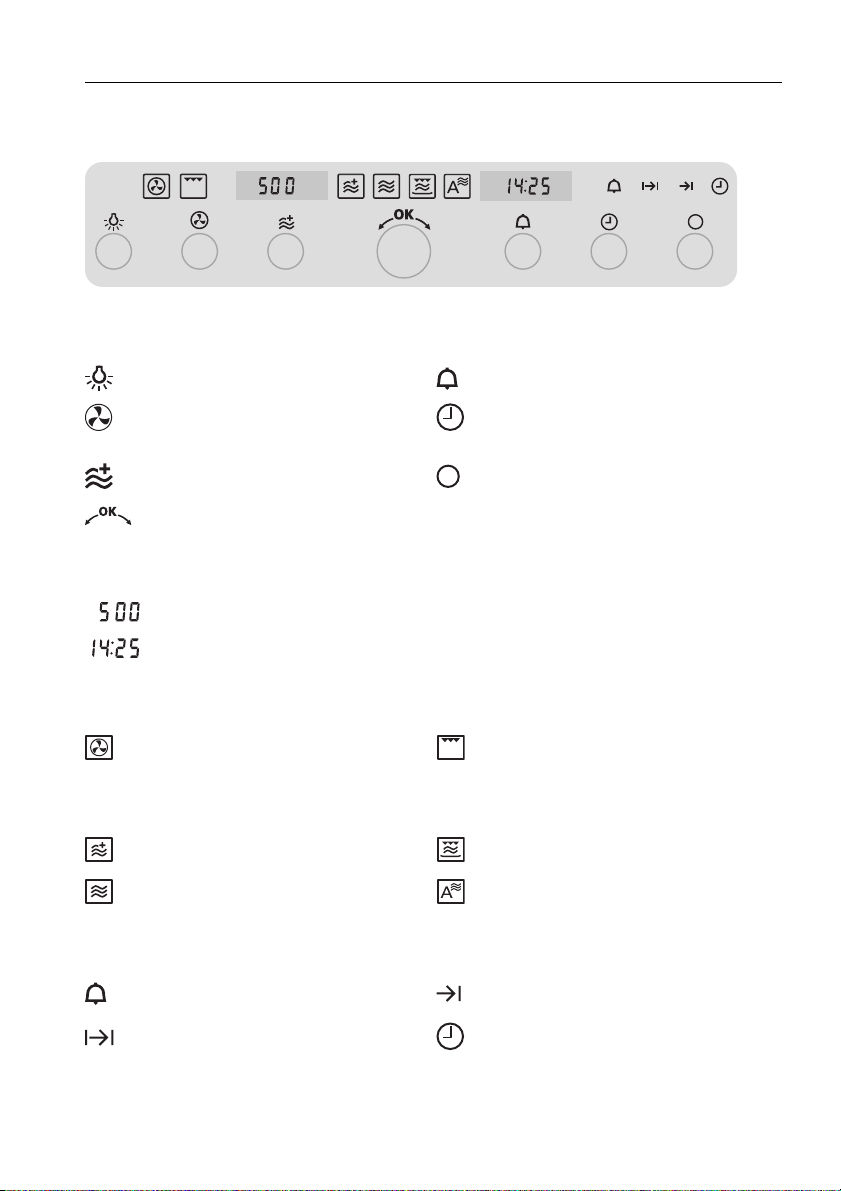
Operating and display elements
Buttons
Illumination Timer
Operating modes Time, operating time,
Microwave operating modes Off
Adjusting knob
Displays
Microwave power level, temperature
switch-off time
Time, operating time, switch-off time, timer, etc.
Operating modes
Hot air Grill
Microwave operating modes
Power&Favorit CombiCrunch
Microwave AutomaticPlus
Symbols
Timer Switch-off time
Operating time Time
15
Page 16
… Appliance description
Accessories
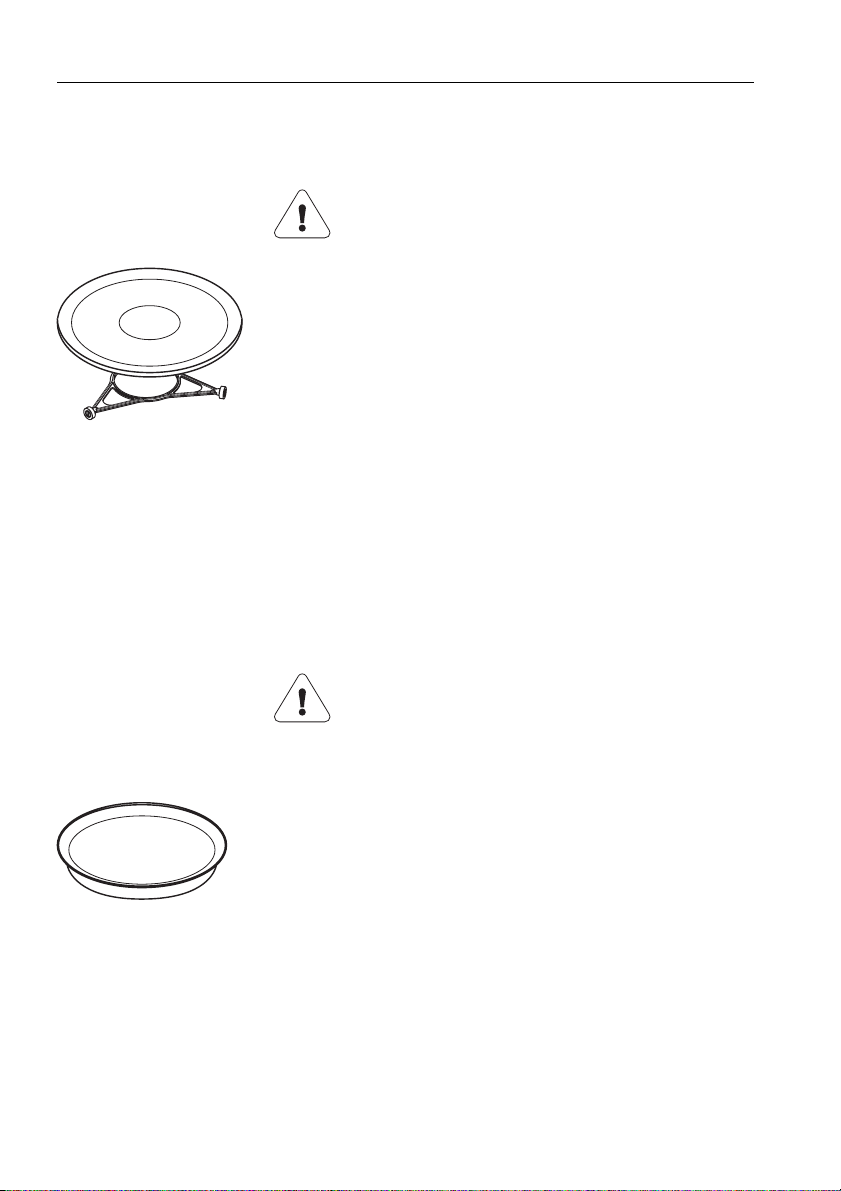
Turntable roller and glass turntable
Do not place any object other than the
glass turntable directly on the turntable
roller.
A Place the turntable roller in the fitting in the floor of
the cooking space.
A Position the glass turntable on the turntable roller
so that the pegs on the base of the glass turntable
engage in the corresponding recesses of the turntable drive in the floor of the cooking space.
The glass turntable can turn clockwise or anticlockwise.
A The glass turntable must be used with all operating
modes. It collects meat juices and food particles,
preventing unnecessary soiling of the cooking
space floor.
16
CombiCrunch plate
The CombiCrunch plate gets very hot
during use – risk of burns!
Using knives or cutting wheels on the
CombiCrunch plate will visibly damage the
surface.
䡲 Use the CombiCrunch plate to achieve crisp
browning of the food.
A Place the food directly on the CombiCrunch plate.
A Always use the glass turntable underneath the
CombiCrunch plate.
Page 17
… Appliance description
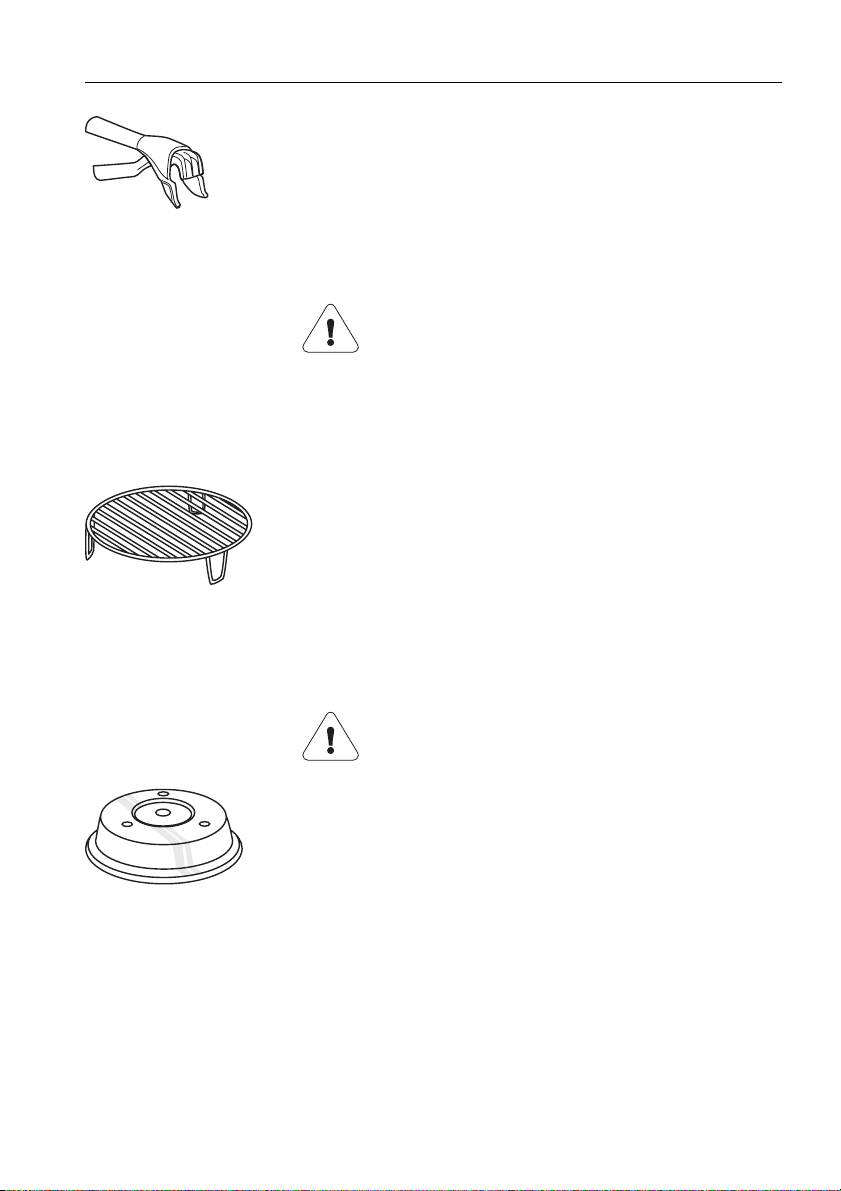
CombiCrunch grip
A Use the CombiCrunch grip for taking the Combi-
Crunch plate out of the cooking space.
Low, or high wire rack
The wire rack gets very hot during use –
risk of burns!
Do not put metal dishes directly on the wire
rack when using the microwave and/or
combi modes – always place a plate in
between. Otherwise, arcing can occur
which will damage your appliance.
A Placing the food on the wire rack allows the air to
circulate freely.
A Always use the glass turntable underneath.
A When using the grill mode, place the food directly
on the wire rack and do not cover!
Food cover
Do not use the food cover with the grill,
CombiCrunch or combi modes as it will
melt!
䡲 Use the food cover to prevent the food from drying
out and the cooking space from becoming soiled.
It is suitable for reheating food on 1 or 2 levels.
Using the food cover shortens the cooking time.
A Place a plate on the glass turntable and cover with
the food cover.
A Place a second plate on the food cover and cover
it with a second food cover.
17
Page 18

… Appliance description
Ventilation fan
The fan switches on automatically during operation. The fan can continue to
run at the end of operation to cool the electronic components. During this
time, the appliance door can be opened and the food removed. The fan
switches off automatically.
Installation
Do not obstruct the ventilation slots at any time.
The appliance may only be operated with the appropriate approved installation kit. Alternative ways of setting up or installing the appliance are not
permitted.
A special installation kit is provided for installing the appliance.
The appliance can be operated at an ambient temperature of +5 °C to
+35 °C.
Adequate air circulation is essential for the trouble-free operation of the appliance. Observe, therefore, the installation instructions and follow the detailed
installation specifications.
18
Page 19
Operating the appliance
The operating modes, the operating time, the switch-off time and various
other functions can be selected by pressing the appropriate button once or
more.
䡲 The symbol for the function selected illuminates or flashes.
䡲 A recommendation flashes in the corresponding digital display.
䡲 Turn the adjusting knob to change the setting.
䡲 Press the adjusting knob to confirm the setting or it will be auto-
matically accepted after 10 seconds.
䡲 Other settings or changes can be made at any time.
䡲 Press the button to switch off the appliance.
Using for the first time
Before using the newly installed appliance for the first time the following
measures should be taken:
A Remove all packaging and transport materials from the cooking space.
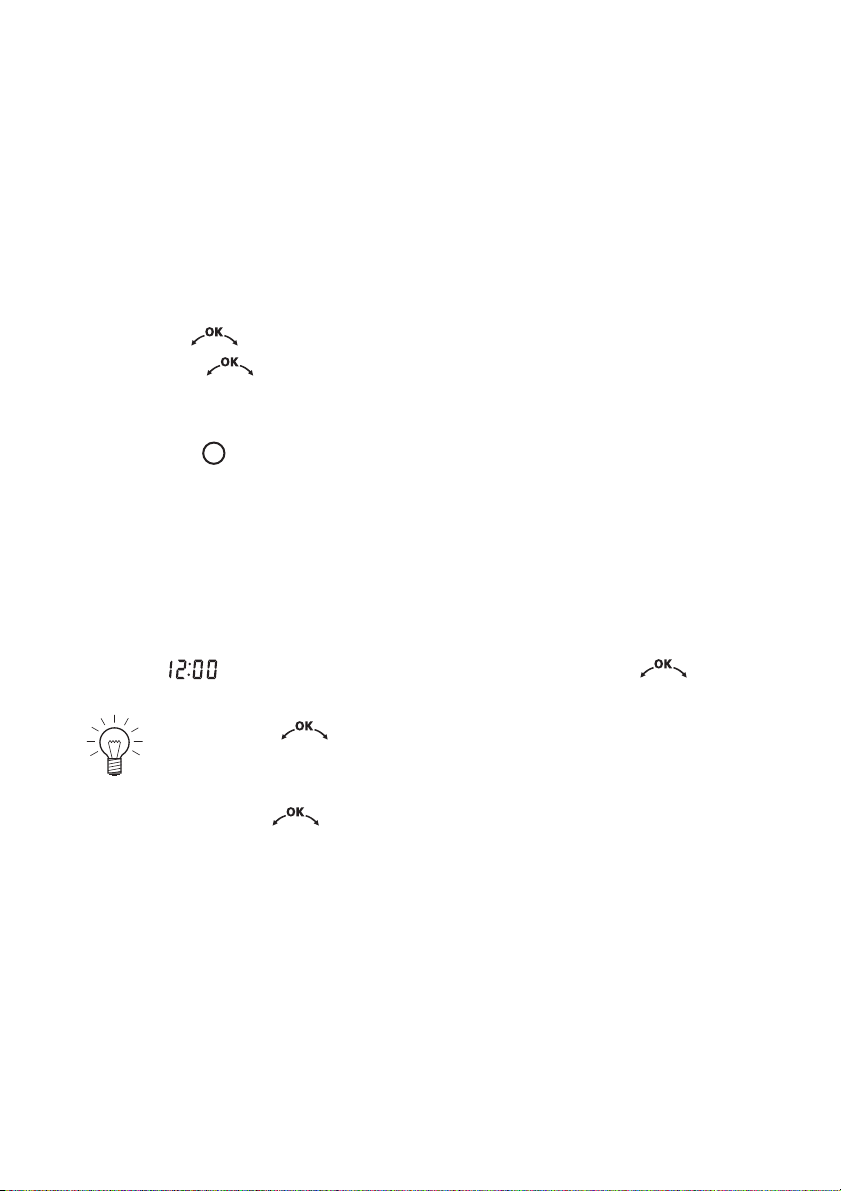
A When flashes in the right digital display, turn the adjusting
knob to set the time.
䡲 Press the adjusting knob to switch between hours and
minutes.
䡲 Turn it to set the hours and the minutes.
䡲 Press the adjusting knob to confirm the setting or it will be
automatically accepted after 10 seconds.
A Clean the cooking space and the accessories.
19
Page 20
… Operating the appliance
Start protection
Start protection prevents an operating mode being started accidentally. If the
length of time between closing the appliance door and starting the appliance
is longer than 1 minute, start protection is automatically activated.
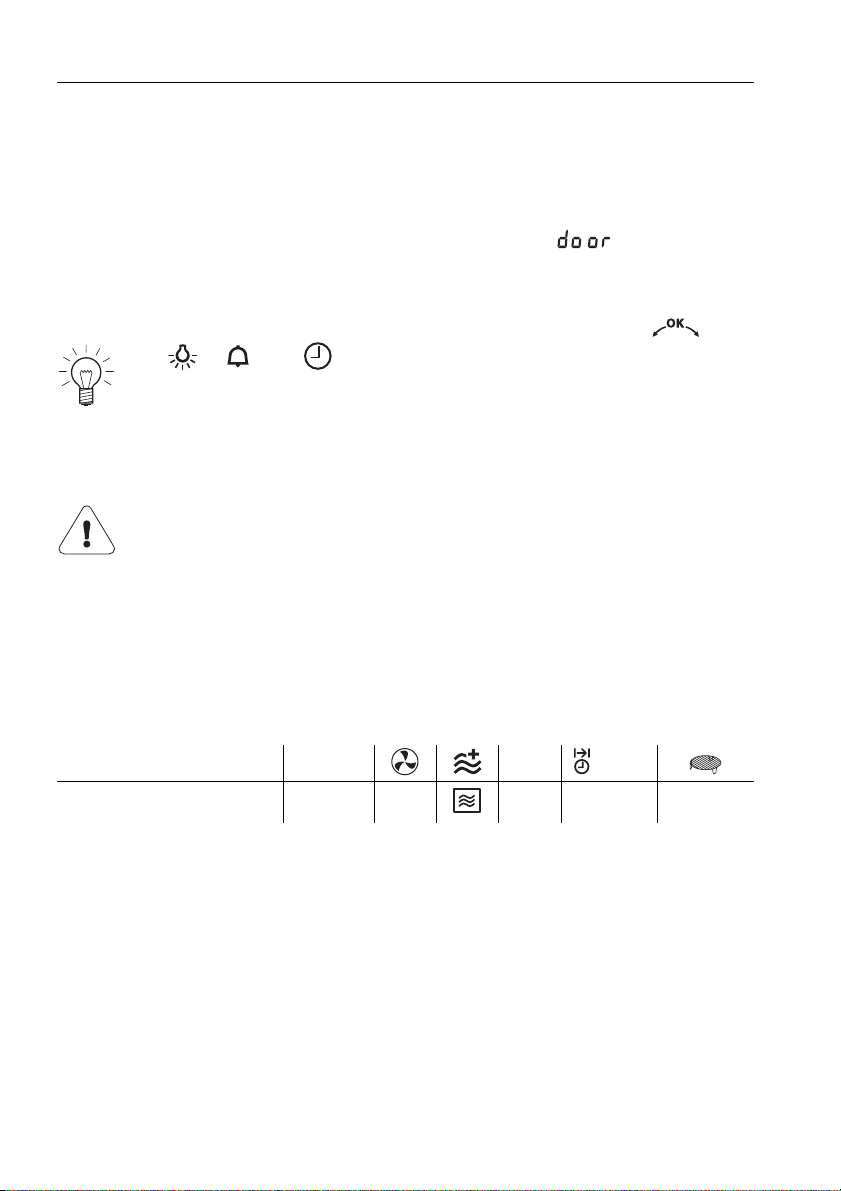
䡲 If any attempt is made to start any operating mode, appears in the
digital displays.
䡲 Opening the appliance door deactivates start protection.
䡲 The operating mode is started by pressing the adjusting knob .
The / and buttons can be used irrespective of whether
start protection is activated or not.
Example
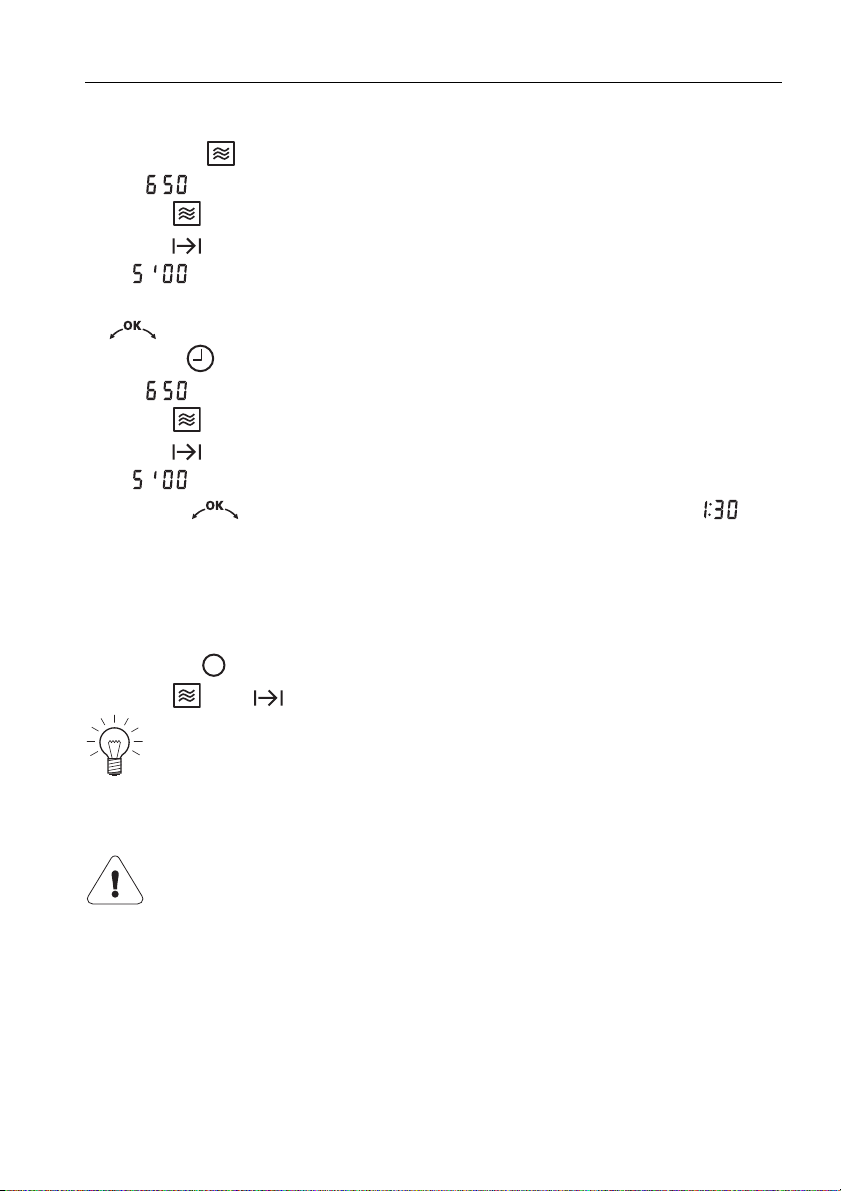
Liquids can be subject to delayed boiling when heating with microwave unless a teaspoon is placed in the vessel. Disturbing the
vessel even slightly can cause the liquid to erupt. Burns hazard!
Burns hazard from heat produced during cooking! Use protective
gloves or oven cloths. Keep children away.
Stir liquids before consuming them.
The symbols are explained in 'Tips on settings'. The tables in 'Tips on settings'
give:
Warming Quantity W mins.
Milk 2 dl – 650 1½–2 –
A The turntable roller and the glass turntable must be used with all operating
modes.
A Next steps are described on the following sides.
20
Page 21
… Operating the appliance
Selecting the operating mode
A Select the operating mode.
– flashes in the left digital display.
– The symbol flashes.
– The symbol illuminates.
– illuminates in the right digital display.
A The microwave power level can be changed by turning the adjusting knob
.
A Use the button to select the operating time.
– illuminates in the left digital display.
– The symbol illuminates.
– The symbol flashes.
– flashes in the right digital display.
A Turn the adjusting knob to change the operating time to and
press to confirm.
– The milk is heated up.
Switching off
A Press the button.
– The and symbols and the digital displays go out.
When the symbols are no longer illuminated the appliance is off. The
cooling fan can continue to run.
Removing the cooked food from the cooking space
Hot air may escape from the cooking space when the appliance
door is opened. Burns hazard!
The accessories will be hot. Burns hazard! Use either protective
gloves or the CombiCrunch grip.
A To prevent corrosion, leave the appliance door open until the cooking
space has cooled down.
21
Page 22
User settings
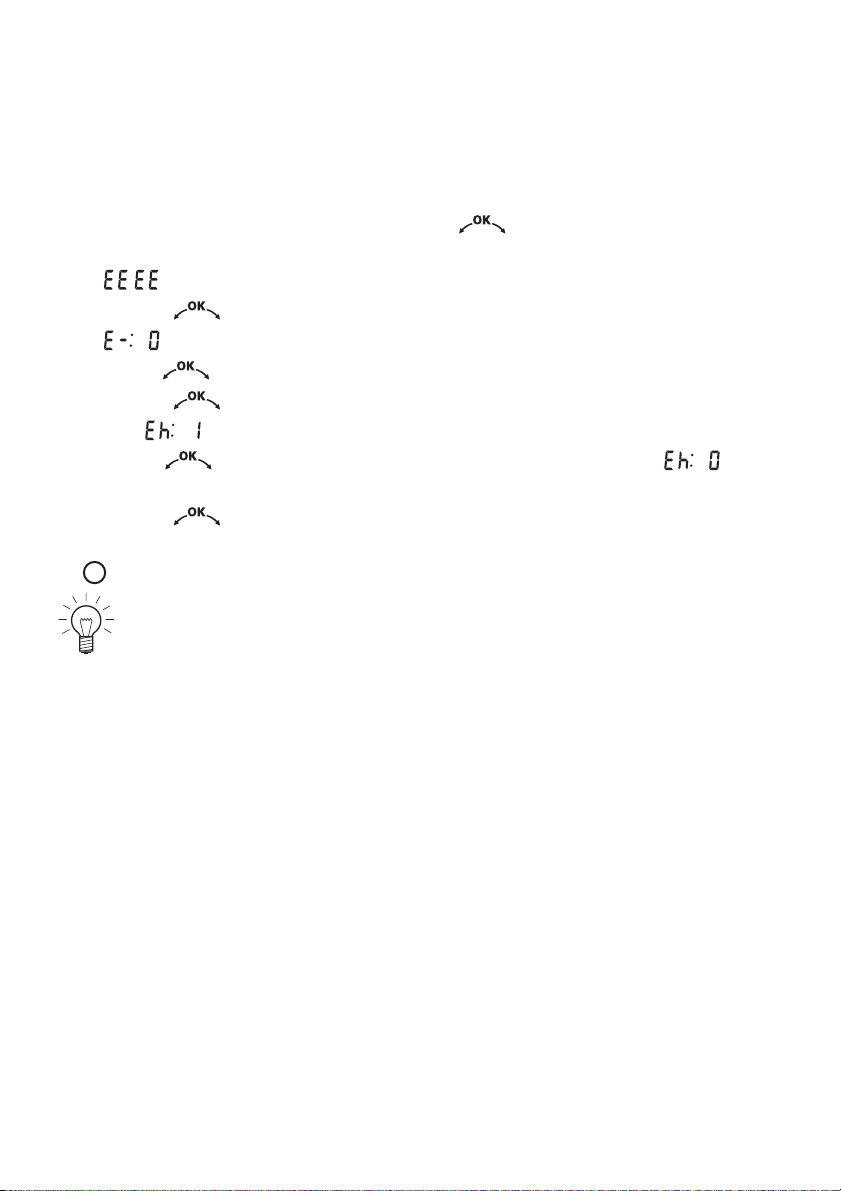
You can adjust the settings.
A With the appliance switched off, hold the adjusting knob depressed
for 5 seconds.
– appears in the digital display.
A Press the adjusting knob to confirm.
– appears in the digital display for «Childproof lock off».
A Turn the adjusting knob to select setting.
A Press the adjusting knob to confirm.
– E.g. flashes in the digital display for «Time display visible».
A Turn the adjusting knob to change the digital display to for
«Time display invisible».
A Press the adjusting knob to confirm the setting.
A The microwave power level can be changed by turning the adjusting knob
.
After a power failure, the respective factory settings are restored.
22
Page 23
… User settings
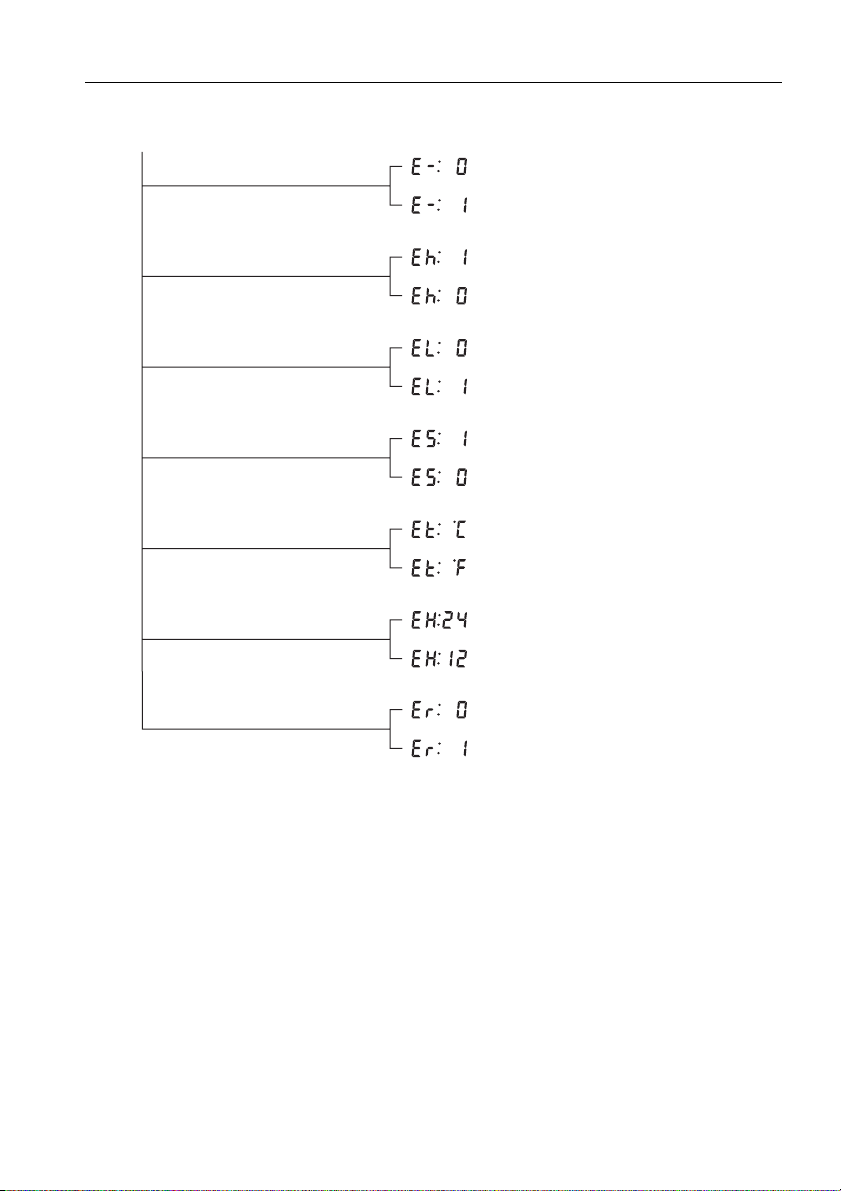
Possible settingschildproof lockchildproof lock
Childproof lock
Time display
Illumination
Acoustic signal
Temperature unit
Time format
Factory settings
off *
on
visible *
invisible
automatically with door
via button only *
high *
off
˚C *
˚F
24 h *
12 h
no change
restore
* Factory setting
23
Page 24
… User settings
Childproof lock
The childproof lock is to prevent the appliance being inadvertently switched
on.
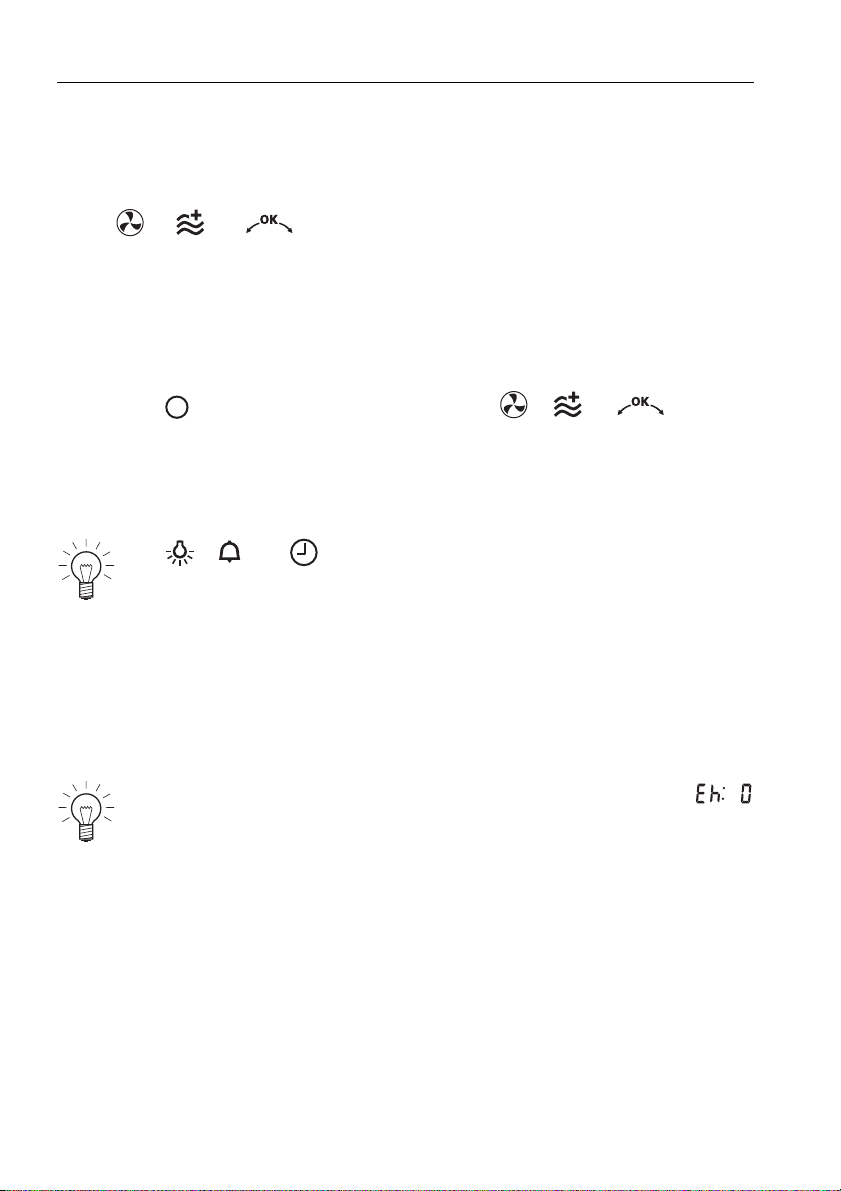
If the / or button are pressed when the childproof lock is
activated:
– A double acoustic signal is emitted.
– Nothing happens when the button is pressed.
Operating the appliance when the childproof lock is activated
A Hold the button depressed and press the / or button.
– The childproof lock is overridden. The appliance can be operated as
normal.
– The childproof lock is automatically reactivated 10 minutes after the
appliance has been switched off.
The / and buttons can be used irrespective of whether the
childproof lock is activated or not.
Time display
If the «invisible» setting is selected, the displays are not illuminated when the
appliance is off, minimizing power consumption. The time is displayed when
the appliance is on.
To reduce power consumption to an absolute minimum, select
«Time display invisible». Despite automatic energy-saving stand-by, all
safety functions are active. All displays go out when the cooking
process has been completed.
24
Page 25
… User settings
Illumination
With the «automatically with door» setting, when an operating mode is running
the illumination comes on when the appliance door is opened and goes off
again when it is closed.
Press the button to switch the illumination on or off at any time. If
the illumination is not switched off by pressing the button, it will
go off automatically 30 minutes after use.
Acoustic signal
The acoustic signal can be switched on or off:
䡲 High Maximum loudness
䡲 Off Acoustic signal is switched off
Even if the acoustic signal setting is set to «off», an acoustic signal is
emitted in the event of a malfunction.
Temperature unit
For temperature unit, select between «°C» and «°F»:
䡲 °C Degrees Celsius
䡲 °F Degrees Fahrenheit
Time format
Select the «24 h» setting to activate the European time format and the «12 h»
setting for the US time format (a.m. / p.m.).
Factory settings
If one or more user settings have been changed, these can be reset to the
factory settings.
25
Page 26
Time functions
The following time functions are available:
䡲 Time
䡲 Timer – can be used at any time and independently of all other functions
䡲 Operating time – time-controlled switch-off of the appliance
䡲 Delayed start – time-controlled switch-on and switch-off of the appliance
When the appliance is switched off, the time display is dimmed
between 24:00 and 6:00.
Setting / Changing the time
The time cannot be changed if the appliance is in operation or if a delayed start has been set.
A Press the button.
– The hour flashes in the right digital display.
– The symbol flashes.
A Turn the adjusting knob to set the hour.
A Press the button or the adjusting knob.
– The minutes flash in the right digital display.
– The symbol flashes.
A Turn the adjusting knob to set the minutes.
Press the adjusting knob to confirm the setting or it will be automatically
accepted after 10 seconds.
26
Page 27
… Time functions
Timer
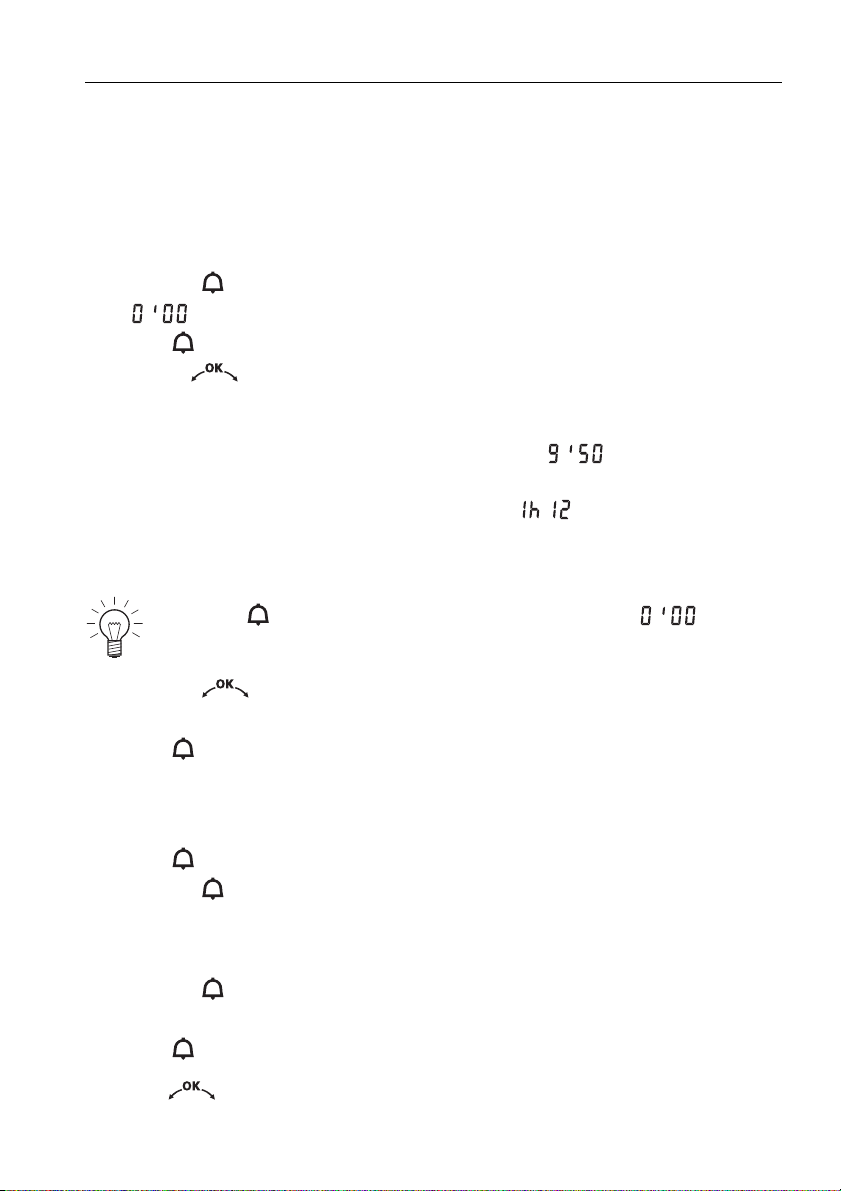
The timer functions like an egg timer. It can be used at any time and independently of all other functions.
Setting
A Press the button.
– flashes in the right digital display.
– The symbol flashes.
A Turn the adjusting knob to set the timer duration.
The timer can be set for:
䡲 up to 10 minutes in 10-second intervals, e.g. = 9 minutes and
50 seconds.
䡲 over 10 minutes in 1-minute intervals, e.g. = 1 hour and
12 minutes.
The maximum timer duration that can be set is 9 hours and 59 minutes.
Press the button 1× to reset the timer duration to .
A Press the adjusting knob to start the timer.
– The countdown to the time remaining is visible in the right digital display.
– The symbol illuminates.
When the set duration is up:
– A sequence of 5 short acoustic signals is repeated for 1 minute.
– The symbol flashes.
A Press the button to switch off the acoustic signal.
Checking / Changing
A Press the button.
– The countdown to the time remaining flashes in the right digital display.
– The symbol flashes.
Turn the adjusting knob to change the timer duration.
27
Page 28
… Time functions
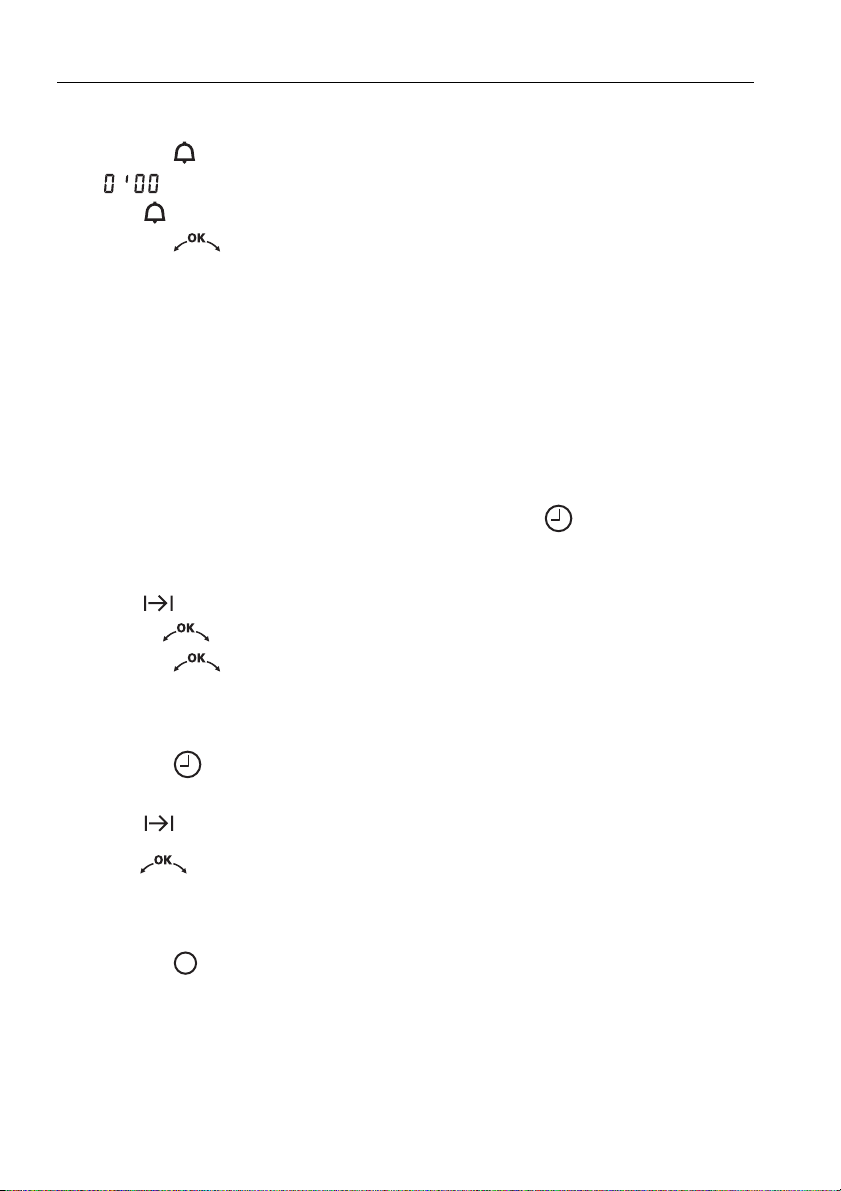
Switching off before time
A Press the button 2×.
– flashes in the right digital display.
– The symbol flashes.
A Press the adjusting knob to confirm.
Operating time
The operating mode selected automatically switches off when the operating
time is up.
Setting
A Select the desired operating mode.
A If the right digital display does not flash, press the button.
– A corresponding recommended value appears in the right digital
display.
– The symbol flashes.
A Turn the adjusting knob to set the duration.
A Press the adjusting knob to confirm.
Checking / Changing
A Press the button.
– The time remaining flashes in the right digital display.
– The symbol flashes.
Turn the adjusting knob to change the duration.
Switching off before time
A Press the button.
28
Page 29
… Time functions
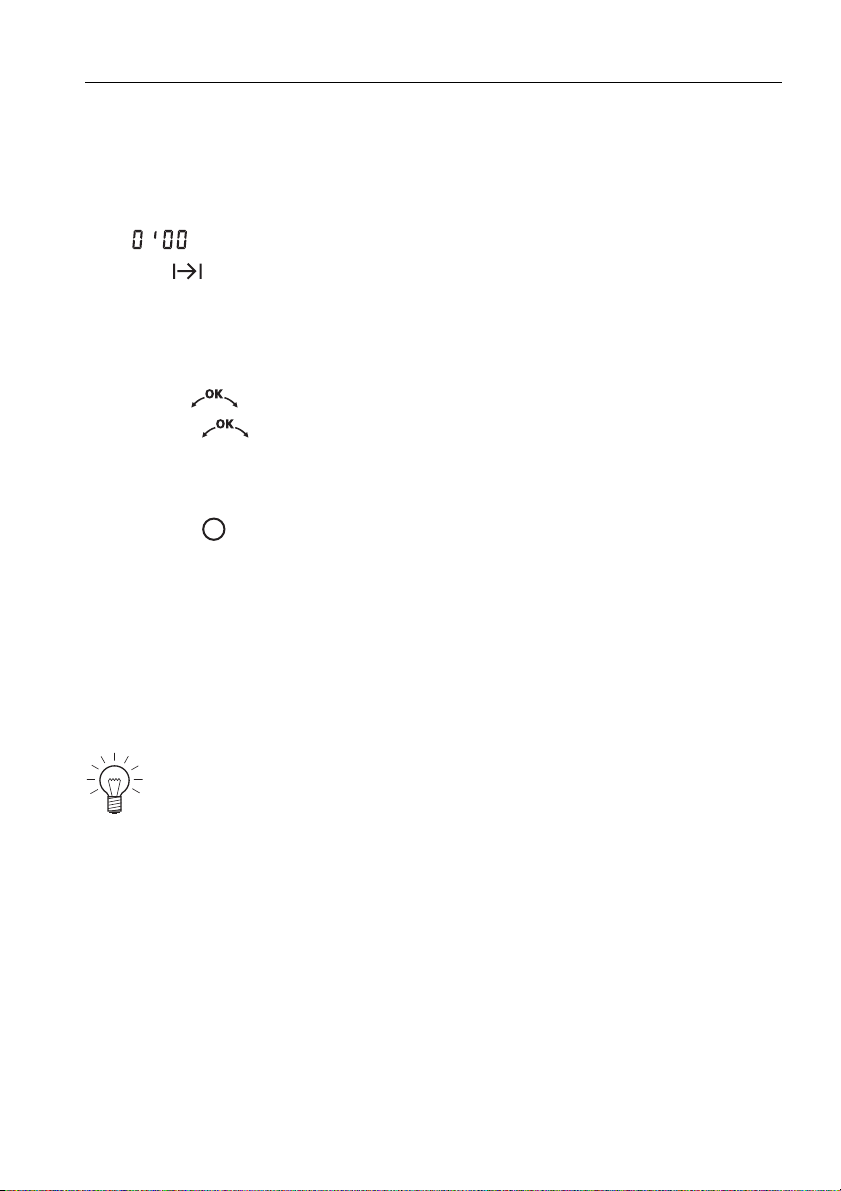
End of the operating time
When the set duration is up:
– The appliance switches off automatically.
– A long, intermittent acoustic signal is emitted for 1 minute.
– flashes in the right digital display.
– The symbol flashes.
– The settings remain for 3 minutes.
Extending the operating time
A Turn the adjusting knob within 3 minutes to select a new duration.
A Press the adjusting knob to confirm.
Switching off
A Press the button to switch off
– The settings are cleared.
Delayed start
The delayed start is activated when for the operating mode selected both an
operating time and a switch-off time are set. The appliance switches automatically on and off again at the desired times.
Delayed start can only be selected if the operating time is shorter than
20 minutes. Exception: with pure hot air mode 1h30.
Perishables should not be kept unrefrigerated.
No start delay is possible for operating mode «AutomaticPlus».
A Select the desired operating mode.
29
Page 30
… Time functions
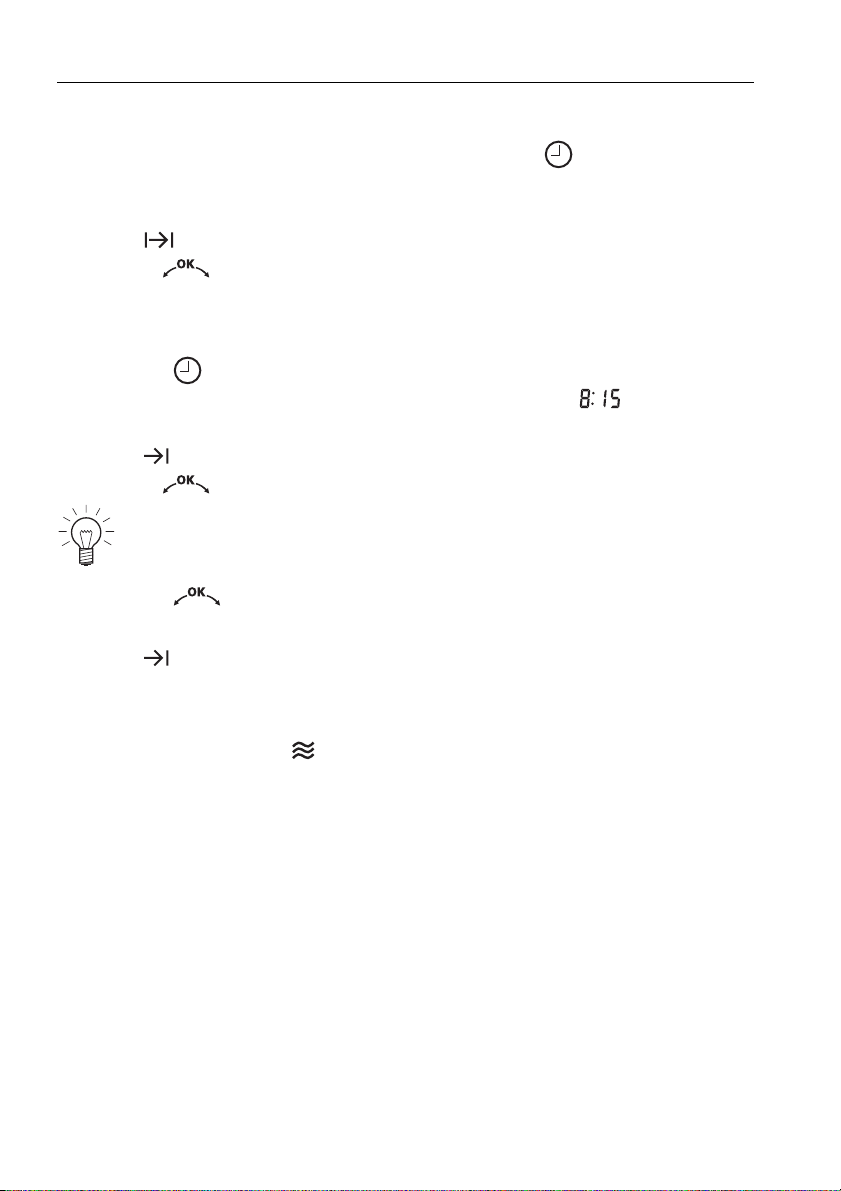
Setting the operating time
A If the right digital display does not flash, press the button.
– The corresponding recommended value flashes in the right digital
display.
– The symbol flashes.
A Turn the adjusting knob to set the duration.
Setting the switch-off time
A Press the button again.
– The switch-off time – without a delayed start – e.g. flashes in the
right digital display.
– The symbol flashes.
A Turn the adjusting knob to set the switch-off time.
The switch-off time can be delayed by a maximum of 23 hours and
59 minutes.
A Press the adjusting knob to confirm.
– The time appears in the right digital display.
– The symbol illuminates.
– The operating mode selected remains switched off until the automatic
start.
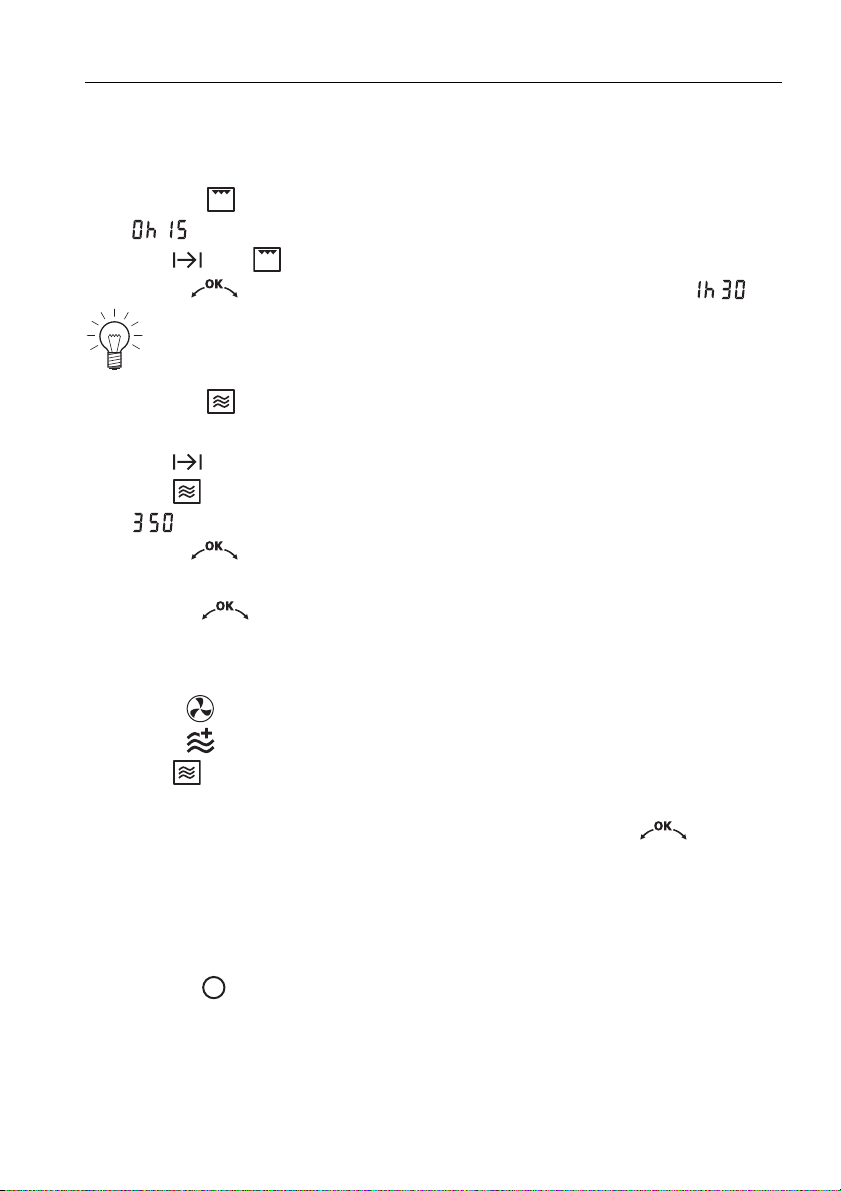
Example:
30
A Select the operating mode and 150 W.
A At 8:00, set an operating time of 15 minutes.
A Set the switch-off time to 11:30.
– The appliance will automatically switch on at 11:15 and off
Page 31
… Time functions
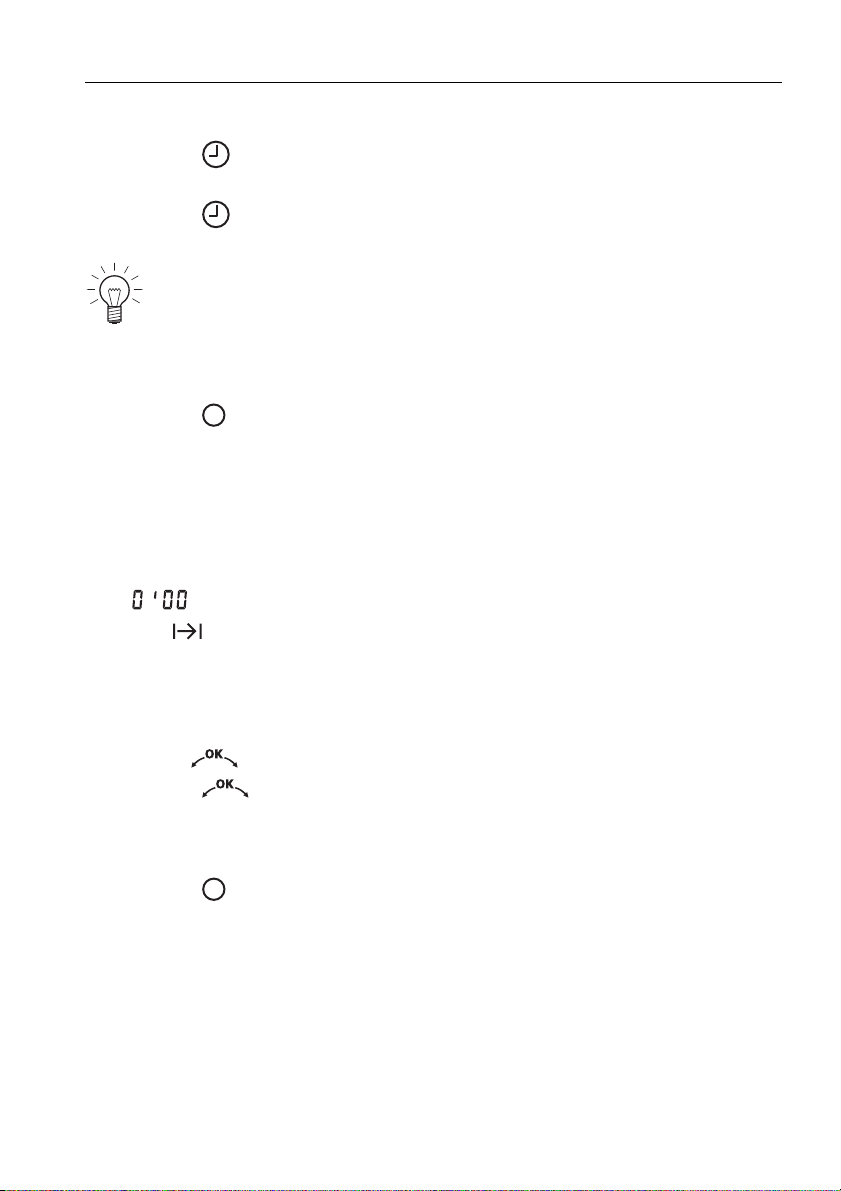
Checking and changing
A Press the button 1×.
– The operating time is visible for 2 seconds.
A Press the button 2×.
– The switch-off time flashes. It can be changed.
The operating time, the operating mode and the microwave power
level cannot be changed.
Switching off before time
A Press the button.
End of the operating time
When the set duration is up:
– The appliance switches off automatically.
– A long, intermittent acoustic signal is emitted for 1 minute.
– flashes in the right digital display.
– The symbol flashes.
– The settings remain for 3 minutes.
Extending the operating time
A Turn the adjusting knob within 3 minutes to select a new duration.
A Press the adjusting knob to confirm.
Switching off
A Press the button to switch off
– The settings are cleared.
31
Page 32
Operating modes
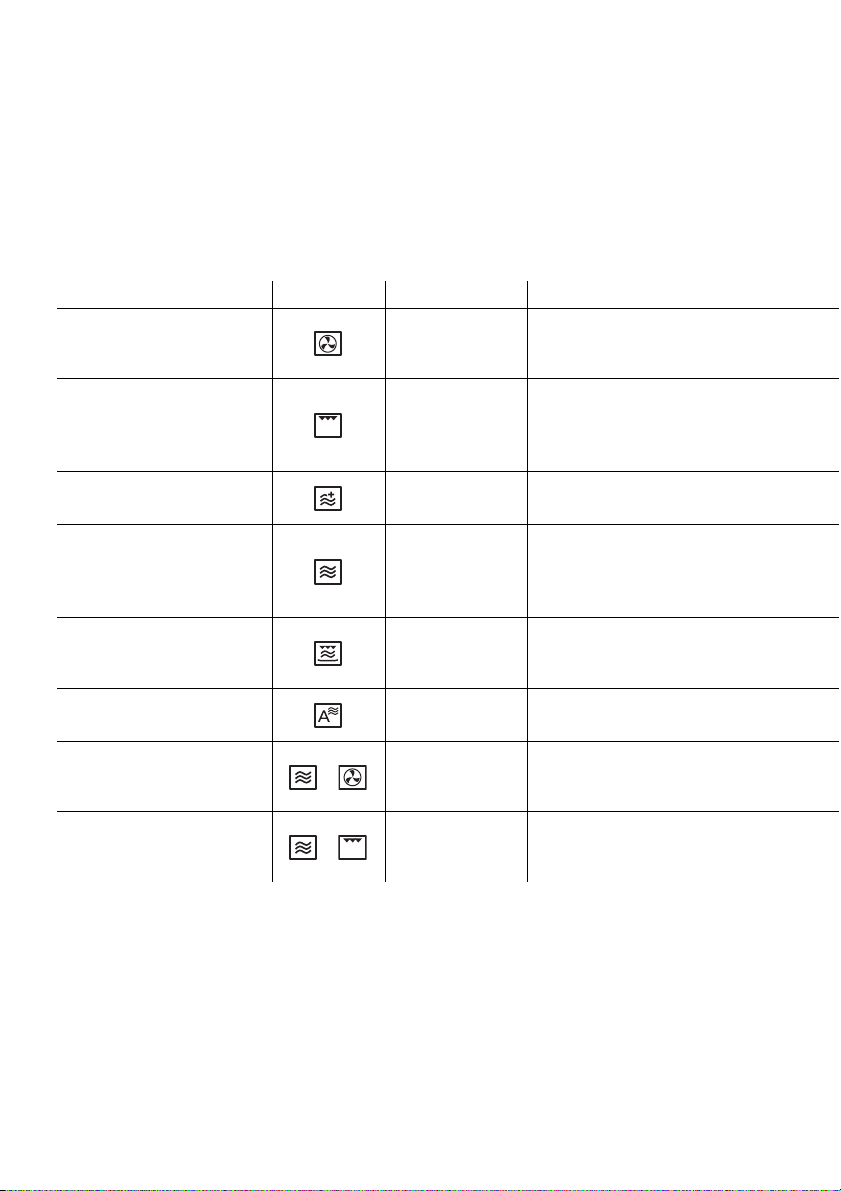
All the operating modes are described below.
A See also the notes in 'Tips on settings'.
Operating mode Symbol Range Recommendation
Hot air
Grill – 15 mins.
Power&Favorit
Microwave
CombiCrunch 0–1 hr. 30 mins. 2 mins.
AutomaticPlus – –
Combi mode «Hot air» +
Combi mode «Grill» +
50–225 °C
0–1 hr. 30 mins.
1000 W
0–2 mins. 30 secs.
0–850 W
0–1 hr. 30 mins.
0–350 W
0–1 hr. 30 mins.
50–225 °C
0–650 W
0–1 hr. 30 mins.
180 °C / 15 mins.
1000 W
50 secs.
650 W
5mins.
180 °C / 350 W / 5 mins
or
180 °C / 350 W / 15 mins
650 W / 5 mins.
or
350 W / 15 mins.
32
Page 33
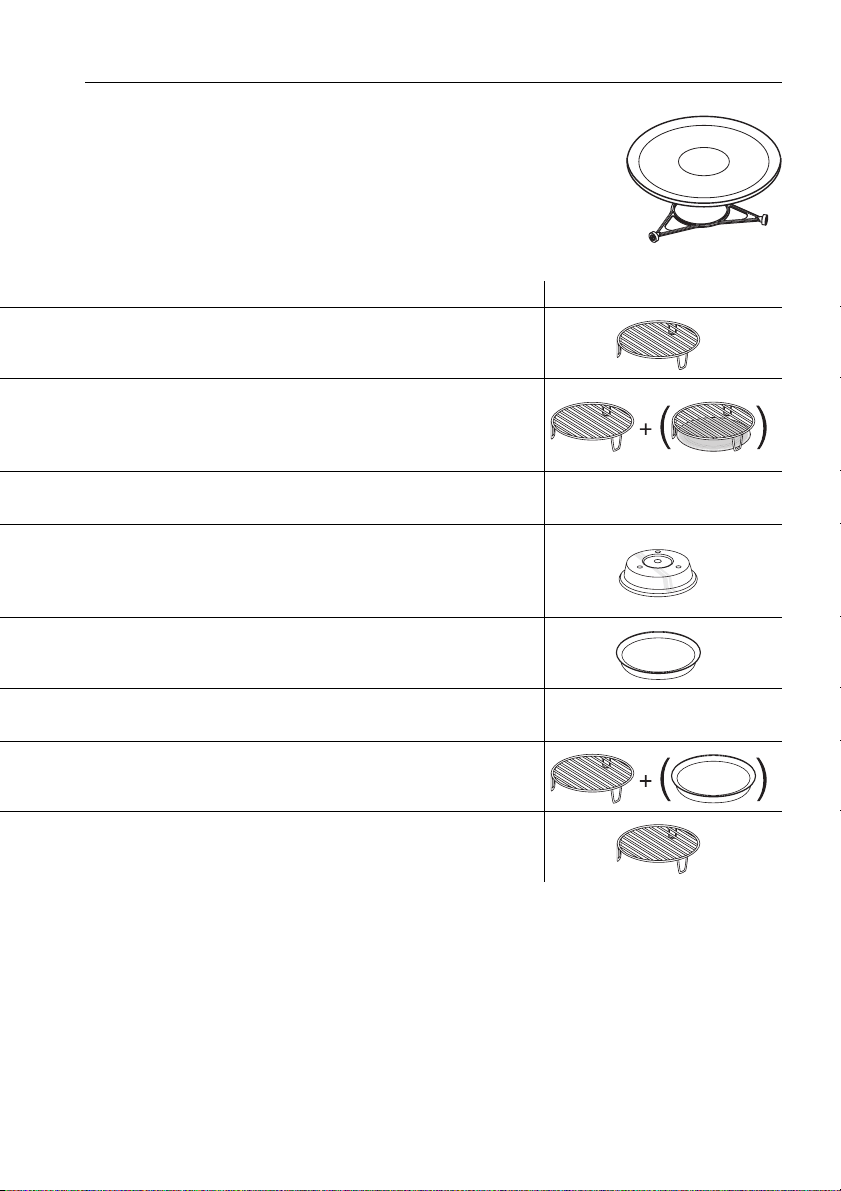
… Operating modes
A Always use the turntable roller and the glass turntable
in combination with the other accessories.
Use Accessories
For cake, bread, savouries and biscuits, etc.
For browning and crisping food, as well as gratinating and
toasting.Place the food to be grilled directly on the wire rack.
Place a plate underneath the wire rack
to catch food residues and condensation.
For everyday use for heating liquids
such as water for tea, milk, etc.
For preparing and heating vegetables, potatoes, meat, fish, etc.
Most foods need to be turned or stirred
halfway through the cooking time.
For deep frozen ready cooked products such as pizzas,
chipped potatoes, fish fingers etc.
For the quick preparation of fish and vegetables.
Everyday food can be cooked to perfection
with the help of «AutomaticPlus».
–
varies depending
on programme
For faster baking of gratins,
lasagne, baked dishes, etc.
For fast browning and gratins.
33
Page 34
… Operating modes
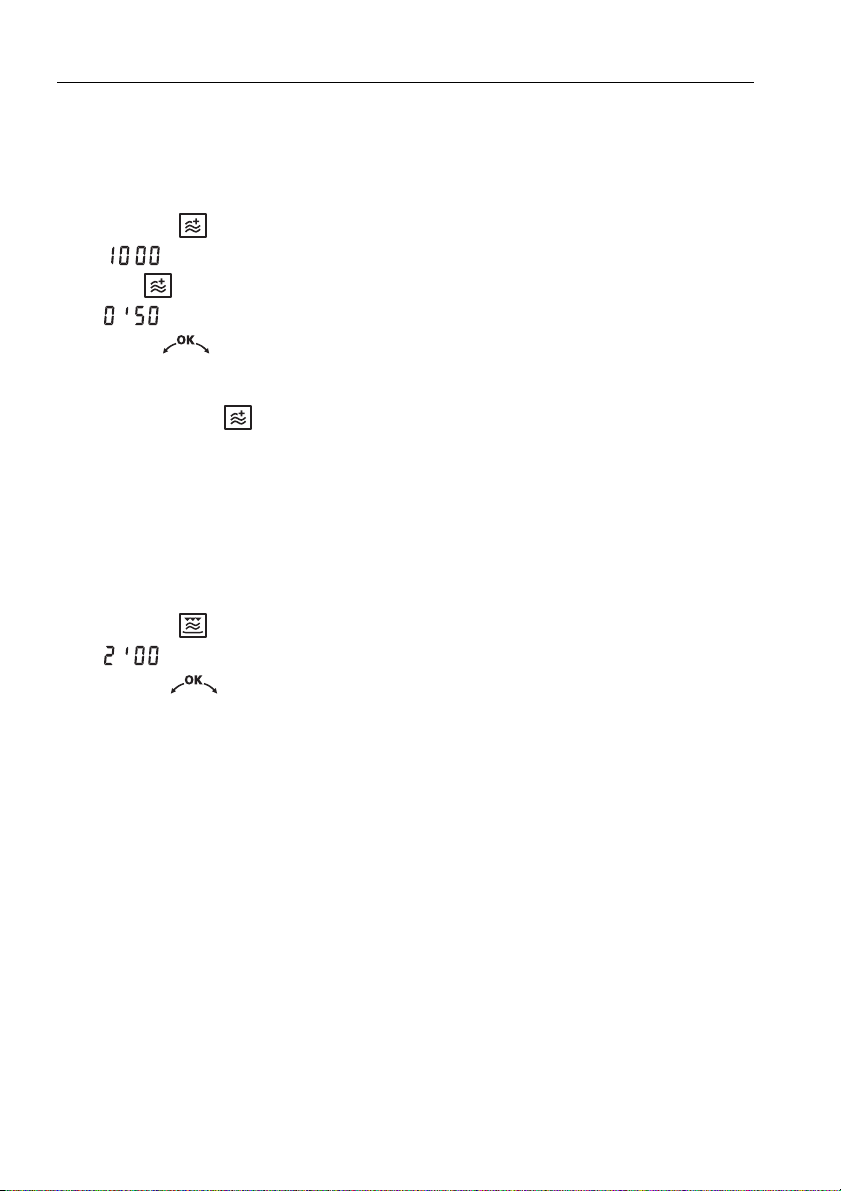
Power&Favorit
The heating of liquids, e.g. 2 dl coffee, can be saved with this operating
mode.
A Select the operating mode.
– illuminates in the left digital display.
– The symbol flashes.
– flashes in the right digital display.
A Turn the adjusting knob to set the operating time.
A Press the adjusting knob for at least 2 seconds to save the duration.
The next time the operating mode is selected, the operating time saved
flashes in the right digital display.
CombiCrunch
This mode combines microwave and grill. The CombiCrunch plate must be
used to obtain an optimal result.
A Select the operating mode.
– flashes in the right digital display.
A Turn the adjusting knob to set the operating time and press to
confirm.
34
Page 35
… Operating modes
AutomaticPlus
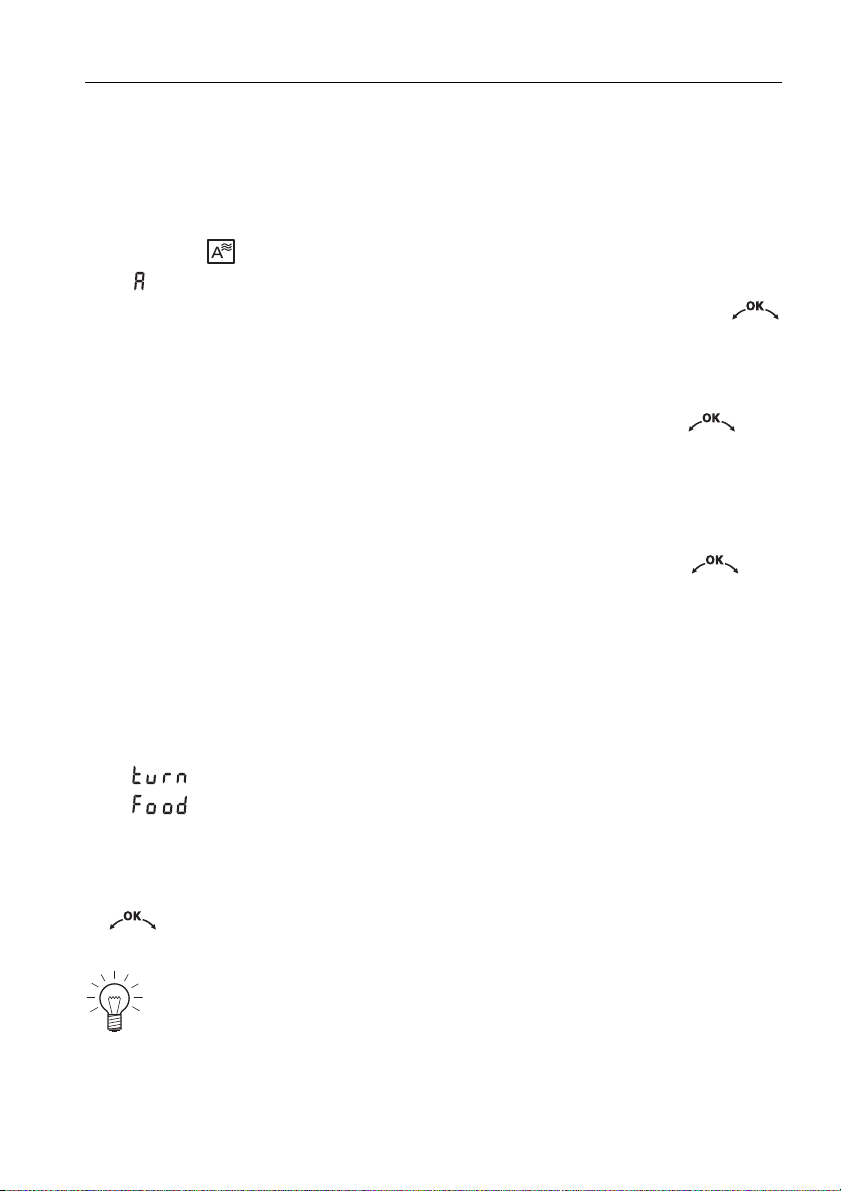
By using «AutomaticPlus», everyday recipes can be simply set up and quickly
prepared. The programmes can be selected by means of the preparation
method and the food category.
A Select the operating mode.
– flashes in the left digital display.
A The preparation method is selected by turning the adjusting knob
and pressing it to confirm.
– In the left digital display the preparation method illuminates and the food
category flashes.
A The food category is selected by turning the adjusting knob and
pressing it to confirm.
– The food category illuminates in the left digital display.
– The appropriate recommended value for the weight of the food flashes
in the right digital display.
A The weight of the food is selected by turning the adjusting knob and
pressing it to confirm.
– The programme starts.
– The countdown of the time remaining takes place in right digital display.
Depending on the food category, the programme stops after approximately
half the set duration.
– The acoustic signal sounds three times.
– illuminates in the left digital display.
– illuminates in the right digital display.
A Open the appliance door.
A Stir, or where necessary turn the food.
A Close the appliance door and confirm by pressing the adjusting knob
.
– The programme resumes.
If the food has not been turned or stirred, the programme resumes
automatically after 2 minutes.
35
Page 36
… Operating modes
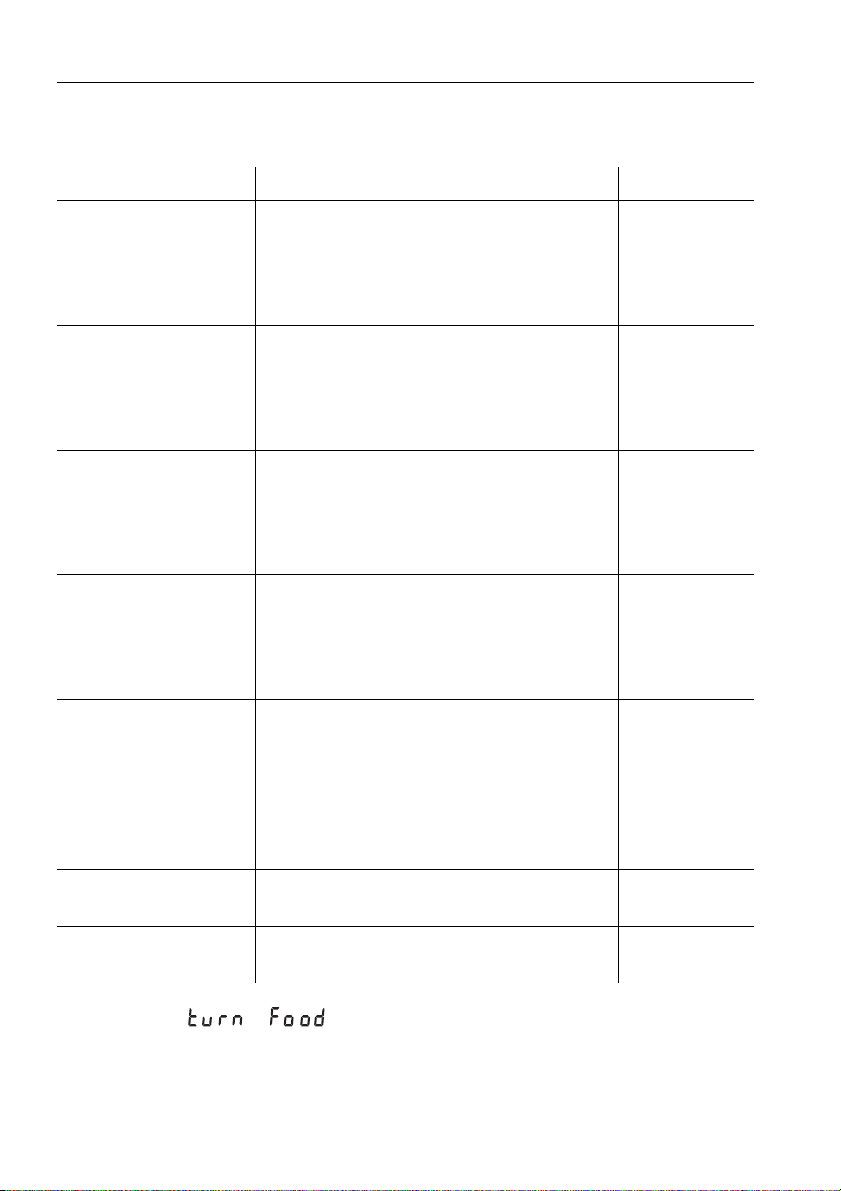
Possible settings
Preparation method Food category Quantity
Plated meal 250–500 g
A1
Frozen plated meal 250–500 g
A2
Regenerate
A
Crispy baking **
B
Defrosting
C
Cooking
D
Baking
E
Melting
F
Softening
G
Soup 200–800 g
A3
Beverages 100–500 g
A4
Frozen lasagne 200–500 g
A5
Potato chips * 200–500 g
B1
Pizza (thin base) 200–400 g
B2
Pizza (thick base) 300–800 g
B3
Chicken nuggets / chicken wings 200–500 g
B4
Quiche 200–500 g
B5
Meat * 100 g–2 kg
C1
Chicken * 100 g–2,5 kg
C2
Fish * 100 g–2 kg
C3
Vegetables * 100 g–2 kg
C4
Bread * 100 g–1 kg
C5
Baked potatoes * 200–1000 g
D1
Fresh vegetables * 200–800 g
D2
Frozen vegetables * 200–800 g
D3
Canned vegetables 200–600 g
D4
Popcorn 100 g
D5
Croissants –
E1
Bread 400–800 g
E2
Cake 500–1000 g
E3
Soufflé ø 19 cm –
E4
Muffins ø 5-6 cm –
E5
Fancy pastries –
E6
Meringues ø 4 cm –
E7
Butter / margarine * 50–200 g
F1
Chocolate * 50–200 g
F2
Butter / margarine * 50–100 g
G1
Ice cream * 250–500 g
G2
* Pause text: /
** Use CombiCrunch plate
36
Page 37
… Operating modes
Combi mode
The combi mode is only possible with the microwave and hot air or grill.
A Select the operating mode.
– flashes in the right digital display.
– The and symbols flash.
A Turn the adjusting knob to set the duration (maximum of ).
The cooking time refers to both the grill and microwave modes.
A Select the operating mode.
– The operating time selected illuminates in the right digital display.
– The symbol illuminates.
– The symbol flashes.
– flashes in the left digital display.
A Turn the adjusting knob to set the microwave power level.
A Set a delayed start, if required.
A Press the adjusting knob to confirm.
Checking and changing
A Use the button to add or switch off the grill.
A Use the button to select the microwave.
– The symbol flashes.
– The microwave power level flashes in the left digital display.
A Reduce the microwave power level to 0 by turning the adjusting
knob.
– The microwave mode is switched off.
Switching off
A Press the button.
37
Page 38
Tips on settings
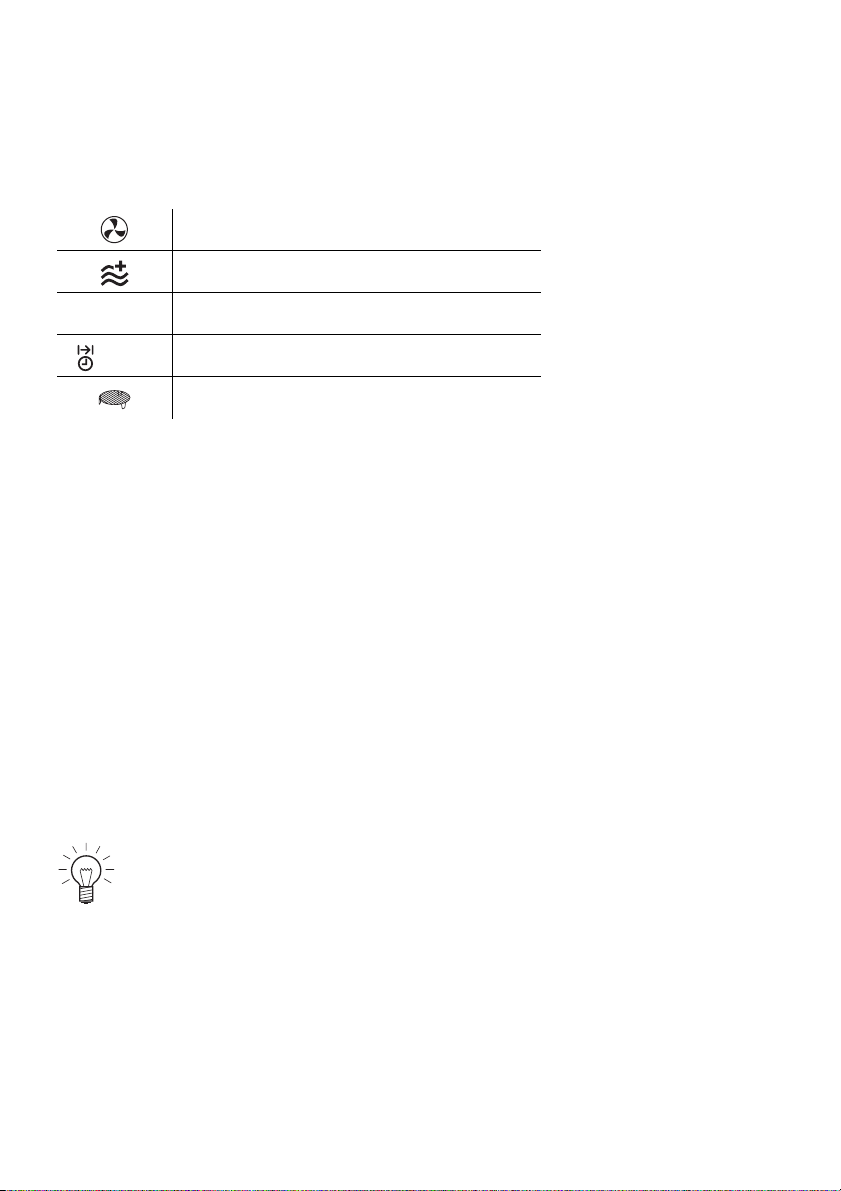
Symbols used
Operating modes
Microwave operating modes
W Watts
mins. Duration in minutes
Accessories
Optimal use
The recommended settings and accessories given in recipe books are, in
part, not optimal for this appliance. In the following tables, you will find
information to help you get the best use out of your appliance.
A Always place the food in the centre of the glass turntable.
A Cover liquid and steaming food, unless it should remain crispy.
A Food containing less liquid must be covered over when being heated up
to prevent it drying out.
A Stir or turn the food halfway through time.
A At the end of cooking, allow the food to stand in the cooking space for
more even heating (Standing time).
A Avoid opening the appliance door frequently.
Several small portions heat faster and more evenly than a single large
portion.
38
Page 39
… Tips on settings
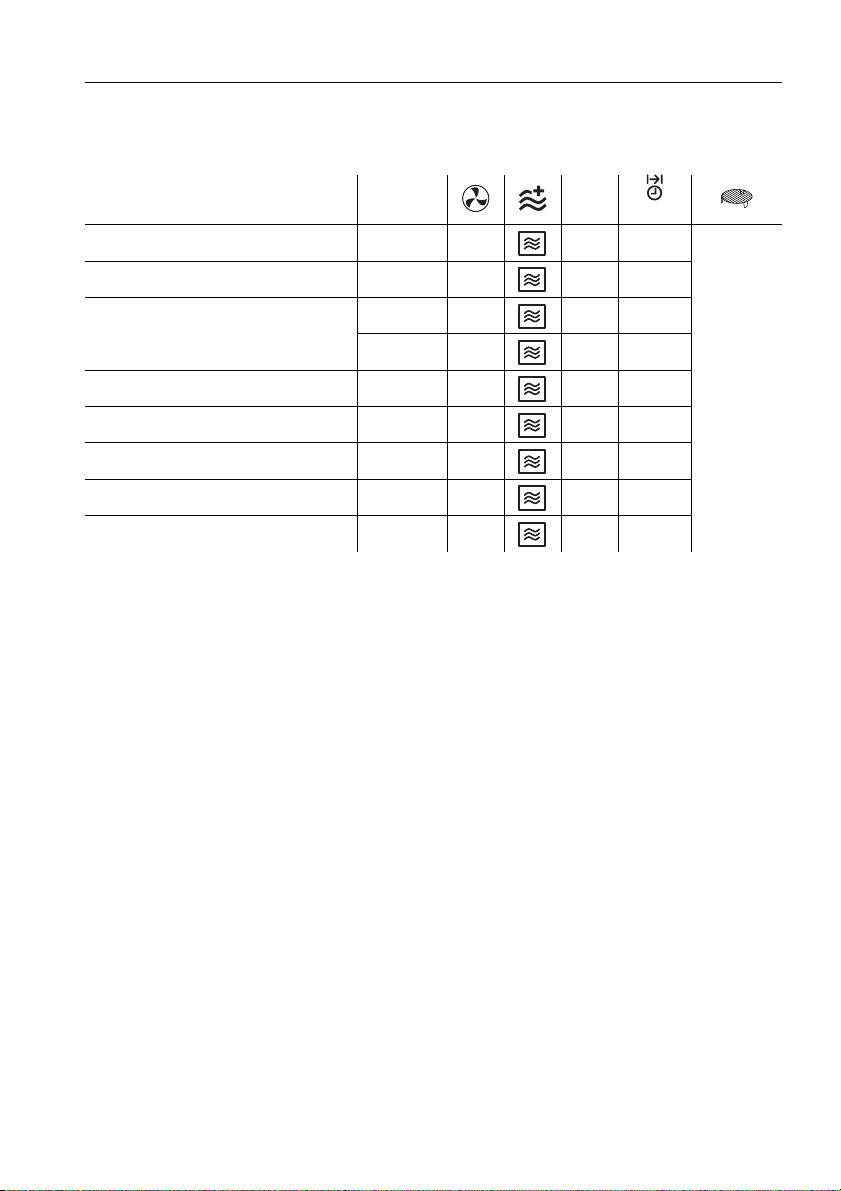
Heating up
Quantity W
Milk * 2 dl – 650 1½–2
Beverager * 2 dl – 800 1½–2
300 g – 800 2½–3
Plated meal
550 g – 800 4–5
Soup * 3–5 dl – 800 2–6
Lasagne, baked dish, gratin 400–500 g – 800 5–6
Pasta ** 200–300 g – 500 2–3
Rice ** 150–300 g – 800 1½–3
Vegetable 250–400 g – 800 1½–3
mins.
–
* When heating liquids, place a teaspoon in the vessel to prevent delayed
boiling (or superboiling).
** Always add a little liquid.
A After heating food up, allow to stand for about 2 minutes.
39
Page 40
… Tips on settings
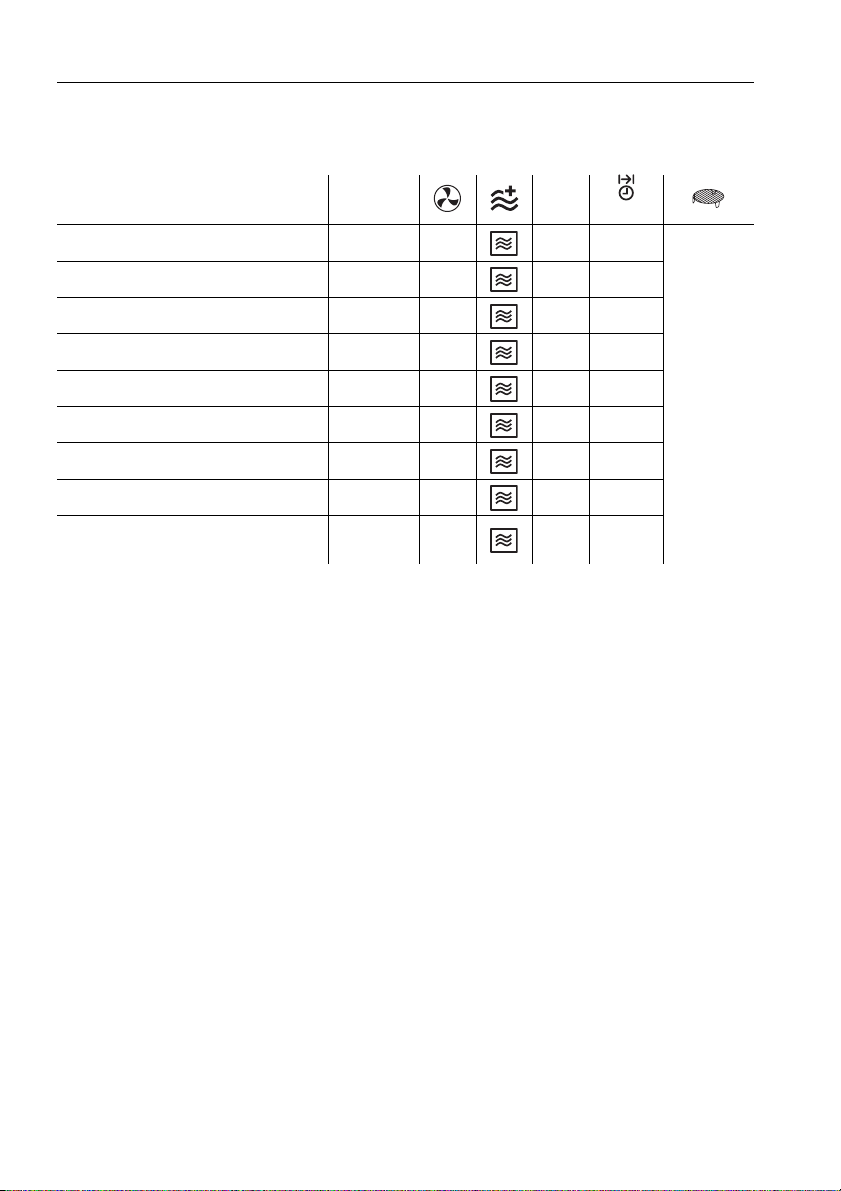
Defrosting
Quantity W
Small sausages * – – 150 5–8
Minced meat * 500 g – 150 10–15
Joint of meat * 800 g – 150 18–25
Chicken parts * 600 g – 150 12–20
Fish * 400 g – 150 7–10
Spinach * 300 g – 150 6–8
Berries 200 g – 150 4–5
Bread loaf 500 g – 150 6–7
Baguette rolls
4 pieces,
50 g
– 150 2–3
mins.
–
* Turn halfway through the cooking time.
A When freezing food, try to make as flat and small a shape as possible.
A For perfect defrosting, allow the food to stand about 4 minutes after
defrosting.
40
Page 41
… Tips on settings
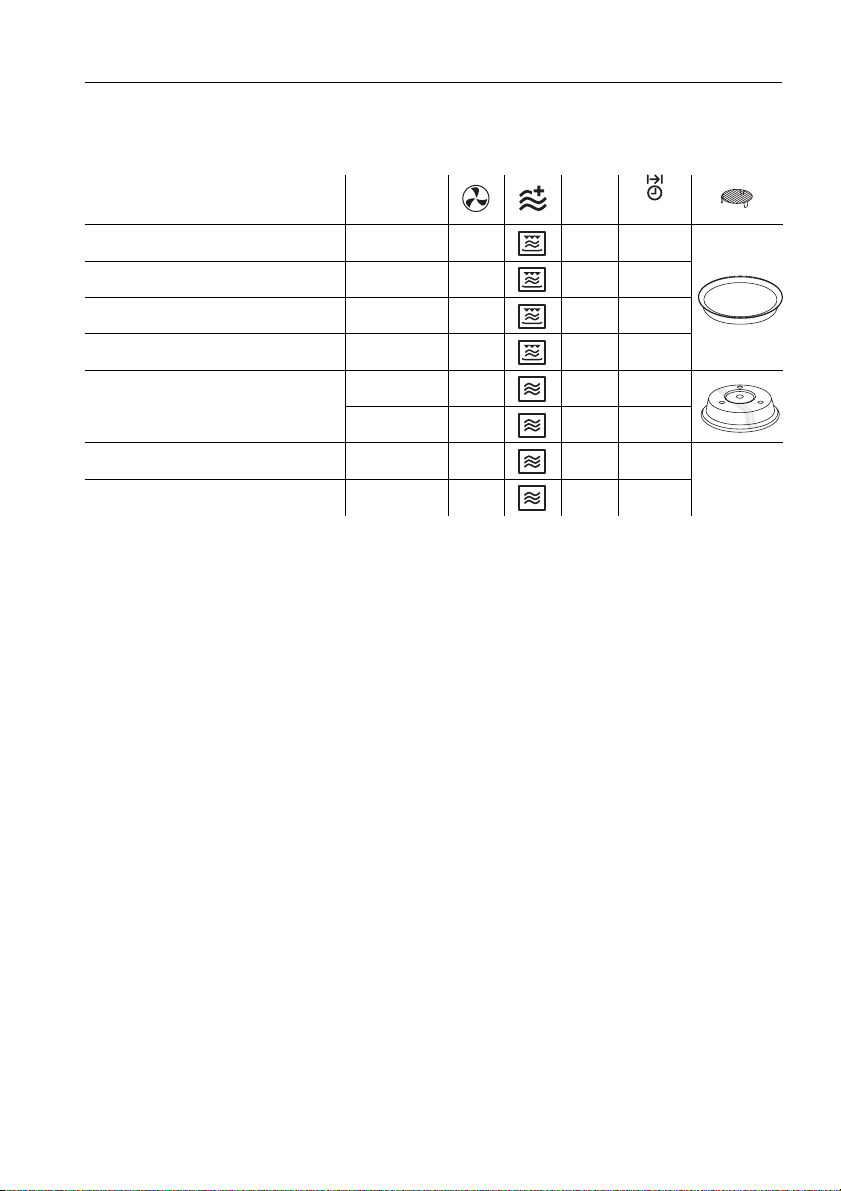
Simultaneous defrosting and cooking
Deep frozen products * Quantity W
Pizza 300–350 g – – 6–8
Hamburgers 2–4 – – 5–8
Fish fingers 200–300 g – – 5–7
Chips 400 g – – 15–16
200 g – 800 4
Mixed vegetables **
500 g – 800 7
Fruit compote 200–400 g – 650 8
Lasagne 400 g – 650 13–17
mins.
* Pay attention to manufacturer’s recommendations.
** Turn halfway through the cooking time.
–
41
Page 42
… Tips on settings
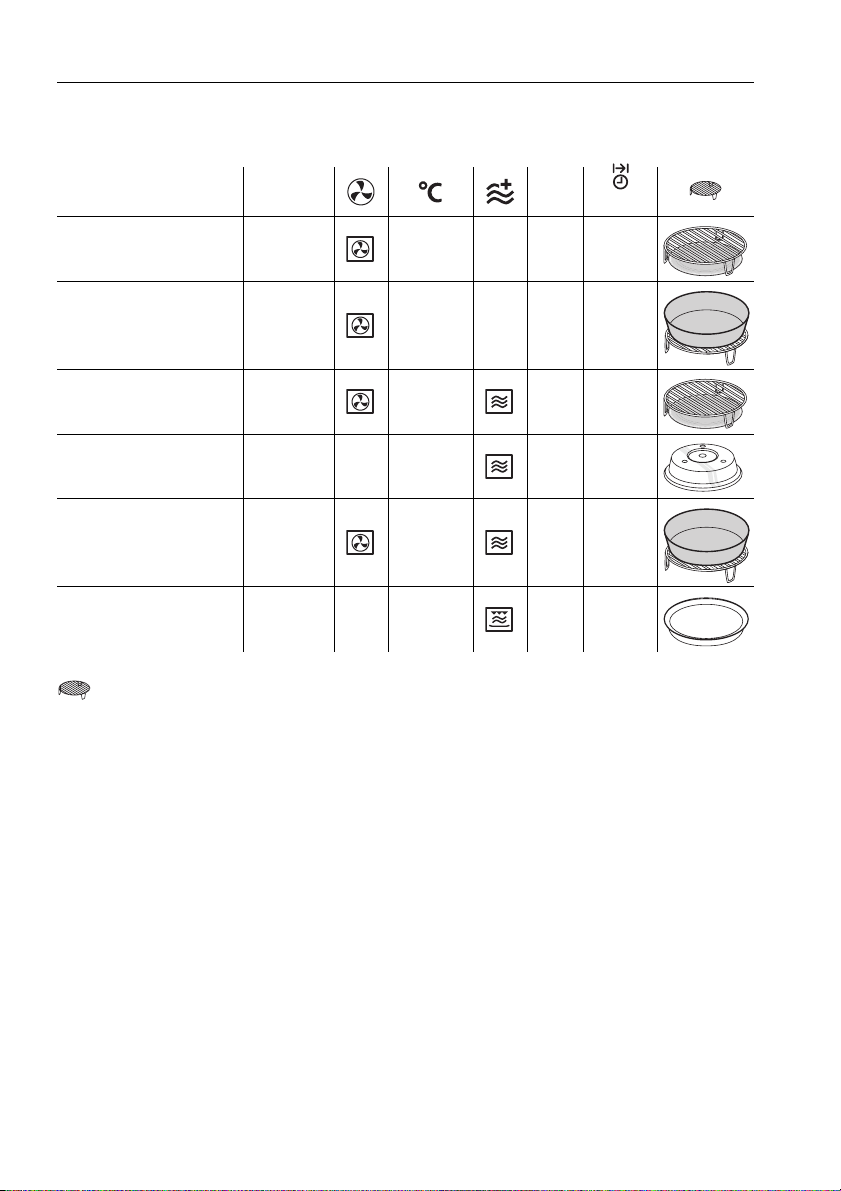
Meat, Poultry, Fish
Quantity W
Roast beef 1 kg 165–175 – – 60–75
Meat loaf 1 kg 180–190 – – 50–80
Chicken 1 kg 225 350 30–32
Chicken breast 125–300 g – – 600 5–6
Whole fish 500–600 g 180–190 350 15–20
Fillet of fish 400–500 g – – – 3–9
mins.
Always use the low wire rack.
42
Page 43
… Tips on settings
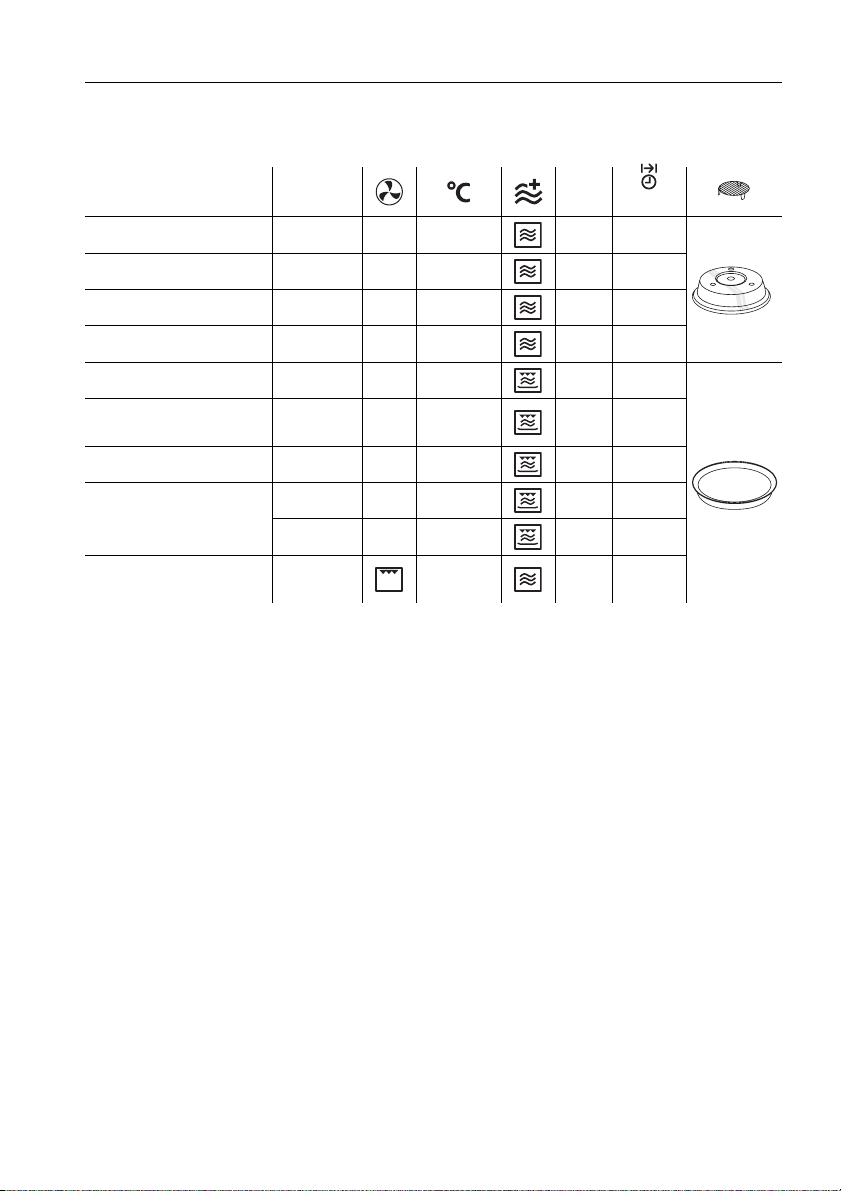
Vegetables, fresh
Quantity W
Broccoli 300–500 g – – 800 5–8
Cauliflower 300–500 g – – 800 3–8
Carrots 300–400 g – – 800 3–8
Tomatoes 400 g – – 800 2–3
Aubergines 400 g – – – 6–8
Sweet pepper 2–4 pieces – – – 10–15
Zucchetti 250 g – – – 3–5
Chipped potatoes
Baked Potatoes *
250 g – – – 8–12
500 g – – – 15–18
1 piece,
250 g
–6507
mins.
* Pierce with a fork before cooking and turn after half the cooking time.
43
Page 44
… Tips on settings
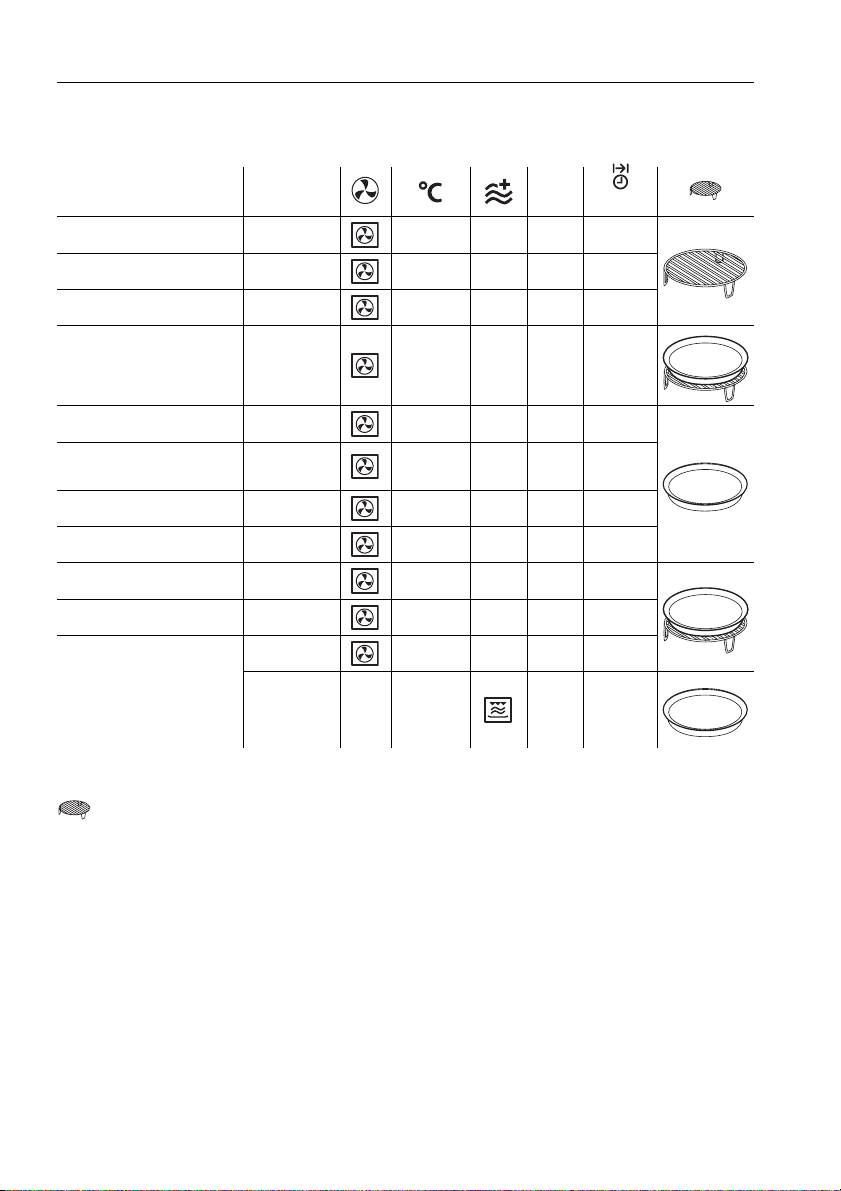
Baking and cooking
Quantity W
Cake * 800 g 170–180 – – 50–70
Bisquit – 170–180 – – 30–35
Linzertorte – 170–180 – – 40–50
Puff pastries with a filling 8 pieces 210–220 – – 25–30
Muffins 8–10 pieces 200 – – 25–35
Mailänderli
(butter biscuits)
Macaroons – 170 – – 15–20
Bruschetta, garlic bread – 225 – – 10–15
Fruit flan – 190–200 – – 45–55
Savoury flan – 180–190 – – 50–60
Pizza, fresh
– 170 – – 15–20
– 225 – – 20–25
– – – – 10–15
mins.
* Preheat until the cooking space temperature is reached.
Always use the low wire rack.
44
Page 45
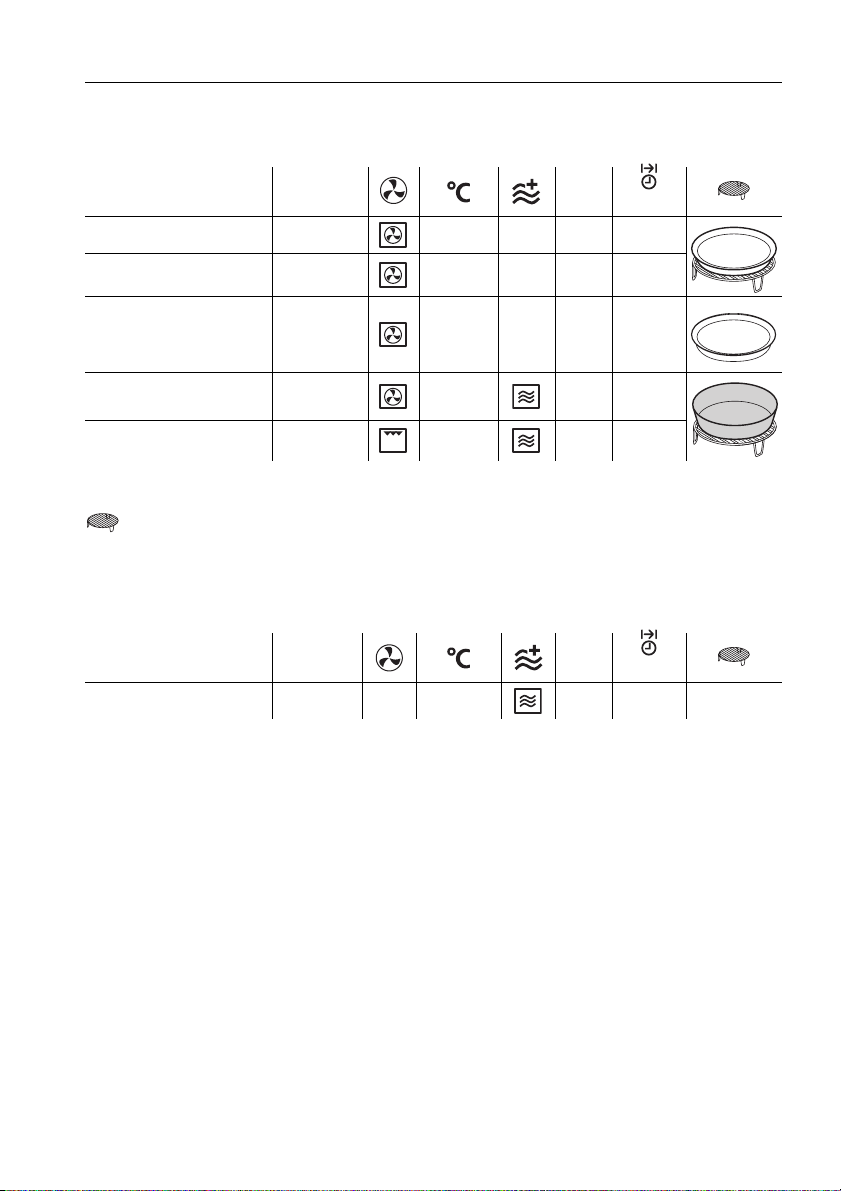
… Tips on settings
Baking and cooking
Quantity W
Bread 500 g–1 kg 210–225 – – 30–35
Bread rolls 5–7 pieces 225 – – 15–20
Bread rolls, pre-baked 6–10 pieces 225 – – 10–15
Lasagne, soufflé, gratin
Gratinated vegetables – – 350 7–12
for
4persons
180–200 350 25–30
mins.
* Preheat until the cooking space temperature is reached.
Always use the low wire rack.
Popcorn
Quantity W
Popcorn * 100 g – – 850 2 –
mins.
* Pay attention to manufacturer’s recommendations.
45
Page 46

Care and maintenance
Allow the appliance and accessories to cool down before cleaning.
The appliance may not be used if the appliance door or lock is
damaged. Inspect these parts regulary.
Do not use abrasive cleaning agents or cleaning aids such as steel
wool, knives, glass scrapers, razor blades, etc. to clean the door
glass. Scratches on the door glass could cause breakage.
Do not use abrasive or caustic cleaning agents or stainless steel
cleaner. Do not use scouring pads, wire wool, etc. as such products will damage the surfaces.
Cleaning the exterior
A Remove any soiling or traces of cleaning agent immediately.
A Clean the surfaces with a soft cloth dampened with water and a little
washing-up liquid – for metallic surfaces rub in the direction of the original
polishlines. Wipe dry with a soft cloth.
Cleaning the appliance door
Under no circumstances may the appliance door be removed!
Do not use abrasive cleaning agents or cleaning aids such as steel
wool, knives, glass scrapers, razor blades, etc. to clean the door
glass. Scratches on the door glass could cause breakage.
A Clean the appliance door with a soft cloth dampened with water and a llitte
washing-up liquid. Wipe dry with a soft cloth.
46
Page 47

… Care and maintenance
Cleaning the cooking space
Always replace the turntable roller and glass turntable immediately
after cleaning.
Do not use abrasive cleaning agents. Do not use scouring pads,
wire wool, etc. as such products will damage the surface.
A Clean the cooking space regularly, especially when food has been spilt.
Take care that no grease splashes or food residues harden. Take all
accessories out of the cooking space before cleaning.
A Ideally remove any soiling with a soft cloth dampened with water and a little
washing-up liquid while the cooking space is still warm to the touch. Wipe
dry with a soft cloth.
A For stubborn dirt deposits heat up a glass of water at maximum microwave
power level for 2–3 minutes. The steam that is produced will soften the
soiling.
A To eliminate unpleasant odours, heat up a glass of water with lemon juice
for 2–3 minutes at maximum microwave power level.
47
Page 48

… Care and maintenance
Cleaning the accessories
Allow the glass turntable to cool down before cleaning.
Allow the CombiCrunch plate to cool down well before cleaning. Do
not immerse the CombiCrunch plate in water whilst still hot or cool
it under running water. Rapid cooling will damage the
CombiCrunch plate.
The following accessories can be cleaned in the dishwasher:
䡲 turntable roller
䡲 glass turntable
䡲 food cover
䡲 CombiCrunch grip
䡲 wire rack.
Do not wash the CombiCrunch plate in the dishwasher as this could
damage the surface coating!
A Clean using a mild detergent, water and a sponge. Scouring pads, steel
wool, etc. will cause visible damage.
Replacing a defective light bulb
For safety reasons, in case of a defective light bulb please contact our
Customer Services.
48
Page 49
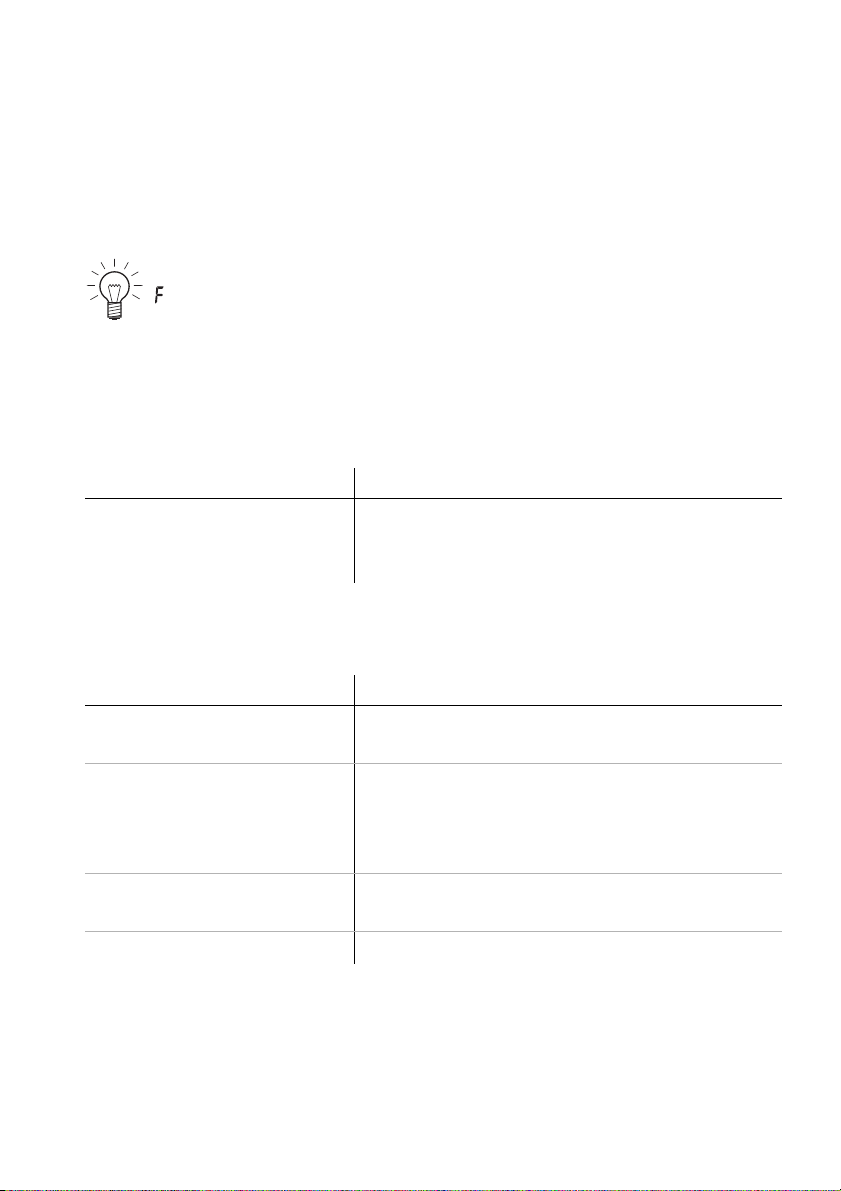
Trouble-shooting
This section lists faults that can be solved simply by following the instructions
given. If another fault is displayed or the fault cannot be remedied, please call
Customer Services.
Please note down the FN number and the error message in full, e.g.
, before calling Customer Services.
XX
What to do if …
… the appliance was switched on without any food in it
Possible cause Solution
The appliance will be undamaged if only
switched on for a short time. Do not switch the
appliance on without any food in it.
… the appliance is not working
Possible cause Solution
䡲 Appliance is not connect-
ed to the power supply.
䡲 Fuse or automatic circuit
breaker for electrical installations in the home is
defective.
䡲 Interruption in the power
supply.
䡲 The appliance is faulty. A Contact our Customer Services.
A Check the power supply.
A Change the fuse.
A Reset the automatic circuit breaker.
A Check the power supply.
49
Page 50

… Trouble-shooting
… a scratching noise can be heard when the appliance is switched on
Possible cause Solution
䡲 Cooking space floor and
turntable roller are soiled.
A Clean the floor of the cooking space and
the turntable roller regularly.
… the appliance affects your television reception
Possible cause Solution
Your appliance is not faulty in this case. When
in use, it can cause interference to television
or radio reception. This is a similar kind of interference to that caused by small electrical
appliances (such as mixers, vacuum cleaners,
etc.).
… hot air flows out of the appliance
Possible cause Solution
This is a normal functional state. The heat
emitted by the food warms the air in the cooking space. This is then discharged to the outside. The heated air contains no microwaves.
The ventilation slots are on no account to be
obstructed.
50
Page 51
… Trouble-shooting
… the appliance switches off prematurely
Possible cause Solution
䡲 Appliance is overheated. A Check the ventilation slots. These must be
freely accessible.
䡲 Ventilation slots are
obstructed.
A Remove any objects obstructing the
ventilation slots.
A Wait for the appliance to cool down.
A Restart the appliance.
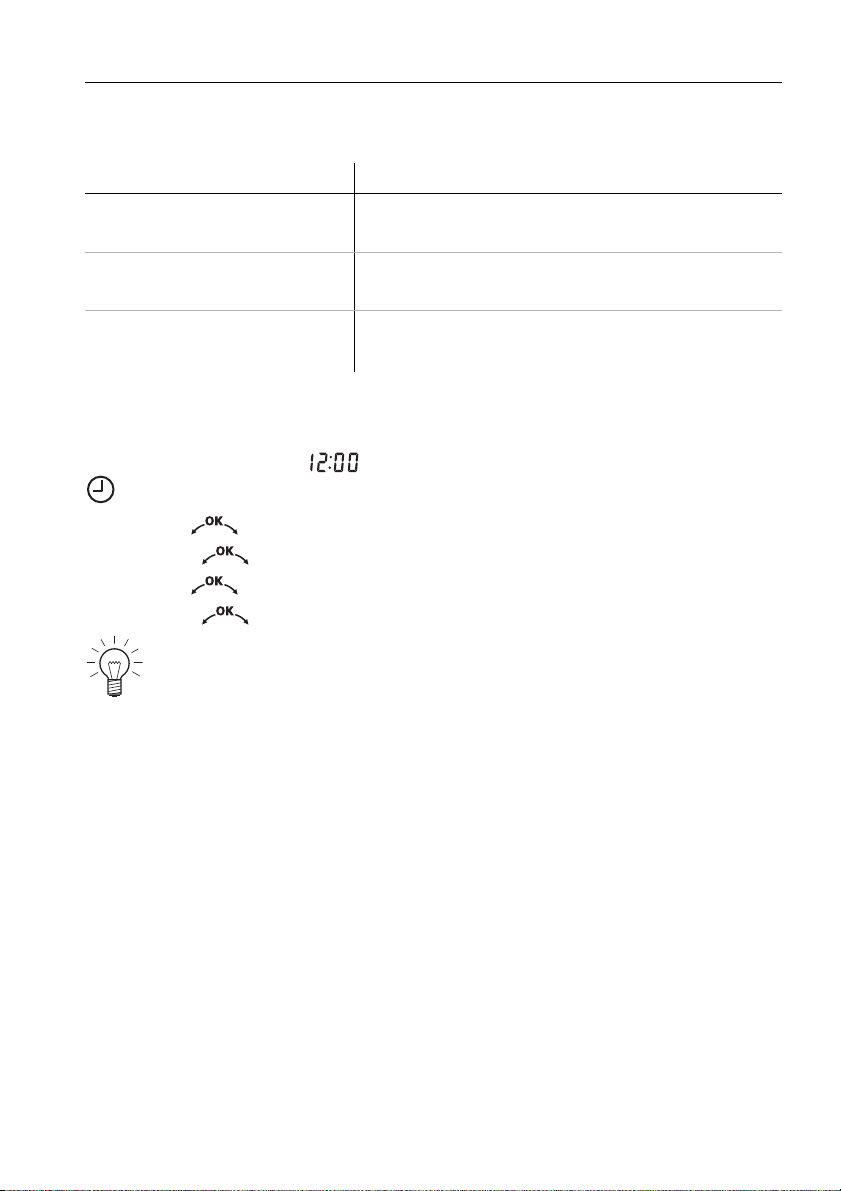
After a power failure
After a power failure, flashes in the right digital display and the
symbol flashes.
A Turn the adjusting knob to set the hour.
A Press the adjusting knob to confirm.
A Turn the adjusting knob to set the minutes.
A Press the adjusting knob again to confirm the time.
All the user settings are reset to the factory settings.
51
Page 52
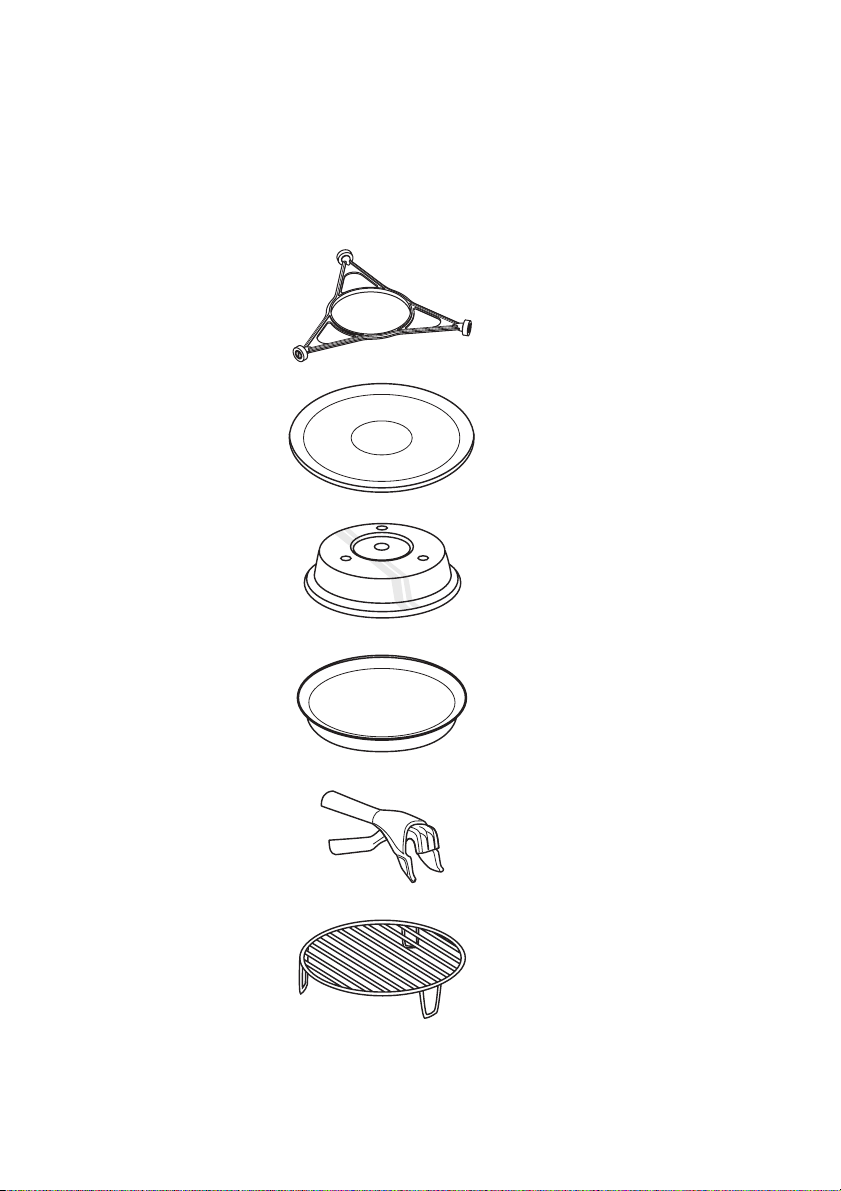
Accessories and spare parts
Please give model number and exact description when ordering parts.
Turntable roller
Glass turntable
Food cover
CombiCrunch plate
CombiCrunch grip
Wire rack
52
low
high
Page 53
Technical data
External dimensions
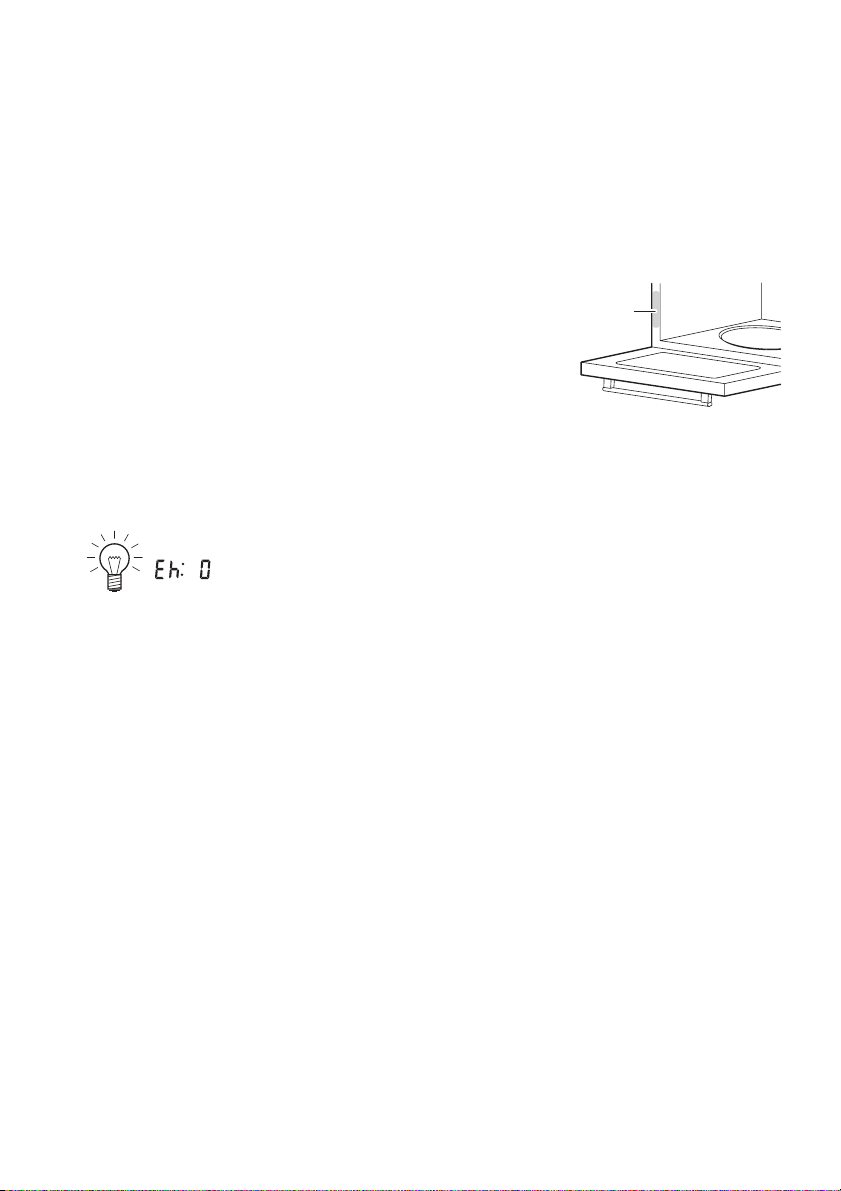
A See Installation Instructions
Electrical connection
A See identification plate 1
Automatic energy-saving stand-by
To avoid consuming power unnecessarily, the appliance is equipped with
automatic energy-saving stand-by.
To reduce power consumption to an absolute minimum, select
, «Time display invisible». Despite automatic energy-saving
stand-by, all safety functions are active.
1
53
Page 54
Disposal
Packaging
䡲 All packaging materials (cardboard, plastic film (PE) and polystyrene
(EPS)) are marked and should, if possible, be collected for recycling and
disposed of in an environmentally friendly way.
Disconnection
䡲 Disconnect the appliance from the mains. With a fixed appliance, this is to
be carried out by a qualified electrician!
Safety
䡲 Disable the appliance to prevent accidents caused by improper use, espe-
cially through children playing.
䡲 Pull the plug out of the mains socket or have the appliance disconnected
from the mains by a qualified electrician. Then cut off the mains cable.
䡲 Remove or disable the lock on the appliance door.
Disposal
䡲 The old appliance should not be discarded as worthless rubbish. If
disposed of correctly, the raw materials can be recovered for recycling.
䡲 The symbol on the identification plate warns that the appliance may
not be disposed of in normal household waste.
䡲 The appliance must be disposed of in accordance with local regulations
on waste disposal. For more information on the handling, disposal and
recycling of the product, please contact the local authorities, the local
recycling facilities for household waste or the retailer from whom you
purchased the appliance.
54
Page 55

Notes
55
Page 56

Index
A
Accessories .................... 12, 16, 52
Cleaning.................................... 48
Acoustic signal...................... 23, 25
Ambient temperature .................. 18
Appliance description ................. 14
Appliance door............................. 14
Cleaning.................................... 46
AutomaticPlus........................ 32, 35
Programme table .................... 36
Avoiding damaging appliance .... 9
B
Before using for the first time...... 5
Buttons........................................... 15
C
Care................................................ 46
Childproof lock...................... 23, 24
Children in the home .................... 6
Cleaning ........................................ 46
Cleaning the exterior................... 46
Combi mode................................. 37
Grill............................................. 32
Hot air........................................ 32
CombiCrunch ........................ 32, 34
Grip ............................................ 17
Plate........................................... 16
CombiCrunch plate ..................... 12
Construction ................................. 14
Cooking ......................................... 41
Cooking space, cleaning ........... 47
D
Defrosting .............................. 40, 41
Delayed start................................ 29
Disconnection .............................. 54
Dishes ........................................... 13
Display elements......................... 15
Displays......................................... 15
Disposal ........................................ 54
E
Electrical connection .................. 53
External dimensions ................... 53
F
Factory settings ........................... 25
Food category.............................. 36
Food cover ................................... 17
Foods, heating............................. 10
G
Glass turntable ..................... 12, 16
Grill................................................. 14
H
Heating up.................................... 39
Hot air fan..................................... 14
I
Identification plate................ 14, 53
Illumination ..................... 14, 23, 25
Installation..................................... 18
L
Light bulb, replacing................... 48
Liquids, heating ........................... 10
56
Page 57

… Index
M
Maintenance.................................. 46
Microwave
Safety precautions................... 10
Microwave energy.......................... 5
Microwave operating modes ..... 15
Model no.......................................... 2
O
Operating elements ..................... 15
Operating mode
AutomaticPlus .......................... 35
CombiCrunch ........................... 34
Power&Favorit .......................... 34
Operating modes ................. 15, 32
Operating the appliance
Example..................................... 20
Operating time.............................. 28
Operation....................................... 19
Optimal use................................... 38
P
Packaging...................................... 54
Power failure ................................. 51
Power&Favorit....................... 32, 34
Preparation method..................... 36
Q
Quick instructions ........................ 60
R
Radio interference........................ 50
Removing cooked food .............. 21
Repair service............................... 59
S
Safety ............................................. 54
Safety lock .................................... 14
Safety precautions
Before using for the first time . 5
Children in the home................ 6
Correct use................................. 6
Note on use ............................... 7
Scratching noise .......................... 50
Spare parts ................................... 52
Stand-by ........................................ 53
Start protection............................. 20
Switch-off time.............................. 29
Symbols.................................... 2, 15
Symbols used .............................. 38
T
Technical data.............................. 53
Television interference................ 50
Temperature unit .................. 23, 25
Time display .......................... 23, 24
Flashing .................................... 51
Time format............................ 23, 25
Time functions.............................. 26
Time, setting ................................. 26
Timer .............................................. 27
Tips on settings............................ 38
Baking ................................ 44, 45
Cooking....................... 41, 44, 45
Defrosting .......................... 40, 41
Fish ............................................ 42
Heating up................................ 39
Meat........................................... 42
Popcorn .................................... 45
Poultry ....................................... 42
Simultaneous defrosting and
cooking ..................................... 41
Vegetables ............................... 43
Trouble-shooting .......................... 49
Turntable roller ...................... 12, 16
Type ................................................. 2
57
Page 58

… Index
U
Use, optimal.................................. 38
User settings................................. 22
Using for the first time ................ 19
V
Validity.............................................. 2
Ventilation fan............................... 18
Ventilation slots ............................ 51
W
Wire rack................................ 12, 17
58
Page 59

Repair service
The 'Trouble-shooting' section will help you to carry out small repairs
yourself, saving you the time and trouble of calling out a service
engineer and the cost that goes along with it.
Whether you contact us about a malfunction or an order, please always state
the serial number (FN) and the model type of your appliance. Enter these
details below and also on the service sticker which comes with the appliance.
Stick it in a conspicuous place or in your telephone or address book.
FN
You will also find the same details on the certificate of guarantee, the original
sales invoice and the identification plate of the appliance.
A Open the appliance door.
– The identification plate is on the left-hand side of the cooking space.
Appliance
59
Page 60
Quick instructions
Please first read the safety precautions in the operating instructions!
To set the time
A Press the button.
A Turn the adjusting knob to set the hour.
A Press the button again.
A Turn the adjusting knob to set the minutes.
A Press the adjusting knob to confirm.
To switch off the appliance
A Press the button.
To set the timer
A Press the button.
A Turn the adjusting knob to set the timer duration.
Switching Power&Favorit on
A Press the button.
A Press the adjusting knob to confirm.
V-ZUG Ltd
Industriestrasse 66, CH-6301 Zug
[email protected], www.vzug.com
4619-694-71751
J946.352-0
 Loading...