

Instructions for use
Bedienungsanleitung
Notice d’emploi
Istruzioni per l’uso
MBI 540
1

INSTALLATION
PRIOR TO CONNECTING
Check that the voltage on the rating plate
corresponds to the voltage in your home.
Do not remove the microwave inlet
protection plates located on the side of the
oven cavity wall. They prevent grease &
food particles from entering the microwave
inlet channels.
Ensure the oven cavity is empty before
mounting.
Ensure that the appliance is not
damaged. Check that the oven door closes
firmly against the door support and that the
internal door seal is not damaged. Empty
the oven and clean the interior with a soft,
damp cloth.
Do not operate this appliance if it has a
damaged mains cord or plug, if it is not
working properly, or if it has been damaged
or dropped. Do not immerse the mains
cord or plug in water. Keep the cord away
from hot surfaces. Electrical shock, fire or
other hazards may result.
Follow the supplied separate mounting
instructions when installing the appliance.
AFTER CONNECTING
The oven can be operated only if the oven
door is firmly closed.
The earthing of this appliance is
compulsory. The manufacturer will accept
no responsibility for injury to persons,
animals or damage to objects arising from
the non-observance of this requirement.
In the case of a permanent connection,
the appliance should be installed by a
qualified technician.
Important!
A permanent connection requires the
installation of a separating device. The
separating device must have an omnipolar
contact opening of more than 3 mm
including LS switches, safety valves and
relays. The separating device must be
connected directly to the terminal.
The manufacturers are not liable for any
problems caused by the user’s failure to
observe these instructions.
IMPORTANT SAFETY INSTRUCTIONS
READ CAREFULLY AND KEEP FOR FUTURE REFERENCE
Do not heat, or use flammable materials
in or near the oven. Fumes can create a fire
hazard or explosion.
Do not use corrosive chemicals or vapors
in this appliance. This type of oven is
specifically designed to heat or cook food.
It is not designed for industrial or laboratory
use.
Do not use your microwave oven for drying
textiles, paper, spices, herbs, wood,
flowers, fruit or other combustible
materials. Fire could result.
If material inside / outside the oven
should ignite, keep oven door closed and
turn the oven off. Disconnect the power
cord or shut off power at the fuse or circuit
breaker panel.
2
Do not over-cook food. Fire could result.
Do not leave the oven unattended,
especially when using paper, plastic or
other combustible materials in the cooking
process. Paper can char or burn and some
plastics can melt if used when heating
foods.
Only allow children to use the oven without
supervision when adequate instructions
have been given so that the child is able to
use the oven in a safe way and
understands the hazards of improper use.
WARNING!
IMPORTANT SAFETY INSTRUCTIONS
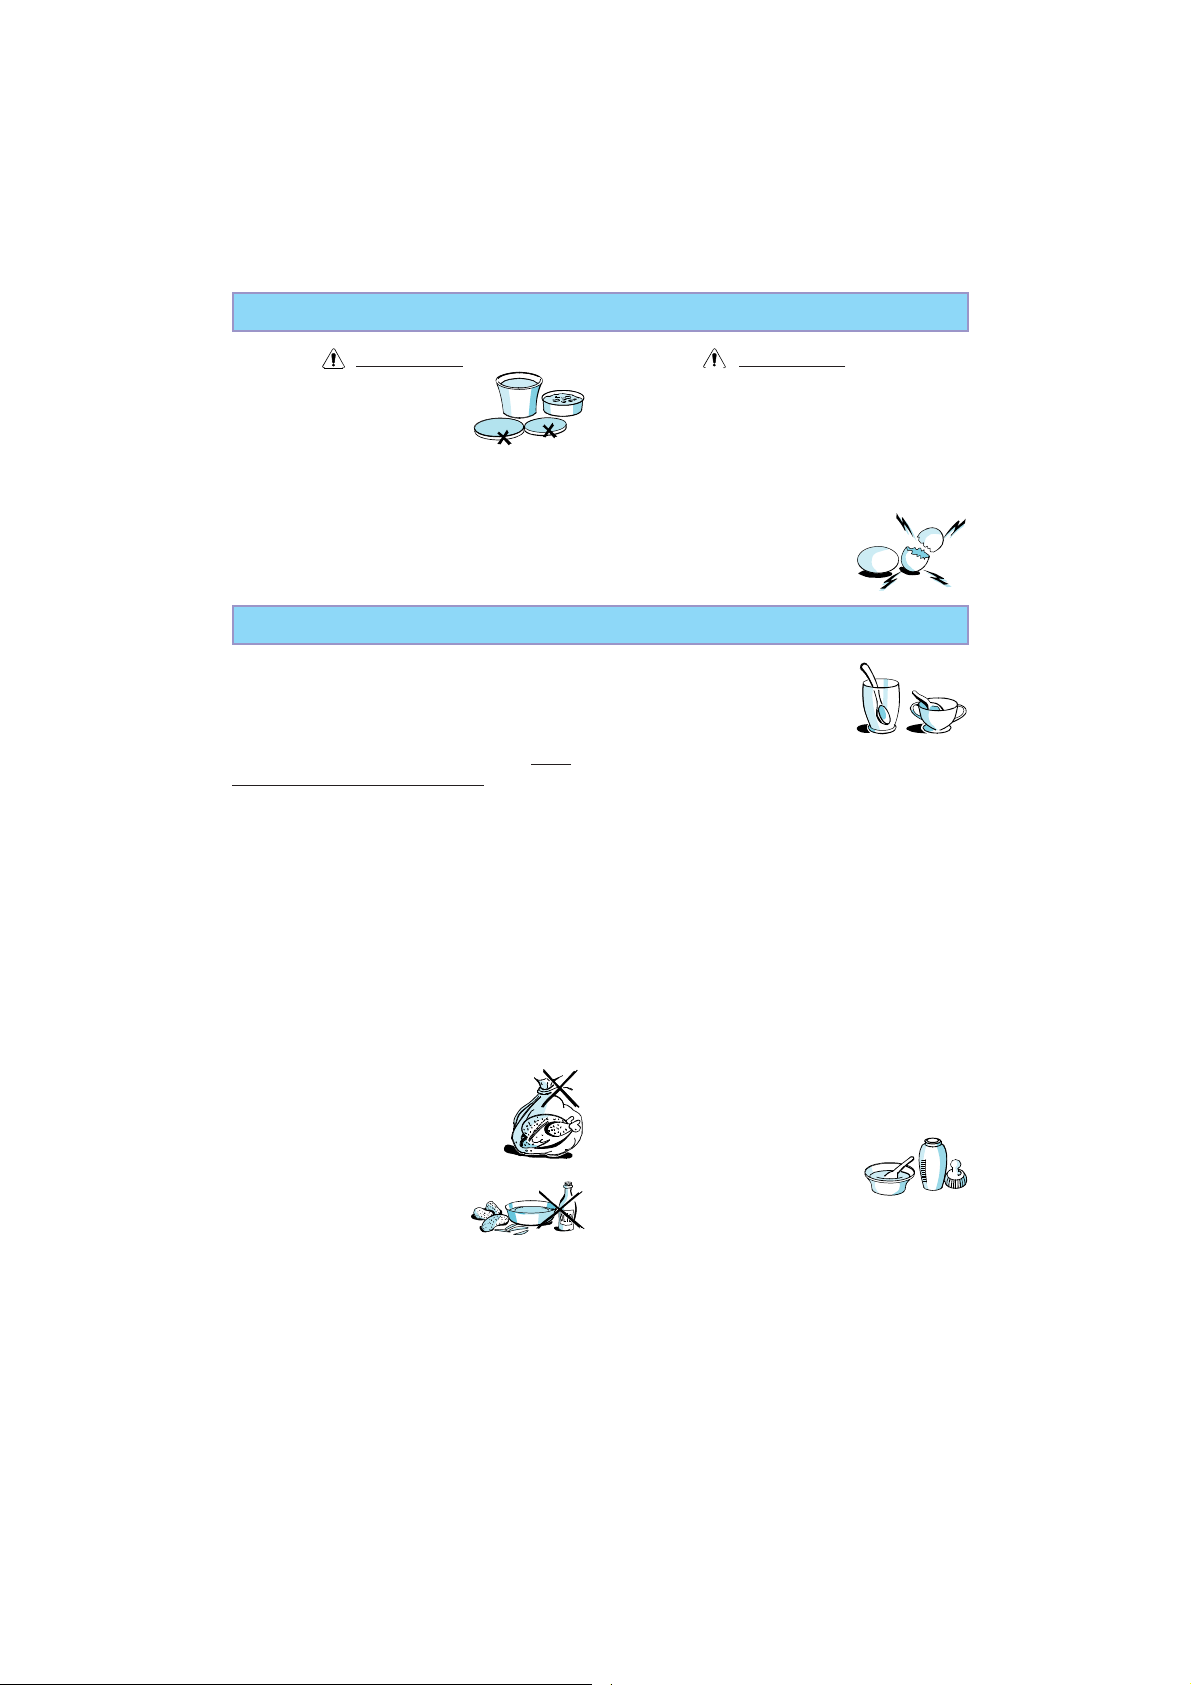
WARNING!
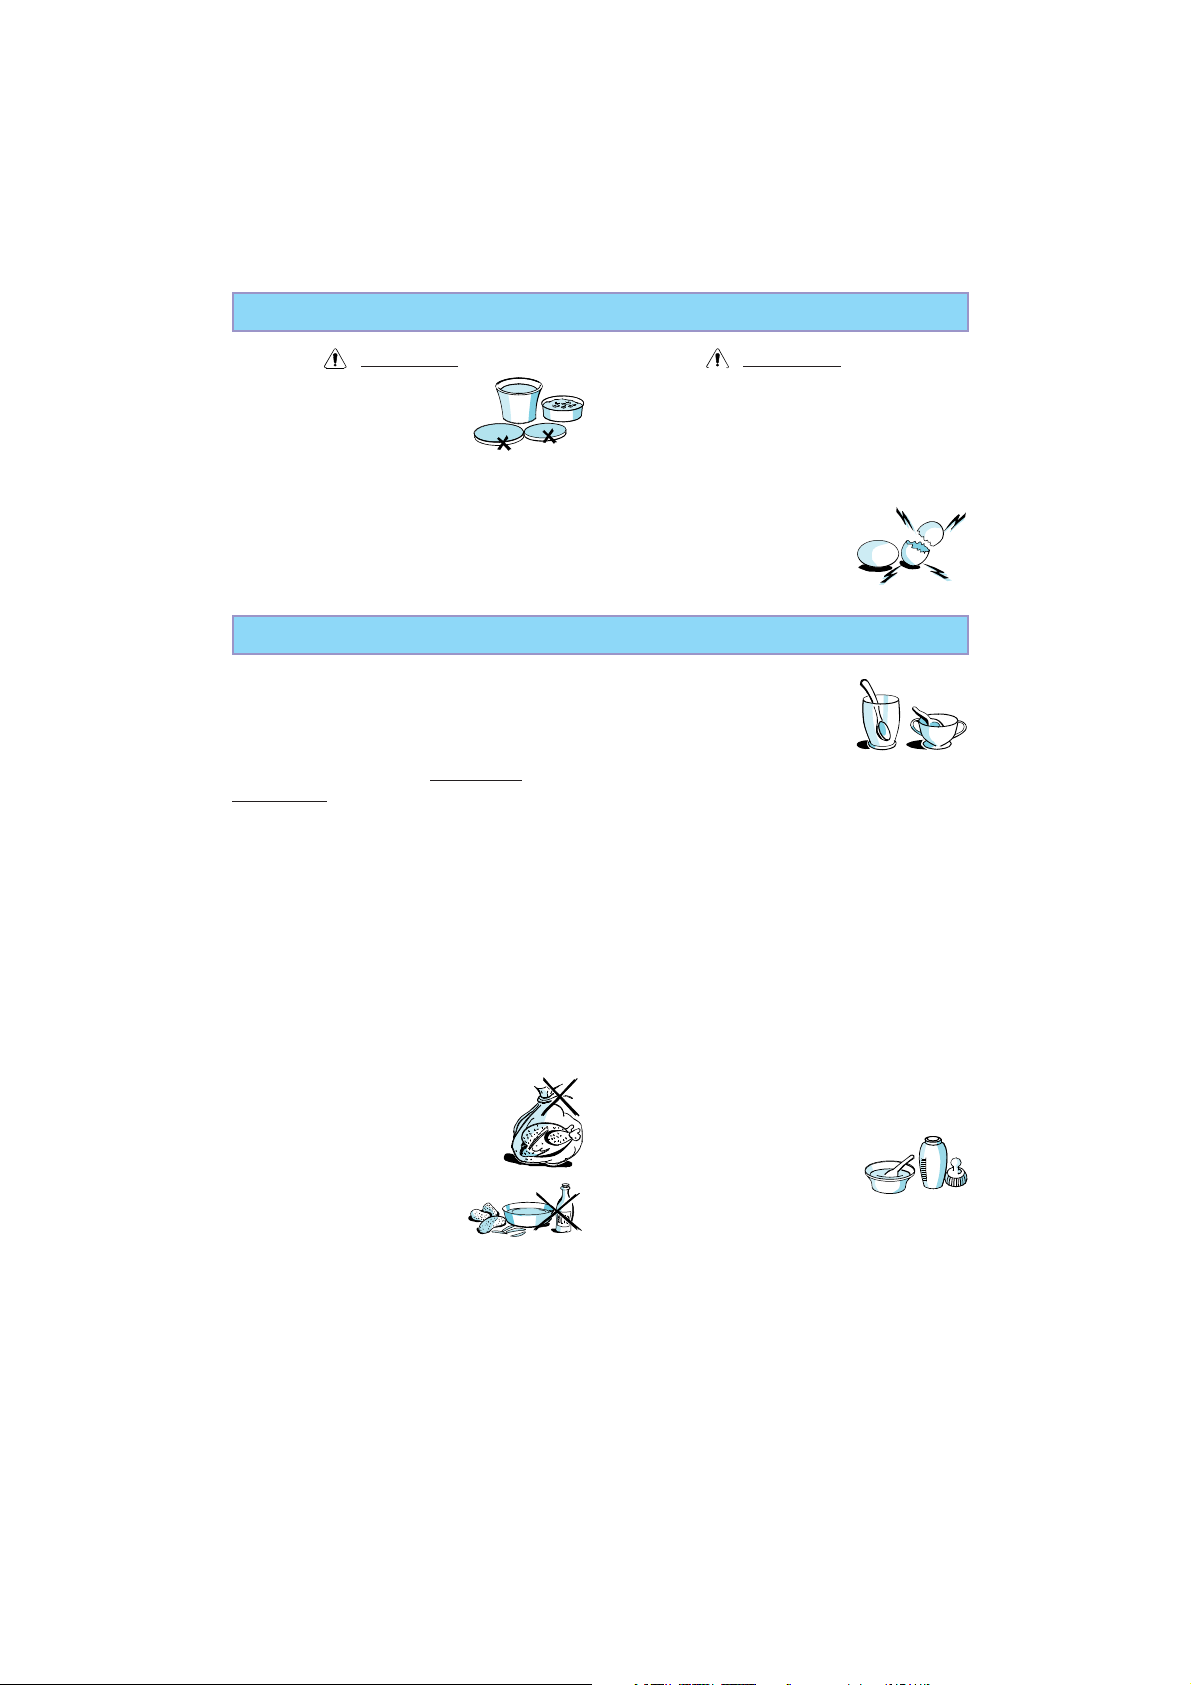
Do not use your microwave
oven for heating anything in
airtight sealed containers.
The pressure increases and
may cause damage when opening or may
explode.
EGGS
Do not use your microwave oven for cooking or reheating whole eggs with
or without shell since they may explode even after microwave heating has
ended.
The door seals and the door seal areas
must be regularly inspected for damage. If
these areas are damaged the appliance
should not be operated until it has been
repaired by a trained service technician.
WARNING!
PRECAUTIONS
GENERAL
This appliance is designed for domestic
use only!
The appliance should not be operated
without food in the oven
when using
microwaves. Operation in this manner is
likely to damage the appliance.
If you practice operating the oven, put a
glass of water inside. The water will
absorb the microwave energy and the oven
will not be damaged.
Do not use the cavity for any storage
purposes.
Do not remove the microwave inlet
protection plates located on the side of the
oven cavity wall. They prevent grease &
food particles from entering the microwave
inlet channels.
Remove wire twist-ties from
paper or plastic bags before
placing bag in the oven.
DEEP-FRYING
Do not use your
microwave oven for deep-
frying, because the oil
temperature cannot be controlled.
Use hot pads or oven mitts to prevent
burns, when touching containers, oven
parts, and pan after cooking.
LIQUIDS
E.g. beverages or water in
your microwave oven,
overheating the liquid
beyond boiling point can occur without
evidence of bubbling. This could result in a
sudden boil over of the hot liquid.
To prevent this possibility the following
steps should be taken:
1. Avoid using straight-sided containers
with narrow necks.
2. Stir the liquid before placing the
container in the oven and let the
teaspoon remain in the container.
3. After heating, allow standing for a
short time, stirring again before
carefully removing the container from
the oven.
CAREFUL
Always refer to a microwave cookbook for
details. Especially, if cooking
or reheating food that
contains alcohol.
After heating baby food or
liquids in a baby bottle or in a baby food
jar, always stir and check the
temperature before serving. This will
ensure that the heat is evenly distributed
and the risk of scalding or burns can be
avoided.
Ensure the Lid and the Teat is removed
before heating!
3

ACCESSORIES
GENERAL
There are a number of accessories
available on the market. Before you buy,
ensure they are suitable for microwave
use.
When you put food and accessories in the
microwave oven, ensure that they do not
come in contact with the interior of the
oven. This is especially important with
accessories made of metal or metal
parts.
If accessories containing metal comes in
contact with the oven interior, while the
oven is in operation, sparking can occur
and the oven could be damaged.
Always ensure that the turntable is able to
turn freely before starting the oven.
Ensure that the utensils you use are oven
proof and allow microwaves to pass
through them before cooking.
TURNTABLE SUPPORT
Use the turntable support
under the Glass turntable.
Never put any other utensils on
the turntable support.
* Fit the turntable support in the oven.
GLASS TURNTABLE
Use the Glass turntable with
all cooking methods. It collects
the dripping juices and food
particles that otherwise would
stain and soil the interior of the oven.
* Place the Glass turntable on the
turntable support.
BABY BOTTLE HOLDER
Use the Baby bottle Holder
when heating baby food in
bottles that are too tall to
stand-alone in the oven.
Please see also, the chapter
”Precautions”, for more information about
heating baby food.
(Not available in the UK and Ireland).
COVER
The Cover is used to cover food
during cooking and reheating
with microwaves only and helps
to reduce spattering, retain food
moisture as well as reducing the
time needed.
Use the cover for two level reheating.
START PROTECTION / CHILD LOCK
This automatic safety function is
activated one minute after the oven has
returned to “stand by mode“.
4
The door must be opened and closed e.g.
putting food into it, before the safety lock is
released.
If you attempt to operate the oven without
putting food into it, the display will show
“door“.
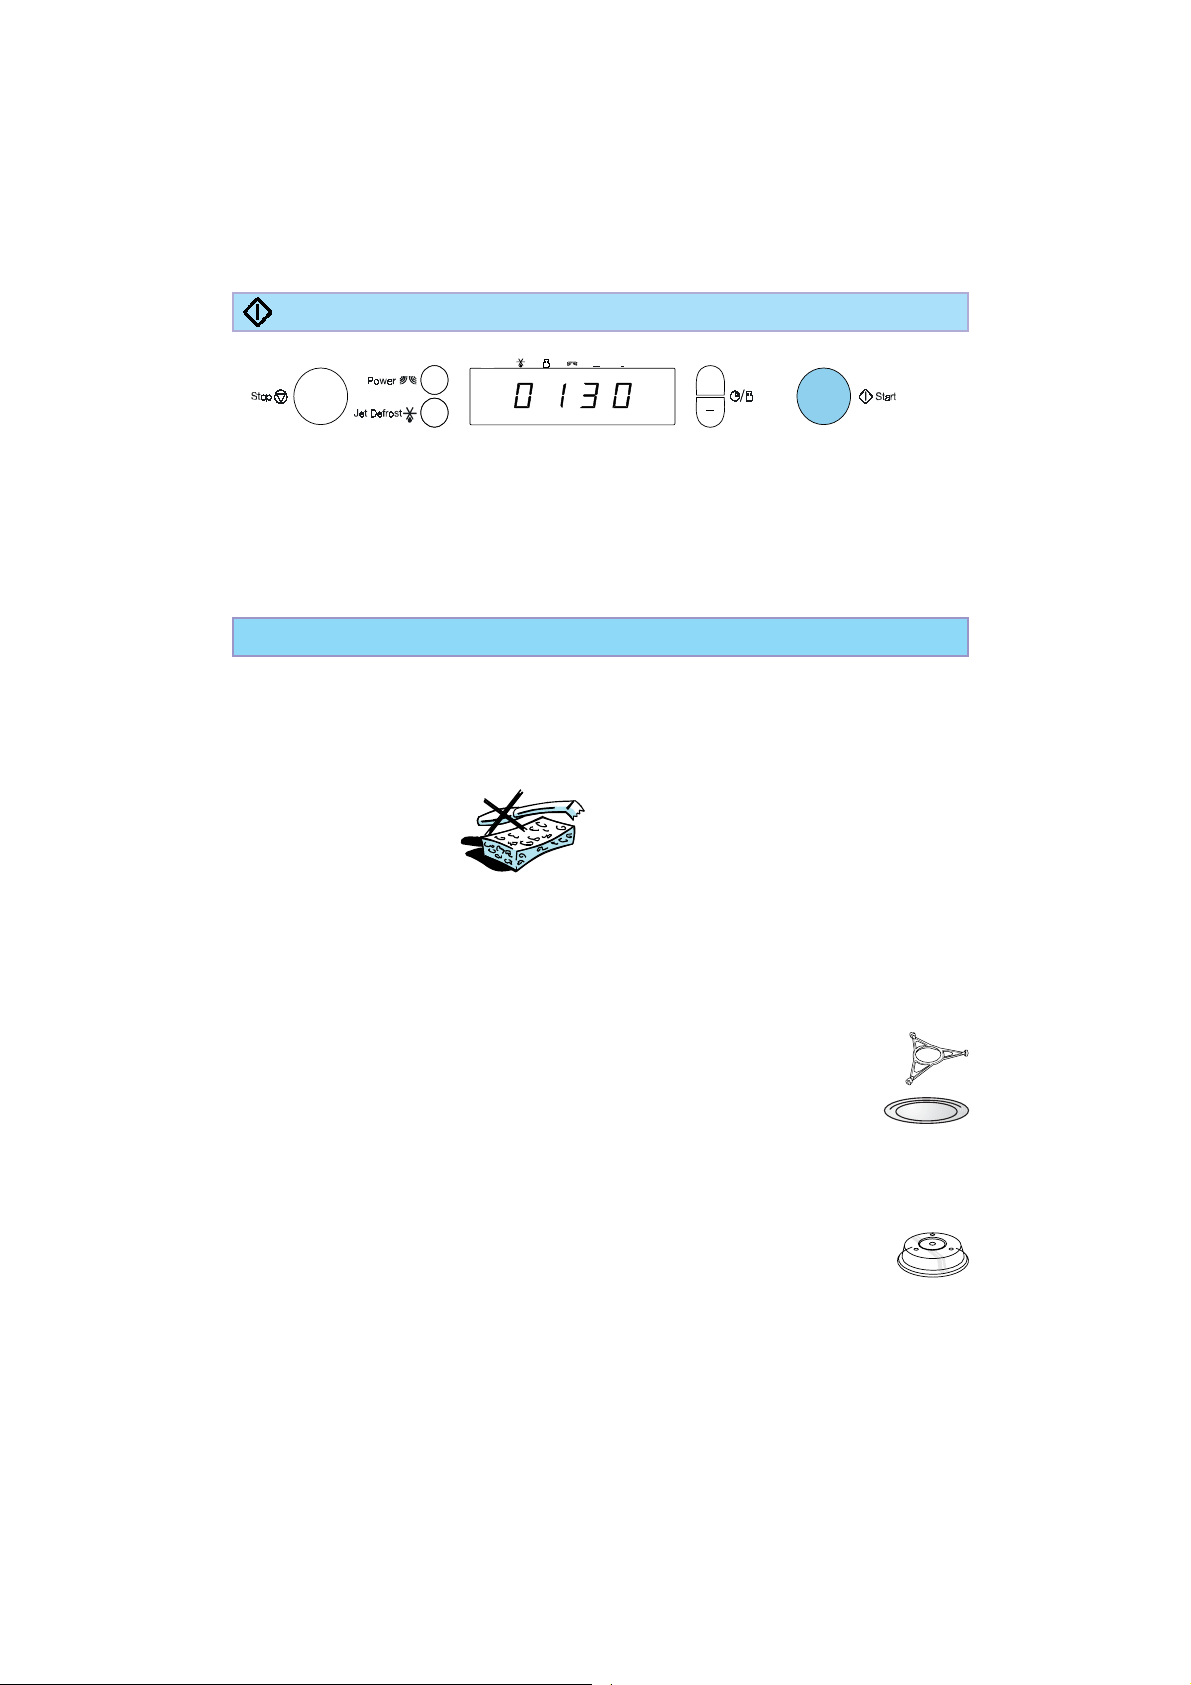
HOW TO PAUSE OR STOP COOKING
To pause cooking:
The cooking can be paused to check, turn
or stir the food by opening the door. The
setting will be maintained for 10 minutes.
To continue cooking:
Close the door and press the Start
button
ONCE
. The cooking is
resumed from where it was paused.
Pressing the Start button
increase the time by 30 seconds.
TWICE
will
If you don’t want to continue
cooking:
Remove the food, close the door
and press the STOP button
A beep will signal once a minute
for 10 minutes when the cooking is
finished. Press the STOP button or open
the door to cancel the signal.
Note: The oven will only hold the settings
for 30 seconds if the door is opened and
then closed after the cooking is finished.
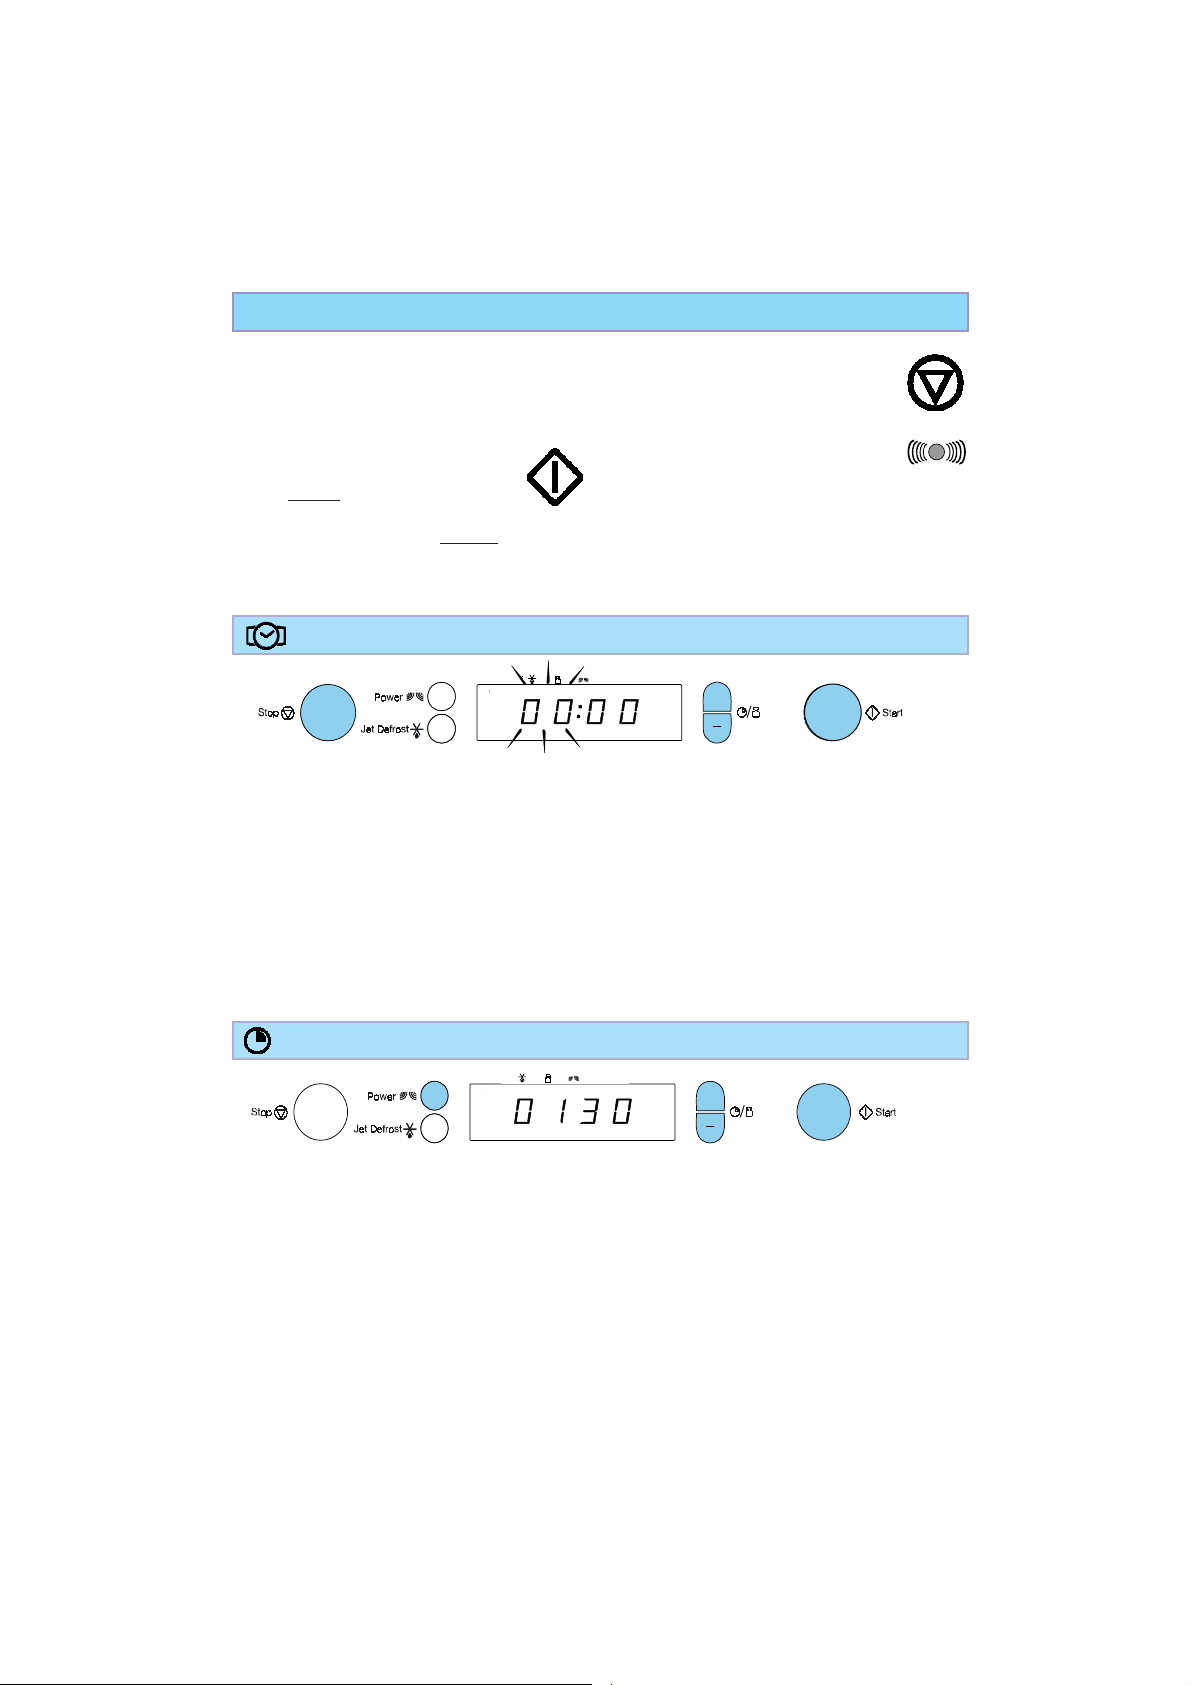
CLOCK
1
+
2
4
Keep the door open while setting the Clock. This gives you 5 minutes to complete the
setting of the Clock. Otherwise, each step must be accomplished within 30 seconds.
1. Press the Stop button (3 seconds) until the left-hand digit (hour’s) flicker.
2. Press the +/- buttons to set the hours.
3. Press the Start button. (The two right hand digits (minutes) flicker).
4. Press the +/- buttons to set the minutes.
5. Press the Start button again.
The Clock is set and in operation.
Note: When the appliance is first plugged in or after a power failure, the display is blank. If
the clock is not set, the display will remain blank until the cooking time is set.
3 5
TIMER
2
Use this function when you need a kitchen timer to measure exact time for various
purposes such as cooking eggs, pasta or letting the dough rise before baking etc.
1. Press the +/- buttons to set the desired length of the timer.
2. Press the power button repeatedly to set the power to 0 W.
3. Press the Start button.
An acoustic signal will be heard when the timer has finished to count down.
1
+
3
5
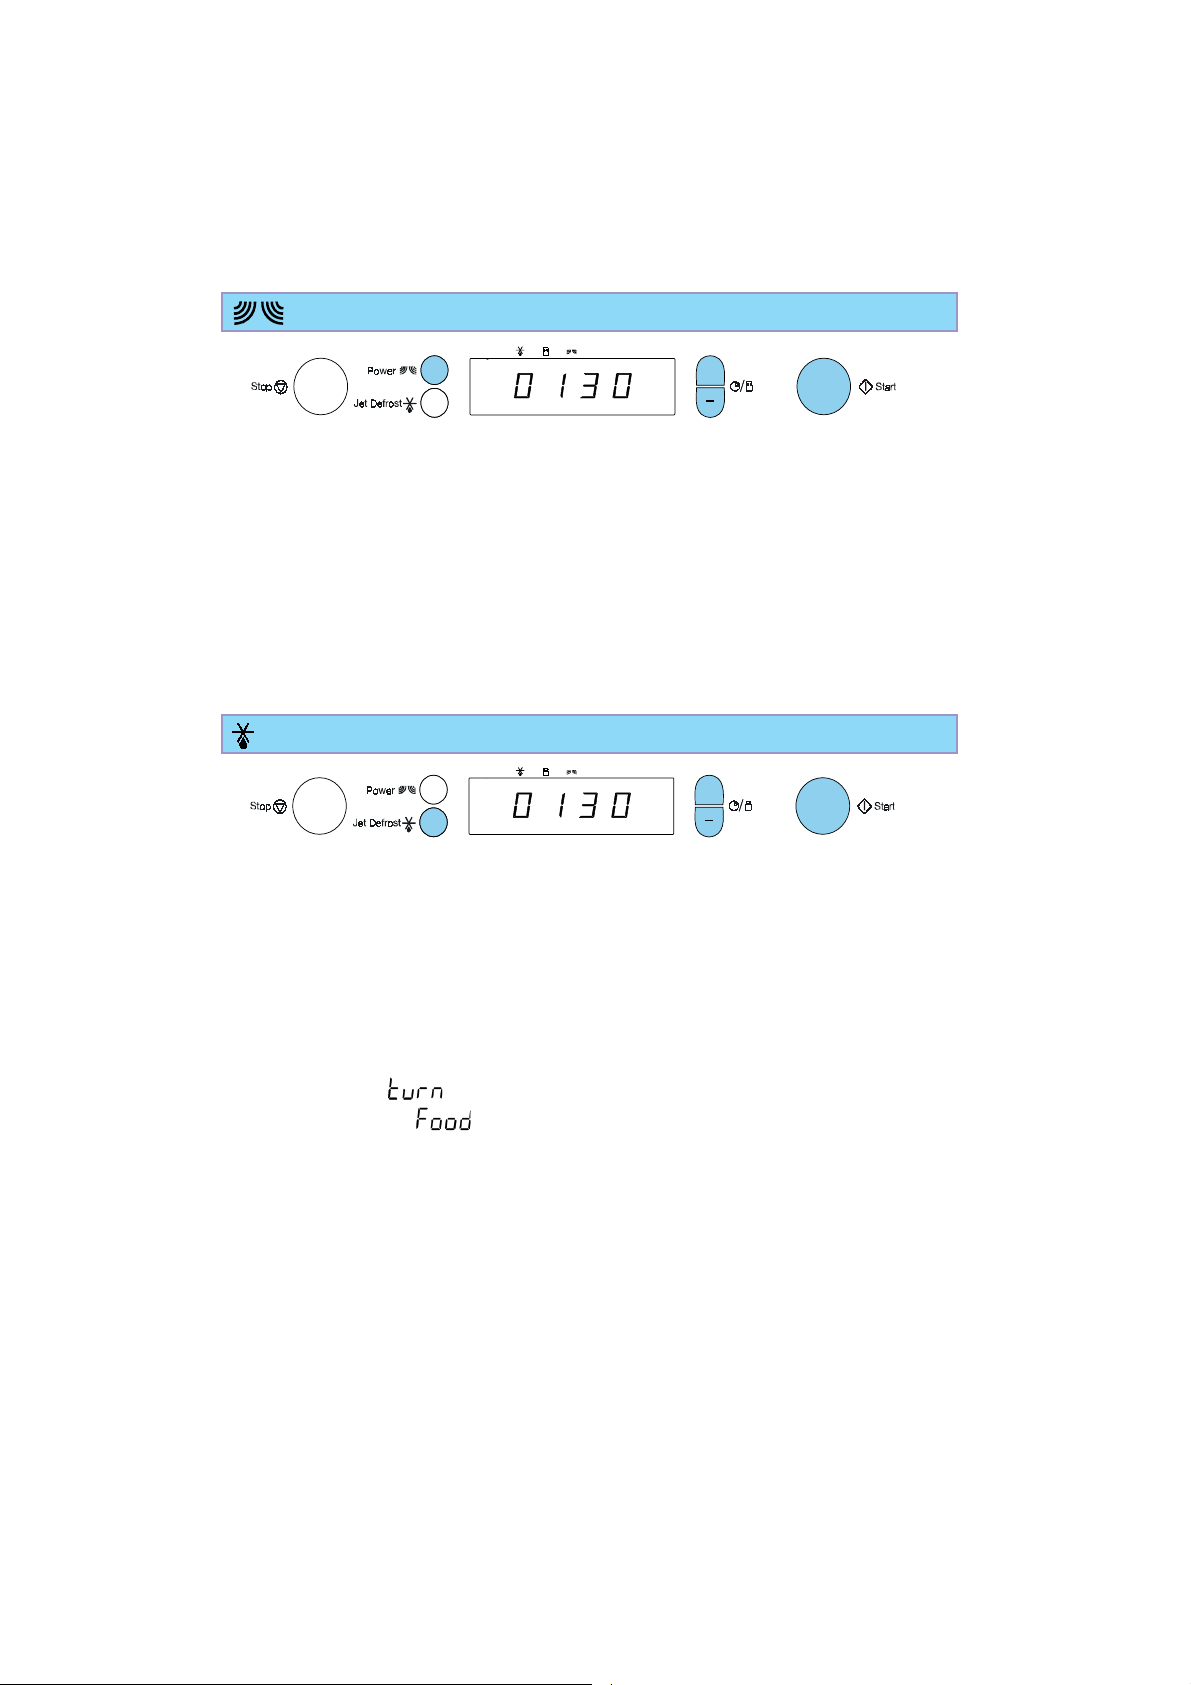
COOK & REHEAT WITH MICROWAVES
2
Use this function for normal cooking and reheating, such as vegetables, fish, potatoes
and meat.
1. Press the +/- buttons to set the time.
2. Press the power button repeatedly to set the power.
3. Press the Start button.
Once the cooking process has been started:
The time can easily be increased in 30-second steps by pressing the Start button. Each
press increases the time with 30 seconds. You may also alter the time by pressing the +/buttons to increase or decrease the time.
Pressing the power button may also change the power level. The first press will show you
the current power level. Press the power button repeatedly to change power level.
1
+
3
JET DEFROST
23
+
1
Use this function for defrosting Meat, Fish & Poultry ONLY. For other foods such as Bread
& Fruit you should follow the procedure for ”How to cook and reheat with microwaves” and
choose 160 W when defrosting.
Jet Defrost should only be used if the net weight is between 100 - 2000g.
1. Press the Jet Defrost button.
2. Press the + / - buttons to set the weight of the food.
3. Press the Start button.
Midway through the defrosting process
the oven stops and prompts you to “TURN”
food.
— Open the door.
— Turn the food.
— Close the door and restart (GO) by
pressing the Jet Start button.
Note: the oven continues automatically
after 2 min if the food hasn’t been turned.
The defrosting time will be longer in this
case.
If the weight is lesser or greater than
recommended weight:
Follow the procedure for ”How to cook and
reheat with microwaves” and choose 160
W when defrosting.
If the food is warmer than deep-freeze
temperature (-18°C), choose lower weight
of the food.
If the food is colder than deep-freeze
temperature (-18°C), choose higher
weight of the food.
6
JET START
+
This function is used for quick reheating of foods with a high water content such as; clear
soups, coffee or tea.
Press to automatically start with full microwave power level and the cooking time set to
30 seconds. Each additional press increases the time with 30 seconds. You may also
alter the time by pressing the +/- buttons to increase or decrease the time after the
function has started.
MAINTENANCE & CLEANING
Failure to maintain the oven in a clean
condition could lead to deterioration of the
surface that could adversely affect the life of
the appliance and possibly result in a
hazardous situation.
Do not use metal scouring
pads on the inside of the
oven cavity. They will
scratch the surface.
At regular intervals, especially if spillovers
have occurred, remove the turntable, the
turntable support and wipe the base of the
oven clean.
This oven is designed to operate with the
turntable in place.
Do not operate the microwave oven when
the turntable has been removed for
cleaning.
Use a mild detergent, water and a soft
cloth to clean the interior surfaces, front
and rear of the door and the door opening.
Do not allow grease or food particles to
build up around the door.
For stubborn stains, boil a cup of water in
the oven for 2 or 3 minutes. Steam will
soften the marks.
Adding some lemon juice to a cup of
water, placing this on the turntable and
boiling for a few minutes can eliminate
odors inside the oven.
Abrasive cleansers, steel-wool pads, gritty
wash cloths, etc. can damage the control
panel, and the interior and exterior oven
surfaces. Use a sponge with a mild
detergent or a paper towel with spray glass
cleaner. Apply spray glass cleaner to a
paper towel.
Do not spray directly on the oven.
Dishwasher safe:
Turntable support.
Glass turntable.
Baby Bottle Holder
(Not available in the UK and
Ireland).
Cover
7
TROUBLE SHOOTING GUIDE
If the oven does not work, do not make a
service call until you have made the
following checks:
* The Turntable and turntable support is
in place.
* The Plug is properly inserted in the wall
socket.
* The Door is properly closed.
* Check your Fuses and ensure that there
is power available.
* Check that the oven has ample
ventilation.
* Wait for ten minutes and then try to
operate the oven once more.
* Open and then close the door before
you try again.
This is to avoid unnecessary calls for
which you will be charged.
When calling for Service, please give the
serial number and type number of the oven
(see Service label). Consult your warranty
booklet for further advice.
ENVIRONMENTAL HINTS
The packing box may be fully recycled as
confirmed by the recycling
symbol. Follow local disposal
regulations. Keep potentially
hazardous packaging (plastic
bags, polystyrene etc.) out of the
reach of children.
This appliance is marked according to the
European directive 2002/96/EC on Waste
Electrical and Electronic Equipment
(WEEE). By ensuring this product is
disposed of correctly, you will help prevent
potential negative consequences for the
environment and human health, which
could otherwise be caused by
inappropriate waste handling of this
product.
Important:
If the mains cord needs replacing it should
be replaced by the original mains cord,
which is available via our service
organization. The mains cord may only be
replaced by a trained service technician.
WARNING!
Service only to be carried
out by a trained service
technician. It is hazardous for
anyone other than a trained
person to carry out any
service or repair operation,
which involves the removal of
any cover, which gives
protection against exposure to
microwave energy.
Do not remove any cover.
The symbol on the product, or on the
documents accompanying
the product, indicates that
this appliance may not be
treated as household waste.
Instead it shall be handed over
to the applicable collection
point for the recycling of
electrical and electronic
equipment.
Disposal must be carried
out in accordance with local environmental
regulations for waste disposal.
For more detailed information about
treatment, recovery and recycling of this
product, please contact your local city
office, your household waste disposal
service or the shop where you purchased
the product.
Before scrapping, cut off the mains cord so
that the appliance cannot be connected to
the mains.
8
Model MBI 540
Supply voltage
230 V/50 Hz
Rated Power Input
1300 W
Fu se
10 A (UK 13 A)
MW output power
750 W
H x W x D
Outer dimensions:
362 x 595 x 320
Oven compartment:
187 x 370 x 290
Test Amount Approx. time Power level Container
12.3.1 750 g 10 min 750 W
Pyrex 3.220
12.3.2 475 g 5 ½ min 750 W
Pyrex 3.827
12.3.3 900 g 14 min 750 W
Pyrex 3.838
13.3.0 500 g 2 min 40 sec Jet defrost
CHOOSING POWER LEVEL
Level To be used for:
750 W Reheating of beverages, water, clear soups, coffee, tea or other food with
a high water content. If the food contains egg or cream choose a lower
power. Cooking of vegetables, fish, meat etc.
500 W More careful cooking e.g. high protein sauces, cheese and egg dishes
and to finish cooking casseroles.
350 W Simmering stews.
160 W Defrosting. Softening butter, cheeses and ice cream.
0 W When using the Timer only.
SPECIAL NOTE
When a function is finished, the oven
carries out a cooling procedure. During this
time the fan, turntable and light operate.
This is normal.
After this procedure the oven switches off
automatically. The cooling procedure can
be interrupted without any harm to the
oven.
TECHNICAL DATA
In accordance with IEC 705.
The International Electrotechnical Commission, SC. 59H, has developed a standard for
comparative testing of heating performance of different microwave ovens. We recommend
the following for this oven:
9

AUFSTELLUNG
VOR DEM ANSCHLIESSEN
Die Spannung auf dem Typenschild muss der
Spannungsversorgung in Ihrem Haus
entsprechen.
Nehmen Sie nicht die Platten zum Schutz
der Mikrowellenluftkanäle an der Seite der
Wandvertiefung des Gerätes heraus. Auf diese
Weise wird verhindert, dass Fettspritzer und
Speisereste in die Luftkanäle der Mikrowelle
gelangen.
Stellen Sie vor dem Einbau sicher, dass
der Garraum des Geräts leer ist.
Das Gerät darf nicht beschädigt sein. Die
Gerätetür muss richtig schließen und die
Dichtung an der Innenseite der Tür darf nicht
beschädigt sein. Entfernen Sie alle Gegenstände
aus dem Gerät und reinigen Sie die Innenflächen
mit einem weichen, feuchten Tuch.
Das Gerät nicht in Betrieb nehmen, wenn
das Stromkabel oder der Stecker beschädigt
sind, es nicht einwandfrei funktioniert oder in
irgendeiner Weise beschädigt wurde. Tauchen
Sie das Stromkabel oder den Stecker nicht in
Wasser. Halten Sie das Kabel von heißen
Flächen fern. Sonst können Stromschlag, Brand
oder sonstige Risiken die Folge sein.
NACH DEM ANSCHLIESSEN
Das Gerät kann nur in Betrieb genommen
werden, wenn die Tür richtig (fest anliegend)
geschlossen ist.
Die Erdung dieses Geräts ist gesetzlich
vorgeschrieben. Der Hersteller übernimmt
keinerlei Haftung für Personen- oder
Sachschäden, die aus einer Nichteinhaltung
dieser Vorschrift resultieren.
Bei einem festen Anschluss sollte das Gerät
von einem qualifizierten Techniker installiert
werden.
WICHTIG!
Ein fester Anschluss erfordert den Einbau
einer Trennvorrichtung. Die Trennvorrichtung
muss über eine allpolige Kontaktöffnung von
mindestens 3 mm verfügen, inkl. LS-Schaltern,
Sicherheitsventilen und Relais. Die
Trennvorrichtung muss direkt an das Endgerät
angeschlossen werden.
Der Hersteller ist für Probleme, die sich
aus der Nichtbeachtung dieser
Anweisungen durch den Nutzer ergeben
nicht verantwortlich.
Befolgen Sie die mitgelieferte separate Einbauanleitung zum Aufbau des Geräts.
WICHTIGE SICHERHEITSHINWEISE
LESEN SIE DIE GEBRAUCHSANWEISUNG AUFMERKSAM DURCH UND BEWAHREN SIE DIESE ZUM
SPÄTEREN NACHSCHLAGEN AN EINEM SICHEREN ORT AUF.
Keine brennbaren Materialien in dem Gerät
selbst oder in seiner Nähe erhitzen oder
verwenden. Rauchentwicklung kann zu Brand
oder Explosion führen.
Verwenden Sie niemals ätzende Chemikalien
oder Dämpfe in diesem Gerät. Dieses Gerät
wurde speziell zum Aufwärmen oder Garen von
Speisen entwickelt. Es eignet sich nicht für
industrielle oder Laborzwecke.
Das Mikrowellengerät nicht zum Trocknen
von Textilien, Papier, Gewürzen, Kräutern, Holz,
Blumen, Früchten oder anderen brennbaren
Materialien verwenden. Es besteht Brandgefahr.
Wenn Material innerhalb oder außerhalb
des Garraums anfängt zu brennen, Gerätetür
geschlossen halten und das Gerät ausschalten.
Ziehen Sie den Netzstecker oder drehen Sie die
Sicherung im Schaltkasten heraus.
10
Die Speisen nicht länger als nötig garen. Es
besteht Brandgefahr.
Das Gerät nicht unbeaufsichtigt lassen,
insbesondere dann, wenn beim Garen Papier,
Kunststoff oder andere brennbare Materialien
verwendet werden. Papier kann verkohlen oder
Feuer fangen und einige Kunststoffe können
schmelzen, wenn sie zusammen mit den
Speisen erhitzt werden.
WARNUNG!
Kindern darf die Nutzung des Gerätes nur
dann ohne Aufsicht gestattet werden, wenn sie
ausreichend in der Bedienung des Gerätes
unterwiesen wurden, so dass sie es sicher
bedienen können und sich den Gefahren eines
unsachgemäßen Gebrauchs bewusst sind.
WICHTIGE SICHERHEITSHINWEISE
WARNUNG!
Speisen oder Flüssigkeiten
nicht in luftdicht verschlossenen
Behältern erhitzen. Der Druck im
Behälter nimmt zu. Dies kann beim
Öffnen des Behälters zu Verletzungen oder zu
einer Explosion führen.
EIER
Benutzen Sie das Mikrowellengerät nicht zum Garen oder Aufwärmen ganzer
Eier mit oder ohne Schale, da diese auch nach Beenden des Gar- oder
Aufwärmvorgangs explodieren können.
Die Türdichtungen und die schließenden
Bereiche müssen regelmäßig auf
Beschädigungen kontrolliert werden. Nehmen Sie
bei einer Beschädigung das Gerät erst wieder in
Betrieb, nachdem es von einem qualifizierten
Kundendiensttechniker repariert wurde.
WARNUNG!
VORSICHTSMASSNAHMEN
ALLGEMEINES
Das Gerät ist ausschließlich für die
Verwendung im Haushalt bestimmt!
Bei Nutzung der Mikrowellenfunktionen
darf das Gerät nur eingeschalten werden,
wenn
sich Speisen im Garraum befinden. Andernfalls
kann es zu Schäden am Gerät kommen.
Wenn Sie sich mit dem Gerät vertraut machen
wollen, stellen Sie ein Glas Wasser in den
Garraum. Das Wasser absorbiert die Energie der
Mikrowellen, so dass das Gerät nicht beschädigt
wird.
Den Garraum nicht als Ablage verwenden.
Nehmen Sie nicht die Platten zum Schutz
der Mikrowellenluftkanäle an der Seite der
Wandvertiefung des Gerätes heraus. Auf diese
Weise wird verhindert, dass Fettspritzer und
Speisereste in die Luftkanäle der Mikrowelle
gelangen.
Alle Metallteile (z.B. Verschlüsse)
von Papier- oder Plastiktüten
entfernen, bevor diese in den
Garraum gelegt werden.
FRITTIEREN
Das Mikrowellengerät darf
nicht zum Frittieren
verwendet werden , da die
Temperatur des Frittieröls nicht gesteuert werden
kann.
Stets Topflappen oder Handschuhe
verwenden , wenn Sie nach dem Kochen
Behälter, Geräteteile und Schalen anfassen. Es
besteht Verbrennungsgefahr.
FLÜSSIGKEITEN
Getränke oder Wasser
beispielsweise können in der
Mikrowelle über den Siedepunkt
hinaus erhitzt werden, ohne dass es zu einer
sichtbaren Blasenbildung kommt. Dadurch kann
es zu einem plötzlichen Überkochen der heißen
Flüssigkeit kommen.
Um das zu vermeiden, sollten Sie folgende
Vorsichtsmaßnahmen ergreifen:
1. Möglichst keine schmalen Gefäße mit
geraden Seitenwänden verwenden.
2. Bevor das Gefäß in den Garraum gestellt
wird, Flüssigkeiten umrühren und den
Teelöffel im Gefäß lassen.
3. Nach dem Erhitzen die Flüssigkeit kurz
stehen lassen, nochmals umrühren und das
Gefäß vorsichtig entnehmen.
VORSICHT
Genauere Informationen dazu finden Sie im
Mikrowellenkochbuch. Dies gilt besonders beim
Garen oder Erhitzen von alkoholhaltigen Speisen.
Babynahrung in Gläsern oder
Getränke in Babyflaschen
müssen nach dem Erwärmen
immer umgerührt und auf die
richtige Temperatur überprüft werden.
Dadurch wird die Wärme gleichmäßig
verteilt und Verbrühungs- oder
Verbrennungsgefahr vermieden.
Entfernen Sie unbedingt den
Schraubverschluss bzw. den Sauger vor
dem Erhitzen!
11

ZUBEHÖR
ALLGEMEINES
Sie können eine Reihe von Zubehörteilen
käuflich erwerben. Prüfen Sie vor dem Kauf, ob
diese für das Mikrowellengerät geeignet sind.
Stellen Sie Speisen und Zubehör nur dann
in das Mikrowellengerät, wenn diese nicht mit
dessen Innenwänden in Berührung kommen.
Dies gilt vor allem für Zubehör aus Metall
oder mit Metallteilen.
Wenn solche Teile mit den Innenwänden des
Garraums in Berührung kommen, während die
Mikrowelle in Betrieb ist, können Funken
entstehen und das Gerät kann beschädigt
werden.
Vergewissern Sie sich vor dem
Einschalten des Gerätes stets, dass sich
der Drehteller unbehindert drehen kann.
Nur hitzebeständiges und
mikrowellengeeignetes Kochgeschirr
verwenden.
DREHTELLERAUFLAGE
Die Drehtellerauflage muss
immer unter dem
Glasdrehteller eingesetzt
werden. Legen Sie auf die
Drehtellerauflage keine anderen Gegenstände
außer dem Drehteller.
* Die Drehtellerauflage in das Gerät einsetzen.
GLASDREHTELLER
Benutzen Sie den
Glasdrehteller bei allen
Zubereitungsarten. Er fängt herunter
tropfende Flüssigkeit und
Speiseteilchen auf. Dadurch wird eine
Verschmutzung des Innenraums vermieden.
* Den Glasdrehteller auf die Drehtellerauflage
setzen.
FLÄSCHCHENHALTER
Benutzen Sie den
Fläschchenhalter zum
Aufwärmen von Babynahrung in
hohen Flaschen, die nicht allein in
der Mikrowelle stehen bleiben. Im Abschnitt
„Vorsichtsmaßnahmen“ finden Sie weitere
Informationen zum Aufwärmen von
Babynahrung.
ABDECKHAUBE
Die Abdeckhaube dient dazu, die Speisen
während des Garens und
Aufwärmens mit Mikrowellen
abzudecken, vermindert
Verschmutzungen des Garraums,
verhindert das Austrocknen der
Speisen und verkürzt die Garzeit.
Die Abdeckhaube auch beim Aufwärmen auf
zwei Ebenen verwenden.
LEERLAUFSCHUTZ / KINDERSICHERUNG
Diese automatische Sicherheitsfunktion
wird eine Minute nachdem das Gerät in den
„Bereitschaftsmodus“ zurückgekehrt ist aktiviert.
12
Die Sicherheitsverriegelung wird erst
dann freigegeben, wenn die Tür geöffnet
und geschlossen wird, z. B. wenn Speisen in
die Mikrowelle gestellt werden.
Bei dem Versuch, das Gerät einzuschalten,
ohne zuvor Speisen hineingestellt zu haben,
erscheint auf dem Display die Anzeige “Door”.

GARVORGANG UNTERBRECHEN ODER ABBRECHEN
Unterbrechen des Garvorgangs:
Der Garvorgang kann durch Öffnen der Tür
unterbrochen werden, um die Speisen zu
kontrollieren, zu wenden oder umzurühren. Die
Einstellungen werden 10 Minuten lang
beibehalten.
Fortsetzen des Garvorgangs:
Tür schließen und Starttaste EINMAL
drücken
Stelle fortgesetzt, an der er unterbrochen
wurde. Durch
Taste START wird die Garzeit um weitere 30
Sekunden verlängert.
. Der Garvorgang wird an der
ZWEIMALIGES
Drücken der
Abbrechen des Garvorgangs:
Nehmen Sie das Gericht heraus,
schließen die Gerätetür und drücken
die Taste STOP.
Ein Piepton signalisiert, dass der
Garvorgang beendet ist. Er ertönt
einmal pro Minute für einen Zeitraum von
10 Minuten nach Ablauf der Garzeit. Um den
Signalton abzuschalten, drücken Sie die Taste
STOP oder öffnen die Tür. Hinweis: Das Gerät
behält die Einstellungen nur 30 Sekunden lang
bei, wenn die Tür geöffnet und dann nach Ende
der Zubereitung geschlossen wird.
UHRZEIT
1
+
2
Beim Einstellen der Uhr die Tür geöffnet lassen. Dann stehen zum Einstellen der Uhr 5 Minuten zur
Verfügung. Andernfalls muss jeder Schritt innerhalb von 30 Sekunden ausgeführt werden.
1. Taste STOP drücken (3 Sekunden), bis die linke Ziffer (Stunden) blinkt.
2. Mit den +/- Tasten die Stunden einstellen.
3. Taste START erneut drücken (die beiden linken Ziffern (Minuten) blinken).
4. Mit den +/- Tasten die Minuten einstellen.
5. Taste START erneut drücken.
Die Uhr ist nun eingestellt und betriebsbereit.
Hinweis: Wenn das Gerät zum ersten Mal an das Stromnetz angeschlossen oder nach einem
Stromausfall eingeschaltet wird, bleibt das digitale Anzeigefeld dunkel. Wenn die Uhr nicht eingestellt
wird, bleibt das digitale Anzeigefeld dunkel, bis die Zubereitungszeit eingestellt ist.
3 5
ZEITSCHALTUHR
2
Mit der Zeitschaltuhr kann z. B. zum Kochen von Eiern oder Nudeln oder zum Gehenlassen eines
Teiges usw. die genaue Garzeit eingestellt werden.
1. Mit den +/- Tasten die gewünschte Garzeit einstellen.
2. Die Taste Power („Leistungsstufe“) mehrmals drücken, bis die Leistungsstufe 0 W gewählt ist.
3. Starttaste drücken.
Nach Ablauf der eingestellten Zeit ertönt ein Signalton.
1
+
3
13

GAREN UND AUFWÄRMEN MIT DER MIKROWELLE
2
Diese Funktion dient zur normalen Zubereitung und zum Aufwärmen von Speisen wie Gemüse,
Fisch, Kartoffeln und Fleisch.
1. Mit den +/- Tasten die Garzeit einstellen.
2. Die Taste Power („Leistungsstufe“) mehrmals drücken, um die Leistungsstufe einzustellen.
3. Starttaste drücken.
Während des Garvorgangs:
Die Dauer kann durch Drücken der Taste START auf einfache Weise in 30-Sekunden-Schritten erhöht
werden. Jede Betätigung der Taste verlängert die Garzeit um 30 Sekunden. Die Zubereitungszeit lässt
sich auch durch Drücken der Tasten +/- verlängern oder verkürzen.
Durch Drücken der Taste POWER kann außerdem die Leistungsstufe geändert werden. Beim ersten
Drücken wird die aktuelle Leistungsstufe angezeigt. Drücken Sie die Taste POWER mehrmals, um die
Leistungsstufe zu ändern.
1
+
3
“JET” SCHNELLAUFTAUFUNKTION
23
+
1
Verwenden Sie diese Funktion NUR zum Auftauen von Fleisch, Fisch und Geflügel. Für andere
Nahrungsmittel wie etwa Brot und Obst sollten Sie wie unter „Garen und Aufwärmen mit der
Mikrowelle“ beschrieben verfahren und zum Auftauen die Leistungsstufe 160 W wählen.
Die Jet Schnellauftaufunktion eignet sich für Speisen mit einem Nettogewicht von 100 - 2000 g.
1. Jet Schnellauftautaste drücken.
2. Mit den +/- Tasten das Nahrungsmittelgewicht einstellen.
3. Starttaste drücken.
In der Mitte des Auftauvorgangs stoppt das
Gerät und gibt die Meldung „TURN“ (Speisen
wenden) aus.
— Öffnen Sie die Tür.
— Wenden Sie die Speisen.
— Schließen Sie die Tür und drücken die Jet
Schnellstarttaste, um den Auftauvorgang
fortzusetzen.
Hinweis: Das Gerät setzt sich automatisch
nach 2 Minuten wieder in Gang, wenn die
Speisen nicht gewendet wurden. Das Auftauen
dauert in diesem Fall länger.
Wenn das Gewicht nicht dem
empfohlenen Wert entspricht:
Wählen Sie zum Auftauen die Leistungsstufe
160 W und verfahren Sie wie unter „Garen und
Aufwärmen mit der Mikrowelle“ beschrieben.
Wählen Sie ein niedrigeres Gewicht, falls
die Speisen wärmer als die
Tiefkühltemperatur (-18°C) sind.
Wenn die Temperatur der Speisen
niedriger als die Tiefkühltemperatur
(-18°C) ist, wählen Sie ein größeres Gewicht
aus.
14

“JET” SCHNELLSTART
+
Mit dieser Funktion lassen sich Speisen schnell aufwärmen, die einen hohen Wassergehalt
haben, z.B. klare Suppen, Kaffee oder Tee.
Drücken Sie diese Taste, um automatisch mit der vollen Mikrowellenleistung und einer Garzeit von
30 Sekunden zu beginnen. Mit jedem weiteren Drücken der Taste wird die Zeit um 30 Sekunden
verlängert. Die Zubereitungszeit lässt sich auch nach dem Start durch Drücken der Tasten +/verlängern oder verkürzen.
WARTUNG UND REINIGUNG
Wird das Gerät nicht sauber gehalten, kann
dies zu Abnutzung der Oberfläche führen, was
die Lebensdauer des Geräts verringern und evtl.
zu gefährlichen Situationen führen kann.
Keine Topfreiniger zum
Reinigen des Garraums
verwenden. Diese würden die
Oberfläche zerkratzen.
In regelmäßigen Abständen
den Boden des Garraumes reinigen,
insbesondere wenn Speisen übergelaufen sind.
Zum Reinigen auch den Drehteller und den
Drehtellerträger entfernen und den Boden des
Garraumes sauber wischen.
Die Mikrowellenfunktion nur mit
eingesetztem Drehteller verwenden.
Die Mikrowelle erst wieder in Betrieb
nehmen, wenn nach der Reinigung der
Drehteller wieder eingesetzt wurde.
Milde Reinigungsmittel, Wasser und ein
weiches Wischtuch zum Reinigen der
Innenraumflächen sowie der Innen- und
Außenseite der Gerätetür verwenden.
Fettspritzer oder Speisereste dürfen sich nicht
an der Tür festsetzen.
Bei hartnäckiger Verschmutzung empfiehlt
es sich, ein Glas Wasser 2 bis 3 Minuten lang im
Garraum zu erhitzen. Durch den Dampf wird der
Schmutz aufgeweicht.
Unangenehmer Geruch im Garraum lässt
sich beseitigen, indem Sie ein Glas
Wasser mit Zitronensaft auf den Drehteller
stellen und dieses einige Minuten lang
kochen lassen.
Scheuermittel, Topfkratzer aus Stahlwolle und
ähnliches können das Bedienfeld sowie die
Innen- und Außenflächen des Geräts
beschädigen. Benutzen Sie zum Reinigen einen
Schwamm und mildes Reinigungsmittel oder ein
Papiertuch und Glasreinigerspray. Sprühen Sie
den Glasreiniger auf ein Papiertuch.
Niemals direkt in das Gerät sprühen.
SPÜLMASCHINENFESTES ZUBEHÖR:
Drehtellerauflage
Glasdrehteller
Fläschchenhalter
Abdeckhaube
15

FEHLERBEHEBUNG
Falls das Gerät nicht einwandfrei
funktioniert, überprüfen Sie zunächst folgende
Punkte, bevor Sie sich an den Kundendienst
wenden:
* Sind Drehtellerauflage und Drehteller richtig
eingesetzt?
* Steckt der Netzstecker richtig in der
Steckdose?
* Ist die Gerätetür richtig geschlossen?
* Sind die Sicherungen in Ordnung und ist Strom
vorhanden?
* Wird das Gerät ausreichend belüftet?
* Nach zehn Minuten versuchen, das Gerät
erneut in Betrieb zu nehmen.
* Vor einem erneuten Versuch die Tür öffnen
und wieder schließen.
Auf diese Weise lassen sich unnötige
Anfahrten des Kundendiensttechnikers und damit
für Sie verbundene Kosten vermeiden.
Wenn Sie den Kundendienst anfordern geben Sie
Seriennummer und Typenbezeichnung Ihres
Gerätes an (siehe Aufkleber). Weitere Hinweise
finden Sie im Garantieheft.
TIPPS ZUM UMWELTSCHUTZ
Die Verpackung besteht aus 100 %
recycelbarem Material und ist durch
das Recycling-Symbol
gekennzeichnet. Bei der Entsorgung
die örtlichen Bestimmungen beachten.
Verpackungsmaterial (Plastikbeutel,
Styropor usw.), das eine potenzielle Gefahr
darstellt, außer Reichweite von Kindern
aufbewahren.
In Übereinstimmung mit den Anforderungen
der Europäischen Richtlinie 2002/96/EG über
Elektro- und Elektronik-Altgeräte (WEEE) ist
vorliegendes Gerät mit einer Markierung
versehen. Sie leisten einen positiven Beitrag für
den Schutz der Umwelt und die Gesundheit des
Menschen, wenn Sie dieses Gerät einer
gesonderten Abfallsammlung zuführen. Im
unsortierten Siedlungsmüll könnte ein solches
Gerät durch unsachgemäße Entsorgung negative
Konsequenzen nach sich ziehen.
16
Wichtig:
Das Netzkabel darf nur gegen ein Originalkabel
ausgewechselt werden, das über unseren
Kundendienst bezogen werden kann. Das
Netzkabel darf nur von einer qualifizierten
Fachkraft ausgewechselt werden.
WARNUNG!
Reparaturen am Gerät dürfen
nur von einem qualifizierten
Kundendiensttechniker
vorgenommen werden. Laien
bringen sich durch
Reparaturversuche in Gefahr, bei
denen die zum Schutz vor
Mikrowellenstrahlung am Gerät
angebrachten Abdeckungen oder
Gehäuseteile entfernt werden
müssen.
Entfernen Sie keine Geräteabdeckungen.
Auf dem Produkt oder der beiliegenden
Produktdokumentation ist
folgendes Symbol einer
durchgestrichenen Abfalltonne
abgebildet. Es weist darauf hin,
dass eine Entsorgung im normalen
Haushaltsabfall nicht zulässig ist
Entsorgen Sie dieses Produkt im
Recyclinghof mit einer
getrennten Sammlung für
Elektro- und Elektronikgeräte.
Die Entsorgung muss gemäß
den örtlichen Bestimmungen zur Abfallbeseitigung
erfolgen. Bitte wenden Sie sich an die
zuständigen
Behörden Ihrer Gemeindeverwaltung, an den
lokalen Recyclinghof für Haushaltsmüll oder an
den Händler, bei dem Sie dieses Gerät erworben
haben, um weitere Informationen über
Behandlung, Verwertung und
Wiederverwendung dieses Produkts zu erhalten.
Das Gerät vor dem Verschrotten durch
Abschneiden des Netzkabels unbrauchbar
machen.

WAHL DER LEISTUNGSSTUFE
Stufe Anwendung:
750 W Zum Aufwärmen von Getränken, Wasser, klaren Suppen, Kaffee, Tee oder
anderen Nahrungsmitteln mit hohem Wassergehalt. Wenn die Speise Ei oder
Sahne enthält, eine niedrigere Leistungsstufe wählen. Zubereitung von Gemüse,
Fisch, Fleisch usw.
500 W Schonendere Zubereitung, z. B. bei Saucen mit hohem Eiweißgehalt, Käse und
Eierspeisen, sowie zum Fertigkochen von Eintopfgerichten.
350 W Für Eintopfgerichte.
160 W Zum Auftauen. Zum Anwärmen von Butter, Käse und Eis.
0 W Nur bei der Verwendung der Zeitschaltuhr.
BESONDERER HINWEIS
Nach Beenden einer Funktion kühlt sich das
Gerät selbständig ab.
Während dieser Zeit sind der Ventilator, der
Drehteller und das Licht in Betrieb. Das ist
normal.
Nach diesem Vorgang schaltet sich das Gerät
automatisch ab.
Der Abkühlvorgang kann ohne Schaden für das
Gerät unterbrochen werden.
TECHNISCHE DATEN
Model MBI 540
Netzspannung
Nennleistungsaufnahme
Absicherung
Mikrowellen-Ausgangsleistung
Außenabmessungen:
Ofenfach:
Gemäß IEC 705.
Die Abteilung SC. 59H der Internationalen Elektrotechnischen Kommission hat einen Standard für
Vergleichstests der Heizleistung verschiedener Mikrowellengeräte entwickelt. Für dieses Gerät
empfehlen wir Folgendes:
Test Menge Zeit ca. Leistungsstufe Behälter
12.3.1 750 g 10 min 750 W
12.3.2 475 g 5½ min 750 W
12.3.3 900 g 14 min 750 W
13.3.0 500 g 2 min 40 sek Jet defrost
230 V/50 Hz
1300 W
10 A (U K 13 A)
750 W
H x B x T
362 x 595 x 320
187 x 370 x 290
Pyrex 3.220
Pyrex 3.827
Pyrex 3.838
17

INSTALLATION
AVANT DE BRANCHER L’APPAREIL
Vérifiez que la tension indiquée sur la
plaque signalétique correspond bien à celle
de votre habitation.
Ne démontez pas les plaques de
protection micro-ondes situées sur le côté
de la cavité du four. Elles empêchent à la graisse
et aux particules alimentaires de pénétrer dans
les canaux d’amenée du four micro-ondes.
Avant de procéder à l’installation, vérifiez
que la cavité du four est vide.
Assurez-vous que l’appareil n’est pas
endommagé. Vérifiez que la porte ferme
correctement et que l’encadrement intérieur de la
porte n’est pas endommagé. Enlevez les
accessoires du four et essuyez l’intérieur avec
un chiffon doux humide.
N’utilisez en aucun cas cet appareil si le
câble d’alimentation ou la prise de courant sont
endommagés, si l’appareil ne fonctionne pas
correctement ou s’il a été endommagé suite à
une chute. N’immergez pas le câble
d’alimentation ou la prise dans l’eau. Éloignez le
cordon des surfaces chaudes. Si l’appareil a été
endommagé, son utilisation peut s’avérer
dangereuse.
Lors du montage de l’appareil, respectez les
instructions de montage fournies séparément.
APRÈS LE BRANCHEMENT DE L’APPAREIL
Le four ne peut être utilisé que si la porte
est correctement fermée.
La mise à la terre de l’appareil est obligatoire
aux termes de la loi. Le fabricant décline toute
responsabilité en cas d’accidents causés à des
personnes, des biens ou des animaux, suite au
non-respect de cette obligation.
En cas de connexion permanente, l’appareil
doit être installé par un technicien qualifié.
REMARQUE IMPORTANTE !
Une connexion permanente exige
l’installation d’un disjoncteur. Le disjoncteur doit
avoir un contact omnipolaire s’ouvrant de plus de
3 mm et être équipé d’interrupteur LS, de fusibles
de sécurité et de relais. Le disjoncteur doit être
relié directement à la prise.
Le constructeur décline toute
responsabilité si l’utilisateur ne respecte
pas ces instructions.
REMARQUES IMPORTANTES CONCERNANT LA SÉCURITÉ
CETTE NOTICE D’EMPLOI DOIT ÊTRE LUE ATTENTIVEMENT ET CONSERVÉE EN LIEU SÛR POUR TOUTE
CONSULTATION ULTÉRIEURE
Veillez à ne pas chauffer, stocker ou
utiliser de matériaux inflammables à l’intérieur
ou à proximité du four. Les vapeurs dégagées
peuvent provoquer un incendie ou une
explosion.
N’utilisez pas de produits chimiques ou de
vapeurs corrosifs dans cet appareil. Ce type de
four est spécifiquement destiné à réchauffer ou
cuire des aliments. Il n’a pas été conçu pour un
usage industriel ou de laboratoire.
N’utilisez pas votre four micro-ondes pour
sécher des textiles, du papier, des épices, des
herbes, du bois, des fleurs, des fruits ou
d’autres matériaux combustibles. Risque
d’incendie.
18
Si de la fumée apparaît, arrêter ou
débrancher le four, et garder la porte fermée
pour étouffer les flammes
Ne surcuisez pas les aliments. Ils pourraient
s’enflammer.
Ne laissez pas le four sans surveillance,
surtout si vous utilisez du papier, du plastique ou
d’autres matériaux combustibles pour la cuisson.
Le papier peut carboniser ou brûler et certains
plastiques peuvent fondre lorsqu’ils sont utilisés
pour réchauffer des aliments.
ATTENTION !
Ne laissez les enfants utiliser le four sans
surveillance que si vous leur avez donné des
instructions appropriées afin qu’ils puissent
utiliser le four de façon sûre et qu’ils
comprennent les dangers d’un usage incorrect.

REMARQUES IMPORTANTES CONCERNANT LA SÉCURITÉ
ATTENTION !
N’utilisez pas le four microondes pour chauffer des aliments
ou des liquides dans des
récipients hermétiques.
L’augmentation de la pression peut les
endommager lors de l’ouverture, ou les faire
exploser.
ŒUFS
N’utilisez pas votre four micro-ondes pour cuire ou réchauffer des oeufs avec
ou sans coquille, car ils peuvent exploser même si la cuisson est terminée.
Les joints et l’encadrement de la porte
doivent être inspectés régulièrement en vue de
détecter la présence de détériorations. Si ces
zones étaient endommagées, n’utilisez plus
l’appareil et faites-le contrôler par un technicien
spécialisé.
ATTENTION !
MESURES DE PRÉCAUTION
GÉNÉRALITÉS
N’utilisez cet appareil que pour l’usage
domestique pour lequel il est prévu !
Le four ne doit jamais être utilisé à vide
avec la fonction micro-ondes. Cela risquerait de
l’endommager.
Si vous vous exercez à le programmer ,
placez un verre d’eau à l’intérieur. L’eau
absorbera l’énergie des micro-ondes et le four
ne sera pas abîmé.
N’utilisez pas la cavité du four pour y ranger
des objets.
Ne démontez pas les plaques de
protection du micro-ondes situées sur le
côté de la cavité du four. Elles empêchent à la
graisse et aux particules alimentaires de
pénétrer dans les canaux d’amenée du four
micro-ondes.
Enlevez les fermetures
métalliques des sachets papier ou
plastique avant de les placer dans
le four.
FRITURE
N’utilisez pas le four microondes pour frire, car il ne
permet pas de contrôler la
température de l’huile.
Afin d’éviter de vous brûler, utilisez des
gants isolants ou des maniques pour saisir
les récipients, un plat après utilisation du gril ou
pour toucher les parties du four.
LIQUIDES
Par ex. boissons ou eau, Le
chauffage de boissons par
micro-ondes peut provoquer un
jaillissement brusque et différé
de liquide en ébullition. Aussi
des précautions doivent être prises lorsqu’on
manipule le récipient par exemple :
1. Évitez d’utiliser des récipients à bord droit
et avec un col étroit.
2. Agitez le liquide avant de placer le récipient
dans le four.
3. Après avoir chauffé, attendez un court
instant et agitez de nouveau avant de sortir
le récipient du four.
ATTENTION
Reportez-vous systématiquement à un livre
de recettes pour plus de détails à propos de la
cuisson aux micro-ondes, en particulier si vous
cuisez ou réchauffez des aliments contenant de
l’alcool.
Après avoir réchauffé des
aliments pour bébé
(biberons, petits pots),
agitez toujours et vérifiez la
température avant de servir. Ceci permet
de vérifier que la chaleur est répartie
correctement, et évite les risques de
brûlure ou d’ébouillantage.
Enlevez la tétine ou le couvercle avant de
réchauffer !
19

ACCESSOIRES
GÉNÉRALITÉS
De nombreux accessoires et ustensiles pour
four micro-ondes sont disponibles sur le marché.
Avant de les acheter, assurez-vous qu’ils
conviennent bien à cet usage.
Lorsque vous placez des aliments et des
accessoires dans le four micro-ondes,
assurez-vous que ceux-ci ne sont pas en
contact direct avec l’intérieur du four. Ceci est
particulièrement important pour les
accessoires en métal ou avec des parties
métalliques.
Si des ustensiles métalliques entrent en
contact avec l’intérieur du four en cours de
fonctionnement, des étincelles peuvent se
produire et endommager le four.
Assurez-vous toujours que le plateau
tournant peut tourner librement avant de mettre
l’appareil en marche.
Vérifiez que les ustensiles utilisés sont
résistants à la chaleur et perméables aux microondes avant de les utiliser.
SUPPORT DU PLATEAU TOURNANT
Utilisez le support du plateau
tournant en dessous du plateau
tournant en verre. Ne placez jamais
d’autres ustensiles que le plateau
tournant directement sur le support du plateau
tournant.
* Installez le support du plateau tournant dans
le four.
PLATEAU TOURNANT EN VERRE
Utilisez le plateau tournant en
verre pour tous les types de
cuisson. Il permet de récolter les jus
de cuisson et les particules d’aliments
qui pourraient salir l’intérieur du four.
* Placez le plateau tournant en verre sur le
support du plateau tournant.
PORTE BIBERON
Utilisez le porte biberon
lorsque vous réchauffez des
aliments pour bébé dans des
biberons trop grands pour tenir
tout seuls dans le four. Voir également le
chapitre “Mesures de précautions “ pour plus
d’informations sur la cuisson d’aliments pour
bébé.
COUVERCLE
Le couvercle sert à couvrir les aliments à cuire
ou à réchauffer avec la fonction
micro-ondes seulement; il permet
d’éviter les éclaboussures, retient
l’humidité, et réduit le temps
demandé.
Utilisez-le couvercle pour le réchauffage sur
deux niveaux en plaçant le 2e plat sur le
couvercle.
PROTECTION CONTRE UNE MISE EN MARCHE
DU FOUR A VIDE / SÉCURITÉ ENFANTS
Cette fonction de sécurité automatique
est activée une minute après le retour du
four en “mode veille”.
Cela signifie que vous devez ouvrir et
refermer la porte, pour y introduire un plat, afin
d’annuler la sécurité enfants.
20
Si vous essayez de faire fonctionner le
four sans ouvrir puis refermer la porte (pour
placer un plat à l’intérieur), l’afficheur indiquera
“door”.

INTERRUPTION OU ARRÊT DE LA CUISSON
Pour interrompre la cuisson : Si vous
souhaitez vérifier, mélanger ou retourner les
aliments, ouvrez la porte ; la cuisson s’arrêtera
automatiquement. Les fonctions restent
affichées pendant 10 minutes.
Pour poursuivre la cuisson :Fermez
la porte et appuyez
touche DÉPART/JET START. La cuisson
reprend là où elle a été interrompue.
Si vous appuyez
DÉPART/JET START, le temps de cuisson est
augmenté de 30 secondes.
UNE FOIS
DEUX FOIS
sur la
sur la touche
Si vous ne souhaitez pas
continuer la cuisson : Enlevez les
aliments, fermez la porte et appuyez
sur la touche ARRÊT/STOP.
Un signal sonore retentit toutes les
minutes pendant 10 minutes en fin de
cuisson. Pour désactiver le signal, appuyez sur
la touche ARRÊT/STOP ou ouvrez la porte.
Remarque : Les réglages choisis ne restent
affichés que pendant 30 secondes, si l’on ouvre
et referme la porte à la fin de la cuisson.
HORLOGE
1
+
2
Maintenez la porte ouverte pendant le réglage de l’horloge. Vous disposez ainsi de 5 minutes pour
effectuer cette opération. Sinon, chaque opération doit être effectuée en moins de 30 secondes.
1. Appuyez sur la touche ARRÊT/STOP pendant 3 secondes, jusqu’à ce que les chiffres de gauche,
les heures, clignotent.
2. Appuyez sur les touches +/- pour régler les heures.
3. Appuyez de nouveau sur la touche DÉPART/JET START. (Les deux chiffres de droite (des
minutes) clignotent).
4. Appuyez sur les touches +/- pour régler les minutes.
5. Appuyez de nouveau sur la touche DÉPART/JET START.
L’horloge est réglée et fonctionne.
Remarque : Lorsque l’appareil est rebranché après une panne de courant, l’écran d’affichage est
vide. Si l’horloge n’est pas réglée, l’écran restera vide jusqu’au réglage d’un temps de cuisson.
3 5
MINUTEUR INDEPENDANT
2
Utilisez cette fonction si vous avez besoin de mesurer la durée exacte de différentes opérations,
telles que cuire des œufs, des pâtes ou faire lever la pâte avant de la cuire, etc.
1. Appuyez sur les touches +/- pour spécifier la durée de cuisson.
2. Appuyez par pressions successives sur la touche PUISSANCE/POWER pour régler le niveau de
puissance sur 0 W.
3. Appuyez sur la touche DÉPART/JET START.
Un signal sonore vous avertit lorsque le minuteur a terminé son compte à rebours.
1
+
3
21

CUISSON ET RÉCHAUFFAGE AVEC
LA FONCTION MICRO-ONDES
2
Utilisez cette fonction pour la cuisson normale ou le réchauffage rapide d’aliments tels que les
légumes, les poissons, les pommes de terre et la viande.
1. Appuyez sur les touches +/- pour régler la durée de cuisson.
2. Appuyez par pressions successives sur la touche PUISSANCE/POWER pour régler le niveau de
puissance.
3. Appuyez sur la touche DÉPART/JET START.
Lorsque la cuisson a démarré :
Le temps de cuisson peut être augmenté facilement par paliers de 30 secondes en appuyant sur la
touche DÉPART/JET START. Chaque nouvelle pression augmente le temps de cuisson de 30
secondes. Vous pouvez également modifier le temps de cuisson en appuyant sur les touches +/pour augmenter ou diminuer sa durée. Le niveau de puissance peut également être modifié au moyen
de la touche PUISSANCE/POWER. La première pression vous indiquera le niveau de puissance actuel.
Appuyez par pressions successives sur la touche PUISSANCE/POWER pour modifier le niveau de
puissance.
1
+
3
FONCTION JET DEFROST
23
+
1
Utilisez cette fonction UNIQUEMENT pour la décongélation de la viande, du poisson et de la volaille. Pour
les autres aliments tels que le pain et le fruits, suivez les instructions du point “Cuisson et réchauffage des
aliments aux micro-ondes” et sélectionnez 160 W pour la décongélation.
La fonction JET DEFROST ne doit être utilisée que si le poids net des aliments se situe entre 100 et 2000 g.
1. Appuyez sur la touche JET DEFROST.
2. Appuyez sur les touches +/- pour spécifier le poids des aliments.
3. Appuyez sur la touche DÉPART/JET START.
A la moitié du processus de
décongélation, le four s’arrête et vous invite à
retourner les aliments ( “TURN”).
— Ouvrez la porte.
— Retournez les aliments.
— Fermez la porte et le four redémarre (“GO”)
en appuyant sur la touche DÉPART/JET
START.
Remarque : le four continue automatiquement
après 2 minutes si vous n’avez pas retourné les
aliments. Dans ce cas, la durée de décongélation
sera plus longue.
22
Si le poids des aliments est inférieur ou
supérieur au poids recommandé :
Suivez les instructions du point “Cuisson et
réchauffage des aliments aux micro-ondes” et
sélectionnez 160 W pour la décongélation.
Pour les aliments plus chauds que la
température de surgélation (-18°C),
choisissez un poids d’aliment inférieur.
Pour les aliments plus froids que la
température de surgélation (-18°C),
choisissez un poids supérieur.

DÉPART / JET START
+
Utilisez cette fonction pour le réchauffage rapide d’aliments, tels que soupe, café, thé ou autres
aliments à haute teneur d’eau.
Appuyez sur cette touche pour faire démarrer automatiquement le four à puissance maximale
pendant 30 secondes. Chaque nouvelle pression augmente le temps de 30 secondes. Vous pouvez
également modifier le temps de cuisson en appuyant sur les touches +/- pour augmenter ou diminuer
sa durée après le démarrage de la fonction.
ENTRETIEN ET NETTOYAGE
Si le four n’est pas maintenu propre, cela
peut entraîner la détérioration de la surface: la
durée de vie de l’appareil pourra en être affectée
et provoquer des situations de danger.
Évitez d’utiliser des éponges
abrasives. En effet, vous
pourriez rayer la surface.
À intervalles réguliers,
notamment en cas de
débordements, enlevez le plateau tournant, le
support du plateau tournant et essuyez la base
du four.
Ce four est conçu pour fonctionner avec le
plateau tournant en place.
Ne le mettez pas en marche lorsque celui-ci
est enlevé pour le nettoyage.
Utilisez un détergent doux, de l’eau et un
chiffon doux pour nettoyer l’intérieur, les deux
faces de la porte et l’encadrement de la porte.
Veillez à ce que de la graisse ou des
particules alimentaires ne s’accumulent pas
autour de la porte.
Pour les salissures tenaces, faites bouillir
une tasse d’eau dans le four pendant 2 ou 3
minutes. La vapeur facilitera l’élimination des
salissures.
Éliminez les odeurs éventuelles à
l’intérieur du four en faisant bouillir une
tasse d’eau additionnée de jus de citron,
placée sur le plateau tournant
Des nettoyants abrasifs, tampons
métalliques, etc. peuvent abîmer le bandeau de
commandes et les surfaces intérieures et
extérieures du four. Utilisez une éponge avec
un détergent doux ou une serviette en papier
avec un nettoyant pour vitres. Vaporiser le
produit sur la serviette en papier.
Ne le vaporisez pas directement sur le four.
NETTOYAGE AU LAVE-VAISSELLE :
Support du plateau tournant.
Plateau tournant en verre.
Porte biberon
Couvercle
23

DIAGNOSTIC DES PANNES
Si le four ne fonctionne pas, avant de
contacter votre Revendeur, veuillez vérifier si :
* Le support du plateau tournant et le plateau
tournant sont en place.
* La prise de courant est bien branchée.
* La porte est correctement fermée.
* Les fusibles sont en bon état et la puissance
de l’installation est adaptée.
* Vérifiez que le four ait une bonne aération.
* Attendez 10 minutes et essayez à nouveau.
* Ouvrez et refermez la porte avant d’essayer
à nouveau.
Cela vous évitera peut-être des
interventions inutiles qui vous seraient
facturées.
Lorsque vous contactez le Service AprèsVente, veuillez préciser le modèle et le numéro
de série du four (voir étiquette Service).
Consultez le livret de garantie pour de plus
amples informations à ce sujet.
INFORMATIONS POUR LE RECYCLAGE
Les matériaux d’emballage sont entièrement
recyclables comme l’indique le
symbole de recyclage. Suivez les
règles locales en vigueur en matière
d’élimination des déchets. Ne laissez
pas les éléments d’emballage
(sachets en plastique, éléments en polystyrène,
etc.) à la portée des enfants.
Cet appareil porte le symbole du recyclage
conformément à la Directive Européenne 2002/
96/CE concernant les Déchets d’Équipements
Électriques et Électroniques (DEEE ou WEEE). En
procédant correctement à la mise au rebut de
cet appareil, vous contribuerez à empêcher
toute conséquence nuisible pour l’environnement
et la santé de l’homme.
Remarque importante :
Si le câble d’alimentation doit être remplacé, il doit
l’être par un câble d’origine disponible auprès du
Service Après-Vente. Le câble d’alimentation doit
être remplacé par un technicien spécialisé du
Service Après-Vente.
ATTENTION !
Le Service Après-Vente ne
doit être effectué que par des
techniciens spécialisés. Il est
dangereux pour quiconque, autre
qu’un technicien spécialisé,
d’assurer le Service Après-Vente
ou d’effectuer des opérations
impliquant le démontage de tout
panneau protégeant contre
l’exposition à l’énergie des
micro-ondes.
Ne démontez aucun panneau.
Le symbole présent sur l’appareil ou sur la
documentation qui l’accompagne
indique que ce produit ne peut
en aucun cas être traité comme
déchet ménager. Il doit par
conséquent être remis à un centre
de collecte des déchets chargé du
recyclage des équipements
électriques et électroniques.
Pour la mise au rebut,
respectez les normes relatives
à l’élimination des déchets en
vigueur dans le pays d’installation.
Pour obtenir de plus amples détails au sujet du
traitement, de la récupération et du recyclage de
cet appareil, veuillez vous adresser au bureau
compétent de votre commune, à la société de
collecte des déchets ou directement à votre
revendeur.
Avant de vous séparer de l’appareil, rendez-le
inutilisable en coupant le cordon d’alimentation,
de manière à ne plus pouvoir raccorder l’appareil
au réseau électrique.
24

SÉLECTION DU NIVEAU DE PUISSANCE
Niveau Sert au :
750 W Réchauffage de boissons, eau, potages, café, thé ou autres aliments à haute
teneur en eau. Pour les plats préparés avec des œufs ou de la crème, choisir une
puissance inférieure. Cuisson de légumes, poisson, viande, etc.
500 W Cuisson attentive, p.ex. des plats préparés avec de la sauce, du fromage et des
œufs et fin de cuisson des ragoûts.
350 W Cuisson à petit feu des ragoûts.
160 W Décongélation. Ramollissement du beurre, des fromages et de la glace.
0 W Seulement avec le minuteur.
REMARQUE PARTICULIÈRE
Lorsque le four a terminé de fonctionner, il
exécute une procédure de refroidissement.
Durant ce laps de temps le ventilateur, le plateau
tournant et la lampe fonctionnent. Cela est
normal.
Après cette procédure, le four s’arrête
automatiquement.
La procédure de refroidissement peut être
interrompue sans aucun dommage pour le four.
CARACTÉRISTIQUES TECHNIQUES
Model MBI 540
Tension d'alimentation
Puissance absorbée
Fu si bl e
Puissance micro-ondes restituée
Dimensions extérieures (mm) :
Cavité four (mm) :
selon la norme CEI 705.
La Commission électrotechnique internationale, SC. 59H, a établi une norme relative à des essais de
performance comparatifs effectués sur différents fours micro-ondes. Nous recommandons ce qui
suit pour ce four :
Test Quantité Temps (environ) Niveau de puissance Récipient
12.3.1 750 g 10 min 750 W
12.3.2 475 g 5½ min 750 W
12.3.3 900 g 14 min 750 W
13.3.0 500 g 2 min 40 sec Jet defrost
230 V/50 Hz
1300 W
10 A (U K 13 A)
750 W
H x L x P
362 x 595 x 320
187 x 370 x 290
Pyrex 3.220
Pyrex 3.827
Pyrex 3.838
25

INSTALLAZIONE
PRIMA DI FAR FUNZIONARE IL FORNO
Controllate che la tensione indicata sulla
targhetta matricola corrisponda alla tensione
della vostra abitazione.
Non rimuovere le piastre di protezione del
forno a microonde che si trovano
lateralmente sulla cavità del forno. Tali
piastre evitano che i grassi e i pezzetti di cibo
entrino nelle feritoie del forno.
Assicuratevi che prima del montaggio il
forno sia vuoto.
Assicuratevi che l’apparecchio non sia
danneggiato. Verificate che la porta del forno
si chiuda perfettamente e che la guarnizione
interna non sia danneggiata. Vuotate il forno
e pulite l’interno con un panno morbido e
umido.
Non fate funzionare l’apparecchio con il
cavo di alimentazione o la spina danneggiati,
se non funziona correttamente o se ha
subito danni o è caduto. Non immergete il
cavo di alimentazione o la spina in acqua.
Tenete il cavo di alimentazione lontano da
superfici calde. Si potrebbero verificare
scosse elettriche, incendi o altri pericoli.
Durante l’installazione, seguite le istruzioni
per il montaggio fornite separatamente.
DOPO IL COLLEGAMENTO
Il forno funziona solo se la porta è stata
chiusa correttamente.
La messa a terra dell’apparecchio è
obbligatoria a termini di legge. Il fabbricante
declina qualsiasi responsabilità per
eventuali danni a persone, animali o cose,
derivanti dalla mancata osservanza di
questa norma.
In caso di connessione permanente,
l’apparecchio deve essere installato da un
tecnico qualificato.
ATTENZIONE!
La connessione permanente implica
l’installazione di un dispositivo di
separazione. Tale dispositivo deve
presentare un contatto a polarità multipla con
apertura superiore a 3 mm e comprendente
commutatori LS, valvole di sicurezza e relè.
Deve essere connesso direttamente al
terminale.
I produttori non sono responsabili per
problemi causati dall’inosservanza
dell’utente delle presenti istruzioni.
IMPORTANTI PRECAUZIONI DI SICUREZZA
LEGGERE ATTENTAMENTE E CONSERVARE PER ULTERIORI CONSULTAZIONI
Non riscaldate o usate materiali
infiammabili all’interno o vicino al forno. I
vapori potrebbero causare pericoli d’incendio
o esplosioni.
Non usate prodotti chimici corrosivi o prodotti
vaporizzati su quest’apparecchio. Questo tipo
di forno è stato progettato per riscaldare o
cuocere alimenti. Non usatelo a scopi
industriali o di laboratorio.
Non usate il forno a microonde per
asciugare tessuti, carta, spezie, erbe, legno,
fiori, frutta o altro materiale combustibile. Si
potrebbero causare incendi.
Se il materiale all’interno/esterno del forno
dovesse incendiarsi, tenete chiusa la porta
e spegnete il forno. Staccate la spina dalla
presa di corrente o disinserite
26
l’alimentazione generale dell’abitazione.
Non cuocete troppo gli alimenti. Potrebbero
incendiarsi.
Non lasciate il forno senza sorveglianza,
specialmente quando si usa carta, plastica o
altri materiali combustibili durante il
processo di cottura. La carta si potrebbe
carbonizzare o bruciare e alcuni tipo di
plastica potrebbero sciogliersi con il calore.
ATTENZIONE!
Permettete ai bambini di utilizzare il forno
senza la vostra supervisione soltanto se
sono stati istruiti adeguatamente e se sono in
grado di utilizzare il forno in modo sicuro e di
comprendere i rischi connessi ad un utilizzo
improprio.

IMPORTANTI PRECAUZIONI DI SICUREZZA
ATTENZIONE!
Non usate il forno a microonde
per riscaldare alimenti o liquidi in
contenitori sigillati. L’aumento
di pressione potrebbe
causare danni all’apertura del contenitore, il
quale potrebbe anche esplodere.
UOVA
Non usate il forno a microonde per cucinare o riscaldare uova intere, con o
senza guscio, poiché potrebbero esplodere anche dopo che il processo di
riscaldamento a microonde è terminato.
Le guarnizioni della porta e le zone
circostanti devono essere controllate
periodicamente. In caso di danni, non far
funzionare l’apparecchio finché non sia
stato riparato da un tecnico qualificato.
ATTENZIONE!
PRECAUZIONI
SUGGERIMENTI GENERALI
Questo apparecchio è destinato
esclusivamente all’uso domestico!
Utilizzando la funzione microonde, questo
forno non deve mai essere messo in
funzione
senza alimenti. Ne potrebbero
derivare danni all’apparecchio.
Se fate delle prove di programmazione ,
mettete all’interno un bicchiere di acqua.
L’acqua assorbirà le microonde e il forno
non si rovinerà.
Non usate la cavità come dispensa.
Non rimuovere le piastre di protezione del
forno a microonde che si trovano
lateralmente sulla cavità del forno. Tali
piastre evitano che i grassi e i pezzetti di
cibo entrino nelle feritoie del forno.
Togliete i lacci di chiusura dai
sacchetti di plastica o carta
prima di metterli in forno.
FRITTURA A BAGNO D’OLIO
Non usate il forno a
microonde per fritture a
bagno d’olio, poiché è
impossibile controllare la temperatura
dell’olio.
Per evitare bruciature, usate sempre
guanti da forno per manipolare contenitori,
toccare il forno e togliere le casseruole.
LIQUIDI
Quando si riscaldano liquidi
come ad esempio bevande o
acqua nel vostro microonde,
questi si possono surriscaldare oltre il punto
di ebollizione senza che appaiano bollicine.
Questo potrebbe portare ad un
traboccamento improvviso di liquido bollente.
Per prevenire questa possibilità, operate
come segue:
1. Evitate l’uso di contenitori con colli
stretti.
2. Mescolate il liquido prima di mettere il
recipiente nel forno e lasciatevi
immerso un cucchiaino da tè.
3. Dopo il riscaldamento, prevedete un
tempo di riposo, mescolando ancora
prima di togliere il recipiente dal forno.
CAUTELA
Per maggiori dettagli riferitevi sempre ad
un libro di ricette per forno a microonde.
specialmente se gli alimenti da cuocere o
riscaldare contengono alcool.
Dopo aver riscaldato gli alimenti
per bambini o liquidi nel
biberon, oppure in contenitori
per omogeneizzati, agitate e
controllate sempre la temperatura prima di
servire. Questo favorirà la distribuzione
omogenea del calore evitando il rischio di
bruciature.
Togliete il coperchio e la tettarella dal
biberon prima di riscaldarlo!
27

ACCESSORI
SUGGERIMENTI GENERALI
Sul mercato ci sono diversi accessori
disponibili per la cottura nel forno. Prima di
acquistarli, accertatevi che siano adatti alla
cottura a microonde.
Quando mettete l’alimento e gli accessori
nel forno a microonde, accertatevi che non
tocchino le pareti interne del forno. Ciò è
particolarmente importante per gli
accessori metallici o con parti metalliche.
Se gli accessori metallici vengono in
contatto con le pareti interne mentre il forno
è in funzione, si produrranno scintille ed il
forno ne risulterà danneggiato.
Verificate sempre che il piatto rotante sia
in grado di ruotare liberamente prima di
avviare il forno.
Assicuratevi che gli utensili usati siano
resistenti al calore del forno e trasparenti
alle microonde.
GUIDA PER PIATTO ROTANTE
Servitevi del supporto del
piatto rotante sotto al piatto
rotante in vetro. Non appoggiate
altri utensili sopra la guida per
piatto rotante.
* Montate la guida per il piatto rotante nel
forno.
PIATTO ROTANTE IN VETRO
Usate il piatto rotante in vetro
con tutti i metodi di cottura. Il
piatto rotante raccoglie i sughi di
cottura e le particelle di cibo che
altrimenti macchierebbero e
sporcherebbero l’interno del forno.
* Posizionate il piatto rotante in vetro
sopra la guida.
PORTAPOPPATOIO
Usate il Portapoppatoio per
riscaldare alimenti per bambini in
poppatoi troppo alti per essere
posti in posizione eretta all’interno
del forno. Fate anche riferimento al capitolo
”Precauzioni” per ulteriori informazioni circa il
riscaldamento di alimenti per bambini.
COPERCHIO
Utilizzate l’apposito coperchio per coprire
l’alimento durante la cottura ed il
riscaldamento con solo le
microonde. Il coperchio serve a
ridurre gli schizzi, trattenere l’umidità
degli alimenti ed abbreviare i tempi di
cottura.
Utilizzate il coperchio per il riscaldamento su
due livelli.
PROTEZIONE ANTI-AVVIO / SICUREZZA BAMBINI
Questa funzione di sicurezza si attiva
automaticamente un minuto dopo che il
forno viene a trovarsi nella fase di attesa
“standby“.
28
La porta del forno deve essere aperta e
poi richiusa per esempio inserendo il cibo,
per sbloccare il meccanismo di sicurezza.
Quindi, se nella fase di attesa cercate di
far funzionare il forno senza prima aver
inserito il cibo, sul visualizzatore apparirà
la scritta “door”.

SOSPENSIONE O INTERRUZIONE DELLA COTTURA
Per sospendere il processo di cottura:
Se desiderate controllare, mescolare o
girare l’alimento, aprite la porta ed il
processo di cottura si interromperà
automaticamente. La funzione rimane
impostata per 10 minuti.
Per riprendere il processo di cottura:
Chiudete la porta e premete il tasto
di Avvio
Premendo il tasto di avvio una sola
volta, il processo di cottura riprende da dove
era stato interrotto. Premendo il tasto di Avvio
DUE VOLTE
tempo di cottura di 30 secondi.
UNA SOLA VOLTA
si determina un incremento del
.
Se non volete continuare la cottura:
Togliete l’alimento, chiudete la porta
e premete il tasto di Arresto
Al completamento del processo di
cottura, il cicalino del forno suona
ogni minuto per 10 minuti. finché non viene
premuto il tasto di Arresto o non viene aperta
la porta per far cessare il segnale.
Nota: ricordate che se aprite e chiudete la
porta al termine del processo di cottura, le
impostazioni rimangono memorizzate per 30
secondi.
OROLOGIO
1
+
2
Tenete la porta del forno aperta quando impostate l’orologio. Tale operazione darà 5 minuti
di tempo per l’impostazione dell’orologio. Altrimenti, ogni singolo passo va compiuto entro 30
secondi.
1. Premete il tasto Arresto (3 secondi) finché le cifre a sinistra, indicanti le ore, non
lampeggiano.
2. Premete i tasti +/- per impostare le ore.
3. Premete di nuovo il tasto Power (potenza). (Le due cifre a destra, indicanti i minuti,
lampeggiano).
4. Premete i tasti +/- per impostare i minuti.
5. Premete di nuovo il tasto Power (potenza).
L’Orologio è impostato ed è in funzione.
Nota: Quando l’apparecchio è collegato alla corrente per la prima volta o dopo un
blackout, il display è vuoto. Se l’orologio non è impostato, il display resterà vuoto finché
non verrà impostato un tempo di cottura.
3 5
TEMPORIZZATORE
2
Utilizzate questa funzione per indicare sul timer di cucina il tempo desiderato, ad esempio
per cuocere uova, pasta o far lievitare la pasta prima di cuocerla ecc.
1. Premete i tasti +/- per impostare il tempo desiderato sul contatore del timer.
2. Premete ripetutamente il tasto Power (potenza) per impostare il livello di potenza su 0 W.
3. Premete il tasto di Start (avvio).
Allo scadere del tempo impostato sul timer, il forno a microonde emette un segnale acustico.
1
+
3
29

COTTURA E RISCALDAMENTO CON LE MICROONDE
2
Utilizzate questa funzione per normali operazioni di cottura e riscaldamento di verdure,
pesce, patate e carne.
1. Premete i tasti +/- per impostare il tempo desiderato.
2. Premete ripetutamente il tasto Power (potenza) per impostare il livello di potenza.
3. Premete il tasto Start (avvio).
Una volta che il processo di cottura è iniziato:
Il tempo può essere facilmente incrementato di 30 secondi alla volta premendo il tasto
d’Avvio. Ogni successiva pressione incrementa il tempo di cottura di ulteriori 30 secondi.
Si può anche aumentare o ridurre il tempo, premendo i tasti +/-.
Premendo il tasto Power (potenza), è possibile modificare anche il livello di potenza
impostato. Alla prima pressione verrà indicato l’attuale livello di potenza. Premete il tasto
ripetutamente per modificare il livello di potenza nel modo desiderato.
1
+
3
JET DEFROST
23
+
1
Usate questa funzione per scongelare SOLO carne, pesce e pollame. Per altri alimenti,
quali pane e frutta, seguite la procedura descritta per ”Funzione di cottura e riscaldamento
con le microonde” e selezionate il livello di potenza 160 W per effettuare lo
scongelamento.
La funzione Jet Defrost può essere usata solo se il peso netto è compreso tra 100 e 2000 g.
1. Premete il tasto Jet Defrost.
2. Premete i tasti +/- per impostare il peso
dell’alimento.
3. Premete il tasto Start (avvio).
A metà del processo di scongelamento il
forno si arresta e invita a girare (”TURN”)
l’alimento.
— Aprite la porta.
— Girate l’alimento.
— Chiudete la porta e riavviate (GO)
premendo il tasto Jet Start.
Nota: il forno riprenderà a funzionare
automaticamente dopo 2 minuti se gli
alimenti non vengono girati. In questo
caso, sarà richiesto un tempo di
scongelamento maggiore.
Se il peso è inferiore o superiore a quello
raccomandato:
Seguite la procedura descritta per
”Funzione di cottura e riscaldamento con le
microonde” e selezionate il livello di
potenza 160 W per effettuare lo
scongelamento.
Se l’alimento è a temperatura più alta di
quella di surgelamento (-18°C),
selezionate un peso inferiore dell’alimento.
Se l’alimento è a temperatura più bassa
di quella di surgelamento (-18°C),
selezionate un peso superiore
dell’alimento.
30
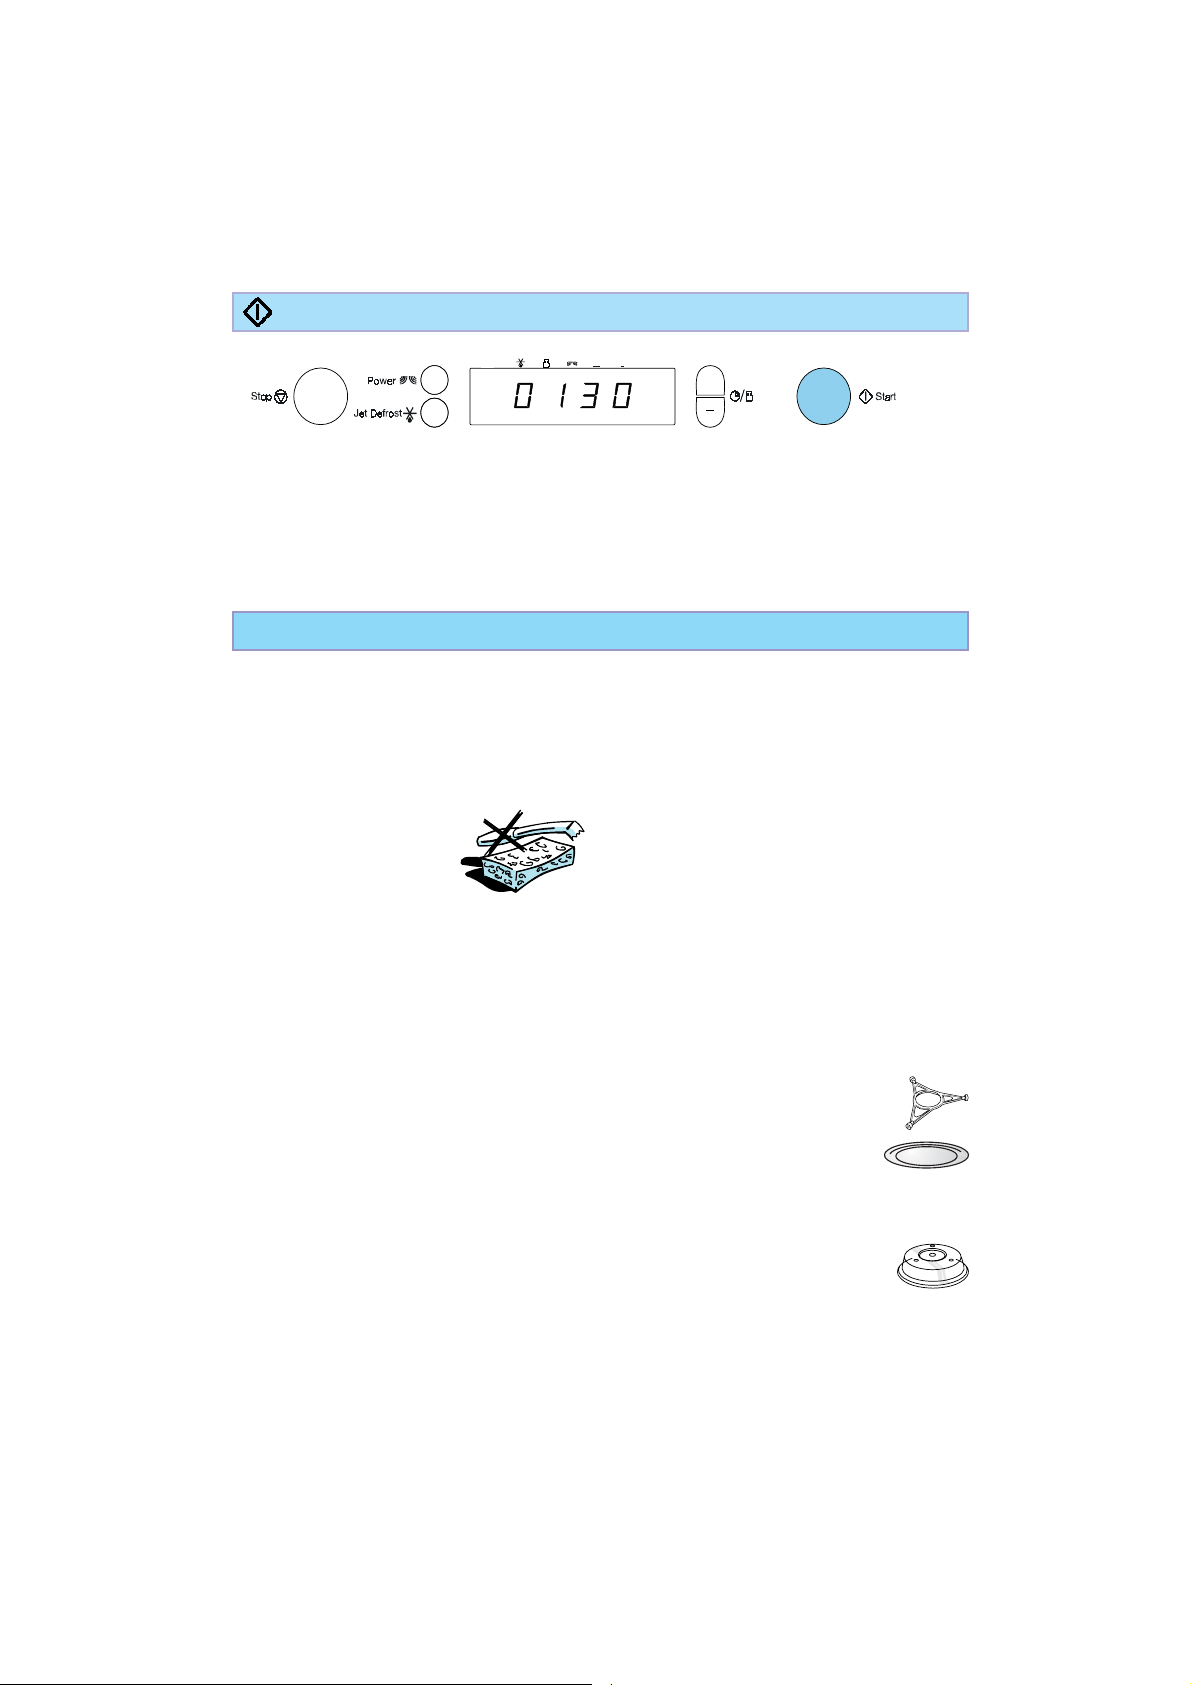
JET START
+
Usate questa funzione per riscaldare rapidamente alimenti ad alto contenuto d’acqua
come zuppe non dense, caffè o tè.
Premere questo tasto per avviare automaticamente il forno a microonde alla massima
potenza e con il tempo di cottura impostato a 30 secondi. Ogni ulteriore pressione
incrementa il tempo di 30 secondi. Potete anche modificare il tempo premendo i tasti +/-,
rispettivamente per incrementarlo o diminuirlo, dopo l’avvio della funzione.
MANUTENZIONE E PULIZIA
La mancata esecuzione delle operazioni
di pulizia periodiche può provocare
deterioramenti della superficie che
possono influenzare negativamente la
durata dell’apparecchio e causare
situazioni di pericolo.
Non usate pagliette
metalliche all’interno della
cavità del forno.
Righerebbero la
superficie.
Ad intervalli regolari, in particolare se si
sono verificati dei traboccamenti di liquidi,
togliete il piatto rotante, la relativa guida e
pulite la base del forno.
Questo forno è stato progettato per
funzionare con il piatto rotante alloggiato
nella sua sede.
Non fate funzionare il forno quando il piatto
rotante è stato rimosso per essere pulito.
Usate un detergente neutro, acqua e un
panno morbido per pulire le superfici
interne e la parte interna ed esterna e i
giunti della porta.
Non lasciate che si formino depositi di
grasso o di cibo attorno alla porta.
Per macchie tenaci, fate bollire una tazza
colma d’acqua nel forno per 2 o 3 minuti. Il
vapore ammorbidirà lo sporco.
Per eliminare gli odori all’interno del
forno, aggiungete del succo di limone ad
un bicchiere d’acqua, ponete il bicchiere
sul piatto rotante e lasciate bollire per
alcuni minuti.
Detergenti aggressivi, pagliette
metalliche, panni abrasivi, ecc. possono
danneggiare la mascherina, l’interno e
l’esterno del forno. Usate una spugna con
un detergente neutro o un panno carta con
un prodotto spray per la pulizia dei vetri.
Applicate il prodotto spray per la pulizia dei
vetri su un panno carta.
Non spruzzate direttamente sul forno.
SI CONSIGLIA L’USO DELLA
LAVASTOVIGLIE:
Guida per piatto rotante.
Piatto rotante in vetro.
Portapoppatoio
Coperchio
31

GUIDA RICERCA GUASTI
Se il forno non funziona, prima di
chiamare il Servizio Assistenza, effettuate i
seguenti controlli:
* Il piatto rotante e l’apposita guida sono
alloggiati nella sede.
* La spina è inserita correttamente nella
presa di corrente.
* La porta chiude correttamente.
* Controllate i fusibili e accertatevi che
non manchi la corrente.
* Controllate che il forno sia ventilato
adeguatamente.
* Aspettate una decina di minuti, poi
riavviate il forno.
* Aprite e poi chiudete la porta prima di
tentare nuovamente di avviare il forno.
Questo per evitare chiamate inutili in
Assistenza, che vi potrebbero essere
addebitate. Quando chiamate l’Assistenza,
indicate sempre il numero di matricola e il
modello del forno (vedere la targhetta
Service). Per ulteriori informazioni,
consultate il libretto garanzia.
CONSIGLI PER LA SALVAGUARDIA DELL’AMBIENTE
Attenzione:
Il cavo di alimentazione deve essere
sostituito solo con un cavo originale,
disponibile tramite la nostra
organizzazione del servizio assistenza. Il
cavo di alimentazione deve essere
sostituito solo da personale specializzato.
ATTENZIONE!
Il Servizio Assistenza deve
essere effettuato
esclusivamente da tecnici
addestrati. E’ pericoloso per
chiunque non faccia parte del
personale specializzato
effettuare operazioni di
assistenza o riparazione che
comportino la rimozione di
qualunque pannello di
copertura contro l’esposizione
all’energia delle microonde.
Non rimuovere alcun pannello di
copertura.
Il materiale d’imballo è riciclabile al 100%
ed è contrassegnato dal
simbolo del riciclaggio. Per lo
smaltimento seguire le
normative locali. Il materiale di
imballaggio (sacchetti di
plastica, parti in polistirolo, ecc.) deve
essere tenuto fuori dalla portata dei
bambini in quanto potenziale fonte di
pericolo.
Questo apparecchio è contrassegnato in
conformità alla Direttiva Europea 2002/96/
EC, Waste Electrical and Electronic
Equipment (WEEE). Assicurandosi che
questo prodotto sia smaltito in modo
corretto, l’utente contribuisce a prevenire le
potenziali conseguenze negative per
l’ambiente e la salute.
32
Il simbolo sul prodotto o sulla
documentazione di
accompagnamento indica
che questo prodotto non deve
essere trattato come rifiuto
domestico ma deve essere
consegnato presso l’idoneo
punto di raccolta per il
riciclaggio di
apparecchiature elettriche
ed elettroniche.
Disfarsene seguendo le normative locali
per lo smaltimento dei rifiuti.
Per ulteriori informazioni sul trattamento,
recupero e riciclaggio di questo prodotto,
contattare l’idoneo ufficio locale, il servizio
di raccolta dei rifiuti domestici o il negozio
presso il quale il prodotto è stato
acquistato.
Prima della rottamazione, rendetelo
inservibile tagliando il cavo elettrico di
alimentazione.

COME SCEGLIERE IL LIVELLO DI POTENZA
Livello Da usare per:
750 W Riscaldare bevande, acqua, zuppe non dense, caffè, tè o altri alimenti ad
alto contenuto di acqua. Se l’alimento contiene uova o creme, scegliere
una potenza inferiore. Cottura di verdure, pesce, carne, ecc.
500 W Cottura accurata per esempio di salse molto proteiche, piatti a base di
uova e formaggio e per terminare la cottura di piatti in umido.
350 W Far bollire lentamente stufati.
160 W Scongelamento. Ammorbidire burro, formaggi e gelati.
0 W Solo quando si usa il Temporizzatore.
NOTA PARTICOLARE
Dopo l’esecuzione di una funzione, il forno
inizia un ciclo di raffreddamento.
Durante questo ciclo funzionano la ventola,
il piatto girevole e la luce. Ciò è da ritenersi
del tutto normale.
Alla fine del ciclo di raffreddamento il forno
si spegne automaticamente.
Il ciclo di raffreddamento può essere
interrotto senza provocare danni al forno.
DATI TECNICI
Modello MBI 540
Tensione di alimentazione
Potenza assorbita nominale
Fusibili
Potenza sviluppata micronde
Dimensioni esterne:
Comparto forno:
In conformità alla norma IEC 705.
La Commissione Elettrotecnica Internazionale, SC. 59H, ha messo a punto una prova di
riscaldamento standard per valutare le prestazioni di riscaldamento di tutti i forni a
microonde. Per questo forno, raccomandiamo quanto segue:
Test Quantità Tempo appros. Potenza Contenitore
12.3.1 750 g 10 min 750 W
12.3.2 475 g 5½ min 750 W
12.3.3 900 g 14 min 750 W
13.3.0 500 g 2 min 40 sec Jet defrost
230 V/50 Hz
1300 W
10 A (U K 13 A)
750 W
A x L x P
362 x 595 x 320
187 x 370 x 290
Pyrex 3.220
Pyrex 3.827
Pyrex 3.838
33

343536


FRGBDE
4619 694 44862
IT
Whirlpool Sweden AB
 Loading...