

Page 1
See-Through
Washer
Installation &
Operating Guide
Model No.
LSR4311DQO
AVhiilpw)!
/ HOME^i APPLIANCES
1 —
i
—
Display Unit Only
Not For Resale
---------------------
-—
^
WWLL056/3947954
Page 2

If you have any problems or questions regarding
your See-Through Washer, please contact your
Whirlpool Account Manager or
Field Marketing Representative
or call toll-free:
1-800-253-1301
Whirlpwl
/ HOME appliances
Page 3

Unit Not for Resale!
Whirlpool Corporation has built this demonstration unit
to show your customers how Whirlpool Automatic
Washers create rollover at all agitation speeds with the
new Xtra Roll Actiom" Agitator.
TO ORDER SEE-THROUGH WASHER
FREE DEMO MATERIALS,
CALL WHIRLPOOL FULFILLMENT:
1-800-643-3444
Have the form numbers ready for the items you need:
1 See-Through Washer Instruction Manual # WWLL05T
(included in your demonstration kit)
200 Red/White/Blue Chips
(included in your demonstration kit)
10 White Poly-Cotton Swatches # WWLP121
(not included in your demonstration kit)
# WWLD041
1 Point-of-Purchase Kit should accompany your
see-through washer upon delivery. Please call the
above number if you did not receive one, and
order form #WWLP118.
1
Page 4

Installation Instructions
Your demo model must be installed using the
following manual fill method.
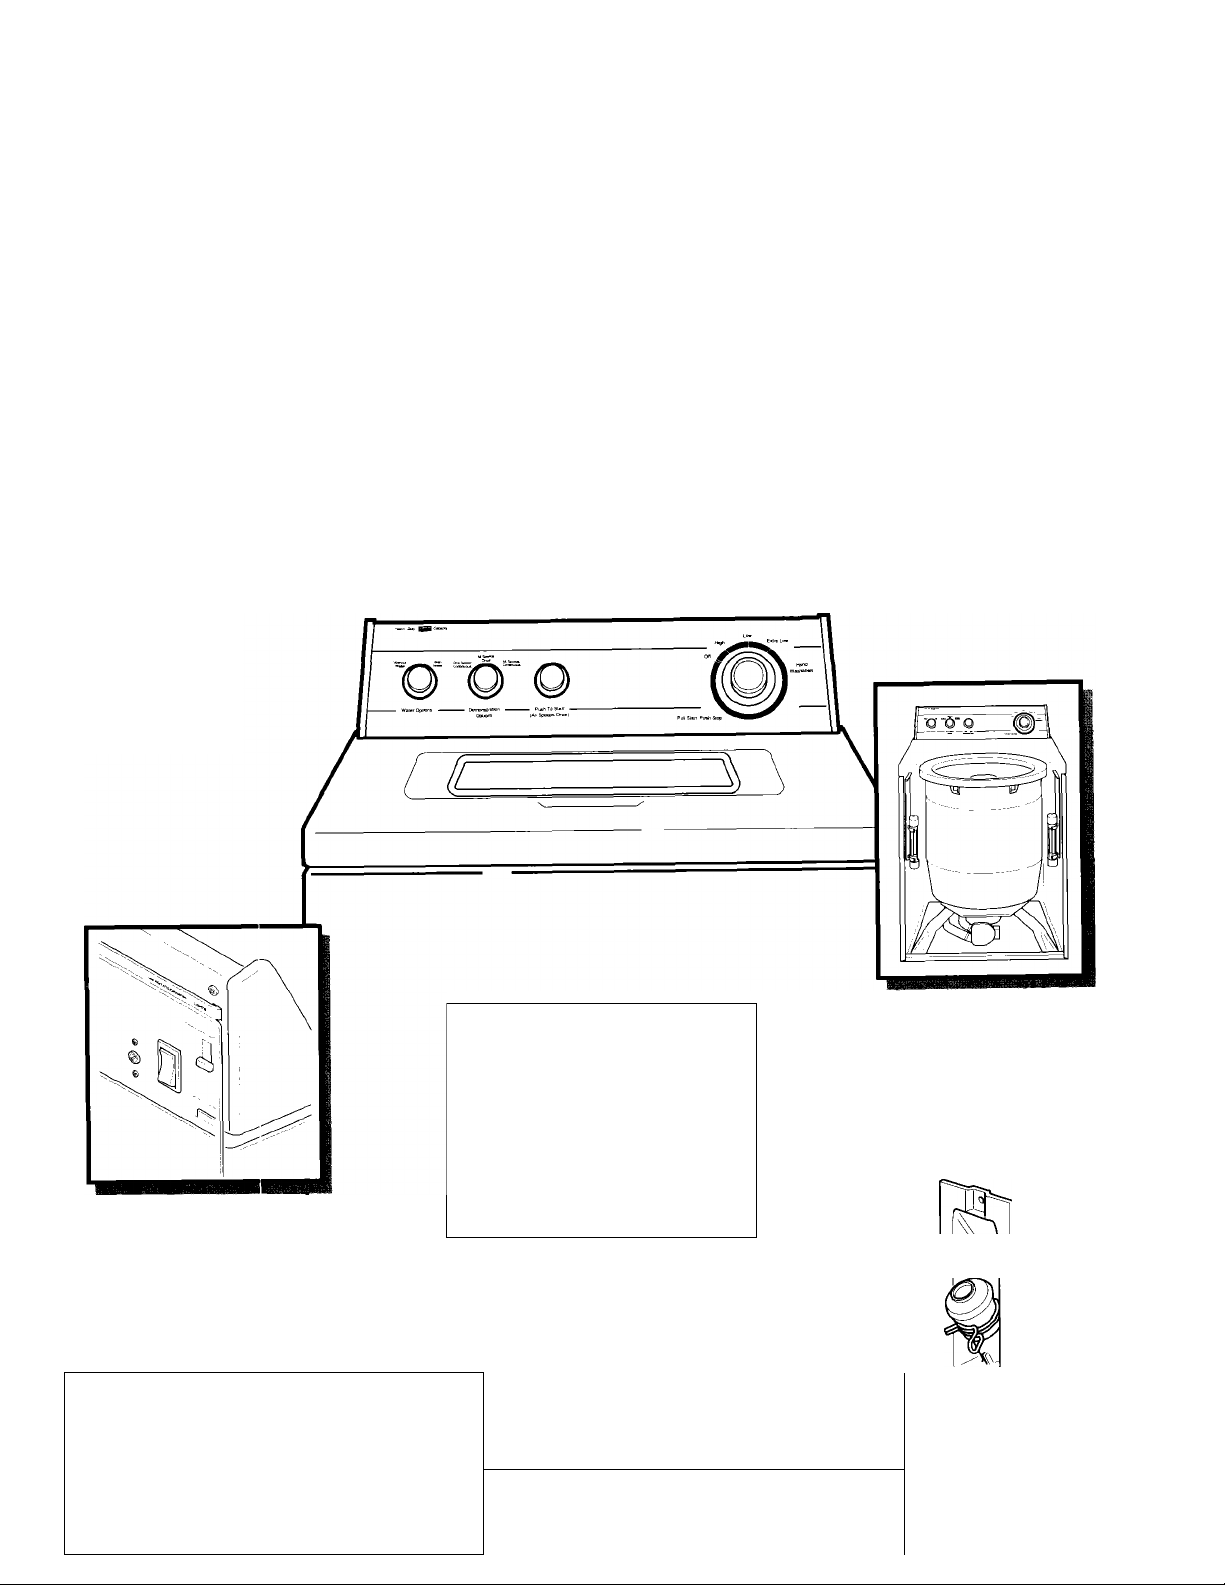
Place the Unit into
©
position on the sales
floor, preferably on an
end cap next to a
Whirlpool 3-Speed
washer.
With pliers, remove the
yellow plug at the base
of the washer in the
back. The plug must be
completely removed for
the self-leveling legs to
2
be released.
Insert leveling legs into
correct holes at each
front corner of washer
until nuts touch
washer. Do not tighten
nuts until step 6.
Page 5
Installation Instructions
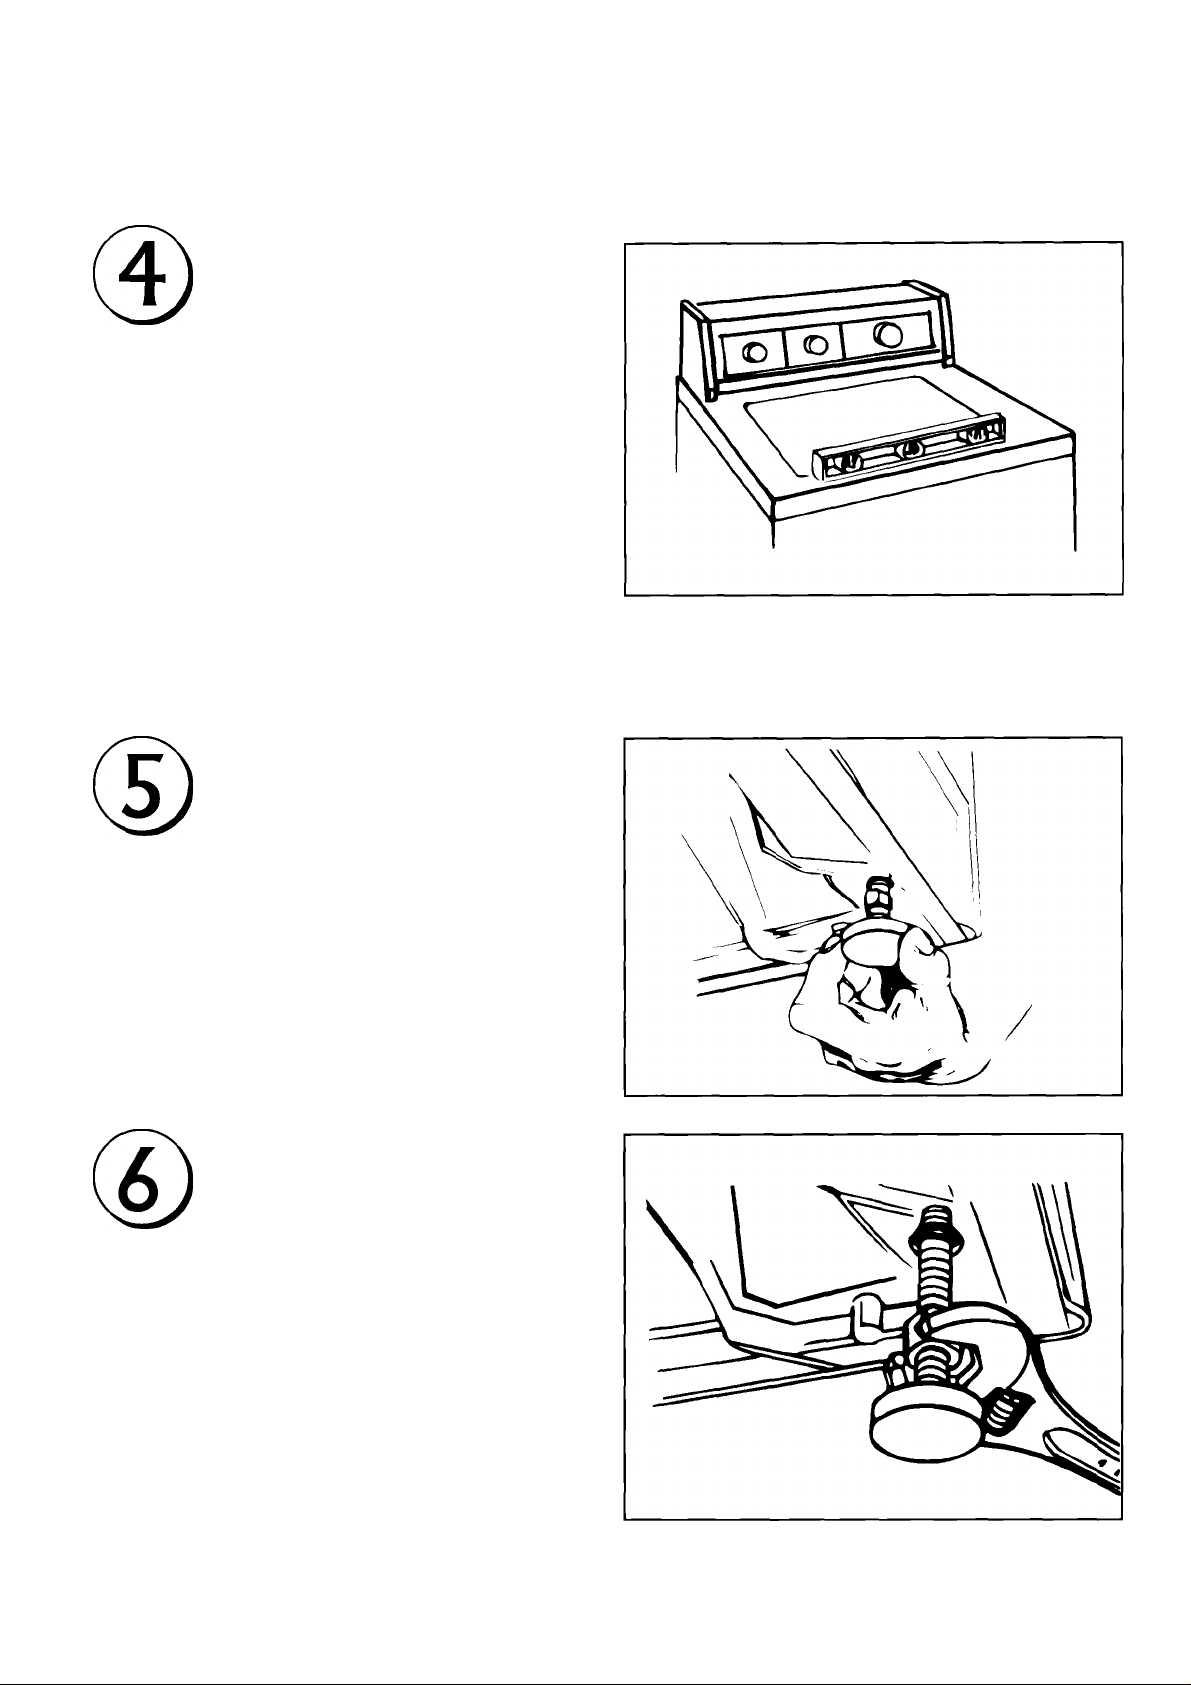
Tilt washer forward,
raising back legs l"off of
floor to adjust rear
self-leveling legs. Gently
lower washer to floor.
Check levelness of the
washer by placing a
carpenter's level on the
top of the washer, first
side to side; then front to back
If washer is not level,
screw the front legs up
or down to adjust and
repeat step 4.
Once the washer is level,
use wrench to turn nuts
on front legs up tightly
against washer base. If
nuts are not tight against
washer base, the washer
may vibrate.
3
Page 6
Installation Instructions
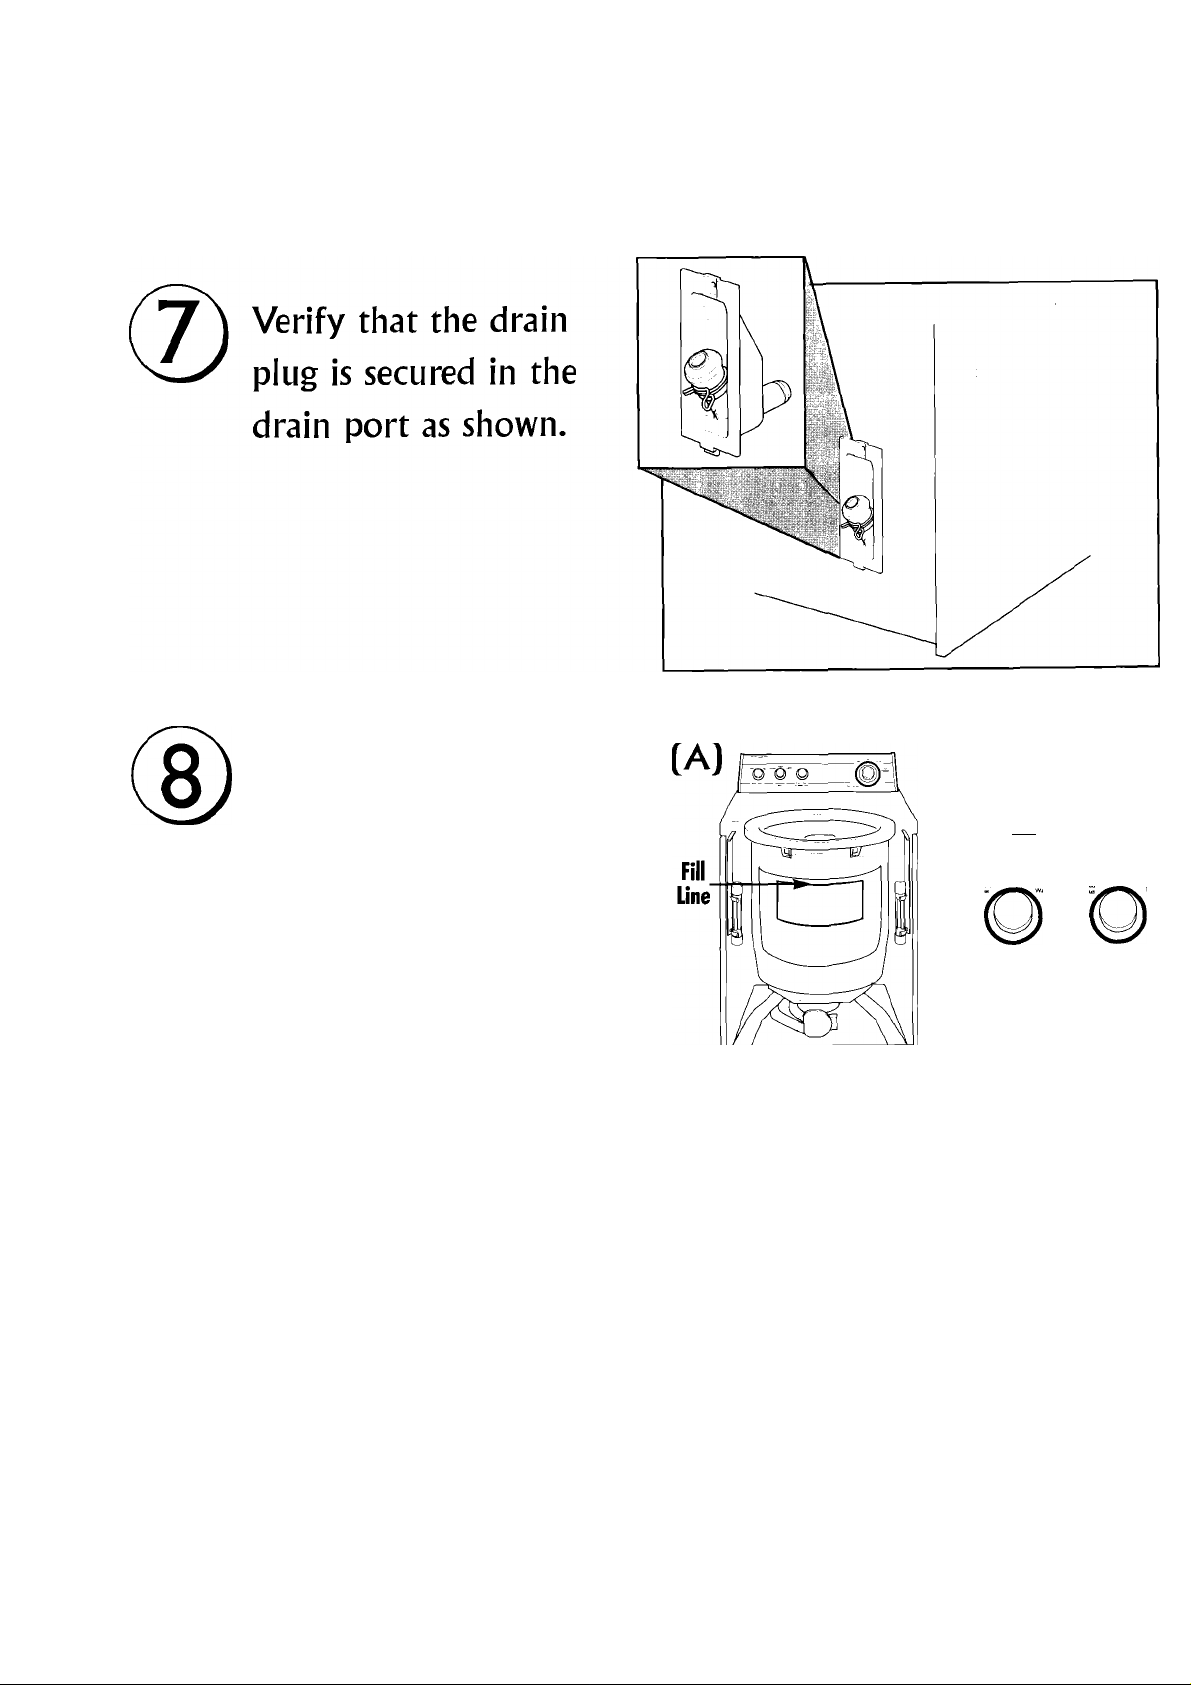
Manually fill the basket
(using a bucket or
garden hose) with 20-23
gallons of water (A). Fill
to top of gasket on
basket. Set the Water
Options dial to "Without
Water." (B)*
(B)
■ Our/ L-. •• = C.p«:dV
4
* If you are running the demonstration model without any water at all,
you must add at least I pint of water to the basket for proper operation.
Check regularly for evaporation and repeat as needed.
Page 7
Installation Instructions
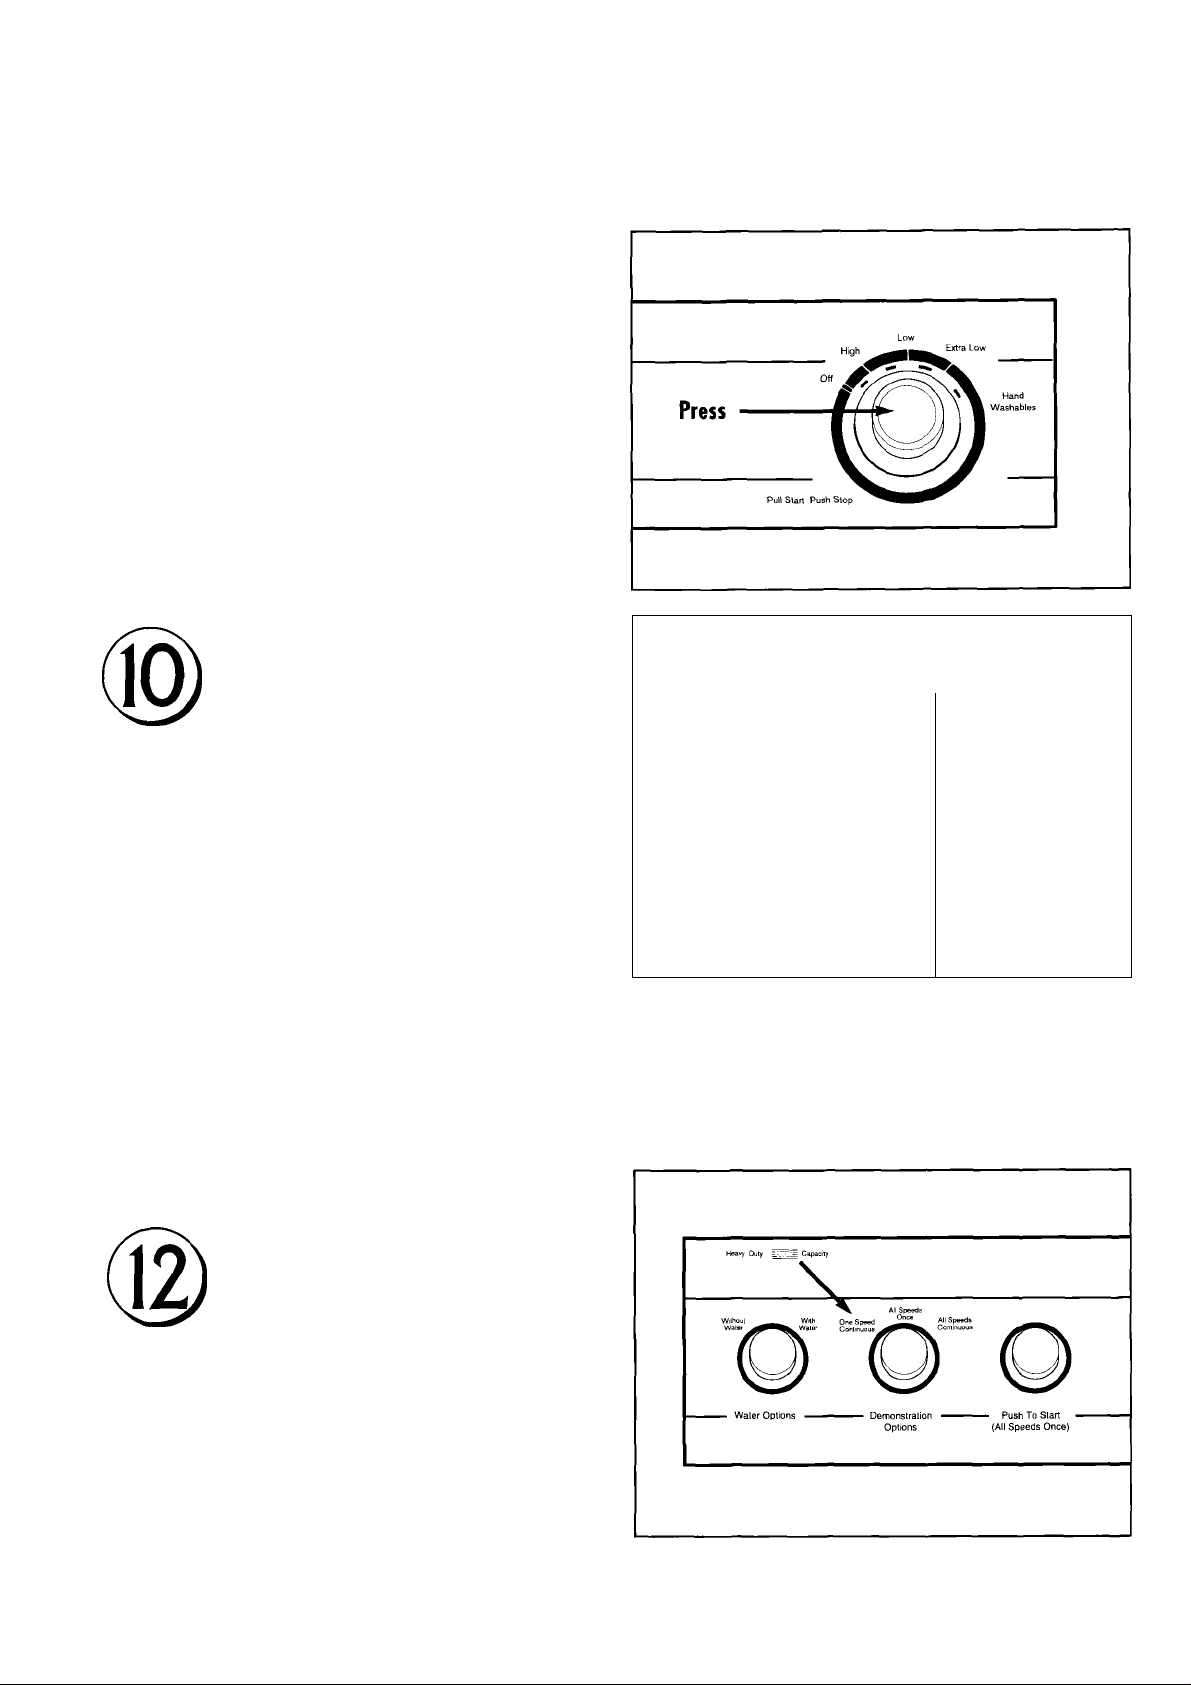
Push the Timer dial in
(Washer is now in OFF
position]
With a screwdriver, turn
the Drain / Agitate Switch
(D
on the back of the
washer to "Agitate"
Load the 200 colored
chips into the machine.
(See Page I for how to
order your free demo
swatches.)
Set the Demonstration
Options dial to desired
function ("All Speeds
Continuous" is the
recommended
demonstration mode]
5
Page 8
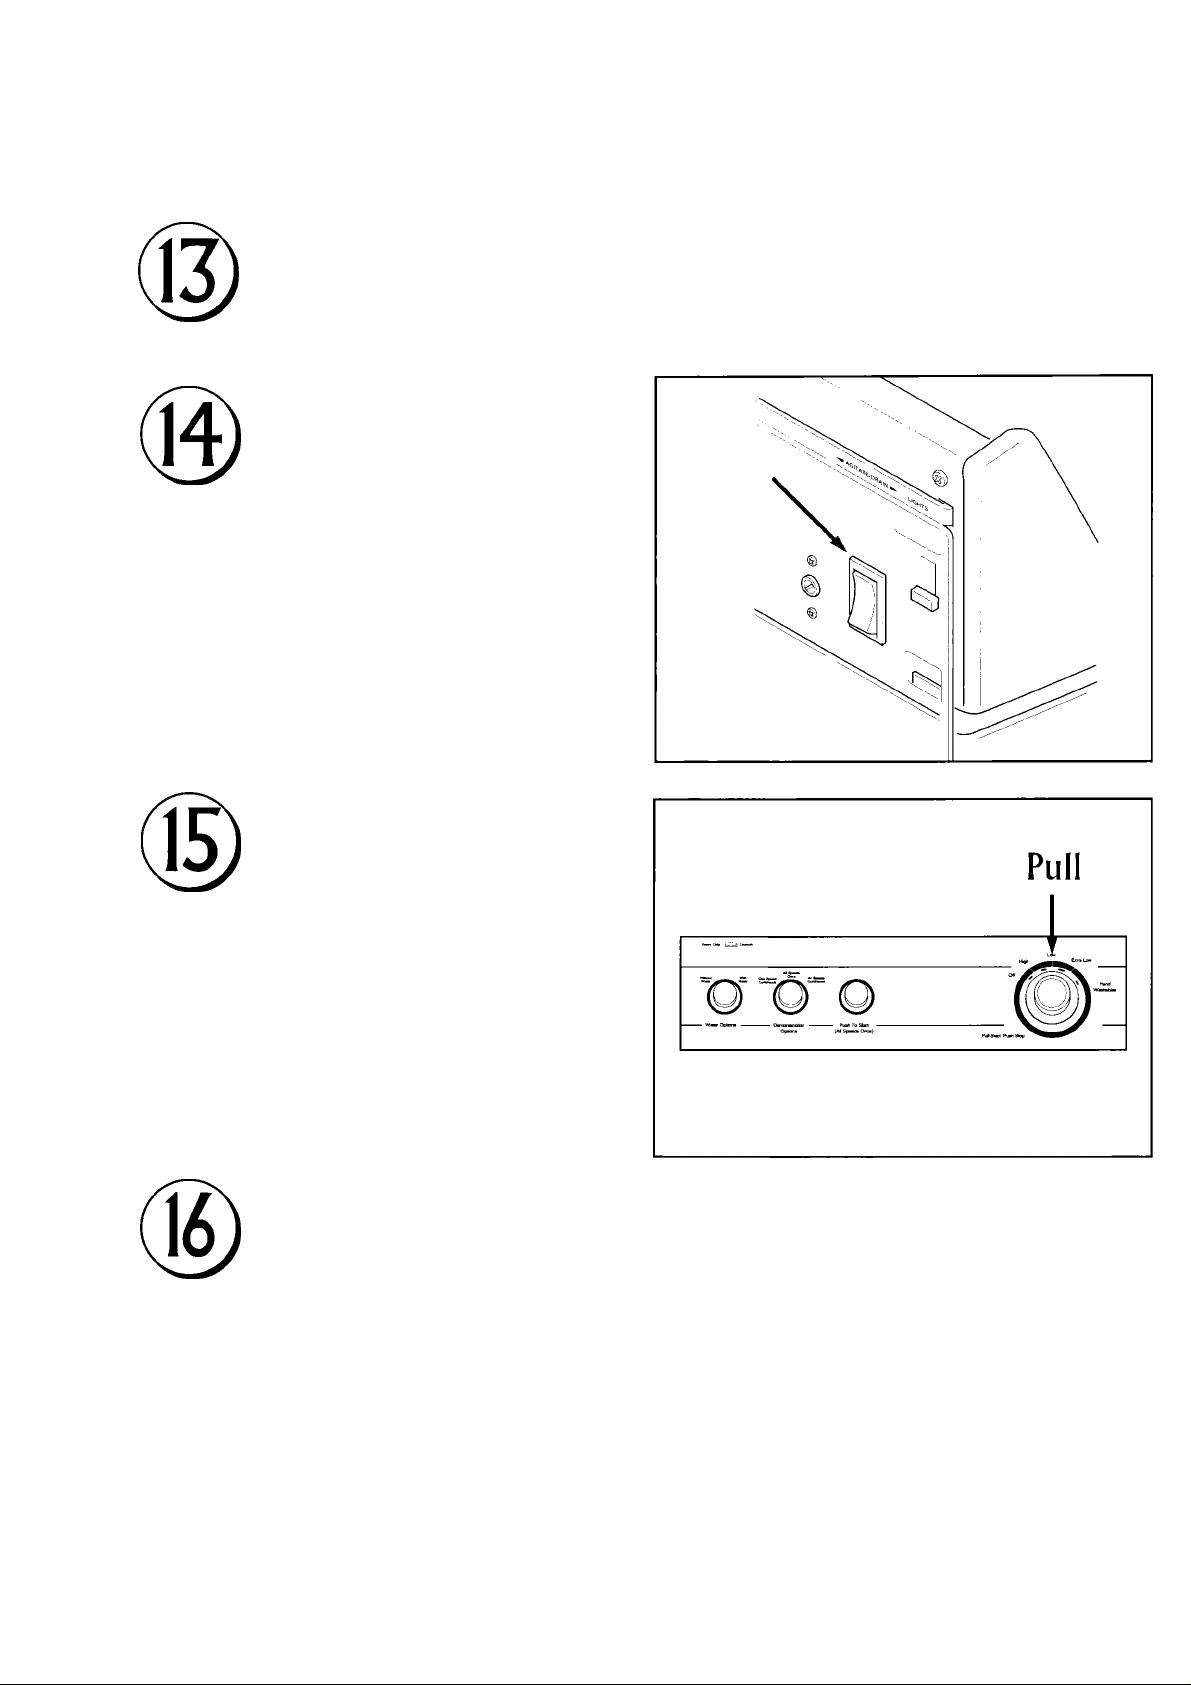
Installation Instructions
Plug-in the unit using a 20 amp 3-pronged, electrically
grounded extension cord not longer than 50 feet.
Turn the lights on with
the Light rocker switch
on the back of the
machine.
Pull the timer on.
The unit may now be operated using the Demonstration
Options listed in the Demonstration Instruction section of
this manual.
6
Page 9
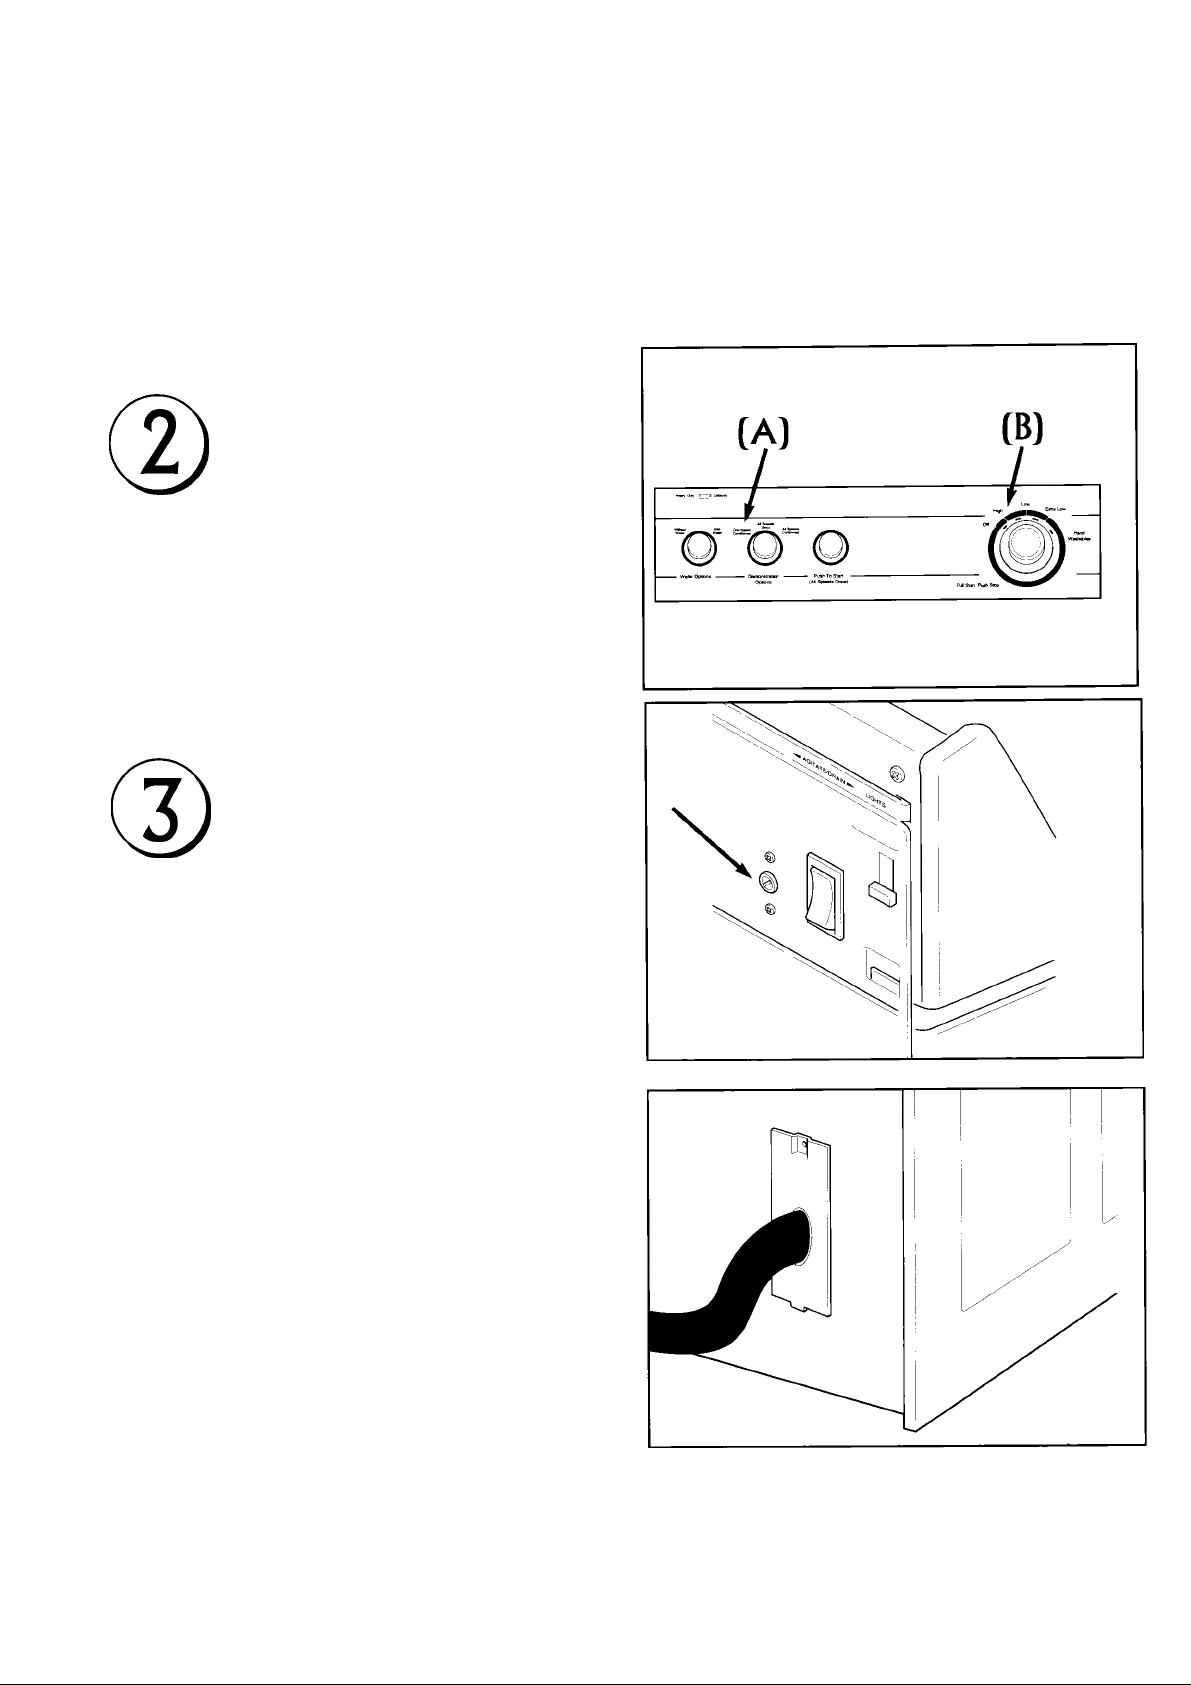
To Drain Unit
Water may be siphoned into a drain or 25-gallon container
©
on wheels.
To change from plug to
drain hose, turn machine
off and put option dial
to "One Speed
Continuous" (A). Turn
the timer dial to HIGH
speed (B).
With a screwdriver turn
the Drain/Agitate switch
to "Agitate" and turn the
machine on.
While machine is
agitating, remove plug cap
and put drain hose on.
Some water may drip out
or spill. Turn machine
OFF and turn
Drain/Agitate switch to
DRAIN. Direct a drain
hose into a drain [or a 25-50 gallon
trash container with wheels also works).
7
Page 10
Demonstration Kit & Materials
1 Hanger - for hanging this booklet on the
back of the unit.
200 colored chips
I Service Request Fax Form (on back page
of Instruction Manual). Make Xerox copies
as needed.
10 Poly-Cotton Swatches can be obtained by
ordering through Whirlpool Fulfillment.
(See page 1)
Demonstration Up
Only use the poly-cotton swatches provided by Whirlpool Fulfillment in
your demonstrations. These poly-cotton swatches have been tested to
sustain many hours of agitator demonstrations. Other fabrics, when left
standing in water, or agitating for long periods of time, will become
mildewed and weak, as well as cause the water to cloud.
8
Page 11

Care for the See-Through Washer
Keep the viewing glass clean by wiping down
with a soft cotton cloth.
DO NOT USE PAPER TOWELS. THEY WILL
SCRATCH THE SURFACE.
It is important to keep the water in the
demonstration model clean and clear for the
best visibility inside the washer. When you
notice the water is becoming cloudy or dirty,
it is time to change the water.
Limited contact with the water helps keep it
cleaner longer. The Point-of-Sale piece that lays
on the washer-top is intended to help keep
customers from opening the lid.
Demonstration Tip
For the cleanest water and most effective demonstration, change the
water inside the washer once or twice a month. Frequency of water
changes will be determined by the type of water in your city.
9
Page 12
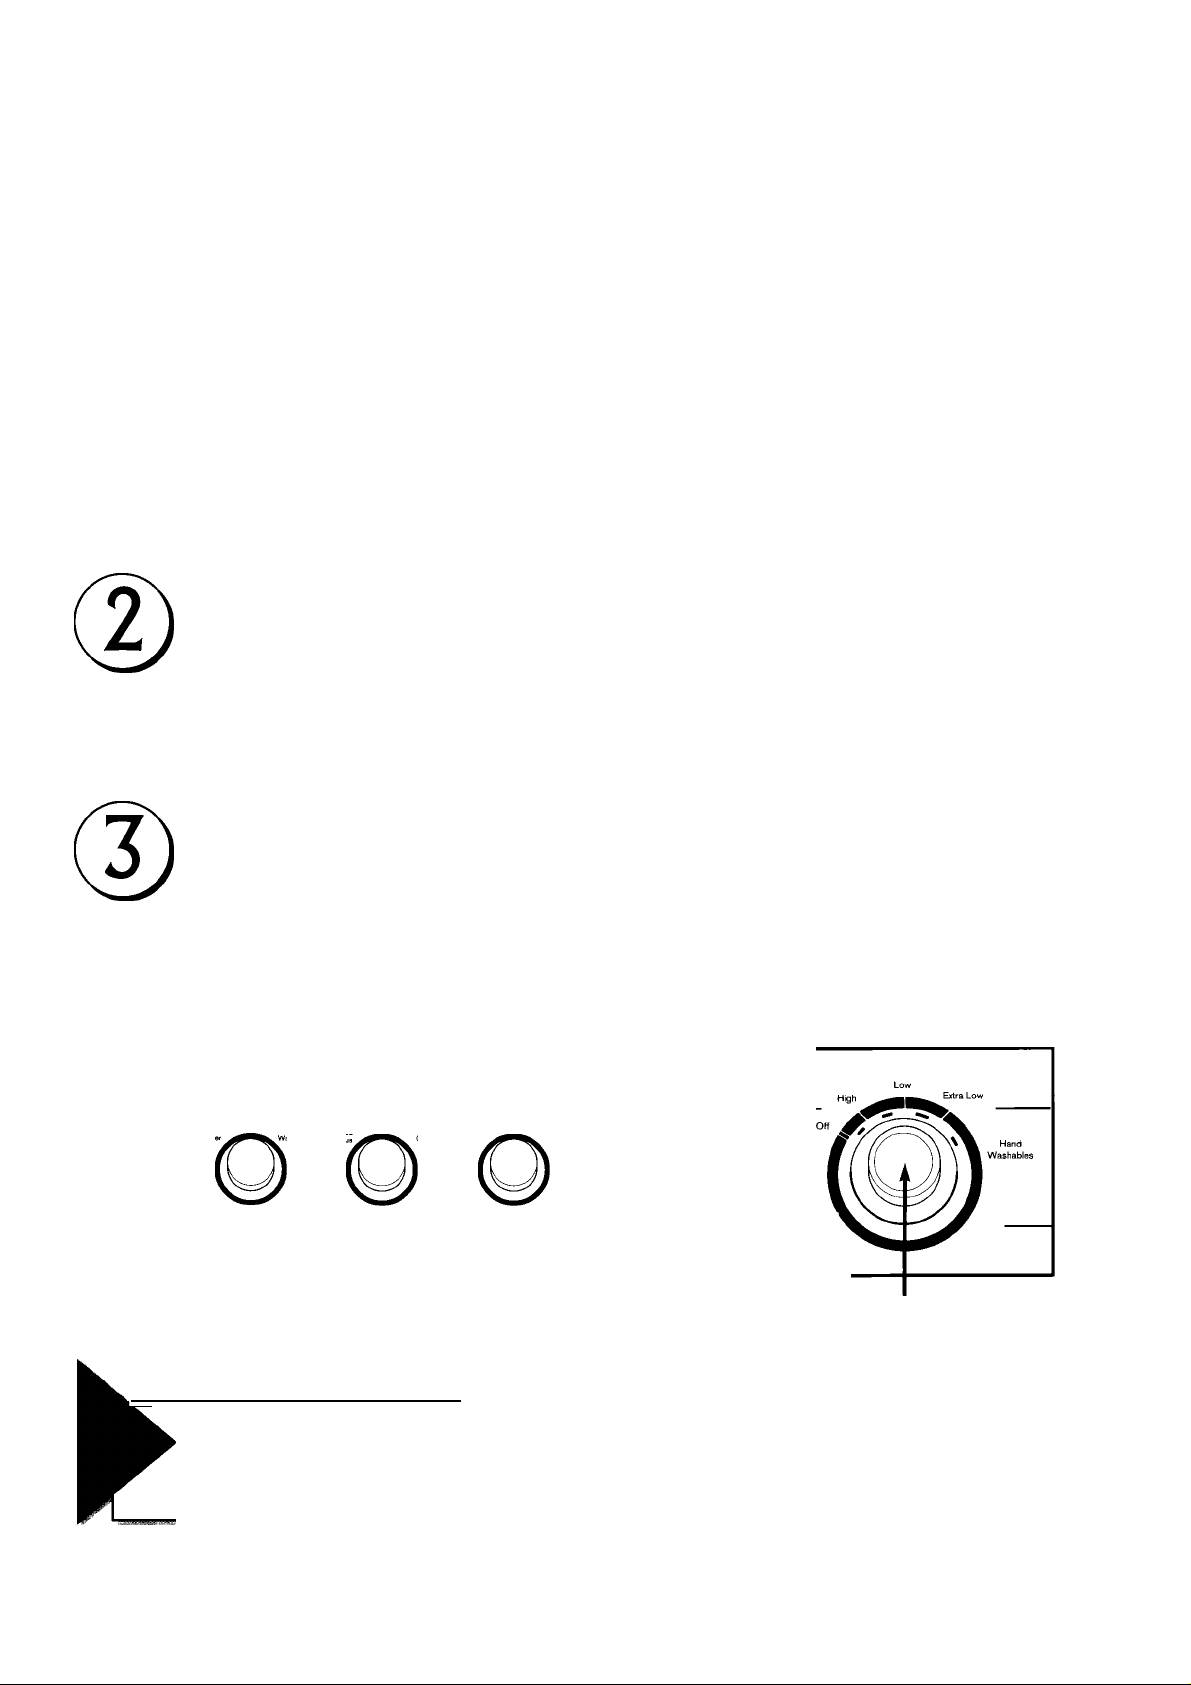
Operating Instructions
You and your customers have three
demonstration options to choose from
All Speeds Continuous - preferred operation mode
©
• Set Demonstrations Options dial to "All Speeds Continuous"
• Pull Timer on
All Speeds Once - demonstrate each mode once
• Set Demonstrations Options dial to "All Speeds Once"
• Pull Timer on (will operate until timer reaches OFF position)
• Push to start or restart
One Speed Continuous - demonstrate one mode only
• Set Demonstrations Options dial to "One Speed Continuous"
• Set Timer dial to desired demonstration speed High, Low,
Extra Low, Hand Washables
• Pull timer on
Heavy Duty — Capacrty
10
Demonstration
Options
Options Dial
- Push To Start ■
(All Speeds Once)
Pull Start Push Stop
Demonstration Tip
If you are running the demonstration unit non-stop for more
than 4 hours, set the Options Dial to "All Speeds Continuous."
Timer Dial
Page 13
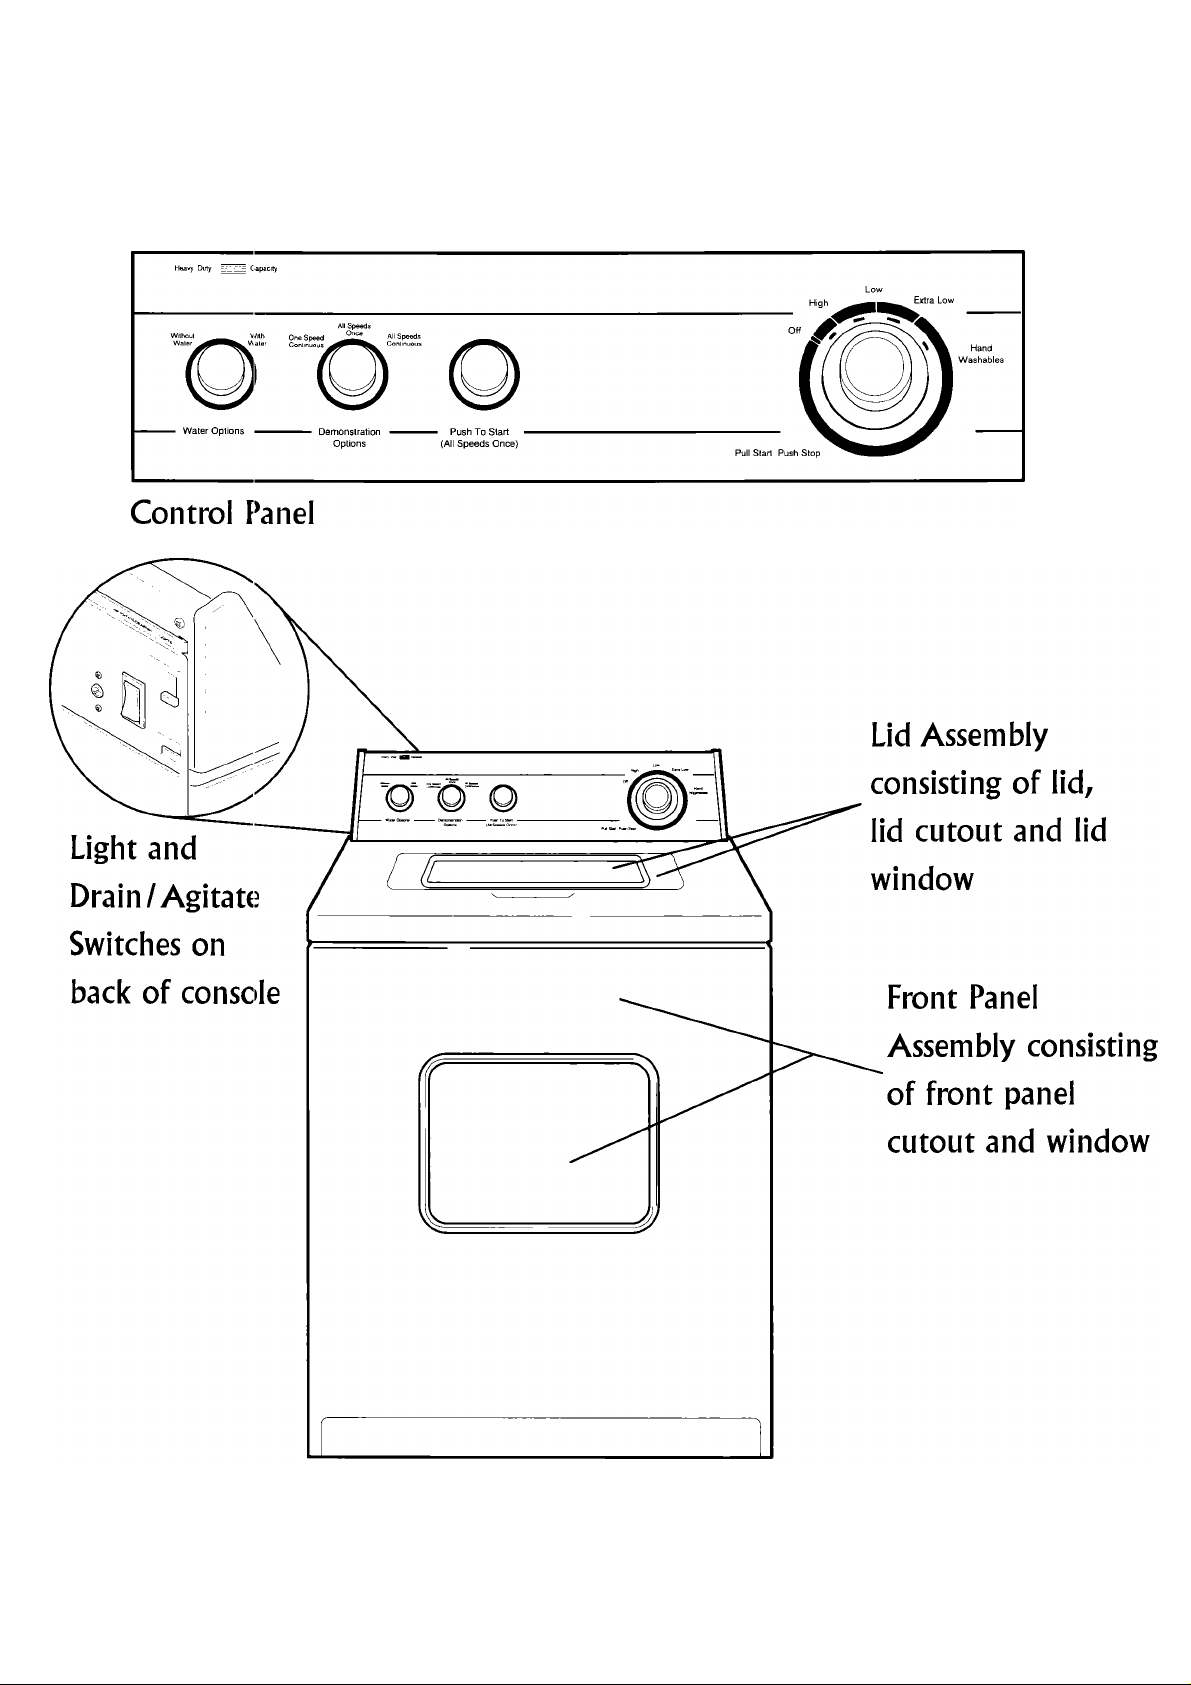
Unique Parts for Service
11
Page 14
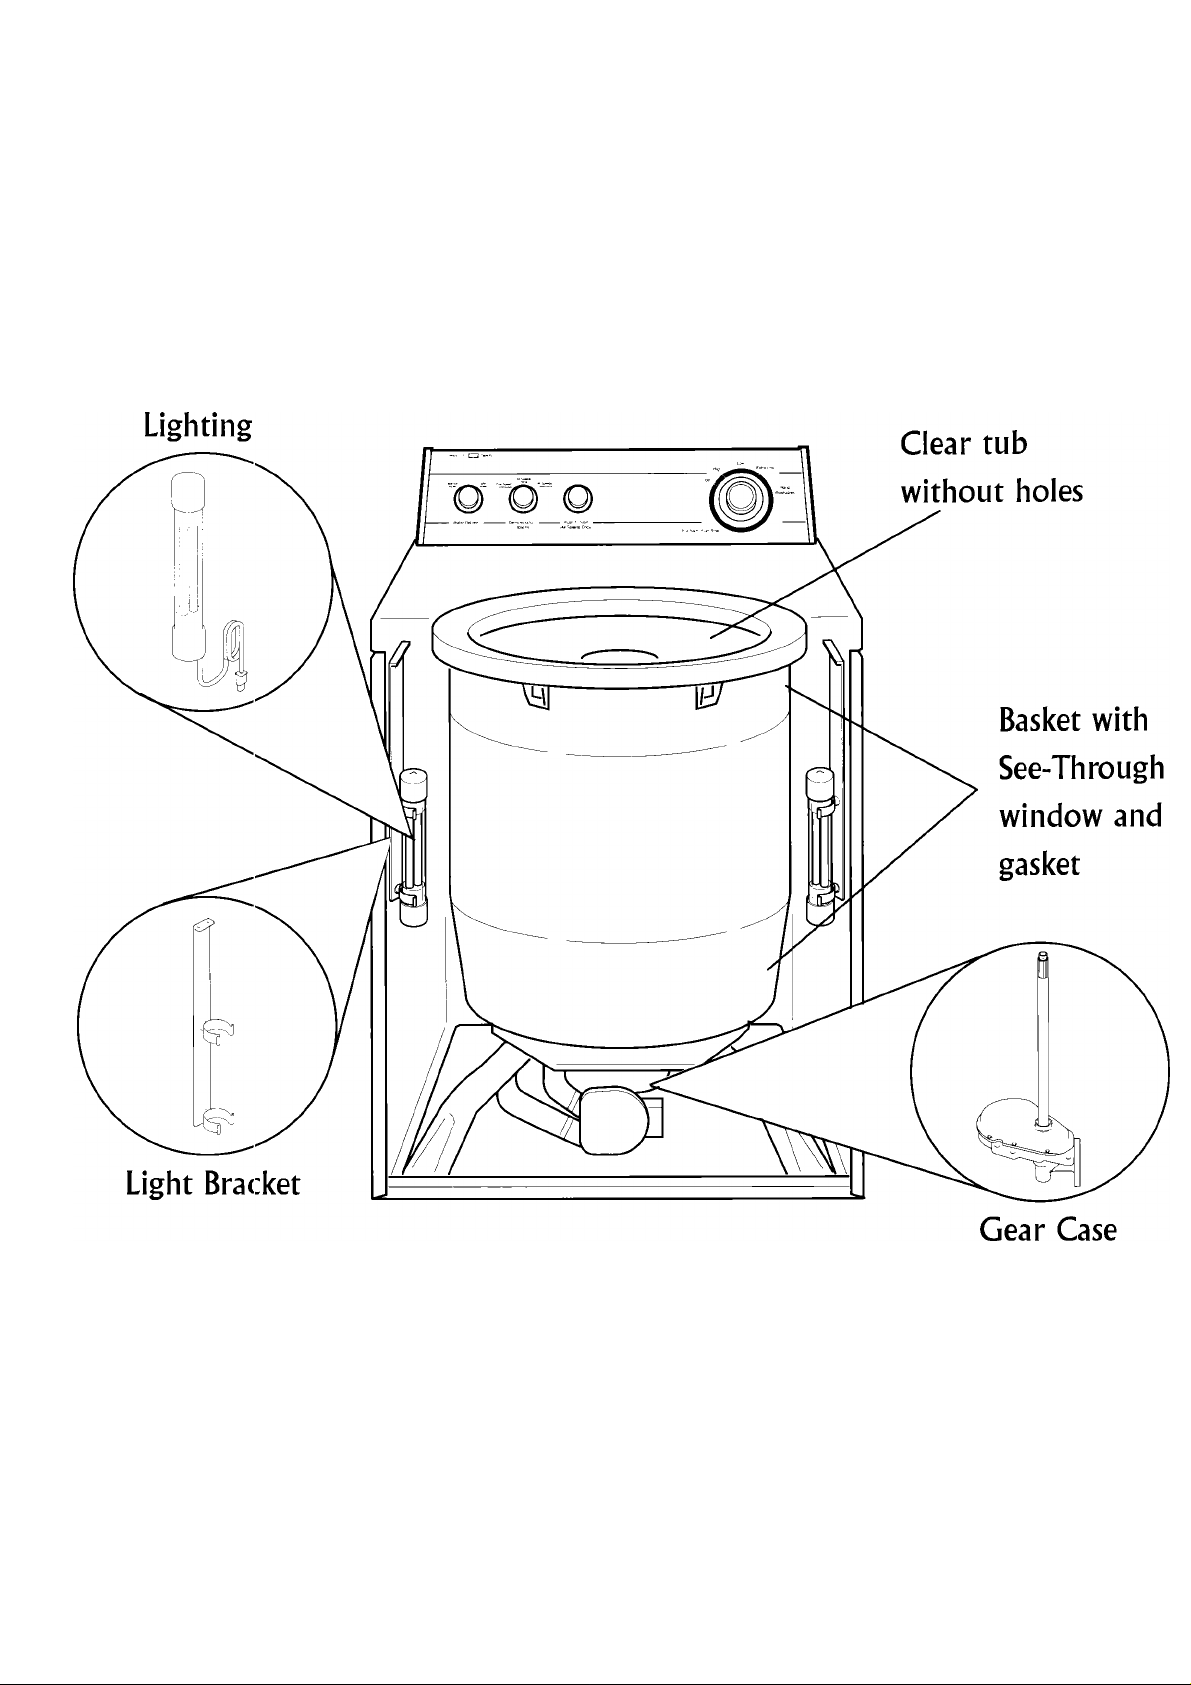
Unique Parts for Service
12
Page 15

Whirlpool is Responsible for the Following:
• Labor and parts for repairing the unit
• Furnishing demonstration materials
• Flauling the unit after demonstration
Wh Mpw l
/ HOMEAPPLIANCES
Page 16
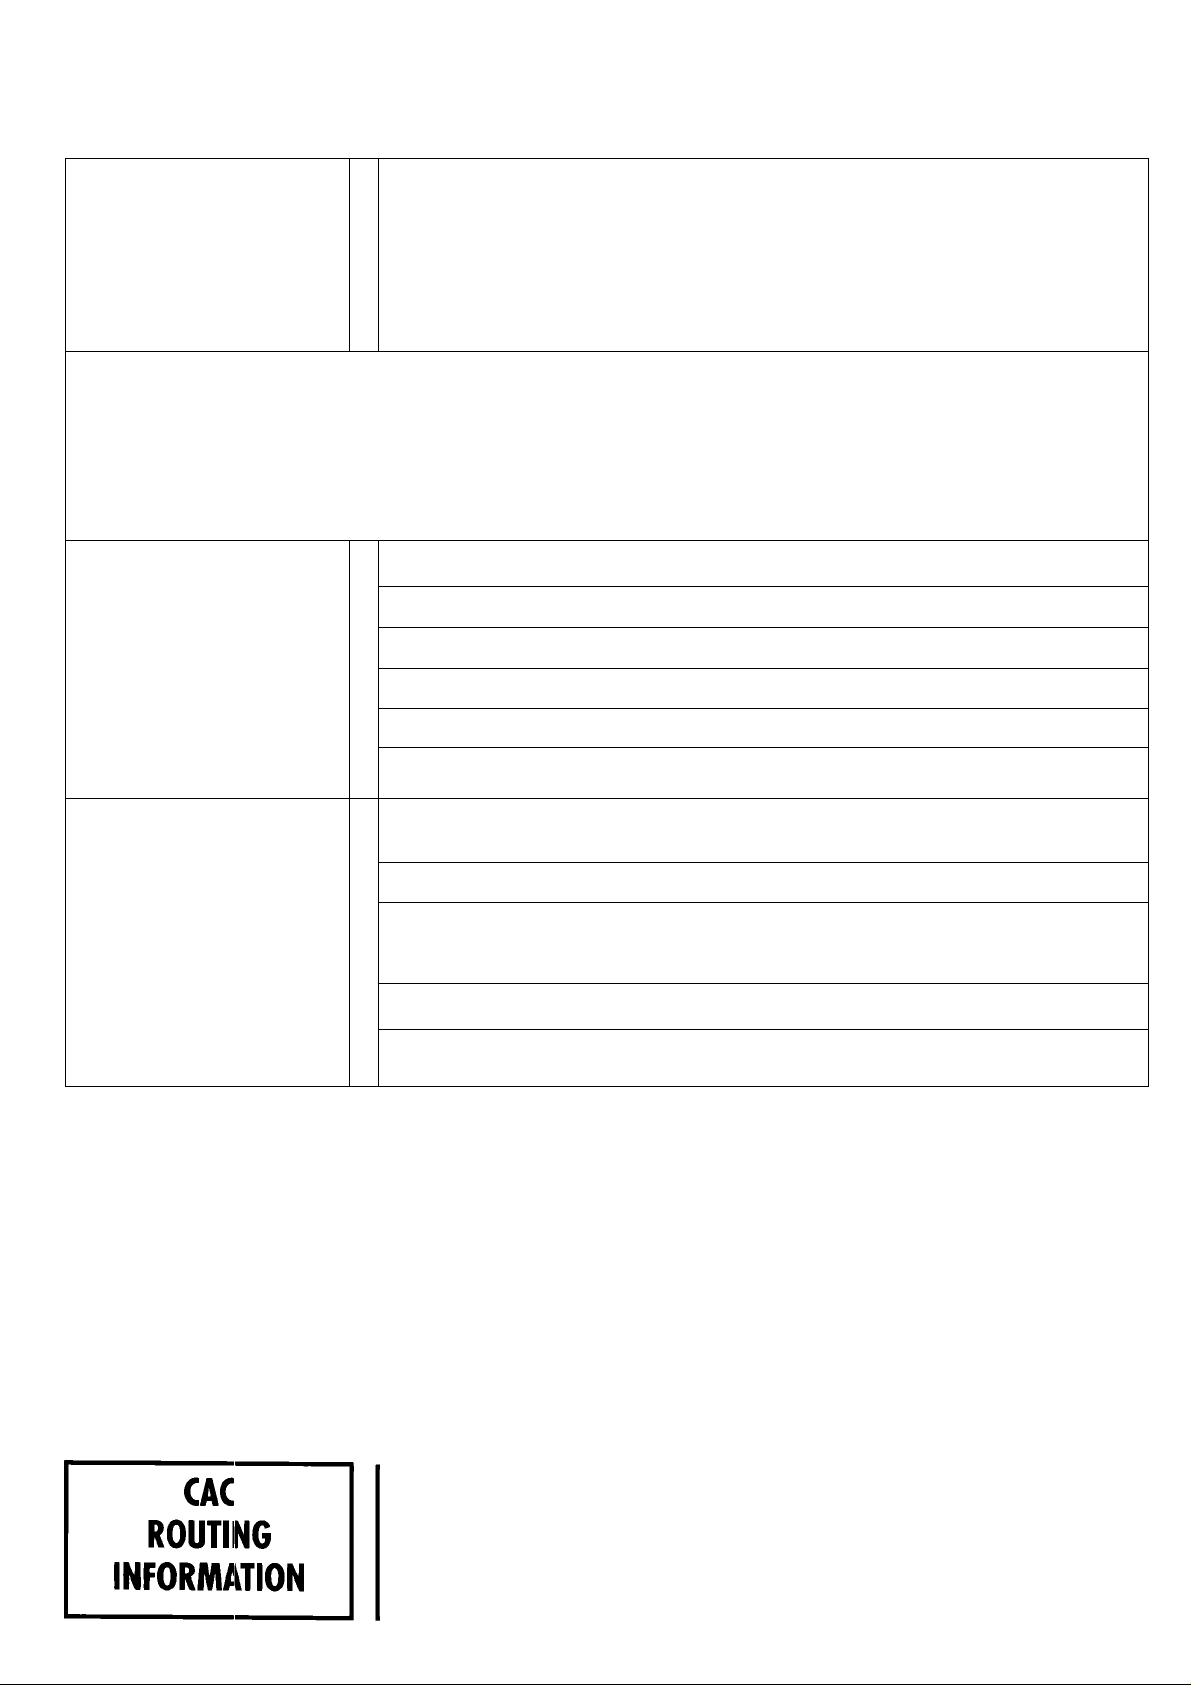
TO
REQUEST
SERVICE
SERVICE REQUEST FOR WHIRLPOOL
DEALER
INFORMATION
FAX to: CAC Partner Team
FAX PH#: 1-800-545-9093
Note: Please contact a local servicer and request
service lor the washer below
SEE-THROUGH WASHER
Store Name:
Store #:
Contact Person:
Phone #:
Store Address:
Model#: LSR43I1DQ0
WASHER
Description ol
IHFORMATIOH
Serial #:
Problem:
Service Instructions
Please contact the dealer listed. Please arrange to service the washer
IMMEDIATELY.
Bill Rework #R22591 lor all labor and common parts.
FAX: 800-670-9855 lor all unique parts. PHONE: 800-259-7278
Service Name:
Service Ph #:
Service FAX:
 Loading...