

KDO70X PRODUCT DESCRIPTION SHEET
GB
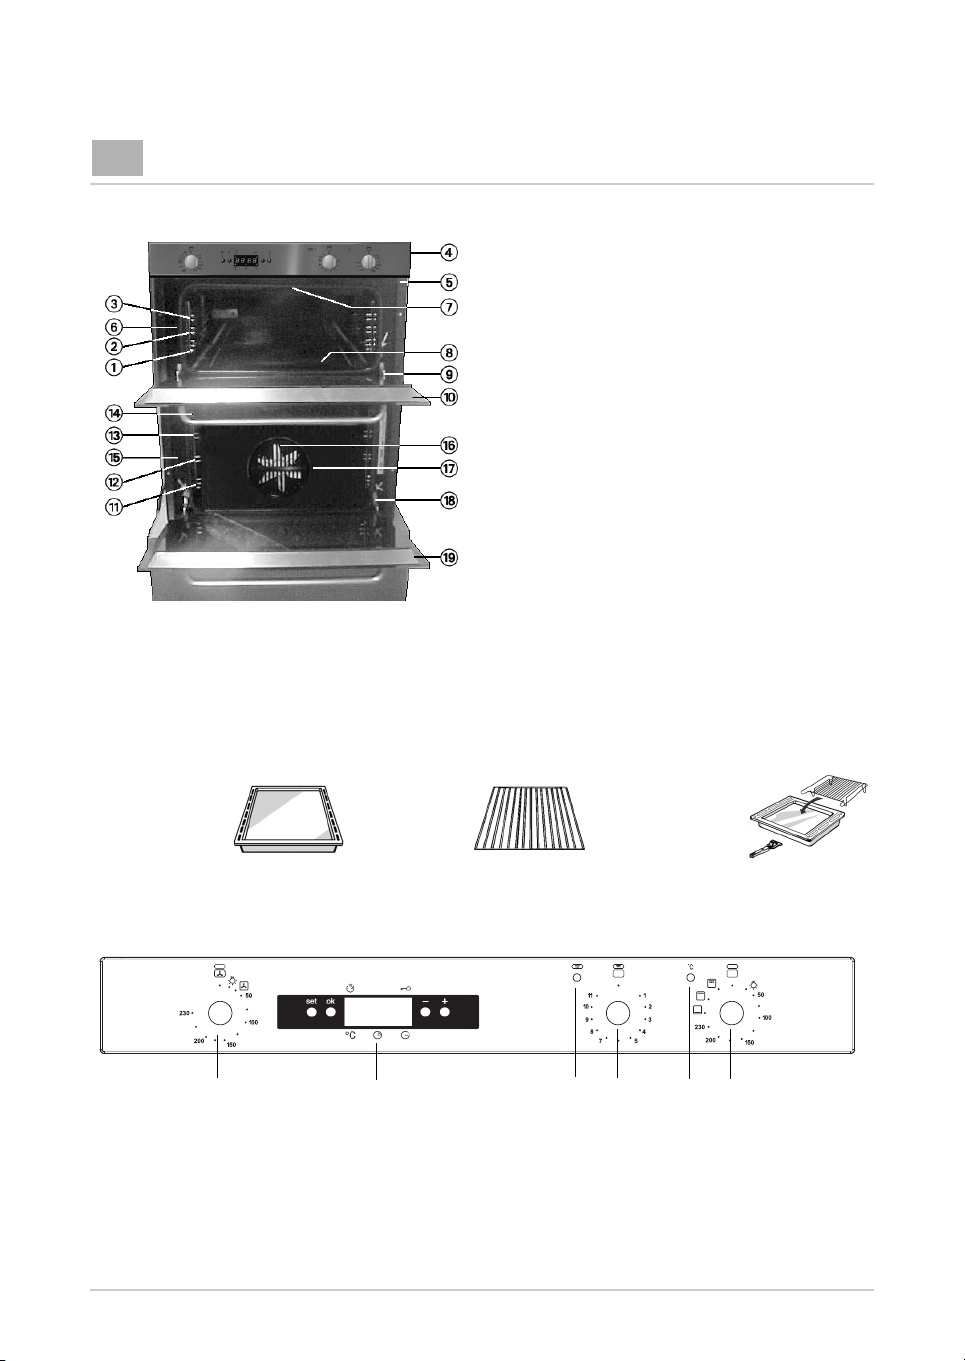
1.2.3. Top oven runner positions
11.12.13.14. Bottom oven runner positions
4. Control panel
5. Top oven cooling fan (not visible)*
6. Top oven light
7. Top oven grill heating element
8. Top oven bottom heating element
(not visible)
9. Top oven door hinges
10. Top oven door
15. Bottom oven light
16. Bottom oven fan
17. Bottom oven round heating element
18. Bottom oven door hinges
19. Bottom oven cool door
Accessories
• 2 wire shelves
• 2 drip trays
• Kit “Grill Pan Set”
ACCESSORIES
Drip tray Wire shelf Grill Pan Set
CONTROL PANEL
1. Bottom oven function/temperature selector
2. Programmer (for bottom oven only)
3. Top oven grill control light
4. Top oven grill control knob
5. Top oven temperature light
6. Top oven function/temperature selector
*Warning: The cooling fan (not visible)
still works for a few minutes after the
oven is switched off to allow optimum
cooling of the appliance.
5019 610 66064
INSTRUCTIONS FOR USING
THE ELECTRONIC TIMER
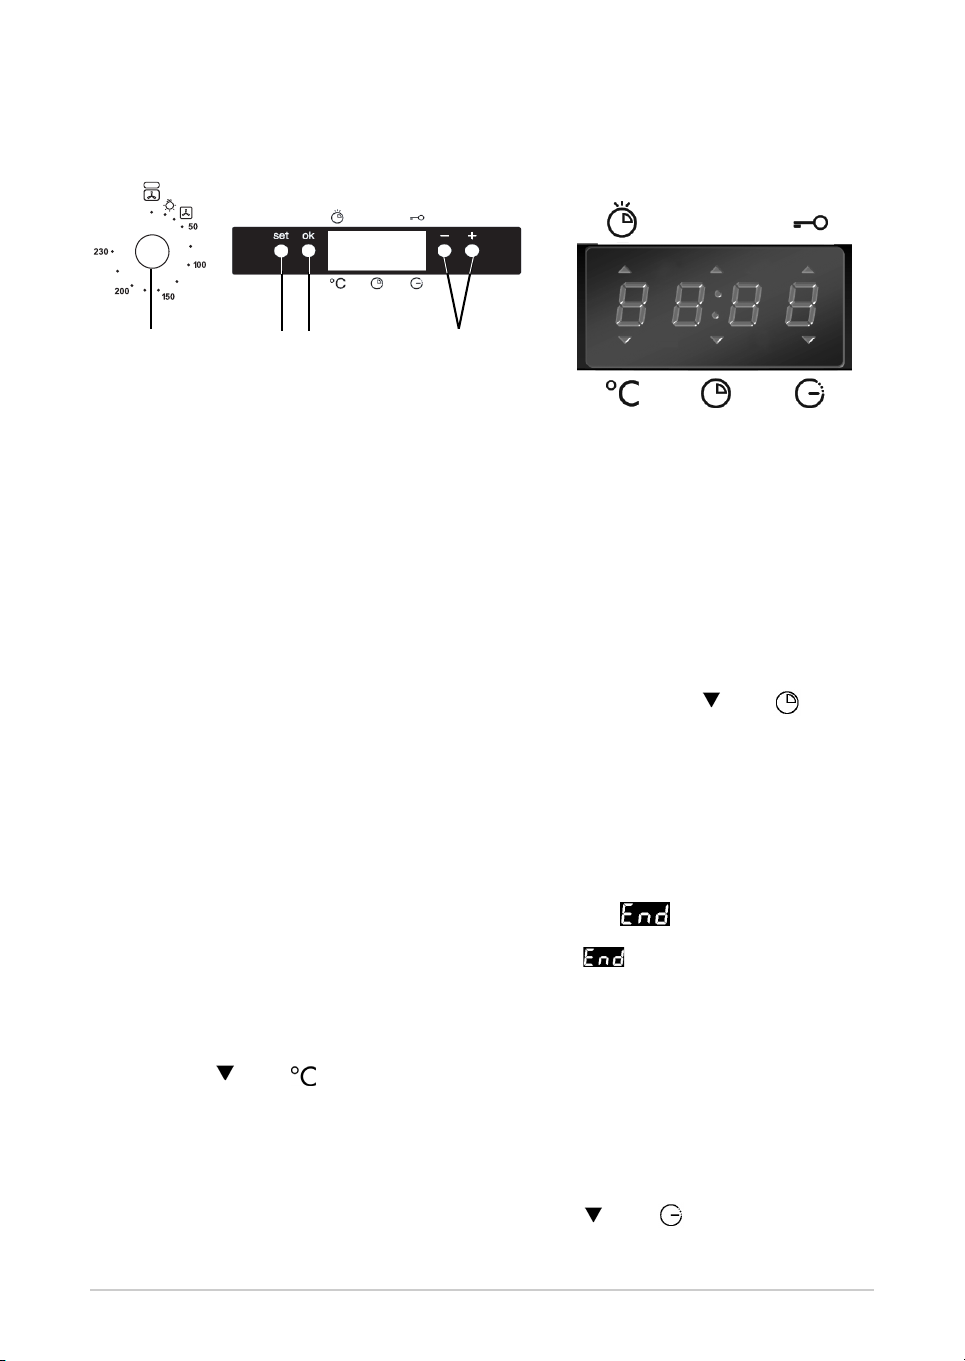
Electronic timer
Display
Bottom oven function/temperature selector
Setting button (“set”)
Confirmation button (“ok”)
Buttons for changing time (“-” “+”)
Starting the oven
When the oven is connected to the power supply
for the first time, or reconnected after a power
failure, the display shows “12:00” flashing.
Selecting and changing the clock time:
1. Press “ok”. The time of day flashes on the
display.
2. Press “-” or “+” to set the time.
3. Press “ok” and “-” or “+” to set the minutes.
4. Press “ok” to confirm.
To modify the time of day:
Press and hold “ok” for 2 seconds. until the time flashes
on the display. Repeat the steps described above.
Electronic timer:
The electronic timer controls all cooking functions
and the setting of cooking time (except the minute
minder) for the bottom oven (lower compartment).
Selecting the cooking
function:
1. Turn the knob to the required function and
temperature.
2. Press “ok” to confirm; the oven will switch on.
The indicator above switches off when
the selected temperature is reached.
To change the temperature:
1. The required temperature can be changed at any
time by turning the thermostat knob
Important notes:
To cancel any selection, turn knob
Alternatively, press “ok” to switch the oven off,
maintaining the previously selected functions.
.
to “0”.
Selecting the cooking time:
Select the cooking time (available with any function) to
turn the oven on for a set time, after which the oven
will switch off automatically. The maximum
programmable cooking time is 6 hours.
1. Set the function and the temperature (see:
“Selecting the cooking function”) without
confirming by pressing “ok”.
2. Press “set” (the indicator above lights up)
and, within 8 minutes, select the required
cooking time using buttons “-” or “+”.
3. Confirm the selection by pressing “ok”; the oven
switches on and the display shows the remaining
cooking time. To change the cooking time, use
buttons “-” “+” at any time, without confirming
by pressing “ok”.
4. To change the previous temperature setting, turn
knob .
Appearance of on the display:
Once the set time has elapsed, an acoustic signal
sounds and appears on the display.
The oven will switch off automatically.
1. Tu rn kn ob
The time of day reappears on the display.
to “0”
Setting end of cooking time
By using this function it is possible to preset the end
of cooking time. The maximum programmable
cooking time is 23 hours and 59 minutes.
1. Proceed as described in points 1 and 2 of
“Selecting the cooking time”
2. Press “set” to set the end of cooking time: The
indicator above lights up.
3. Set the end of cooking time using button “-” or “+”.
4. Press “ok” to confirm the end of cooking time.
 Loading...