

Whirlpool FL 244/1WP, FL 243, FL 243/1, FL 242/1 WP INSTRUCTION FOR USE
00033-gb.fm5 Page 107 Thursday, May 11, 2000 4:52 PM
QUICK REFERENCE GUIDE
GB
BEFORE USING THE APPLIANCE FOR THE FIRST TIME:
• IMPORTANT: MAKE SURE YOU HAVE READ THE INSTALLATION.
• REMOVE THE TRANSIT SCREWS AND TRANSIT BAR BEFORE USING THE
MACHINE FOR THE FIRST TIME.
• First wash cycle without laundry:
1. Open the tap.
2. Close the door.
3. Pour a little detergent (about 100ml) into the detergent compartment .
4. Select a short wash programme (see programme chart).
5. Switch on the appliance.
This will remove any water remaining in the machine from the manufacturer's test run.
ROUTINE WASHES:
1. Open the tap.
2. Sort the laundry according to fabric type and colour and load the machine.
3. Close the door.
4. Add detergent and any additives required.
5. Select the programme, temperature and special options (depending on model).
6. Switch on the appliance.
107

00033-gb.fm5 Page 108 Thursday, May 11, 2000 4:52 PM
GB
CONTENTS
APPLIANCE AND ACCESSORIES PAGE 109
INSTALLATION PAGE 110
PROTECTING THE ENVIRONMENT PAGE 112
SAFETY INSTRUCTIONS PAGE 112
MOVING AND TRANSPORTING THE APPLIANCE PAGE 112
SORTING THE WASH PAGE 113
DETERGENT AND ADDITIVES PAGE 114
LIQUID DETERGENTS PAGE 115
DYEING PAGE 116
REMOVING THE FILTER PAGE 116
DRAINING RESIDUAL WATER PAGE 117
WASHING MACHINE INSTALLED IN ROOM
EXPOSED TO FREEZING TEMPERATURES PAGE 117
CARE AND MAINTENANCE PAGE 118
TROUBLESHOOTING GUIDE PAGE 119
AFTER-SALES SERVICE PAGE 119
108
00033-gb.fm5 Page 109 Thursday, May 11, 2000 4:52 PM
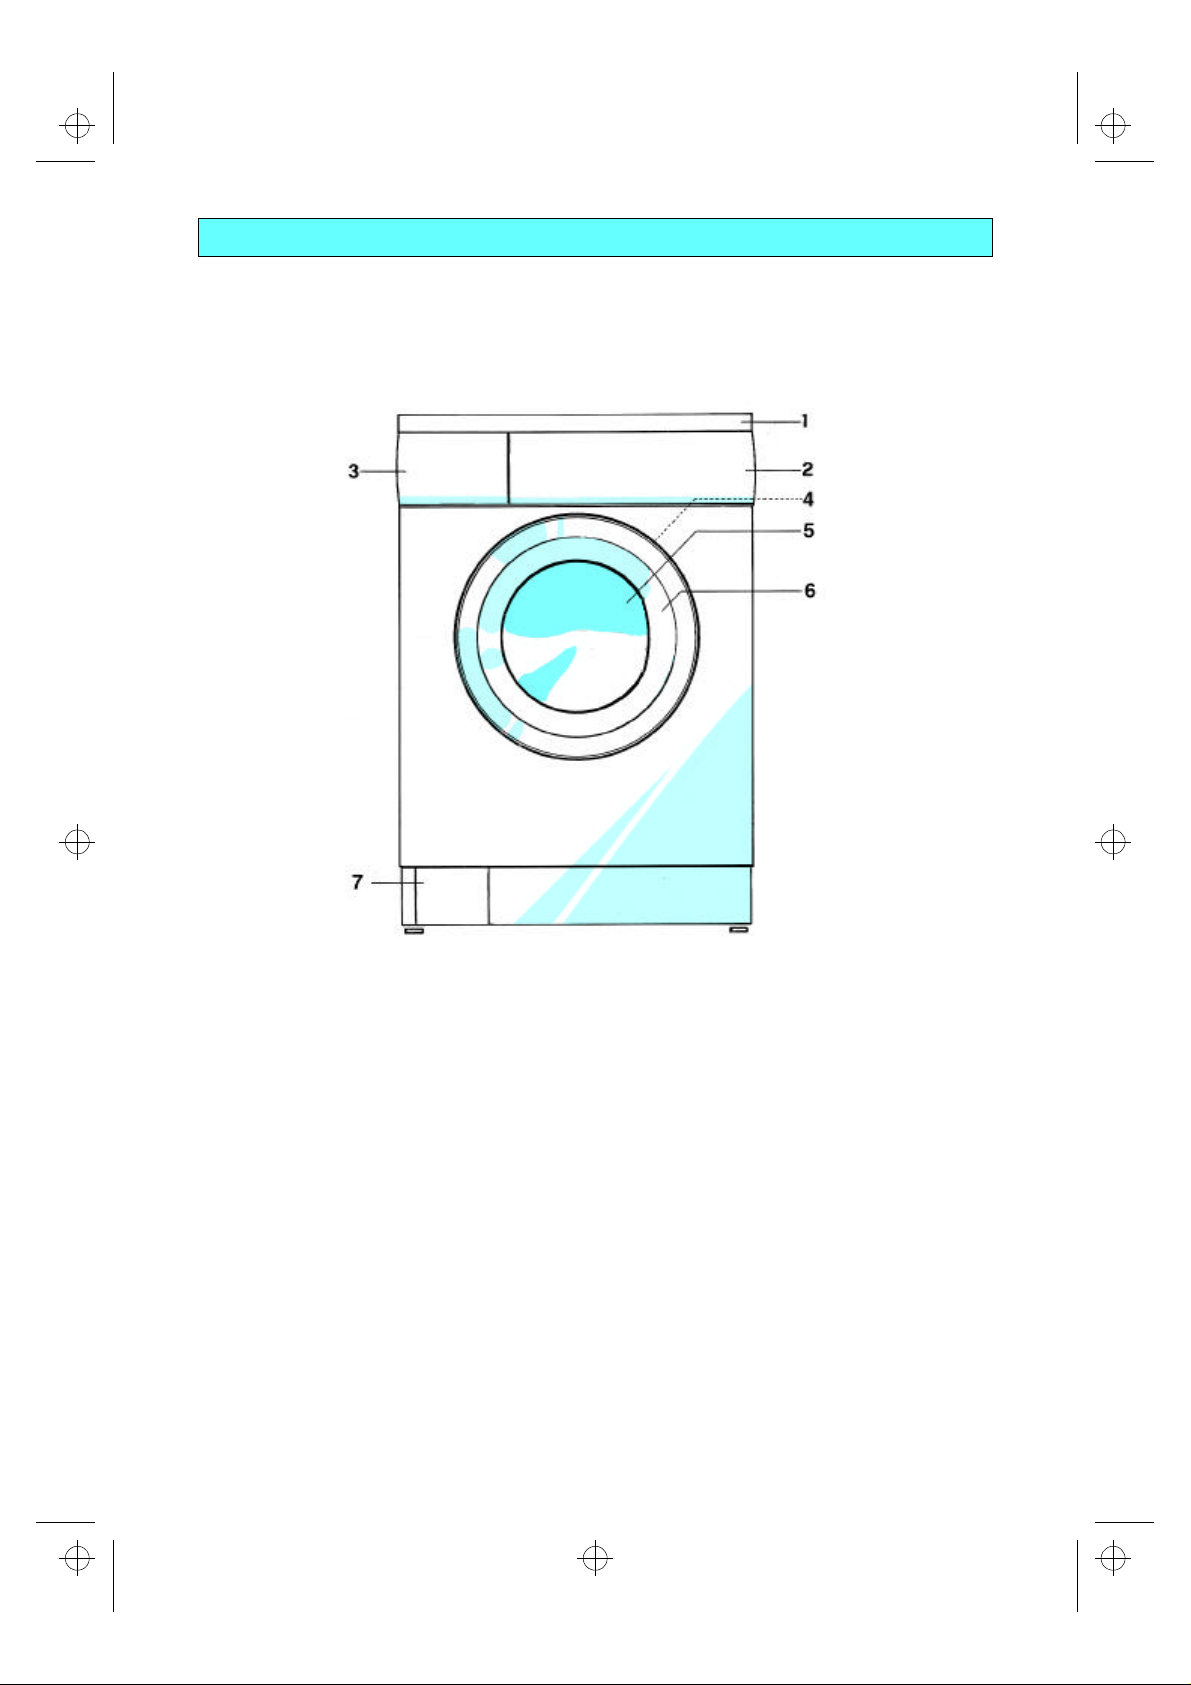
APPLIANCE AND ACCESSORIES
1. Worktop
2. Control panel
3. Detergent drawer
4. After-Sales Service sticker (inside door)
5. Door
6. Door handle
- To open: pull handle
- To lock: press the door firmly (the lock will click into place)
7. Filter (inside compartment door).
109
00033-gb.fm5 Page 110 Thursday, May 11, 2000 4:52 PM
.
INSTALLATION
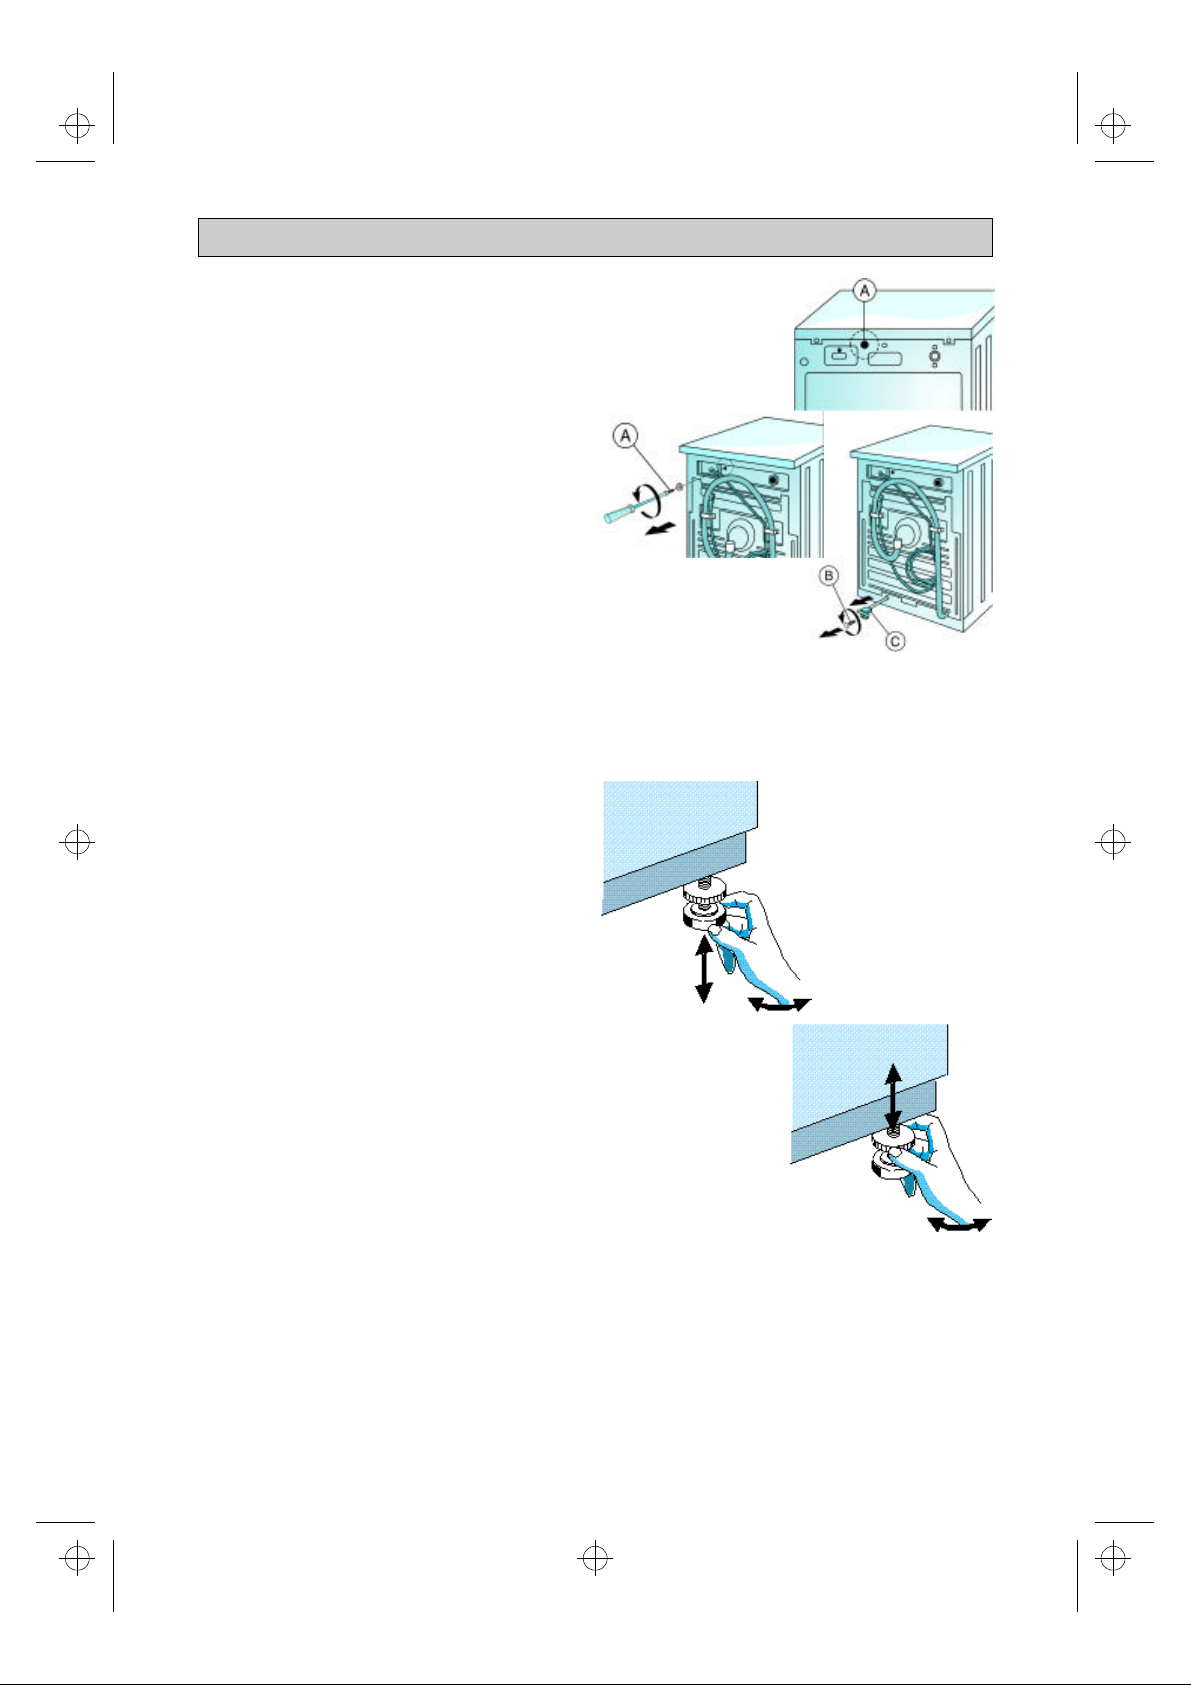
TRANSIT SCREWS
The appliance is fitted with two transit screws and
a transit bar to prevent internal damage while it is
being moved.
Before using the appliance the transit screws
and transit bar MUST be removed.
The appliance is fitted with two screws and a
transit bar.
1. Remove the black screw (A) with a
screwdriver.
2. Unscrew the screw (B) on the red transit bar
with a screwdriver.
3. Completely withdraw and remove the transit
bar (C) by pulling firmly on the red handle.
Keep the screws and the bar for future use.
Note: Refit the transit screws and transit bar before transporting the appliance by repeating the above
steps in reverse order. In order to locate the screws and bar correctly, it will be necessary to remove the
appliance top, having first made sure that the appliance is disconnected from water and electricity
supplies.
INSTALLATION
• Install the appliance on a solid and level floor
surface, preferably in a corner of the room.
• Make sure that all four feet are resting firmly
on the floor and check that the appliance is
perfectly level (use a spirit level).
• If the floor is uneven, adjust the levelling feet
as required (do not insert pieces of wood,
cardboard etc. under the feet).
1. Slacken the locknut.
2. Adjust the height of the foot, turning it by
hand.
3. Tighten the locknut anticlockwise towards
the washing machine.
If the appliance is to be installed on a wooden
floor, distribute the weight by placing it on a
60x60 cm sheet of plywood at least 3 cm in
thickness. Secure the plywood sheet to the floor.
t
WATER SUPPLY
• Water supply: only cold water.
• Tap: 3/4” threaded hose connector.
• Water pressure (mains pressure):
10-100N/cm2 (1-10bar).
INLET HOSE
• Carefully screw the inlet hose to the tap by
hand.
• Turn the tap on fully and check that the joints
at the washing machine and the tap are
watertight.
110
• If the hose is not long enough, replace it with
a suitable length of pressure-resistant hose
(approved under EN50065 to withstand a
minimum of 10bar).
• Check the hose regularly for brittleness and
cracks and replace if necessary.
• The washing machine may be connected
without a non-return valve.
• Observe any special local regulations
regarding connection to the water supply.
 Loading...