

Page 1
use&care guide
____
t
AVhirlpool
QtduljL SERIES
UPRIGHT
Model EV110E
Freezers, Relrigerator-Freezers, Ice Makers, Dishwashers, Built-In Ovens and Surface Units, Ranges, Microwave Ovens, Trash Compactors, Room Air Conditioners, Dehumiditiers
Page 2

Please read this
Use and Care Guide
before you do anything else...
This booklet tells you how to start your freezer,
defrost it, ciean it and adjust controis.
Treat your new freezer with care. Use it only to
do what home freezers are designed to do.
Parts and features
Temperature'
Coritrol
Power Saving
Control
Stationary
Freezer
Shelves
Copy your Model and Serial Numbers here...
When you need service, or call with a question,
have this information ready,
1. Complete Model and Serial Numbers (from the
plate located as shown),
2. Purchase date from sales slip.
Copy this information in these spaces. Keep this
book, your warranty and sales slip together in a
handy place, There is no warranty registration to re
turn. Proof-of-purchase is all that is required for in
warranty service.
Model Number
Serial Number
Purchase Dote
Service Company and Telephone Number
Stationary
Door
Shelves
Model and
Serial Number
Plate
Page 3

Contents
SAFETY FIRST
BEFORE YOU PLUG IT IN
Install Properly
Level Freezer............................................. 4
Remove Sales Labels................................ 4
Clean It ...................................................... 4
Plug It In..................................................... 4
USING YOUR FREEZER
Setting the Temperature Control
Adjusting the Temperature Control .... 5
Cooling Freezer First
The Power Saving Control
Removing the Bottom Trivet
Energy Saving Tips.................................... 5
CLEANING YOUR FREEZER
Safety first
Child entrapment and suffocation ore
not things of the past. Junked or aban
doned freezers are still dangerous...even if
they will "just sit in the garage a few days."
If you are getting rid of your old freezer,
do if safely. Please read the enclosed
safety booklet from the Association of
Home Appliance Manufacturers. Help pre
vent accidents.
..............................................
.............................
..........................................
................................
............
.................................
........................
......................
...........................
©1985 Whirlpool Corporation
3
3
4
5
5
5
5
5
6
Cleaning Chart .......................................... 6
FREEZING FOOD IN YOUR FREEZER
Packaging and Sealing Food
To Wrap Foods
Loading...................................................... 8
Storing Frozen Food
VACATION AND MOVING CARE
Vacations
Shutting Off and Moving
IF YOU NEED SERVICE OR ASSISTANCE 10
1. Before Calling For Assistance
2. If You Need Assistance
3. If You Need Service .............................. 10
4. If You Flave a Problem
..........................................
.................................
..................................................
...........................
........................
.........................
........
....................
................
............
Page
7
7
7
8
9
9
9
10
10
10
Before you plug it in
IMPORTANT
Before using your freezer, you are personally re
sponsible for making sure that it...
• is installed and levelled on a floor that will hold the
weight, and in an area suitable for its size and use.
• is connected only to the right kind of outlet, with the
right electrical supply and grounding. (Refer to
your "Electrical Requirements and Grounding
Instructions.")
• is used only for jobs expected of home freezers.
• is not near an oven, radiator or other heat source.
• is properly maintained.
• is out of the weather.
• is used in an area where the room temperature
will not exceed 110°F (43.3°C).
• is not run where there are explosive fumes.
• is not used by those who may not understand
how it should be used.
• is not loaded with food before it has time to get
properly cold.
Page 4

Install properly...
1, Check the strength of the floor. It should hold the
weight of a fully loaded freezer.
2 Pick a safe place, indoors, away from in
flammables such as gasoline.
3. Allow 3 Inches (7.5 cm) air space on top of freezer
for proper ventilation.
4. Allow at least an Inch (2.5 cm) between the
freezer condenser, on the back of the unit, and
the wall.
5. Allow '/2 Inch (1,25 cm) on each side of the freezer
for ease of installation.
6. If the freezer is to be against a wall, you might
want to leave extra space on the hinge side so the
door can be opened wider.
Remove sales labels...
Remove the Consumer Buy Guide label and any
inside labels before using the freezer.
To remove any remaining glue:
1, Rub briskly with thumb to make a ball, then
remove.
OR
2, Soak area with dishwashing detergent solution (1
teaspoon detergent in 1 quart warm water) be
fore removing glue as described in step 1
DO NOT USE rubbing aloohol or flammable or
toxio solvents, suoh as aoetone, gasoline, oarbon tetraohloride, eto. These oan damage the
material.
NOTE: DO NOT REMOVE the Teoh Sheet fas
tened under the freezer at the front.
Clean it...
Clean your freezer before
using it. See cleaning
instructions on page 6.
Plug it in...
3-prong grounding
type wall receptacle
Level freezer...
so the door will stay
Sfart adjustment with the door hinge side.
1. Slide freezer into place.
2. Adjust front legs to level the freezer,
-To raise front, turn each leg clockwise.
-To lower front, turn each leg counter-clockwise,
3. Check with level.
4. After freezer is fully loaded, recheck with level.
Freezer
Power Plug
Recommended Grounding Method
A 115 Volt, 60 Hz., AC only 15 or 20 ampere fused
and properly grounded electrical supply is required.
It Is recommended that a separate circuit serving only
this appliance be provided. Use a receptacle
which cannot be turned off with a switch or pull
chain. Do not use an extension cord.
Attach retaining clip over power cord plug from
literature package inside the freezer
3-prong
grounding plug
Page 5
Using your freezer
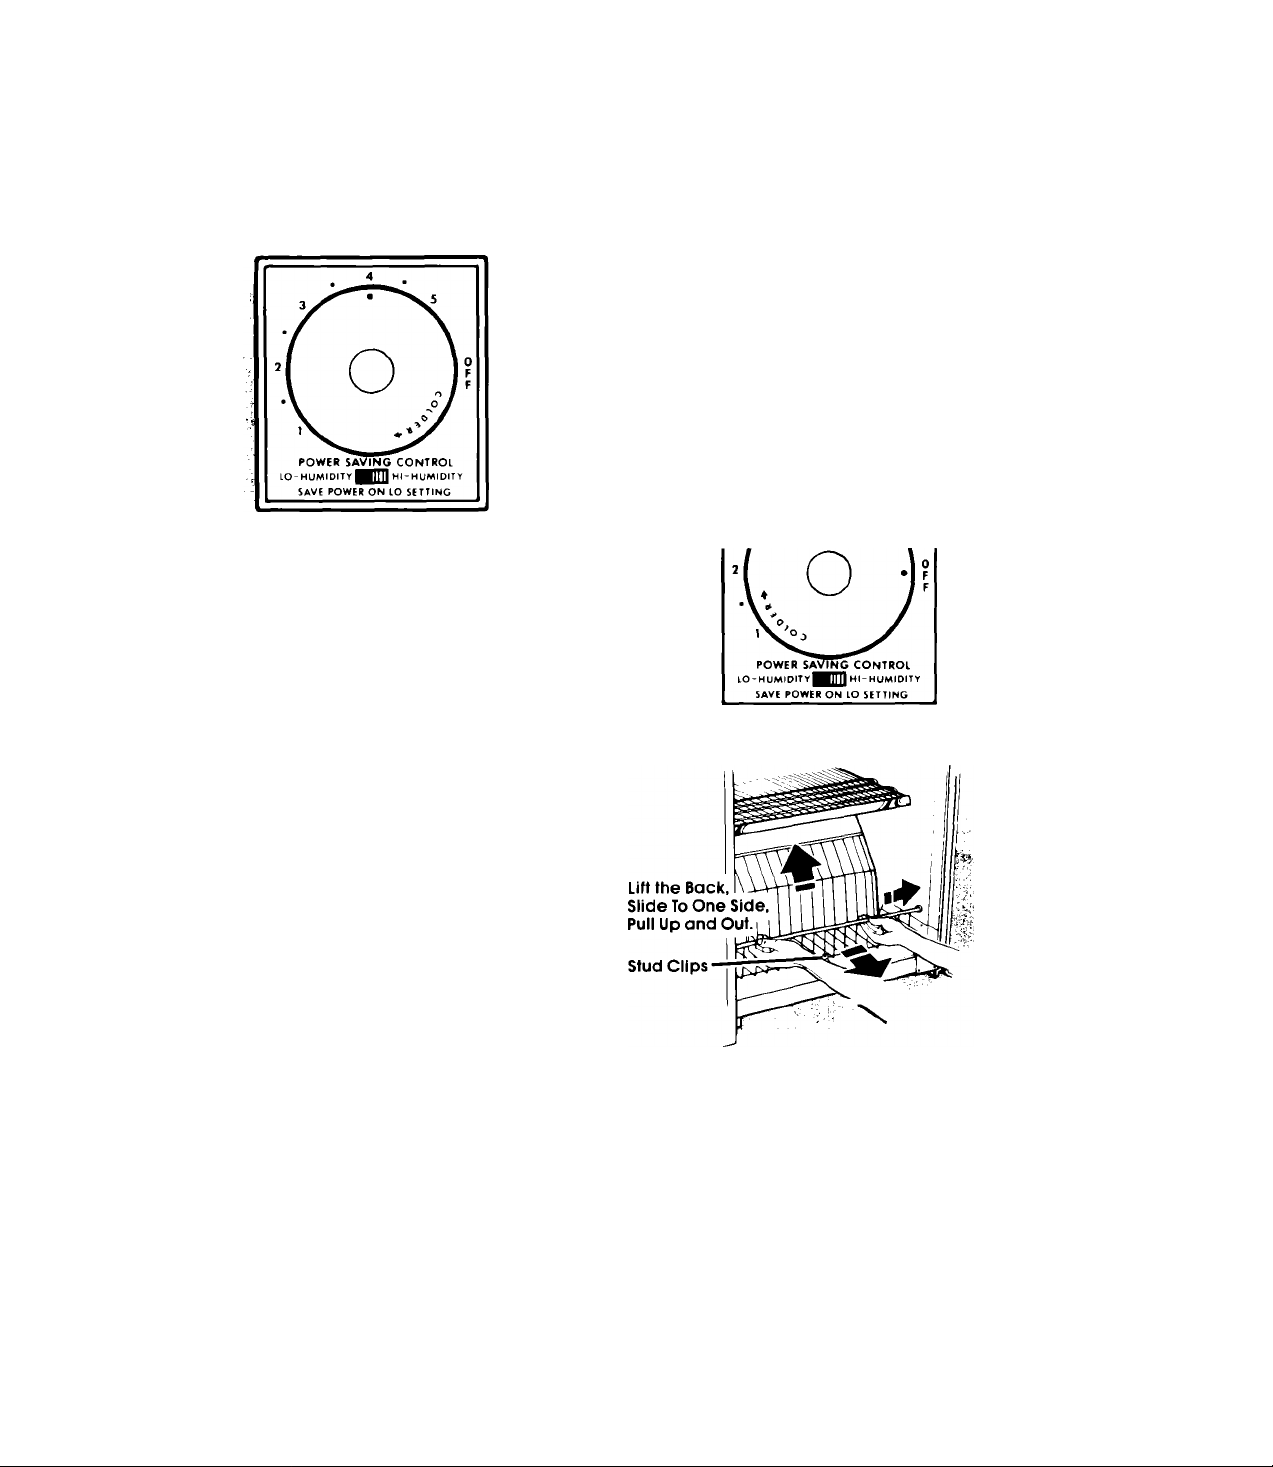
Setting the temperature control... Adjusting the temperature control
T<^ c+/-irf +1 irri r\f Hi/^l TKie ^ Ti irn r'rsn+ri^l hi/^hor ni imKor ir\r tomrso
To start, turn control to the middle of the dial. This
setting is designed to maintain the temperature at
or near 0°F ( - 17,8 °C) under normal operating
conditions
The Power Saving Control...
operates electric heaters. These heaters help pre
vent moisture from forming on fhe outside of the
freezer when humidity is high.
1. Use the LO setting when humidity is low.
2. Use the HI setting only if moisture forms on the out
side of the freezer
1. Turn control to higher number for colder femperafures,
2. Turn to lower number for less cold temperafures.
Cooling freezer first...
1, Allow freezer to cool 6 to 8 hours before filling with
frozen food.
2. Let it cool overnight before adding large amount
of unfrozen food.
Nofe: When freezer is first started, the compressor
will run constantly until the cabinet is cooled. It may
take up to 6 to 8 hours or longer, depending on room
temperature and the number of times the freezer
door is opened
After the cabinet is cooled, the compressor will
turn ON and OFF as needed to keep the freezer at
the proper temperature.
Removing the bottom trivet...
makes freezer bottom cleaning easier
To remove:
1. Lift back of trivet to tilt trivet forward and release it
from stud clips.
2. Slide front of trivet all the way to one side and pull
up and out.
To replace:
1. Position trivet behind stud clips with back of trivet
raised.
2. Slide each end of front rod into its socket and lower
back of trivet.
Energy saving tips...
You can help your freezer use less electricity,
• Check door gasket and level freezer to assure a
good door seal,
• Clean the condenser coils regularly,
• Keep door openings to a minimum. Remove several
items at one time. Keep contents organized to elimi
nate searching.
• Fill to capacity. Follow recommended procedures
for freezing foods. See pages 7 and 8.
• Set Temperature Control to provide temperatures
around 0°F (-17,8 °C). There is no need to store
foods below 0°F,
• Keep door locked to ensure door closure,
• Do not let frost build up to more than inch (6 mm]
thick. Efficiency is reduced,
• Keep Power Saving Control on LO when humidity is
low.
Page 6

Cleaning your freezer
This freezer should be cleaned when frost has built up to about Ka inch (6 mm] thickness.
Complete defrosting and cleaning should be done at least once a year
In high humidity areas, a freezer may need more frequent defrosting.
To defrost and clean:
1 Turn Temperature Control to OFF,
2, Unplug power cord.
3, Place a shallow pan on floor under drain hole in
bottom of freezer.
4, Take out all food and removable parts.
Note: Wrap frozen foods and packages in several
layers of newspaper and cover with blanket. Food will
stay frozen for several hours.
Cleaning chart...
Part What to use
Removable part
(trivet)
Outside
Sponge or cloth; mild
detergent and warm
water.
Sponge, cloth or paper
towel; mild detergent;
appliance wax [or good
auto paste wax)
5, Place pan of hot water inside freezer to speed
melting of frost. Keep door open. Ice can be re
moved in large pieces as it melts Direct air from
electric fan into freezer to speed defrosting
6, Clean freezer according to the following
directions.
After defrosting:
1. Remove shallow pan from underneath freezer
2, Plug in power cord,
3 See directions for "Setting the Temperature Con
trol," page 5
How to clean
Wash with warm water and a mild detergent.
Rinse and dry.
Wash with warm water and a mild
detergent Do not use abrasive or
harsh cleansers.
Rinse and dry.
Wax painted metal surfaces at least twice a
year with appliance wax or a good auto
paste wax. Apply wax with a clean, soft cloth.
Do not use wax on plastic parts.
Inside walls
Door liner and gasket
Condenser coils
Waxing painted metal surfaces provides rust protection.
Plastic scraper, pans of
hot water, sponge or
towel, baking
soda and warm water.
DO NOT USE an ice pick, knife of other sharp-pointed tool or any
type of electric defroster to defrost freezer. They can cause damage
to the liner and interior parts.
Sponge, soft cloth or
paper towel; mild deter
gent and warm water.
DO NOT USE cleaning waxes, concentrated detergents, bleaches or cleansers containing petroleum on plastic parts.
Use vacuum cleaner
with brush attachment.
WARNING: Watch out
for sharp wire ends at
top of condenser
colls. They can cause
injury or damage
brush.
Use plastic scraper to remove frost.
Place pans of hot water in freezer with door open
to speed melting.
' Wash with solution of 2 tablespoons (26 g) baking
soda to 1 quart (.95 L) warm water,
' Rinse and dry.
Wash with mild detergent and warm water.
Rinse and dry.
' Slide freezer out away from the wall.
' Clean dust and lint from condenser coils behind
the freezer, every two or 3 months.
Page 7
Freezing food in your freezer
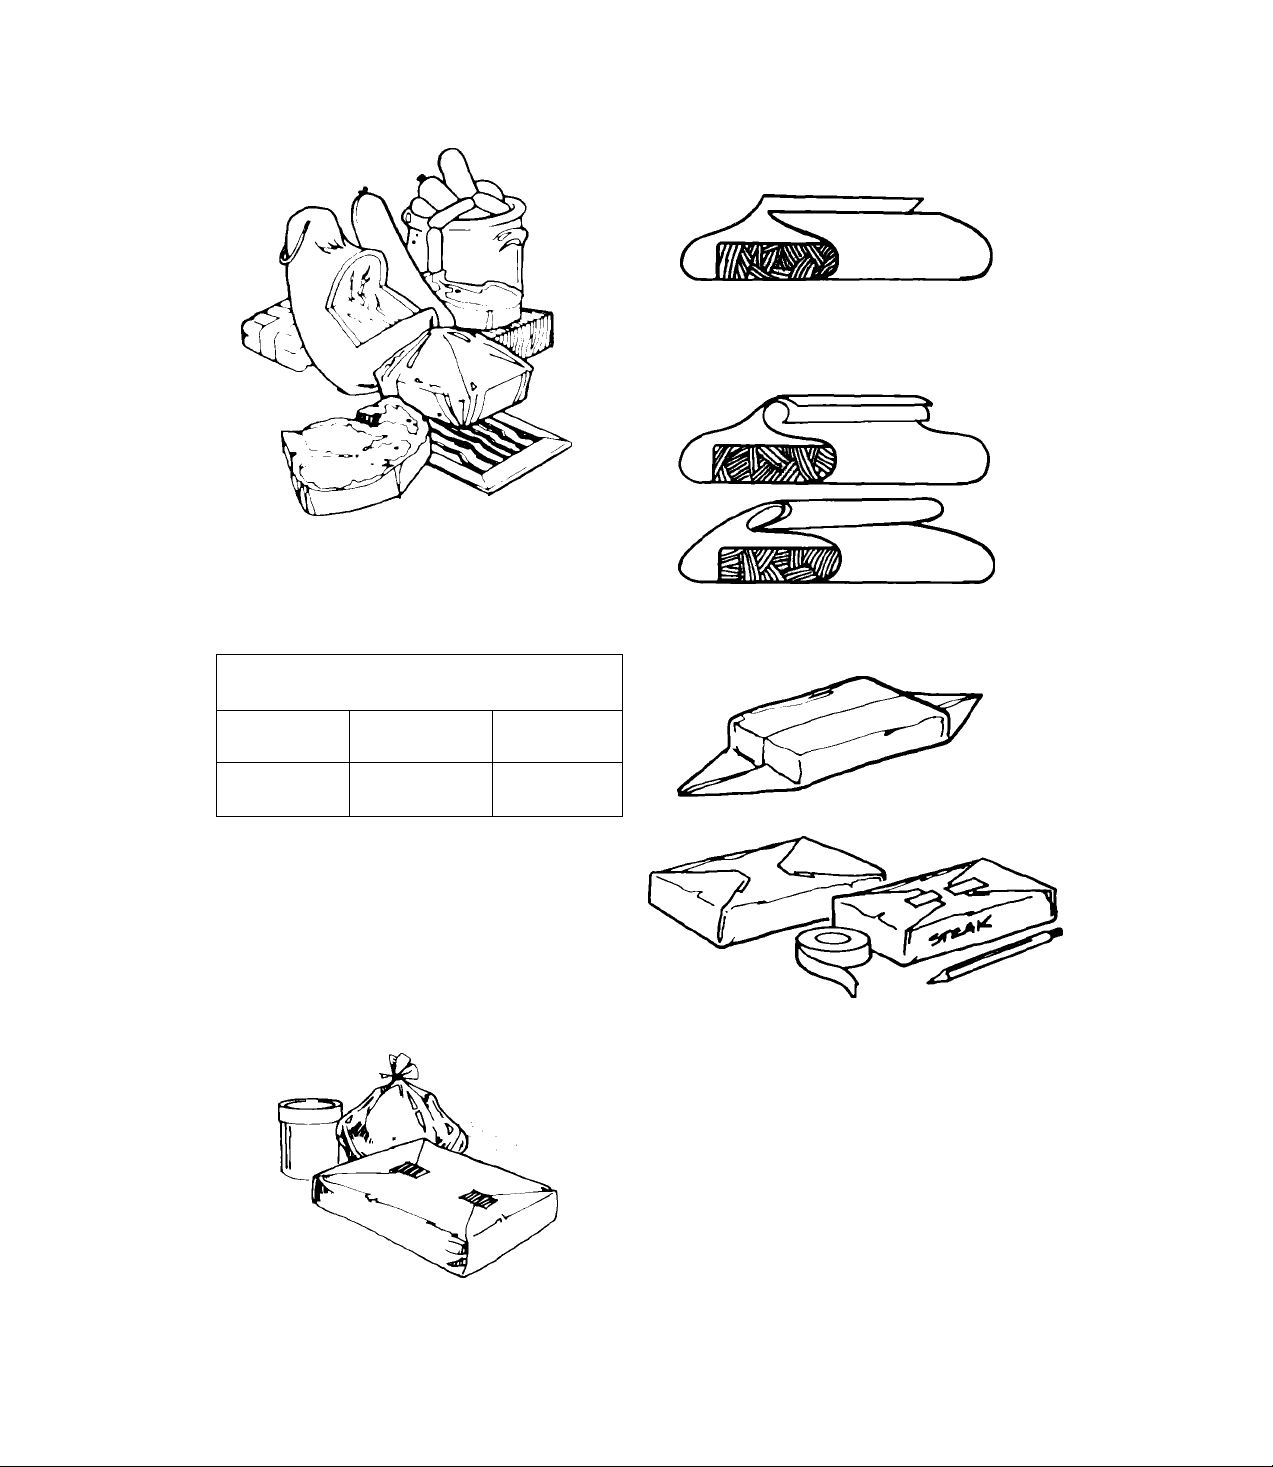
1. Cut sheet of wrapping material about one-
When freezer has cooled to a safe storage
temperato'e h may be loaded with frozen food.
When ye a plan to freeze unfrozen food, see
the following chart for the amount to freeze at
one time.
POUNDS OF FOOD
TO FROa iff ONE TUMI*
Size of
Freezer
11 cu. ft.
(311.5 L)
'These am' nun's are Cased on JSDA recommen
datic'-'S If '.Si:, many packages of unfrozen food
are packe 3 a’ one fimie rn'o 'he freezer fhe rate
cf freezing s 'oo siO'w Poor quah'v products 'esut
Mieotor
Fish
22 lbs.
(9.9 kg)
Visgetables
or Fruit
33 lbs.
(14.8 kg)
2. Bring front and back of wrapping together
3. Crease ends close to food to eliminate air
To nrap foods...
third longer than distance around food to be
wrapped. Place wrapping sheet on flat sur
face with food in center of sheet
and fold in toward food, making at least two
one-inch [2 5 cm] folds until food fits tightly
against wrapping.
pockets
Packaging and sealing food...
Airtight packaging is important in freezing
foods, Cordainers and wrappings should be
moisture ard 'uapor-proof and packages should
be sealed carefully to keep moisture in and air
out
Freezer burn can result If food Is not properly
wrapped. When this happens, food dehydrates
and Is of poor quality.
4. Press all air from package. Fold each end over
twice Make sure fold is tight and fasten
against end of package with freezer tape.
NOTE: When packaging meats that have not
been boned, pad sharp edges with extra wrap
or use stockinette to protect against tearing or
puncturing
Use heavy-duty aluminum freezer foil, kraft pa
per with cellophane bonded to it, special freezer
bags, jars, cartons and freezer sealing tape for
packaging yourfood items. You'll find them at the
supermarket or freezer dealer
See booklet, “How to Preserve Foods the
Modern Way with Your WHIRLPOOL Freezer,”
for complete Information and tips on home
freezing.
Page 8
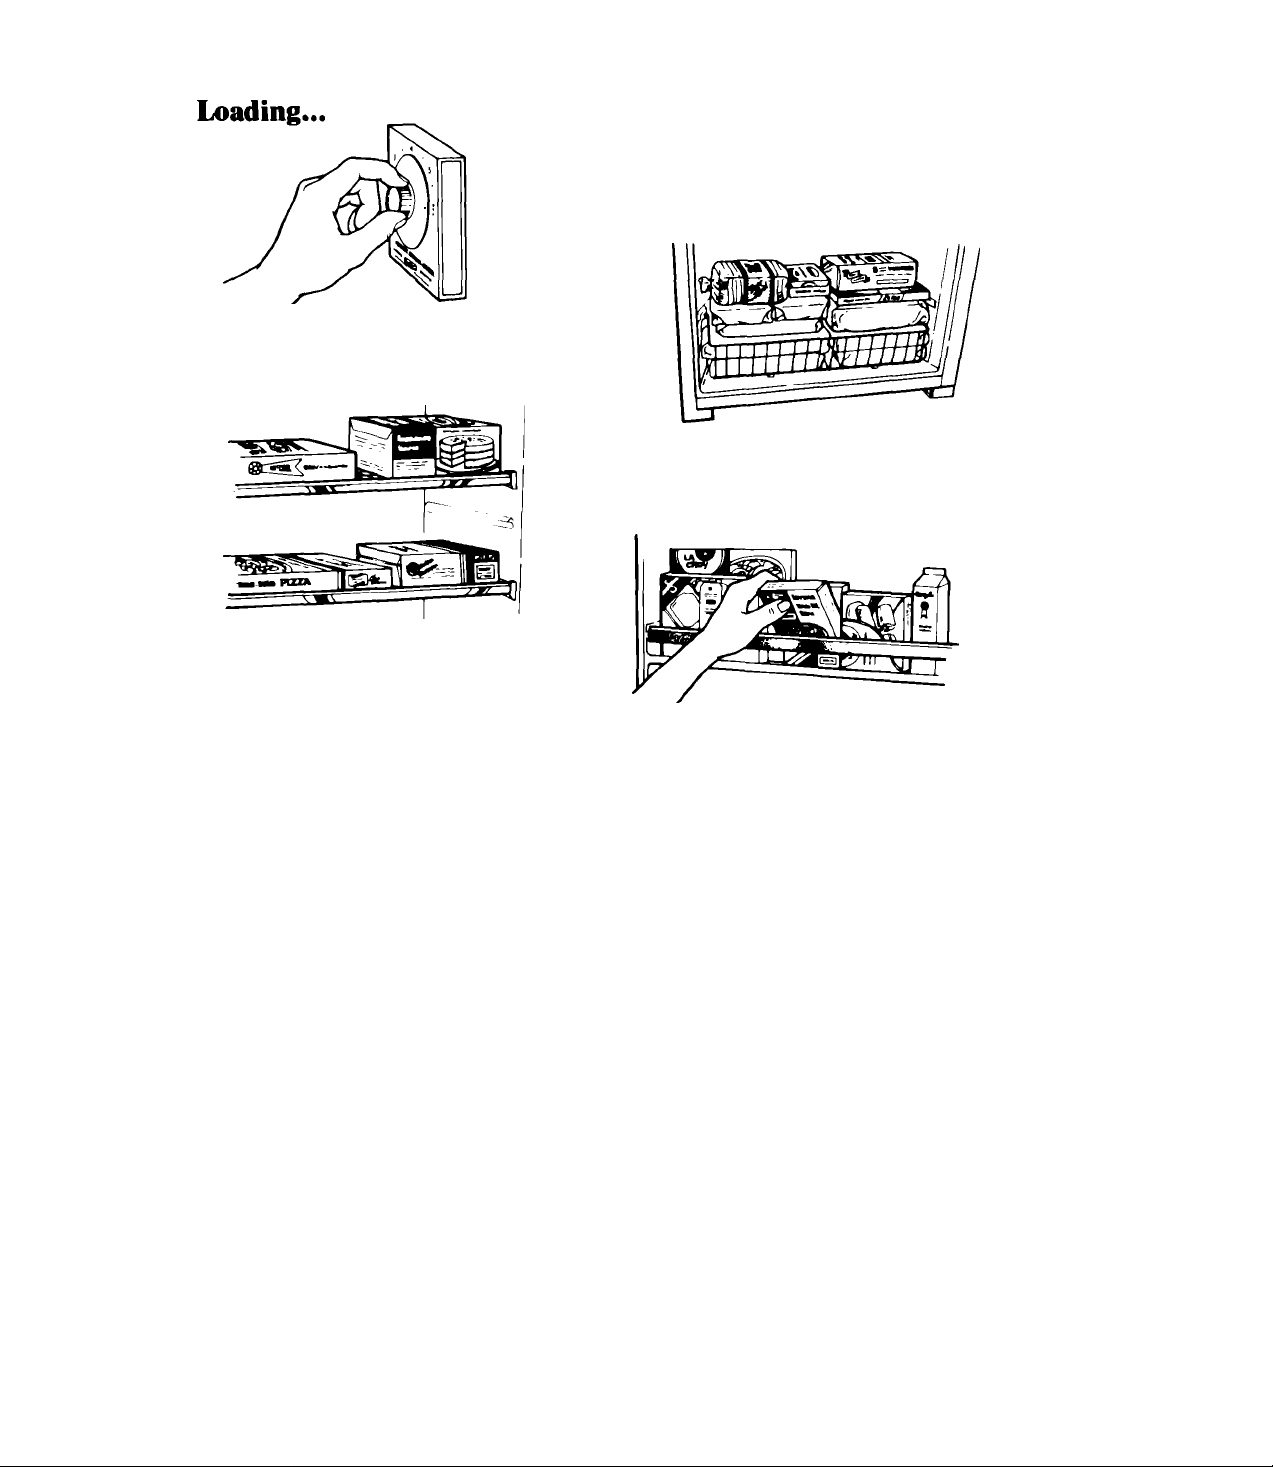
1. Before freezing large quantities of food, turn Tem
perature Control to highest setting and let freezer
operate for several hours. After loading all food
Items, return Temperature Control to the usual
setting.
2. To speed freezing, lay packages in a single
layer so each rests on the freezing surface of a
shelf Leave space between packages.
3. Add more unfrozen food after first load is
frozen (approximately 18 to 24 hours).
Storing frozen food...
After food is frozen, stack packages anywhere
in the freezer. Packages should not extend be
yond the shelf edge or they may keep the door
from closing and sealing properly.
Ttivet - Store heavy and bulky packages here.
Trivet should be in piace at all times for proper air
circulation.
Door storage - Store packages on the door
shelves behind the retaining bar
Page 9
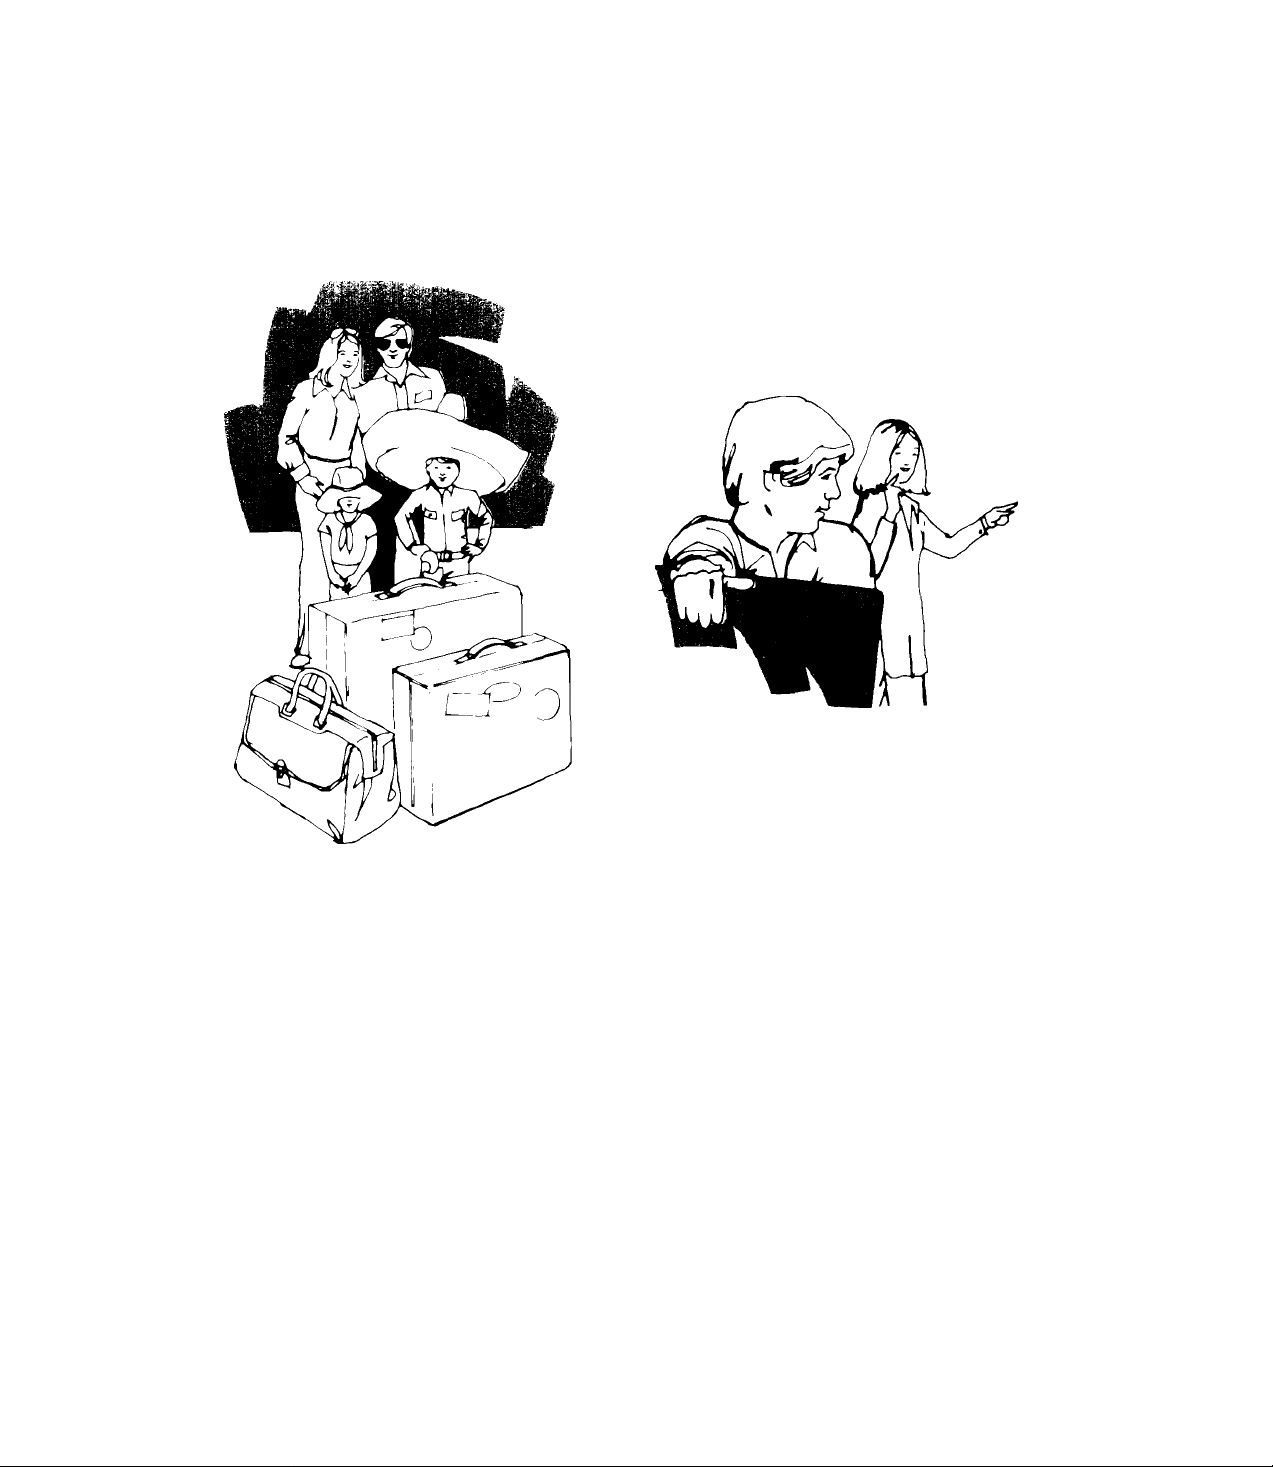
Vacation and moving care
Vacations...
Arrange for someone to make regular checks of
your freezer to make sure it is operating and electricity
has not been interrupted.
Shutting off and moving...
If freezer is shut off for more than 24 hours:
1. Remove and store all food.
2. Unplug freezer.
3. Clean thoroughly. See "Cleaning your freezer,"
page 6.
4. Block door open for air circulation. Place blocks
between door and cabinet and tape in place
with self-adhesive filament tape.
If you move the freezer:
1. Remove trivet.
2. Do not place objects inside cabinet.
3. Level properly to ensure good door seal.
WARNING:
Do not allow children near the freezer when the I
door is blocked open. They may become In-1
jured or trapped.
To restart freezer, see "Using your freezer," page 5.
Page 10

If you need service or assistance, we suggest
you follow these four steps:
1. Before calling for assistance...
Performance problems often result from little things
you can find and fix yourself without tools of any kind.
If electricity goes off:
Learn how iong power wiil be off by caliing the
power company.
• If service is to be interrupted 24 hours or iess, keep
freezer closed. Most food will stay frozen.
• If service is to be interrupted ionger than 24 hours,
do this:
1. Remove aii unfrozen food and store in a frozen
food iocker. OR...
2. Place 2 lbs. (0.9 kg) of dry ice in freezer for every
cu. ft. of freezer space. This will keep frozen foods
for 2 to 4 days. Wear gloves to protect your hands
from dry ice burns.
3. If neither food iocker storage or dry ice is avail
able, use or can perishable food at once,
• The length of time food will stay frozen depends on
several factors. For instance: a full freezer will remain
cold longer than a freezer partially filled. And a
freezer full of meat will stay cold longer than a
freezer filled with baked goods. Also, if the food still
contains ice crystals, it may be safely refrozen, al
though the quality and flavor may be affected. Use
this food as soon as convenient. If the condition of
the food is poor or is in any way questionable, it is
wise to dispose of it.
If freezer stops running:
• Check to see if power cord is plugged into the
outlet.
• Check fuse box or circuit breaker
• Check electric company for a power failure.
• Be sure Temperature Control is turned ON,
If compressor seems to run too long:
• Check to see that condenser, located on back of
freezer, is free of dust and lint.
• On hot summer days or if room is hot, compressor will
run longer to provide the correct amount of cooling,
• If large amounts of unfrozen food have been put
into the freezer, compressor will run longer,
• Check to see that there is enough air circulation
space above and in back of the freezer.
FSP is a registered trademark of Whirlpool
Corporation for quality parís Look for this symbol
of quality whenever you need a replacement part
for your Whirlpool appliance. FSP replacement
^0^
parts will fit right and work right, because they are
® made to the same exacting specifications used
to build every new Whirlpool appliance.
2. If you need assistance*...
Call Whirlpool COOL-LINE ’ service assistance
telephone number. Dial free from:
Continental U.S............................. (800) 253-1301
Michigan
Alaska & Hawaii
and talk with one of our trained Consuitants. The
Consultant can instruct you in how to obtain satisfac
tory operation from your appliance or, if service is
necessary, recommend a quaiified service company
in your area.
........................................
...........................
(800) 632-2243
(800) 253-1121
3. If you need service*...
Whirlpool has a na
tionwide network of
franchised TECH-CARE®
Service Companies
WWrip2)l
rfC^-CA/^f
FRANCHISED SERVICE
TECH-CARE service in your area, cail our COOL-LiNE
service assistance telephone number (see Step 2] or
look in your teiephone directory Yeliow Pages under:
APPLIANCES - HOUSEHOLD-
MAJOR - SERVICE & REPAIR
WHIRLPOOL APPLIANCES
FRANCHISED TECH-CARE SERVICE
HER\'n.'E COMPAMES
XYZ SERVICE CO
123 Maple
...........................
999-9999
WASHING MACHINES, DRYERS
& IRONERS-SERVICING
WHIRLPOOL APPLIANCES
FRANCHISED TECH-CARE SERVICE
SERVICE COMPANIES
XYZ SERVICE CO
123 Maple............................. 999-9999
TECH-CARE service
technicians are trained
to fulfiil the product
warranty and provide
after-warranty service,
anywhere in the United
States. To locate
ELECTRICAL APPLIANCES-
MAJOR - REPAIRING & PAI ITS
OR
WHIRLPOOL APPLIANCES
FRANCHISED TECH-CARE SERVICE
SERVICE COMPAMES
XYZ SERVICE CO
123 Maple
............................
OR
999-9999
4. If you have a problem*...
Caii our COOL-LiNE service assistance teiephone
number (see Step 2] and talk with one of our
Consultants, or if you prefer, write to:
Mr Stephen E, Upton
Senior Vice President
Whirlpool Corporation
Administrative Center
2000 US-33, North
Benton Harbor, Ml 49022
*lf you must call or write, please provide: model
number, serial number, date of purchase, and a
complete description of the problem. This informa
tion is needed in order to better respond to your
request for assistance.
10
Page 11

IF YOU NEED SERVICE OR ASSISTANCE
(#5
-M
O
Z
Page 12
".iii':}'-.!»^5» i-
Making your world a little easier.
Part No. 1104079
©1985 Whirlpool Corporation
/l3kers, Distiwashers. Built-In Ovens and Surface Units. Ranees, Microwave Ovens. Trash Compactors, Room Air Conditioners. Oehumiditiers, Automatic Washers. Clothes Oryers
Printed in U.S.A.
 Loading...