

Whirlpool ETl8CK User Manual
0
cl
NO-FROST
:rs, Freezers, Refrigerator-Freezers. Ice Makers, Dishwashers. BullI-In
ovens
and
C
REFRIGERATORFREEZER
Model ETl8CK
Surface
Units, Ranges, MIcrowave Ovens, Trash Compactors, Room Air Conditioners, Oehumidlfie,
Please read this
llse and Care Guide
before you do anything else...
This booklet leils you how to start your refrig-
erator, clean :t move shelves and adjust con-
trols It even tells you what new sounds to expect
from your refrigerator
Treat your new refrlgeroror wit11 care. Use it
vniy to do wtlat home refrigerators are designed to do.
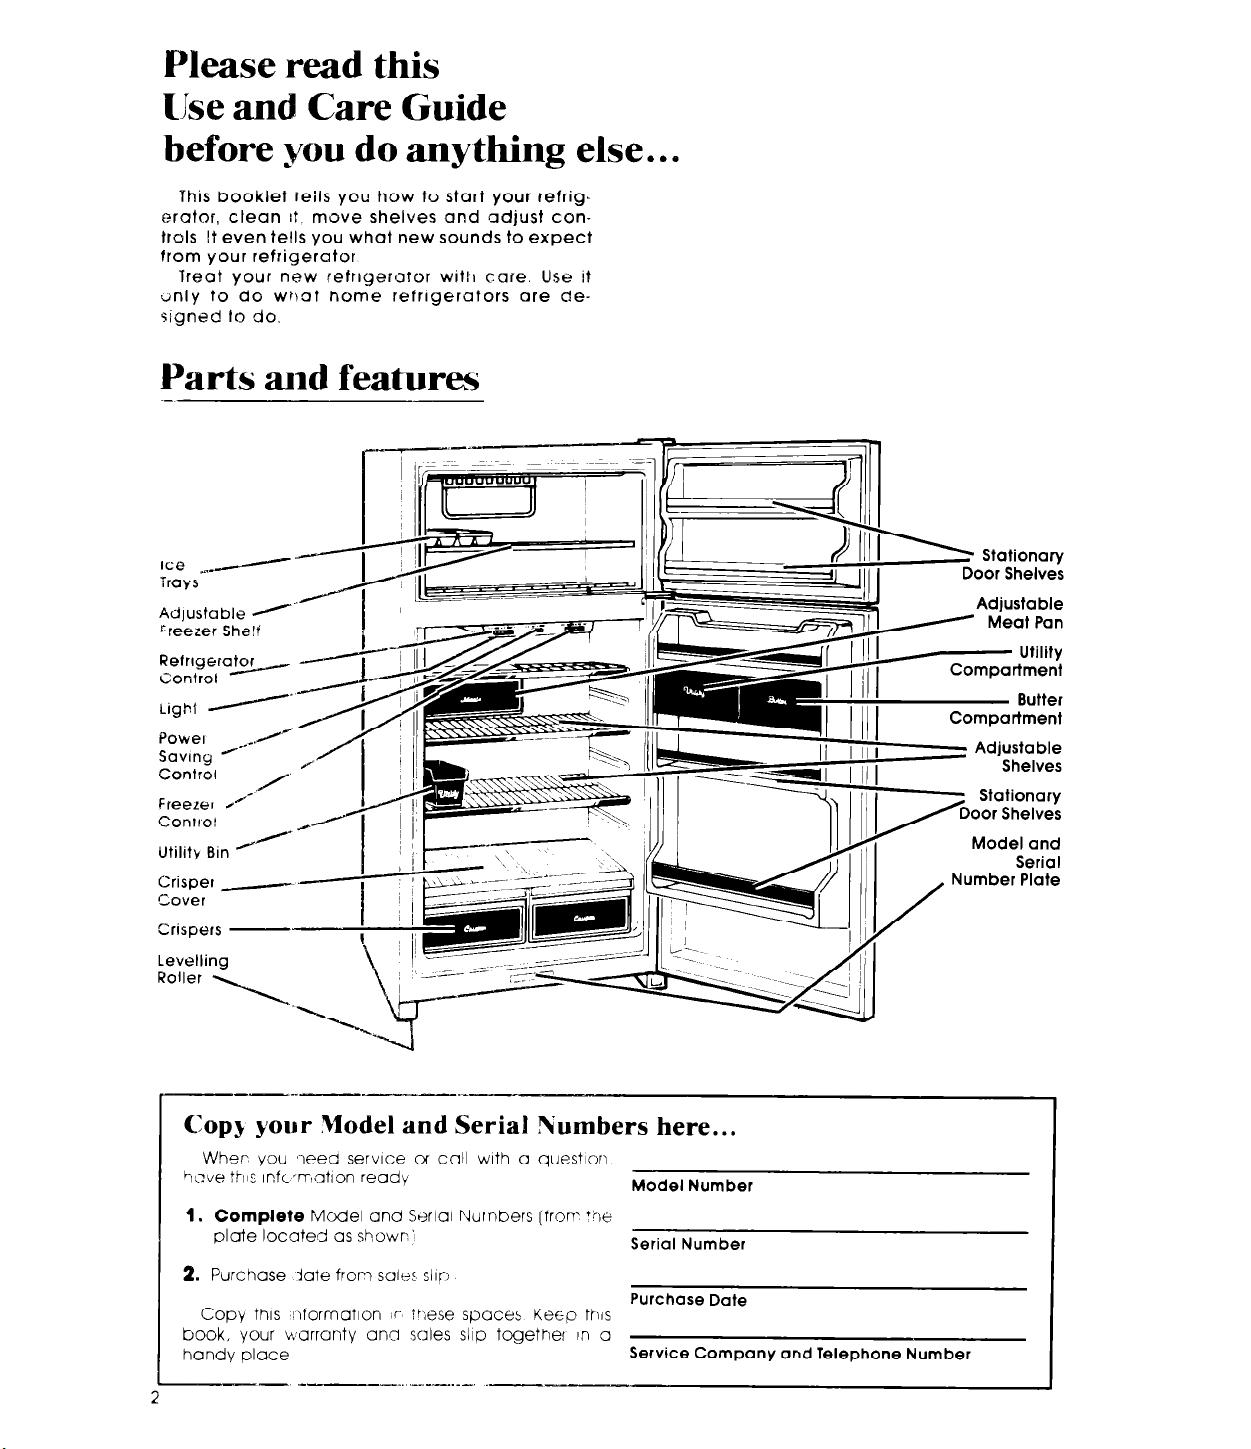
Parts and features
Ice #A----
Trays
Adjustable A
rreezer Shelf
Refrigerator
Coritral -
Povvel
Savlny IH
Control
Freerer /
Control
Utility Bin Y
Crisper -
Cover
Crispers Levelling
Ro”er \
-.H’
-4--"--.
l-
/
1T-l
Model and
Serial
Number Plate
Copy your Model and Serial Numbers here...
I
Wher vou ?eed service OT ccl11 with a auestion
1
Model Number
1. Complete
plate located as showr:
2.
Purchase late from sales slay?
I
Copy
book, your warranty am sales slop together In a
handy place
L
2
-- -
Model and Serla Nurnbers (from- +&
this
:)formation #r8 Tr:ese spaces
-“_. .-_ _.-._-_. .-
Serial Number
Purchase Date
Keep ths
Service Company and Telephone Number
Contents
BEFORE YOU PLUG IT IN
Install Properly
Level Refrigerator-Freezer
Remove Sales Labels
Clean It
Plug It In
USING YOUR REFRIGERATOR
Setting the
Changing the Control Settings
Power Saving Control
Removing the Meat Pan and Cover
Changing the Light Bulb
Adjusting the Refrigerator Shelves
Removing the Crispers and Cover
Adjusting :he Freezer Shelf
Controls
C 1984 Whrrlpool Corporation
Before you plug it in
Page
3
4
4
4
4
Ice Cube Trays
Optronal Automatic l&Maker : : : : 7 7
Sounds You May Hear, 7
Energy Saving Tips
CLEANING YOUR REFRIGERATOR’ : :
Cleaning Chart 8
z
FOOD STORAGE GUIDE 9
5
5
5
6
6
6
6
6
Storing Fresh Food 9
Storing Frozen Food 10
VACATION AND MOVING CARE : :
IF YOU NEED SERVICE OR ASSISTANCE
1, Before Calling for Assistance 1 1
2. If You Need Assistance 1 1
3.
If You Need Sewice
4. If You Have a Problem : :. : :
Page
7
8
10
11
11
11
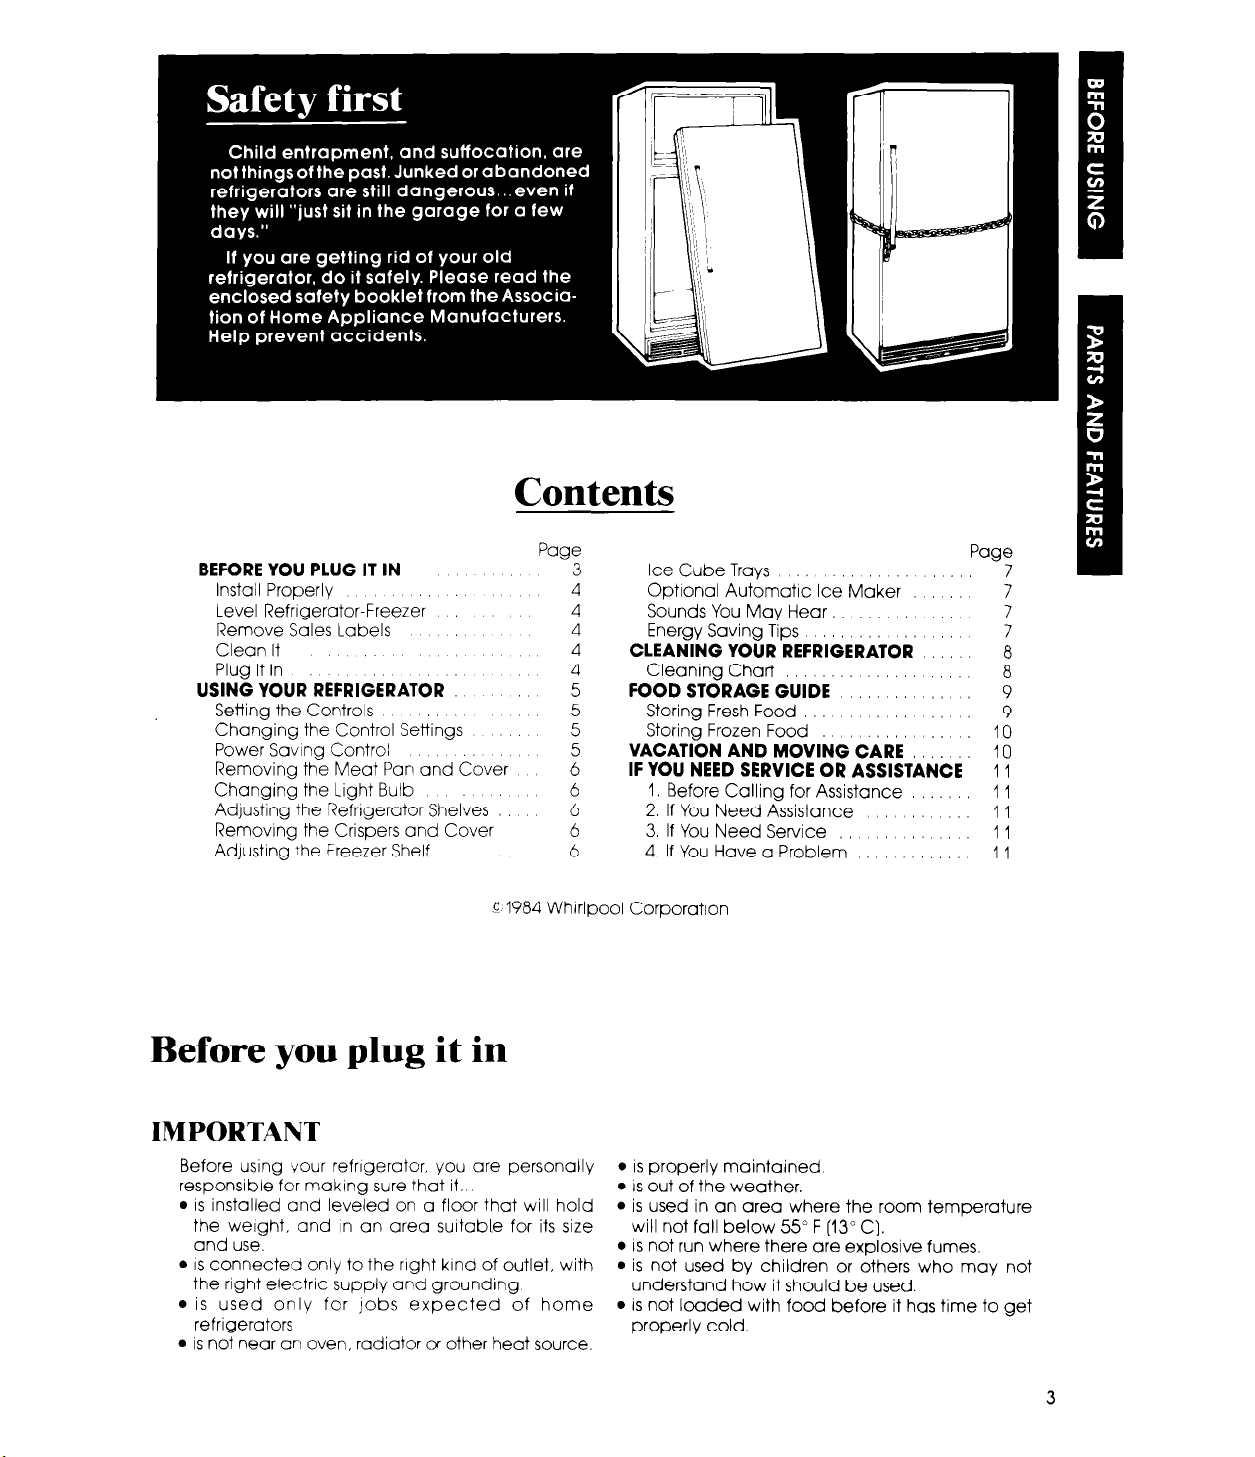
IMPORTANT
Before using your refrrgerator, you are personally
responsible for making sure that it.
l
IS installed and leveled on a floor that will hold
the weight, and in an area suitable for its size
and use.
l
IS
connected only to the right kind of outlet, with
the right electric supply and grounding
l
is used only for jobs expected of home
refrigerators
l
is not near an oven, radiator or other heat source.
l
IS
properly maintained
l
IS out of the weather.
l
is used in an area where the room temperature
will not fall below 55” F (13” C).
l
IS not run where there are explosive fumes.
l
is not used by children or others who may not
understand how it should be used.
l
IS not loaded with food before it has time to get
properly cold.
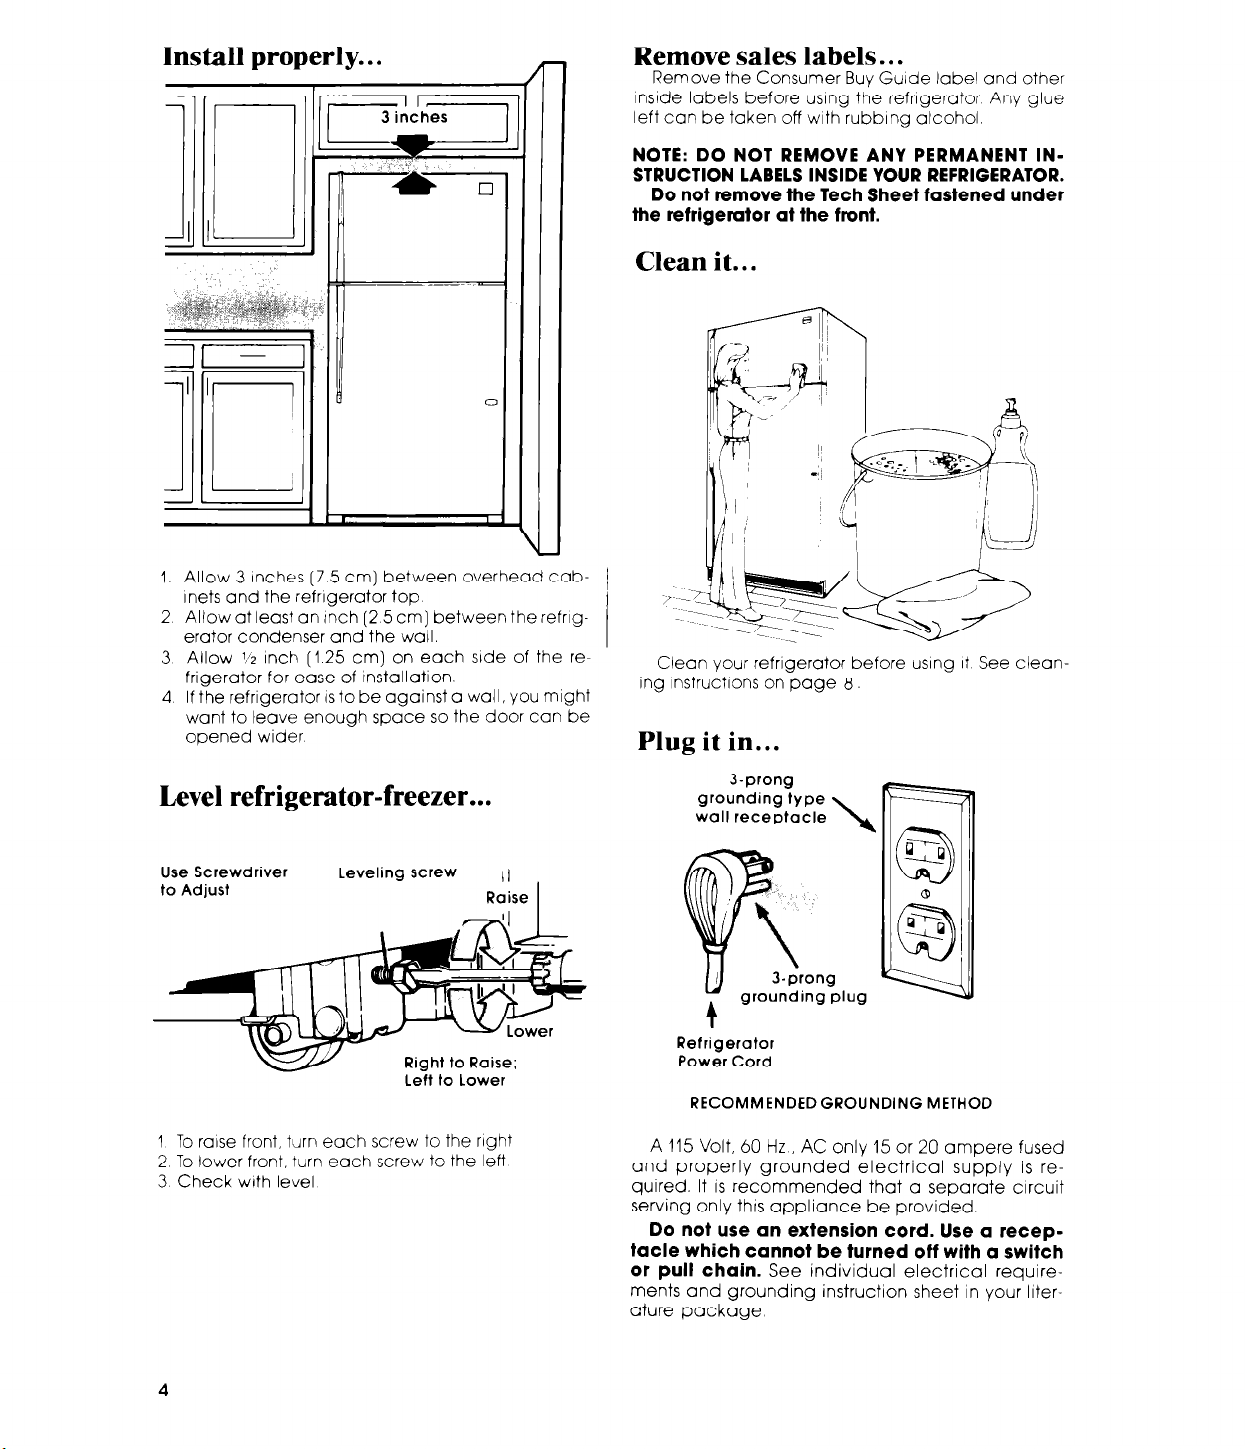
Install properly.. .
1 Allow 3 Inches (7 5 cm) between overhead cab-
lnets and the refrigerator top
2 Allow at least an tnch (2 5 cm] between the refrig-
erator condenser and the wall.
3 Allow 1% inch (1.25 cm) on each srde of the re-
frigerator for ease of Installation.
4 If the refrigerator IS to be against a
want to leave enough space so the door can be
opened wider
wall,
you might
Remove sales labels.. .
Remove the Consumer Buy Guide label and other
InsIde labels before using the refrigerator Any glue
left can be taken off with rubbing alcohol.
NOTE: DO NOT REMOVE ANY PERMANENT INSTRUCTION LABELS INSIDE YOUR REFRIGERATOR.
Do not remove the Tech Sheet fastened under
the refrigerator at the front.
Clean it...
Clean your refrigerator before usrng It See clean-
ing Instructions on page 8.
Plug it in...
Level
Use Screwdriver
to Adjust
1 To raise front, turn each screw to the right
2 To lower front, turn each screw to the left
3 Check with level
refrigerator-freezer...
Leveling screw
Left to Lower
3-prong
grounding type
wall receptacle
Refrigerotol
Power Cord
RECOMMENDEDGROUNDING METHOD
A 115 Volt, 60 Hz, AC only 15 or 20 ampere fused
and properly grounded electrical supply is required. It
serving only thts appliance be provided.
IS
recommended that a separate circuit
Do not use an extension cord. Use a receptacle which cannot be turned off with a switch
or pull chain.
ments and grounding instruction sheet in your Irter-
ature package
See individual electrical require-
4
 Loading...