

Page 1
use&care guide
CYCLE DEFROST
REFRIGERATOR-
ol
Model ET12DC
and
Model ET14DC
i, F re ez ers , Re fri ge ra tor -F re eze rs , Ice M ak ers . Di sh was he rs , B ui lt- In O ve ns an d Sur fa ce Un it s, Ra ng es, M ic row av e Ov ens , Tra sh C omp ac to rs , R oo m Air C on dit io ner s, D eh umi di fi
Page 2
Please read this
Use and Care Guide
before you do anything else.
This booklet tells you how to start your refrig
erator, clean it move shelves and adjust con
trols. It even tells you what new sounds to expect
from your refrigerator
Treat your new refrigerator with core Use it
only to do what home refrigerators are de
signed to do.
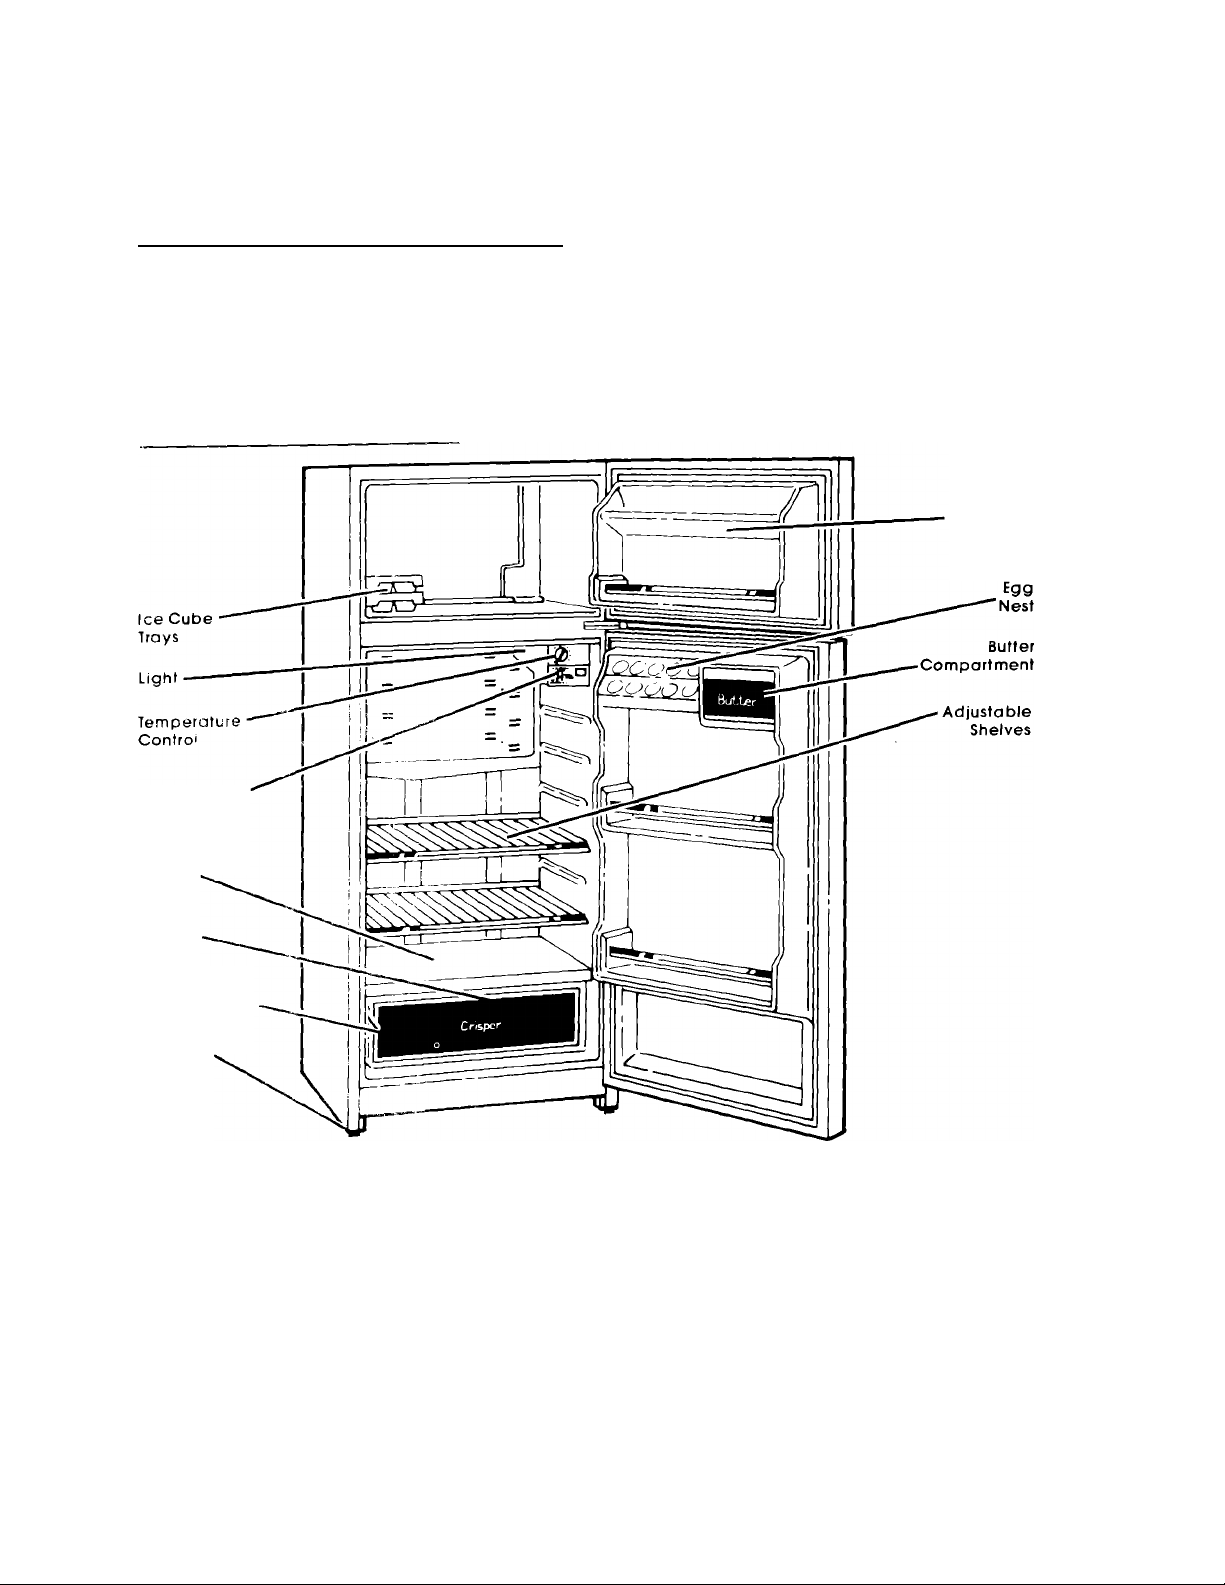
Parts and features
Juice Can
Rack
Power Saving
Control
Crisper
Cover
Crisper
Model and
Serial Number
Plate
Levelling
Leg
Copy your Model and Serial Numbers here.
Wheo vcxi nt--ea service or call with a question,
have this ctorn sit'on ready
1. Complete Mcxtel and Ser ai Numbers (from the
plate located as shown j Serial Number
2. Purchase dare from sales sl'p
Copy this information ri these spaoes. Keep this
book, your warranty and sales slip together in a
handy place
Model Number
____________
Purchase Date
Service Company and Telephone Number
Page 3
Safety first
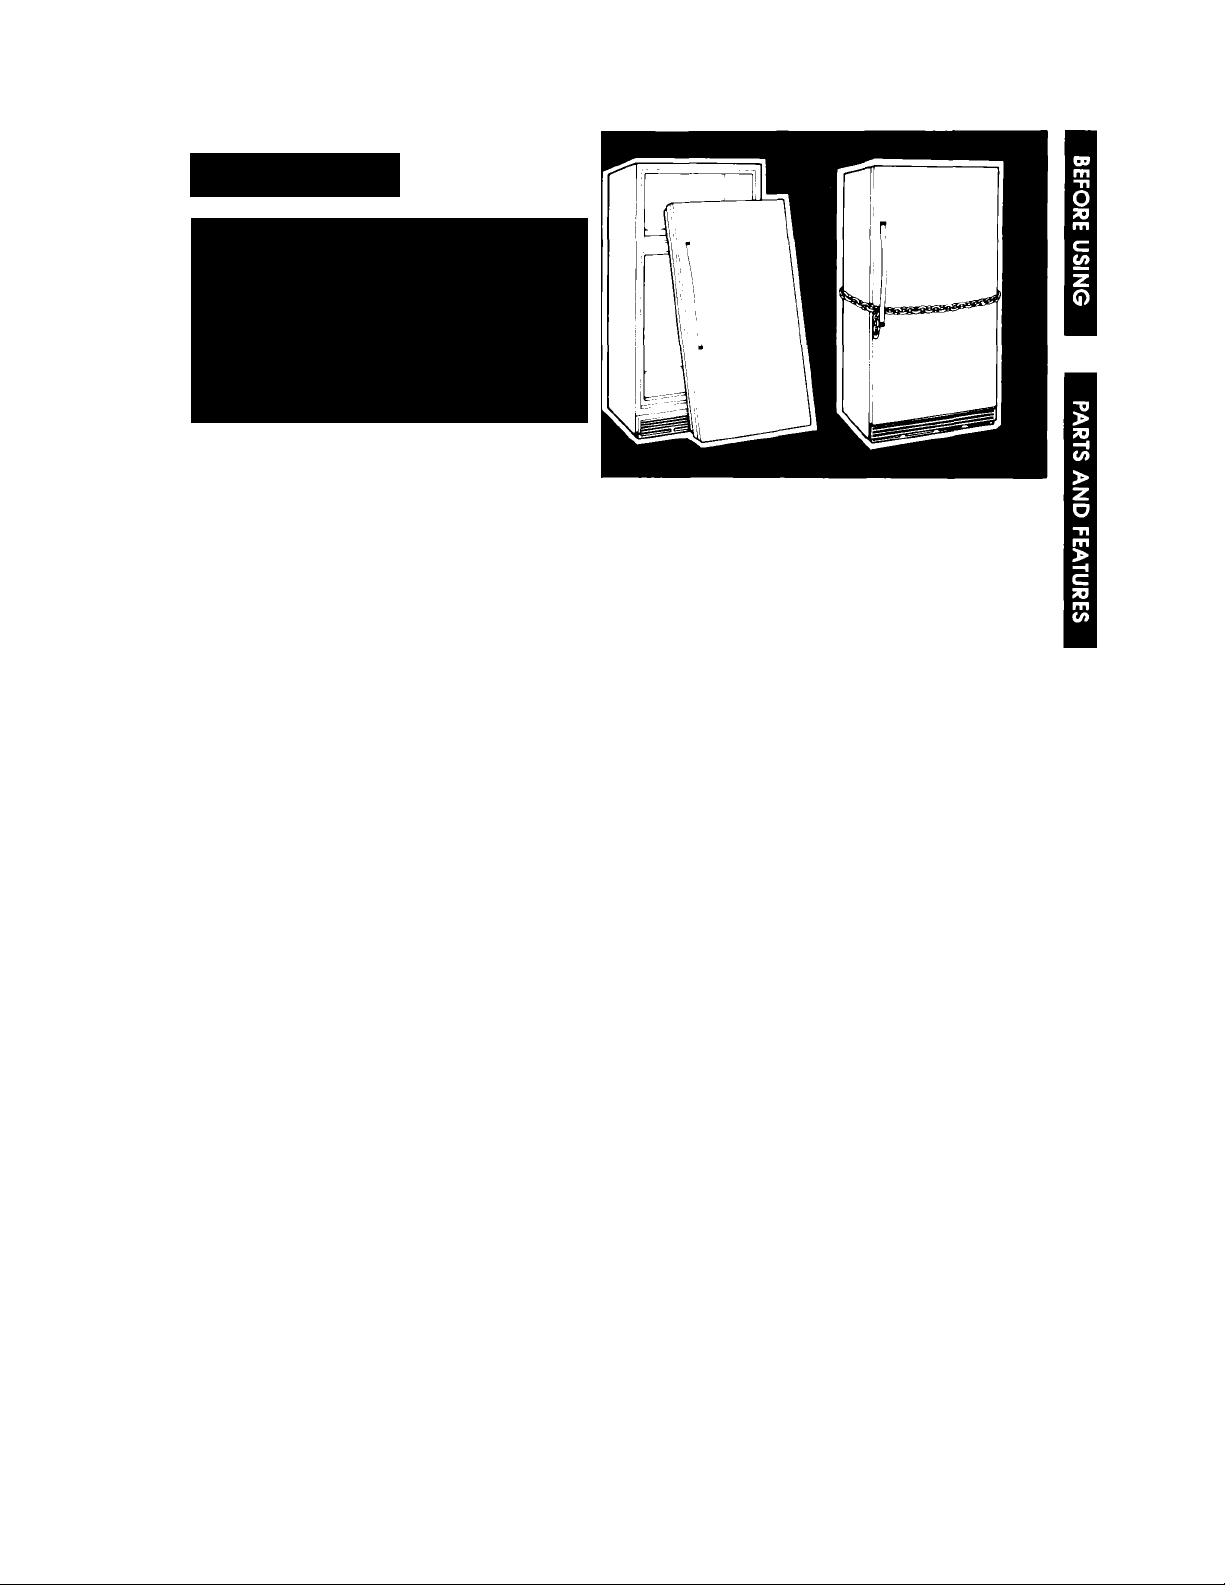
Child entrapment, and suffocation, are
not things of the past. Junked or abandoned
refrigerators are still dangerous , even if
they will "just sit in the garage for a few
days.”
If you are getting rid of your old
refrigerator, do it safely. Please read the
enclosed safety booklet from the Associa
tion of Home Appliance Manufacturers.
Help prevent accidents.
Contents
Page
BEFORE YOU PLUG IT IN
Remove Shipping Block............................. 4
install Properly
Levei Refrigerator Freezer , 4
Remove Sales Labels
Cleon It .......................................................4
Plug It In .....................................................4
USING YOUR REFRIGERATOR
Getting the Control
rowei'Saving Control
.Adjustinq the Shelves ................................5
Removing Crisper and Crisper
Cover ......................................................5
Changing the Light Bulb .............................6
Ice Cube Travs............................................6
...........................................
...........................
................................
...................
.....................................
..................................
3
4
4
5
5
5
Page
Sounds You May Hear
Energy Saving lips
CLEANING YOUR REFRIGERATOR
Defrosting the Freezer
Cleaning Chart .......................................... 8
FOOD STORAGE GUIDE
Storing Fresh Food
Storing Frozen Food
VACATION AND MOVING CARE 10-11
IF YOU NEED SERVICE OR ASSISTANCE 11
1. Before Calling for Assistance
2. If You Need Assistance
3. If You Need Service
4. If You Have a Problem
...............................
......................................
..........
..............................
............................
....................................
................................
.............
.......................
............................
........................
6
6
7
7
9
9
10
11
11
11
11
©1985 Whirlpool Corporation
Before you plug it in
IMPORTANT
Before using your refrigerator, you are personally
responsible for making sure that it,,
• IS installed and leveled on a floor that will hold
the weight, and in an area suitable for its size
and use
• is cortnected only to the right kind of outlet, with
the right electric supply and grounding.
• is used orhy for jobs expected of home
refrigerators
• IS not near an oven, radiator or other heat source
IS properly maintained,
is out of the weather.
is used in an area where the room temperature
will not fall below 55'- F (13'' C).
is not run where there are explosive fumes
is not used by children or others who may not
understand how it should be used
is not loaded with food before it has time to get
properly cold
Page 4
Remove the shipping block...
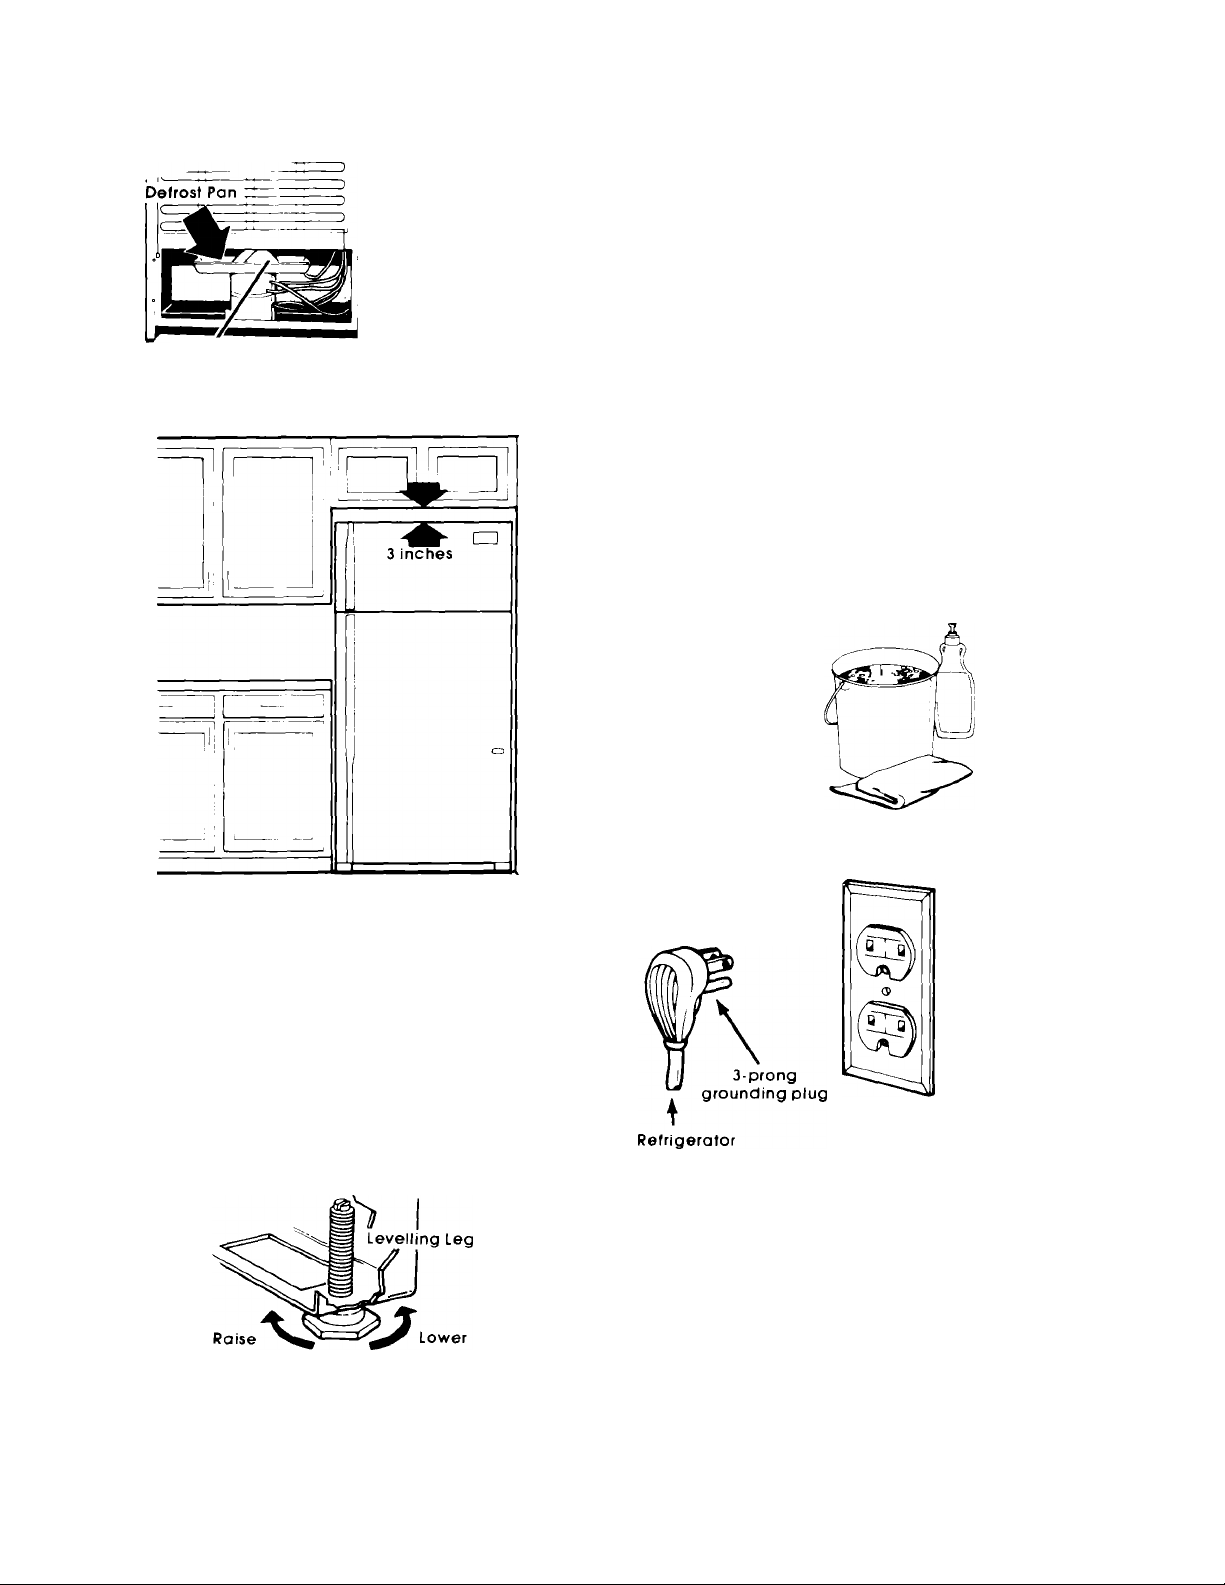
A Styrofoam
block IS wedged in the
defrost pan to help
prevent shipping dam
age This block must
be removed to clear
the way for defrost
water, evaporation
Shipping Biock
Must Be Removed
and to make the
power cord acces
sible.
Install properly...
3. Adjust each leg until the refrigerator won't rock.
4, Adjust front legs to level the refrigerator.
— To raise corners, turn legs clockwise.
— To lower corners, turn legs counterclockwise.
6. Check with level.
Remove sales labels...
Remove the Consumer Buy Guide label, tape and
any inside labels before using the refrigerator
To remove any remaining glue:
1, Rub briskly with thumb to make a ball then remove.
OR
2. Soak area with dishwashing detergent solution (1
teaspoon detergent in 1 quart warm water] before
removing glue as described in step 1.
DO NOT USE rubbing aicohol or flammable or
toxic solvents, such as acetone, gasoline, car
bon tetrachloride, etc. These can damage the
material.
NOTE: DO NOT REMOVE ANY PERMANENT IN
STRUCTION LABELS INSIDE YOUR REFRIGERATOR.
Do not remove the Tech Sheet fastened under
the refrigerator at the front.
Clean it...
Clean your refrigerator
before using it.
See cleaning instructions
on page 7
1 Allow 3 inches 1 7 5 cm) between overhead cab
nets and the refrigerator top
2 Allow at least an inch [2 5 cm) between the refrig
erator conaenser and the wal
3 You don't need space between counters and
cabinets and *ne refrigerator sides. For ease of
installation, you might want to leave enough room
i’.-’ inch - 'l,2f' cm) so the retrigerator can be
moved easily
4 If the refrigerateis to De against a wall, you might
want to leave enough space so the door can be
opened wider
Level refrigerator-freezer...
Keep the 4 bolts that hold refrigerator In shipping
crate. They are the levelling legs
Screw these bolts all the way into bolt holes at the
bottom comers of refrigerator Move refrigerata
nto place
Plug it in.
3-prong
grounding type v
wall receptacle
Power Cord
Recommended
Grounding Method
A 115 Volt, 60 Hz , AC only 15 or 20 ampere fused
and properly grounded electrical supply is re
quired, It is recommended that a separate circuit
serving only this appliance be provided
Do not use an extension cord. Use a recep
tacle which cannot be turned off with a switch
or pull chain. See individual electrical require
ments and grounding instruction sheet in your liter
ature package
Page 5
Using your refrigerator
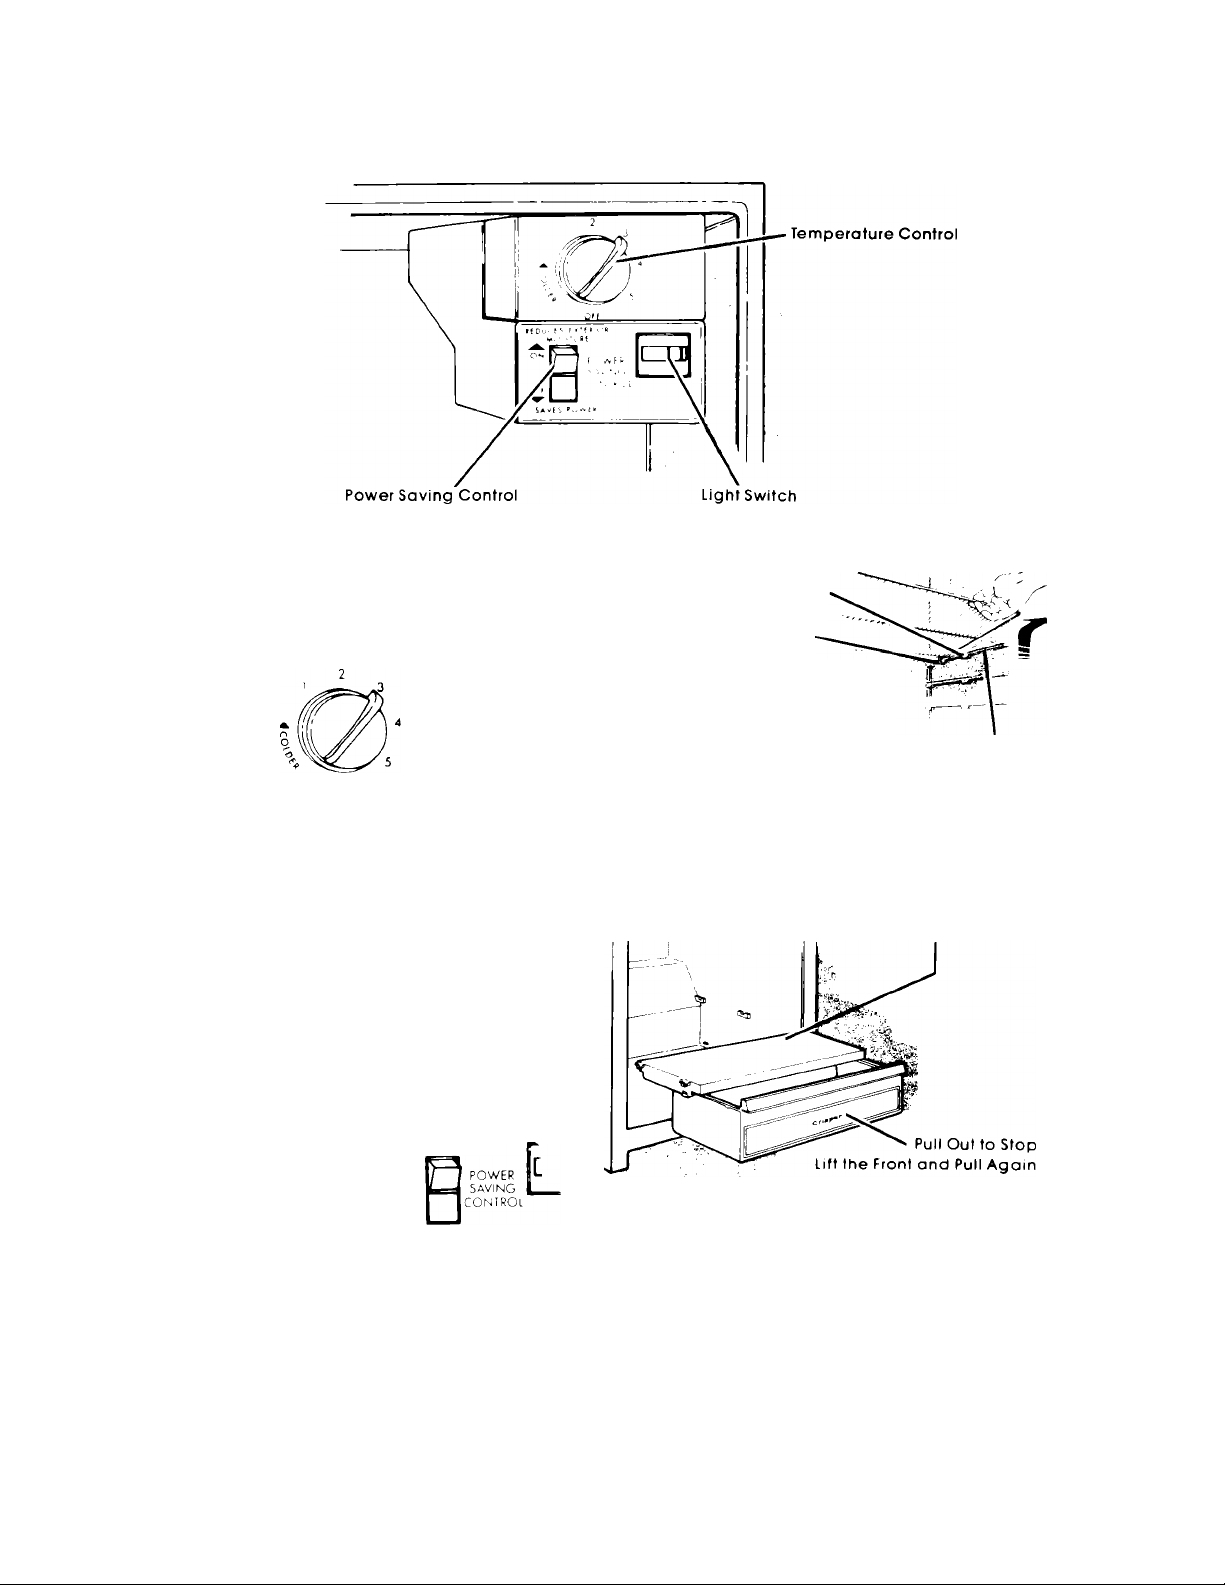
Setting the control...
The Temperature Control is on a console In
side the refrigerator in the top right corner It oontrols
the temperature in both the refrigerator and freezer.
To start the refrigerator, set the control to Number 3.
This setting should be about right tor nor
mal household refrigerator usage.
Give the refrigerator time to cool down com
pletely before adding food. (This may take several
hours].
The control will be set about right when milk or
luice is as cold as you like
Power Saving Control...
The Power Saving Control operates electric heat
ers around door openings. These heaters help keep
moisture from forming on the outside of the
refrigerator.
Use the "OFF" setting
when humidity is low.
Use the "ON" setting if
moisfure forms on the
outside of the refrig
erator.
REDUCES EXTERIOR
MOISTURE
SAVES POWER
Adjusting the shelves...
Guide Stop
Shelf Stop
1 First, remove food from shelf
2 Slide shelf straight ouMo stop
3, Lift front.
4 Slide the rest of the wav out
Repiacing Sheif;
1, Fit notches on back of cover into back supports
on wall of refrigerator,
2. Lower front into place
Shelf Guide
Removing crisper and crisper cover...
Lift the Front, Then the Bock
Removing Crispers:
1 Slide crisper straight out to stop
2. Lift the front
3. Slide the rest of the way out,
4. Replace m reverse order
Removing Cover:
• Lift front, then lift back
• Pull up and out
Repiacing Cover:
1 Fit notches on back of cover into back supporfs
on wall of refrigerator,
2 Lower front into place.
Page 6
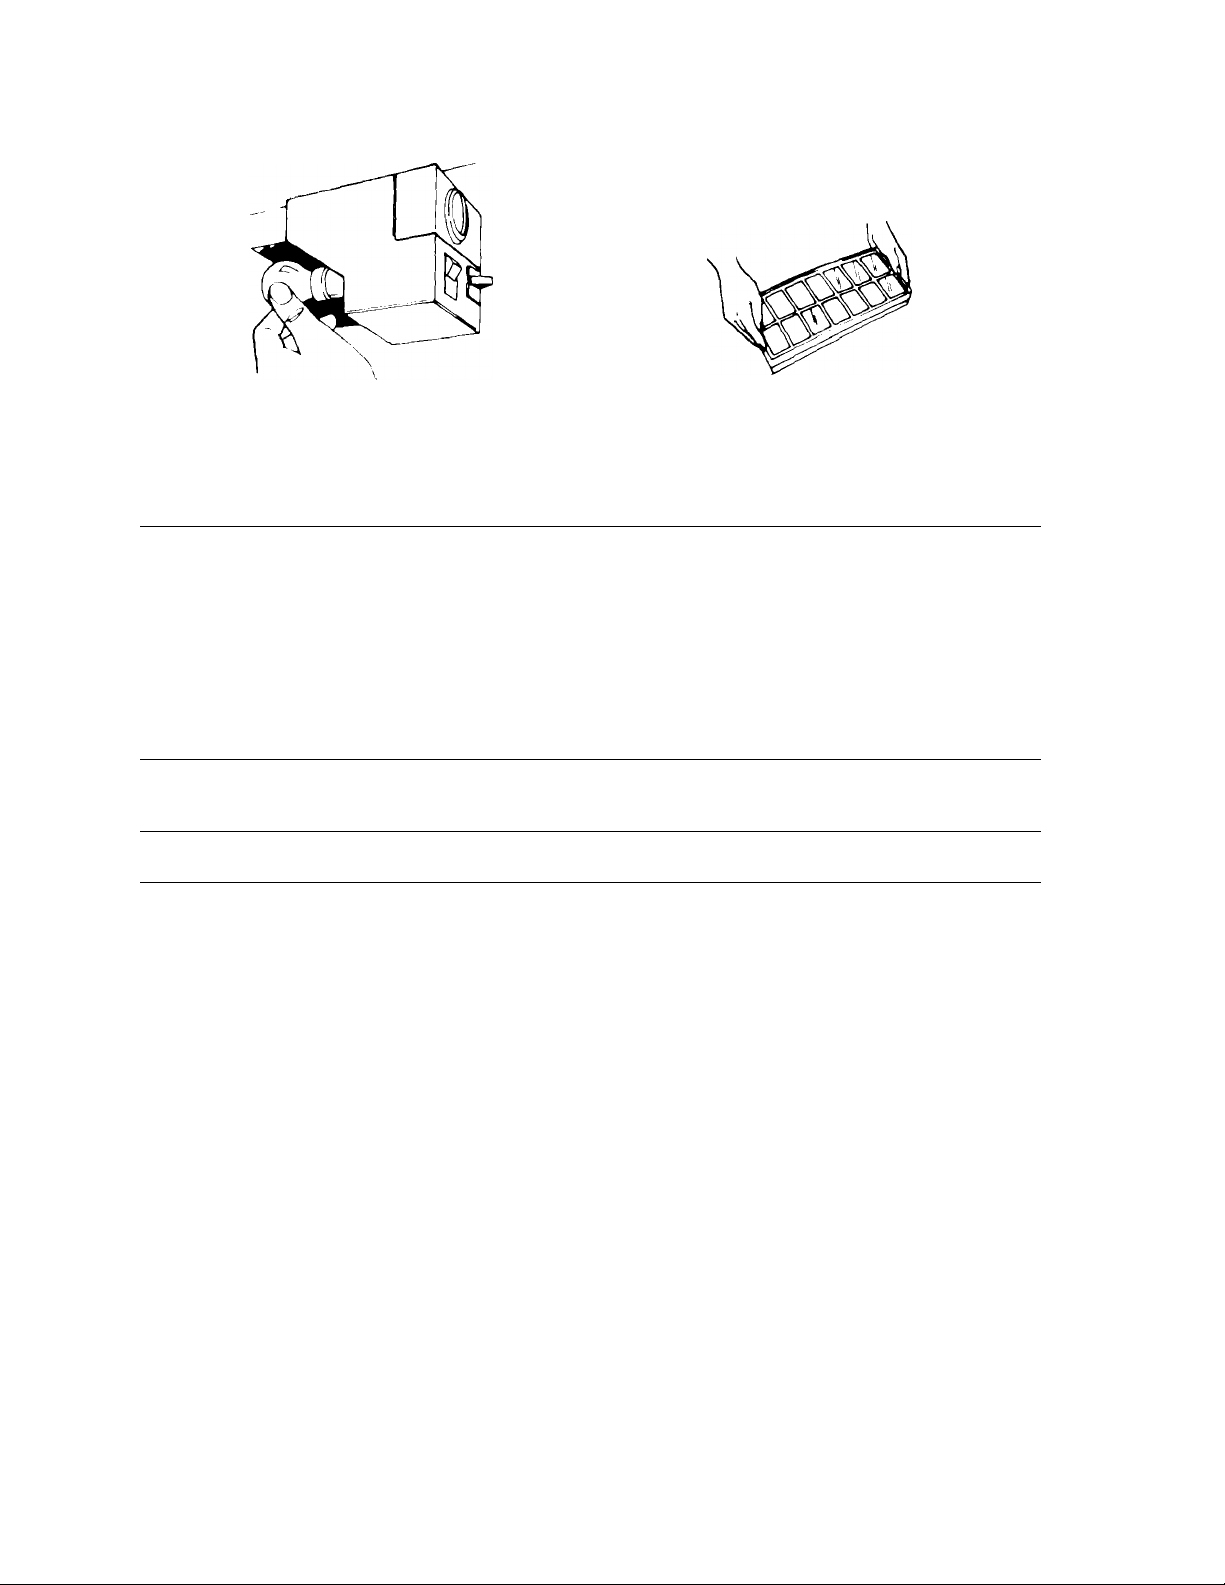
Changing the light bulb..
Ice cube trays...
To remove Ice:
• Hold tray at both ends
• Slightly twist
Unplug the refrigerator first.
1 Reach behind control console to find bulb
2 Remove bulc
3 nenr/nce w‘t! 'jo.o.''once only
Sounds you may hear...
Your new refrigerator may make sounds that your old one didn't
Because the sounds are new to you, you might be conoerned about
them Don't be. Most of the new sounds are normal Hard surfaces like
*he floor, walls and cabinets can make the sounds seem louder,
- The following chart describes the kinds of sounds that might be new
to you and what may be making them.
• Wafer Sounds
• Running Sounds:
When the refrigerator stops running, you may hear gurgling in the tubing for a
few minutes after it stops. You may also hear defrost water running into the
defrost water pan
Your refrigerator has a high-efficiency compressor and motor It will run longer
than older designs. It may even seem to run most of the time
If cubes are not used, they may snnnk. The moving
cold air starts a slow evaporation The longer cubes
are stored, the smaller they get
Energy saving tips...
You can help your refrigerator use less electricity,
• Check door gaskets for a tight seal. Level the cab
inet to be sure of a good seal
• Clean the condenser coil regularly.
• Open the door as few times as possible. Think
about what yoc' need before you open the door.
Get everything out at one time. Keep foods orga
nized so you won't have to search for what you
want. Close door as soon as tood is removed
• Go ahead ana fill up the refrigerator, but don't
overcrowd it so air movement is blocked
It is a waste of electricity to set the refrigerator and
freezer to temperatures colder than they need to
be. If ice cream is firm in the freezer and drinks are
as cold as your family likes them, that's cold
enough.
Keep the Power Saving Control on OFF unless
moisture forms on the refrigerator exterior.
Make sure your refrigerator is not next to a heat
source such as a range, water heater, furnace,
radiator, or in direct sunlight.
Page 7
Cleaning your refrigerator
Tne freezer section of your refrigerator needs
defrosting from time to time The fresh food section
defrosts automatically.
Both the fresh food and freezer compart
ments should be cleaned about once a month to
help prevent odors from building up. Of course, spills
should be wiped up right away.
To clean your refrigerator, turn the Tempera
ture Control to "OFF." Unplug it, take out all remov
able parts and clean it according to the following
chart
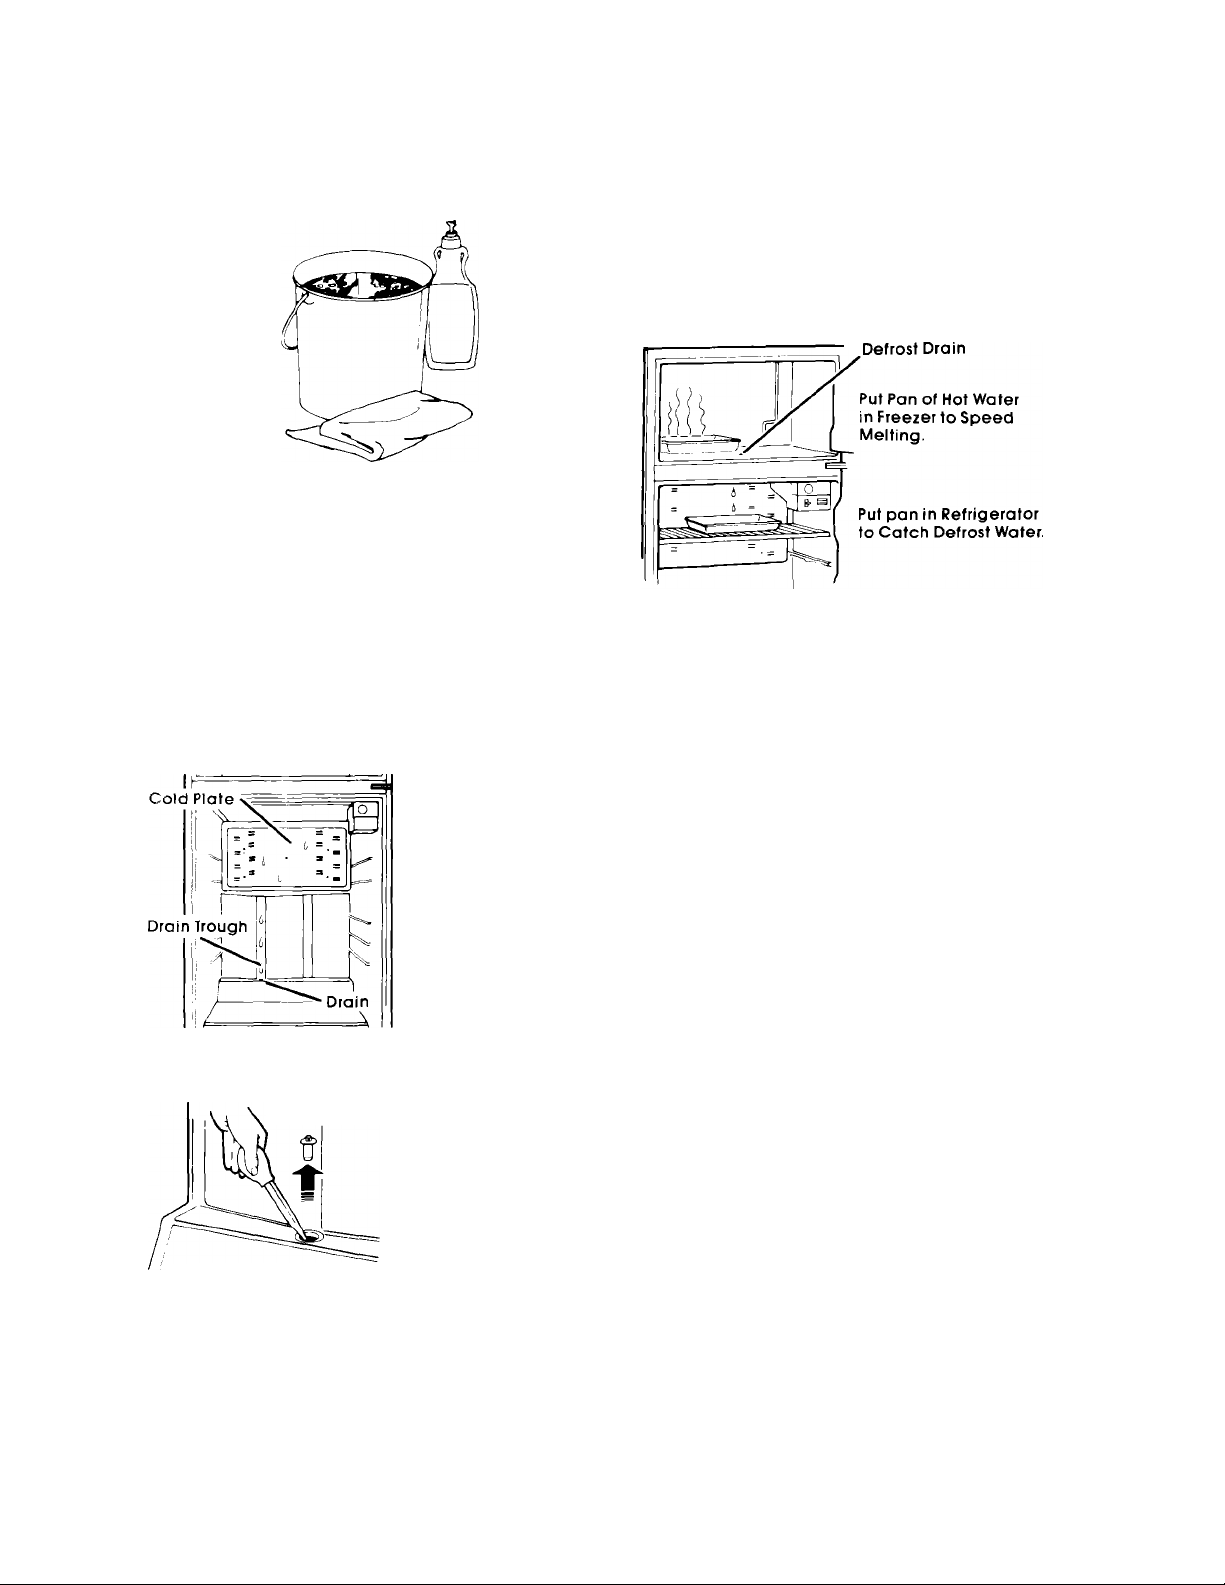
There is a cold plate on the back wall at the
mp of the fresh food compartment. When the refrig
erator motor runs, frost collects on the cold plate.
frigerator motor Heat from the motor evaporates the
water.
Remove
Drain Cap
Force Soda/Water
Solution Through
Drain
When the motor
turns off, the frost
melts
Water from
this melted frost drips
into a drain trough
just below the cold
plate. Then it runs
down the back wall
and through a drain
just above the cris
per. The drain leads
to a defrost water
pan on top of the re
If the drain be
comes clogged, re
move the drain cap.
Force warm water
mixed with baking
soda through the drain
until the water flows
through freely. Replace
the cap. Make sure it is
pushed all the way
down.
Defrosting the freezer...
The freezer section should be defrosted
whenever frost builds up to a 'A-inch (6 mm) thick
ness. DO NOT USE ANY TYPE OF ELECTRIC DEFROST
ER OR SHARP UTENSILS [ICE PICK, KNIFE, ETC.) to
speed defrosting. These can cause damage.
Put empty pan in the refrigerator on the top shelf
in the center
Move frozen food and ice to the refrigerator
section.
Turn the Temperature Control to "OFF."
Close the refrigerator door. Leave the freezer door
open.
Put a pan of hot water in the center of the freezer.
This helps melt frost. Don't place pan over drain
hole in center of freezer.
Defrost water will drain through a hole in the bot
tom of the freezer into the pan you put in the
refrigerator. You may have to melt frost from the
drain hole by pouring a little hot water around the
hole.
Wash the inside of the freezer with a solution of
two tablespoons [30 mg) of baking soda and
one quart [1 L) warm water. Rinse well and dry.
Remove the pan of defrost water from the refrig
erator; put frozen food and ice back into freezer.
9.
Reset the Temperature Control.
Page 8

Cleaning chart.
Part What to use
Removable parts
(shelves, crisper, )
Outside
Inside walls (Freezer
should be allowed to
warm up so cloth won't
stick.)
Door liners and gaskets
Dark panels
Mild detergent and
warm water
Sponge, cloth or paper • Wash with warm water and a mild de
towel, mild detergent tergent. Do not use abrasive or harsh
appiianoe wax (or gooa cleansers,
auto paste wax) • IRinse and dry
Waxing painted metal surfaces provides rust protection.
Sponge, soft cloth or
paper towel, baking
soda, warm water, mild
detergent
Sponge, soft cloth or
paper towel, mild
detergent, warm water
DO NOT USE Cleaning waxes, concentrated detergents,
bleaches or cleansers containing petroleum on plastic parts.
Mild detergent and
warm water, soft, clean
sponge and soft, clean
cloth
DO NOT USE paper towels, window sprays, scouring cleansers,
or solvents like acetone, benzine, carbon tetrachloride, etc.
These can scratch or damage the material.
How to clean
• Wash removable parts with warm water
and a mild detergent
• Rinse and dry.
• Wax painted metal surfaces at least
twice a year with appliance wax ora
good auto paste wax. Apply wax with
a clean, soft cloth. Do not use wax
on plastic parts.
• Wash with warm water and
- mild detergent or
- baking soda ¡2 tablespoons | 26 g| to
1 quart ; 95 l) warmi water
• Rinse and dry
• Wash with mild detergent and warm
water
• Rinse and dry
• Wash with a soft gnt-free cloth or
sponge
• Rinse and dry with a damp gnt-free
cloth or chamois
Defrost pan Sponge, cloth or
paper towel; worm
water and mild
detergent
Condenser Coil
Use vacuum cleaner
with brush attachment
• The Defrost pan is bolted to the motor,
• Wash defrost pan with warm water and
mild detergent,
• Wipe clean and dry.
• Make sure defrost dram tube points into
pan
• Clean dust and lint from condenser coils
on back of the refrigerator at least every
other .month
Leave one inch [2 5 cm) between wall
and condenser coil on back of the
refrigerator
Page 9
Food storage guide
STORING FRESH FOOD
There is a right way to package and store refrig
erated or frozen foods. To keep foods fresher, longer,
take the time to study these recommended steps.
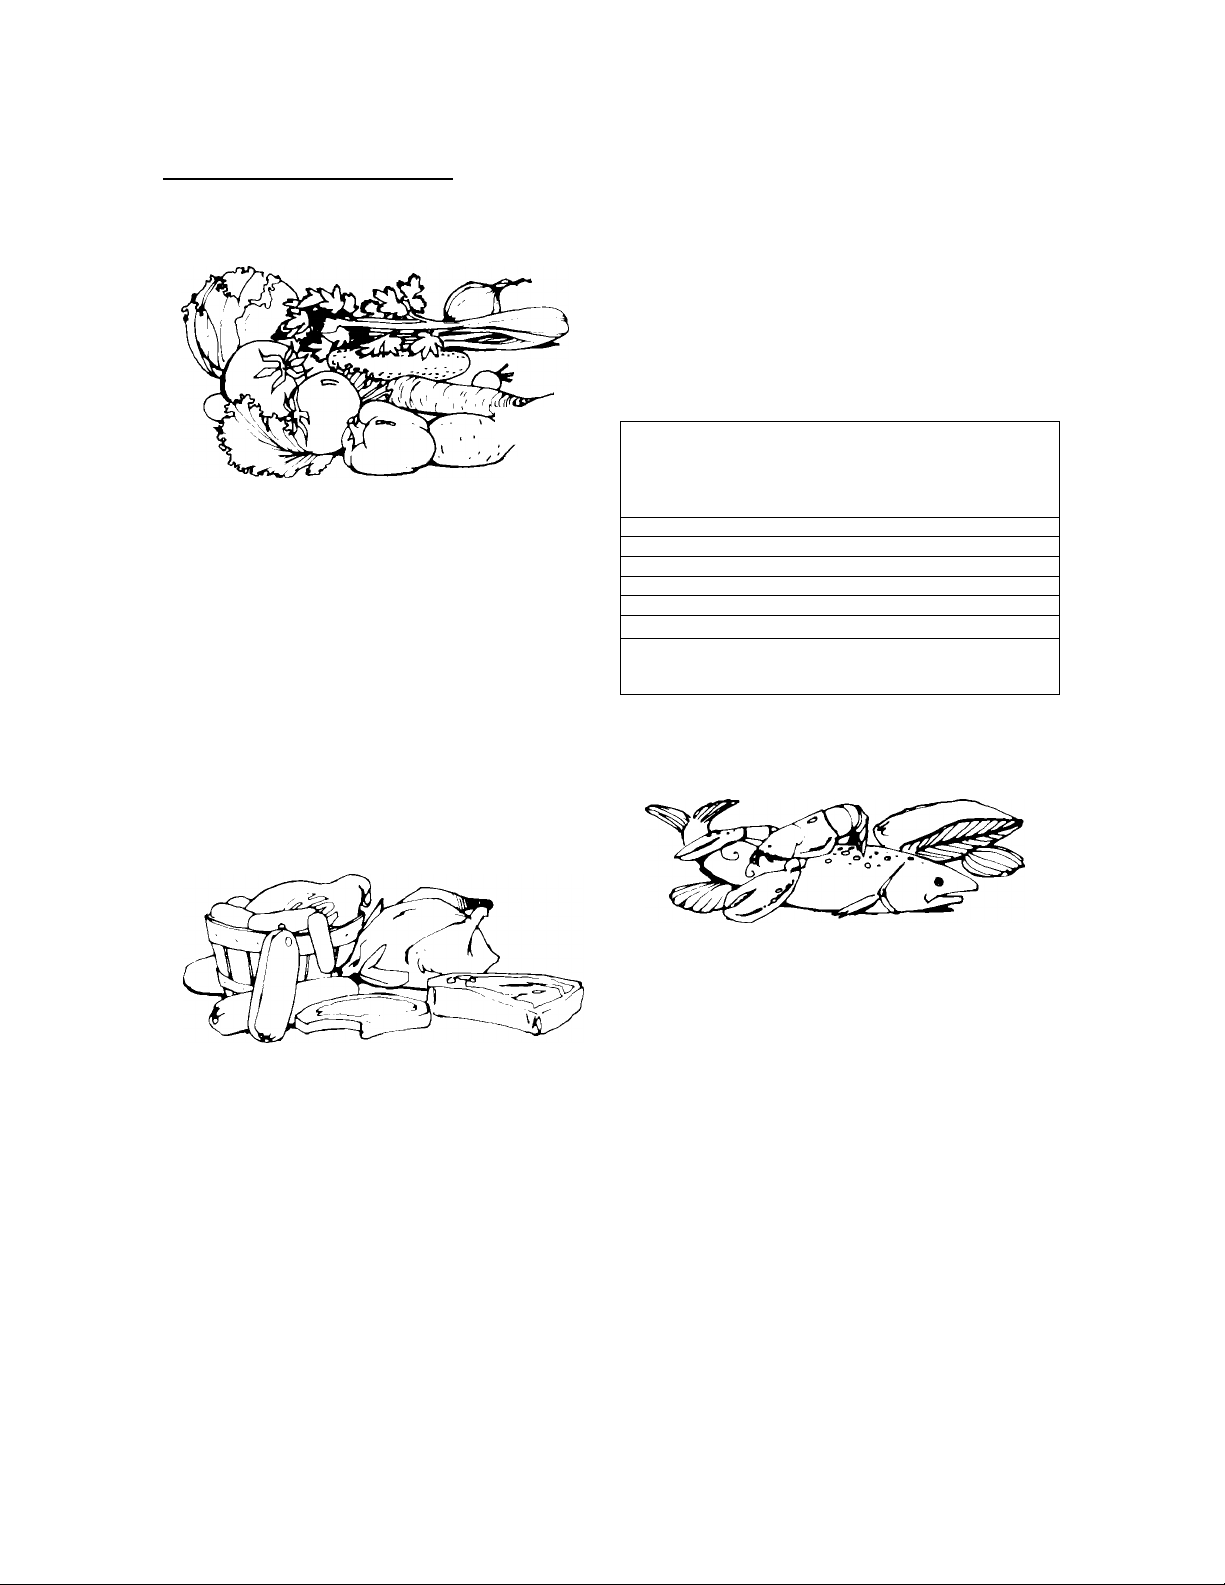
Leafy Vegetables... Remove the store wrapping
and trim or tear off bruised and discolored areas.
Wash in cool water, drain and store in crisper.
Vegetables with Skins (carrots, peppers).,.Store
n crisper, plastic bags or plastic container.
Fruits Wash, let dry and store in refrigerator in
plastic bags or crisper. Do not wash or hull berries
until they are ready to use. Sort and keep berries in
their store container in a crisper, or store in a loosely
closed paper bag on a refrigerator shelf.
Cured or Smoked Meat and Cold Cuts. Ham,
bacon, sausage, cold cuts, etc., keep best in origi
nal wrappings. Once opened, tightly re-wrap in
plastic wrap or aluminum foil
Canned Ham. Store in refrigerator unless the la
bel says it's okay to store on the shelf. Do not freeze
Fresh Poultry...Wrap in plastic wrap, flie plastic
wrap on poultry, as purchased, may be used for
storage.
STORAGE CHART FOR FRESH AND CURED MEAT*
Type
Variety Meats
Chicken
Ground Beef
Steaks and Roasts ..
Cured Meats ..............
Bacon
Cold Cuts
follow the directions for freezing.
NOTE: Fresh fish and shelifish should be used the
same day as purchased.
........................
•If meat is to be stored longer than the times given.
............
......................
..............
..................
Approximate Time
(days)
.......................
.......................
.......................
.......................
.......................
.......................
.......................
1 to 2
1to2
1 to 2
3 to 5
7 to 10
5 to 7
3to5
Meat' , Meat is perishable and expensive,..you
won't want to waste an ounce of it through careless
handling. The following list and chart give you pack
aging hints and time limits
Fresh, Prepackaged Meat. Store fresh meat in
the store wrapping. Vacuum packaged meat can
be frozen for as long as one month if the seal is not
broken. If you want to keep it frozen longer, you
should wrap it with special freezer wrapping material
Fresh Meat, Not Prepackaged. Remove the
market wrapping paper and re-wrap in aluminum foil
for storing it unfrozen.
Cooked Meat. Wrap or cover cooked meaf with
plastic wrap or aluminum foil. Store immediately.
Eggs , . . Store without washing in the original
carton or use the egg nest in the door of your
refrigerator.
Milk,,.Wipe milk cartons. For best storage, place
milk on interior shelf.
Beverages...Wipe bottles and cans. Store on a
door shelf or inside the refrigerator.
Butter ,.Keep opened butter in covered dish or in
the Butter Compartment. When storing an extra sup
ply, wrap in freezer packaging and freeze.
Cheese , , .Store in the original wrapping until
you are ready to use it. Once opened, re-wrap
tightly in plastic wrap or aluminum foil.
Condiments , . .Store small jars and bottles (cat
sup, mustard, jelly, olives) on the door shelves where
they are in easy reach.
Leftovers...Cover ieftovers with plastic wrap or
aluminum foil to keep food from drying out and
transferring food odors. Plastic containers with tight
lids are fine, too
Page 10
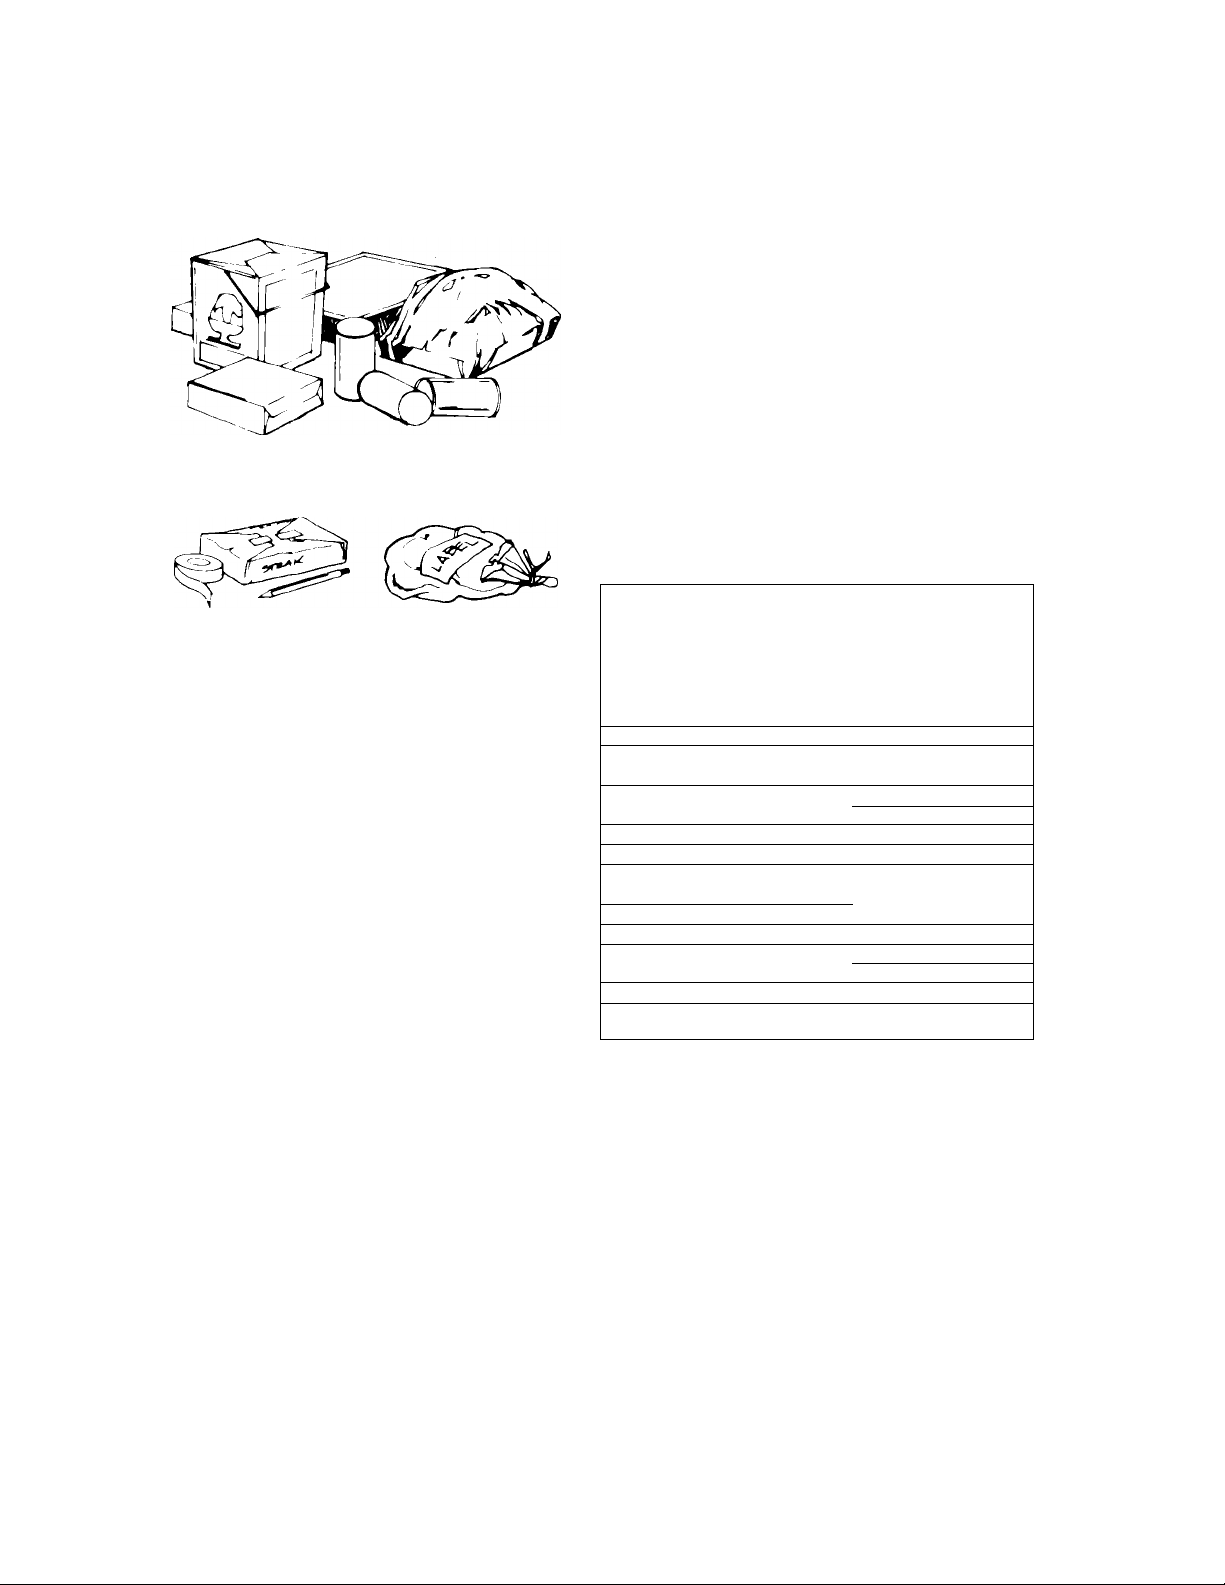
STORING FROZEN FOOD
"rie freezer se on is designed for storage of com-
oeooal'v doze'i foods and for freezing foods at
■"'ome
Packaged Frozen Food . . .Store on freezer door
shelf or in the freezer. If you plan to store it for a long
time, re-wrap it with aluminum foil or plastic wrap
Frozen Meats" ...The following hints will help
keep the quality in your frozen meats:
1.
Freeze meat while fresh and in top condition
2,
Use only recommended wrapping materials.
3.
Prepare the meat for freezing before wrap
ping it. Trim off excess fat and remove bones
when practical. Meat should not be salted
because salt shortens freezer life.
Wrap tightly, pressing out as much air as
possible.
5,
Label and date it,
6,
Refreezing thawed meat is not recommiended
Frozen Soups, Juices . , .Store on freezer door
shelf or in the freezer.
Packaging
r' *he packagir
n-'osf^jre ana vc
seal 'ne prjcko
.aooo r O' out
Rigid fioiyeth',
n*n-,g has stra
neanv au'y alun
■ on-rie^meabie
■ecomrnended '
easy to use ana
sarton liners
IMPORTANT: Do not expect your treezer to quickfreeze any large quantity of food. Leave enough
space for air to circulate around packages. Be
careful to leave enough room at the front so the
door can close tightly.
Ice Cream., '-tore ¡n the freezer. Once the pack-
.::ye is operied. place a p^ece of aluminum foil or
oaxed paper smoChiy against the ice cream sur
' .¡ce 'h .h prn,,-erif ice crystals from forming
ne seoret of successful freezing is
g rtie wrap you use must be air,
cor proof The way you close and
je must not allow air, moisture or
ene (plastic) containers with tight-
„bif-sided canning freezing jars,
num foil plastic-coated paper and
plastic wraps (such as saran] are
\ioie. Heat-sealed boiling bags are
can be used by themselves or as
Vacation and moving care
STORAGE CHART FOR FROZEN FOOD
Storage times given in this chart are only a
guide. For best use of freezer space, keep fro-
zen foods for short times. Use, then replace as
needed.
Bread
................................
Cooked Dishes
Fish and Seafoods
Fresh .............................
Commercially Frozen
Fruits
................................
Ice Cream
Concentrated Juice
Meats
Bacon
Pork roasts, chops ....
Sausage ........................
Beef, veal, lamb roasts
Ground meat
Poultry
Vegetables
‘Courtesy of National Live Stock and Meat Board
'Courtesy of U.S.D.A.
.................
..........................
_____
............................
.................
..........................
.......................
.........
2-3 months
............
.........
............
..............
Less than 1 month
6 months
1-3 months
6 months
1 month
.......
4-6 months
.......
3-4 months
.........
1-2 months
..........
6 months
.........
1-2 months
.......
3-4 months
...........6 months
Short vacations. . .
No need to shut off the refrigerator if you will be
away (or less than four weeks. Use up perishables,
freeze other iterr ,
Long vacations. . .
Remove aH the 'ood if you are going for a month
O' more
Unplug the refrigerator and clean it,..rinse well
and dry. Tape rubber or wood blocks to both doors
keeping them open far enough for air to get in.
This will keep odor and mold from building up.
Tape the blocks out of a child’s reach...do
not allow children near the refrigerator when
the doors are blocked open.
To restart refrigerator, see "Using Your Refrigerator,'
Page 11
Moving...
Remove all food. Pack frozen foods in dry ice.
Unplug the refrigerator and clean it thoroughly.
Remove everything that comes out. Wrap all parts
well and tape them together so they don't shift and
rattle.
Screw in the leveling legs; tape the doors shut;
tape the electric cord to the cabinet. When you get
to your new home, put everything back, level it,
and refer to page 4,
If you need service or
assistance, we suggest
you follow these four steps:
1. Before calling for assistance... 3.
Pertormance problems often result from little things
you can tind and tix yourselt without tools of any kind.
If your refrigerator will not operate:
• Is the electric cord plugged in?
• Is a fuse blown or a circuit breaker tripped?
• Is the Temperature Control turned ON?
If there Is a rattling or jingling noise, or other unfamiliar sounds:
• Is something on top or behind the refrigerator mak
ing noise when the refrigerator is running?
If there Is wafer in the defrost pan:
• In hot, muggy weather, this is normal. The pan can
eæn be half full Make sure the refrigerator is level
sc the pan doesn't overflow.
If the light doesn’t work;
• Check fuses and circuit breakers. Make sure it's
plugged in
if a buib is burned out:
• See instructions for changing light bulbs on page
6, Use appliance bulbs only.
If the motor seems to run too much:
• Is the condenser free of dust and lint?
• On hot days, or if the room is warm, the motor
naturally runs longer.
• if the door has been opened a lot, or if a large
amount of food has been put in, the motor will run
longer to cool down the interior.
Remember; Motor running time depends on dif
ferent things: number of door openings, amount of
food stored, temperature of the room, setting of fhe
controls.
and talk with one of our trained Consultants, The
Consultant can instruct you in how to obtain satisfac
tory operation from your appliance or, if service is
necessary, recommend a qualified service com
pany in your area.
If you need service*...
Whirlpool has a na
tionwide network of
franchised TECH-CARE"
Service Companies.
Whir >ool
TECH-CARE service
technicians are trained
to fulfill the product
warranty and provide
rfG//-CA^f
FRANCHISED SERVICE
after-warranty service,
anywhere in the United
States, To locate
TECH-CARE service in your area, call our COOL-LINE
service assistance telephone number (see Step 2) or
look in your telephone directory Yellow Pages under .
APPLIANCES—HOUSEHOLDMAJOR—SERVICE & REPAIR
whirlpoolappliances
FRANCHISED TECH-CARE SERV
123 Maple
•S'i.'/?\lCh: (
WASHING MACHINES, DRYERS
& IRONERS—SERVICING
WHIRLPOOLAPPLIANCES
FRANCHISED TECH-CARE SERVICE
XV2 SERVICE CO
123 Maple 999-9999
Vii SERVICE CO
999-9999
SERVICE ('OMPAMES
ELECTRICAL APPLIANCES—
MAJOR—REPAIRING & PARTS
OR
WHIRLPOOLAPPLIANCES
¡FRANCHISED TECH-CARF SERVICE
XYZ SERVICE CO
OR
SKR VICE COMRAMES
123 Maple 999-9999
4. If you have a problem*...
Call our COOL-LINE service assistance telephone
number (see Step 2] and talk with one of our Consul
tants, or if you prefer, write to
Mr. Stephen E. Upton
Senior Vice President
Whirlpool Corporation
Administrative Center
2000 US-33 North
Benton Harbor, Ml 49022
*lf you must call or write, please provide: model
number, serial number, date of purchase, and a
complete description of the problem. This Informa
tion is needed in order to better respond to your
request for assistance.
2. If you need assistance*...
Call Whirlpool COOL-LINE'!^ service assis
tance telephone number. Dial free from:
Continental U.S
Michigan
Alaska & Hawaii
.......................
..................................
.....................
(800)253-1301
(800)632-2243
(800) 253-1121
PSP IS a registered trademark of Whirlpool
Corporation for quality parts. Look for this symbol
of quality whenever you need a replacement
pari for your Whirlpool appliance. FSP
replacement parts will fit right and work right,
because they are made to the same exacting
specifications used to build every new
Whirlpool appliance
Page 12
WhirlDOol
Making your world a little easier
Part No. 942261 Rev. A
©1985 Whirlpool Corporation
Make rs D is hwa sh ers . Bu ilt -I n Ove ns a nd Su rf ac e U ni ts , R an ges , Mi cro wa ve O ven s, Tr as h Com pa ct ors , Ro om Ai r Co ndi ti on ers , De hum id tf ier s, A uto ma ti c W as he rs, C lot he s Dr y:r
Home^^. Appliances
Printed in U S A
 Loading...