

Whirlpool EH180FXK, EH150FXK User Manual
Whirlpool
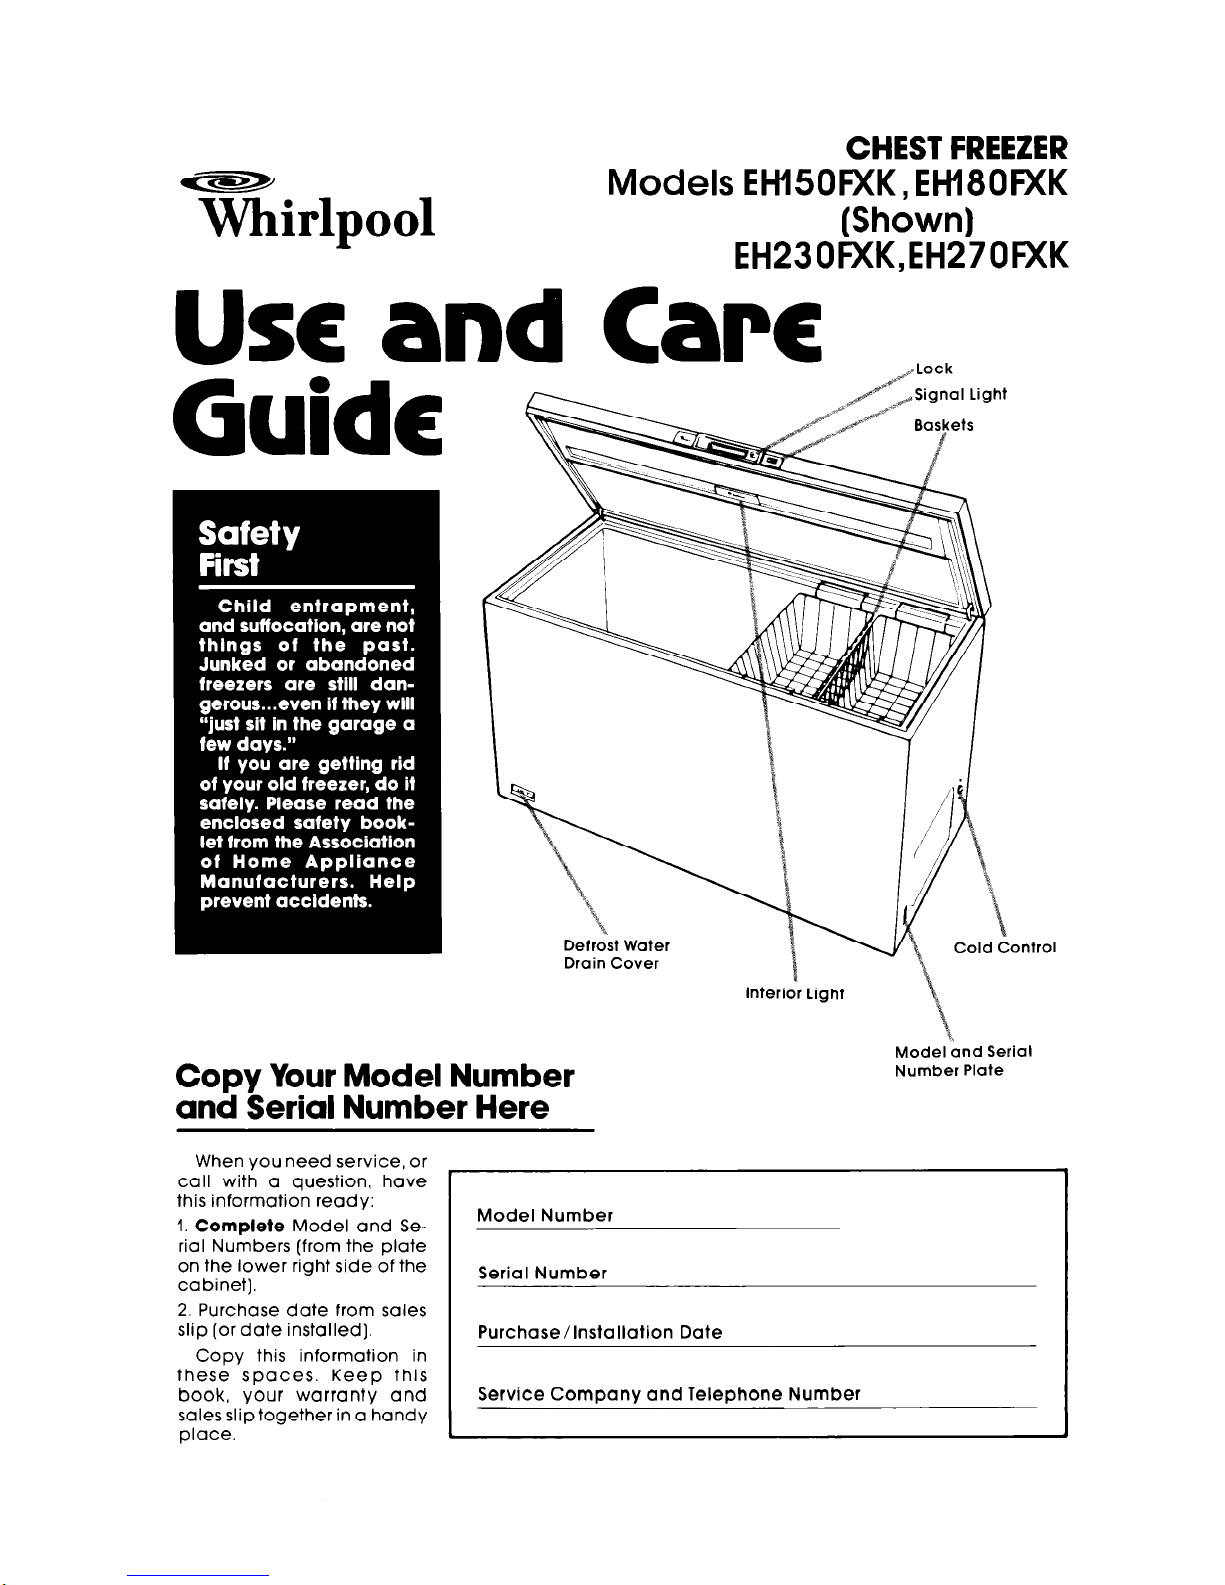
CHEST FREEZER
Models EHISOFXK, EHl80FXK
(Shown)
EH230FXK,EH270FXK
USC
and Cars
,Lock
Guide
Interior Light
Copy Your Model Number
and Serial Number Here
Model bnd Serial
Number Plate
When you need service, or
call with a question, have
this information ready:
1. Complete Model and Serial Numbers (from the plate
on the lower right side of the
cabinet).
2. Purchase date from sales
slip [or date installed).
Copy this information in
these spaces. Keep this
book, your warranty and
sales slip together in a handy
place.
Model Number
Serial Number
Purchase/Installation Date
Service Company and Telephone Number
Before you plug it in
Before using your freezer, you are personally
responsible for making sure that it...
l
is installed and leveled on a floor that will
hold the weight, and in an area suitable for
its size and use.
l
is connected only to the right kind of outlet,
with the right electric supply and grounding
(see below).
l
is used only for jobs expected of home
freezers.
Install Properly...
l
is not near an oven, radiator or other heat
source.
l
is properly maintained.
l
is in a dry sheltered area
l
is used in an area where the room temperature will not exceed 110-F (43.3 C].
l
is not run where there are explosive fumes.
l
is not used by children or others who may not
understand how it should be used.
l
is not loaded with food before it has time to
get properly cold.
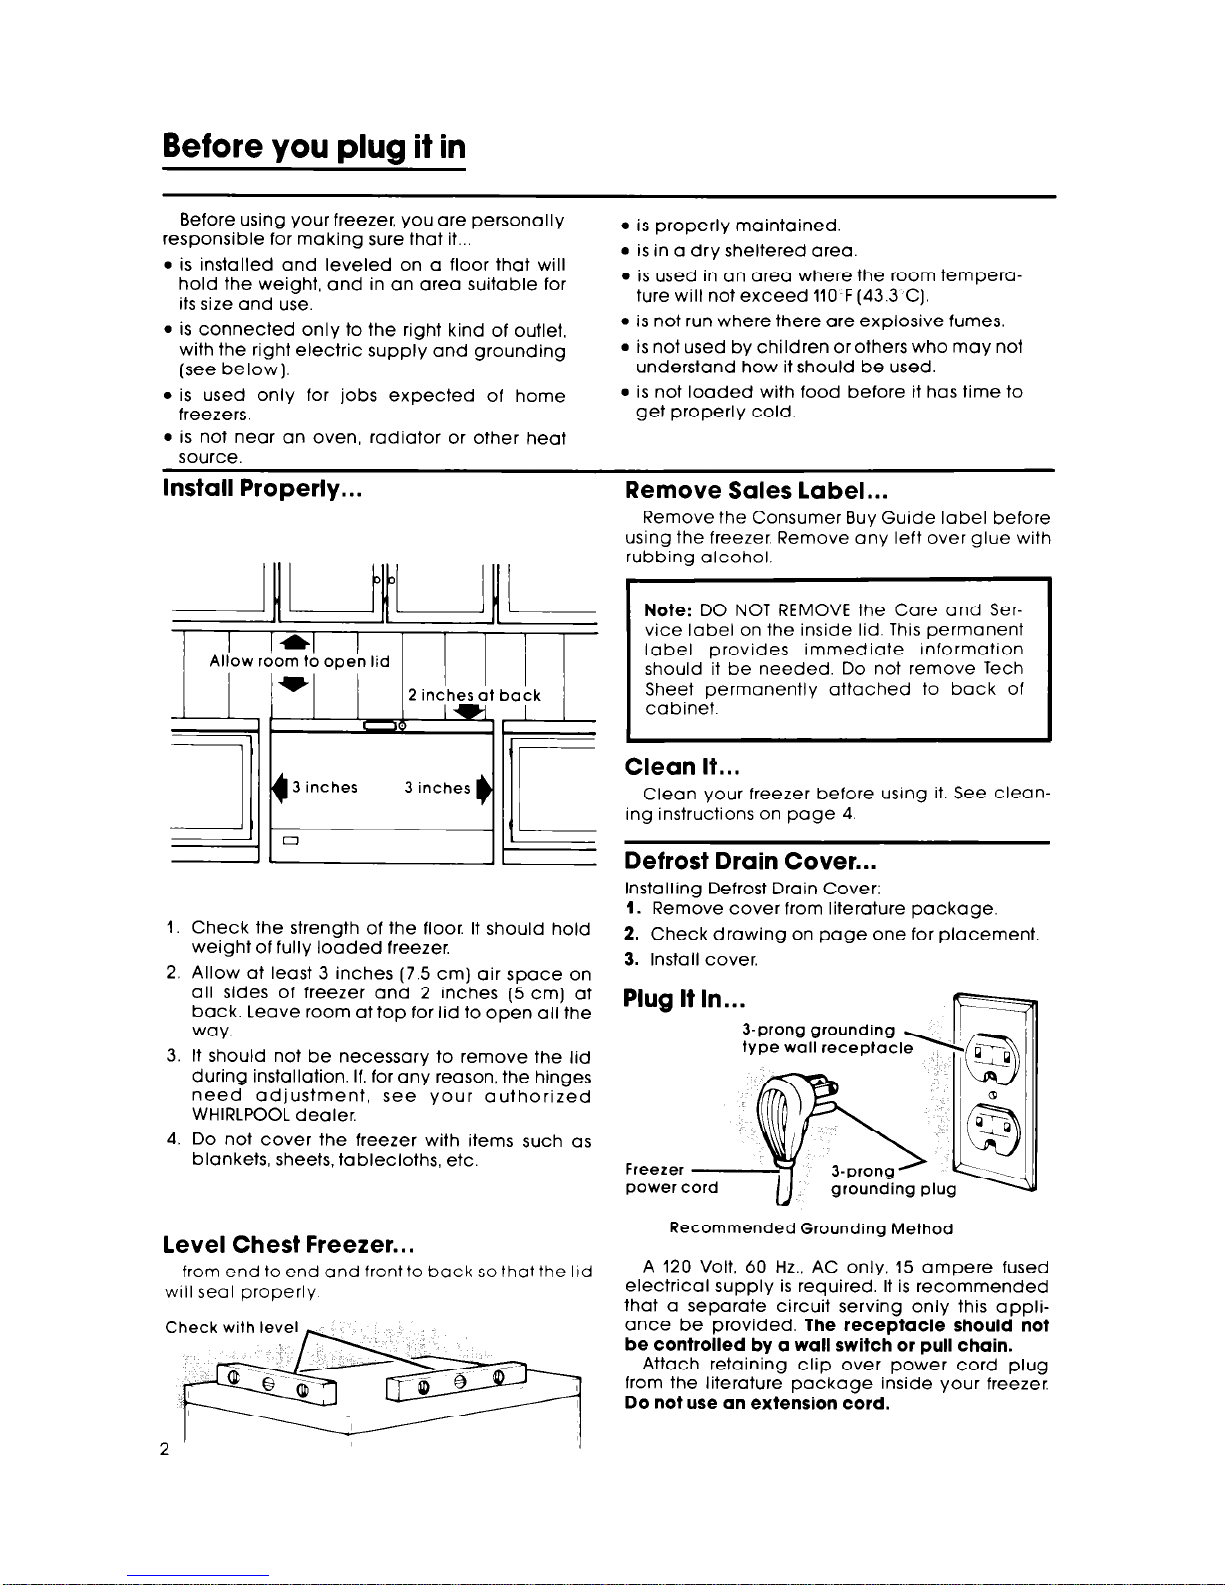
Allow room to ooen lid
w
I I
2 inches at
1 10
Iwl,
3 inches 3 inches
I
back
1. Check the strength of the floor. It should hold
weight of fully loaded freezer.
2. Allow at least 3 inches (7.5 cm) air space on
all sides of freezer and 2 inches (5 cm) at
back. Leave room at top for lid to open all the
way.
3. It should not be necessary to remove the lid
during installation. If, for any reason, the hinges
need adjustment, see your authorized
WHIRLPOOL dealer.
4. Do not cover the freezer with items such as
blankets, sheets, tablecloths, etc.
level Chest Freezer.. .
from end to end and front to back so that the lid
will seal properly
Check
with level
2~
Remove Sales label...
Remove the Consumer Buy Guide label before
using the freezer. Remove any left over glue with
rubbing alcohol.
Note: DO NOT REMOVE the Care and Service label on the inside lid. This permanent
label provides immediate information
should it be needed. Do not remove Tech
Sheet permanently attached to back of
cabinet.
Clean It...
Clean your freezer before using it. See cleaning instructions on page 4.
Defrost Drain Cover...
Installing Defrost Drain Cover:
1. Remove cover from literature package.
2. Check drawing on page one for placement.
3. Install cover.
Plug It In...
Recommended Grounding Method
A 120 Volt, 60 Hz., AC only, 15 ampere fused
electrical supply is required. It is recommended
that a separate circuit serving only this appliance be provided. The receptacle should not
be controlled by a wall switch or pull chain.
Attach retaining clip over power cord plug
from the literature package inside your freezer
Do not use an extension cord.
Using your freezer
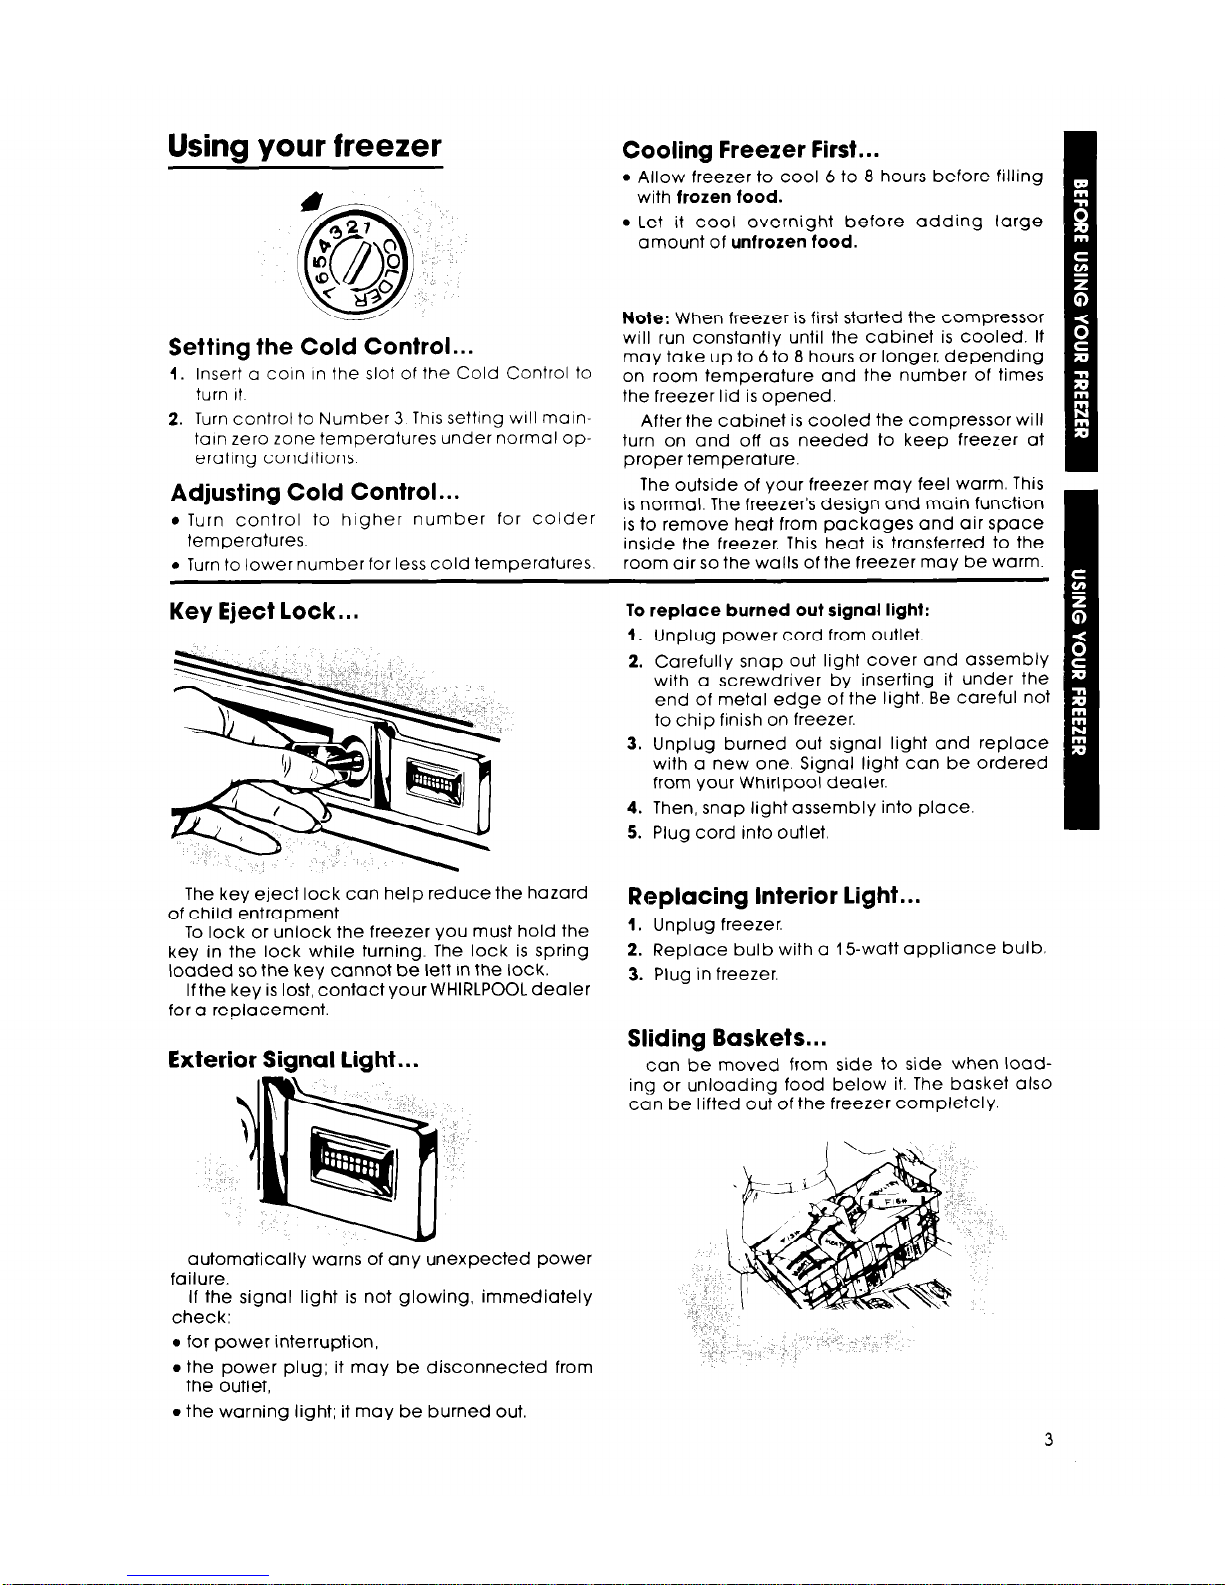
Setting the Cold Control...
1. Insert a coin In the slot of the Cold Control to
turn It
2. Turn control to Number 3 This setting will malntaln zero zone temperatures under normal operating conditions
Adjusting Cold Control...
l
Turn control to higher number for colder
temperatures
l
Turn to lower number for less cold temperatures.
Cooling Freezer First. . .
l
Allow freezer to cool 6 to 8 hours before filling
with frozen food.
l
let it cool overnight before adding large
amount of unfrozen food.
Note: When freezer is first started the compressor
will run constantly until the cabinet is cooled. It
may take up to 6 to 8 hours or longer, depending
on room temperature and the number of times
the freezer lid is opened.
After the cabinet is cooled the compressor will
turn on and off as needed to keep freezer at
proper temperature.
The outside of your freezer may feel warm. This
is normal. The freezer’s design and main function
is to remove heat from packages and air space
inside the freezer. This heat is transferred to the
room air so the walls of the freezer may be warm.
Key Eject lock.. .
The key eject lock can help reduce the hazard
of child entrapment.
To lock or unlock the freezer you must hold the
key in the lock while turning. The lock is spring
loaded so the key cannot be left in the lock.
lfthe key is lost, contact your WHIRLPOOL dealer
for a reolacement.
Exterior Signal Light...
automatically warns of any unexpected power
failure.
If the signal light is not glowing, immediately
check:
0 for power interruption,
l
the power plug; it may be disconnected from
the outlet,
l
the warning light; it may be burned out.
To replace burned out signal light:
1.
2.
3.
4.
5.
Unplug power cord from outlet.
Carefully snap out light cover and assembly
with a screwdriver by inserting it under the
end of metal edge of the light. Be careful
not
to chip finish on freezer.
Unplug burned out signal light and replace
with a new one. Signal light can be ordered
from your Whirlpool dealer.
Then, snap light assembly into place.
Plug cord into outlet.
Replacing Interior light. . .
1. Unplug freezer.
2. Replace bulb with a 15watt appliance bulb.
3. Plug in freezer.
Sliding Baskets...
can be moved from side to side when loading or unloading food below it. The basket also
ccin be lifted out of the freezer completely.
 Loading...