

Whirlpool EEV 202X User Manual
AVhirlpool
Use and Care
Guide
To help you get
UPRIGHT FREEZER
Model EEV 202X
the most from your
new freezer
Before you freeze the first apple
pie, you will waritto know all
about your new Whirlpool
freezer. That's what this Use and
Care Guide is all about. Ittells
you howto start it, fill it, clean it...
even what to do if anything goes
wrong. See handy Self-service
Check List on back page of
simple problems you can solve
yourself without the wasted time
and possibleexpenseofa need
less sen/ice call. After all, who
needs a service technician to
plug back in an electric cord
that’s been accidentally
pulled out?
Safety first
Prevent child
entrapment
Please read the safety booklet
from the Association of Home
Appliance Manufacturers
that is packed in your freezer.
Help prevent accidents if
you plan to abandon or
"junk" an old freezer.
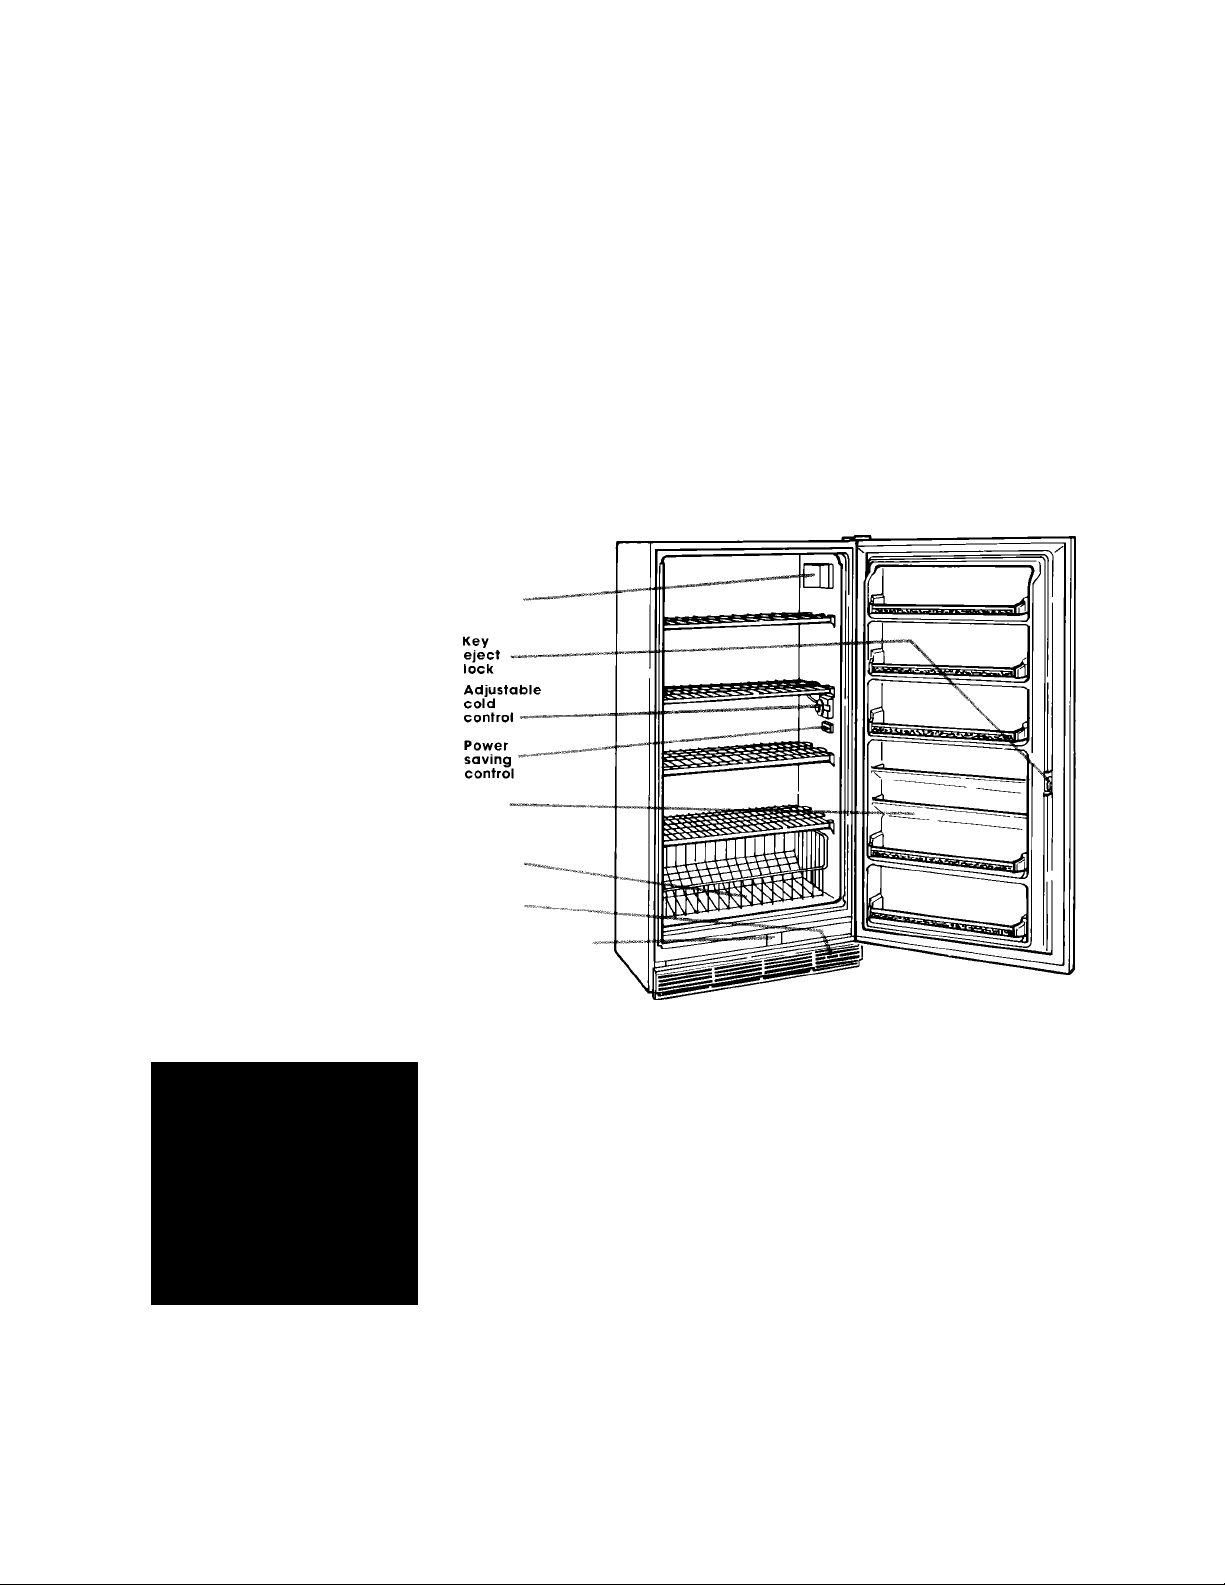
Interior
light
Juice
can
shelves
Built-in
defrost
drain
Signal .
light
Model and serial
number plate
Before you use
your freezer
• Be sure your freezer is properly
installed in an appropriate level
area and a place suitable for
the size, function and protection
of the freezer.
• Properly conneetto electricity.
• Remove the Consumer Buy
Guide label before freezer is
used.
• Do not remove TECH SHEET
fastened behind the base grille.
It contains technical information
required by your service
technician.
• Do not permit children to
operate or play with the freezer.
• REMEMBER: Use the appliance
only for the job it was designed
to perform.
(See booklet, How to
Preserve Foods the
Modern Way with Your
WHIRLPOOL Freezer, tor
complete information
and tips on home
freezing.)
Before starting your freezer
1. Locate it properly - For best
performance, your freezer
should be located in a coal, dry
well-ventilated place outofthe
direct sunlight and away from
such heat sources as radiators.
The freezer may be installed
flush against the wall and the
cabinets on each side. Also,
check the strength of your floor.
Makecertain itcansupportthe
weight of the freezer when
loaded.
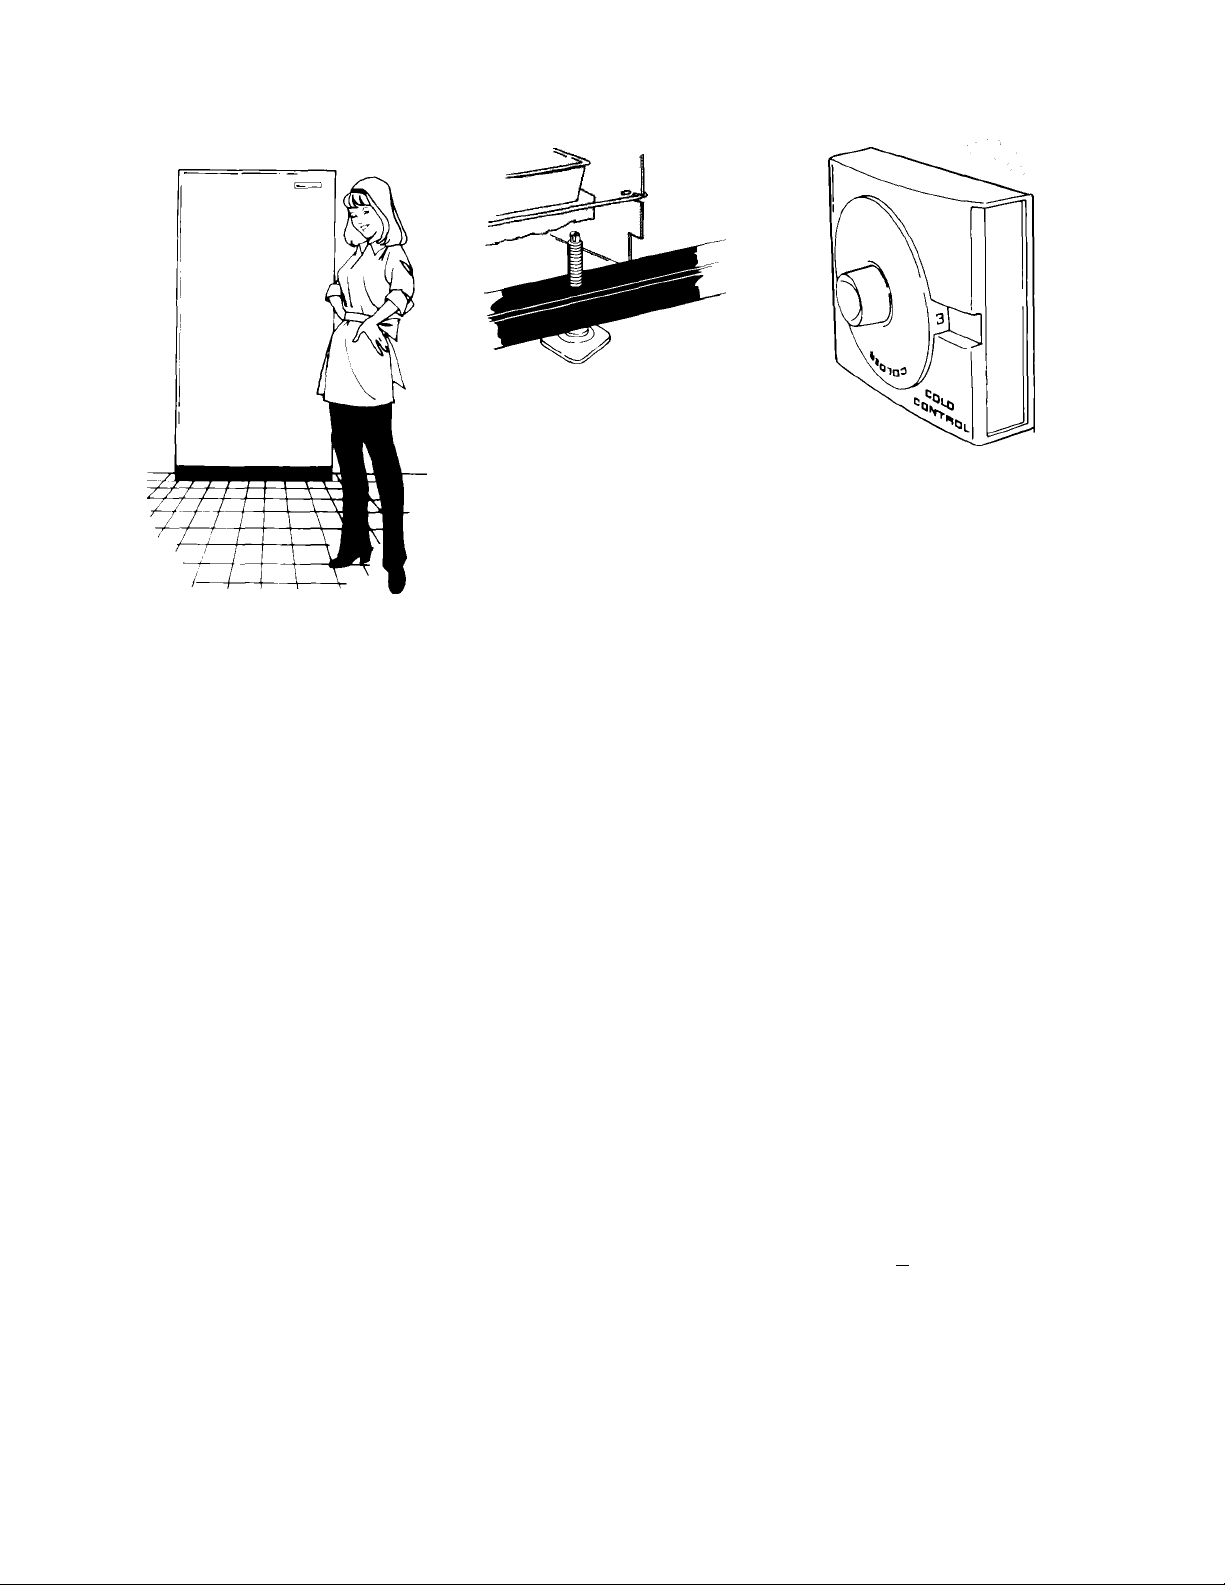
2. Keep it level - Level your
freezer by adjusting the two
leveling legs at the front corners.
(Adjust door-hinge side first.) Turn
left to raise the corner; right to
lower it. When freezer is sitting
level, the freezer door (when
opened) will stay at any open
position. After the freezer has
been filled, recheck to see if it is
sitting level.
NOTE: Before turning freezer on,
you may wantto wash the inside
of the freezer with a solution of
two tablespoons baking soda to
a quart of warm water. Rinse
thoroughly and dry.
To start freezer
Electrical Connection - Your
freezer should be connected to
its own individual outlet, one not
controlled by a wall switch.
Make sure the outlet provides 120
volt, 60 Hz AC current. For your
safety, the power supply cord of
the freezer is equipped with a
three-pronged grounding plug.
Itshould be plugged into a
matching grounded three
pronged type wall receptacle.
Attach retaining clip for cord
plug Do not remove the ground
prong. See electrical require
ments and grounding in
structions sheet for complete
information.
Set cold control - The cold
control is located inside your
freezer on the right wali. To start,
turn cold control to middle of
dial. This position will maintain
zero zone temperatures under
normal operating conditions.
Turn the cold control to a higher
number for colder temperatures
or a lower number for less cold
temperatures.
Let freezer cool before filling -
Allow freezer to cool 6 to 8 hours
before filling with frozen food.
Let it cool overnight before add
ing a quantity of fresh food to be
frozen. As freezer cools, you will
see frost forming on the shelves.
It is normal forthe frost to form
first on the top shelves, and be
heaviest there.
NOTE: When freezer first starts, the
compressor will ruh all the time
until the cabinet is cooled to
selected temperature. This first
cooling may take 6 to 8 hours or
longer depending upon the
weather and the humber of times
the freezer door is opened. After
the cabinet has cooled, the
compressor turns off. It will turn
on and off as needed to keep
the freezer at selected
temperature.
¡flower saving conirol
The Power Saving Control is lo
room humidity
lo on
save povv^r on lo settihg
cated inside the freezer. It con
trols electric heaters in the walls
of the freezer that helps reduce
condehsatioh of moisture oh the
outside of the freezer during
periods of high humidity. When
humidity in room is high, push
switch toward HI to prevent
condensation. When humidity is
low, push switch toward LO to
conserve electricity.
Taking care of
Exterior signal light - Located on
the right side of the base grille,
automatically indicates any
power interruption to the freezer.
When power is being supplied,
the light will glow If light does
not glow, check immediately.
The electric current may be ott;
the freezer may be discon
nected from the outlet; orthe
warning light may be burned
out.
your freezer
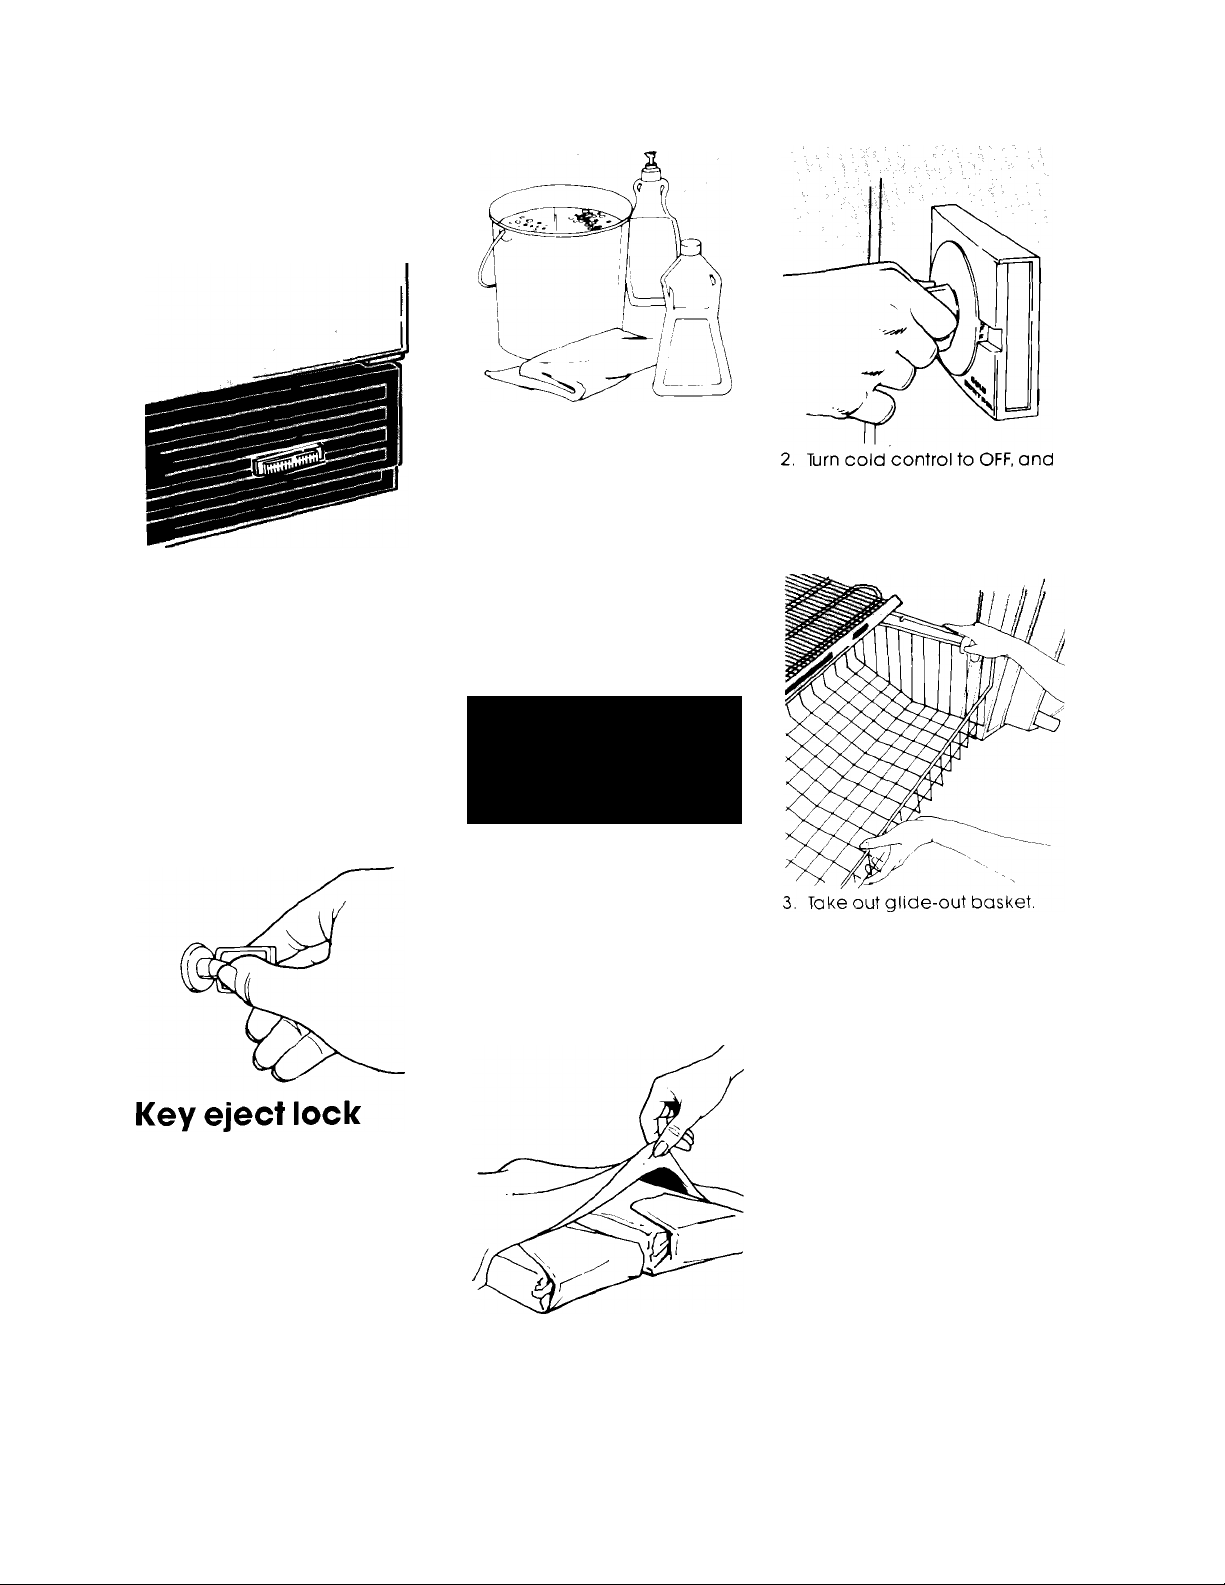
Defrosting and cleaning
Complete defrosting should be
done about once a year. Eor in
between defrosting, remove
frost by scraping with a plastic
scraper Do not use an ice pick,
knife or other sharp-pointed
tool. You could damage the
refrigerant coils.
Caution: Do not use any type
of electric defroster to speed
the defrosting of the freezer.
The heat can cause damage
to some of the interior parts
suoh as the breaker strip.
FOLLOW THESE
STEPS WHEN
DEFROSTING AND
CLEANING:
disoonnect service cord
from wall outlet.
Wash in warm, soapy water;
rinse and dry.
To remove glide-out basket at
bottom, pull it out until it stops.
Lift basket up and out. To
replace, insert basket into
rear slides and lower into
position. Push basket into
freezer.
Your freezer is equipped with a
key eject lock which can help
reduce the hazard of child en
trapment. To lock or unlock the
freezer it is necessary to man
ually hold the key in the lock
while turning. The lock is
spring loaded so the key can
not be left in the lock
If key is lost, a replacement can
be obtained from your dealer or
a Whirlpool TECH-CARE service
agent. Always give complete
model and serial numbers of
your freezer when requesting a
replacement key
Remove frozen foods and
wrap packages individually
in several thicknesses of
newspaper and cover with a
blanket. Food handled this
way will stay frozen several
hours
 Loading...