

Whirlpool EEV 201 X User Manual
Whirlpool
Use and care
Interior
light
guide
UPRIGHT FREEZER
Model EEV201X
Model and serial
number plate
To help you get the most from your new freezer Before starting your freezer
^before you freeze the first apple pie, you will w'ant to know
all about your new Whirlpool freezer. That’s w'hat this Use
and Care Guide is all about. It tells you how to start it, fill it,
I lean it . . . even w'hat to do if anything goes W'rong.
Self-service Check List on back page of simple problems you
can solve yourself without the wasted time and possible exjiense of a needless service call. After all, who needs a service
man to plug back in an electric cord that’s been accidentally
])ulled out?
See handy
Before you use your freezer
• Be sure your freezer is properly installed in an appropriate
level area and a place suitable for the size, function and
protection of the freezer.
• Properly connect to electricity.
• Remove the Consumer Buy Guide label before freezer is
used.
• Do not remove TECH SHEET fastened behind the base
grille. It contains technical information required by your
serviceman.
• Do not permit children to operate or play with the
freezer.
• REMEMBER: Use the appliance only for the job it w^as
designed to perform.
•
1. Locate it properly — For best performance, your freezer
should be located in a cool, dry, well-ventilated place out of
the direct sunlight and away from such heat sources as radi
ators. Allow space above and at the back of freezer for air
to circulate — at least 3" above and 1" at the back between
the condenser and the w'all. Also, check the strength of your
floor. Make certain it can support the weight of the freezer
when loaded.
2. Keep it level — Level your freezer by adjusting the twm
leveling legs at the front corners. (Adjust door-hinge side
first.) Turn left to raise the corner; right to lower it. When
freezer is sitting level, the freezer door (when opened) w'ill
stay at any open position. After the freezer has been filled,
recheck to see if it is sitting level.
NOTE: Before turning freezer on, you may want to wash the
inside of the freezer with a solution of two tablespoons bak
ing soda to a quart of warm water. Rinse thoroughly and dry.
To start freezer
Electrical Connection — Your freezer should be connected to
its own individual outlet, one not controlled by a wall switch.
Make sure the outlet provides 120 volt, 60 Hz AC current.
For your safety, the power supply cord of the freezer is
equipped with a three-pronged grounding plug. It should be
plugged into a matching grounded three-pronged type wall re
ceptacle. Attach retaining clip for cord plug. Do not remove
the ground prong. See electrical requirements and ground
ing instructions sheet for complete information.
saving
control
(See booklet, How to Preserve Foods the Modern Way with
Your WHIRLPOOL Freezer, tor complete information and
tips on home freezing.)
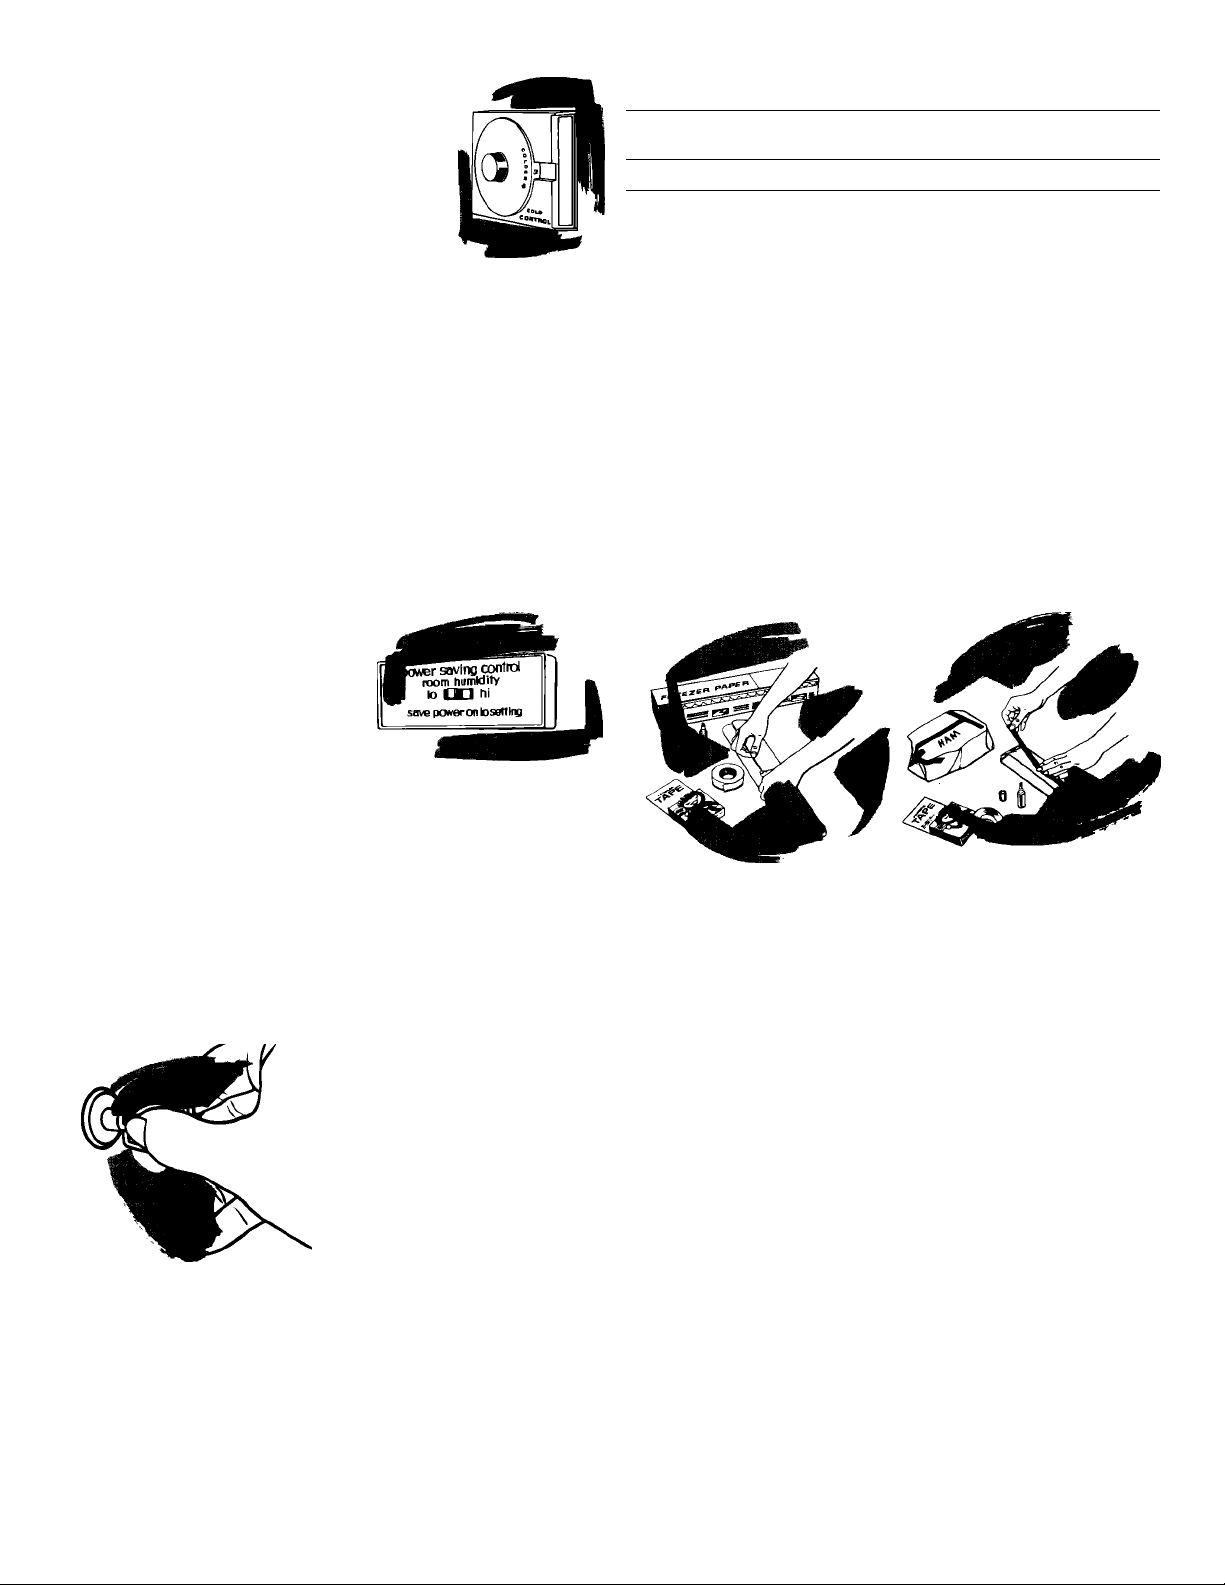
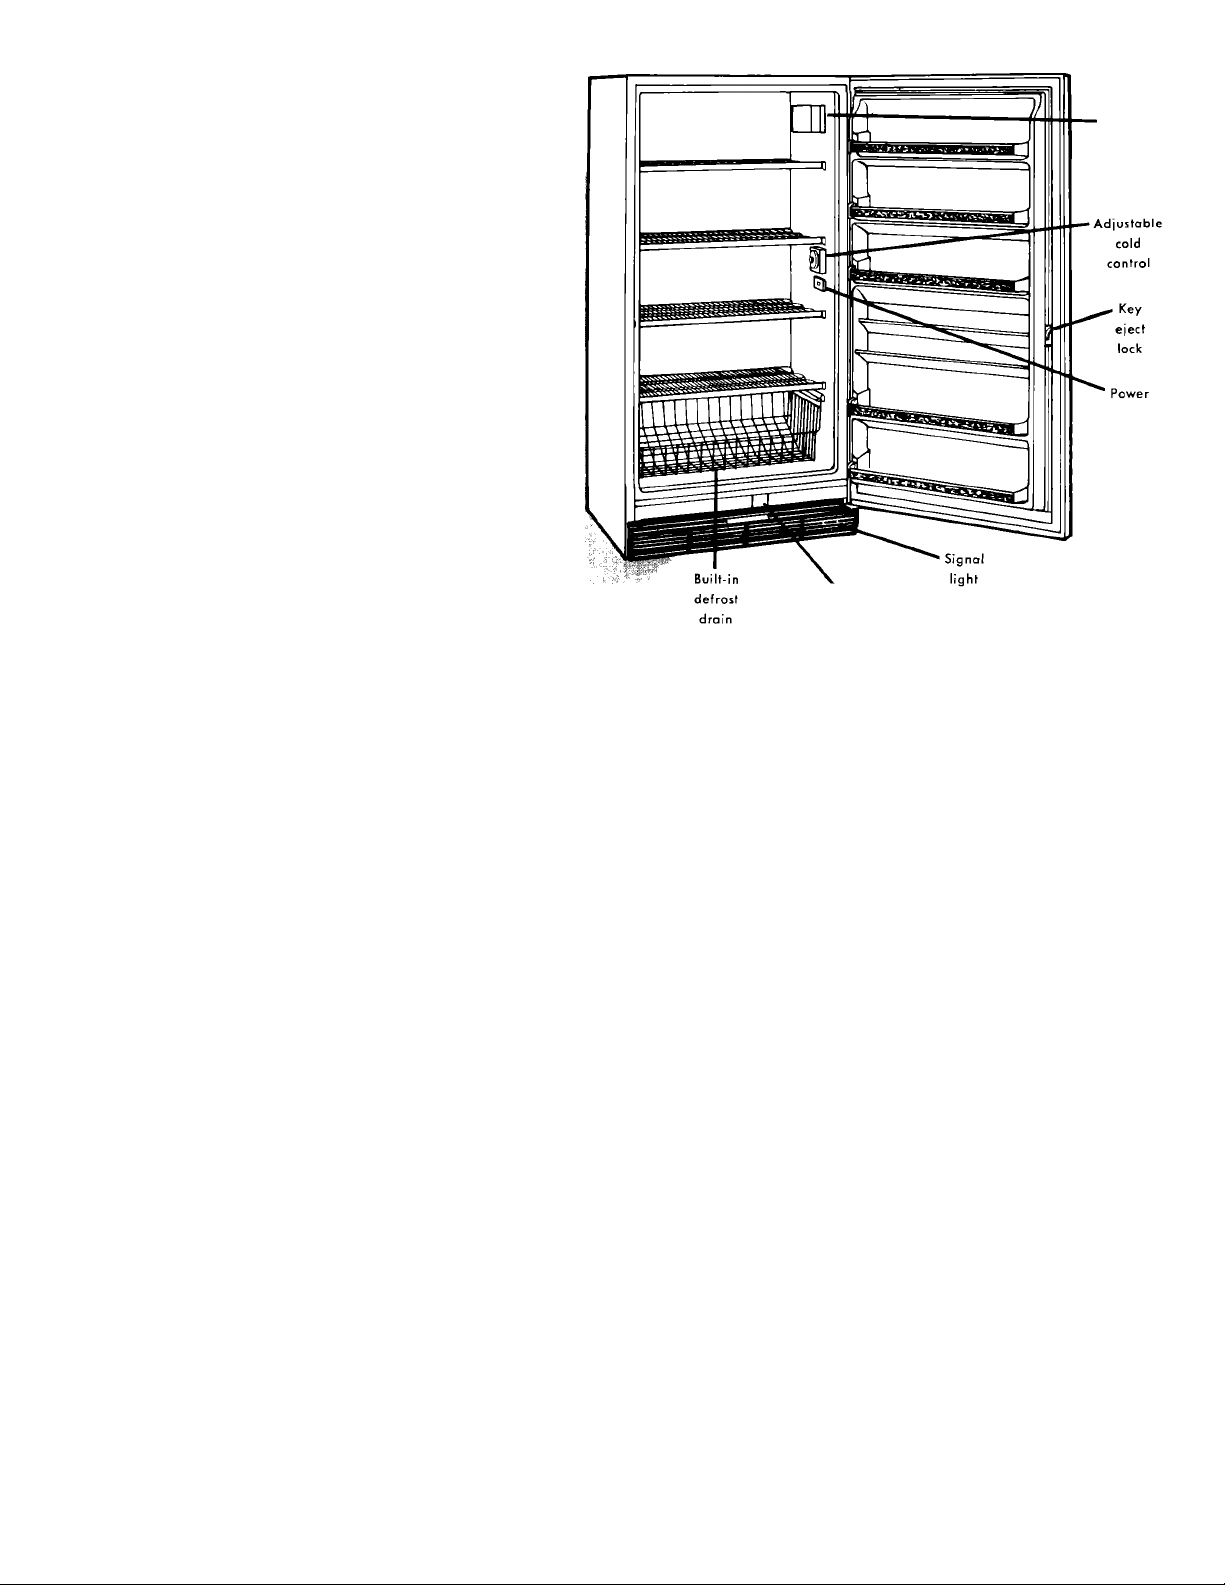
Set cold control — The cold control is lo
cated inside your freezer on the right wall.
To start, turn cold control to middle of dial.
This position will maintain zero zone tem
peratures under normal operating condi
tions. Turn the cold control to a higher
number for colder temperatures or a lower
number for less cold temperatures.
Let freezer cool before filling — Allow freezer to cool 4 to 6
hours before filling with frozen food. Let it cool overnight
before adding a quantity of fresh food to be frozen. As
freezer cools, you will see frost forming on the shelves. It is
normal for the frost to form first on the top shelves, and be
he'aviest there.
NOTE: When freezer first starts, the motor will run all the
time until the cabinet is cooled to selected temperature.
This first cooling may take 4 to 8 hours or longer depending
upon the weather and the number of times the freezer door
is opened. After the cabinet has cooled, the motor turns off.
It will turn on and off as needed to keep the freezer at selected
temperature.
The Power Saving Control is lo
cated inside the freezer. It con
trols electric heaters in the walls
of the freezer that prevent con
densation of moisture on the out
side of the freezer during periods
of high humidity. When humidity
in room is high, push switch toward hi to prevent conden
sation. When humidity is low, push switch toward LO to
conserve electricity.
Pounds of food to freeze at one time*
Vegetables
Size of Freezer Meat or Fish
20 cu. ft.
40 60
or Fruit
*These amounts are based on USDA recommendations. If too
many packages of unfrozen food are packed at one time into
the freezer, the rate of freezing is too slow. Poor quality
products result.
Package and seal carefully
Airtight packaging is the secret of success in freezing foods.
Containers and wrappings should be moisture-vapor-proof
and packages should be sealed carefully to keep natural
moisture in and air out.
If food is not properly wrapped, freezer burn will result.
When this happens, food dehydrates and is of poor quality.
The drugstore fold is recommended for efficiency and econ
omy. Bring the edges of the paper together and fold over
until it fits tightly around the articles being wrapped (at
least two folds).
Exterior signal light — Located on the right side of the base
grille, automatically indicates any power interruption to the
freezer. When power is being supplied, the light will glow. If
light does not glow, check immediately. The electric current
may be off; the freezer may be disconnected from the outlet;
or the warning light may be burned out.
Key eject lock
Your freezer is equipped with
a key eject lock which can help
reduce the hazard of child en
trapment. To lock or unlock the
freezer it is necessary to man
ually hold the key in the lock
while turning. The lock is
spring loaded so the key can
not be left in the lock.
If key is lost, a replacement can be obtained from your dealer
or a Whirlpool tech-care® service agent. Always give com
plete model and serial numbers of your freezer when re
questing a replacement key.
How to freeze food in your freezer
When freezer has cooled to selected temperature, it may be
loaded with frozen food. However, when you plan to freeze
a quantity of unfrozen food, use the following chart as a
guide to the amount to freeze at one time.
Heavy-duty aluminum freezer foil, kraft paper with cello
phane bonded to it, special freezer bags, jars, cartons and
special pressure-sensitive freezer sealing tape are available
at your supermarket or freezer dealer. See your “How to
Freeze Book’’ for packaging material guide.
Loading
Before loading with unfrozen food, turn cold control to cold
est position (highest number) and let freezer operate for
several hours. This will speed up the rate of freezing. Lay
packages to be frozen in a single layer so each rests on the
freezing surface of a shelf. Allow space between packages
for cold air to circulate.
Food will be frozen in about 18 to 24 hours, depending upon
the kind of food, size and shape of the package and the amount
to be frozen. Do not add more unfrozen food until previous
load is frozen. If in doubt, wait 24 hours before adding more
unfrozen food.
When food is frozen, return cold control to its usual setting.
Storing frozen food
When food is frozen, stack packages anywhere in the freezer.
Make sure that packages do not extend beyond the shelf edge
keeping the door from closing and sealing.
 Loading...