

Page 1
use&care guide
ea
AVhi^npool
NO-FROST
REFRIGERATOR
Model ED20AK
tor-Freezers Ice Makers. Dishwashers. Built-In Ovens and Surlace Units, Ranges. Microwave Ovens. Trash Compactors. Room Air Conditioners. Dehumidiliers. Automatic Washers Clothes Dryers Freez
Page 2
Please read this
Use and Care Guide
before you do anything else...
This booklet tells you how to start your
refrigerator, clean it, move shelves and adjust
controls. It even tells you what new sounds to
expect from your refrigerator.
Treat your new refrigerator with care. Use it
only to do what home refrigerators are designed
to do.
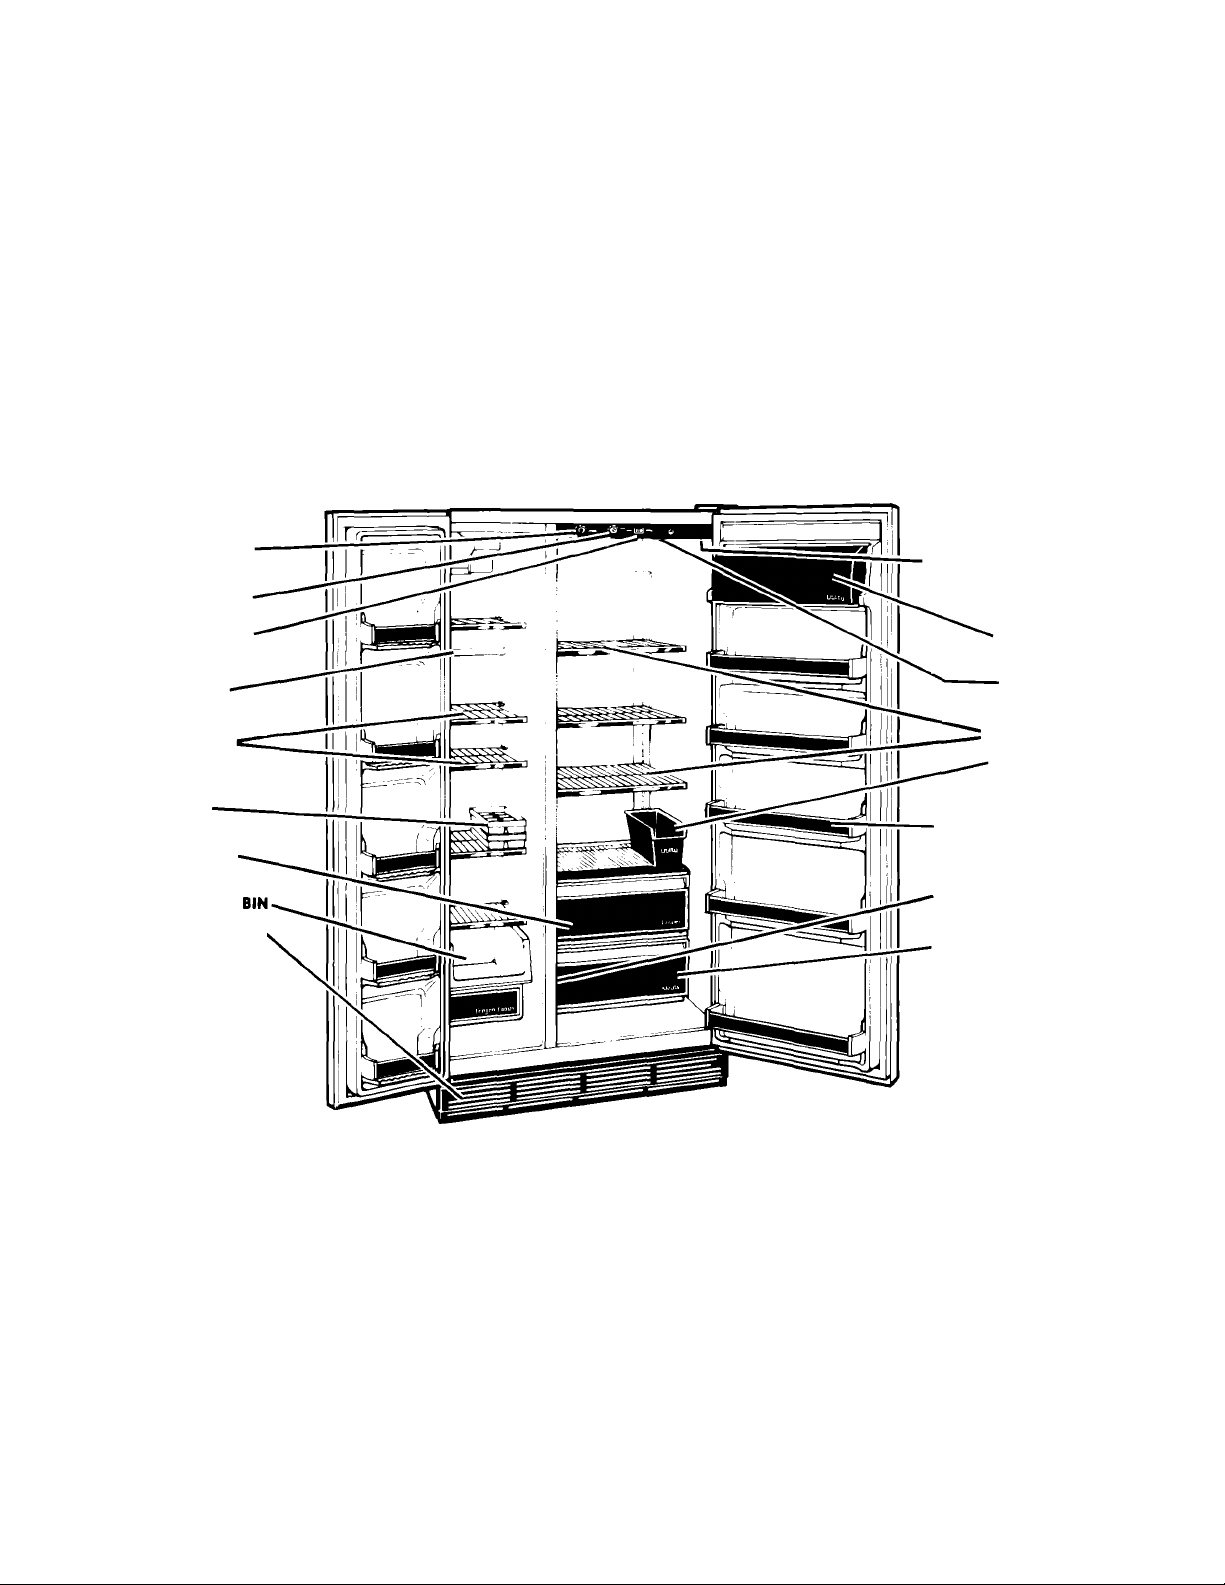
Parts and features
FREEZER
CONTROL
REFRIGERATOR
CONTROL
EXTERIOR
MOISTURE
CONTROL
FREEZER
LIGHT
ADJUSTABLE
FREEZER
SHELVES
TRAYS
CRISPER
FREEZER
STORAGE
BASE GRILLE
MODEL AND
SERIAL NUMBER
PLATE
(not shown)
UTILITY
COMPARTMENT
LIGHT
ADJUSTABLE
SHELVES
UTILITY
BIN
STATIONARY
DOOR
SHELVES
MEAT DRAWER
AIR CONTROL
(on side wall)
MEAT DRAWER
Thank you for buying a Whirlpool appliance. Please complete and mail the Owner Registra
tion Card provided with this product. Then complete the form below. Have this Information ready
vou need sen/ice or call with a question.
< ,.-opy Model and Serial Numbers from' plate
(see diagram above] and purchase date
from sales slip.
• Keep this book and sales slip together in a
handy place.
Model Number
Serial Number
Purchase Date
Service Company Phone Number
Page 3

Contents
IMPORTANT SAFETY INSTRUCTIONS
BEFORE USING YOUR REFRIGERATOR . 4
Remove Sales Label
Clean It
.......................................................
Plug It In
Install Properly
Level Refrigerator-Freezer
USING YOUR REFRIGERATOR................. . 5
Setting the Controls................................... , 5 CLEANING YOUR REFRIGERATOR
Changing the Control Settings
Exterior Moisture Control
Adjusting the Refrigerator Shelves ..
Removing the Crisper, Meat Drawer Storing Frozen Food
Adjusting Meat Drawer IF YOU NEED SERVICE OR ASSISTANCE
Removing Freezer Bin
.....................................................
and Covers ............................................ . 6
Temperature .......................................... . 6 WHIRLPOOL REFRIGERATOR
.................................
..........................................
......................
.................
..........................
..............................
Page
. 3
. 4
. 4 Optional Automatic Ice Maker
. 4 Ice Cube Trays
. 4
. 4 Sounds You May Flear
. 5
. 5
. 6
. 6
Removing and Adjusting the
Freezer Shelves
Changing the Light Bulbs
Removing the Base Grille...........................
Energy Saving Tips ....................................
Cleaning Chart ............................................
FOOD STORAGE GUIDE
Storing Fresh Food
VACATION AND MOVING CARE
WARRANTY...................................................
......................................
..........................
...........................................
..............................
..............................
.....................................
..................................
....................
.................
©1989 Whirlpool Corporation
IMPORTANT
SAFETY INSTRUCTIONS
...........
Page
. 7
. 7
. 7
. 8
. 8
. 8
. 9
. 9
. 10
. 11
. 11
. 12
. 15
. 16
. 20
▲WARNING
To reduce the risk of fire, electrical shock, or injury when using your
refrigerator, foiiow basic precautions inciuding the foliowing:
• Read ail instructions before using
the refrigerator.
• Child entrapment and suffocation are not
probiems of the past. Junked or aban
doned refrigerators are still dangerous...
even if they will “just sit in the garage a
few days.”
If you are getting rid of your old refrigerator,
do it safeiy. Piease read the enciosed
safety bookiet from the Association
of Home Appiiance Manufacturers. Heip
prevent accidents.
• Never ailow chiidren to operate, piay with,
or crawi inside the refrigerator.
• Never clean refrigerator parts with fiammabie fluids. The fumes can create a fire
hazard or explosion.
• FOR YOUR SAFETY*
DO NOT STORE OR USE GASOLINE OR OTHER
FLAMMABLE VAPORS AND LIQUIDS IN THE
VICINITY OF THIS OR ANY OTHER APPLIANCE.
THE FUMES CAN CREATE A FIRE HAZARD OR
EXPLOSION.
- SAVE THESE INSTRUCTIONS -
It is your responsibiiity to be sure your
refrigerator:
• is installed and leveled on a floor that will
hold the weight, and in an area suitable for its
size and use.
• is connected only to the right kind of outlet,
with the right electrical supply and ground
ing. (Refer to the Electrical Requirements and
Grounding Instructions Sheet.)
• is used only to do what home refrigerators
are designed to do.
• is not near an oven, radiator or other heat
source.
• is properly maintained.
• is out of the weather.
• is used in an area where the room tempera
ture will not fall below 55°F (13°C).
• is not used by anyone unable to operate
it properly.
• is not loaded with food before it has time to
get properly cold.
Page 4

Before using your refrigerator
1. Remove sales labels...
Remove the Consumer Buy Guide Label, tape
and any inside labels before using the refrigera
tor To remove any remaining glue:
1. Rub briskly with thumb to make a ball then
remove.
OR
2. Soak area with liquid hand dishwashing de
tergent before removing glue as described in
step 1.
DO NOT USE sharp instruments, rubbing alco
hol, flammable fluids or abrasive cleaners.
These can damage the material. See “Impor
tant Safety Instructions’’ on page 3.
NOTE; DO NOT REMOVE ANY PERMANENT IN
STRUCTION LABELS INSIDE YOUR REFRIGERATOR.
Do not remove the Tech Sheet fastened under
the refrigerator at the front.
2. Clean it...
Clean your refrigerator before using it. See
cleaning instructions on page 9.
3. Plug it in...
4. Install properly...
1. Allow '/2 inch (1.25 cm) space on each side and
at the top of the refrigerator for ease of
installation.
2. If the refrigerator is to be against a wall, you
might want to leave extra space on the hinge
side closest to the wall so the door can be
opened wider.
3. The refrigerator back can be flush against the
wall.
RECOMMENDED GROUNDING METHOD
A115 Volt, 60 Hz,, AC only 15 or 20 ampere fused
and properly grounded electrical supply is re
quired. It is recommended that a separate circuit
serving only this appliance be provided.
Do not use an extension cord. Use a recepta
cle which cannot be turned off with a switch or
pull chain. See Electrical Requirements and
Grounding Instruction Sheet in your Literature
Package.
5. Level refrigerator-freezer...
1. Remove base grille. (See page 8.)
2. To raise front, turn screw in direction shown,
3. To lower front, turn screw in direction shown.
4. Check with level.
5. Replace base grille. (See page 8.)
Page 5

Using your refrigerator
FREEZER CONTROL REFRIGERATOR CONTROL EXTERIOR MOISTURE CONTROL LIGHT SWITCH
Setting the controls...
Controisfortherefrigeratorandfreezerareinthe Give the refrigerator time to cool down corn-
refrigerator. When the refrigerator is plugged in for pletely before adding food. (This may take sevthe first time... eral hours.)
1 Setthp PFFi?lQFPA These settings should be about right for nor-
TOR CONTROL to 3' household refrigerator usage.
2. Set the FREEZER
CONTROL to B,
The controls will be set about right when milk or
juice is as cold as you like when ice cream is firm.
Changing the control settings...
If you need to adjust temperatures in refrigerator
or freezer, use the settings listed in the chart below.
REASON;
Large amount of food added
Room temperature too warm
Large amount of food added
Very cold room temperature
(can’t cycle often enough)
Controls not set correctly
for your conditions
Heavy ice usage
Very cold room temperature
(can't cycle often enough)
Door opened often
Large amount of food added
Very warm or very cold
room temperatures
QUESTIONS?
..call your
COOL-LINE"
service
assistance
telephone
number
(page 16)
CONDITION;
If Refrigerator Door opened often
Section is
TOO WARM
If Freezer Door opened often
Section is
TOO WARM
If Refrigerator
Section is
TOO COLD
If lOE isn't
MADE FAST ENOUGH
If BOTH SECTIONS
are TOO WARM
Adjust the Refrigerator Control first.
Wait at least 24 hours between adjustments.
Then adjust the Freezer Control if needed.
RECOMMENDED
CONTROL SETTINGS;
Refrigerator
Freezer
Refrigerator 3
Freezer
Refrigerator
Freezer
Refrigerator
Freezer
Refrigerator 4
Freezer
4
A
C
2
B
3
C
B
Exterior Moisture Control
The Exterior Moisture Control on the Control
Console operates electric heaters around the
EXTERIOR
MOISTURE
CONTROL
door openings. These heaters help keep moisture
from forming on the outside of the refrigerator.
1. Use the "OFF" setting when humidity is low.
2. Use the "ON" setting if moisture forms on the out
side of the refrigerator.
Page 6

Adjusting the refrigerator shelves...
Shelves can be adjusted to match the way you
To remove shelves:
1. Tilt up at front.
2. Lift up at back.
3. Pull shelt straight out.
To replace shelves:
1. Guide the rear hooks into the slots in the shelf
2. Tilt up front of shelf until hooks drop into slot.
Removing the crisper, meat drawer and covers
To remove the crisper and meat drawer:
1. Slide crisper and meatdrawerstraightouttothe
stop, lift drawer, then slide the rest of the way out.
2. Replace in reverse order.
To remove the covers:
1. Push up crisper cover glass insert from bottom,
then slide out with both hands.
2. Lift front of cover frame.
3. Lift out cover frame by pulling up and out.
4. Repeat for meat drawer cover.
To replace the covers:
1. Fit back of meat drawer cover in notch supports
on walls of refrigerator, then lower into place
2. Repeat for crisper cover frame.
3. Slide back of crisper cover glass insert into
place, then lower front.
supports.
Lower front of shelf to level position.
.-J,.
PULL OUT TO THE STOP,
LIFT THE FRONT
AND PULL AGAIN.
REMOVE THE
GLASS INSERT,
LIFT THE FRAME FRONT,
THEN THE BACK.
Adjusting meat drawer temperature...
USE CONTROL TO ADJUST
MEAT DRAWER TEMPERATURE
t
i
Removing freezer bin...
For proper air movement, keep the freezer bin
in place when the refrigerator is operating.
To remove the bin:
1. Slide bin out to the stop.
2. Lift the front to clear the stop.
3. Slide out the rest of the way.
To replace the bln:
1. Place bin on the slides.
2. Make sure the stops olear the front of the
slides.
3. Slide bin in
Cold air tiows against the meat drawer through
an opening between the freezer and the refrigera
tor. This helps keep the meat drawer colder than
the rest of the refrigerator.
Slide the control to let more or less cold air
thraugh.
Page 7
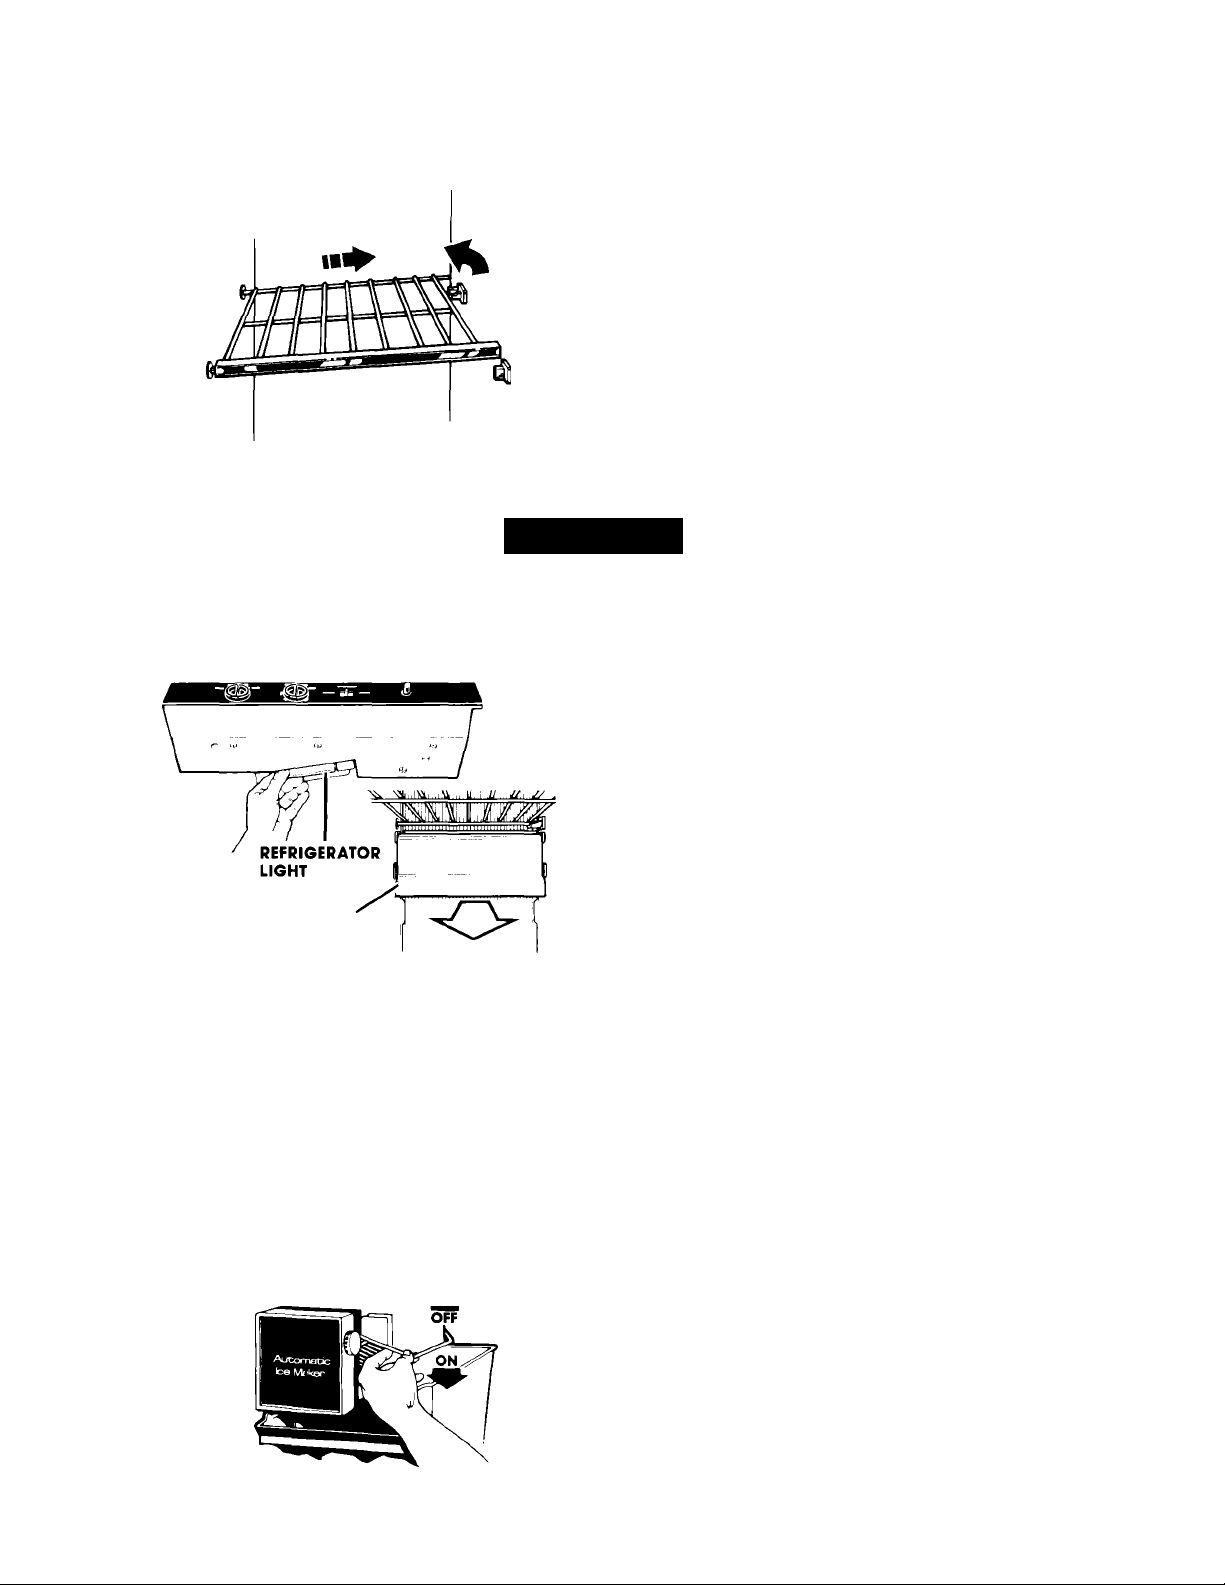
Removing and adjusting the freezer shelves...
To remove the shelf:
LIFT THE RIGHT SIDE
THEN SLIDE OUT
1. Lift right side of sheif off supports.
2. Siide sheif out of shelf support holes.
3. Replace in reverse order.
To adjust the shelf:
1. Remove sheit.
2. Remove supports by sliding up\wards.
3. Replace supports on desired level.
4. Replace shelf.
NOTE: The cup shaped supports go in the back
of the freezer.
Changing the light bulbs...
▲warning
Electrical Shock Hazard
Before removing a light bulb, either unplug the refrigerator or disconnect the electricity
leading to the refrigerator at the main power supply. Shock and injury can occur If electricity
remains connected.
To change refrigerator light:
1. Disconnect refrigerator from power suppiy.
2. Reach behind the control console to find bulb.
3. Remove bulb.
4. Replace with a 40-watt appiiance bulb.
5. Reconnect power supply.
To change freezer light:
1. Disconnect refrigerator from power suppiy.
2. Grasp front of light shieid.
GRASP LIGHT SHIELD
PULL BOnOM FORWARD
3. Puii bottom of shield forward until it snaps tree.
4. Remove buib.
5. Replace with a 40-watt appiiance bulb.
6. Press light shieid straight on untii it snaps into
place.
7. Reconnect power supply.
Optional automatic ice maker...
If you have the automatic ice maker accessory,
or if you plan to add one later (Part No. ECKMF-90),
there are a few things you wiii want to know:
• The ON/OFF lever is a wire signal arm
Down...for making ice automatically
Up...to shut oft the ice maker.
DO NOT TURN ICE MAKER ON UNTIL IT IS CON
NECTED TO THE WATER SUPPLY.
LOWER
SIGNAL
ARM TO
START IT
RAISE
SIGNAL
ARM TO
STOP ICE
• The dial or lever on the side of the ice maker
changes the size of the cubes.
• Shake the bin occasionally to keep cubes sepa
rated, and to obtain increased storage capacity.
• It is normal for ice crescents to be attached by a
corner. They will break apart easily.
• You will hear water running when ice maker is
working. You'll hear ice fall into the bin. Don’t let
these sounds bother you.
• The ice maker will not operate until the freezer
is cold enough to make ice. This can take
overnight.
• Because of new plumbing connections, the first
ice may be discolored or off-flavored. Discard
the first few batches of ice.
continued on next page
Page 8
If ice is not being made fast enough and more
ice is needed, turn the Refrigerator Control to
ward a higher number. Wait a day and, if neces
sary, turn the Freezer Control toward C
If you remove the ice bin, raise the signai arm to
shut off the ice maker. When you return the bin,
push it all the way in and lower the arm to the ON
position.
if cubes are stored too long, they may develop
an off-flavor...like stale water. Throw them away.
They will be replaced. Cubes in the ice bin can
also become smaller by evaporation.
Ice cube trays...
If cubes are not used, they may shrink. The mov
ing cold air starts a slow evaporation. The longer
cubes are stored, the smaller they get.
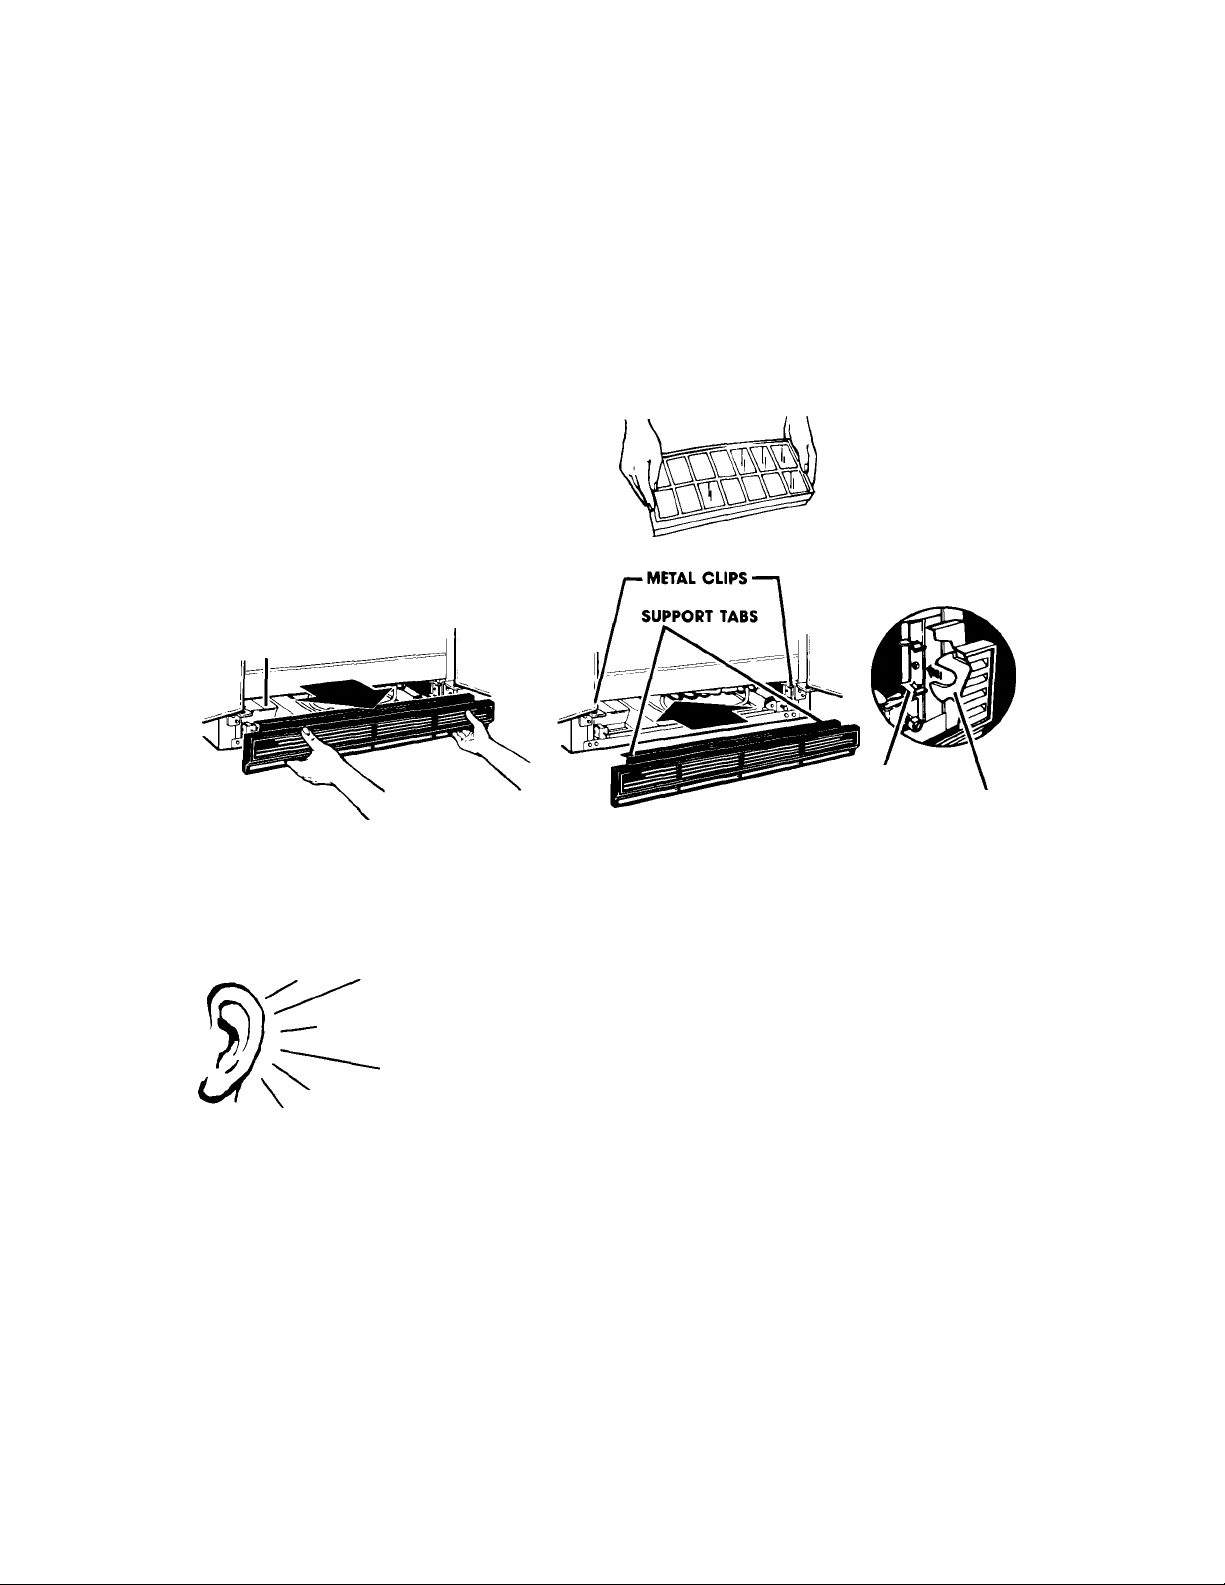
Removing the base grille...
To remove the grille:
DEFROST PAN
Good water quality is important for good ice
quality. It is not recommended that the ice maker
be connected to a softened water supply. Water
softener chemicals such as salt from a malfunc
tioning softener can damage the ice maker
mold and lead to poor quality ice. If a softened
water supply cannot be avoided, then it is impor
tant that the water softener be well maintained
and operating properly.
To remove ice:
1. Hold tray at both ends.
2. Twist slightly.
1. Open the doors.
2. Pull grille outward as shown.
3. Do not remove Tech sheet fastened behind
grille.
Sounds you may hear...
Your new refrigerator may make sounds that your old one didn’t.
Because the sounds are new to you, you might be concerned about them.
Don’t be. Most of the new sounds are normal. Hard surfaces like the floor,
walls and cabinets can make the sounds seem louder.
The following chart describes the kinds of sounds that might be new to
you, and what may be making them.
Possible Sounds:
• Slight Hum, Soft Hiss:
• Clicking or Snapping
Sounds:
• Water Sounds:
Ice Maker Sounds:
- trickling water
- thud (clatter of ice)
Running Sounds:
Probable Causes:
You may hear the refrigerator’s fan motor and moving air.
The thermostat makes a definite click when the refrigerator
stops running. It also makes a sound when the refrigerator starts.
The defrost timer will click when the defrost cycle starts and stops.
When the refrigerator stops running, you may hear gurgling in the
tubing for a few minutes after it stops. You may also hear defrost
water running into the defrost water pan.
If your refrigerator has an ice maker, you may hear buzzing (from
the water valve), trickling water and the clatter of ice dumped
into the bin.
Your refrigerator has a high-efficiency compressor and motor.
It will run longer than older designs. It may even seem to run most
of the time.
METAL CLIPS
SUPPORT TABS
Tc replace the grille:
1. Line up grille support tabs with metal clips.
2. Push firmly to snap into place.
3. Close the doors.
Page 9
Energy saving tips...
You can help your refrigerator use less electricity.
• Check door gaskets for a tight seal. Level the
cabinet to be sure of a good seal.
• Clean the condenser coils regularly.
• Open the door as few times as possible. Think
about what you need before you open the door
Get everything out at one time. Keep foods orga
nized so you won't have to search for what you
want. Close door as soon as food is removed.
• Go ahead and fill up the refrigerator, but don't
overcrowd it so air movement is blocked.
Cleaning your refrigerator
Both the refrigerator and freezer sections defrost
automatically. But both should be cleaned about
onoe a month to help prevent odors from building
up. Of course, spills should be wiped up right away.
To clean your refrigerator turn the Refrigerator
Control to OFF, unplug it, take out all removable
parts and olean it acoording to the following
directions.
It is a waste of electricity to set the refrigerator
and freezer to tempe'otures colder than they
need to be. If ice cream is firm in the freezer and
drinks are as cold as your family likes them, that's
cold enough.
' Keep the Exterior Moisture Control on the "OFF"
setting unless moisture forms on refrigerator
exterior.
Make sure your refrigerator is not next to a heat
source such as a range, water heater, furnace,
radiator or in direot sunlight
continued on next page
Page 10

Cleaning chart
PART
Removable parts
(shelves, crisper, meat
drawer, etc.)
Outside
Inside walls (Freezer
should be allowed to
warm up so cloth won't
stick.)
Door liners
and gaskets
Dark plastics
(covers ohd pohels)
Defrost pan
Condenser coils
Floor under
refrigerator
WHAT TO USE HOW TO CLEAN
Spohge or cloth; mild
detergent and worm
water.
Sponge, cloth or paper
towel; mild detergent;
appliance wax (or
good auto paste wax).
Waxing painted metai surfaces provides rust protection.
Sponge, soft cloth or • Wash with warm water and
papertowel, baking - mild detergent or
soda, warm water, mild _ baking soda (2 tablespoons [26 g] to
detergent. i quart [.95 L.] warm water).
Sponge, soft cloth or
papertowel; mild
detergent, warm water
DO NOT USE cleaning waxes, concentrated detergents, bleaches
or cleansers containing petroieum on piastic parts.
Mild detergent and • Wash with a soft cloth or sponge,
warm water; soft, clean • Rinse and dry.
sponge or soft, clean
cloth.
DO NOT USE paper towels, window sprays, scouring cleansers,
or flammable fluids. These can scratch or damage the material.
See “Important Safety Instructions” on page 3.
Sponge or cloth; mild
detergent and warm
water.
Vacuum cleaner; using
the extended narrow
attachment.
Floor cleaners.
• Wash removabie parts by hand with
warm water and a mild detergent.
• Rinse and dry.
• Wash with warm water and a mild
detergent. Do not use abrasive or
harsh cleansers.
• Rinse and dry.
• Wax painted metal surfaces at least twice
a year with appliance wax ora good auto
paste wax. Apply wax with a clean, soft
cloth. Do not use wax on plastic parts.
• Rinse and dry.
• Wash with mild detergent and warm
water.
• Rinse and dry.
Remove base grille. (See page 8.)
To remove defrost pan, lift pan over wire
brace (remove tape; if any).
Wash defrost pan with warm water and
mild detergent.
Rinse and dry.
Replace with notched corner to the rear.
Push it all the way in.
Make sure defrost drain tube is pointing
Into pan.
Replace base grille.
Remove base grille.
Clean dust and lint from condenser at
least every other month.
Replace base grille.
Roll refrigerator out only as far as water
supply line allows.
Clean the floor.
Roll refrigerator back.
Check to see if the refrigerator is level.
10
Page 11
Food storage guide
There is a right way to package and store re
frigerated or frozen food. To keep food fresher,
longer, take the time to study these recommended
steps.
STORING FRESH FOOD
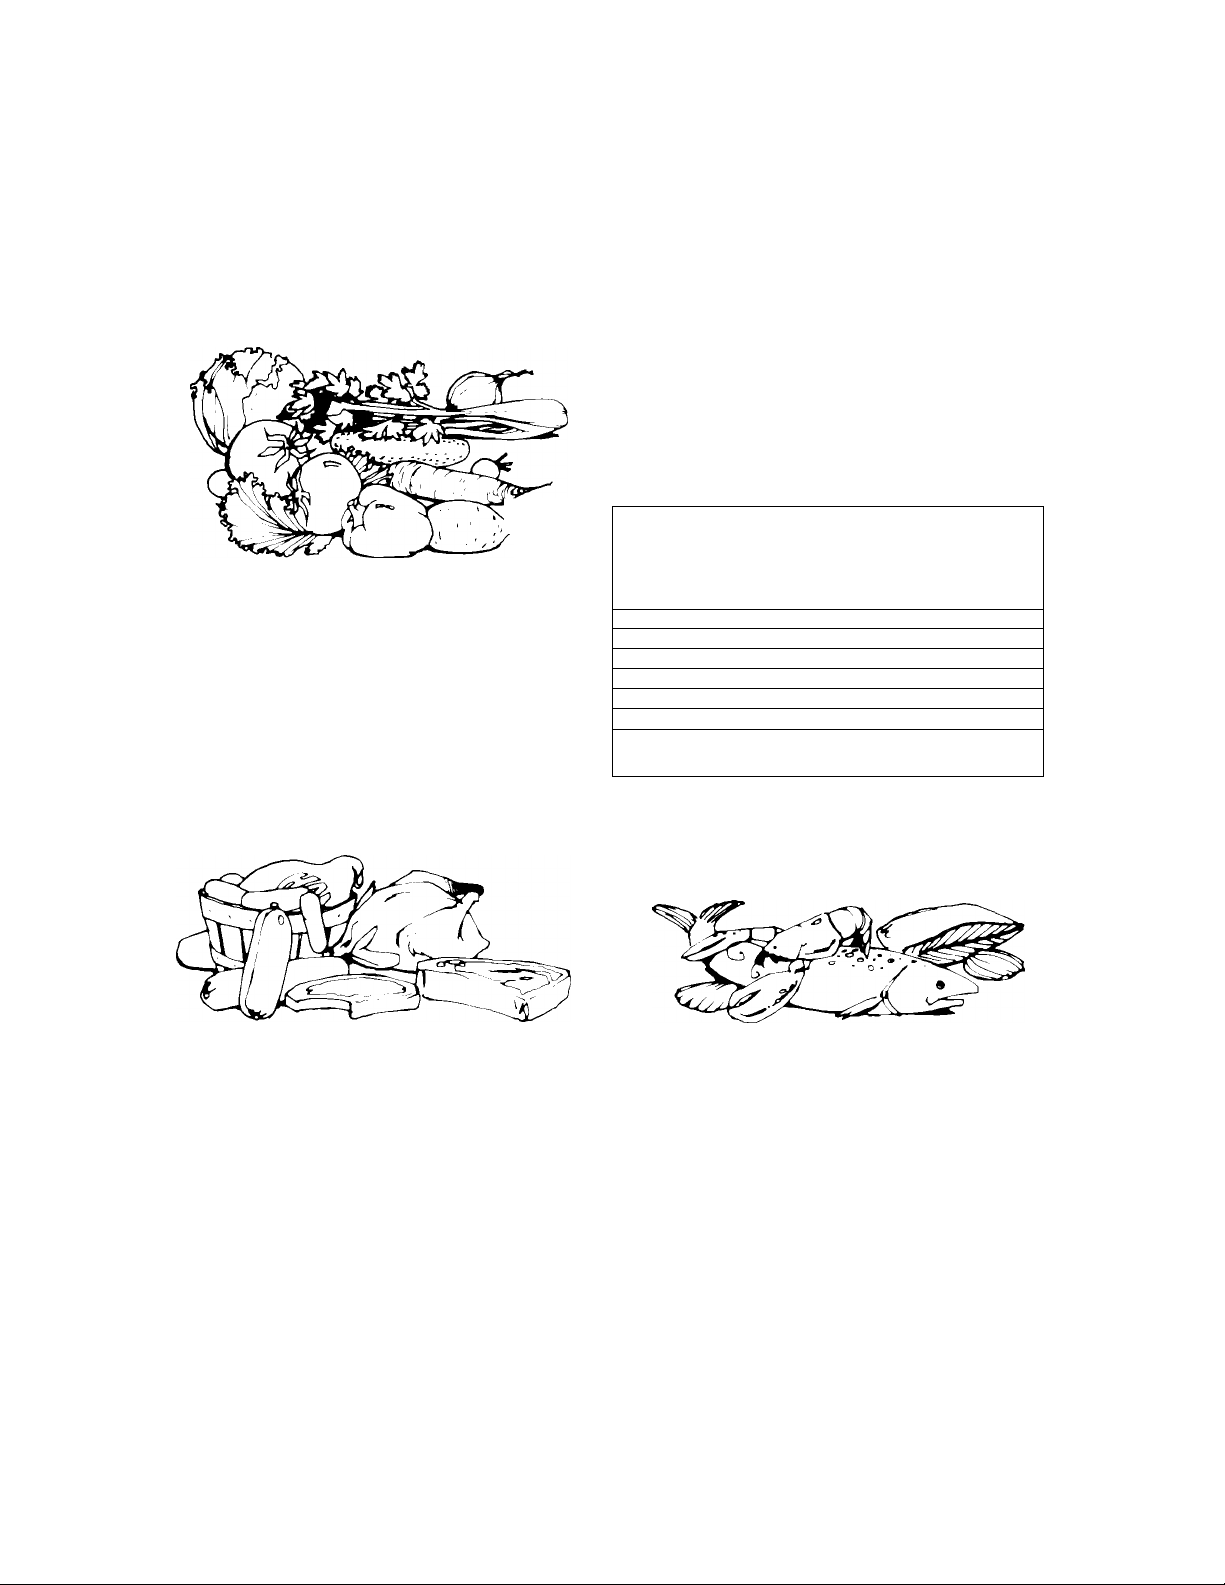
Leaty Vegetables...Remove store wrapping
and trim or tear off bruised and discolored areas.
Wash in cold water and drain. Place in plastic bag
or plastic container and store in crisper. Cold, moist
air helps keep leafy vegetables fresh and crisp.
Vegetables with Skins (carrots, peppers)...Store
in crisper, plastic bags or plastic container.
Fruit...Wash, let dry and store in refrigerator in
plastic bags or crisper. Do not wash or hull berries
until they are ready to use. Sort and keep berries in
their store container in a crisper, or store in a
loosely closed paper bag on a refrigerator shelf.
Cured or Smoked Meat and Cold Cuts. Ham,
Paeon, sausage, cold cuts, etc., keep best in origi
nal wrappings. Once opened, tightly re-wrap in
plastic wrap or aluminum foil.
Canned Ham. Store in refrigerator unless the
label says it's okay to store on the shelf. Do not
freeze
Fresh Poultry...Wrap in plastic wrap. The plastic
on poultry, as purchased, may be used far storage.
STORAGE CHART FOR FRESH AND CURED MEAT*
Type
Variety Meats
Chicken .......................
Ground Beef
Steaks and Roasts ..
Cured Meats
Bacon
Coid Cuts.....................
*lf meat Is to be stored longer than the times given.
follow the directions for freezing.
NOTE: Fresh tish and shelltish should be used the
same day as purchased.
..............
................
................
.........................
Approximate Time
(days)
.... 1 to 2
.......
1to2
.......
1to2
.......
3to5
.......
7 to 10
.......
5 to 7
.......
3to5
Meat...Meat is perishable and expensive...you
won't want to waste an ounce of it through careless
handling. The following list and chart give you
packaging hints and time limits. Store meat in the
meat drawer.
Fresh, Prepackaged Meat. Store fresh meat in
the store wrapping. Vacuum packaged meat can
be frozen for as long as one month if the seal is not
broken. If you want to keep it frozen longer, you
should wrap it with special freezer wrapping
material.
Fresh Meat, Not Prepackaged. Remove the
market wrapping paperand re-wrap in aluminum
toil for storing it unfrozen.
Cooked Meat. Wra p or cover cooked meat with
plastic wrap or aluminum foil. Store immediately
Eggs...Store without washing in the original car
ton or use the Utility Bin that came with your
refrigerator.
Milk...Wipe milk cartons. For best storage, place
milk on interior shelf.
Beverages...Wipe bottles and cans. Store on a
door shelf or inside the refrigerator.
Butter...Keep opened butter in covered dish or
in the Utility Compartment. When storing an extra
supply, wrap in freezer packaging and freeze.
Cheese...Store in the original wrapping until
you are ready to use it. Once opened, re-wrap
tightly in plastic wrap or aluminum foil.
Condiments...Store small jars and bottles
(catsup, mustard, jelly, olives) on the door shelves
where they are in easy reach.
Leftovers...Cover leftovers with plastic wrap or
aluminum foil to keep food from drying out and
transferring food odors. Plastic containers with tight
lids are fine. too.
11
Page 12
STORING FROZEN FOOD
The freezer section is designed for storage of
commerciaily frozen food and for freezing food at
home.
Packaging - The secret of successfui freezing is
in the packaging. The wrap you use must be air,
moisture and vapor proof. The way you cióse and
seai the package must not aiiow air, moisture or
vapor in or out. Packaging done in any other way
couid cause food odor and taste transfer through
out the refrigerator and drying of frozen food.
Rigid polyethylene (piastic) containers with tight
fitting iids, straight-sided canning/freezing jars,
heavy-duty aiuminum foii, piastic-coated paper
and nonpermeable piastic wraps (made from a
saran film) are recommended. NOTE: Heat-
sealed boiling bags are easy to use and can be
used by themselves or as carton liners.
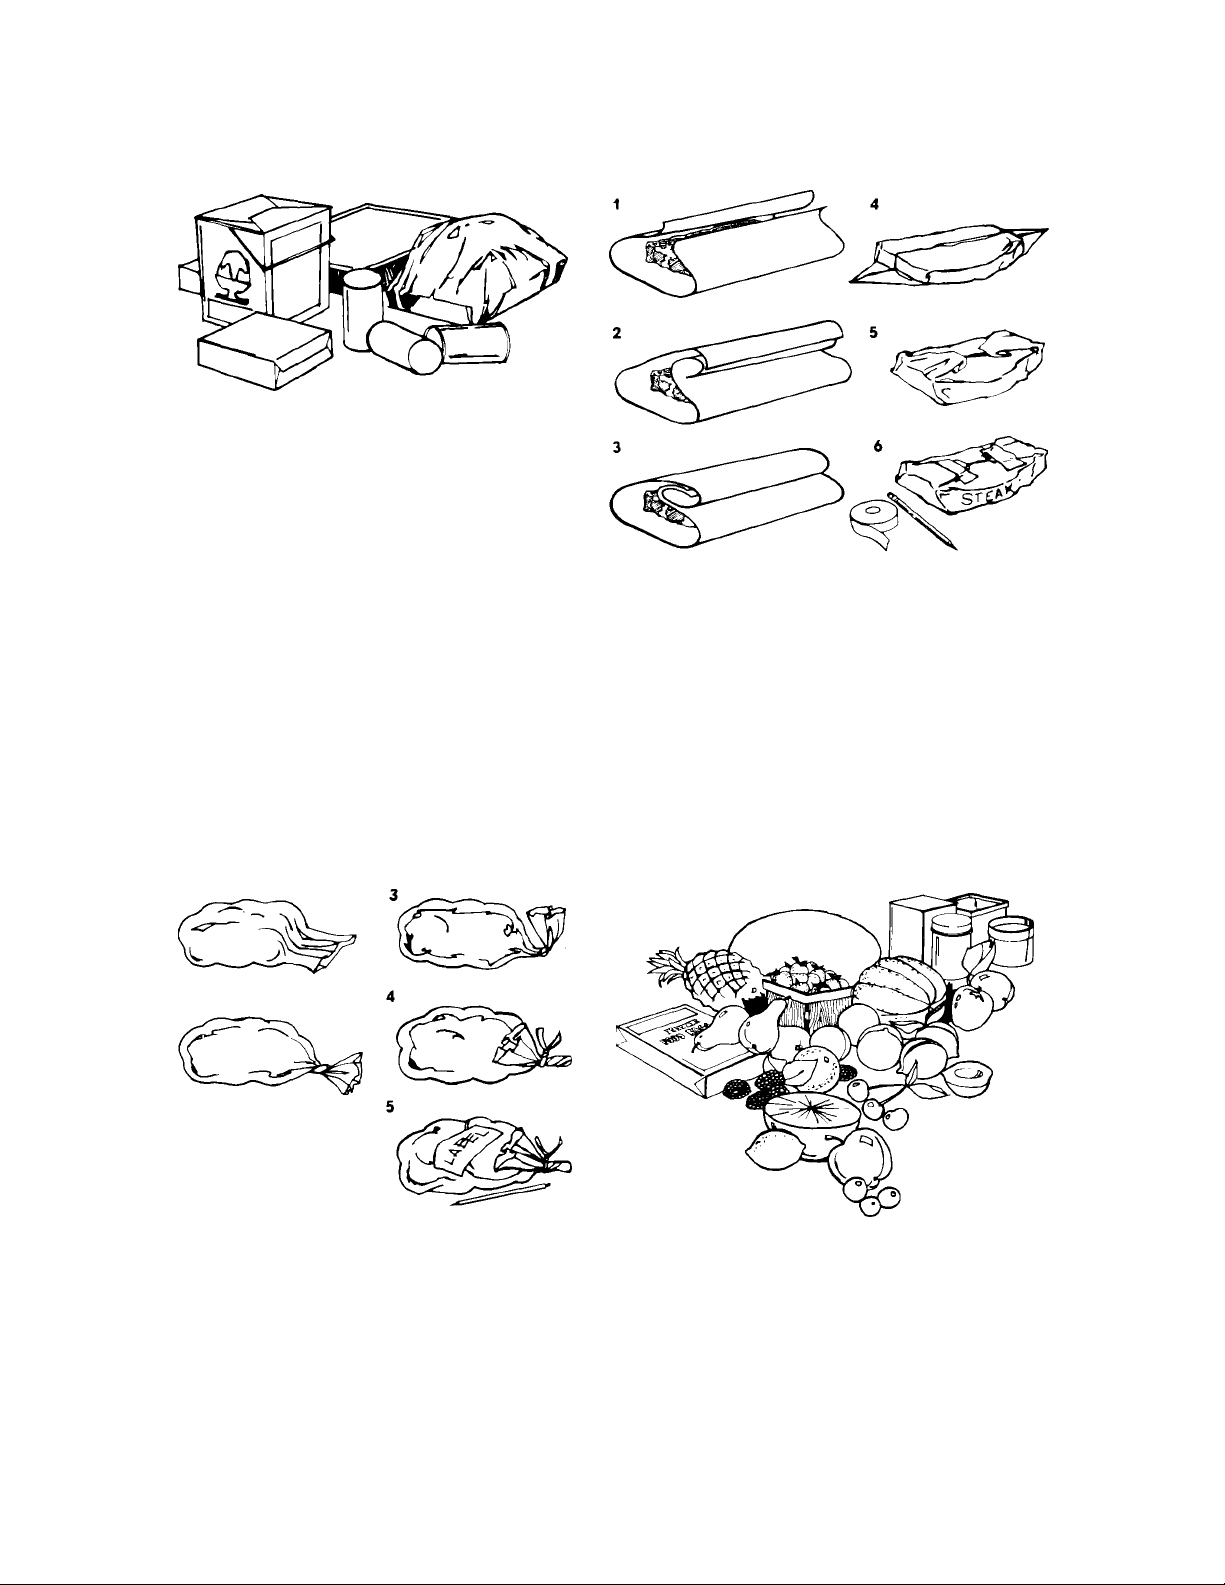
Sealing - When sealing food in bags, squeeze
out the air (liquids need headspace to aiiow for
expansion). Twist the top and turn it back. Fasten
tie securely around the doubled-over tail. Put the
label inside transparent bags; use self-adhesive
label on outside of opaque ones.
DO NOT USE:
• Bread wrappers
• Non-polyethylene plastic containers
• Containers without tight lids
• Waxed paper
• Waxed-coated freezer wrap
• Thin, semi-permeable wrap
None of these are totally moisture, air or vapor
proof. The use of these wrappings could
cause food odor and taste transfer and dry
ing of frozen food.
1
Air-tight wrapping calls for nonpermeable wrap.
See recommended wraps under "Packaging." Cut
the sheet about one-third longer than the distance
around the food. Bring the ends together and fold
in (toward the food) at least twice to seal out air.
Crease ends close to food, press air from package.
Fold tips over twice. Finish package and tape
closed. NOTE: Pad sharp edges of boned meat
with extra wrap to protect the wrap from
punctures.
12
Freezing Fruits - Select ripe, blemish-free fruits.
Be sure they taste as good as they look. Wash 2 to 3
quarts (liters) at a time and drain. Fruit that stands in
water may lose food value and become soggy.
Sort, peel, trim, pit and slice as needed.
Pack in rigid wide-mouthed containers or other
recommended material. Leave head space to
allow liquids to expand during freezing.
Page 13
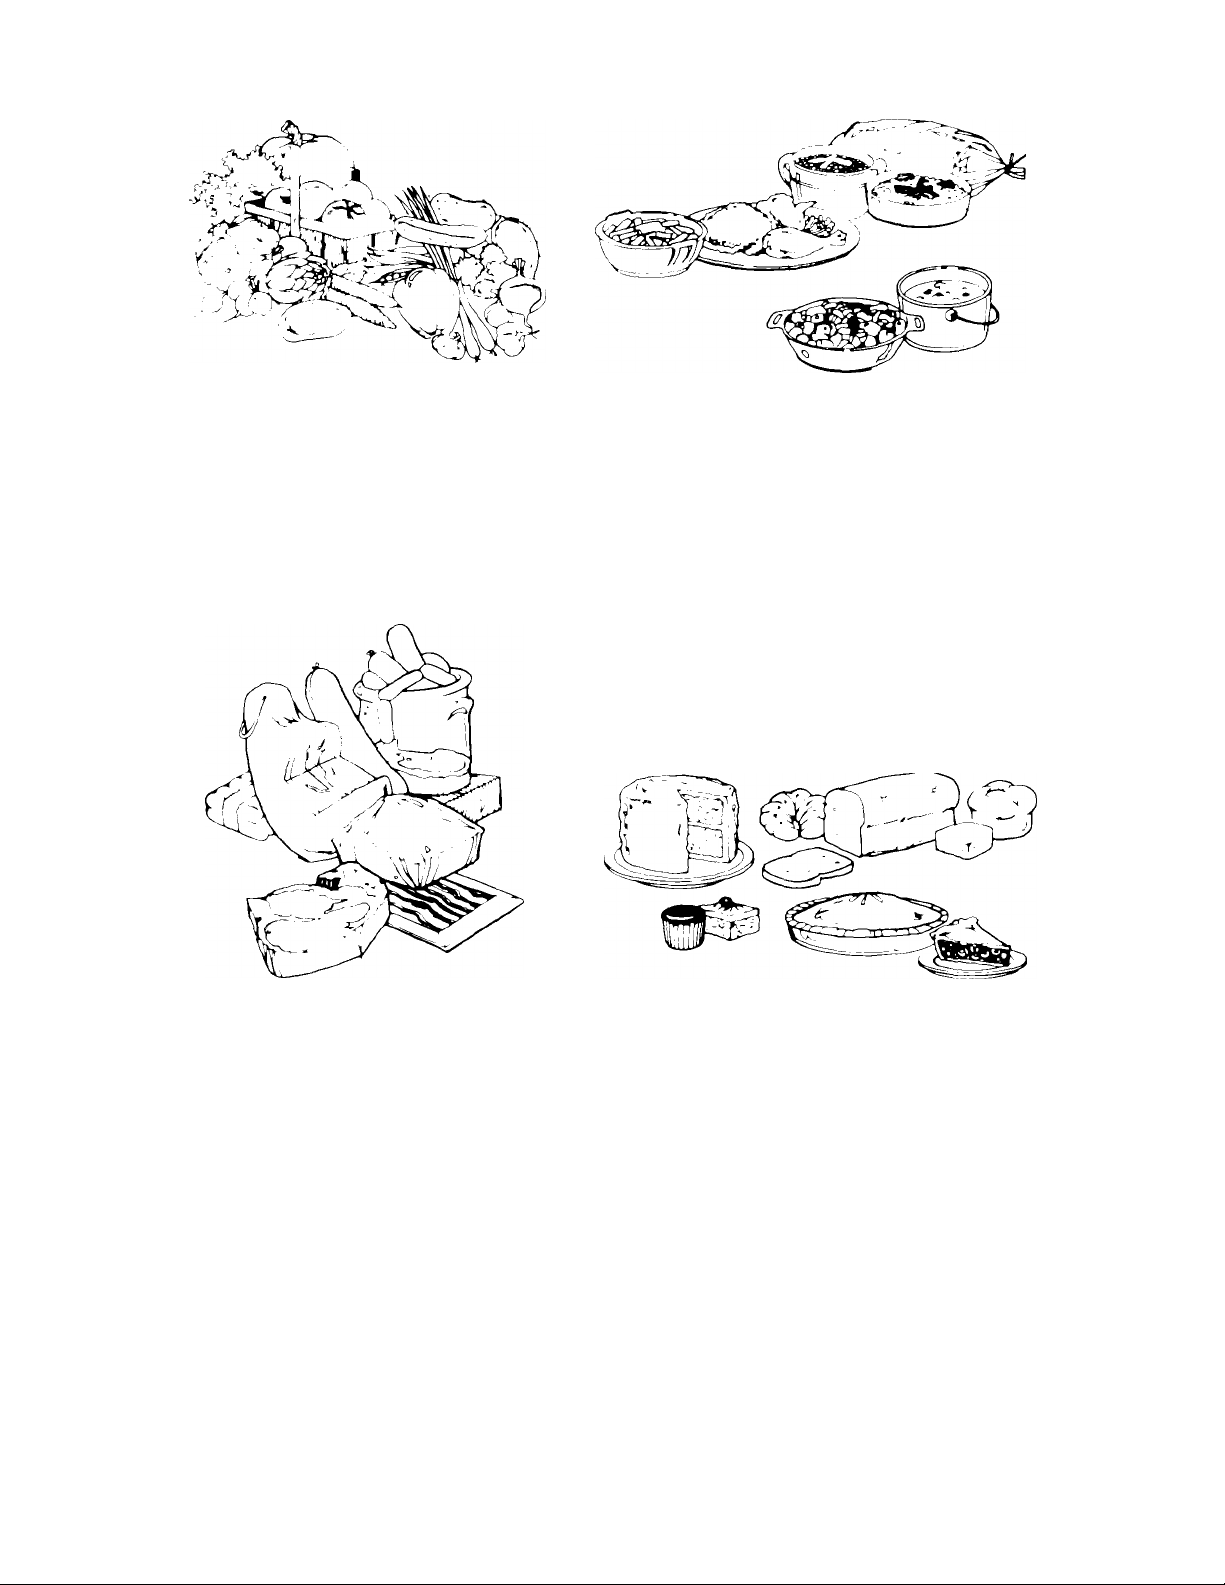
-ieezing Vegetabies 'eeze only fresh high
qi uiity vegetables pickea when barely mature,
rc oest results, freeze no more than 2 to 3 hours
picking Wash iri coia water, sort and cut into
appropriate sizes. Blanch or scald. Pack in recomme'^ided container and freeze,
: .j not freeze lettuce celery, carrot sticks,
porafoes or fresh tomatoes All will become limp or
mushy Tomatoes will collapse when thawed.
Freezing Cooked Food - Prepare cookea foods
as you would for the table, shorten cooking time 10
to 15 minutes to allow for additional cooking dur
ing reheating. Omit seasonings and part of the liq
uid. Plan to add them at reheating time Potatoes
should also be added to soup and stew at heating
time. Add crumb and cheese toppings at heating
time.
Cool as rapidly as possible and freeze of once.
Liquid or semi-liquid dishes may be frozen in rec
ommended containers with
seroles and other more solid foods may be frozen
in the baking container. If you don’t want to leave
your casserole dish in the freezer, line if with foil.
Bake, cool, freeze, lift out the foil package, bag it
and return to freezer
head-space Cas
Freezing Meats - the meat you thaw can only
be as good as the meat you freeze. Wrap in mealsize packages. Fiat cuts or patties shouid be
wrapped individually or in iayers separated by a
double thickness of freezer wrap.
Make sure store wrappings are moisture and
vapor proof. If not, re-wrap meats with one ot the
wraps recommended under "Packaging."
Freezing Baked Goods-Wrap baked breads in
recommended material. Thaw in wrapping.
Unbaked yeast breads can be frozen after the first
rising. Punch down, wrap and freeze.
Bake cookies as usual. Cool and freeze on trays,
then pack in recommended freezer bags or car
tons. Unbaked cookies may be dropped, molded
or rolled and frozen on cookie trays. Store in bag or
carton; bake without thawing. Refrigerator-type
cookies can be wrapped and frozen in roll form.
Thaw only enough to slice when ready to bake.
Fruit pies are best frozen unbaked. Bake without
thawing. Bake pecan and similar pies before
freezing,..rich fillings do not freeze solid. Cut steam
vents in top crusts when reaay to bake
13
Page 14
IMPORTANT: Do not expect your freezer to quick-
freeze any large quantity of food. Put no more
unfrozen food into the freezer than will freeze
within 24 hours. (No more than 2 to 3 pounds of
food per cubic foot of freezer space.) Leave
enough space for air to circulate around pack
ages. Be careful fo leave enough room at the
front so the door can close tightly.
FOOD STORAGE CHART
Storage times will vary according to the quality
of the food, the type of packaging or wrap used
(moisture and vapor-proof), and the storage
temperature which should be 0°F ( -'17.8°C).
Food Storage Time
FRUITS
Fruit juice concentrate ...
Commercially frozen fruit.
Citrus fruit and Juices
Others
VEGETABLES
Commercially frozen
Home frozen
MEAT
Bacon ....................................
Corned beef
(Salting meat shortens freezer life)
Frankfurters
Ground beef, lamb, veal ..
Roasts:
Sausage, fresh
Steaks and chops:
FISH
Cod, flounder, haddock
Blue fish, salmon
Mackerel, perch
Breaded fish (purchased)
Clams, oysters, cooked
Alaskan king crab
Shrimp, uncooked
POULTRY
Chicken or turkey.
Duck ......................................
Giblets
Cooked poultry w/gravy .
Slices (no gravy)
MAIN DISHES
Stews; meat, poultry
TV dinners.............................
..................................
........................
...........................
.........................
Beef
..................................
Lamb and veal...................
Pork....................................
Beef
..................................
Lamb, veal, pork
sole
....................................
fish, crab, scallops
whole or parts
..................................
and fish casserole
...........
....................
..............
................
....................
...............
................
..................
...................
............
.........
..........
.......
12 months
.......
12 months
.. 4 to 6 months
8 to 12 months
.........
8 months
8 to 12 months
4 weeks or less
4 weeks or less
.. 2 to 3 months
6 to 12 months
.. 6 to 9 months
.. 4 to 8 months
.. 1 to 2 months
8 to 12 months
.. 3 to 4 months
.. 2 to 3 months
.. 2 to 3 months
.........
3 months
.. 3 to 4 months
.......
10 months
.. 2 to 3 months
Food
Storage Time
DAIRY PRODUCTS
Butter
...................................
Margarine
.............................
. 6 to 9 months
__
12 months
Cheese:
Camembert, Mozzarella,
farmer’s
Creamed cottage
..........................
............
DO NOT FREEZE
Cheddar, Edam, Gouda,
Swiss, brick, etc
...........
. 6 to 8 weeks
Freezing can change texture of
cheese.
.......
Ice cream, ice milk, sherbet
2 months
EGGS
__
Whole (mixed) .....................
Whites...................................
Yolks.....................................
(Add sugaror salt to yolks orwhole mixed eggs)
12 months
__
12 months
__
12 months
BAKED GOODS
.......
Yeast breads and rolls
.........
Baked Brown ’N Serve rolls .
Unbaked breads
Quick breads
Cakes, unfrosted
Cakes, frosted
..................
.......................
................
....................
Fruitcakes ............................
Cookie dough
Baked cookies
.......................
.....................
Baked pies............................
Pie dough only
Based on U.S.D.A. and Michigan Cooperative
Extension Service suggested storage times.
If electricity goes off
Call the power company. Ask how long power
will be off,
1. If service is to be interrupted 24 hours or less,
keep both doors closed. This will help frozen
foods to stay frozen.
2. If service is to be interrupted longer than 24
hours:
(a) Remove all frozen food and store in a
frozen food locker. Or...
(b) Place 2 lbs (0.9 kg) of dry ice in freezer for
every cu. ft, of freezer space. This will keep
frozen foods for 2 to 4 days. Wear gloves to
protect your hands from dry ice burns.
(c) If neither food locker storage nor dry ice is
available, use or can perishable food at
once,
3. A full freezer will stay colder longer than a
partly filled one. A freezer full of meat will stay
cold longer than a freezer full of baked
goods. If food contains ice crystals, it may be
safely refrozen, although the quality and fla
vor may be affected. If the condition of the
food is poor or if you feel it is unsafe, dispose
of it.
....................
3 months
.......
3 months
.........
1 month
. 2 to 3 months
. 2 to 4 months
8 to 12 months
__
12 months
.......
3 months
8 to 12 months
. 1 to 2 months
. 4 to 6 months
14
Page 15
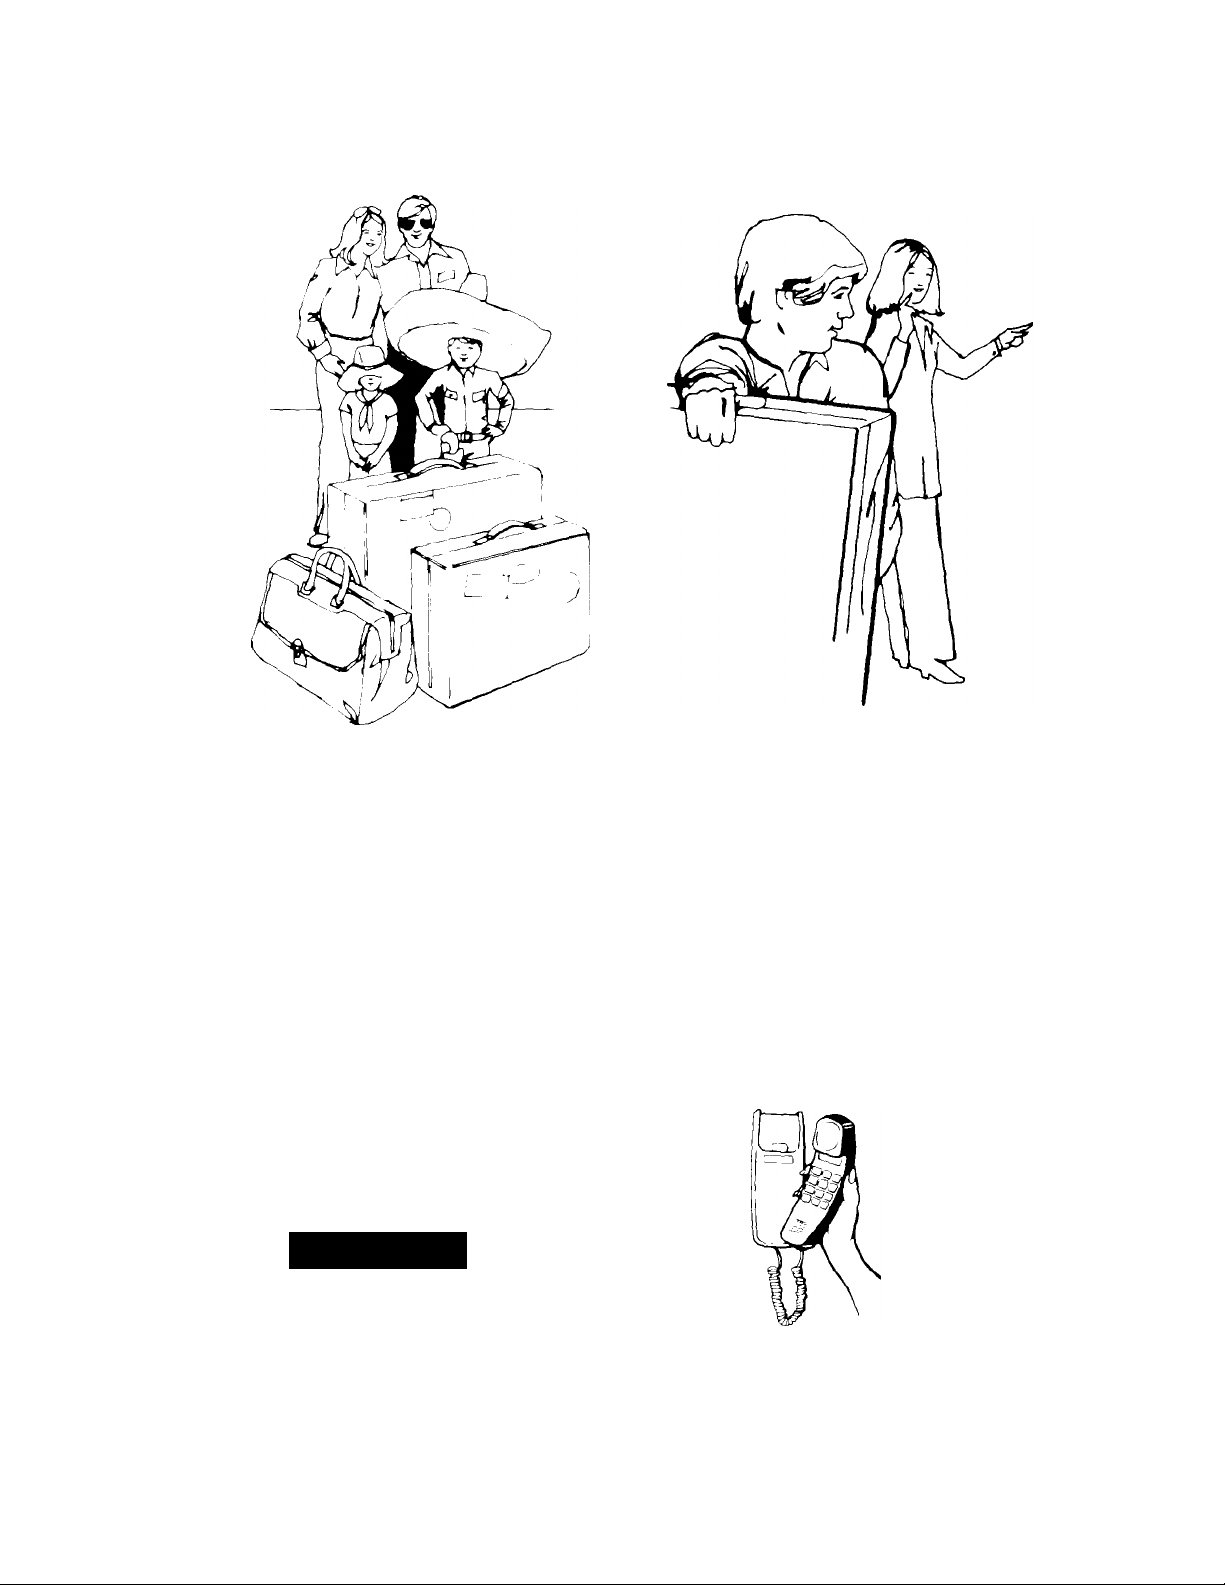
Vacation
and
Moving
Care
Short vacations...
No need to shut off the refrigerator if you will be
away for less than four weeks. Use up perishables:
freeze other items. If your refrigerator is equipped
with an automatic ice maker:
1. Turn it off.
2. Shut off the water supply to the ice maker
3. Empty the ice bin.
Long vacations...
Remove all the food if you are going for a month
or more. If your refrigerator is equipped with an
automatic ice maker, turn off the water supply to
the ice maker at least a day ahead. When the last
load of ice drops, turn off the ice maker.
Unplug the refrigerator and clean it., rinse well
and dry. Tape rubber or wood blocks to the top of
both doors...keeping them open far enough for air
to get in. This will keep odor and mold from build
ing up.
▲warning
Personal Injury Hazard
Do not allow children near the retrigerator
when the doors are blocked open. They may
become injured or trapped.
Moving...
If your refrigerator is equipped with an auto
matic ice maker, shut off the ice maker water sup
ply a day ahead of time. Disconnectthe water line,
After the last supply of ice drops, lift the signal arm
to turn off the ice maker.
Remove all food. Pack frozen foods in dry ice.
Unplug the retrigerator and clean it thoroughly.
Remove everything that comes out Wrap all
parts well and tape them together so they don't
shift and rattle.
Screw in the leveling rollers; tape the doors shut,
and tape the electric cord to the cabinet. When
you get to your new home, put everything back,
and refer to page 4. Don't forget to reconnect the
water supply line it you have an ice maker.
Questions?
...call your
COOL-LINE"
service
assistance
telephone
number
(page 16).
To restart refrigerator, see “Using Your Refrigera
tor” on page 5.
15
Page 16

If you need service or assistance
We suggest you follow these steps:
1. Before calling for assistance...
Performance problems often result from little things
you can find and tlx yourself without tools of any
kind.
If your refrigerator will not operate:
• Is the power supply cord plugged Into a live
circuit with proper voltage? (See page 4.)
• Have you checked your home’s main fuses or
circuit breaker box’’
• Is the Refrigerator Control ON?
If there is a rattling or jingling noise or unfamiliar
sounds:
• is something on top of or behind the refrigerator
making noise when the refrigerator is running?
• New features on your new refrigerator make new
sounds. You may be hearing air fiowing from the
fans, timer clicks for the defrosting cycle, or
defrost water draining in the defrost pan.
if your ice maker will not operate:
• Has the freezer had enough time to get cold"?
With a new refrigerator, this might take overnight,
• is the signal arm ON...in the down position"’
• IS the water valve turned on"’ Is water getting to
the ice maker?
If there is water in the defrost pan:
• This is normal in hot, muggy weather. The pan can
even be half full. Make sure the refrigerator is
level so the pan does not overflow
It the light does not work:
• Have you checked your home’s main fuses or
circuit breaker box?
• IS the power supply cord plugged info a iive
circuit with proper voltage? (See page 4.)
If a bulb is burned out:
• See instructions for changing light bulbs on page
7 Use appliance bulbs only
If the motor seems to run too much:
• Is the condenser free of dust and linP
« On hot days, or if the room is warm, the motoi
naturally runs longer.
• If the door has been opened a lot. or if a large
amount at food has been putin.themotorwill run
longer to cool down the interior.
Remember:
Motor running time depends on different things:
number of door openings, amount of food stored,
temperature of the room, setting of the controls.
Your new refrigerator may be larger than your
old one so it has more space to be cooled. It also
has a regular freezer instead of a frozen food com
partment. All this means better refrigeration and
may require more running time than your old one.
2« If you need assistance"^...
Call Whirlpool COOL-LINE^ service assistance
telephone number. Dial free from anywhere in
the U.S.:
1-800-253-1301
end talk with one of our trained consultants. The
consultant can instruct you in how to obtain satis
factory operation from your appliance or, if serw
ice is necessary, recommend a qualified service
company in your area.
T you prefer, write to:
Mr. Donald Skinner
Director of Consumer Relations
Whirlpool Corporation
2000 M-63
Benton Harbor, Ml 49022
Jlease include a daytime phone number in your
correspondence.
3. If you need service*...
. Whirlpool has a nationwide net
WhlTlpooI service companies. Whirlpool
SERVICE service technicians are trained to
.crovide after-warranty service, anywhere in the
United States. To locate the authorized Whirlpool
vervice company in your area, call our COOL
: INE" service assistance telephone number (see
Step 2] or look in your telephone directory Yellow
•^ages under:
APPLiANCES HOUSEHOLD
MA.jOR SERVICE & REPAIR
work of authorized Whirlpoopf^
fulfill the product warranty and
LLECTRICAL APPLIANCES
MAJOR • REPAIRING & PARTS
WASHING MACHINES. DRYERS
OR
& IRONERS - SERVICING
Page 17

4. If you need FSP
replaeement parts*..
FSP is a registered trademark of Whirlpooi Corpo
ration for quality parts. Look tor this symbol of quaP
ity whenever you need a replacement part for
your Whirlpool appliance. FSP replacement parts
will tit rightand work right, because they are made
to the same exacting specifications used to build
every new Whirlpool appliance.
To locate FSP replacement parts In your area,
refer to Step 3 above or call the Whirlpool COOL
LINE service assistance number in Step 2
5. If you are not satisfied with how
the problem was solved*...
• Contact the Major Appliance Consumer Action
Panel (MACAP), MACAP is a group of indepen
dent consumer experts that voices consumer
views at the highest levels of the major apDllance Industry.
• Contact MACAP only when the dealer, autho
rized servicer or Whirlpool have failed to resolve
your problem.
Major Appliance Consumer Action Panel
20 North Wacker Drive
Chicago, IL 60606
• MACAP will in turn inform us of your action.
‘When requesting assistance, please provide
model number, serial number, date of purchase
and a complete description of the problem. This
nformatlon is needed in order to better respond
to your request
17
Page 18

Notes
18
Page 19

Notes
19
Page 20
WHIRIPOOL’ REFRIGERATOR
WARRANTY
RF001
LENGTH OF WARRANTY WHIRLPOOL WILL PAY FOR
FULL ONE-YEAR WARRANTY
From Date of Purchase
LIMITED FIVE-YEAR WARRANTY
From Date of Purchase
FULL FIVE-YEAR WARRANTY
From Date of Purchase
WHIRLPOOL WILL NOT PAY FOR
A. Service calls to:
1. Correct the installation of the refrigerator,
2. Instruct you howto use the refrigerator.
3. Replace house fuses or correct house wiring or plumbing.
4. Replace light bulbs.
B. Repairs when refrigerator is used in other than normal, single-family household use.
C. Pick up and delivery. This product is designed to be repaired in the home.
D. Damage to refrigerator caused by accident, misuse, fire, flood, acts of God or use of
products not approved by Whirlpool.
E. Any labor costs during limited warranty.
F. Any food loss due to product failure.
WHIRLPOOL CORPORATION SHALL NOT BE LIABLE FOR INCIDENTAL OR CONSEQUENTIAL DAMAGES. Some
states do not allow the exclusion or limitation of incidentai orconsequentiai damages so this iimitation or
exclusion may not apply to you. This warranty gives you specitic legal rights, and you may also have
other rights which vary from state to state.
Outside the United States, a different warranty may apply. For details, please contact your franchised Whirlpool
distributor or military exchange.
If you need service, first see the "Service and Assistance" section of this book. After checking "Service and
Assistance," additional help can be fcund by calling our COOL-LINE® service assistance felephcne number,
1-800-253-1301, from anywhere in the U S
FSP ^ replacement parts and repair labor to correct defects
in materials or workmanship. Service must be provided by an
authorized Whirlpool'' service company.
FSP replacement parts for electronic control system if defective
in materials or workmanship. (Electronic models only.)
FSP replacement parts and repair labor to correct defects in
materials or workmanship in the sealed refrigeration system.
These parts are:
1. Compressor
2. Evaporator
3. Condenser
4. Drier
5. Connecting tubing
Service must be provided by an authorized Whirlpool™
service company.
Whirlpool
Part Nc 1114039 Rev. B
c 1989 Whirlpool Corporotior
¡Makers ioshwashers Buill-in Ovens ana Surt.tcp Uniis Ranges Microw^vi Ovens ^'asn ' ^nuai lo's. ^gorr; Air Conflitioners, Dehumidiliers A -nalic Washers. Clothes Dryers Freezers Relrigera
Printed in U.S.A.
 Loading...