

Whirlpool DP8700XT User Manual
! D D
c
PORTABLE
DISHWASHER
Model DP8700XT Series
Zers. Ice Makers, Dishwashers, Buill-In Ovens and SlIdaCe Un~ls. Ranges. Microwave Ovens, Trash Compactors Room Air Conditioners. Oehumidilien, Aulomalic Washers, Clothes Dryers, Freezes, &I,
Contents
Page
BEFORE YOU USE YOUR DISHWASHER 2
IMPORTANT SAFETY INSTRUCTIONS.. 2
PARTS AND FEATURES. 3
POWER CLEAN* WASHING SYSTEM.. 4
Step-Saving Preparation for Washing 4
Hot Water Is a Must 4
Quiet Operating Tips 4
PROPER LOADING 5
Top Rack Loading 5
Bottom Rack Loading 6
Silverware Basket Loading 6
ADDING DETERGENT. 7
The Detergent Dispenser. 7
How Much Detergent to Use 7
RINSE AID DISPENSER.. 7
BEFORE STARTING YOUR DISHWASHER. 8
STARTING YOUR DISHWASHER.. 8
Page
Selecting a Cycle 8
HI-TEMP WASH Option 9
The AIR DRY Option 9
The RESET OPTIONS Button 9
Using DELAY START 10
Changing a Setting 10
The CLEAN Signal Light 10
To Add a Dish After Starting 10
ENERGY SAVING TIPS 11
SPECIAL TIPS ON DISHWASHER USE. 12
COMMON DISHWASHING PROBLEMS.. 13
CONNECTING YOUR PORTABLE
DISHWASHER.. . 15
IF YOU NEED SERVICE OR ASSISTANCE. 16
WHIRLPOOL DISHWASHER WARRANTY 20
01989 Whirlpool Corporation
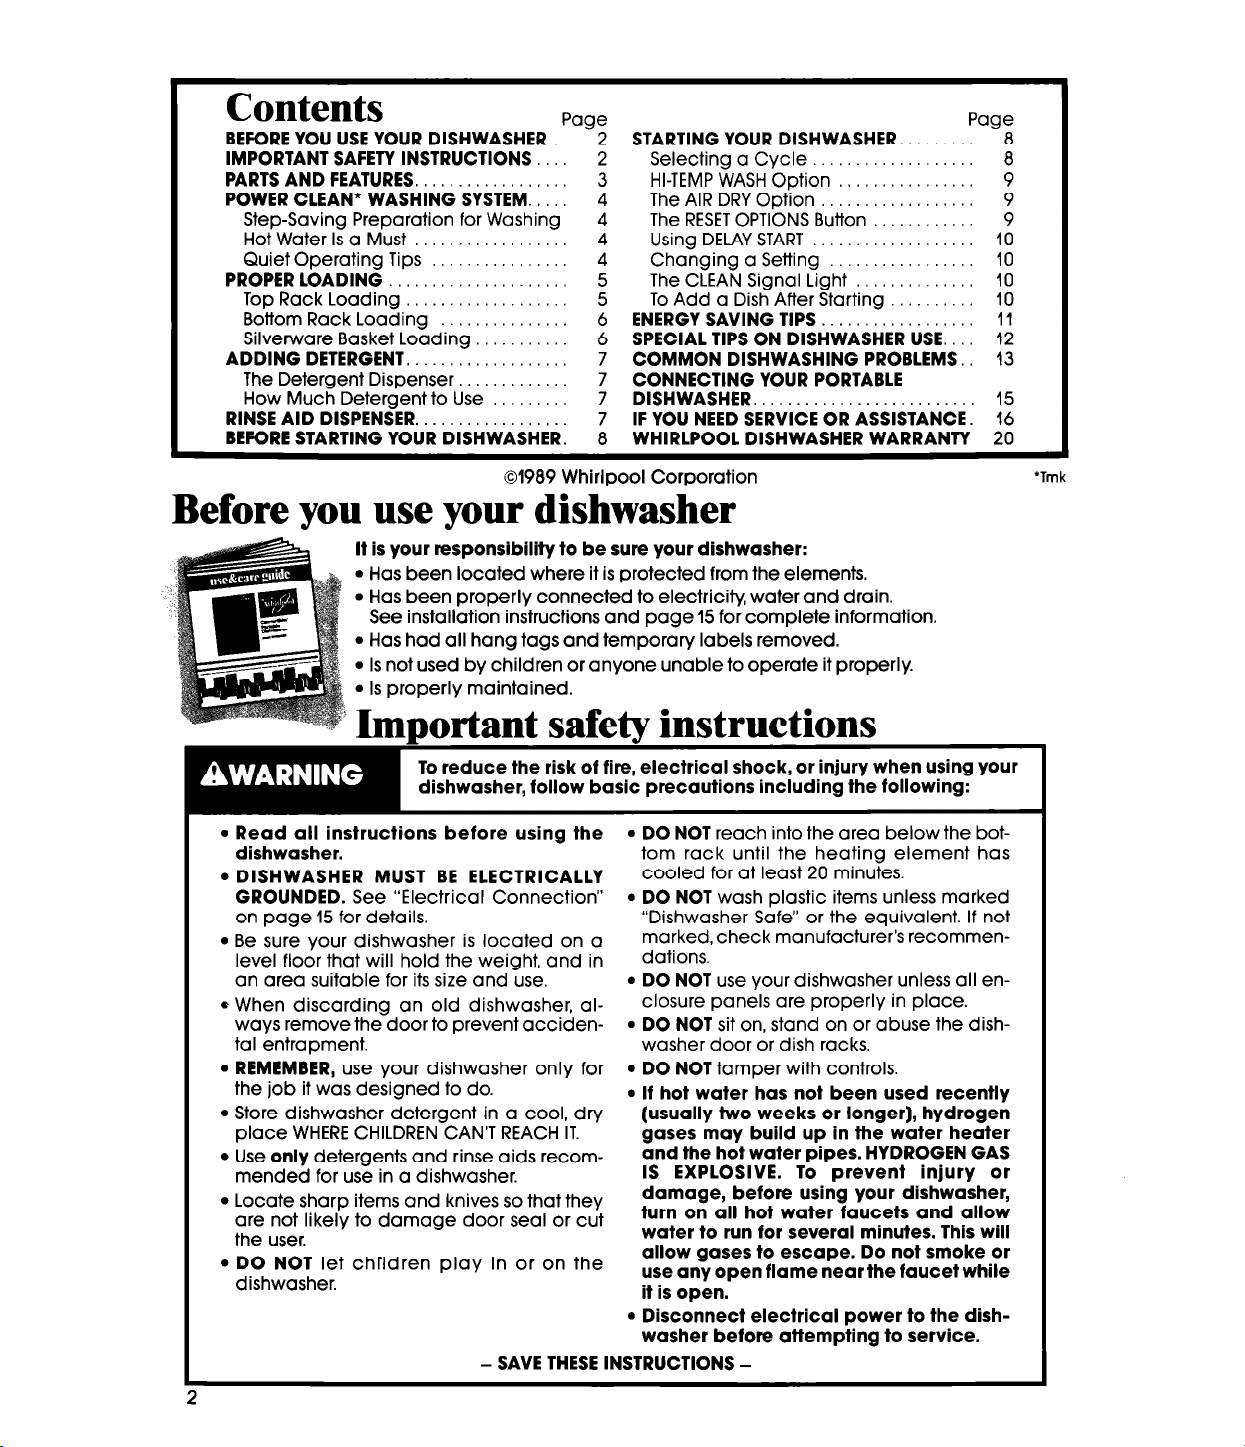
Before you use your dishwasher
It is your responslbillty to be sure your dishwasher:
l
Has been located where it is protected from the elements.
l
Has been properly connected to electricity water and drain.
See installation instructions and page 15 for complete information.
l
Has had all hang tags and temporary labels removed.
l
Is not used by children or anyone unable to operate it properly.
l
Is properly maintained.
’ Important safety instructions
To reduce the risk of fire, electrical shock, or injury when using your
dishwasher, follow basic precautions including the following:
l
Read all instructions before using the
dishwasher. tom rack until the heating element has
. DISHWASHER MUST BE ELECTRICALLY
GROUNDED. See “Electrical Connection”
on page 15 for details.
l
Be sure your dishwasher is located on a
level floor that will hold the weight, and in
an area suitable for its size and use.
= When discarding an old dishwasher, al-
ways remove the door to prevent accidental entrapment. washer door or dish racks.
l
REMEMBER, use your dishwasher only for l DO NOT tamper with controls.
the job it was designed to do.
l
Store dishwasher detergent in a cool, dry (usually two weeks or longer), hydrogen
place WHERE CHILDREN CAN’T REACH IT.
l
Use only detergents and rinse aids recommended for use in a dishwasher.
l
Locate sharp items and knives so that they
are not likely to damage door seal or cut
the user.
l
DO NOT let children play in or on the
dishwasher.
- SAVE THESE INSTRUCTIONS -
l
DO NOT reach into the area below the botcooled for at least 20 minutes.
l
DO NOT wash plastic items unless marked
“Dishwasher Safe” or the equivalent. If not
marked, check manufacturer’s recommendations.
l
DO NOT use your dishwasher unless all enclosure panels are properly in place.
l
DO NOT sit on, stand on or abuse the dish-
l
If hot water has not been used recently
gases may build up in the water heater
and the hot water pipes. HYDROGEN GAS
IS EXPLOSIVE. To prevent injury or
damage, before using your dishwasher,
turn on all hot water faucets and allow
water to run for several minutes. This will
allow gases to escape. Do not smoke or
use any open flame near the faucet while
it is open.
l
Disconnect electrical power to the dishwasher before attempting to service.
‘Tmk
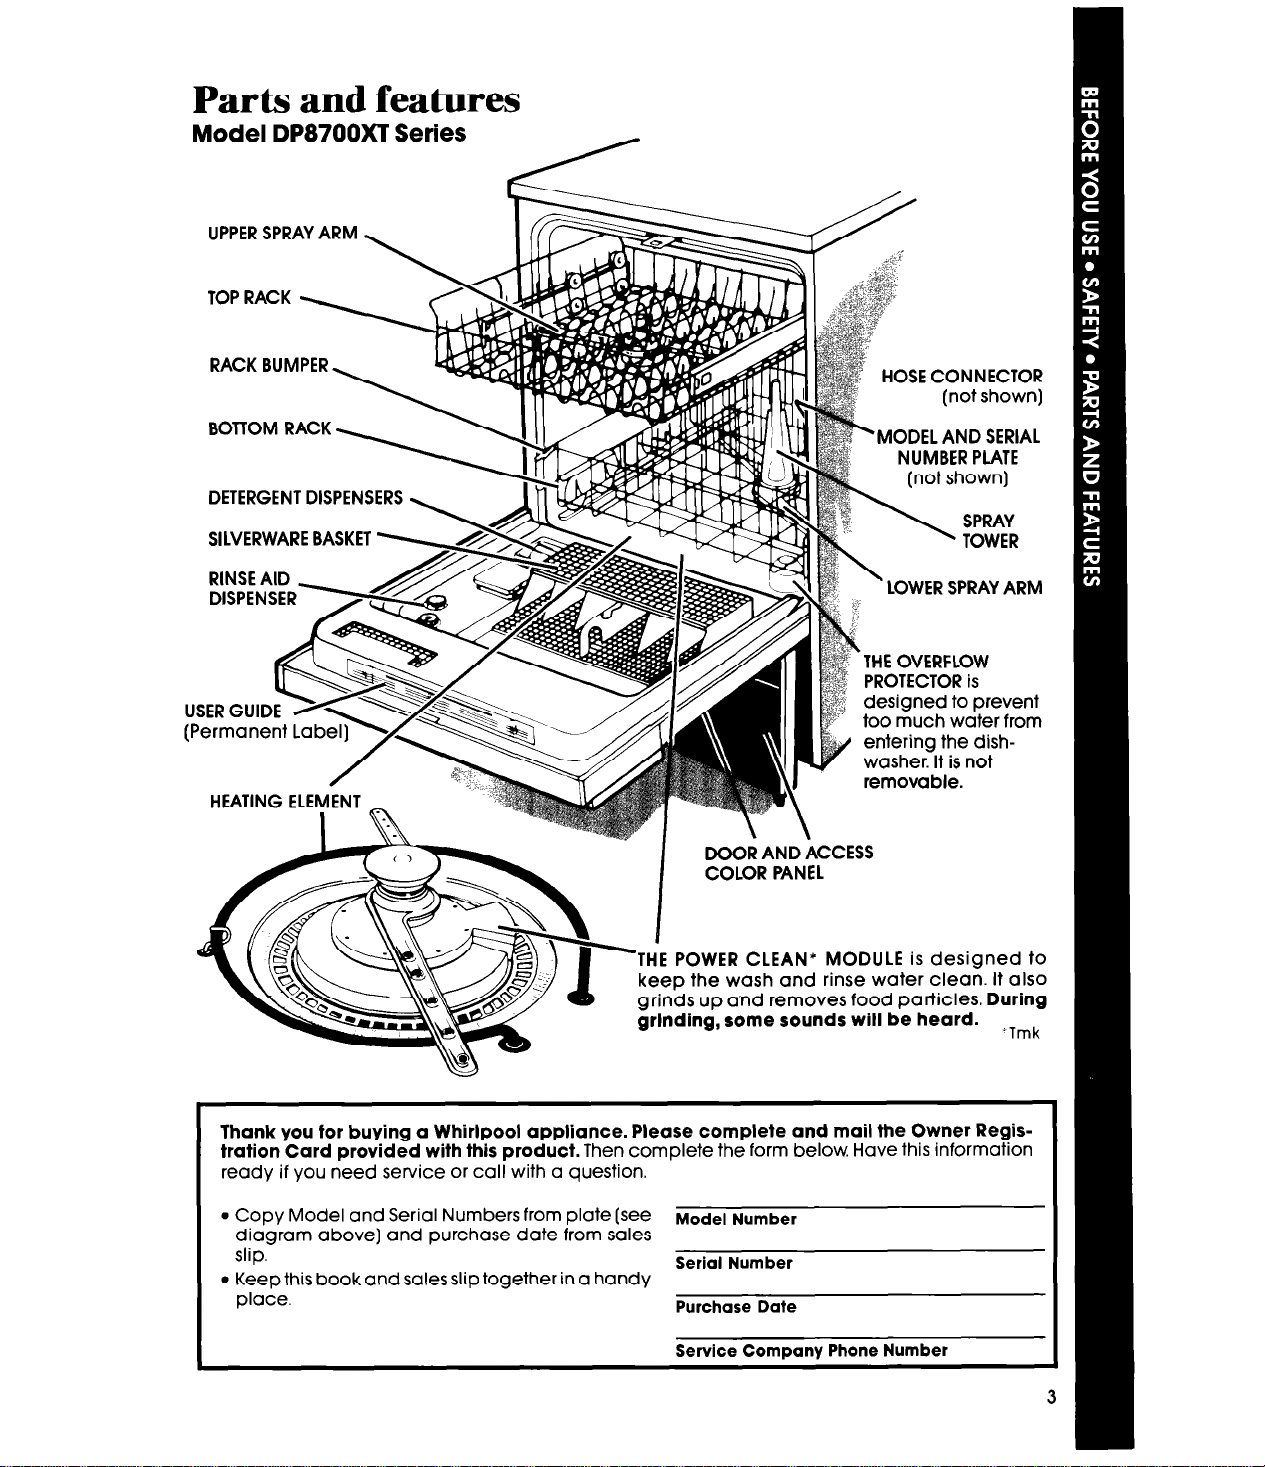
Parts and features
Model DP8700XT Series
UPPER SPRAY ARM
RACK BUMPER
BOTTOM RACK
DETERGENT DISPENSERS
SILVERWARE BASKE
RINSE AID
DISPENSER
USER GUIDE
(Permanent
HEATING ELEMENT
HOSE CONNECTOR
(not shown)
MODEL AND SERIAL
NUMBER PLATE
(not snownl
LOWER SPRAY ARM
entering the dishwasher. It is not
removable.
DOOR AND ACCESS
COLOR PANEL
THE POWER CLEAN* MODULE is designed to
keep the wash and rinse water clean. It also
grinds up and removes food particles. During
grlnding, some sounds will be heard.
Thank you for buying a Whirlpool appliance. Please complete and mail the Owner Registration Card provided with this product. Then complete the form below. Have this information
ready if you need service or call with a question.
l
Copy Model and Serial Numbers
diagram above] and purchase date from sales
slip.
l
Keep this book and sales slip together in a handy
place.
from
plate (see
Model Number
Serial Number
Purchase Date
Service Company Phone Number
,Tmk
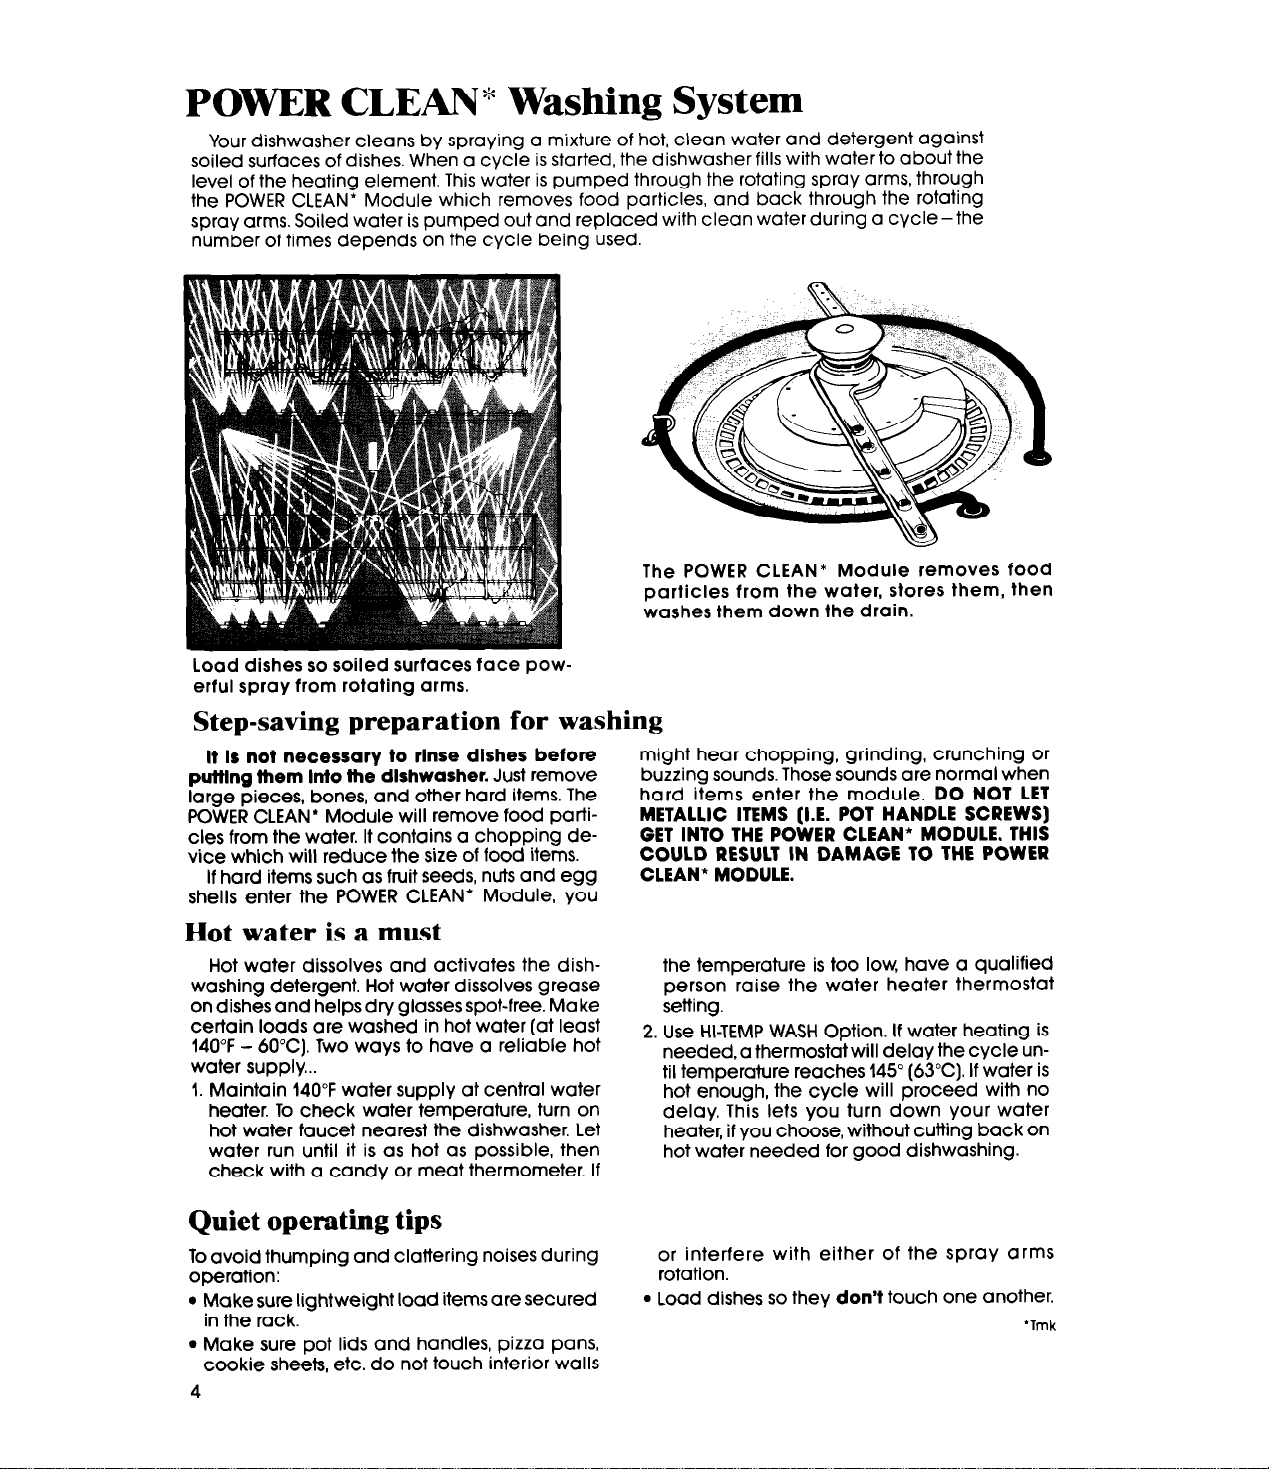
POmR CLEAN* Washing System
Your dishwasher cleans by spraying a mixture of hot, clean water and detergent against
soiled surfaces of dishes. When a cycle is started, the dishwasher fills with water to about the
level of the heating element This water is pumped through the rotating spray arms, through
the POWER CLEAN* Module which removes food particles, and back through the rotating
spray arms. Soiled water is pumped out and replaced with clean water during a cycle-the
number of times depends on the cycle being used.
The POWER CLEAN* Module removes food
particles from the water, stores them, then
washes them down the drain.
Load dishes so soiled surfaces face powerful spray from rotating arms.
Step-saving preparation for washing
It Is not necessary to rinse dishes before
putting them Into the dlshwasher. Just remove
large pieces, bones, and other hard items. The
POWER CLEAN’ Module will remove food particles from the water. It contains a chopping device which will reduce the size of food items.
If hard items such as fruit seeds, nuts and egg
shells enter the POWER CLEAN* Module, you
Hot water is a must
Hot water dissolves and activates the dishwashing detergent. Hot water dissolves grease
on dishes and helps dry glasses spot-free. Make
certain loads are washed in hot water (at least
140°F - 60°C). Two ways to have a reliable hot
water supply...
I. Maintain 140°F water supply at central water
heater. To check water temperature, turn on
hot water faucet nearest the dishwasher. Let
water run until it is as hot as possible, then
check with a candy or meat thermometer. If
Quiet operating tips
To avoid thumping and clattering noises during
operation:
l
Make sure lightweight load items are secured
in the rack.
l
Make sure pot lids and handles, pizza pans,
cookie sheets, etc. do not touch interior walls
4
might hear chopping, grinding, crunching or
buzzing sounds. Those sounds are normal when
hard items enter the module. DO NOT LET
METALLIC ITEMS (I.E. POT HANDLE SCREWS)
GET INTO THE POWER CLEAN* MODULE. THIS
COULD RESULT IN DAMAGE TO THE POWER
CLEAN* MODULE.
the temperature is too low, have a qualified
person raise the water heater thermostat
setting.
2. Use HI-TEMP WASH Option. If water heating is
needed, a thermostat will delay the cycle until temperature reaches 145” (63°C). If water is
hot enough, the cycle will proceed with no
delay. This lets you turn down your water
heater, if you choose, without cutting back on
hot water needed for good dishwashing.
or interfere with either of the spray arms
rotation.
l
Load dishes so they don’t touch one another.
‘Tmk
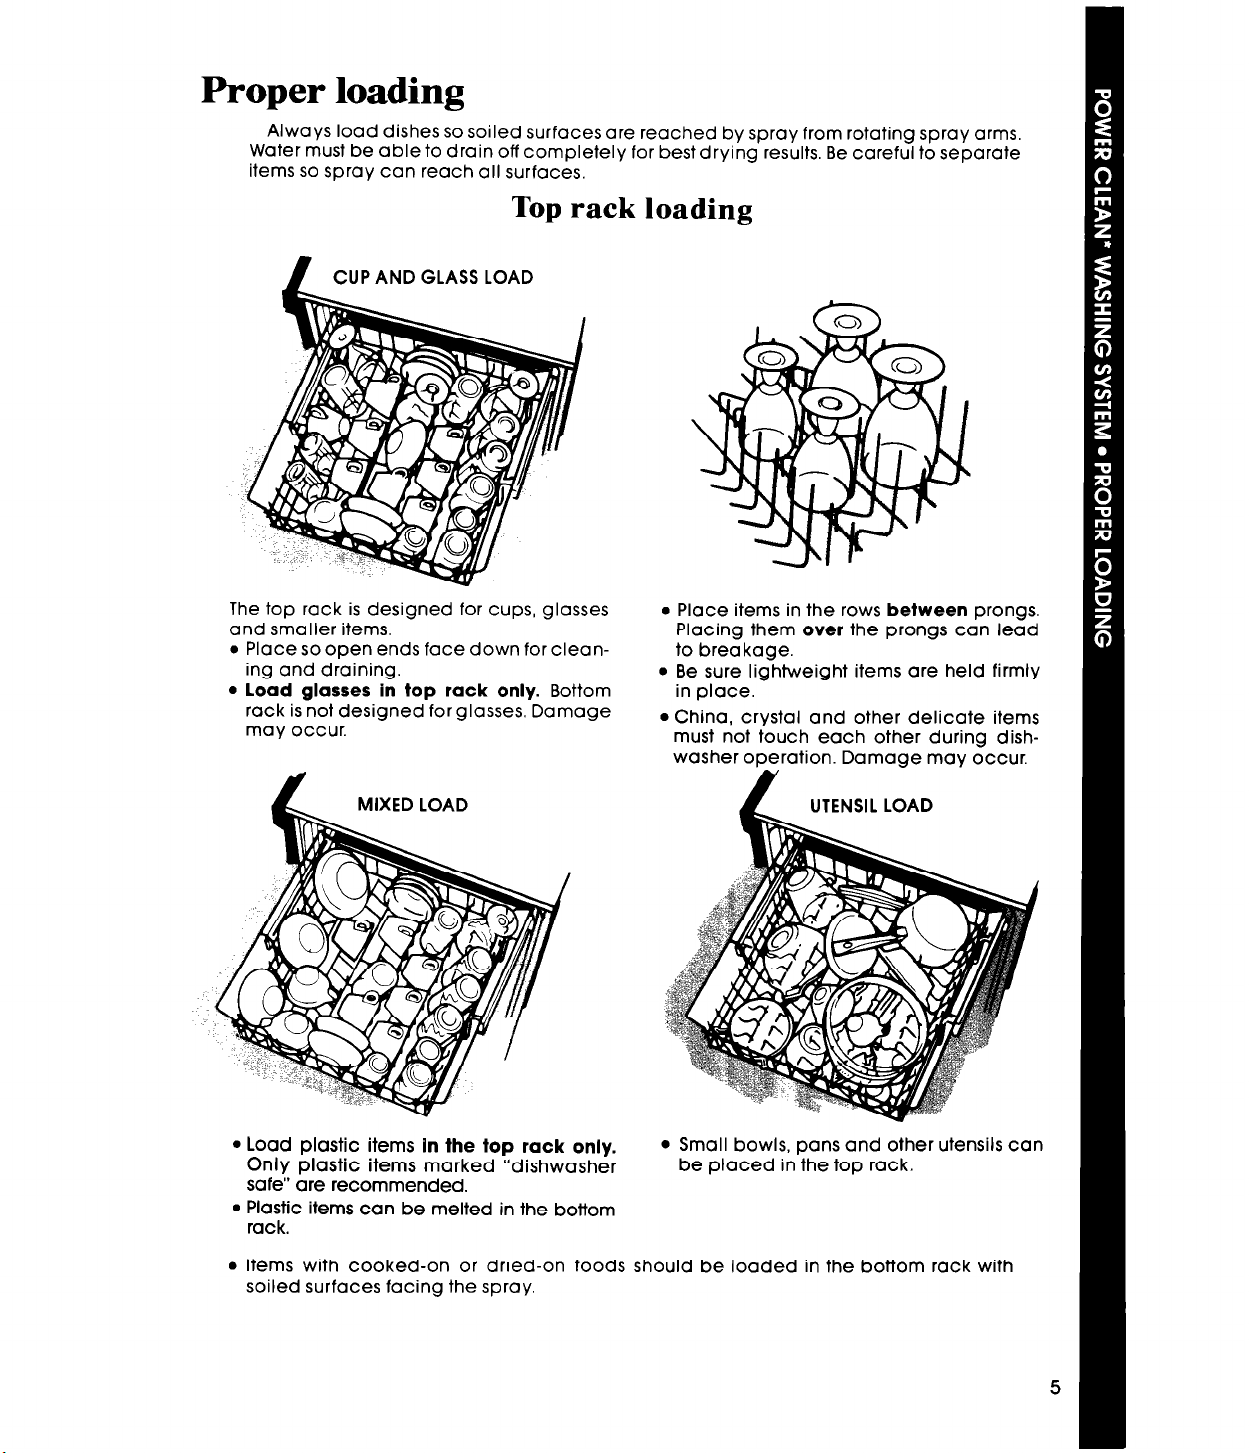
Proper loading
Always load dishes so soiled surfaces are reached by spray from rotating spray arms.
Water must be able to drain off completely for best drying results. Be careful to separate
items so spray can reach all surfaces.
Top rack loading
CUP AND GLASS
I
LOAD
The top rack is designed for cups, glasses
and smaller items.
l
Place so open ends face down for cleaning and draining.
l
load glasses in top rack only. Bottom
rack is not designed for glasses. Damage
may occur.
l
Place items in the rows between prongs.
Placing them over the prongs can lead
to breakage.
l
Be sure lightweight items are held firmly
in place.
l
China, crystal and other delicate items
must not touch each other during dish-
washer operation. Damage may occur.
UTENSIL LOAD
l
Load plastic items In the top rack only.
Only plastic items marked “dishwasher
. Small bowls, pans and other utensils can
be placed in the top rack.
safe” are recommended.
l
Plastic items can be melted in the bottom
rack.
l
Items with cooked-on or dried-on foods should be loaded in the bottom rack with
soiled surfaces facing the spray.
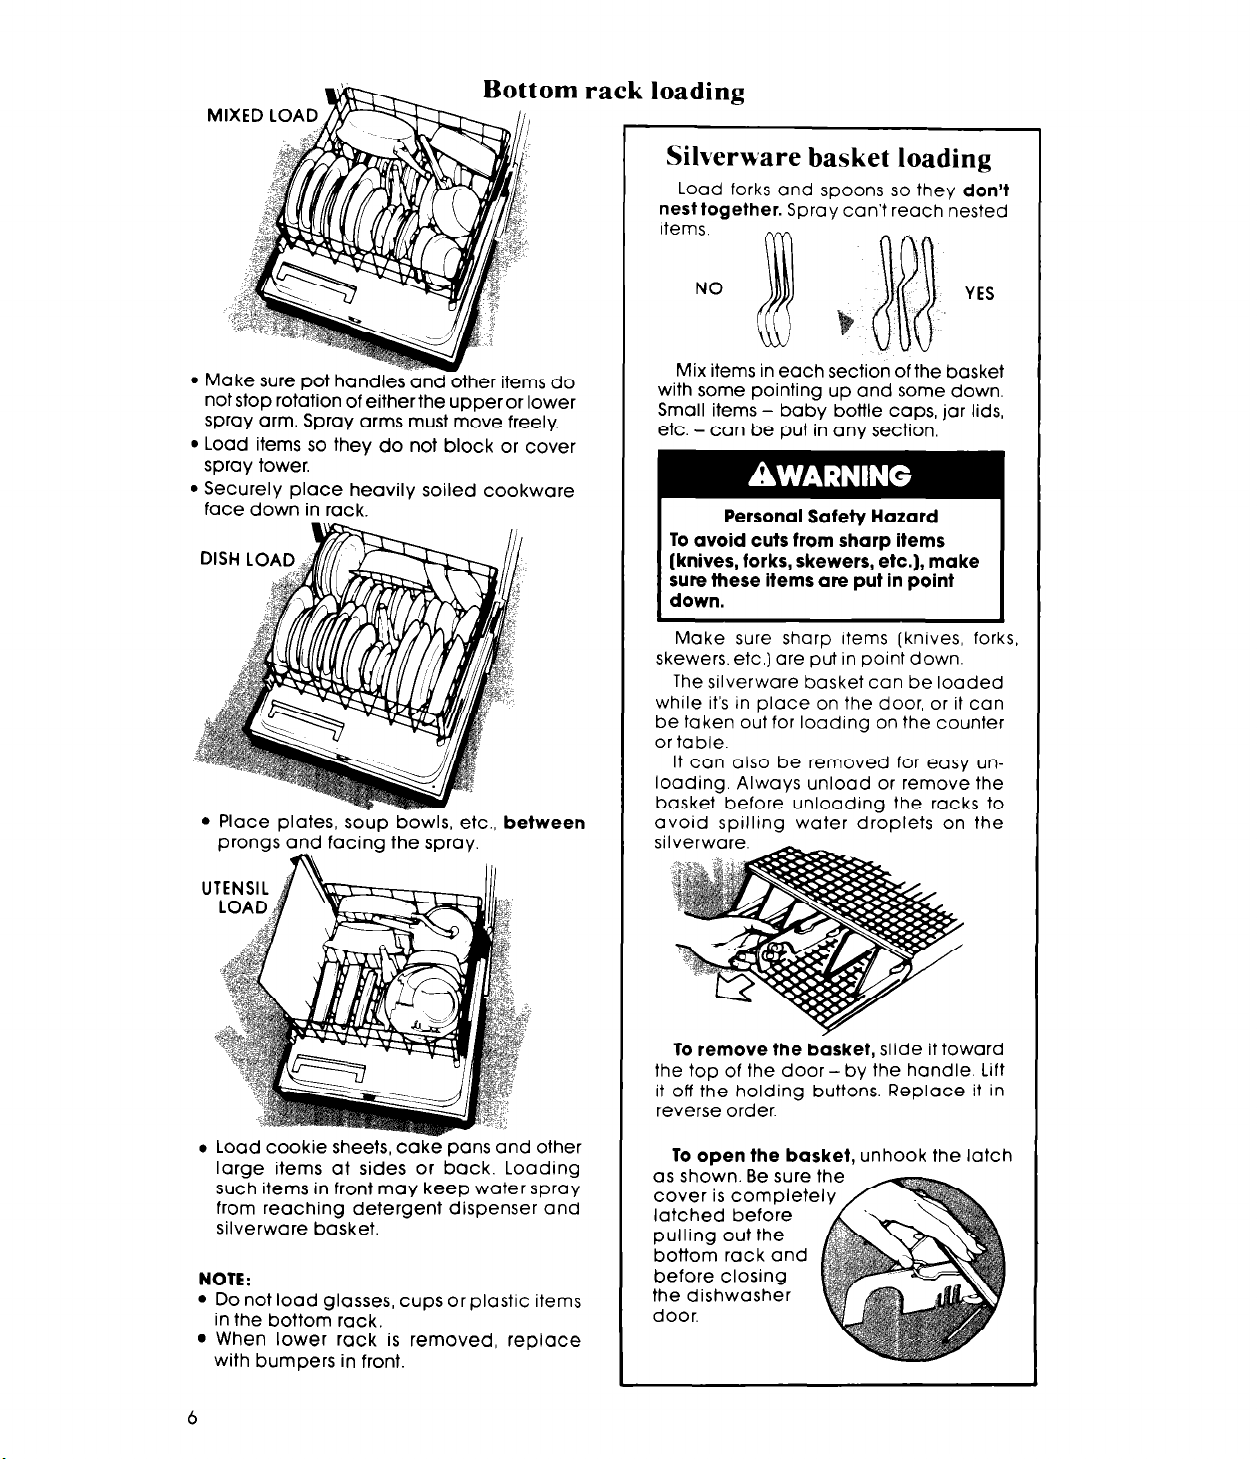
rack loading
Silverware basket loading
Load forks and spoons
nest together.
Items.
so
they
don’t
Spray can’t reach nested
l
Make sure pot handles andother items do
not stop rotation of eitherthe upper or lower
spray arm. Spray arms must move freely.
l
Load items so they do not block or cover
spray tower.
l
Securely place heavily soiled cookware
face down in rack.
l
Place plates, soup bowls, etc., between
prongs and
facing the spray.
NO
YES
Mix items in each section of the basket
with some pointing up and some down.
Small items - baby bottle caps, jar lids,
etc. - can be put in any section,
Personal Safety Hazard
To avoid cuts from sharp items
(knives, forks, skewers, etc.), make
sure these items are put in point
down.
Make sure sharp Hems (knives, forks,
skewers, etc.) are put in point down.
The silverware basket can be loaded
while it’s in place on the door, or it can
be taken out for loading on the counter
or table.
It con also be removed for easy unloading. Always unload or remove the
basket before unloading the racks to
avoid spilling water droplets on the
l
Load cookie sheets, cake pans and other
large items at sides
or
back. Loading
such items in front may keep water spray
from reaching detergent dispenser and
silverware basket.
NOTE:
l
Do not load glasses, cups or plastic items
in the bottom rack.
l
When lower rack is removed,
replace
with bumpers in front.
6
To remove the basket, slide it toward
the top of the door - by the handle. Lift
it off the holding buttons. Replace it in
reverse order.
To open the basket, unhook the latch
as shown. Be sure the
cover is complete
latched before
pulling out the
bottom rack and
before closing
the dishwasher
door.
 Loading...