

WATER COOLER
Use & Care Guide
For questions about features, operation/performance
parts, accessories or service, call: 1-866-363-9472.
or visit our website at...
www.whirlpool.com
ENFRIADOR DE AGUA
Manual de uso y cuidado
Para consultas respecto a características, operación/desempeño,
partes, accesorios o servicio técnico, llame al: 1-866-363-9472.
o visite nuestra página de internet
www.whirlpool.com
DISTRIBUTEUR D’EAU
Guide d’utilisation
et d’entretien
Pour des questions à propos des caractéristiques, du
fonctionnement/de la performance, des pièces, accessoires ou du
service, composez le 1-866-363-9472
ou visitez notre site web à
www.whirlpool.com
W10193251A
Table of Contents/Índice/Table des matières..... 2
Models/
modelos/
modèles/
B10P
D25
D45
Submodels
submodelos
sous-modèles
WDAB600XWX, WHKMB10P
WDAB803XWX, WHKMD25
WDAB805XWX, WHKMD45
TABLE OF CONTENTS
WATER COOLER SAFETY ............................................................2
PARTS AND FEATURES................................................................3
INSTALLATION INSTRUCTIONS..................................................4
Tools and Parts ............................................................................4
Unpack the Water Cooler ............................................................4
Location Requirements................................................................4
Electrical Requirements ...............................................................4
WATER COOLER USE ...................................................................5
Water Cooler Preparation ............................................................5
Operating the Water Cooler.........................................................5
ÍNDICE
SEGURIDAD DEL ENFRIADOR DE AGUA.................................12
PIEZAS Y CARACTERÍSTICAS ...................................................13
INSTRUCCIONES DE INSTALACIÓN.........................................14
Piezas y herramientas................................................................14
Desempaque el enfriador de agua.............................................14
Requisitos de ubicación.............................................................14
Requisitos eléctricos..................................................................14
USO DEL ENFRIADOR DE AGUA...............................................15
Preparación del enfriador de agua ............................................15
Funcionamiento del enfriador de agua......................................15
Water Dispensers.........................................................................7
Changing a Water Bottle..............................................................8
WATER COOLER CARE.................................................................8
Cleaning........................................................................................8
Sanitizing ......................................................................................9
Storing the Water Cooler..............................................................9
TROUBLESHOOTING ..................................................................10
ASSISTANCE OR SERVICE.........................................................11
WARRANTY ..................................................................................11
Despachadores de agua............................................................17
Cómo cambiar una botella de agua...........................................18
CUIDADO DEL ENFRIADOR DE AGUA......................................18
Limpieza .....................................................................................18
Desinfección...............................................................................20
Almacenamiento del enfriador de agua.....................................20
SOLUCIÓN DE PROBLEMAS......................................................20
AYUDA O SERVICIO TÉCNICO...................................................21
GARANTÍA.....................................................................................22
TABLE DES MATIÈRES
SÉCURITÉ DU DISTRIBUTEUR D’EAU......................................23
PIÈCES ET CARACTÉRISTIQUES..............................................24
INSTRUCTIONS D'INSTALLATION ............................................24
Outillage et pièces......................................................................24
Déballage du distributeur d’eau.................................................24
Exigences d'emplacement.........................................................25
Spécifications électriques..........................................................25
UTILISATION DU DISTRIBUTEUR D'EAU .................................25
Préparation du distributeur d’eau..............................................25
Fonctionnement du distributeur d'eau ......................................26
Utilisation des distributeurs d'eau..............................................28
Changement de la bouteille d'eau .............................................28
ENTRETIEN DU DISTRIBUTEUR D'EAU....................................29
Nettoyage ...................................................................................29
Assainissement ..........................................................................30
Remisage....................................................................................30
DÉPANNAGE.................................................................................30
ASSISTANCE OU SERVICE.........................................................31
GARANTIE.....................................................................................32
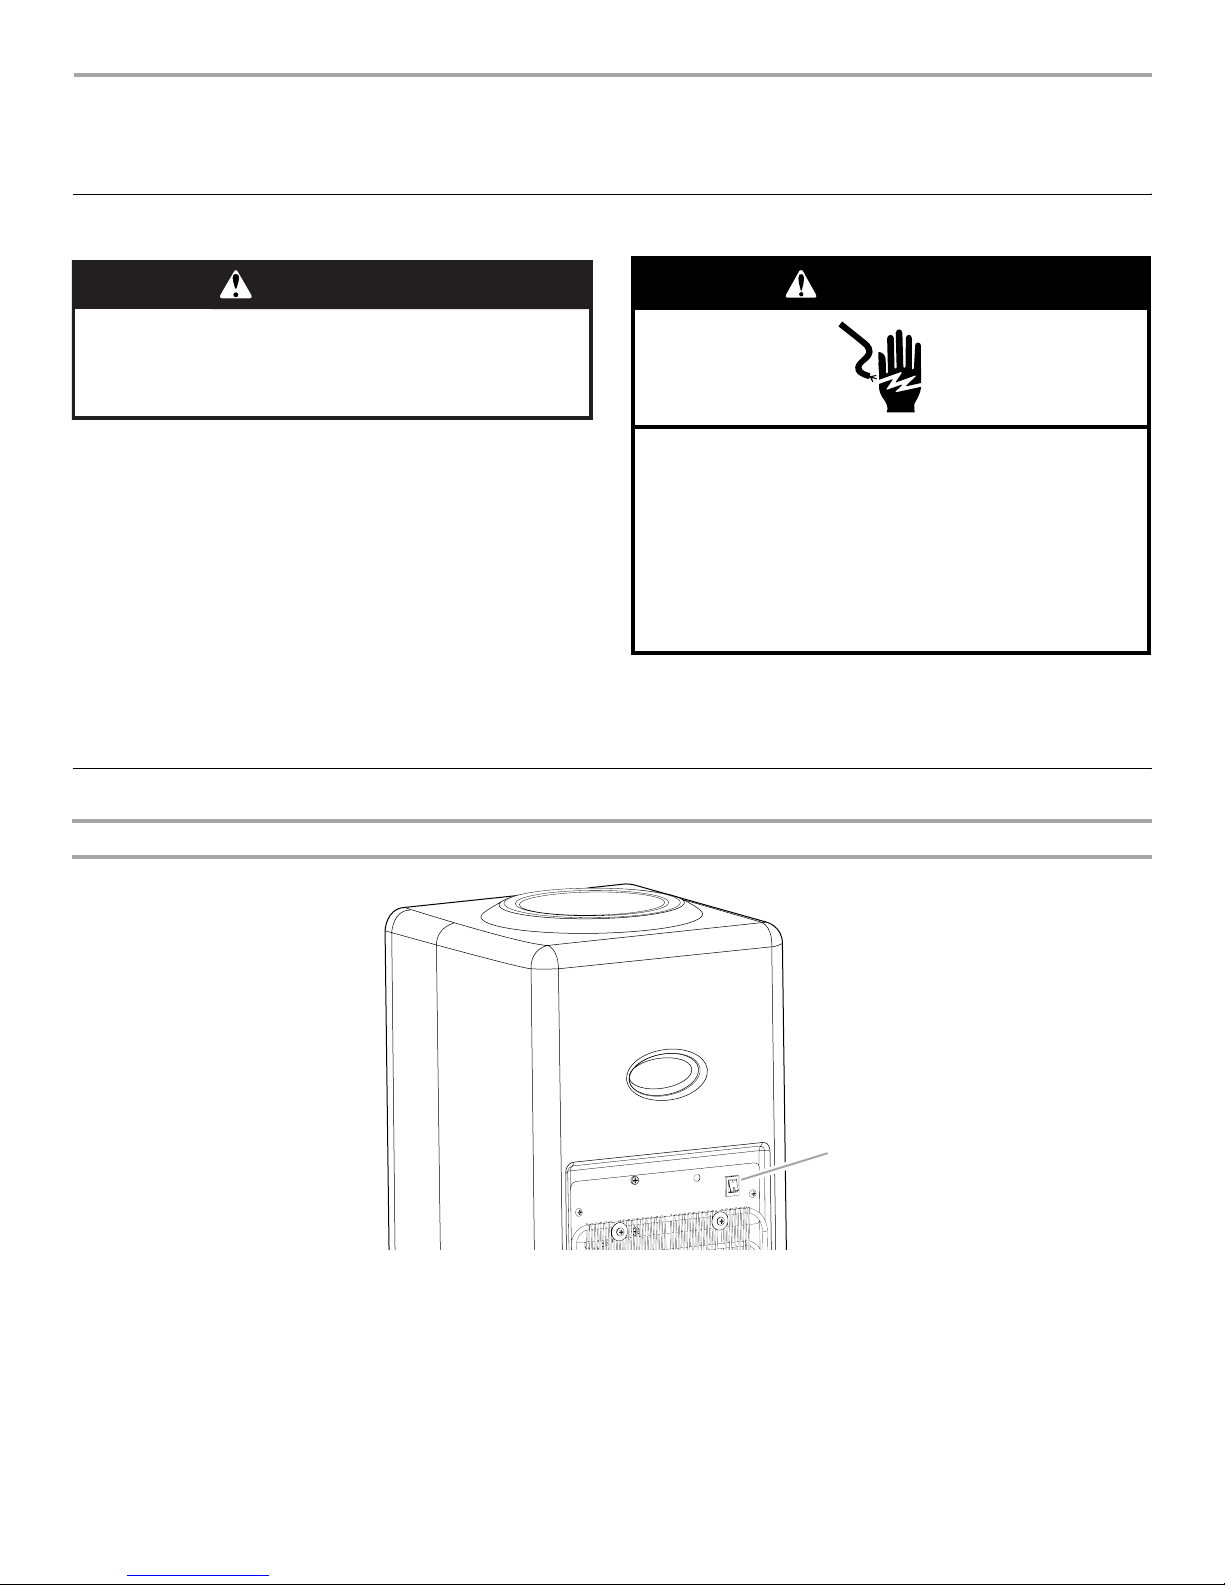
WATER COOLER SAFETY
Your safety and the safety of others are very important.
We have provided many important safety messages in this manual and on your appliance. Always read and obey all safety
messages.
This is the safety alert symbol.
This symbol alerts you to potential hazards that can kill or hurt you and others.
All safety messages will follow the safety alert symbol and either the word “DANGER” or “WARNING.”
These words mean:
You can be killed or seriously injured if you don't immediately
DANGER
follow instructions.
WARNING
All safety messages will tell you what the potential hazard is, tell you how to reduce the chance of injury, and tell you what can
happen if the instructions are not followed.
2
can be killed or seriously injured if you don't
You
instructions.
follow
IMPORTANT SAFETY INSTRUCTIONS
WARNING:
■
Plug into a grounded 3 prong outlet.
■
Do not remove ground prong.
■
Do not use an adapter.
■
Do not use an extension cord.
To reduce the risk of fire, electric shock, or injury when using your water cooler, follow these basic precautions:
■
Disconnect power before servicing.
■
Replace all parts and panels before operating.
■
Use two or more people to move and install water cooler
and bottles.
SAVE THESE INSTRUCTIONS
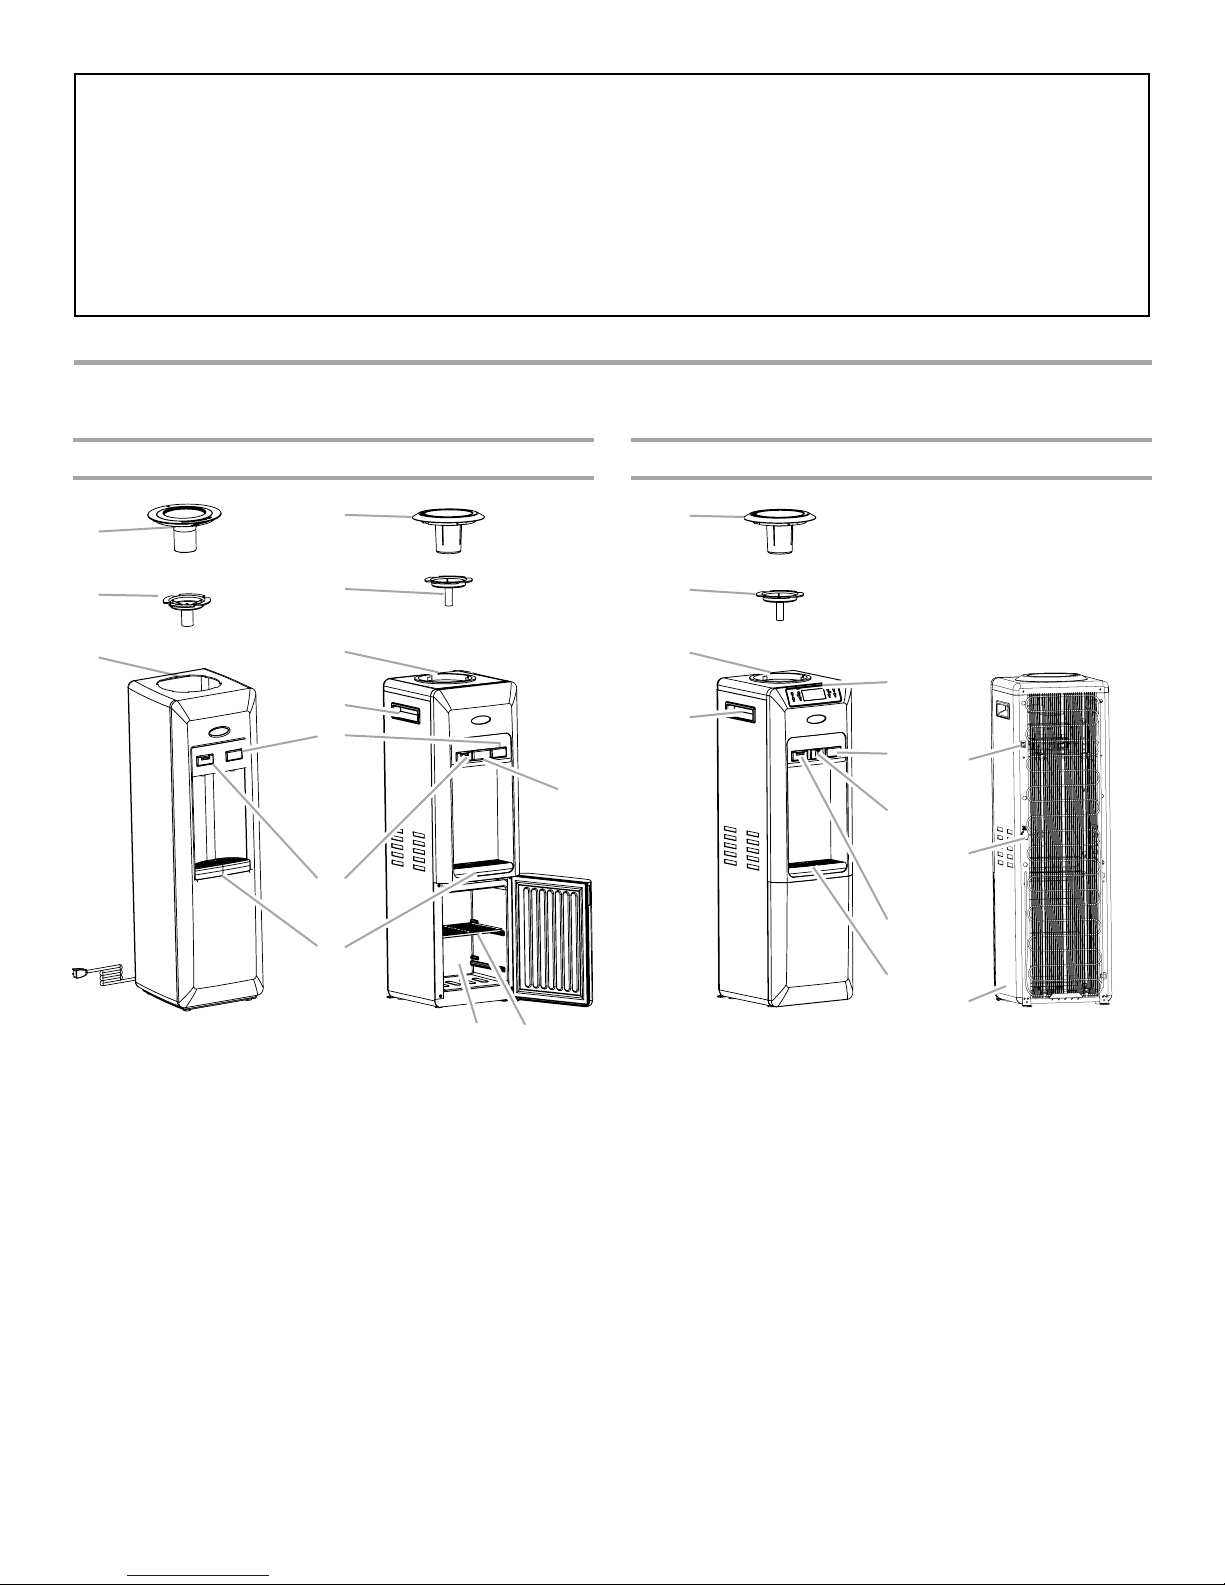
PARTS AND FEATURES
Model B10P Model D25 Model D45 Models B10P, D25, D45
D
C
B
A. Handle
B. Water reservoir
C. Baffle
D. Bottle supply collar
E. Cold water button
D
C
B
A
E
J
F
G
HI
F. Dual action hot water button
G. Drip tray
H. Storage compartment (model D25)
I. Shelf
J. LED display
D
C
B
A
A. Handle
B. Water reservoir
C.Baffle
D. Bottle supply collar
E. Control panel/display
F. Cold water button
E
F
L
G
K
H
I
J
G. Adjustable temperature control
H. Dual action hot water button
I. Drip tray
J. Serial number
K. Drain plug
L. Hot water tank switch (models
B10P and D25)
3
INSTALLATION INSTRUCTIONS
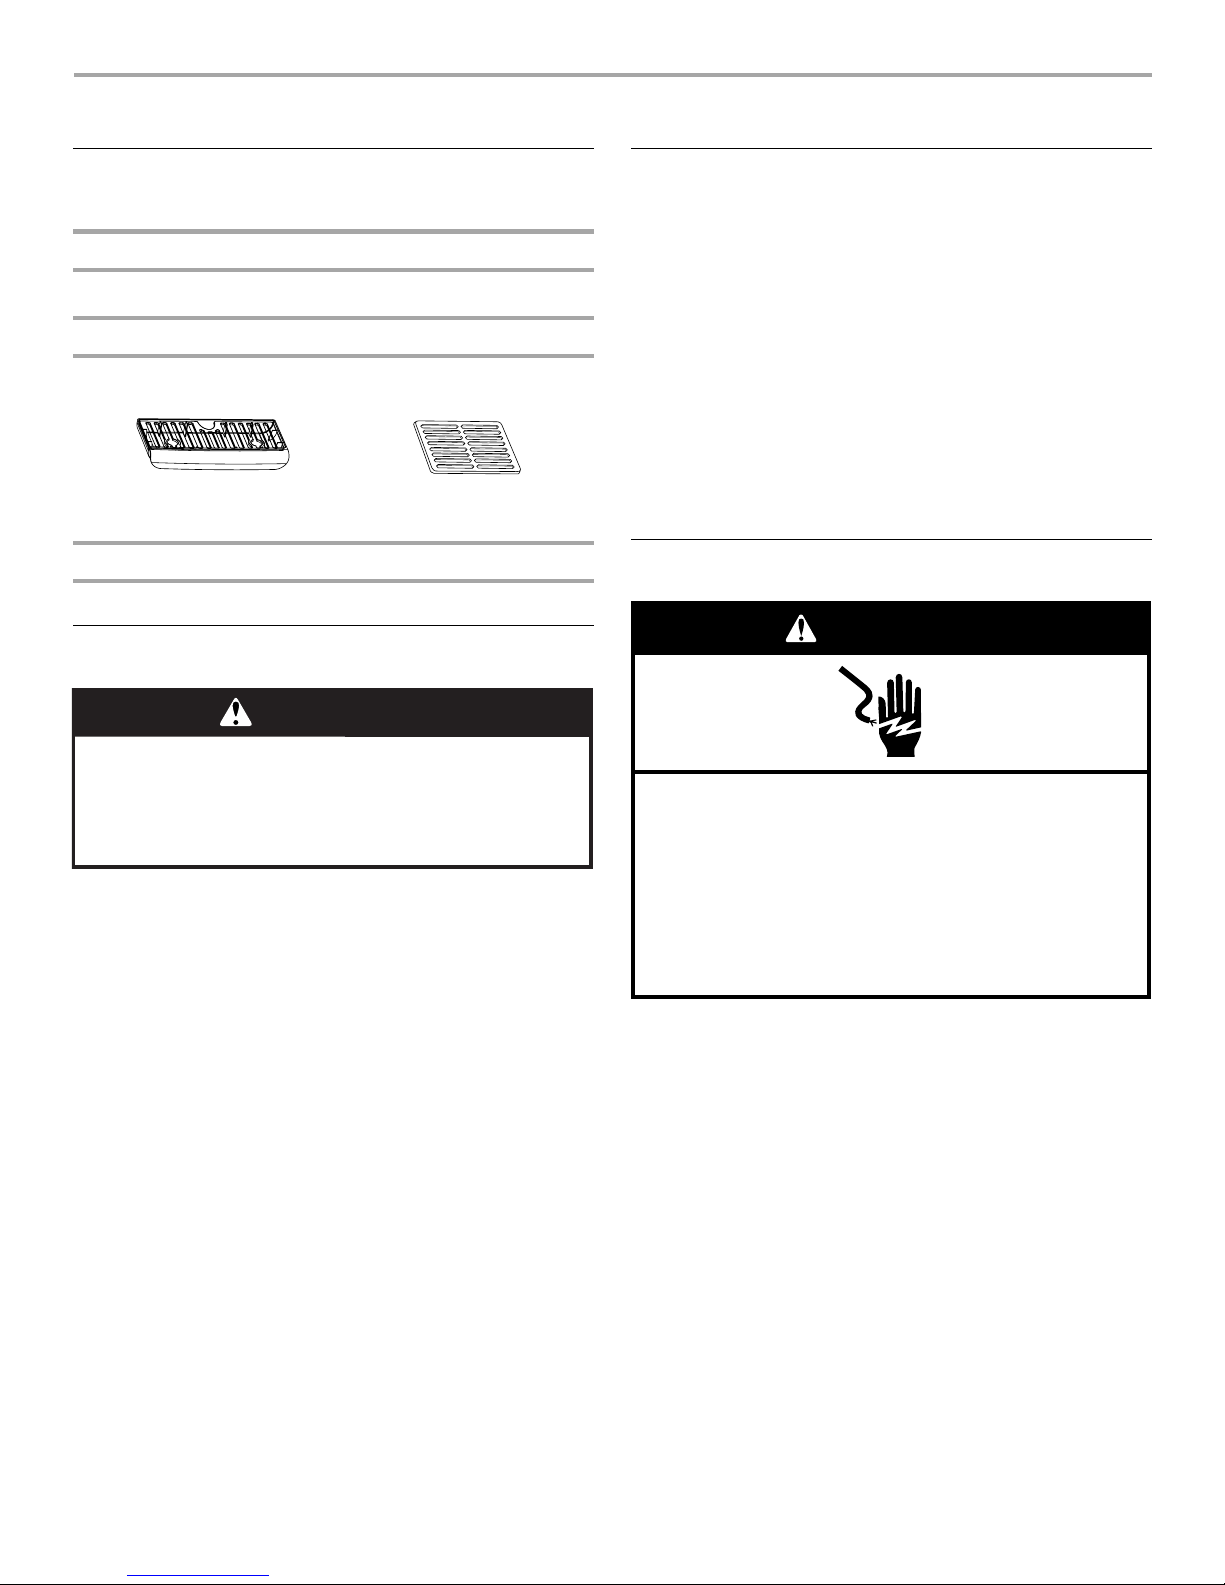
Tools and Parts
Gather the required tools and parts before starting installation.
Too l n ee de d
Flat-blade screwdriver or 7 mm hex nut driver
Parts Supplied
Check that all parts are included.
Drip tray Shelf (model D25)
Part Needed
3 or 5 gal. (11.4 or 18.9 L) water bottle ready to use
Unpack the Water Cooler
WARNING
Excessive Weight Hazard
Use two or more people to move and install
water cooler and bottles.
Failure to do so can result in back or other injury.
IMPORTANT:
■ Allow the water cooler to stand upright for a minimum of
1 hour after unpacking it and before plugging it into an
electrical outlet. This allows the refrigerant to settle properly
and avoids damage to the cooling system.
■ Remove the plastic bag and discard.
■ Remove tape from drip tray and discard.
■ Dispose of/or recycle all packaging materials.
Location Requirements
NOTE: This water cooler is recommended for indoor use only.
Check location where water cooler will be installed. The location
must provide:
■ A 2" (5 cm) clearance between the water cooler and the wall.
IMPORTANT: For best performance, do not place the water
cooler near an open flame, radiator or other heat source.
■ Grounded 3 prong outlet.
■ Install where water cooler is sheltered from the elements.
Protect against freezing to avoid possible rupture of drain
line. Such ruptures are not covered by the warranty. See
“Storing the Water Cooler” for winter storage information.
If the water cooler will be left unused for a period of time or in a
location where it may be subject to freezing, follow the
instructions in “Storing the Water Cooler.”
Electrical Requirements
WARNING
Electrical Shock Hazard
Plug into a grounded 3 prong outlet.
Do not remove ground prong.
Do not use an adapter.
Do not use an extension cord.
Failure to follow these instructions can result in death,
fire, or electrical shock.
A 120 volt, 60 Hz, AC only, 15- or 20-amp fused, grounded
electrical supply is required.
4
WATER COOLER USE
A
NOTE: Clean baffle and reservoir thoroughly before first using your water cooler and during normal maintenance operations. See
“Water Cooler Care.”
Water Cooler Preparation
WARNING
Excessive Weight Hazard
Use two or more people to move and install bottles.
Failure to do so can result in back or other injury.
IMPORTANT: Allow water to fill the tank before connecting the
water cooler to power to avoid a hot tank dry run.
1. Set the water cooler on flat, level floor.
2. Insert the water bottle into the top of the water cooler.
Reposition the water bottle until it is firmly seated in the water
cooler.
3. Wait 5 minutes for water to fill the tank. Make sure water
flows easily from both taps.
Operating the Water Cooler
Model B10P
WARNING
Electrical Shock Hazard
Plug into a grounded 3 prong outlet.
Do not remove ground prong.
Do not use an adapter.
Do not use an extension cord.
Failure to follow these instructions can result in death,
fire, or electrical shock.
4. Plug into a grounded 3 prong outlet.
5. Turn the power on. See “Operating the Water Cooler.”
NOTE: The thermostat is set at the factory. Allow 1 hour for
the water to reach optimal temperature.
1. Press the switch, located on the back of the water cooler, to
either the “0” or “1” position.
A. Hot water tank switch
“0” Position - Turns off the hot water tank.
“1” Position - Turns on the hot water tank.
NOTE: Allow 20 minutes for the water to heat.
5
Model D25
C D E
A
A. Hot water tank switch B. Front Control panel
B
C. Hot water tank on
D. Power on
E. Cold water tank on
1. The STATUS LED will light up to indicate power is on. 2. Press the switch, located on the back of the water cooler, to
either the “0” or “1” position.
“0” Position - Turns off the hot water tank.
“1” Position - Turns on the hot water tank.
NOTE: Allow 20 minutes for the water to heat.
Model D45
A B C D E F G
H OJI K L NM
A. CLOCK button
B. ENERGY button
C. Hot water operation icon
D. Temperature display
E. Clock display
Press the power button to turn power on to the water cooler. When power is first supplied to the water cooler, the cold (snowflake) and
hot (teacup) operation icons will flash and the clock will be set to 12:00 AM.
Set the Clock
1. Press the CLOCK button. The minutes will begin to flash.
2. Press the ADJUST up arrow and down arrow buttons to set
the minutes.
6
F. Adjustment and Control Lock buttons
G. Power ON/OFF button
H. TEMPERATURE button
I. Fahrenheit/Celsius
J. Cold water operation icon
3. Press CLOCK again so the hour display begins to flash.
4. Press the ADJUST up arrow and down arrow buttons to set
the hour.
5. Press CLOCK again to exit.
K. Control panel lock icon
L. Energy Saver icon
M. Energy saving START icon
N. Energy saving STOP icon
O. Energy saving ON/OFF button
Energy Saving Option
Energy saving option is designed to save energy by automatically
turning the hot water tank on and off at preset times so that hot
water is available only when desired.
Set the Energy Saving START time:
The time you want the hot water tank to turn OFF.
1. Press the ENERGY button. The energy saving icon and the
START icon will light up, and the minute display will begin to
flash.
2. Press the ADJUST up arrow and down arrow buttons, to set
the minutes when you want the hot water tank to turn on
(usually set for sometime in the early morning).
3. Press ENERGY again so that the hour display begins to flash.
4. Press the ADJUST up arrow and down arrow buttons, to set
the hour.
Set the Energy Saving STOP time:
The time you want the hot water tank to turn ON.
1. Press the ENERGY button again. The energy saving icon and
STOP icon light up and the minute display begins to flash.
2. Press the ADJUST up arrow and down arrow buttons, to set
the minutes.
3. Press ENERGY again so the hour display begins to flash.
4. Press the ADJUST up arrow and down arrow buttons, to set
the hour.
5. Press ENERGY again to exit.
Turn on energy saving mode:
Press the ENERGY SAVING button to turn on the energy saving
option. The “E” icon will light up to indicate energy saving is on.
Press the ENERGY SAVING button again to turn off the energy
saving option.
Night Light (Model D45 only)
The night light automatically lights up when the water cooler is
plugged in.
Control Panel Lock
The control panel can be locked for easy cleaning or to avoid
unintentional adjustments to the settings.
To lock the control panel, press ADJUST up arrow and down
arrow buttons, simultaneously. The control panel lock icon will
remain lit when the control panel is locked.
To unlock the control panel, press ADJUST up arrow and down
arrow buttons, simultaneously. The control panel lock icon will no
longer be visible.
Water Dispensers
Your water cooler features 2 easy-to-use water dispensers.
Hot Water Dispenser
The HOT button dispenses hot water ranging from 140ºF to
195.8°F (60°C to 91°C)*. To activate, press the hot water button.
Cold Water Dispenser
The COLD button dispenses water ranging from cold (anywhere
from 41°F to 50°F [5°C to 10°C]*) to room temperature water. To
activate, press the cold water button.
Set the Temperature Display
The temperature of the hot and cold water can be set either in
degrees Fahrenheit or degrees Celsius.
1. Press °F/°C button. The “ºF” icon will flash.
2. Press the ADJUST up arrow and down arrow buttons, to set
the temperature to “ºF” for Fahrenheit or “ºC” for Celsius.
3. Press °F/°C button again to exit.
Set the Water Temperature
1. Press the TEMPERATURE button. The hot water icon and
temperature setting on the screen will flash.
2. Press the ADJUST up arrow and down arrow buttons, to set
the hot water temperature. The hot water temperature is
adjustable from 140°F to 195.8°F (60°C to 91°C).
3. Press the TEMP button again. The cold water icon and
temperature setting will flash.
4. Press the ADJUST up arrow and down arrow buttons, to set
the cold water temperature. The cold water temperature is
adjustable from 41°F to 50°F (5°C to 10°C).
5. Press the TEMPERATURE button again to exit.
NOTE: During normal operation of the water cooler, the cold
water icon and/or the hot water icon will flash when the unit is
cooling or heating the water.
Adjustable Temperature Control (Model D45 only)
The adjustable temperature control mixes room temperature
water and cold water. Slide the control to the left for room
temperature water and to the right for water from the coldest
setting on your control panel.
*Tested in environmental chambers at 77°F (25°C).
7
Changing a Water Bottle
WARNING
Excessive Weight Hazard
Use two or more people to move and install bottles.
Failure to do so can result in back or other injury.
1. Unplug water cooler or disconnect power.
2. Remove the empty water bottle from the water cooler.
3. Turn the new water bottle over and insert directly into the top
of the water cooler.
4. Reposition the water bottle until it is firmly seated in the water
cooler.
5. Wait 5 minutes and then check to see that water flows easily
from all taps.
WARNING
Electrical Shock Hazard
Plug into a grounded 3 prong outlet.
Do not remove ground prong.
Do not use an adapter.
Do not use an extension cord.
Failure to follow these instructions can result in death,
fire, or electrical shock.
WATER COOLER CARE
Cleaning
WARNING
Excessive Weight Hazard
Use two or more people to move and install bottles.
Failure to do so can result in back or other injury.
Cleaning the Exterior
In most cases, regular use of a soft, damp cloth or sponge and a
mild detergent, or any nonabrasive household cleaner, is all that
is necessary to keep the outside of your water cooler looking nice
and clean.
Cleaning the Interior
Follow these steps when first using your water cooler and during
regular cleaning operations. It is recommended that you clean
and sanitize the interior every 2 months. You may need to clean
the reservoir more frequently if the water cooler is located in a
high traffic office or factory area.
Wash
1. Unplug the water cooler to disconnect power.
2. Remove the bottle.
3. Using containers large enough to collect all of the water in the
reservoir, empty the reservoir through the water spouts.
4. Remove the baffle from the water cooler.
A. Turn bottle supply collar clockwise and lift to remove.
B. Turn baffle counterclockwise and lift to remove.
6. Plug into a grounded 3 prong outlet.
7. Press the power button located on the front of the water
cooler (model D45).
A
B
C
A. Bottle supply collar
B. Baffle
C. Water reservoir
8
5. Prepare a cleaning solution of 1 tsp (5 mL) of a mild dish soap
to 0.5 gal. (2 L) of clean, room temperature water.
6. Wash the baffle and water spouts completely using a soft
cloth and the cleaning solution.
7. Rinse immediately with clean, running water.
8. Prepare a new cleaning solution of 1 tsp (5 mL) of a mild dish
soap to 0.5 gal. (2 L) of clean, room temperature water.
9. Fill the reservoir with the prepared cleaning solution.
10. Use a soft cloth to clean the inside of the reservoir with the
cleaning solution.
11. Using containers large enough to collect cleaning solution,
drain all of the cleaning solution from the cooler through both
water spouts equally and discard.
Rinse
IMPORTANT: After rinsing, continue on to sanitizing section.
1. To thoroughly rinse, fill the reservoir with clean water and
drain water through both water spouts equally. Repeat at
least 3 times. If an odor is present, continue to rinse until it is
gone.
2. Place container under drain plug on the back of the unit.
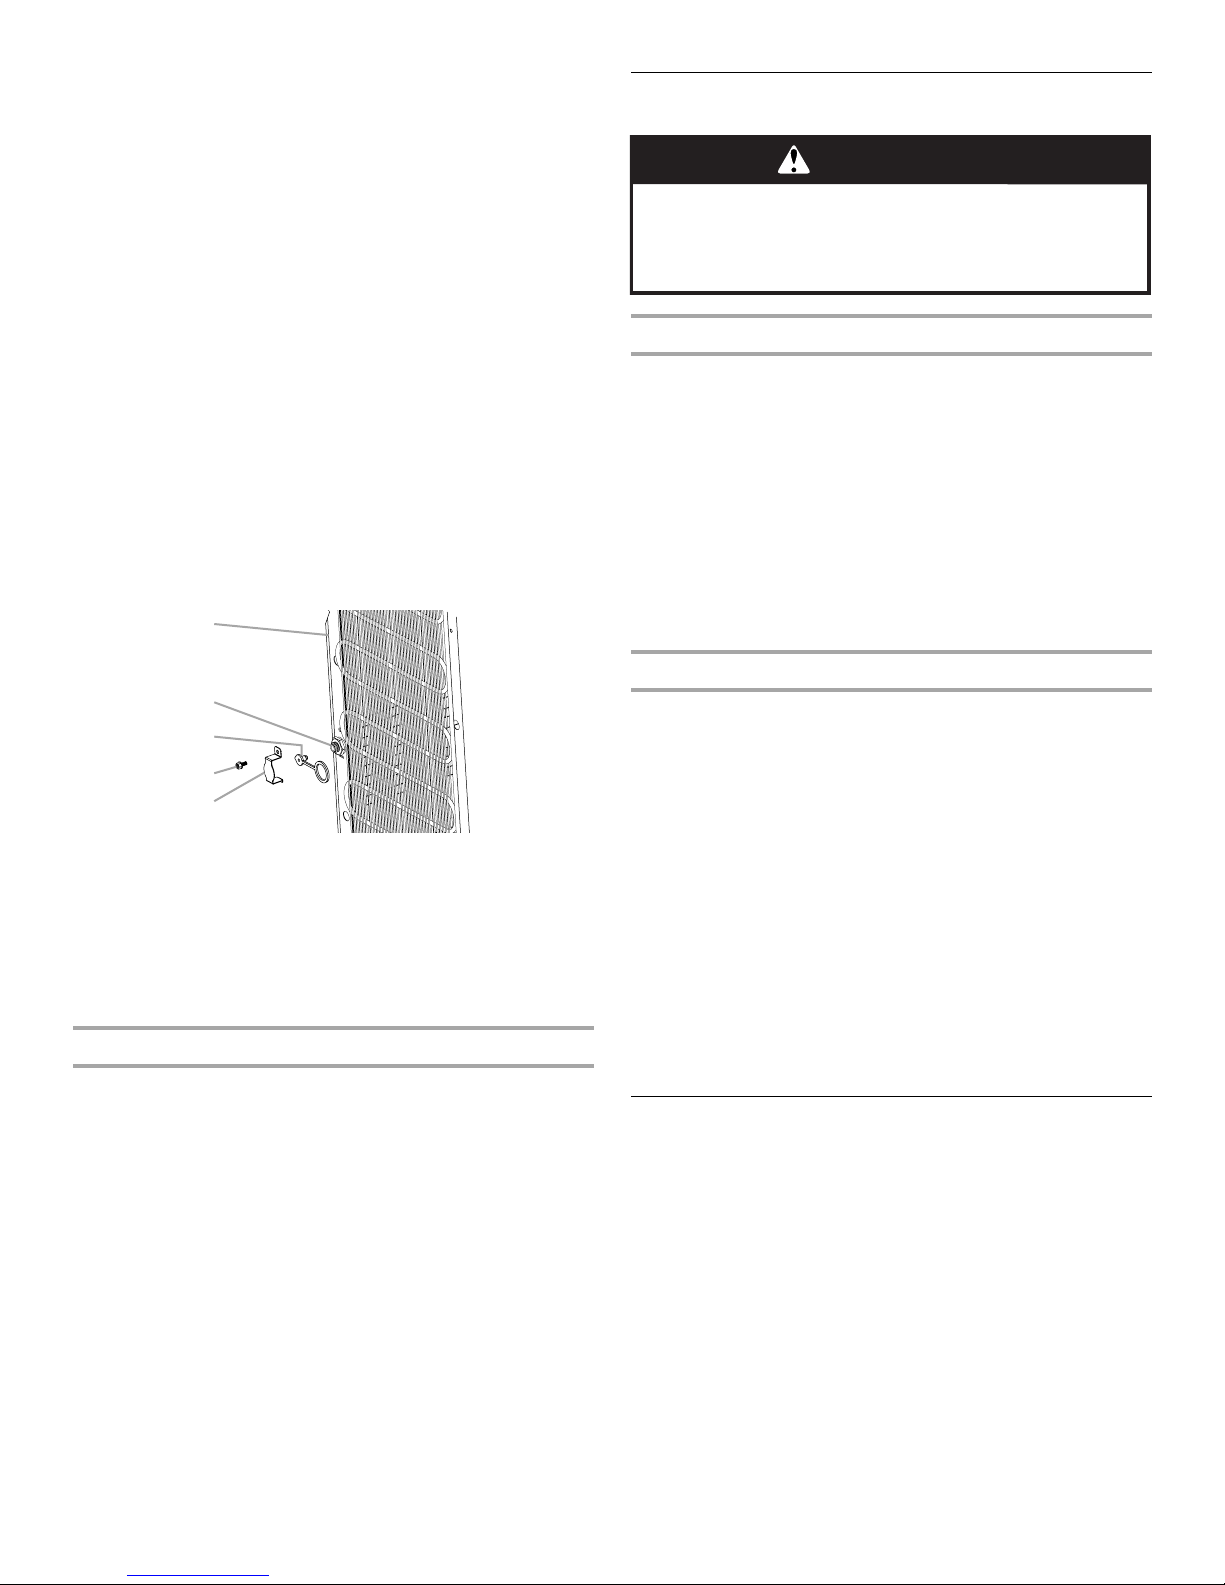
3. Remove drain plug cover with flathead screwdriver or 7 mm
hex nut driver. Pull out the drain plug to remove.
A
Sanitizing
WARNING
Excessive Weight Hazard
Use two or more people to move and install bottles.
Failure to do so can result in back or other injury.
Sanitize
1. Prepare two sanitizing solutions each of 2 tsp (10 mL) of
common household bleach (5.25% sodium hypochlorite) to
1 gal. (4 L) of room temperature water.
2. Remove the baffle from water cooler.
3. Fill a clean container with one of the sanitizing solutions and
place baffle into the solution for 5 minutes.
4. Rinse baffle with running water.
5. Fill the reservoir with the prepared sanitizing solution and let
stand for 5 minutes.
6. Using containers large enough to collect all sanitizing
solution, drain all sanitizing solution from the water cooler
reservoir through both water spouts equally and discard.
B
C
D
E
A. Back of water cooler
B. Screw pipe
C. Drain plug
D. Drain plug cover screw
E. Drain plug cover
4. Drain all rinse water from the drain and discard.
5. Replace the drain plug and reattach the drain plug cover.
Cleaning the Storage Compartment (model D25 only)
1. Hand wash, rinse and dry the removable shelf.
2. Hand wash, rinse and dry the interior walls of the storage
compartment. Use a clean sponge or soft cloth and a mild
detergent in warm water.
■ Do not use abrasive or harsh cleaners such as window
sprays, scouring cleansers, flammable fluids, cleaning
waxes, concentrated detergents, bleaches or cleansers
containing petroleum products on plastic parts, interior
and door liners or gaskets. Do not use paper towels,
scouring pads, or other harsh cleaning tools.
■ To help remove odors, wash the interior walls with a
solution of baking soda and warm water (2 tbs to 1 qt
[26 g to 0.95 L]).
3. Replace the shelf.
Rinse
1. To thoroughly rinse, fill the reservoir with clean water and
drain water through both water spouts equally. Repeat at
least 3 times. If an odor of bleach is present, continue to rinse
until it is gone.
2. Then remove drain plug from the back of the unit to drain
remaining water. If an odor of bleach is present, continue to
rinse until it is gone. Reinstall drain plug. See “Cleaning the
Interior” in the “Cleaning” section.
3. Insert the baffle and turn counterclockwise to position.
4. Insert the bottle supply collar and turn clockwise to position.
5. Install a clean water bottle. See “Changing a Water Bottle.”
6. Clean water spouts and the water cooler exterior with a damp
cloth.
7. Check that water flows freely from water spouts.
8. Plug in the power cord to turn on the water cooler. Press the
power ON/OFF button on the control panel (model D45) so
the green power light display remains lit.
Storing the Water Cooler
If you will be away from your water cooler for an extended period
of time, unplug the power cord, remove the water bottle, empty
the reservoir, and completely drain the water line. See “Cleaning”
for drain plug removal.
9
TROUBLESHOOTING
First try the solutions suggested here and possibly avoid the cost of a service call...
Cooler does not heat or chill water
WARNING
Electrical Shock Hazard
Plug into a grounded 3 prong outlet.
Do not remove ground prong.
Do not use an adapter.
Do not use an extension cord.
Failure to follow these instructions can result in death,
fire, or electrical shock.
■ Is the power supply cord unplugged?
Plug into a grounded 3 prong outlet.
■ Has a household fuse blown, or has a circuit breaker
tripped?
Replace the fuse or reset the circuit breaker.
■ Is the Power button selected?
Check to see if the green light is on.
■ Is the Hot water button selected (on models B10P
and D25)?
Check to see if the switch on the back of the water cooler is
in the “1” position.
Water cooler leaks
Water is not cold enough
■ Is the cold temperature set at the correct temperature?
The cold water temperature select is located on the front of
the water cooler. Water should be 41°F to 50°F (5°C to 10°C)*.
Lower the water temperature (on model D45) by sliding the
adjustable temperature control to the right. See “Adjustable
Temperature Control” in the “Water Dispensers” section.
No water comes out of cooler
■ The reservoir may be empty.
■ Ice may have built up inside the reservoir.
Ice can build up when the temperature of the air surrounding
the water cooler is cold. Raise the water temperature (on
model D45) by sliding the control to the left. See “Adjustable
Temperature Control” in the “Water Dispensers” section.
Water cooler is noisy
The water cooler is equipped with a refrigeration system. It is,
therefore, normal to hear a refrigerator-like vibrating sound as
part of the operating cycle. For hot water models, it is also
normal to hear boiling sounds at regular intervals.
Water is not hot enough
The hot water temperature is adjustable from 140°F to
195.8°F (60°C to 91°C). Water takes several minutes to heat;
if the water is still not hot after several minutes, call customer
service. See “Assistance or Service.”
No water flows from the hot water tap
■ Are air bubbles keeping the water heater from filling up?
WARNING
WARNING
Excessive Weight Hazard
Use two or more people to move and install bottles.
Failure to do so can result in back or other injury.
■ Is the water bottle cracked?
A crack in the water bottle may be invisible to the naked eye.
Replace bottle.
■ Is the drain plug installed and tightened?
Check drain plug and tighten. See “Cleaning.”
10
Excessive Weight Hazard
Use two or more people to move and install bottles.
Failure to do so can result in back or other injury.
Remove the water bottle and check the reservoir water level.
There should be 1" (2.5 cm) of water above the baffle. If this is
not the case, insert a full bottle onto the cooler and check
again. If the water level is adequate, reinstall the bottle.
Place a container under the hot water tap and turn on the tap
to let trapped air out. This process may take up to 1 minute.
*Tested in environmental chambers at 77°F (25°C).

ASSISTANCE OR SERVICE
Before calling for assistance or service, please check
“Troubleshooting.” It may save you the cost of a service call. If
you still need help, follow the instructions below.
When calling, please know the purchase date and the complete
model and serial number of your appliance. This information will
help us to better respond to your request.
If You Need Replacement Parts
If you need a replacement drip tray or baffle, we recommend that
you only use factory specified parts. Factory specified parts will
fit right and work right because they are made with the same
precision used to build every new WHIRLPOOL
To locate factory specified parts in your area, call us or your
nearest designated service center.
®
appliance.
Call customer service toll free in the U.S.A. and Canada:
1-866-363-9472.
For Further Assistance
If you need further assistance, you can write to us with any
questions or concerns at:
Kemflo Environmental & Technical Co. Ltd.
c/o Whirlpool Water Products
Customer eXperience Center
553 Benson Road
Benton Harbor, MI 49022-2692
Please include a daytime phone number in your correspondence.
WATER COOLER WARRANTY
Warrantor: Kemflo, 6400 Corporate Ave., Portage, MI 49002
TWO-YEAR LIMITED WARRANTY
Kemflo Environmental & Technical Co. Ltd. (hereinafter “the Warrantor”) promises the original purchaser to repair or replace, at
Warrantor’s option, any part of this water cooler that proves to be inoperative due to a defect in material or workmanship under normal
use, for a period of two (2) year from the date of purchase. This warranty will be honored provided the water cooler has been installed
and operated in accordance with the written instructions furnished with the water cooler.
GENERAL PROVISIONS AND EXCLUSIONS
This warranty applies only in the United States and Canada. This warranty will be honored if the unit is returned in the original carton (or
suitable replacement) along with proof of purchase. This warranty does not apply to bonus and/or accessory items sold with the water
cooler. This warranty does not apply if the affixed serial number is removed, defaced or obliterated. This warranty does not cover poor
performance, failure or damage of any part resulting from external causes such as alterations, abuse, misuse, misapplication, corrosion,
liming conditions or acts of God.
This warranty does not cover the freight costs to and from the approved service center.
This warranty and the Underwriters Laboratory listing for this water cooler are automatically voided if this water cooler is altered,
modified or combined with any other machine or device. Alteration or modification of this water cooler may cause serious flooding and/
or hazardous electrical shock or fire.
Except as set forth herein or required by law, the Warrantor makes no other warranty, guarantee or agreement, express,
implied or statutory, including any IMPLIED WARRANTY OF MERCHANTABILITY OR FITNESS FOR A PARTICULAR PURPOSE.
The Warrantor does not assume or authorize any person to assume any obligations of liability in connection with this product.
In no event will the Warrantor be liable for indirect, special or consequential damages (including, without limitation, economic
loss) or for any delay in the performance of this agreement due to causes beyond its control.
Some states or provinces do not allow limitations on how long an implied warranty lasts, so the above limitation may not apply to you.
Some states or provinces do not allow the exclusion or limitation of incidental or consequential damages, so the above limitation or
exclusion may not apply to you. This warranty gives you specific legal rights, and you may also have other rights which vary from state
to state or from province to province.
If you need service, first see “Troubleshooting.” Additional help can be found by checking “Assistance or Service,” or by calling our
customer service line at 1-866-363-9472, Monday through Friday, from 8:00 a.m. to 6:00 p.m. (EST), or write: Kemflo Environmental &
Technical Co. Ltd., c/o Whirlpool Water Products, Customer eXperience Center, 553 Benson Road, Benton Harbor, MI 49022-2692.
Keep this book and your sales slip together for future
reference. You must provide proof of purchase or installation
date for in-warranty service.
Write down the following information about your water cooler to
better help you obtain assistance or service if you ever need it.
You will need to know your complete model number and serial
number. You can find this information on the model and serial
number label/plate, located on your appliance as shown in “Parts
and Features.”
2/06
Dealer name____________________________________________________
Address ________________________________________________________
Phone number __________________________________________________
Model number __________________________________________________
Serial number __________________________________________________
Purchase date __________________________________________________
11

SEGURIDAD DEL ENFRIADOR DE AGUA
Su seguridad y la seguridad de los demás es muy importante.
Hemos incluido muchos mensajes importantes de seguridad en este manual y en su electrodoméstico. Lea y obedezca siempre
todos los mensajes de seguridad.
Este es el símbolo de advertencia de seguridad.
Este símbolo le llama la atención sobre peligros potenciales que pueden ocasionar la muerte o una lesión a
usted y a los demás.
Todos los mensajes de seguridad irán a continuación del símbolo de advertencia de seguridad y de la palabra
“PELIGRO” o “ADVERTENCIA”. Estas palabras significan:
PELIGRO
ADVERTENCIA
Todos los mensajes de seguridad le dirán el peligro potencial, le dirán cómo reducir las posibilidades de sufrir una lesión y lo que
puede suceder si no se siguen las instrucciones.
Si no sigue las instrucciones de inmediato, usted puede
morir o sufrir una lesión grave.
Si no sigue las instrucciones, usted puede morir o sufrir
una lesión grave.
INSTRUCCIONES IMPORTANTES DE SEGURIDAD
ADVERTENCIA:
siga estas precauciones básicas:
■ Conecte a un contacto de pared de conexión a tierra de
3 terminales.
■ No quite la terminal de conexión a tierra.
■ No use un adaptador.
■ No use un cable eléctrico de extensión.
Para reducir el riesgo de incendio, choque eléctrico, o lesiones personales al usar su enfriador de agua
■ Desconecte el suministro de energía antes de darle
servicio.
■ Vuelva a colocar todos los componentes y paneles antes de
hacerlo funcionar.
■ Use dos o más personas para mover e instalar el enfriador
de agua y las botellas.
CONSERVAR ESTAS INSTRUCCIONES
12

PIEZAS Y CARACTERÍSTICAS
Modelo B10P Modelo D25 Modelo D45 Modelos B10P, D25, D45
D
C
B
A. Manija
B. Depósito de agua
C. Deflector
D. Collar de suministro de la botella
E. Botón para agua fría
F. Botón de agua caliente de doble
acción
D
C
B
A
E
F
G
G. Bandeja de goteo
H. Compartimiento de
almacenaje (modelo D25)
I. Estante
J. Pantalla LED
HI
D
C
B
E
A
F
L
J
G
K
H
I
J
A. Manija
B. Depósito de agua
C. Deflector
D. Collar de suministro de la
botella
E. Panel de control/pantalla
F. Botón para agua fría
G. Control regulable de temperatura
H. Botón de agua caliente de doble
acción
I. Bandeja de goteo
J. Número de serie
K. Tapón de desagüe
L. Interruptor del tanque de agua
caliente (modelos B10P y D25)
13

INSTRUCCIONES DE INSTALACIÓN
Piezas y herramientas
Reúna las herramientas y piezas necesarias antes de comenzar
la instalación.
Herramienta necesaria
Destornillador de hoja cabeza o llave de tuercas hexagonal de
7 mm
Piezas suministradas
Verifique que estén todas las piezas.
Bandeja de goteo Estante (modelos D25)
Pieza necesaria
Botella de agua lista para usarse de 3 ó 5 gal. (11,4 ó 18,9 L)
Desempaque el enfriador de agua
ADVERTENCIA
Requisitos de ubicación
NOTA: Este enfriador de agua está recomendado solamente para
usarse adentro.
Revise la ubicación donde se instalará el enfriador de agua. El
lugar debe tener:
■ Un espacio de 2" (5 cm) entre el enfriador de agua y la pared.
IMPORTANTE: Para obtener un óptimo rendimiento, no
coloque el enfriador de agua cerca de una llama abierta,
radiador u otra fuente de calor.
■ Contacto de pared de conexión a tierra de 3 terminales.
■ Instale su enfriador de agua en un lugar protegido de las
inclemencias del tiempo. Protéjalo contra las temperaturas
bajo cero para evitar posibles roturas de la tubería de
desagüe. Dichas roturas no están cubiertas por la garantía.
Vea “Almacenamiento del enfriador de agua” para obtener
información acerca de cómo almacenarlo durante el invierno.
Si el enfriador de agua se va a dejar sin usar por un período de
tiempo o en un lugar sujeto a temperaturas de congelación, siga
las instrucciones en “Almacenamiento del enfriador de agua”.
Requisitos eléctricos
ADVERTENCIA
Peligro de Peso Excesivo
Use dos o más personas para mover e instalar
el enfriador de agua y las botellas.
No seguir esta instrucción puede ocasionar
una lesión en la espalda u otro tipo de lesiones.
IMPORTANTE:
■ Deje que el enfriador de agua esté en posición vertical por
una hora como mínimo después de desempacarlo y antes de
enchufarlo en un tomacorriente. Esto permite que el
refrigerante se establezca de manera apropiada y evita daños
al sistema de refrigeración.
■ Quite la bolsa de plástico y descártela.
■ Quite la cinta de la bandeja de goteo y descártela.
■ Deshágase de todos los materiales de embalaje o recíclelos.
Peligro de Choque Eléctrico
Conecte a un contacto de pared de conexión a tierra de
3 terminales.
No quite la terminal de conexión a tierra.
No use un adaptador.
No use un cable eléctrico de extensión.
No seguir estas instrucciones puede ocasionar
la muerte, incendio o choque eléctrico.
Se requiere un suministro eléctrico conectado a tierra de
120 voltios, 60 Hz., CA solamente, de 15 ó 20 amperios y
protegido con fusible.
14

USO DEL ENFRIADOR DE AGUA
A
NOTA: Limpie a fondo el deflector y el depósito antes de usar por primera vez su enfriador de agua cuando se lleve a cabo el
mantenimiento normal. Vea “Cuidado del enfriador de agua”.
Preparación del enfriador de agua
ADVERTENCIA
Peligro de Peso Excesivo
Use dos o más personas para mover e instalar las
botellas.
No seguir esta instrucción puede ocasionar una
lesión en la espalda u otro tipo de lesiones.
IMPORTANTE: Permita que el tanque se llene de agua antes de
conectar el enfriador de agua al suministro eléctrico, para evitar
que el tanque se caliente sin tener agua adentro.
1. Coloque el enfriador de agua sobre un piso liso y nivelado.
2. Introduzca la botella de agua en la parte superior del
enfriador de agua. Acomode la botella de agua hasta que se
asiente firmemente en el enfriador de agua.
3. Espere 5 minutos para que se llene el tanque de agua, y
luego fíjese si el agua fluye con facilidad de ambas llaves.
ADVERTENCIA
Peligro de Choque Eléctrico
Conecte a un contacto de pared de conexión a tierra de
3 terminales.
No quite la terminal de conexión a tierra.
No use un adaptador.
No use un cable eléctrico de extensión.
No seguir estas instrucciones puede ocasionar
la muerte, incendio o choque eléctrico.
4. Conecte a un contacto de pared de conexión a tierra de
3 terminales.
5. Encienda el suministro eléctrico. Vea “Funcionamiento del
enfriador de agua”.
NOTA: El termostato está fijado de fábrica. Deberá esperar
aproximadamente 1 hora para que el agua alcance la
temperatura óptima.
Funcionamiento del enfriador de agua
Modelo B10P
A. Interruptor del tanque de agua caliente
1. Presione el interruptor, el cual está ubicado en la parte
posterior del enfriador de agua, en la posición “0” ó “1”.
Posición “0” – Apaga el tanque de agua caliente
Posición “1” – Enciende el tanque de agua caliente
NOTA: Espere 20 minutos para que se caliente el agua.
15

Modelo D25
A
C D E
B
A. Interruptor del tanque de agua caliente B. Panel de control frontal
C. Tanque de agua caliente encendido
D. Encendido
E. Tanque de agua fría encendido
1. La Luz de estado LED se encenderá para indicar que está
encendido.
2. Presione el interruptor, el cual está ubicado en la parte
posterior del enfriador de agua, en la posición “0” ó “1”.
Posición “0” – Apaga el tanque de agua caliente
Posición “1” – Enciende el tanque de agua caliente
NOTA: Espere 20 minutos para que se caliente el agua.
Modelo D45
A B C D E F G
H OJI K L NM
A. Botón de CLOCK (Reloj)
B. Botón de ENERGY (Energía)
C. Ícono de funcionamiento del agua
caliente
D. Pantalla de temperatura
E. Pantalla del reloj
Presione el botón de POWER (Encendido) para encender el enfriador de agua. Cuando se suministre energía al enfriador de agua por
primera vez, los íconos de funcionamiento de agua fría (copo de nieve) y caliente (taza de té) destellarán y el reloj estará fijo en
12:00 AM.
16
F. Botones de ajuste y bloqueo
de control
G. Botón de ON/OFF (Encendido/
Apagado)
H. Botón de TEMPERATURE
(Temperatura)
I. Fahrenheit/Celsius
J. Ícono de funcionamiento del agua
fría
K. Ícono de bloqueo del panel de control
L. Ícono de ahorro de energía
M. Ícono de START (Inicio) del
funcionamiento de ahorro de energía
N. Ícono de STOP (Parada) del
funcionamiento de ahorro de energía
O. Botón de ON/OFF (Encendido/
Apagado) de ahorro de energía

Cómo fijar el reloj
1. Presione el botón de CLOCK (Reloj). Comenzarán a destellar
los minutos.
2. Para fijar los minutos, presione los botones de ADJUST
(Ajuste) con las flechas hacia arriba y hacia abajo.
3. Presione nuevamente CLOCK (Reloj) para que comience a
destellar la hora.
4. Para fijar la hora, presione los botones de ADJUST (Ajuste)
con las flechas hacia arriba y hacia abajo.
5. Presione nuevamente CLOCK (Reloj) para salir del modo de
fijar el reloj.
Opción de ahorro de energía
La opción de Ahorro de energía se diseñó para ahorrar energía,
apagando y encendiendo automáticamente el tanque de agua
caliente a horas prefijadas, de modo que sólo haya agua caliente
cuando se desee.
Fije la hora de INICIO de Ahorro de energía:
La hora en la que quiere que se APAGUE el tanque de agua
caliente.
1. Presione el botón de ENERGY (Energía). Se encenderán los
íconos de ahorro de energía y de START (Inicio) y
comenzarán a destellar los minutos.
2. Presione los botones de ADJUST (Ajuste) con las flechas
hacia arriba y hacia abajo, para fijar los minutos en los que
usted desea que se encienda el tanque de agua caliente (en
general, se fijan para determinado tiempo temprano en la
mañana).
3. Presione nuevamente ENERGY (Energía) para que comience
a destellar la hora.
4. Para fijar la hora, presione los botones de ADJUST (Ajuste)
con las flechas hacia arriba y hacia abajo.
Fije la hora de FIN de Ahorro de energía:
La hora en la que quiere que se ENCIENDA el tanque de agua
caliente.
1. Presione nuevamente el botón de ENERGY (Energía) para
que se encienda el ícono de ahorro de energía y el de STOP
(Parada) y comiencen a destellar los minutos.
2. Para fijar los minutos, presione los botones de ADJUST
(Ajuste) con las flechas hacia arriba y hacia abajo.
3. Presione nuevamente ENERGY (Energía) para que comience
a destellar la hora.
4. Presione los botones de ADJUST (Ajustar) con las flechas
hacia arriba o hacia abajo para fijar la hora.
5. Presione ENERGY (Energía) nuevamente para salir del menú.
Encienda el modo de ahorro de energía:
Presione el botón de ENERGY SAVING (Ahorro de energía) para
encender la opción de ahorro de energía. El ícono “E” se
encenderá para indicar que el ahorro de energía está encendido.
Presione el botón de ENERGY SAVING (Ahorro de energía)
nuevamente para apagar la opción de ahorro de energía.
Fije la pantalla de temperatura
La temperatura del agua caliente y fría puede fijarse ya sea en
grados Fahrenheit o en grados centígrados.
1. Presione el botón de °F/°C. El ícono de “ºF” destellará.
2. Presione los botones de ADJUST (Ajuste) con las flechas
hacia arriba y hacia abajo, para fijar la escala de temperatura
a usar, "ºF" para Fahrenheit o "ºC" para centígrados.
3. Presione nuevamente el botón de °F/°C para salir del menú.
Cómo fijar la temperatura del agua
1. Presione el botón de TEMPERATURE (Temperatura).
Destellará el ícono de agua caliente y el ajuste de
temperatura.
2. Presione los botones de ADJUST (Ajustar) con las flechas
hacia arriba o hacia abajo para ajustar la temperatura del
agua caliente. La temperatura del agua caliente puede
ajustarse de 140°F a 195,8°F (60°C a 91°C).
3. Presione nuevamente el botón de TEMP. Destellará el ícono
de agua fría y el ajuste de temperatura.
4. Presione los botones de ADJUST (Ajustar) con las flechas
hacia arriba o hacia abajo para ajustar la temperatura del
agua fría. La temperatura del agua fría puede ajustarse de
41°F a 50°F (5°C a 10°C).
5. Presione nuevamente el botón de TEMPERATURE
(Temperatura) para salir del modo de fijar la temperatura.
NOTA: Durante el funcionamiento normal del enfriador de agua,
destellarán el ícono de agua fría y/o el de agua caliente cuando la
unidad esté enfriando o calentando el agua.
Luz nocturna (modelo D45 solamente)
La luz nocturna se enciende automáticamente cuando se
conecta el enfriador de agua.
Bloqueo del panel de control
El panel de control puede bloquearse para facilitar la limpieza o
para evitar cambios accidentales en los ajustes.
Para bloquear el panel de control, presione simultáneamente los
botones de ADJUST (Ajustar) con las flechas hacia arriba y hacia
abajo. Cuando el panel de control esté bloqueado, permanecerá
encendido el ícono del bloqueo del panel de control.
Para desbloquear el panel de control, presione simultáneamente
los botones de ADJUST (Ajustar) con las flechas hacia arriba y
hacia abajo. Ya no estará visible el ícono del bloqueo de panel de
control.
Despachadores de agua
Su enfriador de agua presenta 2 despachadores de agua fáciles
de usar.
Despachador de agua caliente
El botón de HOT (Caliente) despacha agua caliente en
temperaturas que van de 140ºF a 195,8°F (60°C a 91°C)*. Para
activar, presione el botón de agua caliente.
17

Despachador de agua fría
El botón de COLD (Fría) despacha agua que varía desde fría (de
41°F a 50°F [5°C a 10°C]*) a temperatura ambiental. Para
activarlo, presione el botón de agua fría.
Control regulable de temperatura
(solamente el modelo D45)
El control regulable de temperatura mezcla el agua a temperatura
ambiental con agua fría. Deslice el control hacia la izquierda para
obtener agua a temperatura ambiental y hacia la derecha para
obtener el ajuste más frío en su panel de control.
5. Espere 5 minutos y luego fíjese si el agua fluye con facilidad
de todas las llaves.
ADVERTENCIA
Peligro de Choque Eléctrico
Conecte a un contacto de pared de conexión a tierra de
3 terminales.
No quite la terminal de conexión a tierra.
No use un adaptador.
No use un cable eléctrico de extensión.
No seguir estas instrucciones puede ocasionar
la muerte, incendio o choque eléctrico.
6. Conecte a un contacto de pared de conexión a tierra de
3 terminales.
7. Presione el botón de encendido, que está ubicado en el
frente del enfriador de agua (modelo D45).
Cómo cambiar una botella de agua
ADVERTENCIA
Peligro de Peso Excesivo
Use dos o más personas para mover e instalar las
botellas.
No seguir esta instrucción puede ocasionar una
lesión en la espalda u otro tipo de lesiones.
1. Desenchufe el enfriador de agua o desconecte el suministro
de energía.
2. Saque la botella de agua vacía del enfriador de agua.
3. Dé vuelta la nueva botella de agua y colóquela directamente
en la parte superior del enfriador de agua.
4. Acomode la botella de agua hasta que se asiente firmemente
en el enfriador de agua.
CUIDADO DEL
ENFRIADOR DE AGUA
Limpieza
ADVERTENCIA
Peligro de Peso Excesivo
Use dos o más personas para mover e instalar las
botellas.
No seguir esta instrucción puede ocasionar una
lesión en la espalda u otro tipo de lesiones.
Limpieza externa
En la mayoría de los casos, todo lo que se debe hacer es usar
periódicamente un paño suave y húmedo o una esponja con un
detergente suave o cualquier limpiador doméstico no abrasivo
para que el exterior de su enfriador de agua se vea limpio y
reluciente.
*Evaluado en cámaras medioambientales a 77ºF (25ºC).
18

Limpieza interna
Siga estos pasos cuando use por primera vez su enfriador de
agua y durante las operaciones regulares de limpieza. Se
recomienda limpiar e higienizar el interior cada 2 meses. Si el
enfriador de agua está ubicado en un lugar, oficina o fábrica en el
que haya mucha circulación, podría tener que limpiar el depósito
con más frecuencia.
Lavado
1. Desenchufe el enfriador de agua para desconectar el
suministro de energía.
2. Quite la botella.
3. Con recipientes lo suficientemente grandes para contener
toda el agua del depósito, vacíe el depósito a través de las
salidas de agua.
4. Saque el deflector del enfriador de agua.
A. Gire hacia la derecha el collar de suministro de la botella
y levántelo para sacarlo.
B. Gire hacia la izquierda el deflector y levántelo para
sacarlo.
Enjuague
IMPORTANTE: Después de enjuagar, continúe con la sección de
desinfección.
1. Para enjuagar a fondo, llene el depósito con agua limpia y
deje pasar el agua a través de ambas salidas de agua de
manera equitativa. Repita 3 veces por lo menos. Si se siente
olor, continúe enjuagando hasta que desaparezca.
2. Coloque el recipiente bajo el tapón de desagüe, detrás de la
unidad.
3. Quite la cubierta del tapón de desagüe con un destornillador
de hoja plana o una llave de tuercas hexagonal de 7 mm. Jale
hacia afuera el tapón del desagüe para sacarlo.
A
B
C
D
E
A
B
C
A. Collar de suministro
de la botella
B. Deflector
C. Depósito de agua
5. Prepare una solución de limpieza de 1 cta. (5 mL) de
detergente suave para lavavajillas por 0,5 gal (2 L) de agua
limpia a temperatura ambiente.
6. Lave por completo el deflector y las salidas de agua con un
paño suave y la solución de limpieza.
7. Enjuague de inmediato con agua limpia del grifo.
8. Prepare una nueva solución de limpieza de 1 cta. (5 mL) de
detergente suave para lavavajillas por 0,5 gal (2 L) de agua
limpia a temperatura ambiente.
9. Llene el depósito con la solución de limpieza previamente
preparada.
10. Use un paño suave para limpiar el interior del depósito con la
solución de limpieza.
11. Desagüe toda la solución de limpieza del enfriador a través
de ambas salidas de agua de manera equitativa, usando
recipientes que sean lo suficientemente grandes como para
recoger toda la solución de limpieza y descártela.
A. Parte posterior del enfriador de agua
B. Tubería de rosca
C. Tapón de desagüe
D. Tornillo de la cubierta del tapón de desagüe
E. Cubierta del tapón de desagüe
4. Drene toda el agua de enjuage del desagüe y descártela.
5. Vuelva a colocar el tapón del desagüe y la cubierta del
mismo.
Cómo limpiar el compartimiento de almacenaje
(solamente para el modelo D25)
1. Lave el estante removible a mano, enjuáguelo y séquelo.
2. Lave a mano, enjuague y seque las paredes interiores del
compartimiento de almacenaje. Use una esponja limpia o un
paño liso y un detergente suave en agua tibia.
■ No use productos de limpieza abrasivos o ásperos, como
aerosoles para ventanas, productos de limpieza para
pulir, líquidos inflamables, ceras para limpieza,
detergentes concentrados, blanqueadores o productos
de limpieza que contengan productos de petróleo en las
partes de plástico, revestimientos interiores o de la puerta
o empaquetaduras. No use toallas de papel, estropajos
para fregar u otro utensilio de limpieza áspero.
■ Para ayudar a eliminar olores, puede lavar las paredes
interiores con una mezcla de bicarbonato de sodio y agua
tibia (2 cucharadas en un cuarto de galón [26 g en 0,95 L].
3. Vuelva a colocar el estante.
19

Desinfección
ADVERTENCIA
Peligro de Peso Excesivo
Use dos o más personas para mover e instalar las
botellas.
No seguir esta instrucción puede ocasionar una
lesión en la espalda u otro tipo de lesiones.
Desinfecte
1. Prepare dos soluciones para desinfectar con 2 ctas. (10 mL)
de blanqueador doméstico común (5,25 % de hipoclorito de
sodio) en 1 gal. (4 L) de agua a temperatura ambiental cada
una.
2. Saque el deflector del enfriador de agua.
3. Llene un recipiente limpio con una de las soluciones para
desinfectar y coloque el deflector en la solución por
5minutos.
4. Enjuague el deflector con agua del grifo.
5. Llene el depósito con la solución para desinfectar
previamente preparada y déjelo reposar por 5 minutos.
6. Desagüe toda la solución de desinfección del depósito del
enfriador de agua a través de ambas salidas de agua de
manera equitativa usando recipientes que sean lo
suficientemente grandes como para recoger toda la solución
de desinfección y descártela.
Enjuague
1. Para enjuagar a fondo, llene el depósito con agua limpia y
drene el agua a través de ambas salidas de agua de manera
equitativa. Repita 3 veces por lo menos. Si se siente olor a
blanqueador, continúe enjuagando hasta que desaparezca.
2. Después saque el tapón de desagüe de la parte posterior de
la unidad para quitar el agua que queda. Si se siente olor a
blanqueador, continúe enjuagando hasta que desaparezca.
Vuelva a instalar el tapón de desagüe. Vea “Limpieza interna”
en la sección “Limpieza”.
3. Inserte el deflector y gírelo hacia la izquierda para ponerlo en
su posición.
4. Inserte el collar de suministro de la botella y gírelo hacia la
derecha para ponerlo en su posición.
5. Instale una botella de agua limpia. Vea “Cómo cambiar una
botella de agua”.
6. Limpie las salidas de agua y el exterior del enfriador de agua
con un paño húmedo.
7. Verifique que el agua fluya con facilidad de las salidas de agua.
8. Enchufe el cable eléctrico para encender el enfriador de
agua. Presione el botón de power ON/OFF (energía Encendido/Apagado), ubicado en el panel de control
(modelo D45), de modo que la luz verde de la pantalla que
indica energía permanezca encendida.
Almacenamiento del enfriador de agua
Si usted va a mantenerse alejado del enfriador de agua por un
período largo de tiempo, desenchufe el cable eléctrico, quite la
botella de agua, vacíe el depósito y drene por completo la tubería
de agua. Vea “Limpieza” para la remoción del tapón de desagüe.
SOLUCIÓN DE PROBLEMAS
En primer lugar, pruebe las soluciones sugeridas aquí y posiblemente se evite el gasto de una visita de servicio técnico…
El enfriador no calienta ni enfría el agua
■ ¿Hay un fusible de la casa fundido o se disparó el
ADVERTENCIA
Peligro de Choque Eléctrico
Conecte a un contacto de pared de conexión a tierra de
3 terminales.
No quite la terminal de conexión a tierra.
No use un adaptador.
No use un cable eléctrico de extensión.
No seguir estas instrucciones puede ocasionar
la muerte, incendio o choque eléctrico.
cortacircuitos?
Reemplace el fusible o reposicione el cortacircuitos.
■ ¿Se ha seleccionado el botón de Power (Encendido)?
Fíjese si está encendida la luz verde.
■ ¿Se ha seleccionado el botón de agua caliente (en los
modelos B10P y D25)?
Revise si el interruptor ubicado en la parte posterior del
enfriador de agua está en la posición “1”.
■ ¿Está desenchufado el cable de suministro de energía?
Enchufe a un contacto de pared de conexión a tierra de
3 terminales.
20

El enfriador de agua tiene fugas
ADVERTENCIA
Peligro de Peso Excesivo
Use dos o más personas para mover e instalar las
botellas.
No seguir esta instrucción puede ocasionar una
lesión en la espalda u otro tipo de lesiones.
■ ¿Está rajada la botella de agua?
Es posible que no se vea a simple vista si la botella de agua
está rajada. Reemplace la botella.
■ ¿Se ha instalado y apretado el tapón de desagüe?
Verifique el tapón de desagüe y apriételo. Vea “Limpieza”.
El agua no está lo suficientemente fría
El enfriador de agua hace ruido
El enfriador de agua está equipado con un sistema de
refrigeración. De modo que es normal escuchar un sonido
vibrante similar al de un refrigerador como parte del ciclo de
funcionamiento. Para los modelos con agua caliente, también
es normal escuchar sonidos de hervor en intervalos
regulares.
El agua no está lo suficientemente caliente
La temperatura del agua caliente puede ajustarse de 140°F a
195,8°F (60°C a 91°C). El agua toma varios minutos para
calentarse; si el agua todavía no está caliente después de
varios minutos, llame al servicio al cliente. Consulte “Ayuda o
servicio técnico”.
No fluye agua de la llave de agua caliente
■ ¿Hay burbujas de aire que impiden que se llene el
calentador de agua?
■ ¿Se ha fijado la temperatura del agua fría en la
temperatura correcta?
El selector de temperatura del agua fría está ubicado en el
frente del enfriador de agua. El agua debe estar a una
temperatura de 41°F a 50°F (de 5°C a 10°C)*. La temperatura
del agua se puede disminuir (en el modelo D45) deslizando el
control regulable de temperatura hacia la derecha. Vea
“Control regulable de temperatura” en la sección
“Despachadores de agua”.
No sale agua del enfriador
■ Es posible que el depósito esté vacío.
■ Es posible que se haya acumulado hielo dentro del
depósito.
Se puede acumular hielo cuando la temperatura del aire
alrededor del enfriador es fría. La temperatura del agua se
puede aumentar (en el modelo D45) deslizando el control
regulable de temperatura hacia la izquierda. Vea “Control
regulable de temperatura” en la sección “Despachadores de
agua”.
AYUDA O SERVICIO TÉCNICO
Antes de solicitar ayuda o servicio técnico, por favor consulte la
sección “Solución de problemas”. Esto le podría ahorrar el costo
de una visita de servicio técnico. Si considera que aún necesita
ayuda, siga las instrucciones que aparecen a continuación.
Cuando llame, tenga a mano la fecha de compra y el número
completo del modelo y de la serie de su electrodoméstico. Esta
información nos ayudará a atender mejor a su pedido.
Si necesita piezas de repuesto
Si necesita una bandeja de goteo o un deflector de repuesto, le
recomendamos que use únicamente piezas especificadas de
fábrica. Las piezas especificadas de fábrica encajarán bien y
funcionarán bien ya que están confeccionadas con la misma
precisión empleada en la fabricación de cada electrodoméstico
nuevo de WHIRLPOOL
Para encontrar piezas especificadas de fábrica en su localidad,
llámenos o llame al centro de servicio técnico designado más
cercano a su localidad.
*Evaluado en cámaras medioambientales a 77°F (25°C).
®
.
ADVERTENCIA
Peligro de Peso Excesivo
Use dos o más personas para mover e instalar las
botellas.
No seguir esta instrucción puede ocasionar una
lesión en la espalda u otro tipo de lesiones.
Saque la botella de agua y verifique el nivel de agua del
depósito. Deberá haber 1" (2,5 cm) de agua por encima del
deflector. Si no es este el caso, coloque una botella llena en
el enfriador y fíjese de nuevo. Si es adecuado el nivel de
agua, vuelva a instalar la botella.
Coloque un recipiente debajo de la llave de agua caliente y
gire la misma para dejar que salga el aire atrapado. Este
procedimiento puede tomar hasta 1 minuto.
Llame al servicio al cliente sin costo alguno en EE.UU. y Canadá
al: 1-866-363-9472.
Para obtener asistencia adicional
Si necesita asistencia adicional, puede escribirnos con sus
preguntas o dudas a:
Kemflo Environmental & Technical Co. Ltd.
c/o Whirlpool Water Products
Customer eXperience Center
553 Benson Road
Benton Harbor, MI 49022-2692
Por favor incluya en su correspondencia un número de teléfono
en el que se le pueda localizar durante el día.
21

GARANTÍA DEL ENFRIADOR DE AGUA
Garante: Kemflo, 6400 Corporate Ave., Portage, MI 49002
GARANTÍA LIMITADA DE DOS AÑOS
Kemflo Enironmental & Technical Co. Ltd. (de aquí en adelante “el Garante”) promete al comprador original que reparará o reemplazará,
a discreción del garante, cualquier parte de este enfriador de agua que demuestre ser inoperante debido a un defecto en el material o
en la mano de obra bajo uso normal, por un período de dos (2) años a partir de la fecha de compra. Esta garantía se cumplirá siempre
y cuando se haya instalado y operado el enfriador de agua de acuerdo con las instrucciones escritas provistas con el mismo.
PROVISIONES Y EXCLUSIONES GENERALES
Esta garantía se aplica sólo en los Estados Unidos y Canadá. Esta garantía será aceptada si la unidad se devuelve en la caja de cartón
original (o en una caja de reemplazo adecuada) junto con la prueba de compra. Esta garantía no se aplica a los accesorios y/o
bonificaciones que se hayan vendido con el enfriador de agua. Esta garantía no se aplica si se quita, desfigura o borra el número de
serie fijo. Esta garantía no cubre el desempeño insuficiente, el fallo o daño de cualquiera de las piezas que resulte de causas externas
tales como alteraciones, abuso, mal uso, aplicación indebida, corrosión, condiciones de sarro o actos fortuitos.
Esta garantía no cubre los costos de flete desde y hacia el centro de servicio técnico aprobado.
Esta garantía y la aprobación de Underwriter's Laboratory (Laboratorio de normalización) para este enfriador de agua se anularán
automáticamente si este enfriador de agua se altera, modifica o combina con cualquier otra máquina o dispositivo. La alteración o
modificación de este enfriador de agua puede causar serias inundaciones y/o choque eléctrico o incendio peligrosos.
Excepto como se especifica en la presente o requerido por la ley, el garante no otorgará ninguna otra garantía o contrato
expreso, implícito o establecido por ley, incluyendo cualquier GARANTÍA IMPLÍCITA DE COMERCIABILIDAD O IDONEIDAD
PARA UN PROPÓSITO EN PARTICULAR. El garante no asume ni autoriza a ninguna persona a asumir ninguna obligación de
responsabilidad en conexión con este producto. El garante no será responsable de ninguna manera por daños indirectos,
especiales o consecuentes (incluyendo, pero sin limitarse a pérdida económica) o por cualquier demora en el desempeño de
este contrato debido a causas ajenas a su voluntad.
Algunos estados o provincias no permiten la limitación acerca de cuánto tiempo dura una garantía implícita, de modo que la limitación
arriba indicada quizás no le corresponda. Algunos estados o provincias no permiten la exclusión o limitación de daños incidentales o
consecuentes, de modo que esta exclusión o limitación quizás no le corresponda. Esta garantía le otorga derechos legales específicos,
y es posible que usted tenga también otros derechos, los cuales varían de un estado a otro o de una provincia a otra.
Si necesita servicio, vea primero “Solución de problemas”. Puede encontrar ayuda adicional en la sección “Ayuda o servicio técnico”,
llamando a nuestra línea de servicio al cliente al 1-866-363-9472, de lunes a viernes de 8:00 a.m. a 6:00 p.m. (hora del este), o
escribiendo a: Kemflo Environmental & Technical Co. Ltd., c/o Whirlpool Water Products, Customer eXperience Center, 553 Benson
Road, Benton Harbor, MI 49022-2692.
Guarde este libro y su comprobante de compra juntos para
referencia futura. Usted deberá proporcionar el comprobante
de la compra o una fecha de instalación para obtener
servicio bajo la garantía.
Anote la siguiente información acerca de su enfriador de agua
para facilitar la obtención de asistencia o servicio si llegara a
necesitarlo. Deberá tener a mano el número completo del modelo
y de la serie. Encontrará esta información en la placa/etiqueta
con el número del modelo y de la serie, ubicada en su
electrodoméstico como se ilustra en la sección “Piezas y
características”.
2/06
Nombre del distribuidor _________________________________________
Dirección_______________________________________________________
Número de teléfono _____________________________________________
Número de modelo _____________________________________________
Número de serie ________________________________________________
Fecha de compra _______________________________________________
22

SÉCURITÉ DU DISTRIBUTEUR D’EAU
Votre sécurité et celle des autres est très importante.
Nous donnons de nombreux messages de sécurité importants dans ce manuel et sur votre appareil ménager. Assurez-vous de
toujours lire tous les messages de sécurité et de vous y conformer.
Voici le symbole d’alerte de sécurité.
Ce symbole d’alerte de sécurité vous signale les dangers potentiels de décès et de blessures graves à vous
et à d’autres.
Tous les messages de sécurité suivront le symbole d’alerte de sécurité et le mot “DANGER” ou
“AVERTISSEMENT”. Ces mots signifient :
Risque possible de décès ou de blessure grave si vous ne
DANGER
AVERTISSEMENT
Tous les messages de sécurité vous diront quel est le danger potentiel et vous disent comment réduire le risque de blessure et
ce qui peut se produire en cas de non-respect des instructions.
IMPORTANTES INSTRUCTIONS DE SÉCURITÉ
AVERTISSEMENT :
distributeur d'eau, prendre quelques précautions fondamentales, y compris les suivantes :
■
Brancher l'appareil sur une prise à 3 alvéoles reliée à
la terre.
■
Ne pas enlever la broche de liaison à la terre.
■
Ne pas utiliser un adaptateur.
■
Ne pas utiliser un câble de rallonge.
Pour réduire les risques d'incendie, de choc électrique ou des blessures lors de l'utilisation du
suivez pas immédiatement les instructions.
Risque possible de décès ou de blessure grave si vous
ne suivez pas les instructions.
■
Déconnecter la source de courant électrique avant
l'entretien.
■
Replacer pièces et panneaux avant de faire la remise en
marche.
■
Utiliser deux ou plus de personnes pour déplacer et
installer le distributeur d'eau et les bouteilles.
CONSERVEZ CES INSTRUCTIONS
23

PIÈCES ET CARACTÉRISTIQUES
Modèle DB10P Modèle D25 Modèle D45 Modèles B10P, D25, D45
D
C
B
A. Poignée
B. Réservoir d'eau
C. Déflecteur
D. Raccord d'alimentation de la
bouteille
E. Bouton d'eau froide
F. Bouton d'eau chaude à
double action
D
C
B
A
E
F
G
HI
G. Plateau d'égouttement
H. Compartiment de remisage
(modèle D25)
I. Tablette
J. Afficheur DEL
D
C
B
E
A
F
L
J
A. Poignée
B. Réservoir d'eau
C. Déflecteur
D. Raccord d'alimentation de
la bouteille
E. Tableau de commande/
afficheur
F. Bouton d'eau froide
G
K
H
I
J
G. Commande de température
réglable
H. Bouton d'eau chaude à double
action
I. Plateau d'égouttement
J. Étiquette du numéro de série
K. Bonde de vidange
L. Interrupteur du réservoir d'eau
chaude (modèles B10P et D25)
INSTRUCTIONS D'INSTALLATION
Outillage et pièces
Rassembler les outils et pièces nécessaires avant de commencer
l’installation.
Outillage nécessaire
Tournevis à lame plate ou tourne-écrou à tête hexagonale de
7mm
Pièces fournies
Vérifier que toutes les pièces sont présentes.
Plateau d'égouttement Tablette (modèles D25)
Pièce nécessaire
Bouteille d'eau prête à l'emploi de 3 ou 5 gal. (11,4 ou 18,9 L)
24
Déballage du distributeur d’eau
AVERTISSEMENT
Risque du poids excessif
Utiliser deux ou plus de personnes pour déplacer et
installer
Le non-respect de cette instruction peut causer
une blessure au dos ou d'autre blessure.
IMPORTANT :
■ Laisser le distributeur en position verticale pendant 1 heure
minimum après l’avoir déballé et avant de le brancher dans
une prise électrique. Ceci permet au réfrigérant de se répartir
correctement et empêche d’endommager le système de
refroidissement.
■ Enlever le sac plastique et le jeter.
■ Ôter et jeter le ruban adhésif du plateau d'égouttement.
■ Jeter ou recycler tous les matériaux d’emballage.
le distributeur d'eau et les bouteilles.

Exigences d'emplacement
REMARQUE : Ce distributeur d’eau devrait être utilisé à
l’intérieur uniquement.
Vérifier l'emplacement où le distributeur d'eau va être installé.
L'emplacement d'installation doit disposer de :
■ Un espace de 2" (5 cm) entre le distributeur et le mur.
IMPORTANT : Ne pas mettre le distributeur d'eau près d'une
flamme nue, d'un radiateur ou d'une autre source de chaleur.
■ Prise à 3 alvéoles reliée à la terre.
■ Installer le distributeur d'eau dans un endroit à l'abri des
intempéries. Protéger l'appareil contre le gel pour éviter une
rupture possible du tuyau d'évacuation. De telles ruptures ne
sont pas couvertes par la garantie. Voir “Remisage du
distributeur d'eau” pour la préparation du remisage en hiver.
Si le distributeur d'eau est inutilisé pendant un certain temps ou
s'il se trouve à un endroit où il peut geler, suivre les instructions
de la section “Remisage du distributeur d'eau”.
Brancher sur une prise à 3 alvéoles reliée à la terre.
Ne pas enlever la broche de liaison à la terre.
Ne pas utiliser un adaptateur.
Ne pas utiliser un câble de rallonge.
Le non-respect de ces instructions peut causer
un décès, un incendie ou un choc électrique.
Une source d'alimentation de 120 volts, 60 Hz, type 15 ou
20 ampères CA seulement, protégée par fusible et reliée à la terre
est nécessaire.
Spécifications électriques
AVERTISSEMENT
Risque de choc électrique
UTILISATION DU DISTRIBUTEUR D'EAU
REMARQUE : Nettoyer le déflecteur et le réservoir à fond avant la première utilisation et lors des opérations d'entretien normal. Voir
“Entretien du distributeur d'eau”.
Préparation du distributeur d’eau
AVERTISSEMENT
Risque du poids excessif
Utiliser deux ou plus de personnes pour déplacer et
installer les bouteilles.
Le non-respect de cette instruction peut causer
une blessure au dos ou d'autre blessure.
IMPORTANT: Attendre que l'eau ait rempli le réservoir avant de
connecter le distributeur à l'alimentation pour éviter que le
réservoir ne chauffe après une mise en marche à vide.
1. Installer le distributeur d'eau sur un plancher plat et de
niveau.
2. Insérer la bouteille d'eau sur le dessus du distributeur d'eau.
Déplacer la bouteille d'eau jusqu'à celle qu'elle soit bien
encastrée dans le distributeur d'eau.
3. Attendre 5 minutes que l'eau remplisse le réservoir, puis
vérifier que l'eau coule bien des deux robinets. 4. Brancher sur une prise à 3 alvéoles reliée à la terre.
Brancher sur une prise à 3 alvéoles reliée à la terre.
Ne pas enlever la broche de liaison à la terre.
Ne pas utiliser un adaptateur.
Ne pas utiliser un câble de rallonge.
Le non-respect de ces instructions peut causer
un décès, un incendie ou un choc électrique.
5. Mettre l'appareil sous tension. Voir “Fonctionnement du
distributeur d'eau”.
REMARQUE : Le thermostat a été réglé à l'usine. Il est
nécessaire d’attendre environ 1 heure pour que l'eau atteigne
la température optimale.
AVERTISSEMENT
Risque de choc électrique
25

Fonctionnement du distributeur d'eau
A
Modèle B10P
A. Interrupteur du réservoir d'eau chaude
1. Appuyer sur l'interrupteur, situé à l'arrière du distributeur
d'eau, pour le mettre à la position “0” ou “1”.
Position “0” - Ferme la bouteille d'eau chaude
Position “1” - Ouvre la bouteille d'eau chaude
REMARQUE : Attendre 20 minutes que l'eau soit chaude.
Modèle D25
A
A. Interrupteur du réservoir d'eau chaude B. Tableau de commande avant
1. Le témoin lumineux de statut DEL s'allume pour indiquer que
l'appareil est sous tension.
26
C D E
B
C. Témoin d'option d'eau chaude
D. Témoin d'alimentation
E. Témoin d'option d'eau froide
2. Appuyer sur l'interrupteur, situé à l'arrière du distributeur
d'eau, pour le mettre à la position “0” ou “1”.
Position “0” - Ferme la bouteille d'eau chaude
Position “1” - Ouvre la bouteille d'eau chaude
REMARQUE: Attendre 20 minutes que l'eau soit chaude.

Modèle D45
A B C D E F G
H OJI K L NM
A. Bouton CLOCK (horloge)
B. Bouton ENERGY (énergie)
C. Icône de fonctionnement de l'eau chaude
D. Afficheur de la température
E. Afficheur de l'horloge
F. Boutons de réglage et de verrouillage
des commandes
G. Bouton marche/arrêt
H. Bouton TEMPERATURE (température)
I. Fahrenheit/Celsius
J. Icône de fonctionnement de l'eau froide
K. Icône de verrouillage du tableau de
commande
L. Icône d'économie d'énergie
M. Icône START (mise en marche) de
l'économie d'énergie
N. Icône STOP (arrêt) de l'économie
d'énergie
O. Bouton marche/arrêt de l'économie
d'énergie
Appuyer sur le bouton POWER pour mettre le distributeur d'eau sous tension. Lors de la mise sous tension initiale du distributeur d'eau,
les icônes de fonctionnement chaud (tasse) et froid (flocon) clignotent et l'horloge est réglée à 12:00 AM.
Horloge
Réglage de l'horloge :
1. Appuyer sur le bouton CLOCK (horloge). Les minutes
commencent à clignoter.
2. Appuyer sur les boutons de réglage ADJUST à flèche vers le
haut ou vers le bas pour régler les minutes.
3. Appuyer à nouveau sur CLOCK (horloge) pour que l'heure
commence à clignoter.
4. Appuyer sur les boutons de réglage ADJUST à flèche vers le
haut ou vers le bas pour régler l'heure.
5. Appuyer à nouveau sur CLOCK pour sortir du mode de
réglage de l'horloge.
Réglage de l'heure d'ARRÊT du mode Energy Saving :
Heure à laquelle le réservoir d'eau chaude doit s'allumer.
1. Appuyer de nouveau sur le bouton ENERGY (énergie) pour
que les icônes d'économie d'énergie et STOP (arrêt)
s'allument et que les minutes commencent à clignoter.
2. Appuyer sur les boutons de réglage ADJUST à flèche vers le
haut ou vers le bas pour régler les minutes.
3. Appuyer à nouveau sur ENERGY pour que l'heure commence
à clignoter.
4. Appuyer sur les boutons de réglage ADJUST à flèche vers le
haut ou vers le bas pour régler l'heure.
5. Appuyer à nouveau sur ENERGY pour sortir du mode
d'économie d'énergie.
Mode Energy Saving (économie d'énergie)
Le mode Energy saving est conçu pour économiser l'énergie en
allumant et en éteignant le réservoir d'eau chaude aux heures
préréglées pour que l'eau chaude soit disponible seulement
quand désirée.
Activation du mode d'économie d'énergie :
Pour activer le mode d'économie d'énergie, appuyer sur le
bouton d'économie d'énergie ENERGY SAVING pour activer
l'option d'économie d'énergie. L'icône d'économie énergie “E”
s'allume, indiquant que le mode d'économie d'énergie est activé.
Pour désactiver le mode d'économie d'énergie, appuyer de
nouveau sur le bouton d'économie d'énergie ENERGY SAVING.
Réglage de l'heure de DÉMARRAGE du mode Energy Saving :
Heure à laquelle le réservoir d'eau chaude doit s'éteindre.
1. Appuyer sur le bouton ENERGY (énergie). Les icônes
d'économie d'énergie et de START (mise en marche)
s'allument et les minutes commencent à clignoter.
2. Appuyer sur les boutons de réglage ADJUST à flèche vers le
haut ou vers le bas pour régler les minutes de l'heure à
laquelle vous voulez que le réservoir d'eau chaude se mette
en marche (en général tôt le matin).
3. Appuyer à nouveau sur ENERGY (énergie) pour que l'heure
commence à clignoter.
4. Appuyer sur les boutons de réglage ADJUST à flèche vers le
haut ou vers le bas pour régler l'heure.
Réglage de l'afficheur de température
La température de l'eau chaude et de l'eau froide peut être réglée
en degrés Fahrenheit ou en degrés Celsius.
1. Appuyer sur le bouton °F/°C. L'icône “°F” clignote.
2. Appuyer sur les boutons de réglage ADJUST à flèche vers le
haut ou vers le bas pour régler la température à “°F” pour
Fahrenheit ou “°C” pour Celsius.
3. Appuyer sur le bouton °F/°C pour quitter ce mode de réglage.
27

Réglage de la température de l'eau
1. Appuyer sur le bouton TEMPERATURE (température). L'icône
de l'eau chaude et le réglage de température clignotent.
2. Appuyer sur les boutons de réglage des caractéristiques
ADJUST à flèche vers le haut ou vers le bas pour régler la
température de l'eau chaude. La gamme de température de
l'eau chaude est de 140°F à 195,8°F (60°C à 91°C).
3. Appuyer à nouveau sur le bouton TEMP pour que l'icône de
l'eau froide et le réglage de température clignotent.
4. Appuyer sur les boutons de réglage ADJUST à flèche vers le
haut ou vers le bas pour régler la température de l'eau froide.
La gamme de température de l'eau froide est de 41°F et 50°F
[(5°C à 10°C).]
5. Appuyer à nouveau sur le bouton TEMPERATURE pour sortir
du mode de réglage de la température.
REMARQUE : Au cours du fonctionnement normal du
distributeur d'eau, les icônes de l'eau chaude ou de l'eau froide
clignotent lorsque l'appareil refroidit ou chauffe l'eau.
Commande de température réglable
(modèle D45 uniquement)
La commande de température réglable mélange l'eau à
température ambiante et l'eau froide. Faire glisser la commande
vers la gauche pour de l'eau à température ambiante et vers la
droite pour de l'eau au réglage le plus froid sur le tableau de
commande.
Changement de la bouteille d'eau
Veilleuse (Modèle D45 seulement)
La veilleuse s'allume automatiquement quand le distributeur
d'eau est branché.
Verrouillage du tableau de commande
Le tableau de commande peut être verrouillé pour faciliter le
nettoyage et éviter de modifier les réglages accidentellement.
Pour verrouiller le tableau de commande, appuyer simultanément
sur les deux boutons de réglage ADJUST à flèche vers le haut ou
vers le bas. L'icône de verrouillage du tableau de commande
reste allumée lorsque le tableau de commande est verrouillé.
Pour déverrouiller le tableau de commande, appuyer
simultanément sur les deux boutons de réglage ADJUST à flèche
vers le haut ou vers le bas. L'icône de verrouillage du tableau de
commande disparaît.
Utilisation des distributeurs d'eau
Cet appareil comporte 2 distributeurs d'eau faciles à utiliser.
Distributeur d'eau chaude
Le bouton HOT distribue l'eau chaude à une température de
140°F à 195,8°F (60°C à 91°C)*. Pour activer, appuyer sur le
bouton d'eau chaude.
AVERTISSEMENT
Risque du poids excessif
Utiliser deux ou plus de personnes pour déplacer et
installer les bouteilles.
Le non-respect de cette instruction peut causer
une blessure au dos ou d'autre blessure.
1. Débrancher le distributeur d'eau ou débrancher la source de
courant électrique.
2. Enlever la bouteille d'eau vide du distributeur d'eau.
3. Retourner la nouvelle bouteille d'eau et l'insérer directement
sur le dessus du distributeur d'eau.
4. Déplacer la bouteille d'eau jusqu'à ce que la bouteille d'eau
soit bien encastrée dans le distributeur d'eau.
5. Attendre 5 minutes puis vérifier que l'eau coule facilement de
tous les robinets.
AVERTISSEMENT
Distributeur d'eau froide
Le bouton COLD distribue de l'eau dont la température va de
froid (toute température entre 41°F et 50°F [5°C à 10°C]*) à
température ambiante. Pour activer, appuyer sur le bouton d'eau
froide.
28
Risque de choc électrique
Brancher sur une prise à 3 alvéoles reliée à la terre.
Ne pas enlever la broche de liaison à la terre.
Ne pas utiliser un adaptateur.
Ne pas utiliser un câble de rallonge.
Le non-respect de ces instructions peut causer
un décès, un incendie ou un choc électrique.
6. Brancher sur une prise à 3 alvéoles reliée à la terre.
7. Appuyer sur le bouton Power (mise sous tension) situé à
l'avant du distributeur d'eau (modèle D45).
*Testé dans des caissons climatiques à 77°F (25°C).

ENTRETIEN DU DISTRIBUTEUR D'EAU
Nettoyage
AVERTISSEMENT
Risque du poids excessif
Utiliser deux ou plus de personnes pour déplacer et
installer les bouteilles.
Le non-respect de cette instruction peut causer
une blessure au dos ou d'autre blessure.
Nettoyage de l'extérieur
Dans la plupart des cas, il suffit d'utiliser un linge doux, humide
ou une éponge et un détergent doux, ou un produit nettoyant
ménager non abrasif, pour nettoyer les surfaces extérieures du
distributeur d'eau et préserver son aspect de produit neuf.
Nettoyage de l'intérieur
Suivre ces étapes lors de la première utilisation de votre
distributeur d'eau et lors des opérations de nettoyage régulières.
Il est recommandé de nettoyer et d'assainir l'intérieur tous les
2 mois. Le réservoir devra être nettoyé plus fréquemment si le
distributeur d'eau se trouve dans un bureau où il y a plein de
passage ou dans une usine.
Lavage
1. Débrancher le distributeur d'eau pour déconnecter la source
de courant électrique.
2. Retirer la bouteille d’eau.
3. En utilisant des récipients assez grands pour contenir toute
l'eau du réservoir, vider le réservoir par les robinets.
4. Retirer le déflecteur de l'appareil.
A. Tourner le raccord d'alimentation de la bouteille dans le
sens horaire et soulever pour l'enlever.
B. Tourner le déflecteur dans le sens antihoraire et soulever
pour l'enlever.
A
5. Préparer une solution de nettoyage : ajouter 1 c. à thé (5 mL)
de détergent à vaisselle doux à 0,5 gal. (2 L) d'eau propre, à
température ambiante.
6. Laver le déflecteur et les robinets à fond à l'aide d'un chiffon
doux et de la solution de nettoyage.
7. Rincer immédiatement sous l’eau propre.
8. Préparer une nouvelle solution de nettoyage : ajouter 1 c. à
thé (5 mL) de détergent à vaisselle doux à 0,5 gal. (2 L) d'eau
propre, à température ambiante.
9. Remplir le réservoir de la solution de nettoyage préparée.
10. Utiliser un chiffon doux pour nettoyer l'intérieur du réservoir
avec la solution préparée.
11. Utiliser des récipients assez grands pour contenir toute la
solution de nettoyage, vider toute cette solution du
distributeur par les deux robinets de façon égale et la jeter.
Rinçage
IMPORTANT : Après avoir procédé au rinçage, poursuivre avec
la section d'assainissement.
1. Pour bien rincer, remplir le réservoir d'eau propre et vider
l'eau par les deux robinets de façon égale. Répéter au moins
3 fois. En cas d'odeur, continuer de rincer jusqu'à ce que
celle-ci disparaisse.
2. Placer le récipient sous la bonde de vidange à l'arrière de
l'appareil.
3. Ôter le couvercle de la bonde de vidange avec un tournevis à
tête plate ou tourne-écrou à tête hexagonale de 7 mm. Tirer
sur la bonde de vidange pour l'enlever.
A
B
C
D
E
B
C
A. Raccord d’alimentation du bottle
B. Déflecteur
C. Réservoir d’eau
A. Arrière du distributeur d'eau
B. Vis de tuyauterie
C. Bonde de vidange
D. Vis du couvercle de la bonde de vidange
E. Couvercle de la bonde de vidange
4. Vider et jeter toute l'eau de rinçage.
5. Replacer la bonde de vidange et remettre son couvercle en
place.
Nettoyage du compartiment de remisage
(modèle D25 uniquement)
1. Laver à la main, rincer et sécher la tablette amovible.
2. Laver à la main, rincer et sécher les parois internes du
compartiment de remisage. Utiliser une éponge propre ou un
linge doux et un détergent doux dans de l'eau tiède.
29

■ Ne pas utiliser de nettoyants abrasifs tels que les
nettoyants à vitre en atomiseurs, nettoyants à récurer,
liquides inflammables, cires nettoyantes, détergents
concentrés, agents de blanchiment ou nettoyants
contenant du pétrole sur les pièces en plastique, les
garnitures intérieures et de portes ou les joints. Ne pas
utiliser d'essuie-tout, tampons à récurer ou autre outil de
nettoyage abrasif.
■ Pour aider à éliminer les odeurs, on peut laver les parois
intérieures avec un mélange de bicarbonate de soude et
d'eau tiède (2 c. à soupe pour 1 pinte [26 g pour 0,95 L]).
3. Réinstaller la tablette.
Assainissement
AVERTISSEMENT
Risque du poids excessif
Utiliser deux ou plus de personnes pour déplacer et
installer les bouteilles.
Le non-respect de cette instruction peut causer
une blessure au dos ou d'autre blessure.
Assainissement
1. Préparer 2 solutions d'assainissement : 2 c. à thé (10 mL)
d'agent de blanchiment ordinaire (5,25 % d'hypochlorite de
sodium) ajoutées à 1 gal. (4 L) d'eau à température ambiante
pour chacune.
2. Retirer le déflecteur du distributeur d'eau.
3. Remplir un récipient propre d'une des solutions
d'assainissement et mettre le déflecteur dans la solution
pendant 5 minutes.
4. Rincer le déflecteur sous l’eau.
5. Remplir le réservoir de la solution d'assainissement préparée
et laisser reposer pendant 5 minutes.
6. Utiliser des récipients assez grands pour contenir toute la
solution d'assainissement, vider toute cette solution du
réservoir du distributeur par les deux robinets de façon égale
et la jeter.
Rinçage
1. Pour bien rincer, remplir le réservoir d'eau propre et vider
l'eau par les deux robinets de façon égale. Répéter au moins
3 fois. En cas d'odeur d'eau de Javel, continuer de rincer
jusqu'à ce que celle-ci disparaisse.
2. Puis enlever la bonde de vidange de l'arrière de l'appareil
pour vider le reste d'eau. En cas d'odeur d'eau de Javel,
continuer de rincer jusqu'à ce que celle-ci disparaisse.
Réinstaller la bonde de vidange. Voir “Nettoyage de
l'intérieur” dans la section Nettoyage.
3. Insérer le déflecteur et le tourner dans le sens antihoraire
pour le positionner.
4. Insérer le raccord d'alimentation de la bouteille et le tourner
dans le sens horaire pour le positionner.
5. Installer une bouteille d'eau propre. Voir “Changement de la
bouteille d'eau”.
6. Nettoyer les robinets et l'extérieur du distributeur avec un
chiffon humide.
7. Vérifier que l'eau coule librement aux robinets.
8. Brancher le cordon d'alimentation pour mettre en marche le
distributeur d'eau. Appuyer sur le bouton de mise sous
tension ON/OFF (marche/arrêt) du tableau de commande
(modèle D45) pour que le témoin d'alimentation vert reste
allumé.
Remisage
Si vous vous absentez pour une période prolongée, débrancher
le cordon d'alimentation, enlever la bouteille d'eau, vider le
réservoir et vider complètement le tuyau d'eau. (Voir “Nettoyage”
sur la dépose de la bonde de vidange.)
Essayer d'abord les solutions suggérées ici, ce qui vous évitera peut-être le coût d'une visite de service...
Le distributeur ne chauffe pas ni ne refroidit l'eau
AVERTISSEMENT
Risque de choc électrique
Brancher sur une prise à 3 alvéoles reliée à la terre.
Ne pas enlever la broche de liaison à la terre.
Ne pas utiliser un adaptateur.
Ne pas utiliser un câble de rallonge.
Le non-respect de ces instructions peut causer
un décès, un incendie ou un choc électrique.
■ Est-ce que le cordon d’alimentation est débranché?
Brancher sur une prise reliée à la terre (à trois alvéoles).
30
DÉPANNAGE
■ Un fusible est-il grillé ou un disjoncteur s’est-il ouvert?
Remplacer le fusible ou réarmer le disjoncteur.
■ Le bouton Power (alimentation) est-il sélectionné?
Vérifier si le témoin vert est allumé.
■ Le bouton d'eau chaude a-t-il été sélectionné
(sur les modèles B10P et D25)?
Vérifier si l'interrupteur situé à l'arrière du distributeur d'eau
est à la position "1".

Le distributeur d'eau fuit
AVERTISSEMENT
Risque du poids excessif
Utiliser deux ou plus de personnes pour déplacer et
installer les bouteilles.
Le non-respect de cette instruction peut causer
une blessure au dos ou d'autre blessure.
■ La bouteille d'eau est-elle fissurée?
La fissure de la bouteille d'eau peut être invisible à l'œil nu.
Remplacer la bouteille.
■ Le bouchon de vidange est-il en place et serré?
Vérifier et serrer le bouchon de vidange. Voir “Nettoyage”.
L'eau n'est pas assez froide
Le distributeur d'eau fait du bruit
Le distributeur d'eau est équipé d'un système de
réfrigération. Il est donc normal d'entendre un bruit de
vibration comme un réfrigérateur lorsque le programme
fonctionne. Pour les modèles à eau chaude, il est également
normal d'entendre des bruits d'ébullition à intervalles
réguliers.
L'eau n'est pas assez chaude
La température de l'eau chaude est réglable de
140°F à 195,8°F (60°C à 91°C). L'eau met quelques minutes à
chauffer; si l'eau n'est toujours pas chaude au bout de
quelques minutes, appeler le service à la clientèle. Voir la
section “Assistance ou service”.
Il n'y a pas d'eau au robinet d'eau chaude
■ Y a-t-il des bulles d'air qui empêchent le chauffe-eau de
se remplir?
■ La température de l’eau froide est-elle réglée à la bonne
température?
Le bouton de sélection de température de l’eau froide est
situé à l’avant du distributeur d’eau. L'eau devrait être de
41°F à 50°F (5°C à 10°C)*. Baisser la température de l'eau
(sur les modèles D45) en glissant la commande de la
température réglable vers la droite. Voir "La commande de
température réglable" dans la section "Utilisation des
distributeurs d'eau".
L'eau ne coule pas du distributeur
■ Le réservoir est peut-être vide.
■ De la glace peut s'être accumulée dans le réservoir.
De la glace peut s'être accumulée lorsque la température
ambiante est froide. Augmenter la température du
distributeur d'eau (sur les modèles D45) en glissant la
commande vers la gauche. Voir "La commande de
température réglable" dans la section "Utilisation des
distributeurs d'eau".
ASSISTANCE OU SERVICE
Avant de faire un appel pour assistance ou service, veuillez
vérifier “Dépannage”. Ce guide peut vous faire économiser le
coût d’une visite de service. Si vous avez encore besoin d’aide,
suivre les instructions ci-dessous.
Lors d'un appel, veuillez connaître la date d'achat, les numéros
de modèle et de série au complet de l’appareil. Ces
renseignements nous aideront à mieux répondre à votre
demande.
Si vous avez besoin de pièces de rechange
Si un plateau d’égouttement ou un déflecteur de rechange est
nécessaire, nous vous recommandons d’employer uniquement
des pièces spécifiées par l'usine. Celles-ci conviendront et
fonctionneront bien parce qu’elles sont fabriquées avec la même
précision utilisée dans la fabrication de chaque nouvel appareil
WHIRLPOOL
Pour localiser des pièces spécifiées par l'usine dans votre région,
nous appeler ou téléphoner au centre de service désigné le plus
proche.
®
.
AVERTISSEMENT
Risque du poids excessif
Utiliser deux ou plus de personnes pour déplacer et
installer les bouteilles.
Le non-respect de cette instruction peut causer
une blessure au dos ou d'autre blessure.
Retirer la bouteille et vérifier le niveau d'eau dans le réservoir.
Il doit y avoir 1" (2,5 cm) d'eau au-dessus du déflecteur. Dans
le cas contraire, insérer une bouteille pleine sur le distributeur
et vérifier à nouveau. Si le niveau d'eau est bon, réinstaller la
bouteille.
Mettre un récipient sous le robinet d'eau chaude et tourner le
robinet pour dégager l'air. Ce processus peut prendre jusqu'à
1minute.
Composer le numéro sans frais aux É.-U. et au Canada du
service à la clientèle au : 1-866-363-9472.
Pour plus d'assistance
Si vous avez besoin de plus d'assistance, vous pouvez nous
écrire en soumettant toute question ou tout problème à :
Kemflo Environmental & Technical Co. Ltd.
c/o Whirlpool Water Products
Customer eXperience Center
553 Benson Road
Benton Harbor, MI 49022-2692
Dans votre correspondance, veuillez indiquer un numéro de
téléphone où l'on peut vous joindre dans la journée.
*Testé en chambre atmosphérique à 77°F (25°C).
31

GARANTIE DU DISTRIBUTEUR D'EAU
W
©
A
T
T
Garant : Kemflo, 6400 Corporate Ave., Portage, MI 49002
GARANTIE LIMITÉE DE DEUX ANS
Kemflo Enironmental & Technical Co. Ltd. (ci-après “le garant”) s'engage devant l'acheteur original à réparer ou remplacer, au choix du
garant, toute pièce de ce distributeur d'eau qui s'avère être défectueuse (vice de matériau ou de fabrication) en utilisation normale, pour
une période de deux (2) ans à partir de la date d'achat. Cette garantie sera honorée à condition que le distributeur d'eau soit installé et
fonctionne conformément aux instructions écrites fournies avec le distributeur d'eau.
PROVISIONS ET EXCLUSIONS GÉNÉRALES
Cette garantie est valide uniquement aux États-Unis et au Canada. Cette garantie sera honorée si l'appareil est retourné dans son
emballage d'origine (ou dans un autre emballage convenable) avec la preuve d'achat. Cette garantie ne s'applique pas aux articles
bonus et/ou accessoires vendus avec le distributeur d'eau. Cette garantie ne s'applique pas si le numéro de série apposé est enlevé,
effacé ou abîmé. Cette garantie ne couvre pas une mauvaise performance, un défaut ou l'endommagement de toute pièce suite à :
altération, abus, mauvaise utilisation, mauvaise application, corrosion, oxydation ou acte de Dieu.
Cette garantie ne couvre pas les coûts de transport de et jusqu'au centre de service approuvé.
La présente garantie et l'homologation UL (Underwriter's Laboratory) du distributeur d'eau s'annulent automatiquement si ce
distributeur est modifié ou assemblé à tout(e) autre machine ou dispositif. Toute modification de ce distributeur d'eau peut être la cause
d'inondation grave et/ou de choc électrique ou d'incendie dangereux.
Excepté tel que mentionné ici ou tel que requis par la loi, le garant ne fournit aucune autre garantie ou accord, express(e),
implicite ou légal(e), y compris toute GARANTIE IMPLICITE DE QUALITÉ MARCHANDE OU À DES FINS PARTICULIÈRES. Le
garant n'assume et n'autorise personne à assumer les responsabilités liées à ce produit. En aucun cas le garant ne sera
responsable de dommages indirects ou spéciaux (y compris, sans limitation, perte économique) ou de tout retard d'application
de cet accord dû à des causes indépendantes de sa volonté.
Certains États ou certaines provinces ne permettent pas de limitation sur la durée d'une garantie implicite, si bien que la limitation cidessus peut ne pas s'appliquer à votre cas. Certains États ou certaines provinces ne permettent pas l'exclusion ou la limitation des
dommages fortuits ou indirects, si bien que cette exclusion ou limitation peut ne pas être applicable dans votre cas. Cette garantie vous
donne des droits légaux spécifiques, et vous pourriez aussi avoir d'autres droits qui peuvent varier d'un État à l'autre ou d'une province
à l'autre.
Si vous avez besoin de service, consulter d'abord la section “Dépannage”. De l'aide supplémentaire peut être trouvée en consultant la
section “Assistance ou service”, en appelant la ligne de service à la clientèle au 1-866-363-9472, du lundi au vendredi, de 8 h à 18 h
(HNE), ou en écrivant à : Kemflo Environmental & Technical Co. Ltd., c/o Whirlpool Water Products, Customer eXperience Center, 553
Benson Road, Benton Harbor, MI 49022-2692.
2/06
Conservez ce manuel et votre reçu de vente pour référence
ultérieure. Pour l'entretien sous garantie, vous devez
présenter un document prouvant la date d'achat ou
d'installation.
Inscrivez les renseignements suivants au sujet de votre
distributeur d'eau pour mieux obtenir assistance ou service en
cas de besoin. Vous devrez connaître le numéro de modèle et le
numéro de série au complet. Cette information se trouve sur la
plaque signalétique indiquant le numéro de série et le numéro de
modèle, située sur votre appareil tel qu'indiqué dans "Pièces et
caractéristiques".
Nom du marchand ______________________________________________
Adresse ________________________________________________________
Numéro de téléphone ___________________________________________
Numéro de modèle______________________________________________
Numéro de série ________________________________________________
Date d’achat____________________________________________________
10193251A
2008 Whirlpool Corporation.
ll rights reserved.
odos los derechos reservados.
ous droits réservés
Manufactured under license by Kemflo (Nanjing) Environmental & Technical Co. Ltd., Nanjing, China.
Fabricado bajo licencia por Kemflo (Nanjing) Environmental & Technical Co. Ltd., Nanjing, China.
Fabriqué sous licence par Kemflo (Nanjing) Environmental & Technical Co. Ltd., Nanjing, Chine.
® Registered Trademark/TM Trademark of Whirlpool, U.S.A.
® Marca registrada/TM Marca de comercio de Whirlpool, U.S.A.
® Marque déposée/TM Marque de commerce de Whirlpool, U.S.A.
Printed in China
Impreso en China
Imprimé en Chine
5/08
 Loading...