

Page 1
\VhirliKM)l
Use And Care
A Note To You
Understanding
Safety
Knowing Your
Dryer's Features
Operating Your Dryer 6
Caring For Your
Dryer
Laundry Tips
If You Need
Assistance
Or Service
Warranty
2
3
5
10
12
18
20
TIMED DRYERS
I \ / i
Page 2

A NOTE TO YOU
A Note To You
Thank you for buying a Whirlpool* appliance.
You have purchased a quality, world-class home appliance. Years of engineering experience have
gone into its manufacturing. To ensure many years of trouble-free operation, we have developed
this Use and Care Guide. It is full of valuable information on how to operate and maintain your
appliance properly and safely. Please read it carefully. Also, please complete and mail the Owner
ship Registration Card provided with your appliance. This will help us notify you about any new
information on your appliance.
Your safety is important to us.
This guide contains safety symbols and statements. Please pay special attention to these symbols
and follow any instructions given. Here is a brief explanation of the use of each symbol.
AWARNING
This symbol will help alert you to such
dangers as personal injury, burns, fire and
electrical shock.
Help when you need it.
If you have a question concerning your appliance’s operation, or if you need service, first see “If
You Need Assistance Or Service” on pages 18 and 19. If you need further help, call an authorized
Whirlpool service company. When calling, you will need to know your appliance’s complete model
number and serial number. You can find this information on the model and serial number label
(see diagram on page 5). For your convenience, we have included a handy place below for you to
record these numbers, the purchase date from the sales slip and your dealer's name and tele
phone number. Keep this book and the sales slip together in a safe place for future reference.
Model Number
Serial Number
Purchase Date
This symbol will help you avoid actions
which could cause product damage
(scratches, dents, etc.) and damage to your
personal property.
Dealer Name.
Dealer Phone
ACAUTION
Page 3

UNDERSTANDING SAFETY
Understanding Safety
^WARNING
-Do not store or use gasoline or other flammable vapors and liquids
in the vicinity of this or any other appliance.
-WHAT TO DO IF YOU SMELL GAS:
• Do not try to light any appliance.
• Do not touch any electrical switch; do not use any phone in your
building.
• Clear the room, building or area of all occupants.
• Immediately call your gas supplier from a neighbor’s phone.
Follow the gas supplier’s instructions.
• If you cannot reach your gas supplier, call the fire department.
Installation and service must be performed by a qualified installer,
service agency or the gas supplier.
For your safety the information in this manual must
be followed to minimize the risk of fire or explosion
or to prevent property damage, personal injury or
loss of life.
Page 4

UNDERSTANDING SAFETY
IMPORTANT SAFETY INSTRUCTIONS
Awarning
Read all instructions before using your dryer.
Do not machine wash or machine dry items
cleaned, washed, soaked in, or spotted with
wax, paint, gasoline, oil, dry cleaning solvents,
and other flammable fluids. The fumes can
create a fire hazard or explosion. Always hand
wash and line dry items containing these
materials.
Do not allow children to operate, play with or
crawl inside your dryer. Supervise children
when your dryer is used near children.
Do not reach into a dryer if the drum
is moving.
When removing from service or discarding
a dryer, always remove the door to prevent
accidental entrapment.
Do not dry rubber, rubber-like, and heat
sensitive materials with heat.
To reduce the risk of fire, electrical shock, or injury to persons when
using your dryer, follow basic precautions, including the following:
Understanding your responsibilities
• Never operate the dryer if:
-it is not working right (i.e. noisy,
too hot).
-it is damaged.
-parts are missing.
-all panels are not in place.
-the lint screen is loose, damaged or
missing.
• Unplug the power supply cord or turn off
electrical power before attempting to
service your dryer. Shut off gas valve if
you have a gas dryer.
• Do not wash or dry items that are soiled
with vegetable or cooking oil. These items
may contain some oil after laundering.
Due to the remaining oil, the fabric may
smoke or catch fire by itself.
• Store flammable solvents or fluids away
from your dryer.
• Dry cleaning solvents or fluids should
never be put directly into your dryer.
Install and/or store dryer where it will not
be exposed to the weather.
Do not tamper with the controls.
You are responsible for making sure that your
dryer is installed, repaired and has parts
replaced by a qualified person.
Use only fabric softeners specifically labeled
as not being harmful to the dryer.
Do not allow lint to build-up inside the dryer or
exhaust system. Cleaning should be done
periodically by a qualified person.
' Clean lint screen before or after each load.
' Do not let dust, lint, paper, rags, chemicals,
etc. pile up around or under the dryer.
' Dryer must be electrically grounded. See the
Installation Instructions.
• Be sure that your dryer:
-is properly installed and leveled on a
floor that can support the weight in a
well-ventilated room.i^
-is connected to the proper outlet and
electrical supply.^
- is properly connected to fuel and
exhaust systems (gas dryers must be
vented outdoors).^
-is not installed against draperies or
curtains, or on carpet.t
- is located in an area where the tempera
ture is above 45° F (7°C).
-is properly maintained.
- is used only for jobs normally expected
of home clothes dryers.
- is not used by anyone unable to operate
it properly.
+See the Installation Instructions for com
plete information.
- SAVE THESE INSTRUCTIONS -
Page 5
KNOWING YOUR DRYER’S FEATURES
Knowing Your Dryer's Features
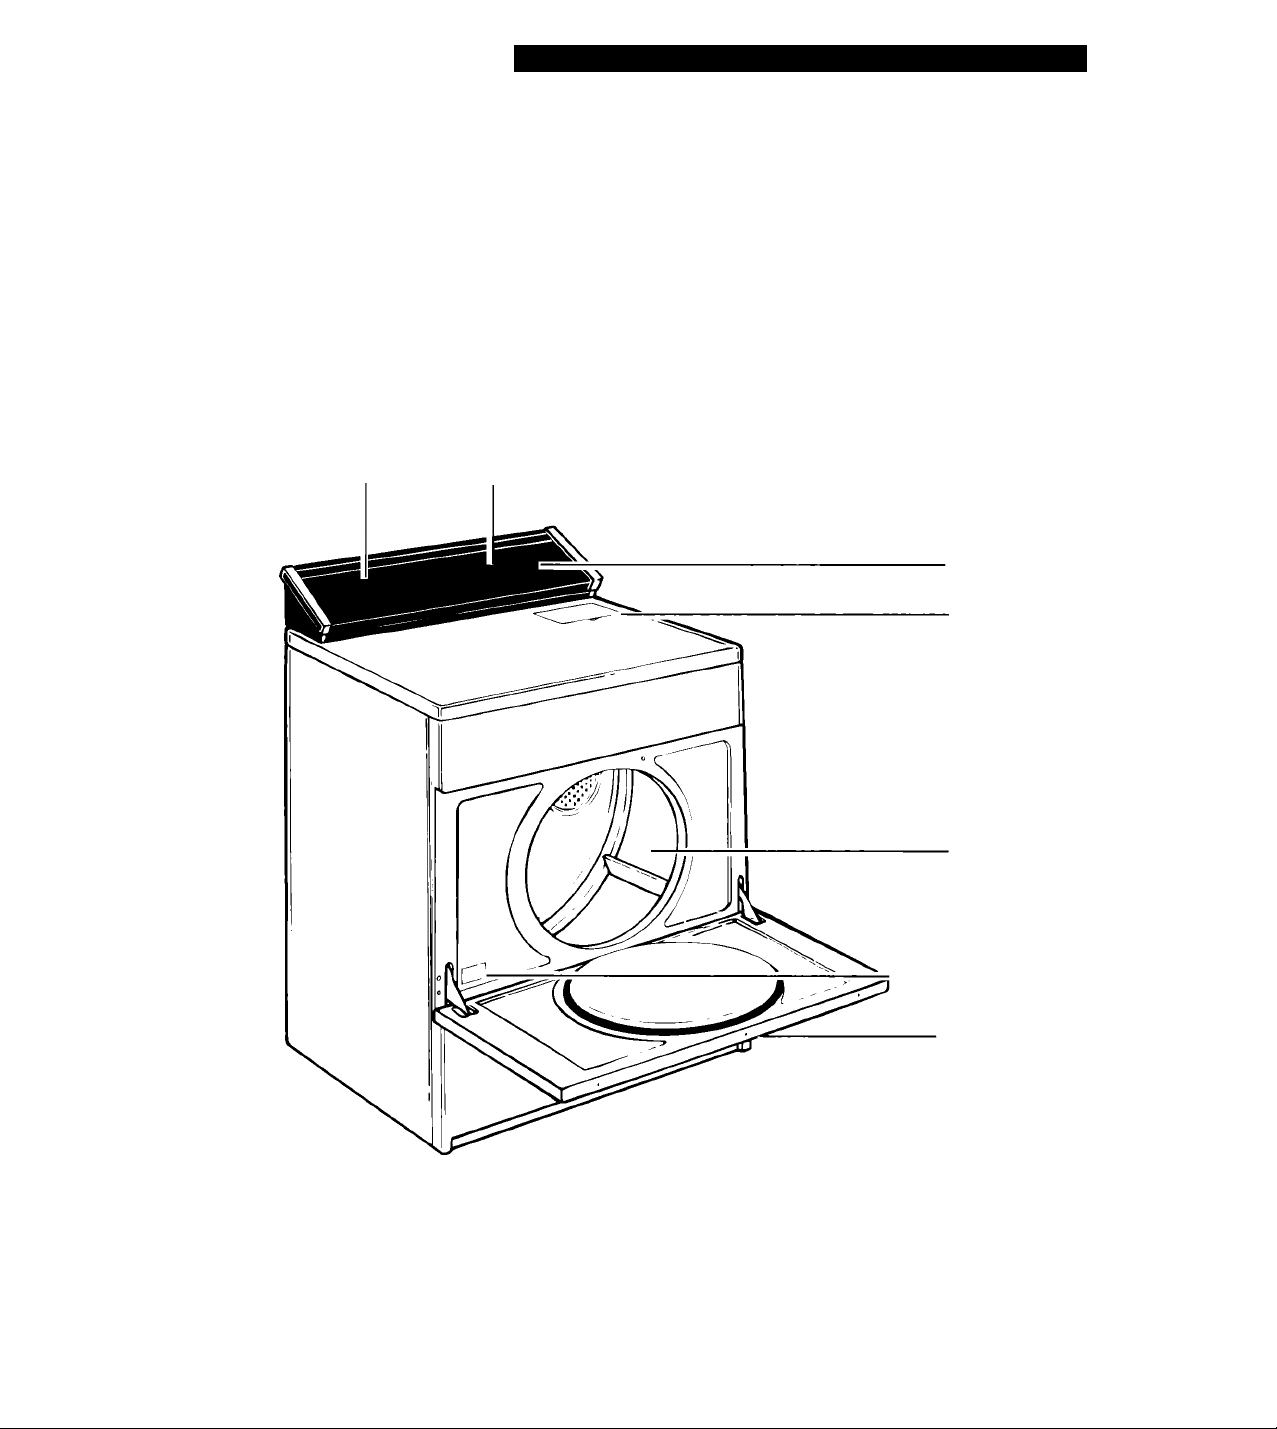
The parts and features of your dryer are illustrated below. Become familiar with all parts and
features before using your dryer.
NOTE: The drawings in this book may vary from your dryer model. They are designed to show the
different features of all models covered by this book. Your model may not include all features.
Cycle control knob
Temperature selector
Start button
Lint screen
Dryer drum
Model and serial
number label
Full-width
hamper door
Page 6
OPERATING YOUR DRYER
Operating Your Dryer
In This Section
Before starting your dryer
Starting or stopping your dryer
Operating your dryer properly assures the best drying results. This section gives you important
information to help you to select a cycle, time, and temperature.
.....................
............
Page
...........
..........
6 Selecting a cycle...............................
6
............................
Page
7
Before starting your dryer
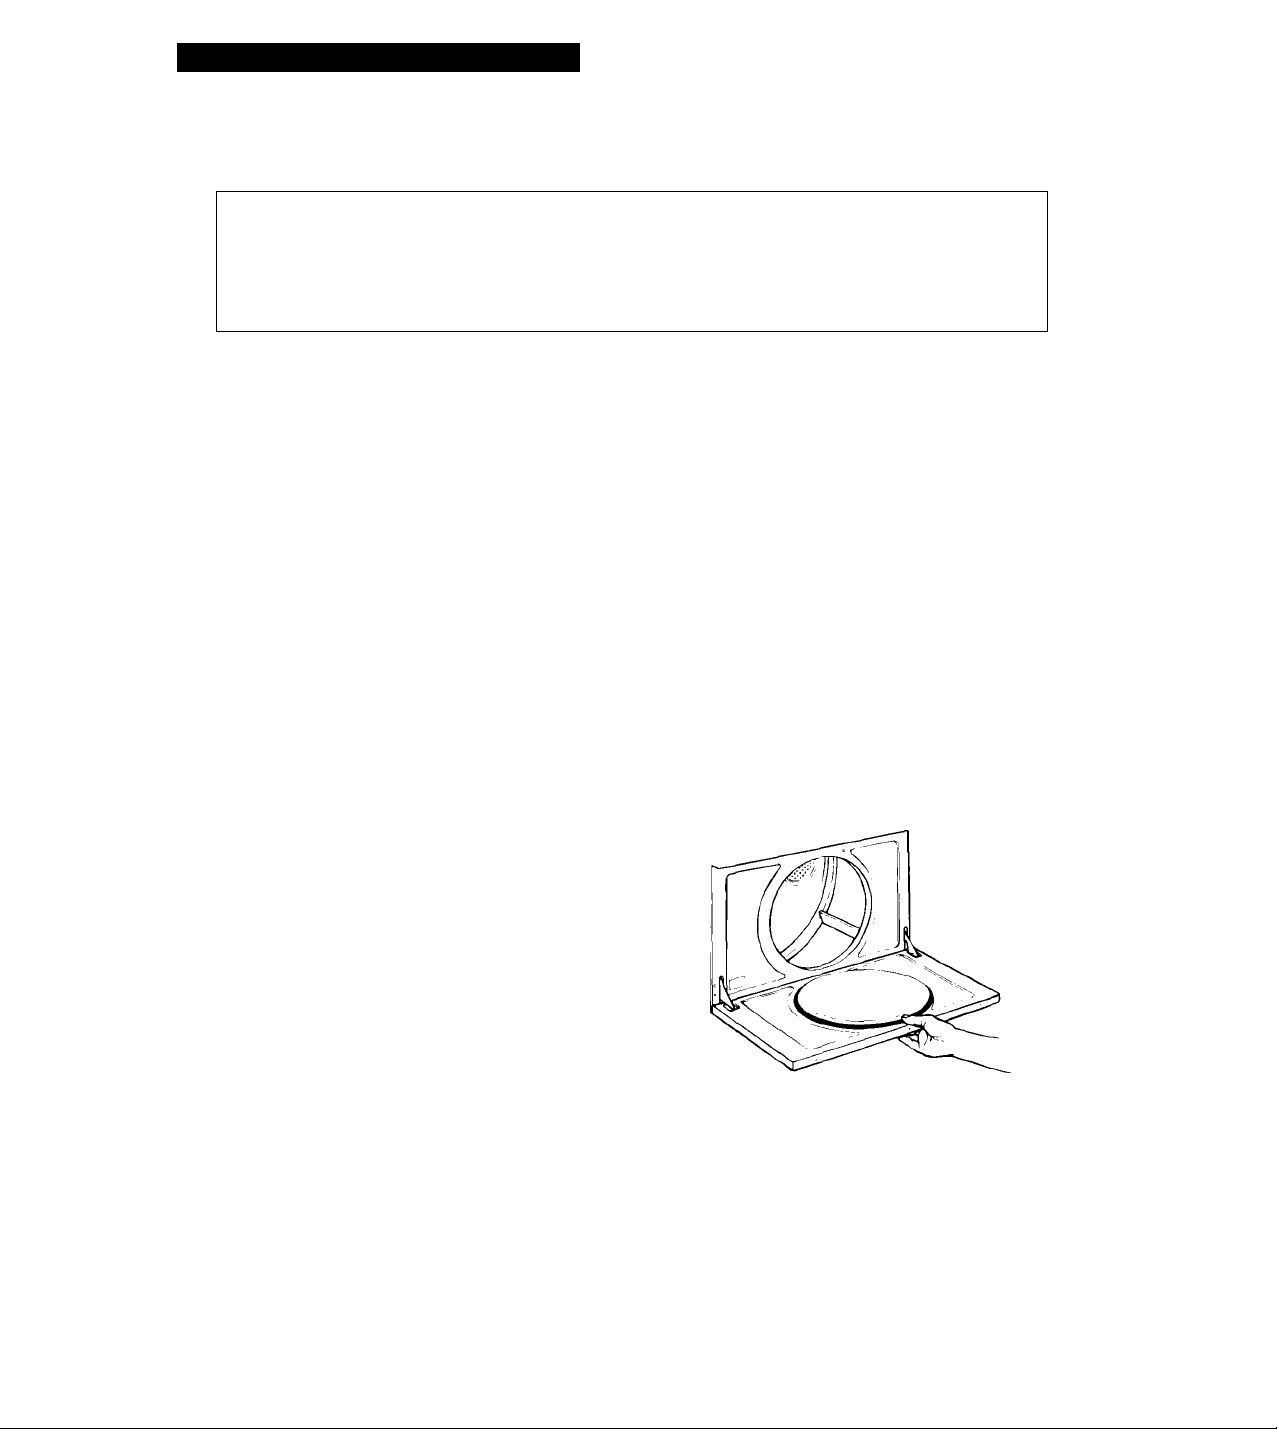
Wipe the dryer drum before using to remove
dust from storing and shipping.
If your dryer has a Consumer Buy Guide,
remove it and place it in your Use and Care
Guide.
Refer to the information below, and “Laundry
Tips” on page 12 for control setting, sorting,
and loading information.
Starting or stopping your dryer
Starting your dryer
Close the door and select a cycle. See pages
7-9 for additional setting information. Your
dryer automatically stops when a cycle ends.
Stopping and restarting your dryer
Open the dryer door or turn the Cycle Control
Knob to OFF. Close the door; make new
selections (if necessary). Push the Start
Button.
NOTE: The Cycle Control Knob should point to
an OFF area when the dryer is not in use. If
the dryer is stopped before the cycle is
finished, turn the Cycle Control Knob to an
OFF area.
Page 7
Selecting a cycle
You will find information you need to make
correct cycie, time, and temperature decisions
in this section,
• Pages 7 and 8: Use these pages to find
additional information about the drying cycles
on your model.
• Page 9: Use the information on this page to
guide you when making drying selections.
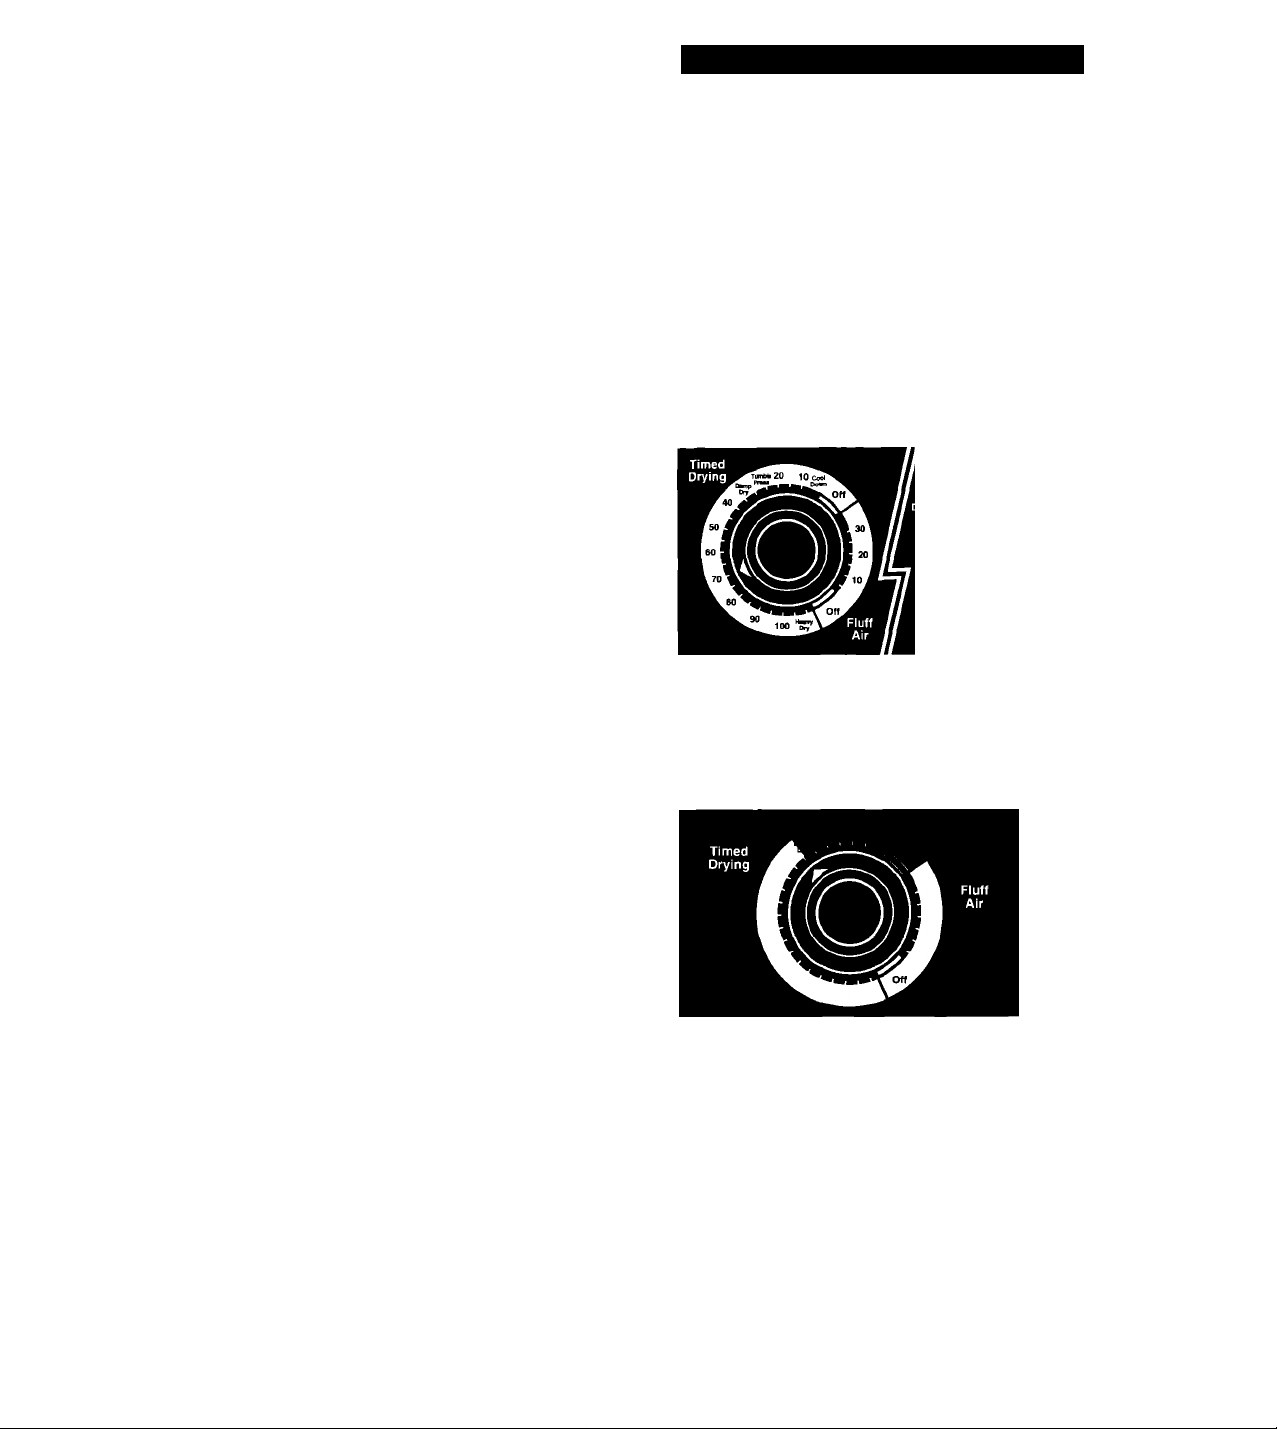
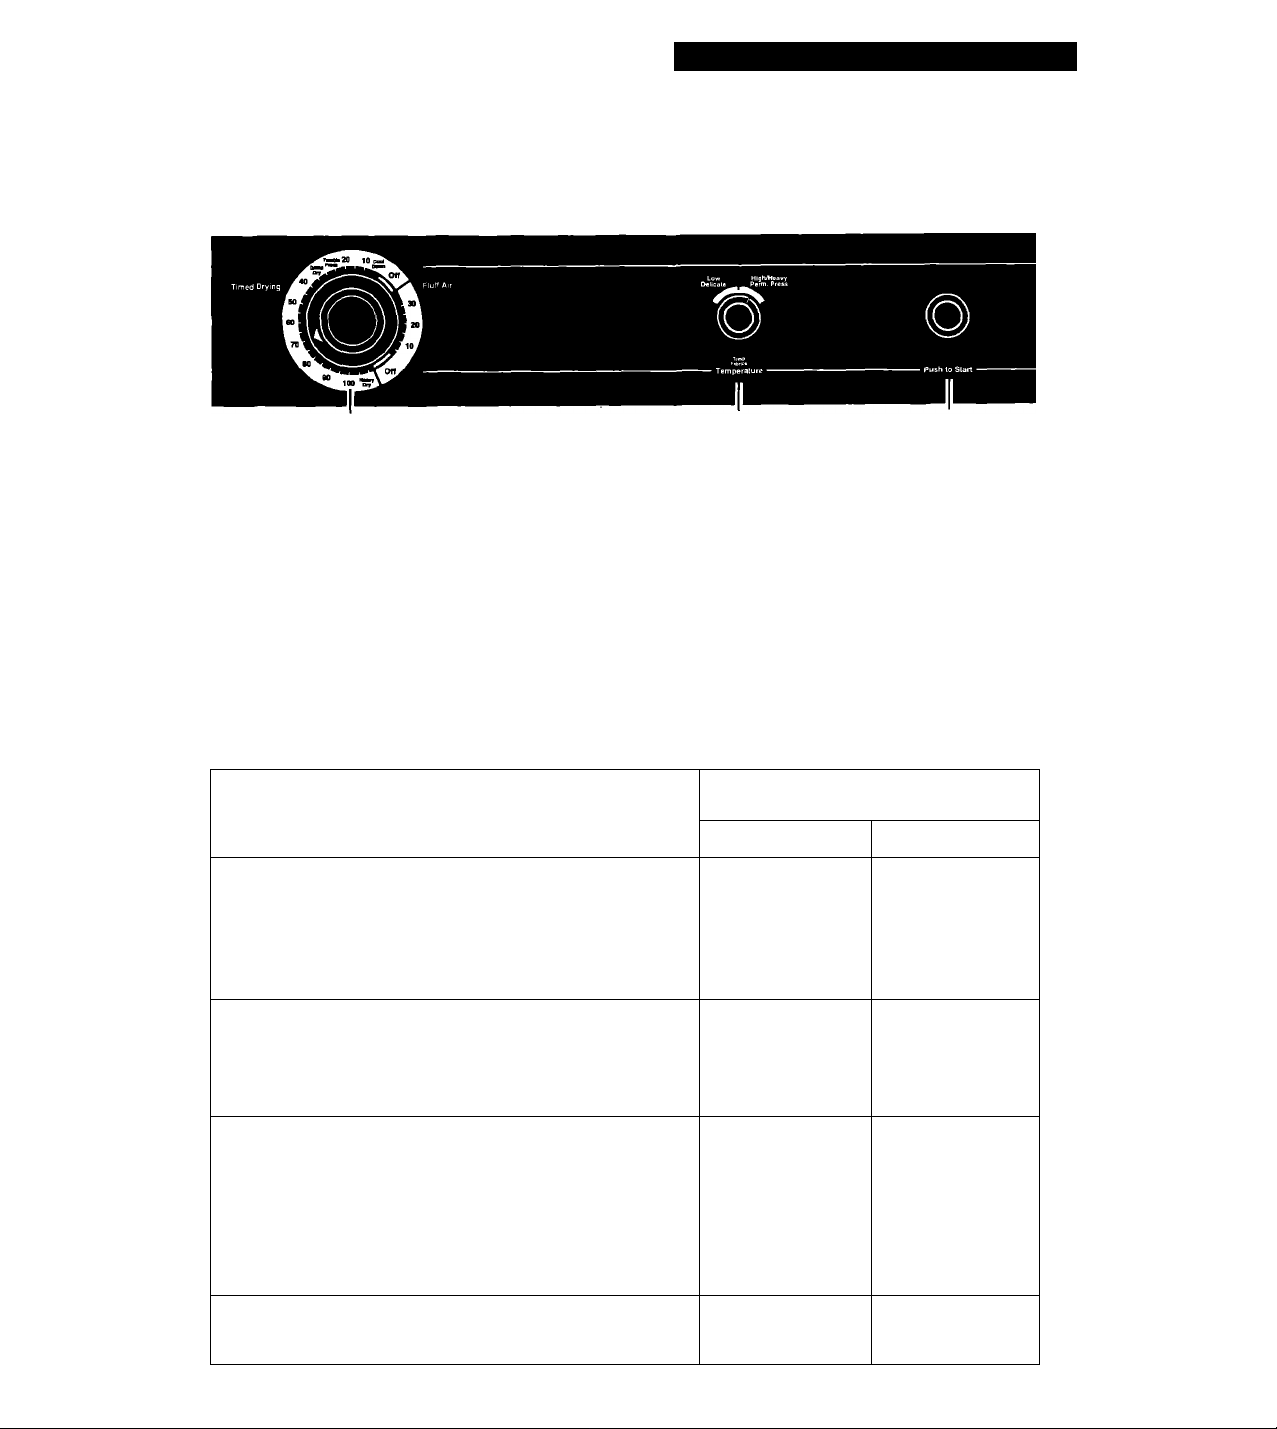
Your dryer has a Cycle Control Knob and a
Temperature Selector;
1. Select a cycle by turning the Cycle Control
Knob either way to the desired time.
2. Stop when the indicator on the knob’s outer
ring points to the cycle and time you want.
3. Set the Temperature Selector to the desired
temperature setting.
Changing a selection:
1. Turn the Cycle Control Knob to a new setting.
2. Move the Temperature Selector to the new
desired temperature.
3. Push the Start Button, if necessary.
OPERATING YOUR DRYER
Cycle control knob
Temperature
selector
Using the Damp Dry cycle
(on some models)
Use this cycle to dry damp items that do not
require an entire drying cycle, or to dry items to
damp level. Two examples are heavy cottons,
such as jeans, which you do not want to
become stiff, or cotton clothes which are easier
to press when damp.
1. Set the Cycle Control Knob on DAMP DRY.
2. Set the Temperature Selector to a high setting.
3. Push the Start Button.
The last few minutes of this cycle are without
heat to help make the load easier to handle.
Page 8
OPERATING YOUR DRYER
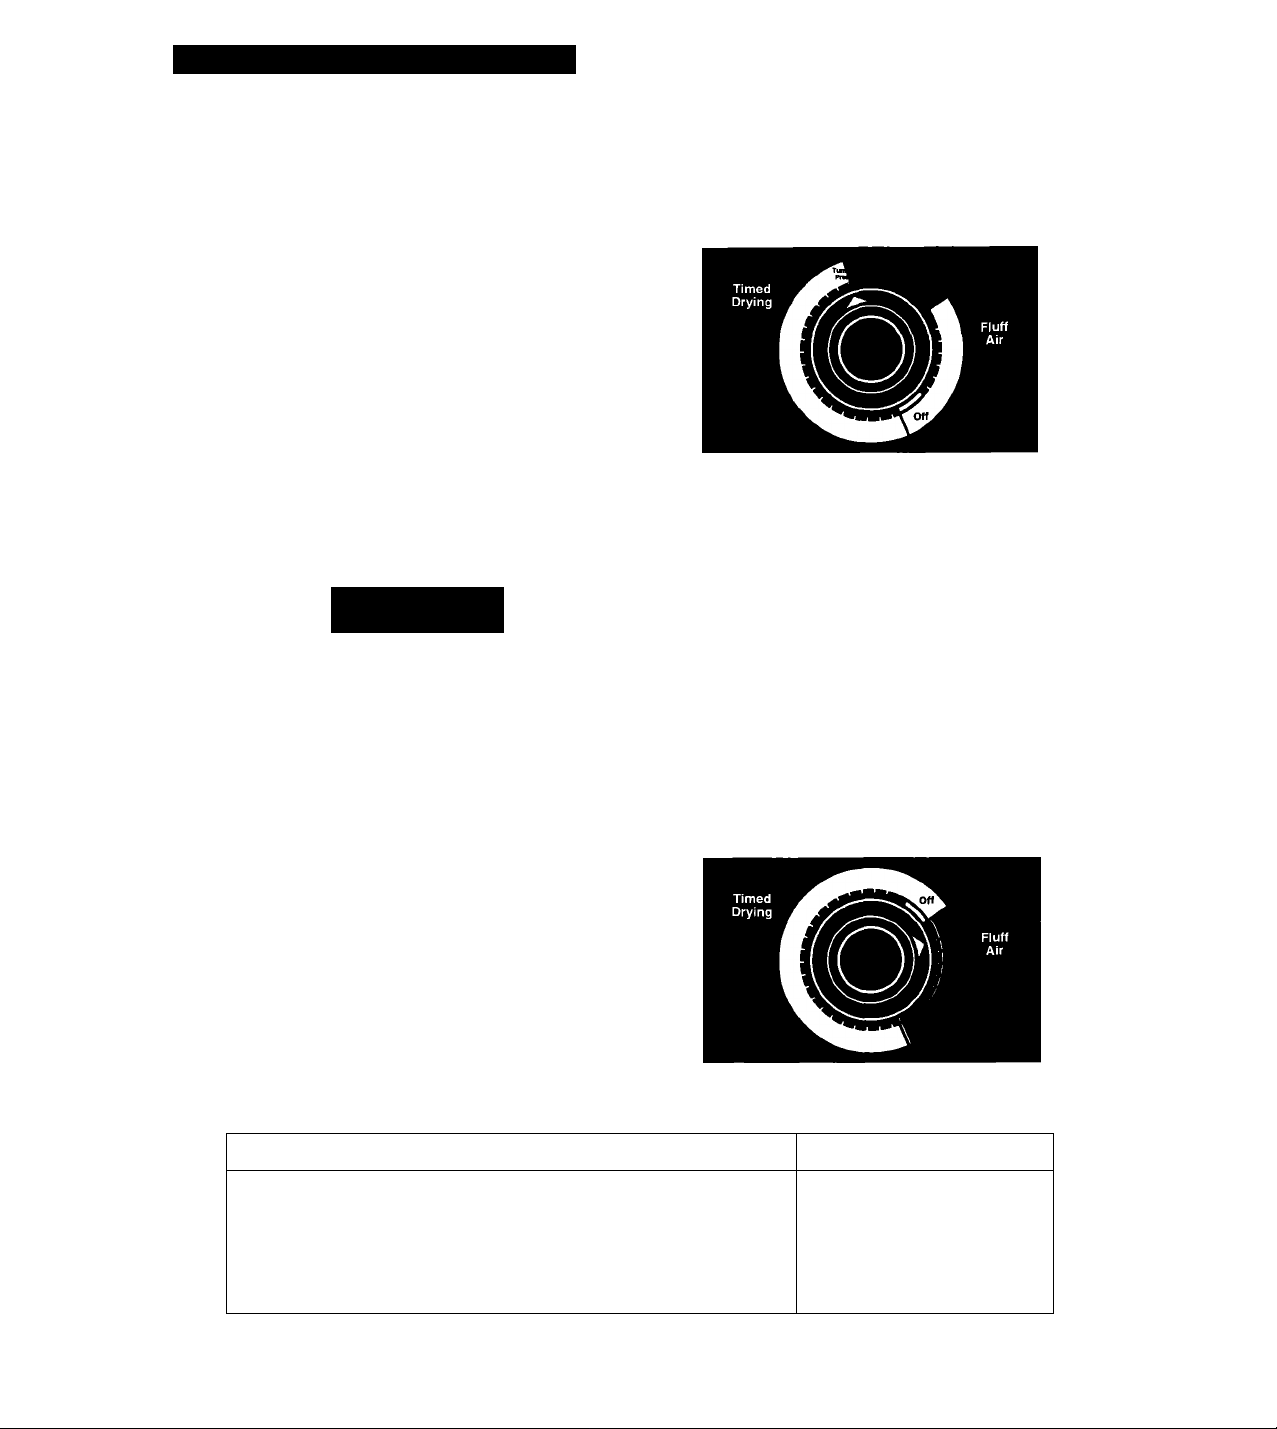
Using the TUMBLE PRESS cycle
The Tumble Press cycle removes wrinkles
from clothing that has been packed in a
suitcase or closet, and from items not removed
from the dryer at the end of a cycle.
1. Set the Cycle Control Knob on TUMBLE
PRESS.
2. Set the Temperature Selector to a high
setting.
3. Push the Start Button.
The last few minutes of this cycle are without
heat to help make the load easier to handle.
Put only a few items in your dryer for best
results when using this cycle. As soon as the
dryer stops, fold or put the items on hangers.
Using the Fluff Air cycle (no heat)
Awarning
Fire Hazard
Do not dry heat-sensitive fabrics, plastic,
rubber, or some stuffed items with heat.
Use the Fluff Air cycle, or line dry.
Failure to do so could result in fire or
damaged items.
The dryer does not heat when the Cycle
Control Knob is set in the Fluff Air cycle. This
cycle can be used to fluff or air dry bedding,
plastic tablecloths, foam rubber pillows, stuffed
toys, sneakers, etc.
1. Turn the Cycle Control Knob to the number
of minutes you want in the Fluff Air cycle.
(No temperature needs to be selected;
cycle is unheated.) Refer to the chart below
for suggested times.
2. Push the Start Button.
NOTE: Repeat steps above if more time is
needed to dry items.
TYPE OF LOAD
RUBBER, PLASTIC, HEAT-SENSITIVE FABRICS
Foam Rubber-Pillows, bras, stuffed toys 20-30 min
Plastic-Shower curtains, tablecloths
Rubber-backed rugs
Olefin, Polypropylene, Sheer nylon
CYCLE AND TIME
Fluff Air
20-30 min
40-50 min
15-20 min
Page 9
Cycle control knob and temperature selector
OPERATING YOUR DRYER
Cycle control knob
Refer to the chart below and the chart on page
8 for cycle information.
Loads tumble without heat during the last
few minutes of all heated cycles. This makes a
load easier to handle and helps keep wrinkles
from setting in.
Using your Timed Drying (heated) cycle
(High/Heavy Perm. Press setting)
Use your Timed Drying cycle, with a high heat
setting, to dry cottons, permanent press, and
some synthetic fabrics.
Using your Timed Drying (heated) cycle
(Low Delicate setting)
Use your Timed Drying cycle, with a low heat
TYPE OF LOAD
COTTONS AND LINENS
Extra Heavy-Bedspreads, mattress pads, quilts
Heavyweight-Towels, jeans, corduroys, work clothes
Mediumweight-Sheets, cotton underwear, diapers
Lightweight-Batistes, organdies, lingerie
Temperature selector Start button
setting, to provide gentle drying for some
synthetics, knits, and delicate fabrics.
Using Heavy Dry
Use Heavy Dry and a high heat setting to dry
large items or items that are thicker or heavier
than regular load items (heavy cotton bath
sheets or robes).
NOTES: To help reduce wrinkling, remove the
load from the dryer as soon as tumbling stops.
This is important for permanent press, knits
and synthetic fabrics.
Do not overdry. Overdrying can cause
shrinkage, static cling, and damage some
fabrics.
TIMED DRYING
(Heated Cycle)
High heat
70-80 min
50-60 min
40-50 min
Low heat
30-40 min
PERMANENT PRESS, SYNTHETICS AND BLENDS
Heavyweight-Work clothes, jackets, raincoats
Mediumweight-Shirts, play clothes, sheets, slacks
Lightweight-Lingerie, blouses, dresses
KNITS
Heavyweight-Cottons, rayons, blends, T-shirts,
slacks, shirts
Mediumweight-Synthetics (polyester, acrylic, etc.),
dress slacks, skirts, sweaters
Lightweight-Synthetics (polyester, acrylic, etc.)
and blends, lingerie, blouses, dresses
DELICATE FABRICS
Sheer curtains (2 or 3 panels), gauze, lace, etc.
40-50 min
30-40 min
20-30 min
40-50 min
30-40 min
20-30 min
15-20 min
Page 10
CARING FOR YOUR DRYER
Caring For Your Dryer
In This Section
Maintenance-every load ..
Dryers require regular maintenance. Follow the suggestions below to maintain your dryer properly.
Page
.....
10 Maintenance-as needed
Page
.....
10
Maintenance-every load
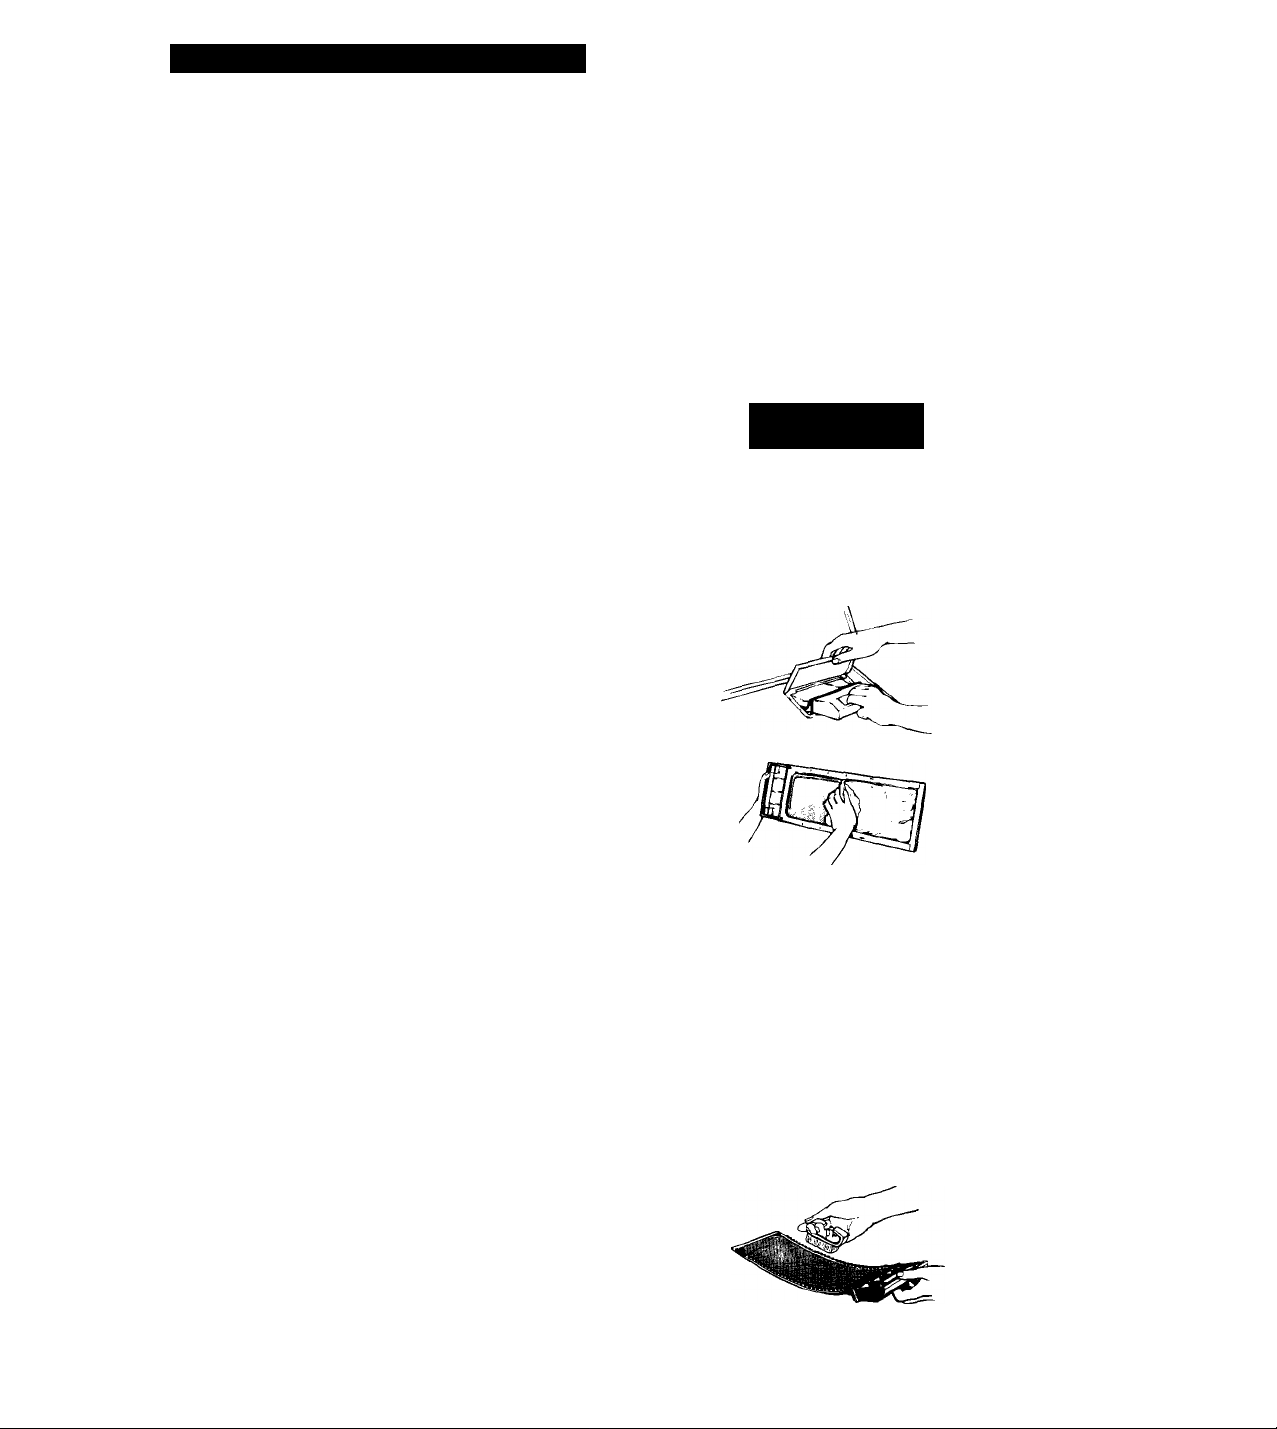
Cleaning the lint screen
The lint screen is located under a lid on top of
the dryer. Clean it before each load. A screen
blocked by lint can increase drying time.
1. Open the lid and pull the lint screen straight
out.
2. Roll lint off the screen with your fingers. Do
not rinse or wash the screen to remove lint.
Wet lint is hard to remove.
3. Push the lint screen firmly back into place
and close the lid.
Product and Fabric Damage Hazard
Do not run the dryer with the lint screen
loose, damaged, blocked or missing.
Doing so can cause overheating and
damage to both the dryer and fabrics.
ACAUTION
Maintenance-as needed
Use the following suggestions about cleaning
and lint removal to help you keep your dryer
safe, looking like new, and at peak operating
efficiency.
Cleaning a clogged lint screen
Laundry detergents and fabric softeners can
cause a residue build-up on the lint screen. A
clogged lint screen can extend drying times.
Clean the lint screen every six months or more
frequently if it becomes clogged due to a
residue build-up. Use the following method:
1. Wet both sides of lint screen with hot water.
2. Wet a nylon brush with hot water and liquid
detergent.
3. Scrub lint screen with the brush until all
residue build-up is removed.
4. Rinse with hot water.
5. Thoroughly dry lint screen with a clean
towel and replace in dryer.
10
Page 11
CARING FOR YOUR DRYER
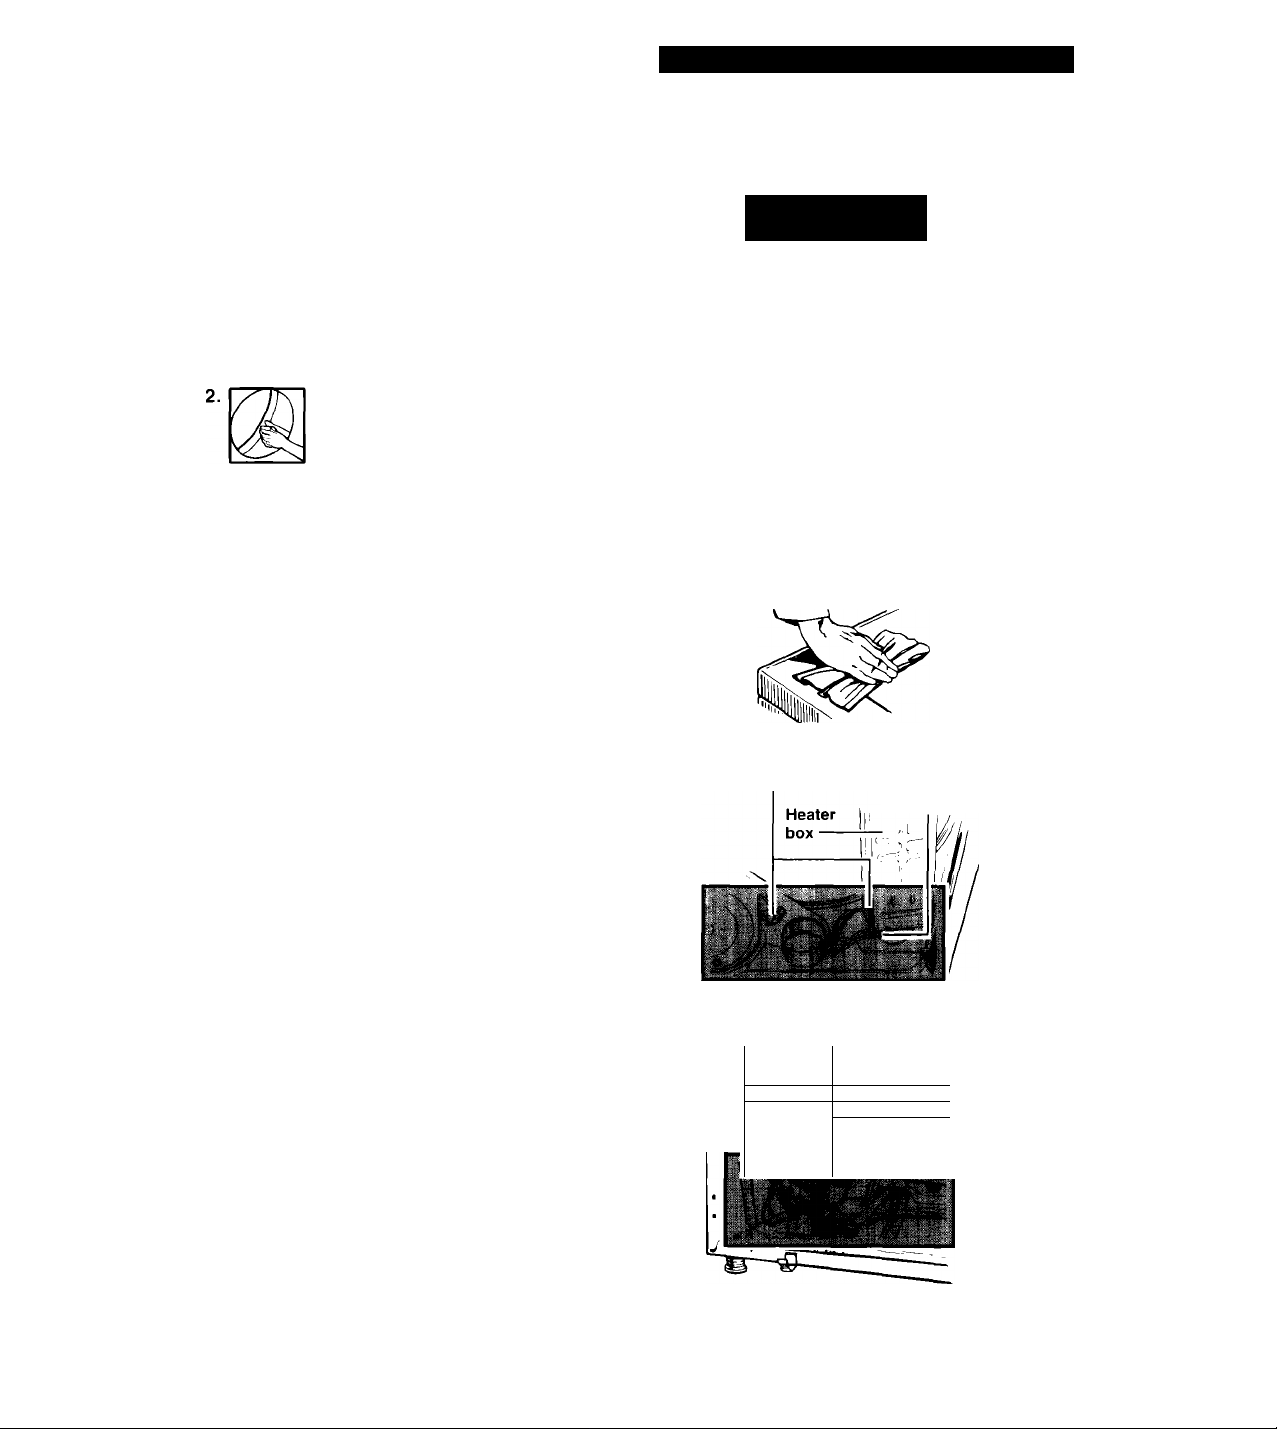
Cleaning the dryer interior
Garments which contain unstable dyes, such
as denim blue jeans or brightly colored cotton
items, may discolor the dryer interior. To
remove stains from dryer drum, use powdered
laundry detergent.
1. Make a paste with detergent and very warm
water.
Apply paste to a soft cloth and
scrub area until all excess dye is
removed.
3. Wipe thoroughly with a damp cloth.
4. Tumble a load of rags to dry.
Cleaning the dryer exterior
Wipe with a soft, damp cloth.
Removing accumulated lint
Lint can gather inside the dryer and be a fuel
for fire. It is recommended the lint be removed
every 2 to 3 years, or more often, depending
on dryer usage. Cleaning should be done by a
qualified person. If you have any questions,
please call an authorized Whirlpool service
company.
^WARNING
Electrical Shock,
Personal Injury and Fire Hazard
•Turn off the electrical power before
cleaning the interior of the dryer.
• Unplug the power supply cord before
removing dryer panels.
• Make sure the dryer is cool.
• Dryer parts can have sharp edges. Use
care when handling.
• Use non-flammable cleaner to clean the
dryer interior.
Failure to do so could result in electrical
shock or injury, fire or explosion.
Thermostats
Heat element
terminals
1. Unplug the power supply cord or turn off the
electrical power.
2. Remove back panel (electric) or lower front
access panel (gas). See the Installation
Instructions.
3. Remove lint from shaded area in illustration
with a soft brush or vacuum cleaner. Avoid
damaging wires, thermostats (electric),
funnel (gas) or ignitor (gas).
4. Replace panel; reconnect and level dryer
again, if necessary.
Electric dryer with back panel removed
Ignitor
inel
1"
1
Gas dryer with lower front access panel
removed
11
Page 12
LAUNDRY TIPS
Laundry Tips
In This Section
Before you dry......................................
Drying special-care items
Using dryer fabric softeners...............
...................
................
................
................
Page
12
13
15
Saving energy
Vacation care
Solving laundering problems..............
.......................................
........................................
Page
..............
..............
..............
This section reviews proper drying techniques, gives you additional drying information, and
discusses causes or solutions to common drying problems.
Before you dry
Before using your dryer, see pages 3 and 4 for
Important Safety Information.
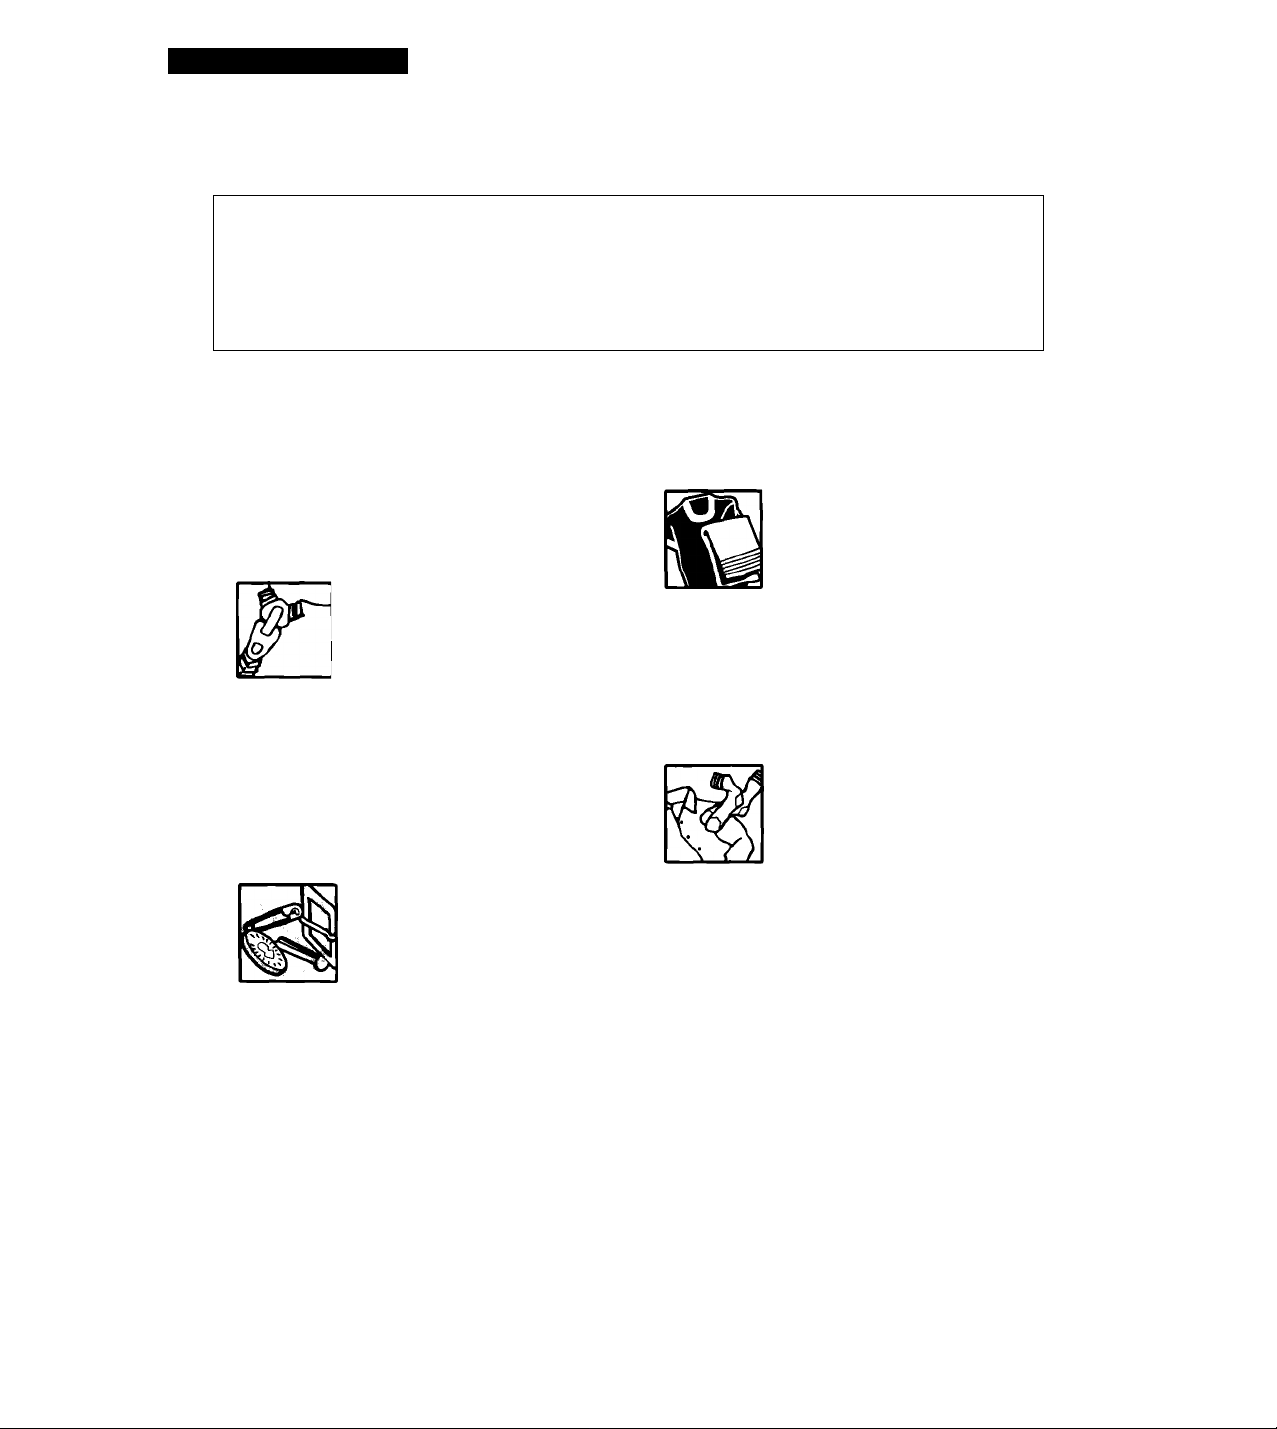
Drying tips
• Ciose zippers, snaps, and hooks to avoid
snagging other items. Remove
pins, buckles, and other hard
objects to avoid scratching the
dryer drum. Remove heatsensitive trim that can
be damaged by drying.
Check garments to make sure all spots and
stains were removed during the wash. If
stains were not removed, do not tumble dry.
Heat may permanently set stains. Soiled
items can also leave stains on the dryer
drum. These stains can be picked up by
other items in the load.
' Sharp or metal objects can damage your
dryer. Check pockets for pins,
clips, money, bolts, nuts, etc.,
and turn pockets inside out. Do
not lay these objects on your
dryer after emptying pockets.
Tie strings and sashes so they will not
tangle.
Turn lint takers and dark items inside out to
help prevent lint pickup.
Place small items such as baby socks or
hankies in a mesh bag for easier removal.
Articles to be ironed should be removed from
Sorting
• Separate dark from light colors; colorfast
from noncolorfast. Items
properly sorted for washing are
usually properly sorted for
drying. Separate heavy fabrics
(denim, towels) from light fabrics
(synthetics, permanent press).
• Separate lint givers (towels, chenille) from
lint takers (corduroy, synthetics, permanent
press). When possible, turn lint takers inside
out.
Load sizes
• Mix large items with smaller items. Load the
dryer by the amount of space
items take up, not by their
weight. Do not overload the
dryer. Overcrowding causes
uneven drying and wrinkling,
and can cause items to wear out faster
(because of pilling).
You may need to rearrange large items
(sheets, blankets, tablecloths) during a cycle
to reduce balling or rolling up.
Reduce wrinkling of permanent press and
synthetics by drying smaller loads and
removing items from the dryer as soon as
tumbling stops.
For better tumbling action when drying only a
few small items, add one or two lint-free
towels. This also prevents small, lightweight
items from blocking airflow.
the dryer while still damp.
15
15
16
12
Page 13
LAUNDRY TIPS
Drying special-care items
Most garments and household textiles have care labels with laundering instructions. Always follow
label directions when they are available. General drying instructions for some special washables
are included in this section.
Heat sensitive fabrics, plastic, rubber, or some stuffed items require drying without heat. Use
Fluff Air cycle or line dry. See Warning on page 8.
Heat-sensitive
fabrics
•Cotton and
canvas shoes
Pillows, stuffed If manufacturer recommends machine drying, dry one pillow at a time.
toys
•Feather, foam.
polyester
Blankets and
woolens
•Cotton, rayon,
synthetic blankets
•Electric blankets.
electric sheets.
woolen blankets,
washable woolen
garments
If shoes can be machine laundered:
1. Place several bath towels in the dryer to act as a buffer.
2. If rubber or foam rubber materials are part of the shoe, use Fluff Air
cycle. For other materials, see pages 8 and 9 for cycle, time or
temperature recommendations.
3. Remove shoes from dryer while still damp and allow to air dry.
Refer to Fluff Air cycle, pages 8 and 9.
1. Make sure coverings are securely stitched.
2. Shake and fluff the items by hand several times during the cycle.
3. Make sure pillows are completely dry. Feather pillows take a long time
to dry.
Machine drying knitted woolens is not recommended. Block to shape
when wet and allow to air dry. Line dry blankets in shade on a breezy day
over two lines. Pin edges together and straighten them. When partly dry,
turn the blanket over, repin and restraighten. When dry, brush nap.
Dry as recommended for permanent press fabrics on page 9.
If manufacturer recommends machine drying:
1. Place one or two dry towels in the dryer and preheat 3-5 minutes on a
high setting. This will dry blankets faster and help avoid pilling.
2. Put blanket in dryer with warm towels. Set control for 20 minutes.
3. Check after 10 minutes. Remove when still damp. Overdrying and long
tumbling can cause shrinking and pilling.
4. Place blanket on flat surface or over two lines to finish drying. Gently
stretch to original size and shape.
5. When completely dry, brush gently to raise nap. Press binding with
cool iron if needed.
Draperies,
slipcovers
•Draperies,
slipcovers
•Bonded or
laminated fabrics
Remove drapery weights and hooks before laundering.
For slipcovers, replace while still slightly damp. They will dry to fit tightly.
Dry only a few minutes.
1. Leave room in dryer for load to fluff.
2. Remove from dryer while slightly damp. Do not overdry.
Line dry these items.
continued on next page
13
Page 14
LAUNDRY TIPS
Diapers, baby
clothes
Elastic items
Fiberglass
materials
Flameretardant
finishes
1
---------------------------
Napped items
•Corduroy,
velveteen
Quilted, down-
filled items
Wash and dry small items in a mesh bag or pillowcase for convenient
handling.
1. Dry according to manufacturer’s instructions.
2. Remove diapers and cotton knit items while still slightly damp. They
will feel softer, shrink less, and be easier to fold. ,
Remove from dryer while still slightly damp.
Do not machine wash or dry fiberglass materials. Small particles can
stick to fabrics washed or dried in following loads and cause skin
irritation.
Some items have been treated with a flame-retardant finish to improve
their resistance to burning. Such items are clearly labeled. To retain
flame-retardant qualities through continuous use and washing, clean and
dry according to the manufacturer’s instructions.
1
Dry separately or with similar colors to avoid lint transfer. Follow care
label directions.
1. Dry according to manufacturer’s instructions.
2. Remove from dryer while there is still a trace of moisture.
3. Smooth, reshape and air dry before putting away.
Follow care label instructions.
1. Dry one at a time.
2. Remove from dryer and shake or fluff the item during the drying cycle.
3. Smooth and reshape before putting away.
Snowsuits,
jackets
•Nylon,
polyester-base
Tinted, dyed or
noncolorfast
items
Towels
Washable knits
14
Check label for fiber content, then follow care label directions.
Dry according to manufacturer’s instructions.
1. Dry garment for about 10 minutes. Remove and turn inside out. Dry for
10 more minutes.
2. Remove from dryer immediately and hang on a nonrusting hanger to
finish drying. This will help eliminate wrinkles.
Dry according to fabric, weight and care label instructions. Wipe the dryer
drum carefully to remove any dye or lint that can be transferred to other
loads. See “Cleaning the dryer interior” on page 11.
Select cycle according to fabric type. Some towels, particularly those
made of a blend of synthetic fibers and natural fibers (polyester and
cotton blends), may shed more lint than other towels causing your dryer’s
lint screen to get full faster. Be sure to remove lint from the dryer lint
screen before and after drying new towels.
Do not overdry knits. Overdrying can cause shrinking and static cling.
1. Select cycle according to fabric and construction.
2. Turn synthetics and blends inside out when drying to avoid pilling.
3. Remove cotton and rayon knits while still slightly damp. Stretch into
shape and lay flat to finish drying.
Page 15

Using dryer fabric softeners
Dryer fabric softeners are recommended for
reducing static cling (static can also be re
duced by not overdrying) and for softening
fabrics. Always follow package instructions
carefully.
• Put fabric softener sheet on top of the load
before starting the dryer. Do not add a
fabric softener sheet after the cycle has
started. Instant heat can cause the fabric
softener to spot fabrics.
• Clear, grease-like spots can result from the
• Some fabric softeners can clog the lint
Saving energy
• Dry only full loads without overdrying.
• Avoid overloading dryer, adding wet items to
a partly dried load, or opening the door
unnecessarily.
• Plan your laundry to dry one load after
another. A warm dryer shortens drying time.
LAUNDRY TIPS
fabric softener sheet becoming tangled in an
item during tumbling. If fabric softener
causes a stain, wet the stain and rub with
liquid detergent or bar soap, rewash.
screen and slow drying. Use fabric softeners
labeled as dryer safe.
' Shorten drying times by exhausting dryer
properly and cleaning exhaust duct as
needed.
-Keep the lint screen clean.
-Use your dryer in a room where room air
temperature is above 45°F (7°C).
-Sort loads by fabric weight and type.
Vacation care
1. Unplug power supply cord or turn off
electrical power supply.
2. Clean lint screen.
15
Page 16
LAUNDRY TIPS
Solving laundering problems
Most laundering problems are easily solved. Check the following list for problems you may have
and possible causes. If you need additional help, check the “Assistance or Service” section of
this book.
PROBLEM CHECK IF
Greasy
spots
Lint
Dryer fabric softeners
were used
Undiluted washer fabric
softener was used
Enough detergent was used
Items were clean before they
were dried
Lint screen is full
Load is properly sorted
Static electricity is
attracting lint
Load is too big or heavy
Paper or tissue was in pocket Empty pockets carefully. A small scrap of
CAUSES/SOLUTIONS
Follow manufacturer’s product directions
carefully.
Dilute fabric softener before adding to
the final rinse.
Use enough detergent to hold soil in the
wash water until it drains away. Undrained
soil can stick to outer tub of the washer and
cause greasy spots with next load.
Soiled items can stain other items in the
load. They can also leave stains on the
dryer drum that can be picked up by items
in later loads. Dryer heat may permanently
set these stains.
Clean lint screen. (See page 10.)
Sort lint-givers (bath towels, etc.) from lint-
takers (synthetics, permanent press).
Use fabric softener in the washer’s final
rinse. Use correct dryer settings for fabric.
Overdrying synthetics can cause lintattracting static electricity.
Dry smaller loads. When items can’t tumble
freely, air is unable to carry lint to lint
screen.
paper can cause a lot of lint.
16
Enough detergent was used
Pilling is being mistaken for lint Pilling (surface fuzz) is caused by normal
Use enough detergent to hold the lint in the
water until it drains away. Base detergent
amount on water hardness and soil in wash
load.
wear and laundering. Pills do not break
away easily from the fabric and can often
collect lint. Synthetic fabrics are more likely
to pill than others, especially at neckbands,
elbows and knees.
Page 17
LAUNDRY TIPS
PROBLEM CHECK iF
Shrinking
Slow drying
Items are overdried
Fabric type and quaiity is
suitable for drying
There is a large amount of
moisture in the load to be
dried
Cold rinse water is used A load rinsed in cold water will take
Room air temperature is
below 45°F (7°C)
Dryer is exhausted according
to Installation Instructions
Lint screen is full
Exhaust duct or outside
exhaust hood is ciogged
Proper electrical supply is
used
CAUSES/SOLUTIONS
Remove items whiie there is stiii a trace
of moisture. Some items should be
removed while damp, then shaped and
air dried.
Some knits are stretched during manufac
turing. Washing and drying returns them
to the original size. This is normal. Check
quality of garment before buying. Follow
fabric care label directions carefully.
Some items hold more moisture than
others (cottons more than polyester).
They take longer to dry. Full loads take
longer to dry than small loads of the same
fabric.
slightly longer to dry than a warm one.
Cold rinses, however, help save energy
and reduce wrinkling more than warm
rinses do.
Install dryer in a room where the air
temperature is warmer than 45°F (7°C).
Cold air increases drying time and may
cause wrinkles not to be removed.
Install and exhaust your dryer according
to the Installation Instructions provided.
Clean lint screen before or after
each use.
Clean if needed.
Properly connect the dryer to a grounded
electrical circuit that meets the electrical
requirements stated in the Installation
Instructions.
Static
eiectricity
Load is overdried
Fabric softener is used
Synthetics, synthetic blends,
permanent press and knits are
in load
Remove items while there is still a trace
of moisture.
Use a fabric softener and follow package
directions carefully.
Synthetics, synthetic blends, permanent
press and knits build up static electricity.
Use a fabric softener and be careful not
to overdry the load.
17
Page 18
IF YOU NEED ASSISTANCE OR SERVICE
If You Need Assistance
Or Service
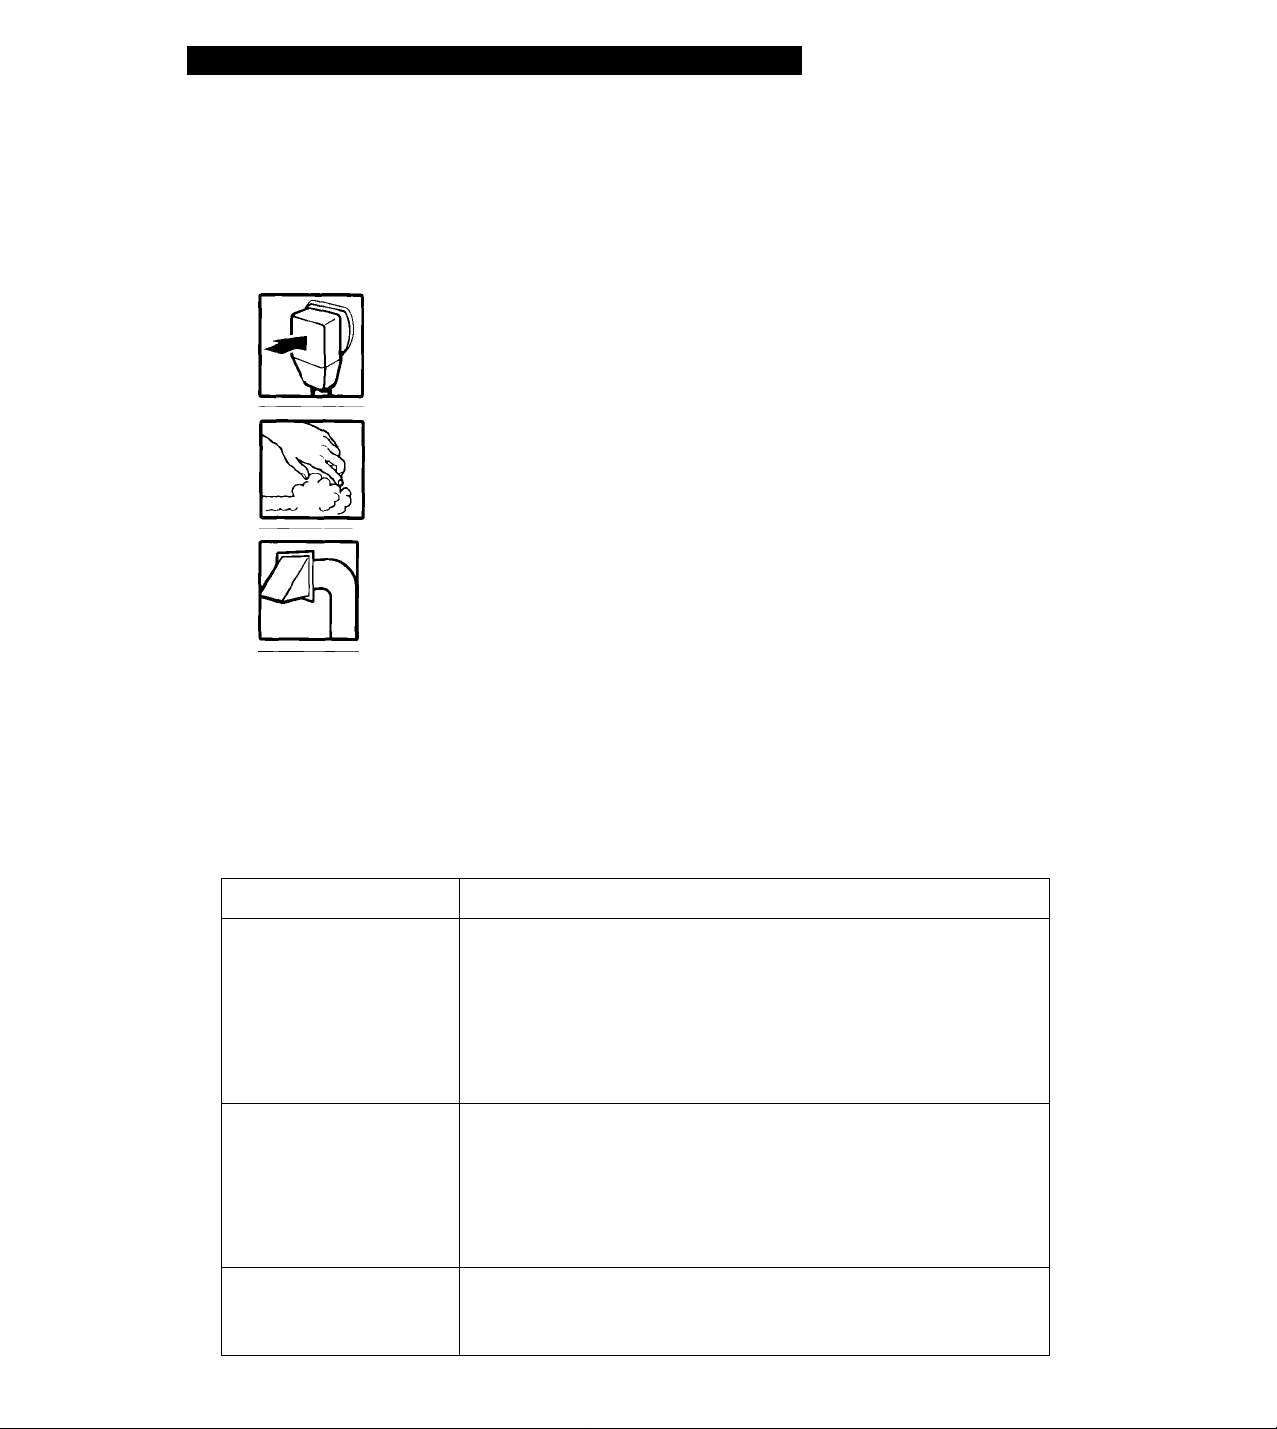
1. Before calling for assistance ...
Is the power cord plugged in?
Is lint screen clogged with lint?
Is exhaust duct or outside exhaust hood clogged with lint?
Have you blown a fuse or tripped the circuit breaker?
If you need more help, check the chart below.
PROBLEM
Dryer will not run
Dryer will not heat
Drying time too long
CHECK THE FOLLOWING
Is the power cord firmly plugged into a live circuit with proper
voltage?
Has a household fuse blown or circuit breaker tripped? Has a
time-delay fuse been used?
Is the dryer door firmly closed?
Did you firmly push the Start Button?
Are the controls set in an ON position?
Is the cycle in the last few minutes? (There is no heat during that
time.)
Has a household fuse blown or circuit breaker tripped? Has a
time-delay fuse been used? '
If you have a gas dryer, are the valves open on both the dryer and
the supply line?
Is your lint screen clean? (See the “Slow drying” section of the
table on page 17 for additional information.)
Is your exhaust duct or outside exhaust hood clogged with lint?
18
Page 19

IF YOU NEED ASSISTANCE OR SERVICE
2. If you need assistance ...
Call an authorized Whirlpool service center.
When asking for help or service, please
provide a detailed description of the problem,
your appliance's complete model and serial
numbers and the purchase date. (See page 2.)
This information will help us respond properly
to your request.
3. If you need FSP* replace
ment parts ...
FSP is a registered trademark of Whirlpool
Corporation for quality parts. Look for this
symbol of quality whenever you need a
replacement part for your Whirlpool* appli
ance. FSP replacement parts will fit right and
work right, because they are made to the same
exacting specifications used to build every new
Whirlpool appliance.
To locate FSP replacement parts in your
area, contact your authorized Whirlpool service
center.
19
Page 20

WHIRLPOOL
Dryer Warranty
LENGTH OF WARRANTY
FULL ONE-YEAR WARRANTY
From Date of Purchase
WHIRLPOOL WILL NOT PAY FOR
A. Service calls to:
1. Correct the installation of your dryer.
2. Instruct you how to use your dryer.
3. Replace house fuses or correct house wiring or plumbing.
4. Replace light bulbs.
B. Repairs when your dryer is used in other than normal, single-family household use.
C. Pickup and delivery. Your dryer is designed to be repaired in the home.
D. Damage to your dryer caused by accident, misuse, fire, flood, acts of God or use of products
not approved by Whirlpool.
E. Repairs to parts or systems caused by unauthorized modifications made to the appliance.
WHIRLPOOL CORPORATION SHALL NOT BE LIABLE FOR INCIDENTAL OR CONSEQUEN
TIAL DAMAGES.
Outside the United States, a different warranty may also apply. For details, please contact your
authorized Whirlpool distributor or military exchange.
WHIRLPOOL WILL PAY FOR
FSP* replacement parts and repair labor to correct defects
in materials or workmanship. Service must be provided by
an authorized Whirlpool service company.
PARING. 3401010
©1994 Whirlpool, U.S.A.
©
Phnled on recycled paper-
10% post-consumer waste
50% recovered materials
Registered Trademark/ Trademark of Whirlpool, U.S.A. Printed in U.S.A.
 Loading...