

Page 1
FOR SERVICE TECHNICIAN ONLY - DO NOT REMOVE OR DESTROY
BASIC OPERATION OF COMMERCIAL STACKED
WASHER/DRYER
n
For additional information, see
www.WhirlpoolCommercialLaundry.com
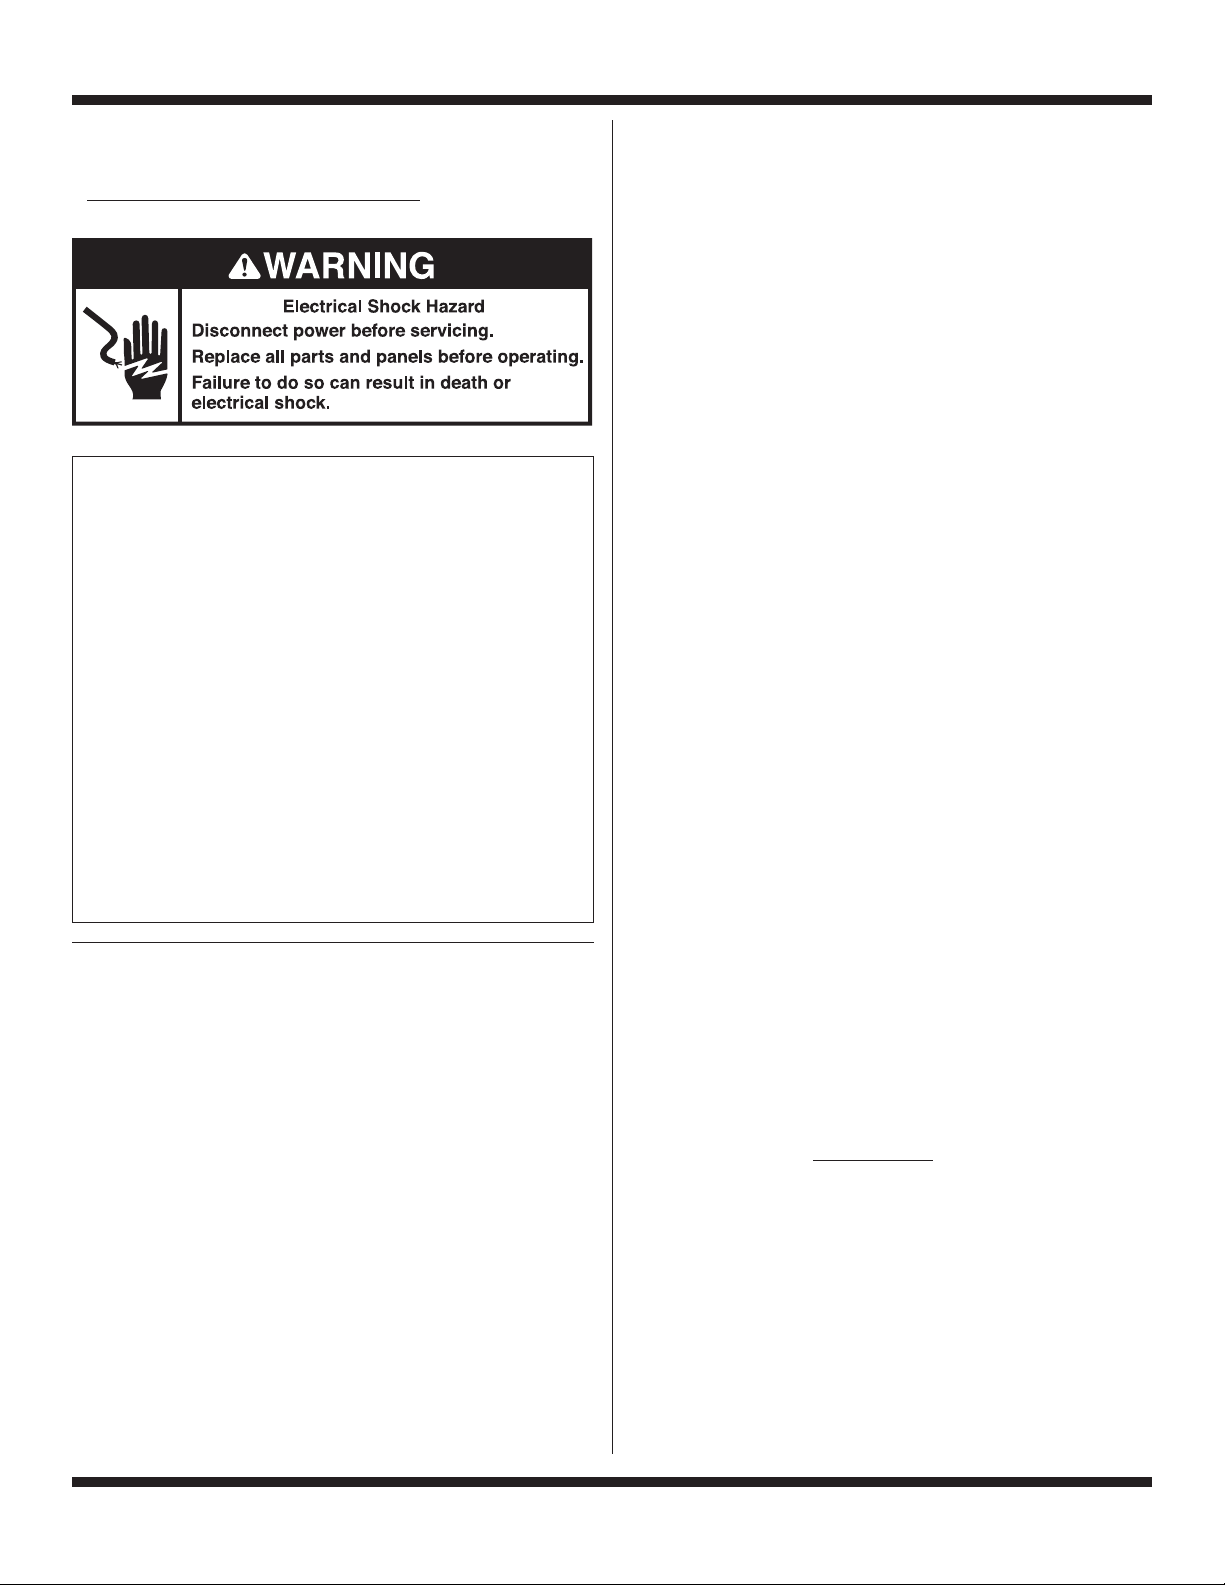
IMPORTANT
Electrostatic Discharge (ESD)
Sensitive Electronics
ESD problems are present everywhere. ESD may damage
or weaken the electronic control assembly. The new control
assembly may appear to work well after repair is finished,
but failure may occur at a later date due to ESD stress.
n
Use an anti-static wrist strap. Connect wrist strap to green
ground connection point or unpainted metal in the appliance.
-ORTouch your finger repeatedly to a green ground connection point
or unpainted metal in the appliance.
n
Before removing the part from its package, touch the anti-
static bag to a green ground connection point or unpainted
metal in the appliance.
n
Avoid touching electronic parts or terminal contacts; handle
electronic control assembly by edges only.
n
When repackaging failed electronic control assembly in anti-
static bag, observe above instructions.
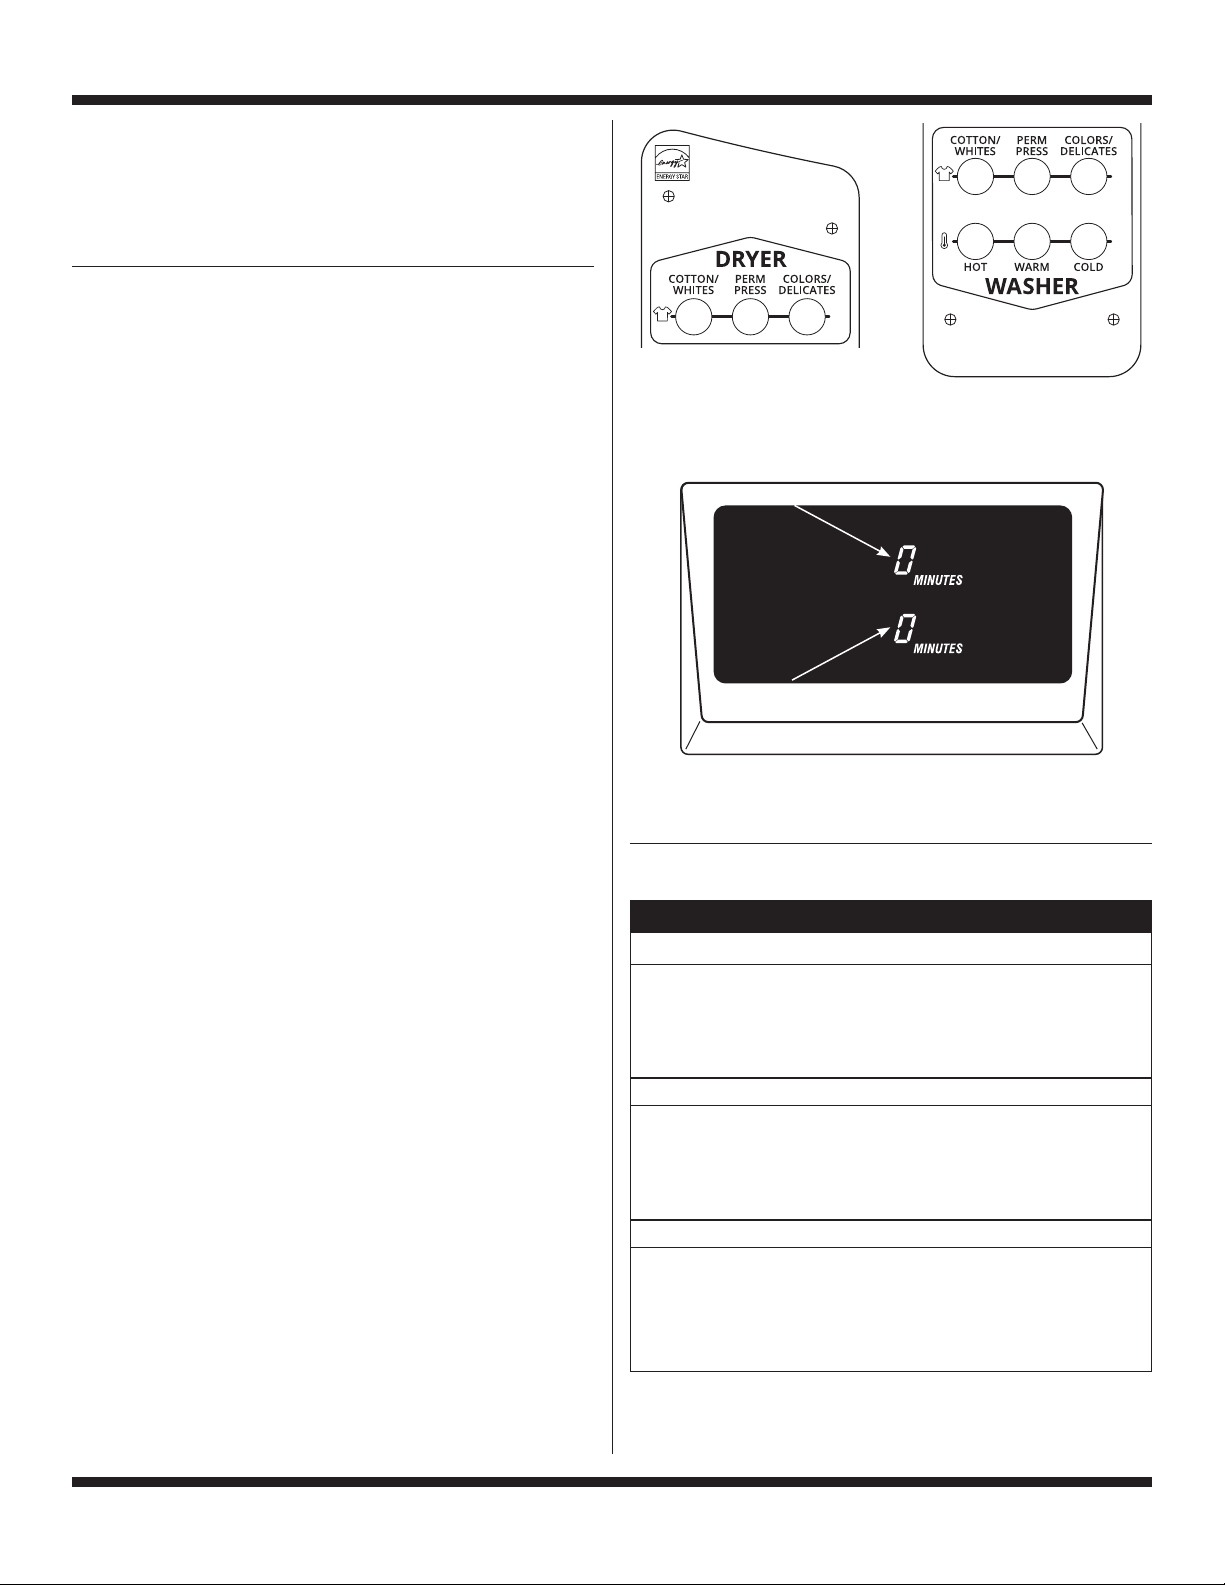
GENERAL USER INFORMATION
Scrolling ‘out of order’ message, followed by a failure
or diagnostic code, showing in display
This condition indicates the washer/dryer is inoperative. Diagnostic
codes being displayed on the upper portion of the display pertain
to the dryer section, and diagnostic codes displayed on the lower
portion of the display apply to the washer section. Diagnostic codes
displayed on both the upper and lower portions of the display
pertain to the control system of both the washer and dryer.
Cold Start (initial use):
‘0 Minutes’ showing in display
This condition indicates the cycle is complete and the washer/dryer
cannot be operated. Coins dropped or debit inputs during this
condition will be stored in escrow but cannot be used until normal
operation is restored by opening and closing the door. If a door
switch has failed, causing ‘0 MINUTES’ to remain in the display
after the door is opened and closed, it must be replaced before
normal operation can be restored.
Warm Start (after power failure):
A few seconds after power is restored, if a cycle was in progress
at the time of the power failure, ‘RESELECT CYCLE’ will flash
in the display, indicating the need for a key press to restart
the washer or dryer.
Washer is programmed at the factory as follows:
n
11 minute wash period
n
3 rinses (extra rinse not enabled)
n
$2.00 wash price
Dryer is programmed at the factory as follows:
n
5 minutes per quarter
n
$1.50 dry price
Washer Door Lock
Prior to beginning a cycle, there is a door lock routine of lock/
unlock/relock, then cycle begins. The door will remain locked
until the end of a cycle or approximately 2 minutes after a
power interruption.
Pricing
After the door is opened and then closed following the completion
of a cycle, the display indicates the cycle price (unless set for free
operation, where the display will flash ‘SELECT CYCLE’). As coins
are dropped or debit inputs arrive, the display will change to lead
the user through the initiation of a cycle.
There are four (4) types of dryer pricing:
Fixed ‘Vend’ Pricing
A dryer set up for ‘Fixed Cycle’ operation can only accept
additional time accumulated by increments equal to the length
of a complete dry cycle. A maximum of 99 minutes may be
purchased; no additional credit is given for coins dropped
with 99 minutes in the display.
Accumulator Pricing
If the price is set to one coin 1, then accumulator pricing is in effect.
Cycle time can be purchased one coin at a time up to the maximum
time of 99 minutes.
Fixed Cycle With Top Off Pricing
A dryer set to offer ‘Top Off’ capability will allow time to be added
to an existing dry cycle in increments equal to the number of
minutes of dry time per quarter (coin 1), up to 99 minutes, regardless
of the cost required to start the dryer. No credit is given for coins
or debit inputs entered when the control is displaying 99 minutes.
With Card Payment System: In Enhanced Debit Mode, the top off
price can be set independently (see VALUE OF COIN 2), and the top
off time is calculated according to the following equation:
full cycle price
top off time =
top off price
x full cycle length
Penny increment offset is not applied to top off purchases.
Free Cycles
This is established by setting the cycle price to zero. When this
happens, ‘SELECT CYCLE’ will appear rather than a cycle price.
Any cycle started as a free cycle will automatically terminate
when the door is opened.
PART NO. W10920938A PAGE 1
Page 2
FOR SERVICE TECHNICIAN ONLY - DO NOT REMOVE OR DESTROY
Debit Card Ready
This washer/dryer is debit card ready. It will accept a variety of
debit card systems, but does NOT come with a debit card reader.
Refer to the debit card reader manufacturer for proper washer/dryer
set-up. In models converted to a Generation 1 debit card system,
debit pulses represent the equivalent of one coin (coin 1).
CONTROL SET-UP PROCEDURES
IMPORTANT: Read all instructions before operating.
n
Coin Payment Models: Insert service switch key and turn
counter-clockwise.
n
With Card Payment System: Once a Generation 2 debit card
reader is installed (according to the reader manufacturer’s
instructions), the set-up modes can be changed by inserting a
set-up card (supplied by the reader manufacturer) into the card
slot. Inserting the service switch key and turning will only access
the service mode.
The washer/dryer is now in the set-up mode. The bottom
temperature setting buttons and the lower portion of the display are
used to set up the digital control for the washer. The upper three
fabric setting buttons and the upper portion of the display are used
to set up the controls for the dryer.
The display can contain four numbers and/or letters and a decimal
point on both the top and bottom display portions. These are used
to indicate the set-up codes and related code values available for
use in programming the washer/dryer.
Start Operating Set-Up
Washer/dryers are preset at the factory and do not require any
programming. However, if you want to change the settings, follow
the ‘Set-Up Codes’ guide.
The first code shown in each segment is the factory default setting.
The set-up code is indicated by the one or two left-hand characters.
The set-up code value is indicated by the two or three right-hand
characters.
Dryer control
setting buttons
Dryer display
Washer display
SET-UP CODES
Washer control
setting buttons
Display
CODE EXPLANATION
6 06 REGULAR CYCLE PRICE (DRYER)
6 06
Represents the number of quarters (coin 1) needed to start the dryer;
6 quarters = $1.50.
Press the lower middle (WARM) button once to advance to next code.
g
6 08 REGULAR CYCLE PRICE (WASHER)
6 08
middle left (COTTON/WHITES) button, decrease by
(HOT) button. Factory default of 8 quarters = $2.00.
Press the lower middle (WARM) button once to advance to next code.
g
7 05 REGULAR DRY TIME (DRYER)
7 05 Represents the number of minutes per quarter (coin 1).
Factory default of 5 minutes per coin. Example: 6 quarters
x 5 minutes = 30 minutes. By pressing the upper left (COTTON/
WHITES) button, value adjusts from 1–99 minutes.
Press the lower middle (WARM) button once to advance to next code.
g
may adjust from 0–200 (See VALUE OF COIN 1). Advance from 0–200 by
pressing the upper left (COTTON/WHITES) button. Factory default of
Represents the number of quarters (coin 1) needed to start the washer;
may adjust from 0–200 (See VALUE OF COIN 1). Increase by pressing the
pressing the lower left
PAGE 2
Page 3
FOR SERVICE TECHNICIAN ONLY - DO NOT REMOVE OR DESTROY
CODE EXPLANATION CODE EXPLANATION
7 11 WASH LENGTH (WASHER)
7 11 This is the number of minutes for WASH. Washer comes from
the factory preset with 11 minutes; may adjust from 9–17 minutes.
Increase by pressing the middle left (COTTON/WHITES) button,
decrease by pressing the lower left (HOT) button.
Press the lower middle (WARM) button once to advance to next code.
g
8 00 TYPE OF DRYER PRICING (DRYER)
8 00 Fixed Cycle with Top Off. For detailed description, see General
Dryer User Information.
8 FC With Card Payment System: Fixed Cycle. For detailed
description, see General Dryer User Information.
Use the upper right (COLORS/DELICATES) button to change
this selection.
Press the lower middle (WARM) button once to advance to next code.
g
8 00 ADDITIONAL RINSE OPTION (WASHER)
This option is either NOT SELECTED ‘00’ or SELECTED ‘Ar.’
8 00
8 Ar
Press the lower right (COLD) button to change this selection.
Press the lower middle (WARM) button once to advance to next code.
g
9 00 CYCLE COUNTER OPTION
This option is either NOT SELECTED ‘00’ or SELECTED ‘0C.’
9 00 Not Selected ‘00.’
9 0C Selected ‘0C’ and not able to be deselected.
Press the lower right (COLD) button three consecutive times
to select ‘0C.’ Once selected ‘0C’ it cannot be deselected.
Press the lower middle (WARM) button once to advance to next code.
g
1.00 MONEY COUNTER OPTION
This option is either NOT SELECTED ‘00’ or SELECTED ‘0C.’
1.00 Not Selected ‘00.’
1.0C Selected ‘0C.’
Press the lower right (COLD) button three consecutive times
to select ‘0C’ and three consecutive times to deselect (Not Selected
‘00’). Counter resets by going from ‘OFF’ to ‘ON.’
1.C0 Selected ‘C0’ and not able to be deselected.
To select ‘C0’ and not able to be deselected, first select ‘0C,’
then within two seconds press the lower right (COLD) button
twice, the lower left (HOT) button once, and exit the set-up mode.
Press the lower middle (WARM) button once to advance to next code.
g
2.00 SPECIAL PRICING OPTION
This option is either NOT SELECTED ‘00’ or SELECTED ‘SP.’
2.00 Not Selected ‘00,’ and next available code will be A.00.
2.SP Selected ‘SP.’ Press the lower right (COLD) button once
to change this selection.
If SPECIAL PRICING OPTION is selected, there is access to codes ‘3.XX’
through ‘9.XX.’
Press the lower middle (WARM) button once to advance to next code.
g
Not Selected ‘00.’
Selected ‘Ar.’
OPTIONS TO USE IF SPECIAL PRICING IS SELECTED:
3.06 SPECIAL CYCLE PRICE (DRYER)
3.06 Represents the number of quarters (coin 1) to start the dryer;
may adjust from 0–200 (See VALUE OF COIN 1). Advance
from 0–200 by pressing the upper left (COTTON/WHITES) button.
Factory default of 6 quarters = $1.50.
Press the lower middle (WARM) button once to advance to next code.
g
3.08 SPECIAL CYCLE PRICE (WASHER)
3.08 Represents the number of quarters (coin 1) to start the washer;
may adjust from 0–200 (See VALUE OF COIN 1). Increase by
pressing the middle left (COTTON/WHITES) button, decrease
by pressing the lower left (HOT) button. Factory default of
8 quarters = $2.00.
Press the lower middle (WARM) button once to advance to next code.
g
4.05 SPECIAL DRY TIME (DRYER)
4.05 Represents the number of minutes per quarter (coin 1).
Factory default of 5 minutes per coin. Example: 6 quarters
x 5 minutes = 30 minutes. By pressing the upper left
(COTTON/WHITES) button, the value can be adjusted
from 1–99 minutes.
Press the lower middle (WARM) button once to advance to next code.
g
5.00 TIME-OF-DAY CLOCK, MINUTES
5.00 This is the TIME-OF-DAY CLOCK, minute setting; select 0–59
minutes by pressing the lower left (HOT) button.
Press the lower middle (WARM) button once to advance to next code.
g
6.00 TIME-OF-DAY CLOCK, HOURS
NOTE: Uses military time or 24 hr. clock.
6.00 This is the TIME-OF-DAY CLOCK, hour setting; select 0–23 hours
by pressing the lower left (HOT) button.
Press the lower middle (WARM) button once to advance to next code.
g
7.00 SPECIAL PRICE START HOUR
NOTE: Uses military time or 24 hr. clock.
7.00 This is the START HOUR; 0–23 hours. Select START HOUR
by pressing the lower left (HOT) button.
Press the lower middle (WARM) button once to advance to next code.
g
8.00 SPECIAL PRICE STOP HOUR
NOTE: Uses military time or 24 hr. clock.
8.00 This is the STOP HOUR; 0–23 hours. Select STOP HOUR
by pressing the lower left (HOT) button.
Press the lower middle (WARM) button once to advance to next code.
g
PAGE 3
Page 4
FOR SERVICE TECHNICIAN ONLY - DO NOT REMOVE OR DESTROY
CODE EXPLANATION
OPTIONS TO USE IF SPECIAL PRICING IS SELECTED (cont.):
9.10 SPECIAL PRICE DAY
9.10 This represents the day of the week and whether special pricing
is selected for that day. A number followed by ‘0’ indicates no
selection that particular day (9.10). A number followed by an ‘S’
indicates selected for that day (9.1S). To change the value of ‘0’
and ‘S,’ use the lower right (COLD) button.
Days of the week (1–7) are selected by pressing the lower left
(HOT) button.
When exiting set-up code ‘9.’, the display must show current day
of week:
DISPLAY DAY OF WEEK CODE (selected)
10 Day 1 = Sunday 1S
20 Day 2 = Monday 2S
30 Day 3 = Tuesday 3S
40 Day 4 = Wednesday 4S
50 Day 5 = Thursday 5S
60 Day 6 = Friday 6S
70 Day 7 = Saturday 7S
Press the lower middle (WARM) button once to advance to next code.
g
A.00 VAULT VIEWING OPTION
This option is either NOT SELECTED ‘00’ or SELECTED ‘SC.’
A.00 Not Selected ‘00.’
A.SC Selected ‘SC.’ Press the lower right (COLD) button once
for this selection. When selected, the money and/or cycle counts
will be viewable (if counter option[s] is selected) when the coin
box is removed.
Press the lower middle (WARM) button once to advance to next code.
g
b.05 VALUE OF COIN 1
b.05 This represents the value of coin 1 in number of nickels:
05 = $0.25.
Increase between 1 and 200 nickels by pressing the middle left
(COTTON/WHITES) button, decrease by pressing the lower left
(HOT) button.
Press the lower middle (WARM) button once to advance to next code.
g
C.20 VALUE OF COIN 2/VALUE OF DRYER TOP OFF
C.20 This represents the value of coin 2 in number of nickels:
20 = $1.00.
Increase between 1 and 200 nickels by pressing the middle left
(COTTON/WHITES) button, decrease by pressing the lower left
(HOT) button.
Press the lower middle (WARM) button once to advance to next code.
g
E.00 ADD COINS OPTION
This option is either NOT SELECTED ‘00’ or SELECTED ‘AC.’ This
option causes the customer display to show the number of coins
(coin 1) to enter, rather than the dollars-and-cents amount.
E.00 Not Selected ‘00.’
E.AC Selected ‘AC.’ Press the lower right (COLD) button
three consecutive times to change this selection.
Press the lower middle (WARM) button once to advance to next code.
g
CODE EXPLANATION
F.00 ENHANCED PRICING OPTION
F.00 Not Selected ‘00.’
F.CP Cycle-Based pricing enabled. This option allows configuration
of different prices for cold, warm, and hot water wash cycles.
F.SU Super Cycle pricing enabled. This option allows customers
to upgrade cycles by depositing extra money. Set-up codes
‘H.’ and ‘h.’ will be displayed only when this option is enabled.
Press the lower right (COLD) button for this selection.
Press the lower middle (WARM) button once to advance to next code.
g
H.01 SUPER CYCLE UPGRADE PRICE
(Skipped unless Super Cycle pricing is enabled.)
H.01 This represents the number of coin 1 required to upgrade a
base cycle to a super cycle. Advance from 0–33 by pressing
the lower left (HOT) button.
Press the lower middle (WARM) button once to advance to next code.
g
h.01 SUPER CYCLE TYPE
(Skipped unless Super Cycle pricing is enabled.)
h.01 This represents the Super Cycle upgrade option. Press the
lower left (HOT) button to step through upgrade options 1
through 3 as follows:
01 – enhanced wash, extra 3 minutes of wash tumble
02 – extra rinse for all cycles.
03 – both 01 and 02.
Press the lower middle (WARM) button once to advance to next code.
g
J.Cd PAYMENT MODE (COIN/DEBIT OPTION)
J.Cd Both coin and debit selected. Press the lower right (COLD) button
three consecutive times to change this selection.
_
J.C
Coins selected, debit disabled. Press the lower right (COLD) button
three consecutive times to change this selection.
J._d With Card Payment System: Debit Card selected, coins
disabled. Press the lower right (COLD) button three consecutive
times to change this selection.
J.Ed Enhanced Debit is self-selected when a Generation 2 card reader
is installed in the washer/dryer. The Ed option cannot be manually
selected or deselected.
Press the lower middle (WARM) button once to advance to next code.
g
L.00 PRICE SUPPRESSION OPTION
This option causes the customer display to show ‘ADD’ or
‘AVAILABLE’ rather than the amount of money to add (used
mainly in debit installations).
L.00 Not Selected ‘00.’
L.PS Selected ‘PS.’ Press the lower right (COLD) button once
to change this selection.
Press the lower middle (WARM) button once to advance to next code.
g
n.CE CLEAR ESCROW OPTION
When selected, money held in escrow for 30 minutes without
further escrow or cycle activity will be cleared.
n.00 Not Selected ‘00.’
n.CE Selected ‘CE.’ Press the lower right (COLD) button once
to change this selection.
Press the lower middle (WARM) button once to advance to next code.
g
in addition to the programmed wash time.
PAGE 4
Page 5
FOR SERVICE TECHNICIAN ONLY - DO NOT REMOVE OR DESTROY
CODE EXPLANATION
U.00 PENNY INCREMENT OFFSET (DRYER)
U.00 This represents the penny increment price offset used in
Generation 2 (Enhanced Debit) models. Choose from 0–4
pennies by pressing the upper left (COTTON/WHITES) button.
Press the lower middle (WARM) button once to advance to next code.
g
U.00 PENNY INCREMENT OFFSET (WASHER)
U.00 This represents the penny increment price offset used in
Generation 2 (Enhanced Debit) models. Choose from 0–4
pennies by pressing the lower left (HOT) button.
Press the lower middle (WARM) button once to advance to next code.
g
A1.00 PREWASH LENGTH (WASHER)
A1.00 This is the number of minutes of PREWASH. Choose 00 to disable
the prewash or select between 2 and 7 minutes by pressing the
lower left (HOT) button.
Press the lower middle (WARM) button once to advance to next code.
g
If cycle counter (9 0C) is selected, the following is true:
1 00 Cycles in HUNDREDS. 1 02 = 200
2 00 Cycles in ONES. 2 25 = 225
TOTAL CYCLES = 225
This is “VIEW ONLY” and cannot be cleared.
Press the lower middle (WARM) button once
to advance to next code.
If money counter (1.0C or 1.C0) is selected, the following is true:
3 00 Dollars in HUNDREDS. 3 01 = $100.00
4 00 Dollars in ONES. 4 68 = $168.00
5 00 Number of CENTS. 5 75 = $100.75
TOTAL = $168.75
END OF SET-UP PROCEDURES
EXIT FROM SET-UP MODE
n
Turn service switch key clockwise and remove
or remove manual set-up card.
DIAGNOSTIC GUIDE
Before servicing, check the following:
n
Make sure there is power at the wall outlet.
n
Verify that both hot and cold water faucets are open and water
supply hoses are unobstructed.
n
Check all connections before replacing components. Look for
broken or loose wires, failed terminals, or wires not pressed
into or onto connections far enough.
n
A potential cause of a control not functioning is corrosion on
connections. Observe connections and check for continuity
with an ohmmeter.
n
Connectors: Look at top of connector. Check for broken or loose
wires. Check for wires not pressed into connector far enough
to engage metal barbs.
n
Resistance checks must be made with power cord unplugged
from outlet, and with component connectors disconnected.
DIAGNOSTIC MODE
To enter the ‘Diagnostic Mode,’ first enter ‘Start Operating Set-Up.’
Then press and hold the lower right (COLD) button for 1 second
while in set-up code six, anytime a diagnostic code is present, or while
dAS displays if operating with a Generation 2 card reader.
On entry to diagnostic mode, the entire display will flash, a cycle
in process is canceled, money in escrow is cleared, and diagnostic
codes are cleared. If a diagnostic code persists on the portion of
the washer/dryer not being tested, it can be acknowledged with the
lower middle (WARM) button prior to starting a diagnostic cycle.
This would be used when, for example, the dryer is out of service
and a diagnostic cycle is to be run on the washer.
There are six possible ways to initiate cycle activity from diagnostic
mode as follows:
1. Washer Cleanout Cycle – With the entire display flashing,
this cycle is started by pressing the center right (COLORS/
DELICATES) button.
Use the Washer Cleanout Cycle once a month to keep the inside
of your washer fresh and clean. This cycle uses a higher water
level. Use with liquid chlorine bleach to thoroughly clean the
inside of your washer. This cycle should not be interrupted.
IMPORTANT: Do not place garments or other items in the
washer during the Washer Cleanout Cycle. Use this cycle
with an empty wash drum.
2. Washer Cycle Credit – With the entire display flashing, a cycle
may be credited by pressing the lower left (HOT) button (CC will
display). When the service mode is exited, ‘SELECT CYCLE’ will
be displayed unless the end-of-cycle door opening is required.
3. Washer Manual Overview Test Cycle – With the entire display
flashing, this cycle is started by pressing the center left (COTTON/
WHITES) button. This cycle provides more typical full length fills,
tumbles, and drains, and allows for a more thorough analysis of
the washer operation, including pressure sensor behavior.
4. Washer Quick Spin Cycle – With the entire display flashing, this
cycle is started by pressing the center middle (PERM PRESS)
button. This cycle provides a method to quickly drain and spin
(remove water from the washer), if desired.
5. Washer Quick Overview Test Cycle – With the entire display
flashing, this cycle is started by pressing the lower middle
(WARM) button. This cycle provides a quick verification that
the cold and hot water valves, dispenser, and pump motor are
working. It also includes door lock, drain, and spin operations.
6. Dryer Field Diagnostic Cycle – With the entire display flashing,
this cycle is started by pressing the upper middle (PERM PRESS)
button. Additional time can be added by pressing the upper left
(COTTON/WHITES) button. This cycle can be used to credit lost
customer dryer time.
Pressing the lower right (COLD) button will exit diagnostic mode
and cancel a diagnostic cycle in process.
PAGE 5
Page 6

FOR SERVICE TECHNICIAN ONLY - DO NOT REMOVE OR DESTROY
FAILURE DISPLAYS
Active dryer diagnostic codes are shown on the upper portion of
the display and active washer diagnostic codes are shown on the
bottom portion of the display.
DRYER DIAGNOSTIC CODES
If the set-up mode is entered and one of the following errors
has previously occurred, the appropriate diagnostic code will
be in the display on the upper portion of the screen.
DRYER
DISPLAY EXPLANATION
d 5
d 9
d 13
d 16
F 01
F 22
F 23
F 70
F 71
COIN 1 ERROR
Blocked coin 1 or coin drop UI control circuit failure
(coin recognition and customer display disabled while
blockage persists).
LOW VOLTAGE DETECTION ERROR
Voltage detected below 90 VAC for 8 seconds.
COIN 2 ERROR
Blocked coin 2 or coin drop UI control circuit failure
(coin recognition and customer display disabled
while blockage persists).
GENERATION 2 DEBIT CARD
READER ERROR
Not receiving communications from installed debit
card reader in Enhanced (Generation 2) Debit mode.
DRYER MOTOR CONTROL
CIRCUIT ERROR
Dryer motor control circuit error (cycles and price
display disabled until diagnostic code is manually
cleared). The control doesn’t know if the motor relay
is bad (stuck on), the motor relay drive circuit is bad
(shorted), causing the motor relay to stay on, or the
motor relay feedback circuit is bad.
EXHAUST THERMISTOR OPEN ERROR
Exhaust thermistor open, temperature drops
below 18°F (>50 kΩ) for 1 minute in Run mode,
or immediately in Factory Diagnostic Mode.
EXHAUST THERMISTOR
SHORTED ERROR
Exhaust thermistor shorted, temperature above 250°F
(<500 Ω) for 1 minute in Run mode, or immediately
in Factory Diagnostic Mode.
COMMUNICATION FAILURE
FROM DRYER CCU TO UIC
UIC is not receiving communications from CCU
(cycles and price display disabled while error persists
or is manually cleared).
COMMUNICATION FAILURE
FROM UIC TO DRYER CCU
CCU is not receiving communications from UIC
(cycles and price display disabled while error persists
or is manually cleared).
DRYER
DISPLAY EXPLANATION
F 73
F 74
UIC MICROPROCESSOR ERROR
UIC Microprocessor is not able to read or verify
EEPROM (cycles and price display disabled until
diagnostic code is manually cleared).
UIC EEPROM ERROR
UIC EEPROM memory is a CRC failure (cycles and price
display disabled until diagnostic code is manually cleared).
WASHER DIAGNOSTIC CODES
If the set-up mode is entered and one of the following errors
has previously occurred, the appropriate diagnostic code will
be in the display on the lower portion of the screen.
WASHER
DISPLAY EXPLANATION AND RECOMMENDED PROCEDURE
F 01
F 04
F 11
WASHER CCU ERROR
Communication error within the Central Control Unit
(CCU); the pump drive in CCU fails to activate; one of
the main relays in the CCU fails to activate.
Possible Causes
– A power surge/drop.
– Reversed polarity or mis-wire, along with open
ground switches.
Surge/drop procedure
1. Clear error code.
2. Unplug washer or disconnect power.
3. Wait 2 minutes before reconnecting power.
4. Verify CCU by running a short diagnostic test.
Mis-wire or reversed polarity procedure
1. Clear error code.
2. Check outlet for correct polarity. To check within
washer for polarity at the RFI, white to cabinet
ground must be 0 volts.
3. Check the white wire on the RFI filter to ensure correct
polarity. White wire needs to be toward front of washer.
If the RFI filter is not easily accessible, the polarity test
can be made on the washer CCU. Disconnect power.
Check for resistance or continuity at IF2 from terminal
#1 to ground or any bare metal on the washer cabinet.
Reading should be infinite or show as an open circuit.
4. Check that the ground switches of the toe panel
and rear panel are correctly closed.
5. Verify CCU by running a short diagnostic test.
If these procedures do not correct the failure, replace
the CCU control.
ACCELEROMETER FAILURE
The accelerometer component failed. The X, Y, and Z
limits are outside of the normal range.
Possible Causes
– CCU dislodged from mounting.
– Accelerometer failure on CCU.
MCU ERROR
Motor Control Unit (MCU) has a failure.
Possible Causes
– A repeating under or overvoltage condition. If the
failure occurs during a high-speed spin, the door
remains locked for 2 minutes.
– A broken drive belt.
Procedure
1. Clear error code.
2. Unplug the washer or disconnect power.
3. Using Ohm meter, check wire harness connections
for continuity between drive motor and the MCU.
4. Check the motor and do a continuity test (page 15).
5. The MCU is good if the motor operates in diagnostic mode.
If the motor fails to turn on, replace the MCU.
PAGE 6
Page 7

FOR SERVICE TECHNICIAN ONLY - DO NOT REMOVE OR DESTROY
WASHER
DISPLAY EXPLANATION AND RECOMMENDED PROCEDURE
F 20
F 21
NO WATER DETECTED ENTERING WASHER
The water fill level is not detected by the pressure
sensor. NOTE: The message “no H20” will appear
before the F20 error is displayed, and the washer may
try three times before the failure code is activated.
Possible Causes
– No water to washer; faucet(s) turned off.
– Defective hot and/or cold valve(s).
– Plugged or kinked inlet hoses or valves.
– Pressure sensor or pressure sensor hose
damaged, kinked, or disconnected.
– Electrical connection from CCU (PS8) to pressure
sensor damaged.
– Drain hose forced down into standpipe > 6" (152 mm).
– Blocked inlet from dispenser to tub.
Procedure
1. Clear error code by opening and closing the main
door or by power cycling the control by removing
power and then reestablishing power to the control.
2. Unplug washer or disconnect power.
3. Check incoming water pressure at faucet.
4. Check inlet hoses for possible leaks.
5. Make sure pressure sensor hose is in good condition
and properly connected to tub and pressure sensor.
6. Verify that water is not running out of the drain hose
(siphoning) as it is filling.
7. Perform continuity test on wire harness connections
from CCU to inlet valves (VCH7 and VSF2), and to
pressure sensor (PS8).
8. Check inlet valves by running a diagnostic test.
9. Check that the pump is not running while the
washer is filling.
10. Verify pressure sensor operation by accessing
Help Mode while running a paid cycle (see Help
Mode Symbols and Elements, page 14).
LONG DRAIN
The drain time exceeds 8 minutes without reaching
empty level in pressure sensor.
NOTE:
n
Suds can cause delays in draining, indicated by an
alternating display of “SudS” and a countdown timer.
Washer drains for 4 minutes, pauses 5 minutes, then
tries again for 4 additional minutes of draining. F21
will display if washer does not drain. (Normal drain
takes less than 2 minutes).
Possible Causes
– Damaged or blocked pump/pump filter.
– Washer fills during drain.
– Excess suds causing cavitating pump.
– Drain hose blocked, kinked, or exceeds
recommended height.
– Poor connection between CCU (DP2) and drain pump.
Procedure
1. Clear error code.
2. Unplug washer or disconnect power.
3. Make sure the drain hose is not sealed into the standpipe.
4. Ensure the drain height is not more than 8 ft (2.4 m)
above the base of the washer.
5. Check the drain hose and make sure it is not
plugged or kinked.
6. Check the drain pump/pump filter for foreign objects
or worn impeller.
7. Check the electrical connection between the pump
and the CCU (DP2).
8. Check the pump using a diagnostic mode.
9. Check pressure sensor operation in Help Mode and
the condition of the pressure sensor hose.
If all the above are OK and pump is powered but does
not pump water or water flow is poor, replace the pump.
WASHER
DISPLAY EXPLANATION AND RECOMMENDED PROCEDURE
F 22
F 24
DOOR LOCK ERROR
Washer will make several attempts to lock the door,
then customer will be asked to open door, clear
obstructions, shut door, and reselect cycle. Washer
will attempt to lock the door again. This procedure
can repeat two times before customer loses vend
and washer resets. If entire procedure happens twice
without a successful door lock, F22 will appear.
Possible Causes
– Misaligned or broken door latch.
– Electrical connections from CCU (DLS2, DL3)
to door lock are damaged.
– Misaligned, broken, or overtightened door hook.
Procedure
1. Clear error code.
2. Unplug the washer or disconnect power.
3. Ensure that the latch is secured to the front panel.
4. Check for misaligned, broken, cracked, or loose
door hook.
5. Check the electrical connections between CCU
(DLS2, DL3) and latch.
If the latch fails to lock after checking all of the above,
replace the latch.
TEMPERATURE SENSOR ERROR
Water temperature sensor value is out of range
(23°F to 217°F [–5°C to 103°C])
NOTE: To find correct Ohm reading, refer to the
Water Temperature Sensor section, page 15.
Possible Causes
– Water temperature sensor damaged.
– Electrical connections from CCU (SET2)
to temperature sensor damaged.
Procedure
1. Clear error code.
2. Unplug the washer or disconnect power.
3. Perform Ohm test on Water Temperature Sensor and
harness connection. This reading can be taken from
the cable attached to CCU terminal SET2.
If the water temperature sensor is out of range,
replace it.
PAGE 7
Page 8

FOR SERVICE TECHNICIAN ONLY - DO NOT REMOVE OR DESTROY
WASHER
DISPLAY EXPLANATION AND RECOMMENDED PROCEDURE
F 25
F 26
TACHOMETER ERROR
If the MCU is unable to properly detect motor speed,
the washer shuts down. If a failure occurs during highspeed spin, the door remains locked for 2 minutes.
Possible Causes
– Damaged or poor contact in electrical connection
from MCU to drive motor.
– Inverted wires on RFI or ground switch(es) open.
Procedure for damaged MCU connection
1. Clear error code.
2. Unplug the washer or disconnect power.
3. Check for broken belt.
4. Verify that the shipping system, including shipping
bolts and spacers, is removed, and that the power
cord is not tangled in any components inside rear
of washer.
5. Verify electrical connection between MCU and drive
motor connector.
6. Reassemble any disassembled parts.
7. Reconnect to power.
8. Check operation of drive motor in diagnostic mode;
if drum tumbles, the MCU and motor are OK.
Procedure for inverted wires on RFI
1. Clear error code.
2. Unplug the washer or disconnect power.
3. Look for reversed polarity at RFI filter.
4. Make sure that the ground switches of the toe panel
or rear panel are closed and working correctly.
5. Check operation of drive motor in diagnostic mode;
if drum tumbles, the motor is OK.
If, after these procedures, the drum fails to tumble,
replace the MCU. If motor operation is not restored,
replace the motor.
DOOR SWITCH ERROR
The door switch circuit is open for 5 seconds while the
door is locked.
Possible Causes
– Electrical connections from CCU (DLS2) to door
switch in latch are damaged.
Procedure
1. Clear error code.
2. Unplug the washer or disconnect power.
3. Verify the electrical connection between CCU and
door switch by using the Help Mode (see appropriate
symbols, page 14) or continuity test at CCU (DLS2)
connection.
If the door switch circuit fails to open or close, replace
the door latch.
WASHER
DISPLAY EXPLANATION AND RECOMMENDED PROCEDURE
F 27
F 28
OVERFLOW CONDITIONS
The overflow contact on the pressure sensor is closed
for more than 60 seconds. If the washer displays F27,
the washer is probably full of water, and the water supply
has been shut off. If not, water will be pouring out
of the washer from the dispenser and door.
Possible Causes
– Inlet valve(s) unable to close.
– Pressure sensor hose is kinked.
Procedure
1. Clear error code.
2. Unplug the washer or disconnect power.
3. If water continues to flow into washer, inlet valve
needs to be replaced.
4. Check if pressure sensor hose is kinked or damaged.
5. Verify functionality of inlet valves and pressure
sensor by running a diagnostic cycle.
COMMUNICATION FAILURE BETWEEN
CCU AND MCU
The communication between the Central Control Unit
(CCU) and the Motor Control Unit (MCU) has failed.
Possible Causes
– Reversed polarity or mis-wire along with open
ground switch(es).
– Communication cable from CCU (MI3) to MCU
is damaged.
Procedure for reversed polarity or mis-wire
1. Clear error code.
2. Unplug washer or disconnect power.
3. Check outlet for correct polarity.
4. Check the white wire on the RFI filter to ensure
correct polarity. White wire needs to be toward front
of washer. If the RFI filter is not easily accessible,
the polarity test can be made on the washer CCU.
Disconnect power. Check for resistance or continuity
at IF2 from terminal #1 to ground or any bare metal
on the washer cabinet. Reading should be infinite
or show as an open circuit.
5. Check that the ground switches of the toe panel
and rear panel are correctly closed. Refer to
Grounding System Wiring Diagram.
Procedure for communication cable
1. Clear error code.
2. Unplug the washer or disconnect power.
3. Perform continuity test on wire harness connections
from CCU (MI3) to MCU (be careful not to spread the
Rast connector ends).
4. Verify the drive motor operation in diagnostic mode.
If drum fails to tumble, replace the MCU.
PAGE 8
Page 9

FOR SERVICE TECHNICIAN ONLY - DO NOT REMOVE OR DESTROY
WASHER
DISPLAY EXPLANATION AND RECOMMENDED PROCEDURE
F 29
F 31
DOOR UNLOCK ERROR
The door is unable to unlock after six tries.
Possible Causes
– Misaligned or broken door latch.
– Electrical connections from CCU (DLS2, DL3)
to door lock are damaged.
– Misaligned, broken, or overtightened door hook.
Procedure
1. Clear error code.
2. Unplug the washer or disconnect power.
3. Manually unlock the door (page 15).
4. Ensure that the latch is secured to the front panel.
5. Check for misaligned, broken, cracked, or loose
door hook.
6. Check the electrical connections between CCU
(DLS2, DL3) and latch (see page 15).
If the latch fails to unlock after checking all of the
above, replace the latch.
OVERHEATING OF MOTOR
The heat sink exceeds 212°F (100°C). If this condition
is met, the CCU resets the MCU, then waits for the
motor to cool down before restarting the motor.
This procedure can repeat up to four times before
F31 is displayed.
Possible Causes
– Improper installation of washer.
– Poor electrical connection from CCU (MS2) to MCU.
Procedure
1. Clear error code.
2. Unplug the washer or disconnect power.
3. Verify the washer is not located near a source
of heat and has proper ventilation.
4. Check the electrical connections between CCU
(MS2) and MCU.
5. Verify the drive motor operation in diagnostic mode.
If, after the above tests, the motor overheats, replace
the motor.
WASHER
DISPLAY EXPLANATION AND RECOMMENDED PROCEDURE
F 33
F 34
F 70
PUMP DISCONNECTED
The electrical connection between the pump and the
CCU is lost.
Possible Causes
– Poor connection between CCU (DP2) and drain
pump.
– Pump thermal overload caused by the pump
running for an extended period of time.
Procedure
1. Clear error code.
2. Unplug the washer or disconnect power.
3. Check electrical connection between pump and
CCU (DP2) (see page 15).
4. Check the pump using a diagnostic mode.
If the pump still does not run, replace the pump.
LOAD DETECTED IN WASHER
DURING WASHER CLEANOUT CYCLE
The washer detects a load inside the washer tub
at the beginning of the Washer Cleanout Cycle.
Possible Causes
– Load inside the washer during the Washer
Cleanout Cycle.
– Friction between the drum and bellows material.
Procedure
1. Clear error code.
2. Unplug the washer or disconnect power.
3. Remove clothes from washer drum.
4. Check for misaligned or damaged bellows rubbing
the drum.
If bellows adjustment does not correct the friction issue,
the spin basket will need to be replaced.
COMMUNICATION FAILURE
BETWEEN CCU AND UIC
Communication between Central Control Unit (CCU)
and User Interface Control (UIC) has failed.
Possible Causes
– Electrical connection between CCU and UIC
is damaged.
Procedure
1. Clear error code.
2. Unplug the washer or disconnect power.
3. Verify that the communication cable is connected
in the lower connector of the UIC.
4. Verify continuity in the cable between the CCU
and the UIC.
If, after these procedures, the continuity test fails,
replace the communication cable. If F70 is still
present, replace the CCU.
PAGE 9
Page 10

FOR SERVICE TECHNICIAN ONLY - DO NOT REMOVE OR DESTROY
WASHER
DISPLAY EXPLANATION AND RECOMMENDED PROCEDURE
F 73
F 74
d 5
d 9
UIC FAILURE
Communication error within the User Interface Control.
Possible Causes
– A power surge/drop.
Procedure
1. Clear error code.
2. Unplug the washer or disconnect power.
3. Wait 2 minutes before reconnecting power.
4. Verify UIC by attempting to start a cycle or run
diagnostic mode.
If these procedures do not correct the failure,
replace the UI control.
COIN 1 ERROR
The Coin 1 sensor is detected as blocked
for 8 seconds.
Possible Causes
– Coin vault full of money.
– Blocked or dirty sensor.
Procedure
1. Clear error code.
2. Unplug the washer or disconnect power.
3. Check for broken coin sensor switch on coin drop.
4. Check the wire harness connections between User
Interface (AA4) and the coin sensor switch to ensure
wires do not block the coin switch beam.
5. Shorting the connections 2 and 3 at AA4 on
UIC or installing jumper (Whirlpool part number
W10785124) on UIC AA4 connection will simulate
a good coin sensor.
If the above procedures do not solve the problem,
replace the UIC.
LOW VOLTAGE DETECTION ERROR
Incoming voltage detected below 90vac for 8 seconds.
Possible Causes
– Voltage drop due to multiple washers
on same circuit.
– Worn outlet.
Procedure
1. Clear error code.
2. Unplug the washer or disconnect power.
3. Check the wire harness connection between the RFI
filter and the transformer.
If the above procedures do not solve the problem,
replace the UIC.
WASHER
DISPLAY EXPLANATION AND RECOMMENDED PROCEDURE
d 13
d 16
Critical errors are indicated as part of the ‘out of order’ message.
NOTE: Errors d5, d13, and d16 will not stop the ongoing cycle,
although they will not allow another cycle to begin until the error
is addressed.
COIN 2 ERROR
The Coin 2 sensor is detected as blocked
for 8 seconds.
Possible Causes
– Coin vault full of money.
– Blocked or dirty sensor.
Procedure
1. Clear error code.
2. Unplug the washer or disconnect power.
3. Check for blocked coin sensor switch on coin drop.
4. Check the wire harness connections between User
Interface (AA4) and the coin sensor switch to ensure
wires do not block the coin switch beam.
5. Shorting the connections 2 and 3 at AA4 on
UIC or installing jumper (Whirlpool part number
W10785124) on UIC AA4 connection will simulate
a good coin sensor.
d13 only occurs with coin 2 installed. If the above
procedures do not solve the problem, replace the UIC.
GENERATION 2 DEBIT CARD
READER ERROR
No communication from installed debit card reader
in Generation 2 debit mode for 5 minutes.
Possible Causes
– Card reader Gen 2 not installed, when washer
is in Ed mode.
– Poor contact or communication cable not
connected between UIC (AA3) and the card reader.
– Card reader failure.
Procedure
1. Clear error code.
2. Unplug the washer or disconnect power.
3. Check the wire harness connections between User
Interface (AA3) and the debit card reader Gen 2. Do
continuity test on cable.
4. Make sure you are using a Gen 2 card reader.
5. Reconnect power and wait for 5 minutes.
If the above procedures do not solve the problem,
replace the card reader.
PAGE 10
Page 11

FOR SERVICE TECHNICIAN ONLY - DO NOT REMOVE OR DESTROY
WASHER QUICK OVERVIEW TEST
n
This cycle consists of 9 steps. In each step, the washer will
perform a Control Action as described in the table below. Once
the action is completed, the washer will move to the next step.
n
Each step can be differentiated from the others by looking at the
display indication. Steps can be advanced if the test requires it.
n
To move to the next step before a control action is complete,
press any key pad except the lower right (COLD) button.
n
To exit the Quick Overview Test at any time, press the lower
right (COLD) button.
Step INDICATION
DISPLAY
Control
Action to be Checked
1 COLORS Door locks, drum
turns 1/2 revolution,
then door unlocks
and relocks.
2 PREWASH Accelerometer tests
Note: “Prewash” flashes are performed.
on the display and is
very easy to miss.
3 CCU Fill by both cold water n Cold water inlet valves
EEPROM Version inlet valves (1 gal. [4 L])
(EC xx) into BLEACH
PERM PRESS compartment.
4 CCU Fill by hot water inlet
Software Version valve to Wash Level
(SC xx) into MAIN WASH
COTTONS compartment.
5 MCU
Software Version
(Sn xx)
COLORS
6 MCU
Hardware Version
Drum executes
tumbling at
wash speed
(30 sec).
(Hn xx)
PERM PRESS
7 UIC Drain pump is ON.
EEPROM Version
(EU xx)
COTTONS
8 UIC Drum rotates
Software Version counter-clockwise
(SU xx) and ramps up.
COLORS Performs unbalance
procedure before and
after spinning. If not
interrupted, the drum
will slow and stop;
after reaching 0 rpm,
the door unlocks and
Step 9 will be skipped.
9 PERM PRESS This Step is only
apparent if Step 8 is
MANUALLY ADVANCED
prior to the drum
reaching 0 rpm
(washer pumps out
if needed). Door
unlocks (washer
returns to flashing
mode).
The drain pump may be running in any of the last three steps,
depending on the water level in the washer and position of the
pressure sensor.
** In the event of an MCU-CCU communications error, the UI
display will go blank for up to 5 minutes and then display an
F28 error message.
** The washer will drain until pressure sensor reaches lowest level
for 10 seconds, then moves to next step.
Actuators
n
Door lock system
n
Child safety routine
n
Motor control (MCU)*
n
Accelerometer
n
#2 and #3
n
Pressure sensor:
n
Suds Level
n
Hot water inlet
n
valve #1
n
Pressure sensor:
n
Wash Level
n Motor
n Motor control (MCU)*
n
Drain pump
n
Pressure sensor**
n
Motor
n
Motor control (MCU)*
n
Drain pump on
n
Door unlock
WASHER MANUAL OVERVIEW TEST
Before replacing any system components, perform this
Manual Overview Test.
n
This cycle consists of 8 steps. In each step, the washer will
perform a Control Action as described in the table below. Once
the action is completed, the washer will move to the next step.
Check Exit Condition column.
n
Each step can be differentiated from the others by looking at the
display indication.
n
To move to the next step before a control action is complete,
press any key pad except the lower right (COLD) button.
n
When Step 8 is complete, the test runs again starting at Step 1.
n
To exit the Manual Overview Test at any time, press the lower
right (COLD) button.
Step DISPLAY Condition
Exit
Control
Action Checked
1 COLORS On Door locks, drum
completion turns 1/2 revolution, n Child safety routine
only then door unlocks
and relocks.
2 PREWASH On Accelerometer tests
completion are performed.
only
3 PERM On Filling with both
PRESS key press cold inlet valves.
or if overfill
level is
detected
4 COTTONS On key Drum executes
press or reversing movement n Motor Control (MCU)*
completion at wash speed
(10 min.).
5 COLORS On key Drain pump is on
press or (4 min.).
completion
6 PERM On Drain pump is on
PRESS completion (reach Suds Level
only plus 10 sec.).
7 COTTONS On key Drum rotates counter-
press or clockwise and ramps n Motor Control (MCU)*
completion up to maximum speed.
8 COLORS On key press Stop motor to 0 rpm.
only after Door unlocks.
rpm = 0 and
door is
unlocked
The drain pump may be running in any of the last three steps,
depending on the water level in the washer and position of the
pressure sensor.
** In the event of an MCU-CCU communications error, the UI
display will go blank for up to 5 minutes and then display an
F28 error message.
To be
n
Door lock system
n
Accelerometer
n
Both Cold Inlet
n
Valves #2 and #3
n
Overfill level
n
Motor
n
Drain Pump
n
Drain Pump
n
Motor
n
Motor
n
Motor Control (MCU)*
n
Door lock system
PAGE 11
Page 12

FOR SERVICE TECHNICIAN ONLY - DO NOT REMOVE OR DESTROY
DIAGNOSTIC TEST QUICK GUIDE
The following table summarizes button function among the diagnostic sub-modes.
Diagnostic Mode Button Function Table
Function in
Function in Function in Diag.
Function in Diag.
Function in Diag. Cycle
Diag. Code Display Flashing Cycle Running Sub-Mode Cycle Running Sub-Mode Running Sub-Mode
Button Display Sub-Mode Sub-Mode (Washer Running) (Dryer Running) (Dryer & Washer Running)
LOWER LEFT Ignore Toggle Customer Go to help mode Toggle Customer Go to help mode
(HOT) BUTTON Wash Cycle Credit Wash Cycle Credit
LOWER MIDDLE Acknowledge Diag. Start Washer Quick Ignore Start Washer Quick Ignore
(WARM) BUTTON Code (Keep Code) Overview Test Cycle Overview Test Cycle
Go to Set-up Mode
LOWER RIGHT Clear Diag. Code Exit Diag. Display Cancel Diag. Cycle Cancel Diag. Cycle Cancel Diag. Cycles
(COLD) BUTTON Exit Diag. Code Flashing Sub-Mode Go to Set-up Mode Go to Set-up Mode Go to Set-up Mode
Display Sub-Mode Go to Set-up Mode
Go to Display
Flashing Sub-Mode
CENTER LEFT (COTTON/ Ignore Start Washer Manual Ignore Start Washer Manual Ignore
WHITES) BUTTON Overview Test Cycle Overview Test Cycle
CENTER MIDDLE Ignore Start Washer Quick Ignore Start Washer Quick Ignore
(PERM PRESS) BUTTON Spin Cycle Spin Cycle
CENTER RIGHT (COLORS/ Ignore Start Washer Ignore Start Washer Ignore
DELICATES) BUTTON Cleanout Cycle Cleanout Cycle
UPPER LEFT (COTTON/ Ignore Ignore Ignore Increment dryer test Increment dryer test
WHITES) BUTTON time by one minute time by one minute
Rolls from 99 back Rolls from 99 back
to 2 minutes to 2 minutes
UPPER MIDDLE Acknowledge Diag. Start Dryer Field Start Dryer Field Ignore Ignore
(PERM PRESS) BUTTON Code (Keep Code) Diag. Cycle Diag. Cycle
Go to Set-up Mode
UPPER RIGHT (COLORS/ Ignore Ignore Ignore Ignore Ignore
DELICATES) BUTTON
HELP MODE
Help mode is entered by pressing the lower left (HOT) button
while in special pricing option 2.XX (or while dAS displays if
operating with Generation 2 card reader). In help mode, the
software revision is displayed. The help mode is advanced
by pressing the lower middle (WARM) button. See Help Mode
Submenu on page 13 for the order in which items are displayed.
Press the lower left (HOT) button at any time to exit help mode.
Help Codes
Help
Code
Description
00 No Help Code
OF Oversuds detected during cycle, and washer was not able to resolve
an unbalance condition detected during the final spin related to the
oversuds detection (via pressure sensor) earlier in the cycle
32 More than six unbalance retries during the final spin – spin (and cycle)
has been aborted
33 Oversuds detected during wash cycle, and washer was not able to
resolve the condition – cycle has been aborted. Washer unable to
sense that water has been fully drained within required time, sensing
as an oversuds condition
71 Generation 2 debit card cycle polling message out of sequence
74 Generation 2 debit card remaining balance message out of sequence
75 Generation 2 debit card new card balance message out of sequence
88 Invalid messaging state found in data acquisition communications
comm_suprv ( ) routine
99 Mismatch of cycle settings between CCU and UI. Wash cycle may not
run as defined by card reader setup
PAGE 12
Page 13

FOR SERVICE TECHNICIAN ONLY - DO NOT REMOVE OR DESTROY
123456
Help Mode Submenu
n
This sub-menu consists of many steps.
n
To change to the next step, press the lower middle (WARM) button.
n
To exit Help Mode and return to set-up mode or dAS mode, press the lower left (HOT) button.
Submode Display Portion Description Note
1h.XX lower
2h.XX lower
The XX value has a meaning according to the Help Code Table. This value is stored
in EEPROM, and is added to as a new error is reported. The oldest drops out of history.*
3h.XX lower Help code 3
1.X## upper Dryer CCU Error History code 1
1.X## lower Washer CCU Error History code 1
2.X## upper Dryer CCU Error History code 2
2.X## lower Washer CCU Error History code 2
3.X## upper Dryer CCU Error History code 3
3.X## lower The X is f or d and ## is the code num as defined in the Ranked Washer CCU Error History code 3
4.X## upper
Stacked Washer/Dryer Diagnostic Codes Table.**
Dryer CCU Error History code 4
4.X## lower Washer CCU Error History code 4
5.X## lower Washer UIC Error History code 1
6.X## lower Washer UIC Error History code 2
7.X## lower Washer UIC Error History code 3
8.X## lower Washer UIC Error History code 4
Sr.ON lower Suds routine selection. Default setting for the washer is to have the suds routine on; • Pressing the center right
standard time is added to the cycle and communicates to the end user via the UI display (COLORS/DELICATES) button
if suds is detected during the first two drain/spins and the final spin. If turned off, “Sr.--,” will toggle the “Sr” setting
gain the ability to reduce suds routine time with the next programming option. from “ON” to “--.”
SL.05 lower Suds routine time selection; can only change the setting if “Sr.--” is selected. Default • Pressing the center left (COTTON/
setting for the washer is “05” minutes of suds/kill foam routine during the first two WHITES) button will toggle the
drain/spins. Allowable programming range is 0–5 minutes. “SL” setting. For proper suds
handling, it is recommended to
keep the setting at “05” minutes.
rE.10 lower Maximum final spin rebalance attempts. Default setting for the washer is “10” • Pressing the center left (COTTON/
rebalance attempts before the cycle is cancelled. For out-of-balance load, allowable WHITES) button will toggle the
programming range is 4–10 attempts. “rE” setting.
SC.XX upper Where XX is the number of the dryer CCU software version
SC.XX lower Where XX is the number of the washer CCU software version
EC.XX lower Where XX is the number of the washer EEPROM CCU version
SU.XX lower Where XX is the software version of the UIC
EU.XX lower Where XX is the EEPROM version of the UIC
SPIN XXX lower Where XXX is the speed in rpm (SPIN element of display is used for this)
P XXX lower Where XXX is the relative amount of power being requested of the motor
U XXX lower Where XXX is the relative amount of unbalance in the system.
NOTE: 255 indicates that the unbalance has not been calculated; 254 indicates
that the unbalance could not be calculated. Any other value is the current unbalance
of the MCU.
* To erase the three help codes, press the lower right (COLD) button.
** The Errors displayed in this section are the history errors that have occurred
in the washer/dryer (not necessarily an error that is in progress).
Button Continuity Test
Check Between
Button Contacts
A 3 and 6
B 3 and 5
C 3 and 4
D 2 and 6
E 2 and 5
F 2 and 4
G 1 and 6
H 1 and 5
I 1 and 4
Help code 1
Help code 2
ABC
DEF
GH I
PAGE 13
Page 14

FOR SERVICE TECHNICIAN ONLY - DO NOT REMOVE OR DESTROY
HELP MODE SYMBOLS AND ELEMENTS
Along with the steps of the help mode, symbols and elements are mapped, at all times, to reflect the state of various inputs and outputs.
Dryer (Upper)
Display Symbol Description
Dryer motor sensed on
OR Dryer heater relay on
& Dryer motor relay on
Dryer door sensed closed
°
Low voltage sensed
*
Washer (Lower)
Display Symbol Description
WASH Water sensed above wash level
RE Washer redistributing due
to out-of-balance condition
DOOR LOCKED Washer door sensed locked
COLD Cold water output on
HOT Hot water output on
OR Door unlock output on
AVAILABLE Washer drain pump output on
°
Washer door sensed closed
Help Mode Button Function Table
Button Name
on Interface Button Function Help Code Not Displayed Help Code Displayed
LOWER LEFT Slew Exits help mode and returns to set-up mode – Exits help mode and returns to set-up mode –
(HOT) BUTTON either dAS display or Manual Set-up Mode (2.) either dAS display or Manual Set-up Mode (2.)
LOWER RIGHT Mode Select Inactive – no result Clears all three help codes
(COLD) BUTTON
LOWER MIDDLE Mode Advance Advances to next help mode screen Advances through each help code or from last
(WARM) BUTTON to the extended fill option
Dryer Drive Motor Resistance
Generic
Result While
Result While
Dryer Temperature and Thermistor Values
Resistance Contact Points
Winding (Ω) of Measurement
Lt. blue wire in back at pin 4
MAIN 2.4–3.6 Ω and bare copper wire on pin 5
of black drive motor switch.
Lt. blue wire in back at pin 4
START 2.4–3.8 Ω and bare copper wire on pin 3
of black drive motor switch.
Dryer Exhaust Temperatures
Fabric Setting Heat Turns Off* Heat Turns On
Cotton/ 155° ± 5°F
Whites (68° ± 3°C)
Perm 155° ± 5°F
Press (68° ± 3°C)
Colors/ 140° ± 5°F
Delicates (60° ± 3°C)
*The measured overshoot using the glass bulb thermometer in the exhaust outlet
can be 30°F (17°C) higher.
heat turn off
temperature
10–15°F
(6–8°C)
Below the
Dryer Gas Valve Resistance
Terminals Resistance
1 to 2 1365 Ω ± 25
1 to 3 1560 Ω ± 25
4 to 5 1220 Ω ± 50
IMPORTANT: Make sure all harness wires are looped back
through the strain relief after checking or replacing coils.
Thermistor
resistance value
at heater shutoff
Fabric (digital or analog
Setting Temperature meter) kΩ
Cotton/ 155° ± 5°F
Whites (68° ± 3°C)
Perm 155° ± 5°F
Press (68° ± 3°C)
Colors/ 140° ± 5°F
Delicates (60° ± 3°C)
2.1 1.7
2.1 1.7
2.8 2.3
Dryer Thermistor Resistance
Thermistor Resistance
Temp. Res. Temp. Res.
°F (°C) kΩ °F (°C) kΩ
50°F (10°C) 19.9 80°F (27°C) 9.2
60°F (16°C) 15.3 90°F (32°C) 7.4
70°F (21°C) 11.9 100°F (38°C) 5.7
PAGE 14
Page 15

FOR SERVICE TECHNICIAN ONLY - DO NOT REMOVE OR DESTROY
H
C
1
1
1
1
1
1
Be sure to perform the Diagnostic Tests before replacing the
system components.
Washer Pump Motor Continuity Test
Pins
1 to 2 Normal = approx. 12.3 Ω
Abnormal = Infinity
Results
Washer Motor Continuity Test
1. Unplug washer or disconnect power.
2. Disconnect the wire harness from the motor and measure the
resistance of the motor. Use the following table:
Pins
Results
1 to 2 Normal = approx. 6.45 Ω
2 to 3 Abnormal = Infinity
1 to 3
Transformer Connector
Primary 30–35 ohms
Blue to blue 1 ohm
White to white 2 ohms
Yellow to blue 0.5 ohms
Red to red 11 ohms
Water Temperature Sensor
1. Unplug washer or disconnect power.
2. Disconnect the wire harness from the water temperature sensor
and measure the resistance of the sensor. Use the following table.
An abnormal condition is an open circuit. This reading can be
taken from the cable attached to the CCU terminal SET2.
Temperature
32°F (0°C) 35.9 kΩ
86°F (30°C) 9.7 kΩ
104°F (40°C) 6.6 kΩ
122°F (50°C) 4.6 kΩ
140°F (60°C) 3.2 kΩ
158°F (71°C) 2.3 kΩ
203°F (96°C) 1 kΩ
Results
Water Valve Locations
Hot Inlet
Valve #1
Cold Inlet
Valve #2
Cold Inlet
Valve #3
Washer CCU Wire Harness Connector Table
Unplug washer/dryer or disconnect power before taking ohm
measurements.
(Ω) Ohm Abnormal Pin Wire
Terminal Component Value Value Connectors* Coding
RP2 Wax Motor 1.2 kΩ Infinity** 1, 2
at 25°C
DLS2 Door Locked Switch Continuity: 1, 2
Locked/Unlocked door locked.
No Continuity:
door unlocked.
DL3 Door Lock Coil 165 Ω Infinity**
Locked or Unlocked
1, 2 door lock
2, 3 door unlock
SET2 Temperature Varies with Infinity** 1, 2
Sensor temperature
changes.
See above.
DP2 Drain Pump 13 Ω Infinity** 1, 2
DCS3 Door Switch Continuity 1, 2
at door close.
No continuity
at door open.
VSF2 Hot Inlet Valve #1 812 Ω Infinity** 1, 3 (hot
valve #1)
VCH7 Cold Inlet Valve #3 812 Ω, Infinity** 1, 3 (cold
Cold Inlet Valve #2 either coil
IF2 RFI 30 Ω
(or more than
10% lower
or higher) valve #2)
Infinity**
(or more than
valve #3)
5, 7 (cold
1, 2
10% lower
or higher)
Infinity**
PS8 Pressure Sensor
4, 7, and 8
**The number 1 pin has been marked on the bottom part of the connector.
**An infinity measurement occurs when the multimeter does not detect an ohm reading.
Manually Unlocking the Door Lock System
1. Unplug washer or disconnect power.
2. Remove the toe kick panel.
3. Reach up along the inside of the front and locate the bottom
of the latch assembly.
4. At the bottom of the latch assembly is a tear-drop shaped tab.
5. Gently pull the tab down about 1/4" (6 mm) or until a click is heard.
PAGE 15
ELECTRONIC ASSEMBLIES –
REMOVAL OR REPLACEMENT
IMPORTANT: Electrostatic (static electricity) discharge may cause
damage to electronic control assemblies. See page 1 for details.
NOTE: Be sure to perform the Diagnostic Tests before replacing the
control board.
Page 16

FOR SERVICE TECHNICIAN ONLY - DO NOT REMOVE OR DESTROY
WASHER
CENTRAL CONTROL UNIT
(CCU)
PK
PK
IF2
1
2
RFI
FILTER
(120
VOLT)
4 7 8121357 13
1
2
1
1
2
3
3
2
1
DP2
MI3
MS2
1
2
3
2
1
PUMP
MOTOR
MOTOR CONTROL UNIT (MCU)
DRUM MOTOR
(OPTIONAL)
COIN SENSOR2
CARD
READER
BACK-UP
BATTERY
COIN
SENSOR1
AVAIL2
AVAIL1
ENABLE1
ENABLE2
POWER
GROUND
ATLAS
J901
J900
AA2
(GEN 1)
USER INTERFACE CONTROL (UIC)
WA3
WB3
EE1
AA4
AA5
AA3
123 123 123412341234
123456
1
2
3
AA1
AA8
WC3
3
21
GG6
DOOR LOCK
HOT
VALVE
#1
COLD
VALVE
#2
COLD
VALVE
#3
TUB
THERMOSTAT
VCH7
VSF2
DCS3
DL3
DLS2
RP2
SET2
PS8
BU
UIC TRANSFORMER
120/22.5/-4.5/-26-/
26 VOLT
BK W
12 3
PRESSURE
TRANSDUCER
VAULT
SWITCH
SERVICE
SWITCH
BK BK
OR
Y
OR
MEMBRANE
SWITCH
GY
HEATER
RELAY 1
GND
NEUTRAL
DOOR
L1
MOTOR
NO
COM
DRYER CCU
EXHAUST TEMP
EXHAUST TEMP RTN
EXHAUST
THERMISTOR
R/WR/W
TSG
TS
BK
120
VOLTS
BK - LINE L1
R - LINE L2
240 VOLTS
120 VOLTS
W - NEUTRAL N
DOOR
SWITCH
W
LBU
WF1
D1
D
G/Y
P14-3
P14-6
P8-2
P8-3
P8-4
W
THERMAL FUSE
BELT
SWITCH
LBU
LBU
T
P9-1
P9-2
BK
THERMAL
CUT-OFF
HI-LIMIT
THERMOSTAT
HEATER
A1
R
R/W
BK
R
MAIN
START
MOTOR
TC01 TC03 HL1
HL3
NC
H1 H2
BU/W
1
2
5
3
6
R
C1
G/Y
4M
P2-1
P2-2
P2-3
VDD
DATA
VSS
TERMINAL CONSTRUCTION
SPLICE
IN LINE CONNECTION
TF1 TF2
121231212
2
WIRING DIAGRAM – ELECTRIC MODELS
PAGE 16
Page 17

FOR SERVICE TECHNICIAN ONLY - DO NOT REMOVE OR DESTROY
WASHER
CENTRAL CONTROL UNIT
(CCU)
IF2
1
2
112 135713
1
2
1
1
2
3
3
2
1
DP2
MI3
MS2
PUMP
MOTOR
1
2
3
2
1
MOTOR CONTROL UNIT (MCU)
DRUM MOTOR
PK
PK
VCH7
VSF2
DCS3
DL3
DLS2
RP2
SET2
PS8
RFI
FILTER
(120
VOLT)
BK W
UIC TRANSFORMER
120/22.5/-4.5/-26-/
26 VOLT
DOOR LOCK
COLD
VALVE
#2
#3
HOT
VALVE
#1
TUB
THERMOSTAT
12 3
1
2
3
AA1
PRESSURE
TRANSDUCER
VAULT
SWITCH
SERVICE
SWITCH
BK BK
OR
Y
OR
(OPTIONAL)
COIN SENSOR2
CARD
READER
BACK-UP
BATTERY
COIN
SENSOR1
AVAIL2
AVAIL1
ENABLE1
ENABLE2
POWER
GROUND
ATLAS
J901
J900
WA3
WB3
EE1
AA4
AA5
AA3
123123 123412341234
123456
AA2
(GEN 1)
USER INTERFACE CONTROL (UIC)
AA8
WC3
3
21
GG6
BU
MEMBRANE
SWITCH
DRYER CCU
P2-1
P2-2
P2-3
VDD
DATA
VSS
HEATER
RELAY 1
GND
NEUTRAL
DOOR
L1
MOTOR
NO
COM
P8-2
P8-3
P8-4
P9-1
P9-2
BK
A1
EXHAUST TEMP
EXHAUST TEMP RTN
EXHAUST
THERMISTOR
R/WR/W
TSG
TS
P14-3
P14-6
P14-4
P14-5
OR
R
MAIN
START
MOTOR
BELT
SWITCH
R
LBU
LBU
NC
BU/W
BU/W
BU/W
1M
2M
5M
3M
6M
G/Y
4M
B3
THERMAL
CUT-OFF
HI-LIMIT
THERMOSTAT
HL1
HL3
GY
LBU
R
IGNITOR
VALVE NO. 1
VALVE NO. 2
FLAME SENSOR
W
G/Y
HOLD
ASSIST
MAIN
IGR
IG
1V
1
2
4
5
3
3V
FS1FS2
50 - 500 Ω
VALVE
MOV
BU/W
W
W
DOOR
SWITCH
F1
TERMINAL CONSTRUCTION
SPLICE
IN LINE CONNECTION
W - NEUTRAL N
120 VOLTS
BK - LINE L1
GROUND
G/Y
W
BK
A1
COLD
VALVE
D1
D
THERMAL
FUSE
TF1
TF2
TC01 TC03
HL1
478 21321212
2
WIRING DIAGRAM – GAS MODELS
PAGE 17
Page 18

FOR SERVICE TECHNICIAN ONLY - DO NOT REMOVE OR DESTROY
TROUBLESHOOTING GUIDE
PROBLEM POSSIBLE CAUSE/TEST
NOTE: Possible Cause/Tests must be performed in the sequence shown for each problem.
BLANK DISPLAY Possible Causes
– UIC not powered or no power to the washer/dryer.
– Wrong communication between CCU and UIC.
Procedure for UIC not powered
1. Check that the washer/dryer is plugged into a working outlet.
2. Unplug washer/dryer or disconnect power.
3. Check continuity from the power cord to the line filter.
4. Check continuity from the line filter to the transformer.
5. Perform Ohm meter test on the transformer (page 15).
Procedure for wrong communication
1. Unplug the washer/dryer or disconnect power.
2. Wait for 2 minutes.
3. Reconnect power.
If the display fails to turn on, replace the UIC.
TOUCH-PADS DO NOT RESPOND Possible Causes
WHEN PRESSED – Keypad ribbon disconnected, damaged, or contaminated, or installed with ribbon flap in wrong position.
– Door switch disconnected, loose, or damaged.
Procedure if matrix key board is disconnected
In this error, the keypad does not respond in any mode (normal operation, set-up, etc.).
1. Unplug washer/dryer or disconnect power.
2. Check that the keypad ribbon is connected to the UIC.
3. Clean the matrix keypad ribbon of soap or other residues.
4. Check the ribbon connector on the control board to see if there is corrosion on the contacts.
Verify the function of the keypad: perform keypad matrix test in service manual. If keypad fails to operate, replace it.
Procedure if door switch is disconnected
In this error, the keypad works normally in set-up mode, but will not start a user paid cycle.
1. Verify door switch operation by performing test for F26 error code (page 8), even if the F26 code is not displayed.
If the above procedures fail to solve the problem, replace the UIC.
WON’T DISPENSE 1. Verify that water is coming into the dispenser.
2. Verify that the washer/dryer is level.
3. Remove the insert and verify that the dispenser drawer is not clogged with detergent.
WASHER/DRYER VIBRATES 1. Verify that the washer/dryer is level.
2. Verify that the shipping system, including shipping bolts and spacers, is removed, and that the power cord
is not tangled in any components inside the rear of the washer/dryer.
3. Verify that the leveling legs are locked into place and firmly in contact with the floor.
4. Check for unbalanced load, especially when washing very small loads.
5. Verify that dampeners are all connected in place and not damaged.
6. Correct any twists in the door bellows.
7. Ensure proper drive belt placement on motor pulley.
8. Ensure that the washer/dryer is not installed on a wooden riser with a platform less than 3/4" (19 mm) thick.
DRUM WON’T ROTATE 1. Check for broken drive belt.
2. Check for drive motor failure error codes (F11, F25, F28).
• Check the electrical connection and verify the function of the cable between the MCU and drive motor.
3. Make sure that the door locks properly.
INCORRECT WATER TEMPERATURE 1. Make sure that the inlet hoses are connected properly.
2. Check the water temperature sensor for an abnormal condition (page 15). Make sure the hoses from the inlet
valves to the dispenser are connected properly.
3. Verify hot and cold water operation in Quick Overview Test in diagnostic mode.
4. Check for blocked filter screen in inlet valves.
PAGE 18
Page 19

FOR SERVICE TECHNICIAN ONLY - DO NOT REMOVE OR DESTROY
NOTES
PAGE 19
Page 20

FOR SERVICE TECHNICIAN ONLY - DO NOT REMOVE OR DESTROY
NOTES
PAGE 20
02/18
 Loading...