

Whirlpool CAM2762KQ Installation Instructions
WHIRLPOOL CAM2762KQ WASHER
INSTALLATION INSTRUCTIONS
FOR DEBITEK SLIM READER
Remove the two screws on either side of the machine backsplash
(Fig. 1) and raise the backsplash to gain access to the wiring harness. The access cover on the meter housing should also be removed.
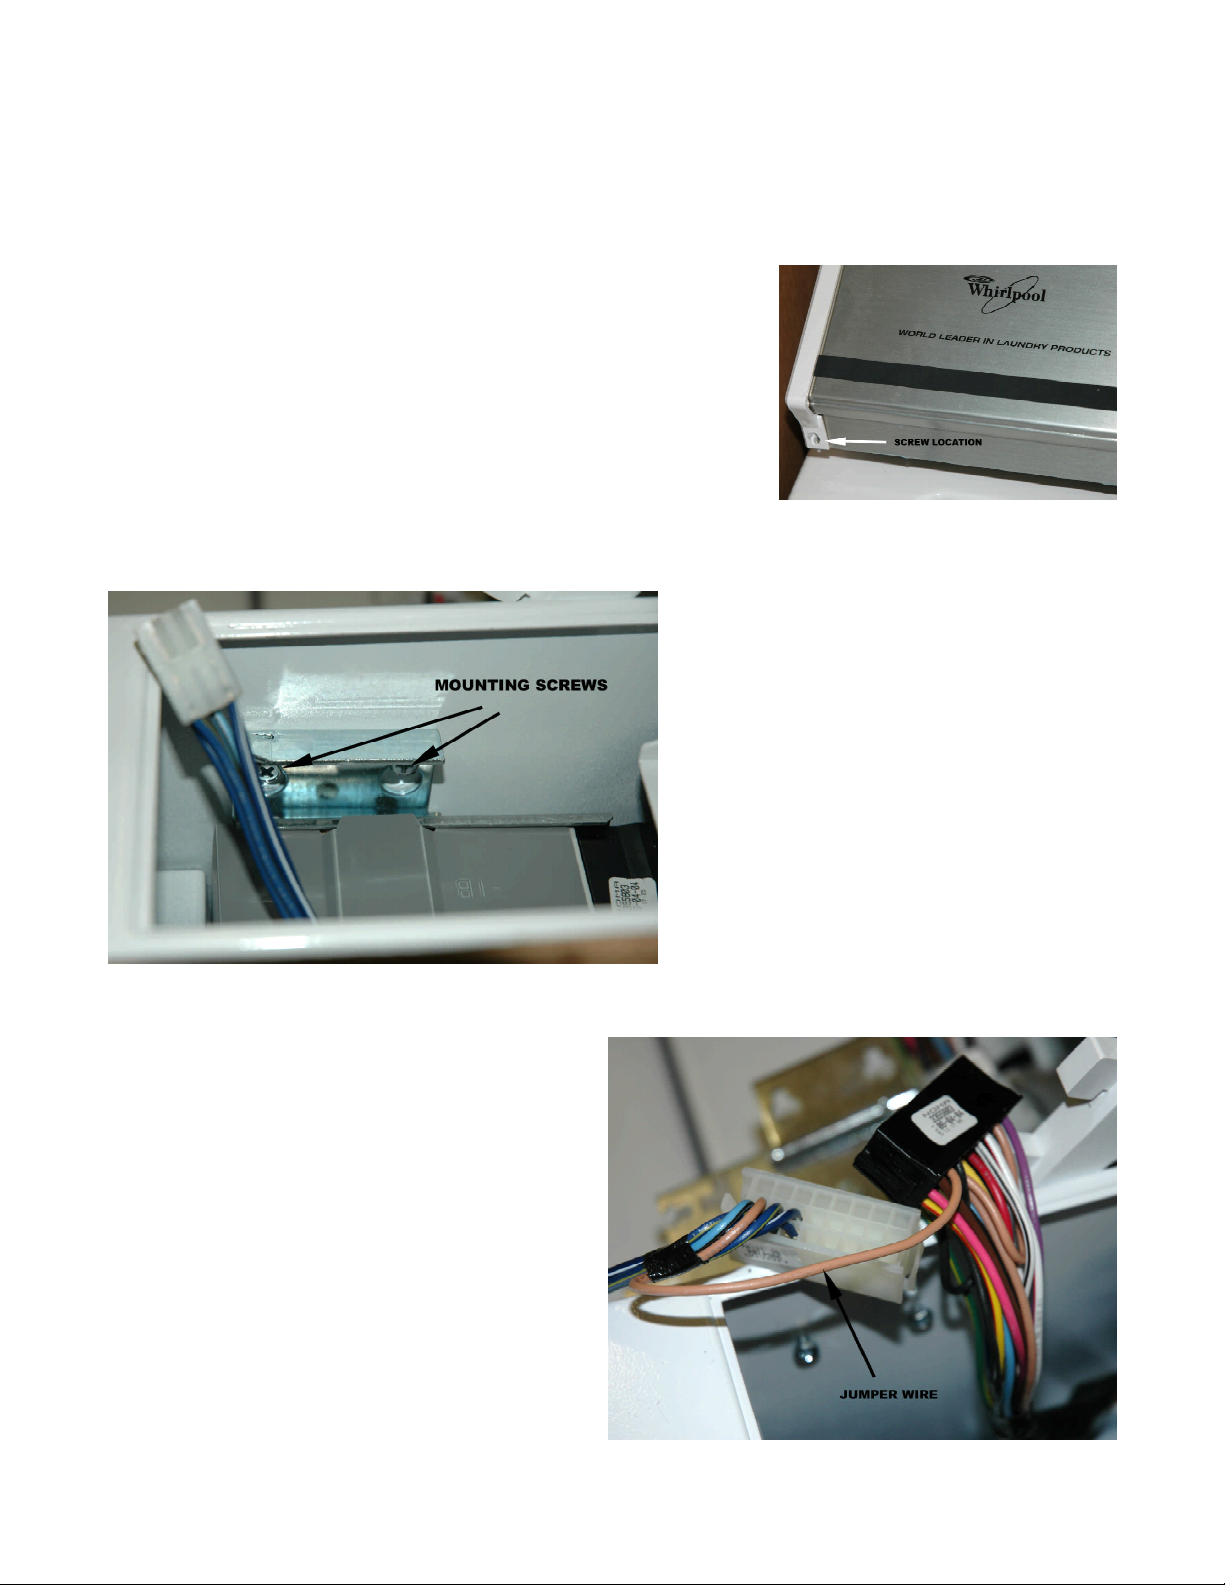
Locate the two mounting screws for the
machine timer inside the meter housing (Fig.
2). Loosen the screws. They do not need to
be completely removed. Lift up on the timer
assembly and remove it from the meter
housing. It may be necessary to remove the
two harness plugs on the back of the timer in
order to accomplish this step. Press in on the
clips on either side of the timer plugs to
release them and carefully detach them from
the timer.
Fig. 1
Fig. 2
Locate the beige jumper wire attached to the
bottom plug (Fig. 3). The end of this wire may be
taped to the harness. If the wire is not already
connected to the upper plug (black), the terminal
on this wire must be installed in the upper plug in
order for the machine to operate.
Fig. 3
1
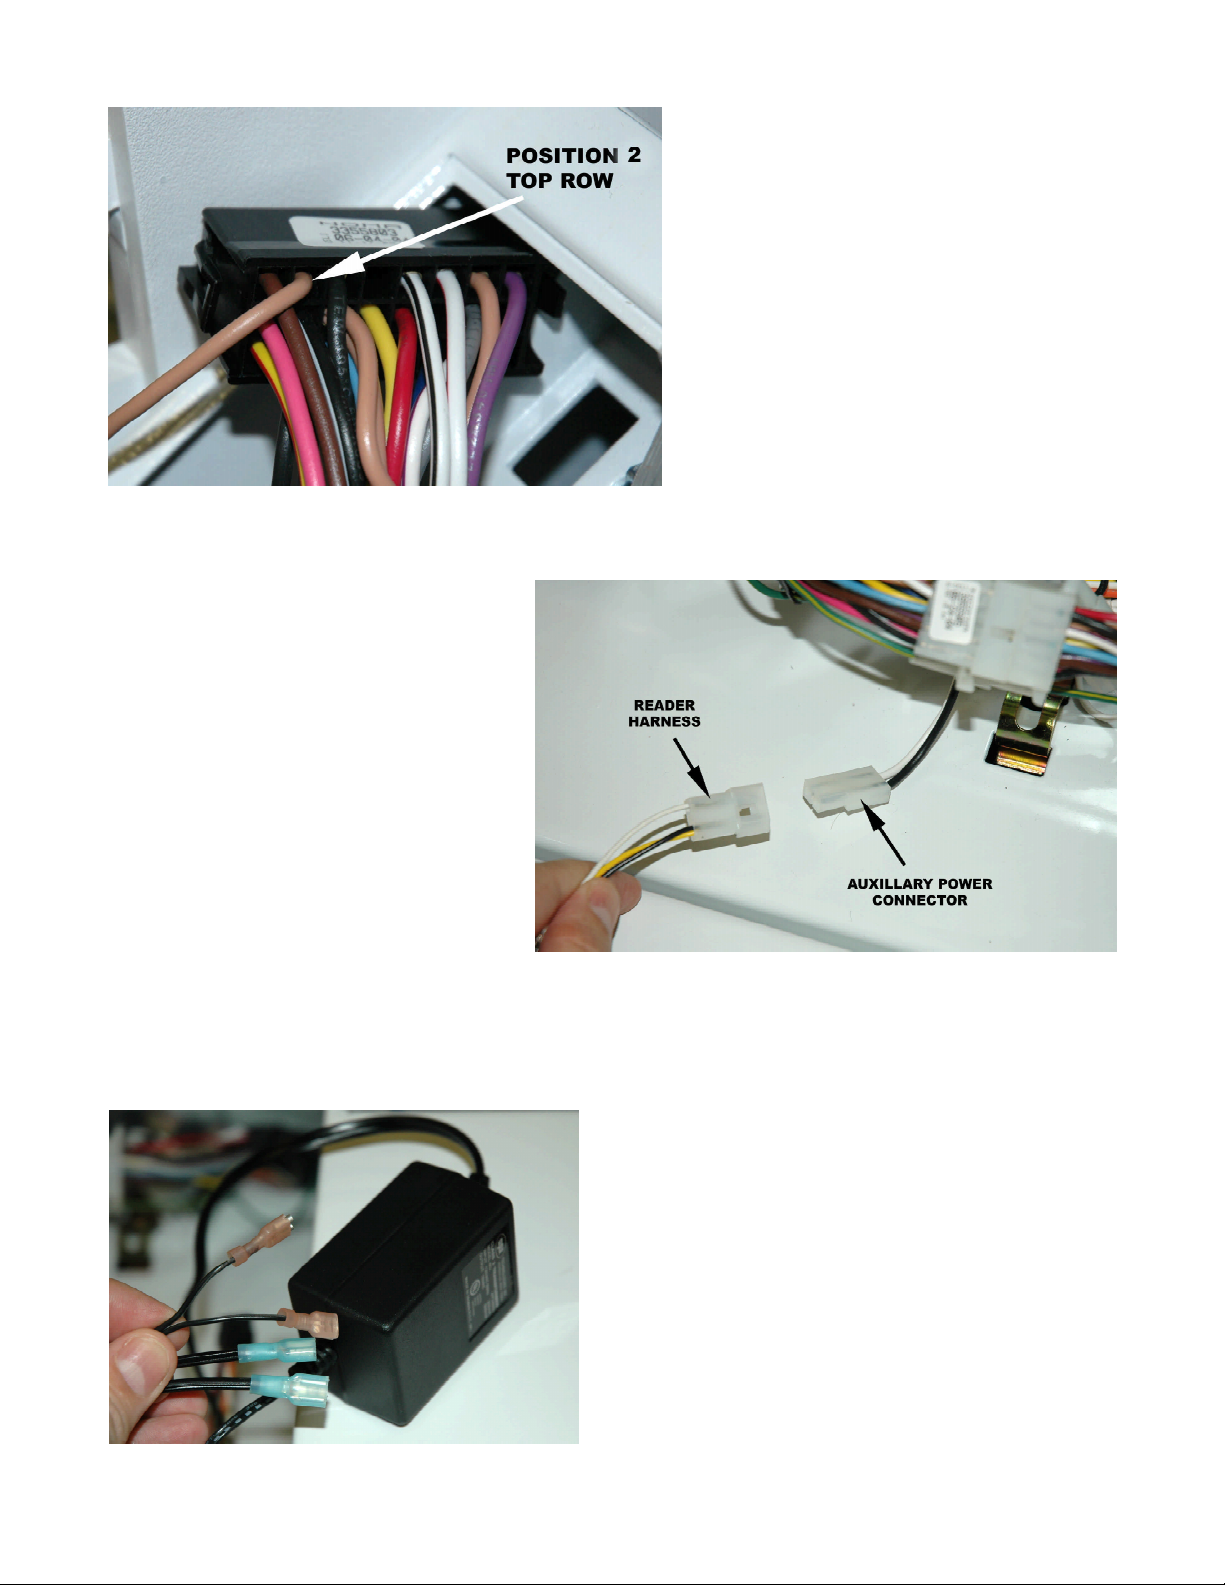
Fig. 4
Locate the power transformer included
with the kit and secure it inside the
backsplash using the self-adhesive velcro
provided. Then connect the two-pin, white
Molex connector on the reader harness to
the matching power connector on the
machine (Fig.5). This connector is located
in the main wiring harness inside the
backsplash and may be taped. It will be
necessary to remove the dummy plug on
the end of the connector prior to attaching
the reader harness.
Looking at the rear of the upper plug, the
connector on the beige jumper should be
inserted into the empty slot located in the
second position from the left on the top row.
This position should have a black wire with
a white stripe directly below it. (Fig. 4)
Once this has been completed, replace the
timer and secure the mounting screws. Make
certain that the feature connection harness
from the bottom plug is not pinched underneath the timer assembly and is easily
accessible from the access opening in the
meter housing.
Fig. 6
Fig. 5
Attach the 110-volt connections on the Debitek
transformer to the reader harness. These are the two
large connectors on the transformer on the ends of the
thickest wire. Corresponding attachment points on the
reader harness have a yellow and black wire on one
and a single white wire on the other. The connections
are not polarized and may be connected to either wire
on the transformer.
Attach the remaining two wires on the transformer to
the red and black wires with matching connectors on
the reader harness . Again, polarity does not matter.
2
 Loading...