

Whirlpool ARC 5120, ARL 478/G, ARC 5130, ART 866/G INSTRUCTION FOR USE
English
ENVIRONMENTAL HINTS
Packing
Do not throw the packing into the garbage: first sort out the
different materials (i.e.: steel, cardboard, polystyrene) following local regulations.
Information
This appliance is free of CFC’s (refrigerant circuit contains
R134a) orfree of HFC’s (refrigerant circuit contains R600a –
Isobutane). For more details, please refer to the rating plate
on the appliance.
For appliances with Isobutane (R600a)
The refrigerant Isobutane is a natural gas of high environmental compatibility but which is inflammable. Therefore, it
is essential to ensure that the ducts of the refrigerant circuit
do not get damaged.
Declaration of conformity
This appliance is intended to come into contact with foodstuffs and conforms to D.L. 108 of 25.01.1992 (European Directive 89/109/EEC).
Ù
KNOW YOUR APPLIANCE
It is a combined refrigerator/freezer.
The freezer compartment, situated at the bottom, allows the
perfect storage of fresh and cooked foods, the production of
ice cubes and the storage of fresh and frozen foods.
The refrigerator compartment, which is provided with automatic
defrost, allows the storageof fresh foods andbeverages.
This appliance is provided with two motors: the refrigerator
and freezer compartments may be used separately.
Please read these instructions carefully.
They include a full description of your appliance and useful
hints to enable you to achieve the correct performances required to store foods.
If the appliance is provided with spacers, fit them at the top
of the condenser (Fig. 4).
The door support is for transport purposes only (Fig. 5).
Clean the inside of the liners with a sponge dampened in a
solution of lukewarm water and vinegar.
Fit the accessories as illustrated in Fig. 1 and Fig. 8.
ELECTRICAL CONNECTION AND
OPERATION
Please check that the voltage on the rating plate (Fig. 6),
which is situated at the right hand side of the crisper, corresponds to the voltage in your home (Fig. 7).
The earthing of this appliance is compulsory bylaw. The
manufacturer will accept no liability for injury to persons or damage to objects arising from the non-observance of this requirement.
Let the appliance to stand for one hour prior to connecting it
to the mains.
ELECTRICAL INFORMATION
“WARNING - THIS APPLIANCE MUST BE EARTHED”
(For Great Britain only)
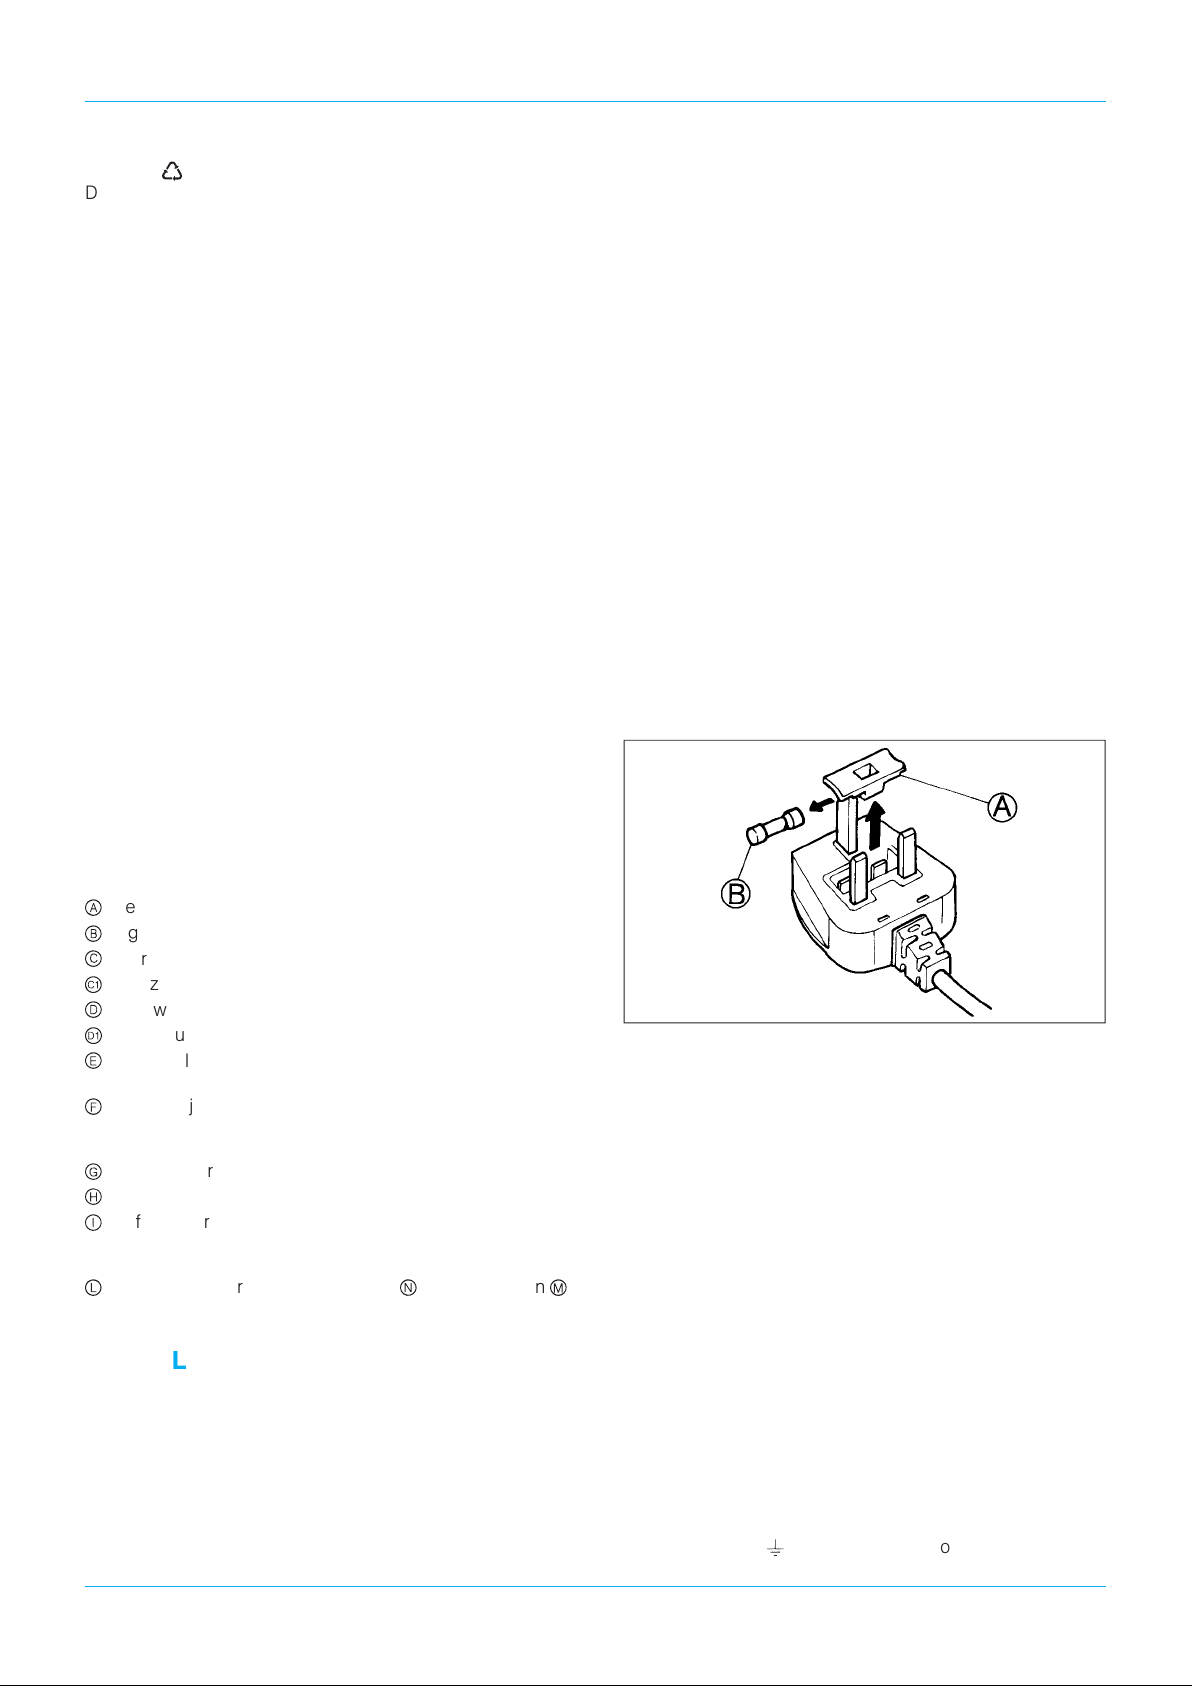
Fuse replacement.
If the mains lead of this appliance is fitted with a BS 1363A
13 amp fused plug, to change a fuse in this type of plug use
an A.S.T.A. approved fuse to BS 1362 type and proceed as
follows:
DESCRIPTION OF THE APPLIANCE
Refrigerator compartment
a
Light switch
b
Refrigerator compartment control button (thermostat)
c
Freezer compartment control button (thermostat)
ü
Yellow luminous switch for fast freeze
d
Green luminous light for operation
ý
Green pilot lamp for critical temperatures in the freezer
e
compartment
Grids (adjustable in height and in some models in incli-
f
nation; some models may also be provided with a grid
with flap)
Glass separator (if provided)
g
Crispers
h
Refrigerator inner door liner with adjustable compart-
i
ments (in some models a butter compartment is provided)
Freezer compartment with storagenand freezing-in
l
baskets.
(Fig. 1)
m
INSTALLATION
Please ensure that your appliance is undamaged.
Any transport damage must be reported to your dealer
within 24 h of receipt.
Do not install the appliance near to heat sources such as
cookers, central heating, boilers, sunlight, etc.
It must however be located in a well ventilated dry space.
Leave a 50 mm space betveen the top of the appliance and
any kitchen furniture (Fig. 2). The appliance should stand
level, this can be achieved by adjusting the front feet
(Fig. 3).
1. Remove the fuse cover (A) and fuse (B).
2. Fit replacement 13A fuse into fuse cover.
3. Refit both into plug.
IMPORTANT:
ing a fuse and
used until a correct replacement is fitted.
Correct replacement are identified by the colour insert or the
colour embossed in words on the base of the plug.
Replacement fuse covers are available from your local electrical store.
The fuse cover must be refitted when changif the fuse cover is lost the plug must not be
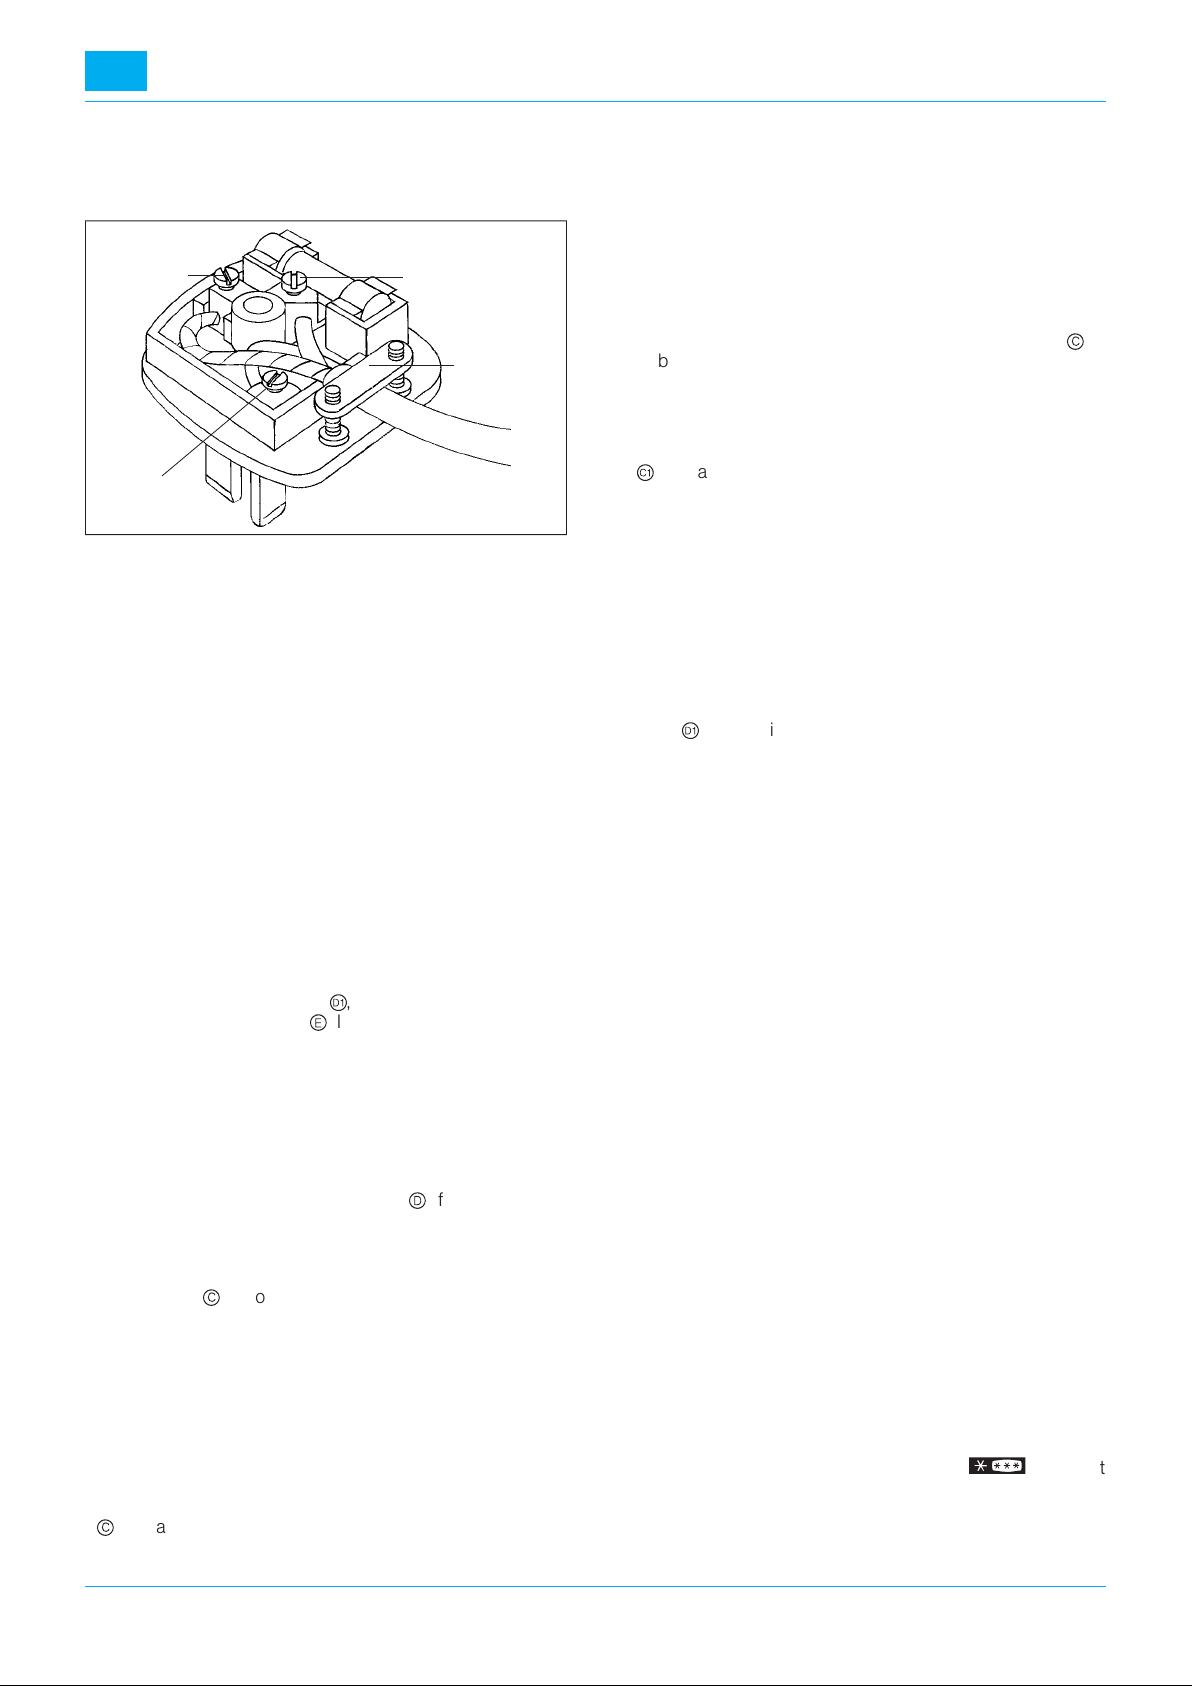
CONNECTION TO A REWIREABLE PLUG
If the fitted plug is not suitable for your socket outlet, then it
should be cut off and disposed of in order to avoid a possible shock hazard should it be inserted into a 13A socket elsewhere.
A suitable altenative plug should then be fitted to the cable.
The wires in this mains lead arecoloured in accordance with
the following code;
BLUE - “NEUTRAL” (“N”)
BROWN - “LIVE” (“L”)
GREEN AND YELLOW - “EARTH” (“E”)
1.
The GREEN AND YELLOW wire must be connected to the
terminal in the plug which is marked with the letter “E” or by
the Earth symbol
or coloured green or green and yellow.
4
5
GB
2. The BLUE wire must be connected to the terminal which
is marked with the letter “N” or coloured black.
3. The BROWN wire must be connected t o the terminal
which is marked with the letter “L” or coloured red.
GREEN AND
YELLOW (“E”)
BLUE (“N”)
Connection to a
typical13ampplug
For the Republic of Ireland only
The information given in respect of Great Britain will frequently apply, but a third type of plug and socket is also
used, the 2-pin, side earth type. In this case, the wire which
is coloured GREENAND YELLOW must be connected to the
EARTH contact, and the other two wires to the two pins, irrespective of colour. The supply to the socket must be fitted
with a 16 amp fuse.
If the plug and the wall socket do not comply, have the socket replaced by a qualified electrician. He should also
check that the section of the socket wires can withstand the
power absorbed by the appliance. The use of adapters, multiple sockets and extension cords is not advisable.
If absolutely necessary, use simple or multiple adapters and
extension cords in compliance with local safety regulations
paying attention not to exceed the maximum amperage,
which is marked on the simple adaptors and on extension
cords and that of the total power marked on the multiple
adapters.
When the appliance is connected, the following devices
switch on:
Freezer compartment
- The green luminous switch
- The red alarm/pilot lamp
correct storage temperaturehas been reached(see chapter
“Adjusting the temperature of the freezer compartment”).
This pilot lamp switches on when:
a) the door of the freezer compartment has been left open
for a long time
b) the appliance has been loaded with fresh foods to be frozen
c) the interior temperature is not correct.
- The yellow luminous fast freeze switch
position.
Refrigerator compartment
- The interior light, if the door is opened and the temperature
selector knob
ruption of operation).
After selection of the temperatures as indicated in the relevant chapters, three hours approx. are required in the freezer
compartment to reach the correct storage t emperatures and
a short time is required in the refrigerator compartment to
reach the correct storage temperatures.
is not on position x (temporaneous inter-
c
, if it is in the on position.
ý
. It will remain alight until the
e
BROWN (“L”)
CABLE CLAMP.
, if this is in the on
d
ADJUSTING TEMPERATURES IN THE
REFRIGERATOR COMPARTMENT
The temperature iscontrolled by thethermostat knob (Fig.1
-
). At an ambient temperature included between +20oC
c
and +25
o
C, and a normal load of foods, we suggest you ad-
just the thermostat knob to position 3.
If you need colder temperatures in thecompartment turn the
thermostat knob to the higher settings, position 4 - 5. Contrarily if the temperature in the compartment is too cold, turn
the knob to the lower settings, position 2 - 1.
We remind you that internal temperatures are affected by
the location of the appliance, the t emperature of the surrounding air and the frequency of door opening.
Thesettingofthethermostatmayhavetobevariedtoallow
for these factors. The operation of the refrigerator compartment may b e interrupted turning the thermostat knob
symbol
x.
c
to
ADJUSTING TEMPERATURES IN THE
FREEZER COMPARTMENT
The temperature is adjusting with the thermostat knob (Fig.
), situated onthe control p anel. In normal ambient condi-
1
ü
tions (ambient temperature included between +20
o
+25
C), we suggest you turn the knob to position 3.
This position allows you t o obtain the ideal -18
temperature for frozen foods for a long time, with the less
energy consumption. If the interior temperature is colder or
warmer than -18
position 1 or to position 5 respectively. We remind you that
internal temperatures are affected by the location of the appliance, the temperature of the surrounding air and the frequency of door opening. The setting of the thermostat may
have to be varied to allow for these factors. The operation of
the freezer compartment may be interrupted by pressing
switch
ý
o
C, adjust the thermostat control knob to
(green light off).
o
Cand
o
Cstorage
USE OF THE REFRIGERATOR
COMPARTMENT
All items stored in the refrigerator compartment should be
wrapped in alluminium or plastic sheeting or kept in a covered container. This prevents food from becoming dry on the
surface and stops strong smells and flavours b eing transferred from one food to another. Thecoldest section of the refrigerator compartment is immediately above the crisper drawer. Different foods are best stored in the positions indicated hereafter.
Meats; sausages, fish, etc. These should be stored on the
shelf nearest the crisper.
Cooked foods, pies, jellies, etc; these shouldbe stored on
the top grids.
Eggs, cheese and dairy produces; these should be stored
in the refrigerator compartment door.
Fruits and vegetables: storeinthecrisperdrawer.
Canned food: once the can has beenopened, transfer unu-
sed food into a non-metallic container.
Important:
rearwall.Storefoodssoastopermitfreecirculationofair.
Do not line the shelves with paper or plastic.
Allow cooked food to cool before storing in the refrigerator
compartment.
Do not place foodstuffs or containers against the
(Fig. 8)
DEFROSTING
Defrosting of the refrigerator compartment is completely automatic: the defrost water is conveyed into a tray on the
compressor casing situated at the rear of the appliance,
where it evaporates thanks to the heat produced during the
operation.
USE OF THE LOW TEMPERATURE
COMPARTMENT
In the freezer compartment, marked by the
is possible tofreeze-in fresh orcooked foods, to produceice
cubes and to store commercially frozen foods. The maximum storage volume is obtained removing the basket and
positioning the foods directly on the refrigerating grids.
(Fig. 8)
ç
symbol, it
6
 Loading...