

Whirlpool ARC 1796, ARC 1788/IX, ARC 1788/1/IX, ARC 1776/1 WP, ARC 1766/1 DATASHEET
...
63501003GB.fm Page 1 Thursday, March 2, 2006 3:30 AM
A
B
3
9
2
10
8
1
PRODUCT SHEET
GB
4
5
7
6
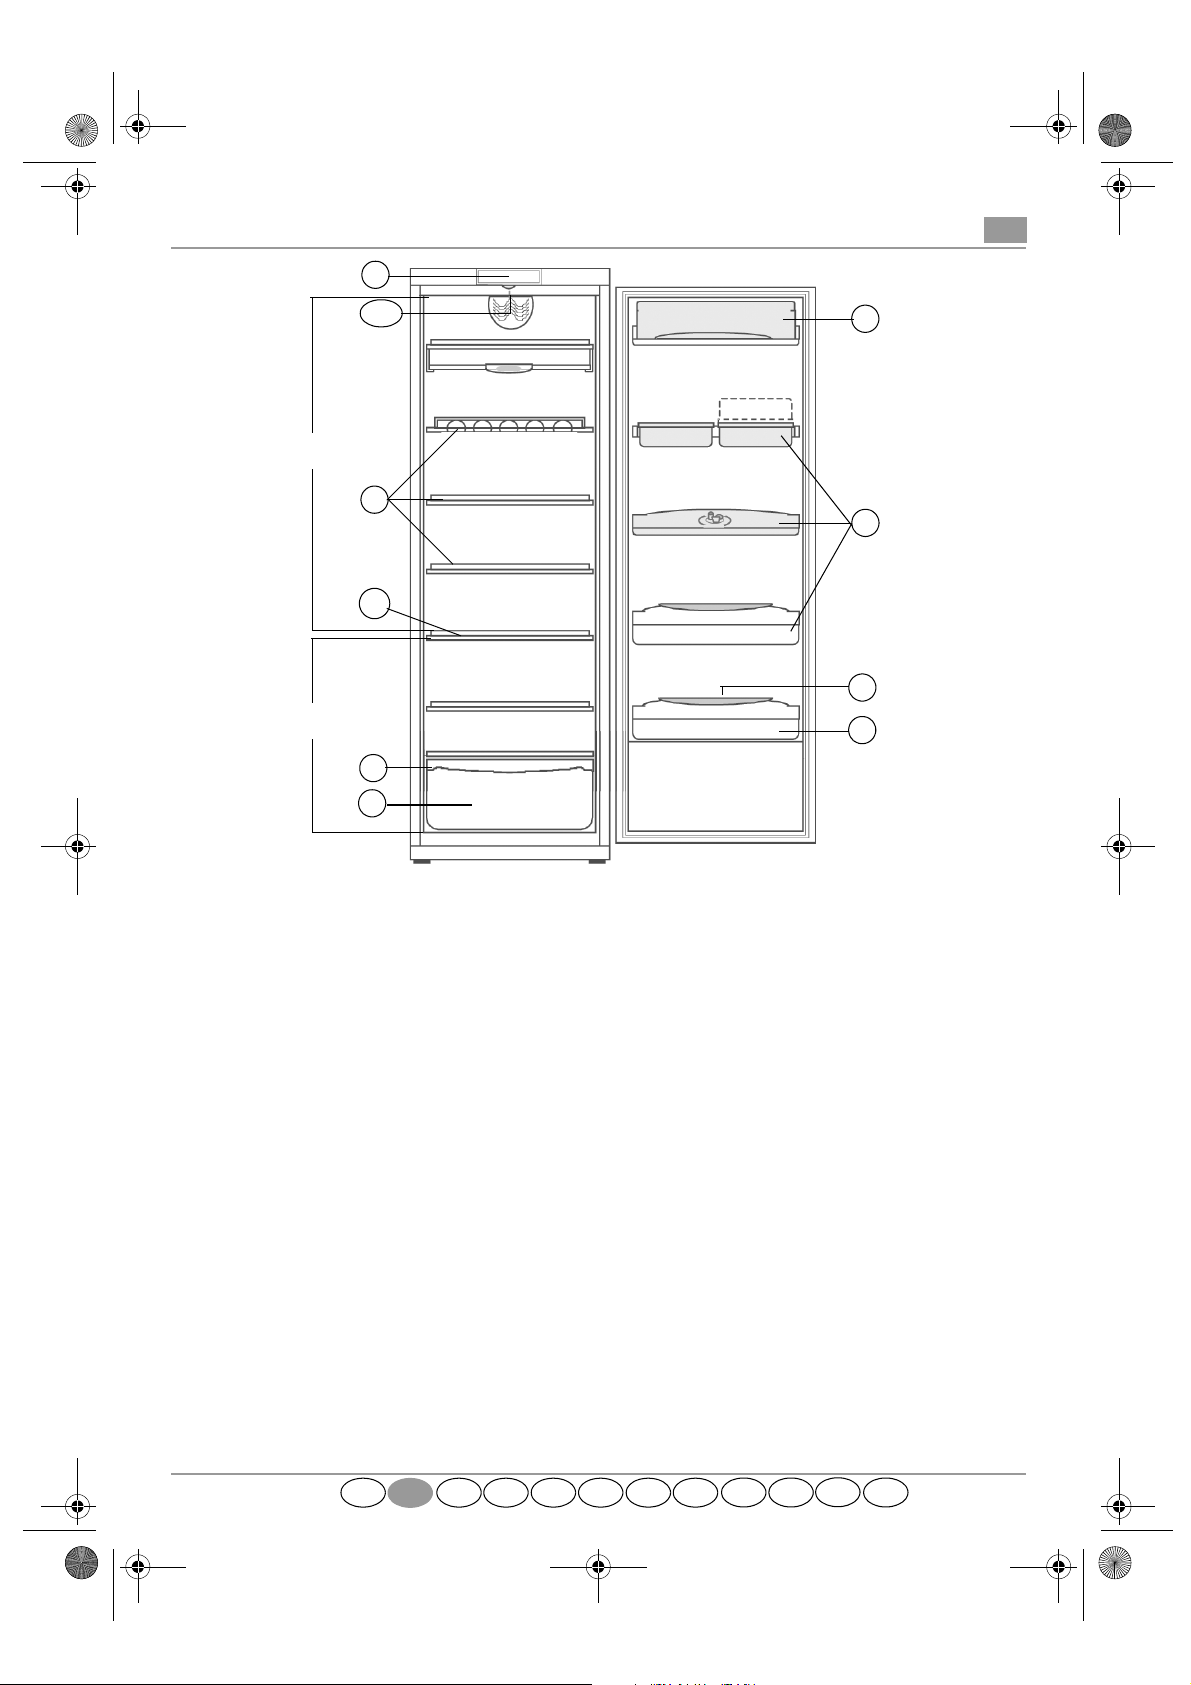
. Refrigerator Zone: coldest area
Refrigerator Compartment
Crisper
1.
Shelves / Shelf area
2.
Control panel
3.
Upper door tray
4.
Door trays
5.
Bottle rack
6.
Removable bottle restrainer (if present)
7.
Rating plate (at the side of crisper drawer)
8.
Light, positioned either below the control
9.
panel or inside the appliance (depending on
model)
Divider between Refrigerator
10.
compartment and Cool Compartment, in
fixed position (if provided)
: The number of shelves and type of accessories may vary, depending on the model.
Notes
All shelves, door trays and racks are removable.
Important: Refrigerator accessories must not be washed in a dishwasher.
A
. Cool Compartment: least cold area
B
D F NL E P GR
GB
I
S N FIN
DK
63501003GB.fm Page 2 Thursday, March 2, 2006 3:30 AM
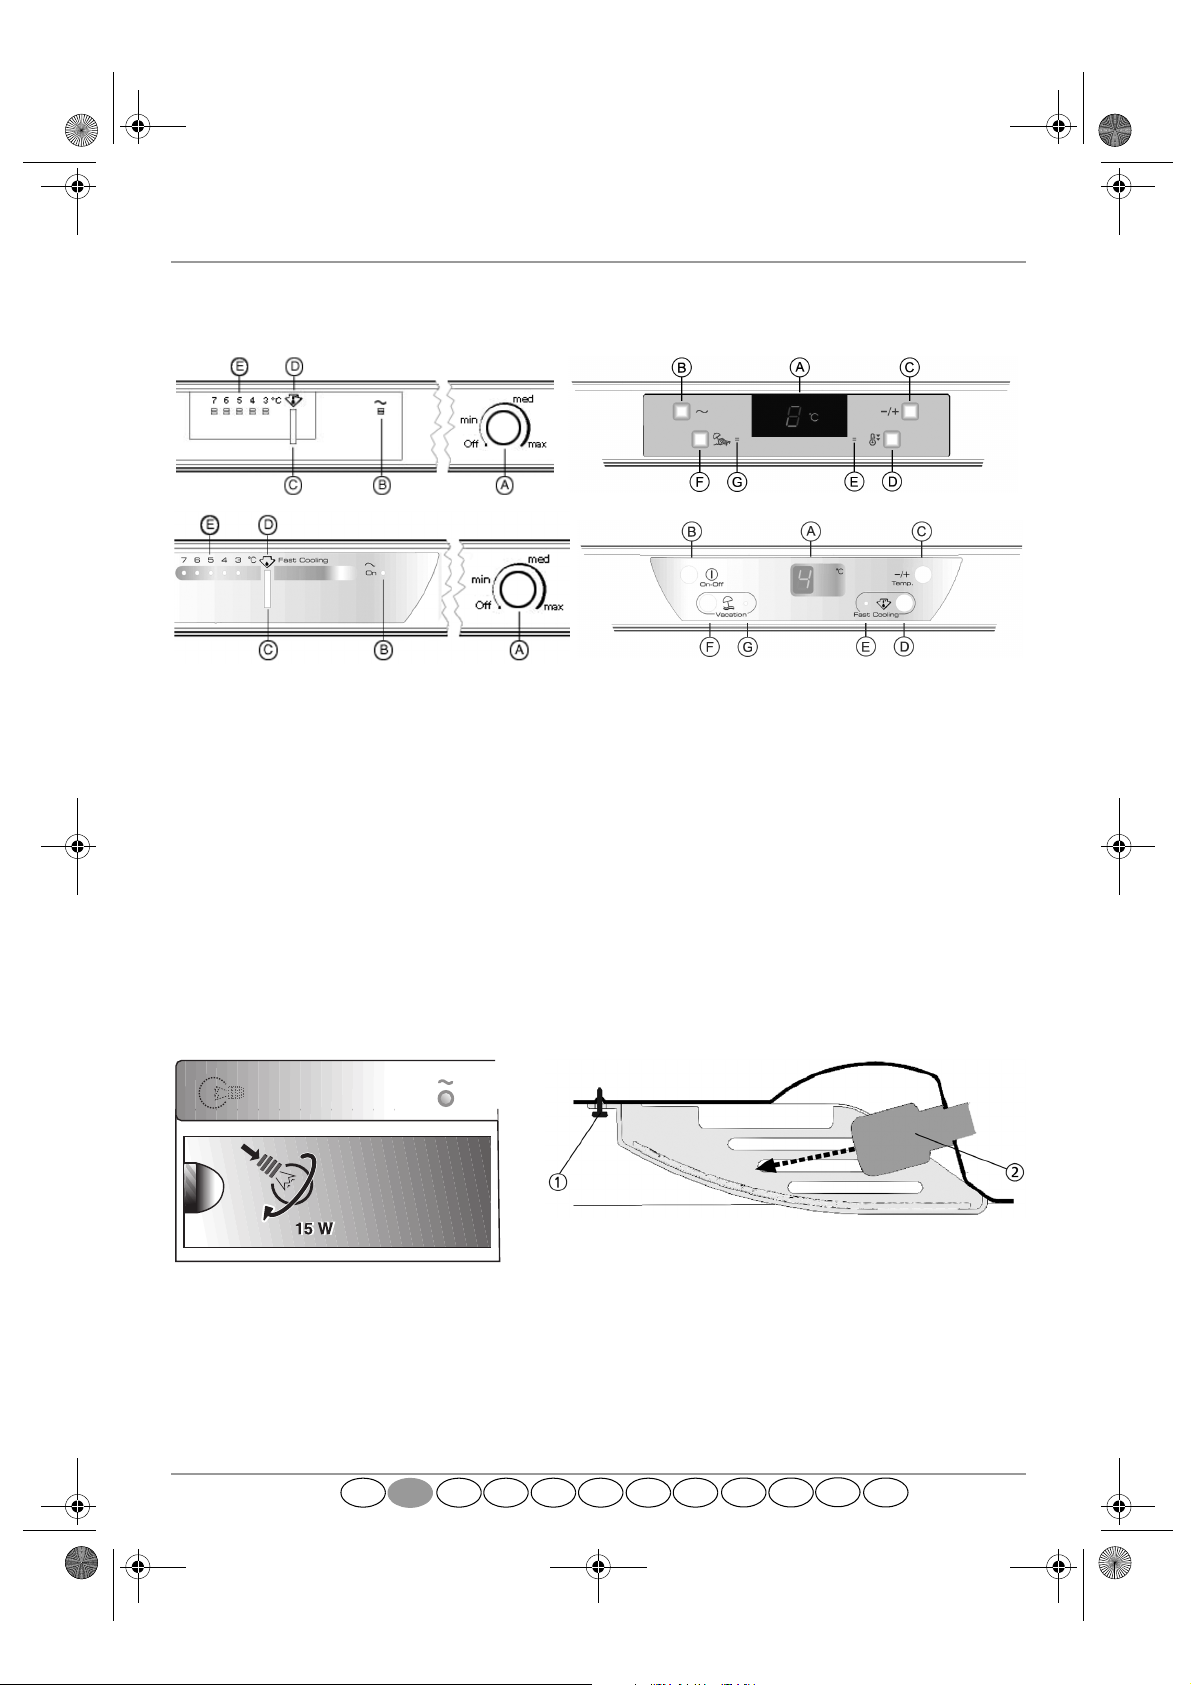
Refrigerator compartment controls
Thermostat knob.
A.
Green LED: indicates that the appliance is ON.
B.
If the LED blinks, contact the After-sales
Service.
Fast Cooling button; the function switches off
C.
automatically after approximately 6 hours.
Fast Cooling function activated.
D.
Thermostat knob setting indicator.
E.
The refrigerator can operate at ambient temperatures between +10°C and +38°C. Optimal performance is obtained
at temperatures between +16°C and +38°C.
: The ambient air temperature, the frequency of door opening and the position of the appliance can affect the
Note
internal temperatures of the refrigerator. These factors must be taken into account when setting the thermostat.
(depending on the model)
Display indicating the set temperature. If the
A.
display indicating the set temperature blinks,
contact the After-sales Service.
ON/OFF button.
B.
Temperature selection button.
C.
Fast Cooling button. The function switches off
D.
automatically after approximately 6 hours.
Fast Cooling function activated.
E.
“Vacation” function activation button: for
F.
prolonged disuse.
“Vacation” function activation indicator.
G.
Removing the light bulb Replacing the bulb
Unscrew the light bulb as shown in the figure.
1.
D F NL E P GR
5019 635 01003
GB
Loosen the screw and remove the lamp cover.
1.
When replacing the bulb, bear in mind that this
2.
appliance is fitted with a special bulb (15W with
bayonet fitting); to replace do not unscrew, but pull
towards the inside of the appliance (as indicated by
the arrow).
Refit the lamp cover and secure it with the screw.
3.
I
S N FIN
DK
 Loading...