

Whirlpool AKZ 233/IX, AKZ 179/IX, AKZ 179/WH, AKZ 179/NB, AKZ 680 IX INSTRUCTION FOR USE

INSTRUCTION FOR USE
INSTALLATION ............................... 17
ADVICE FOR SAFEGUARDING THE
ENVIRONMENT............................................20
IMPORTANT NOTES....................................20
BEFORE USING THE OVEN.........................21
OVEN ACCESSORIES...................................22
CARE AND MAINTENANCE........................23
TROUBLESHOOTING GUIDE......................27
AFTER SALES SERVICE................................27
To make the most of your new oven, read the user's instructions carefully and keep them on hand
for consultation in the future.
16
INSTALLATION
Recommendations
IMPORTANT: Disconnect the oven from the mains before carrying out any installation work
or servicing.
Installation must be carried out by a qualified technician in accordance with the manufacturer's
•
instructions and in compliance with local regulations.
Unpack the oven and make sure that the oven has not been damaged during transport and that the
•
oven door closes pr operly. I f you are no t sure c ontact the de aler or the ne arest serv ice ce ntre.
After remo ving t h e ov en from its packaging , leave it on th e po l y s ty rene base to preve n t it f rom be ing
•
damaged.
When installing the oven it is advisable to wear protective gloves.
•
The oven is provided with two side handles (B) to facilitate installation (fig. 7).
•
Preparing the housing unit
Kitchen units in contact with the oven must be heat resistant (90 °C min).
•
Cut the kitchen unit and worktop to fit before installin g the oven . Car eful ly remove any shavings or
•
sawdust that could prevent the oven from running properly.
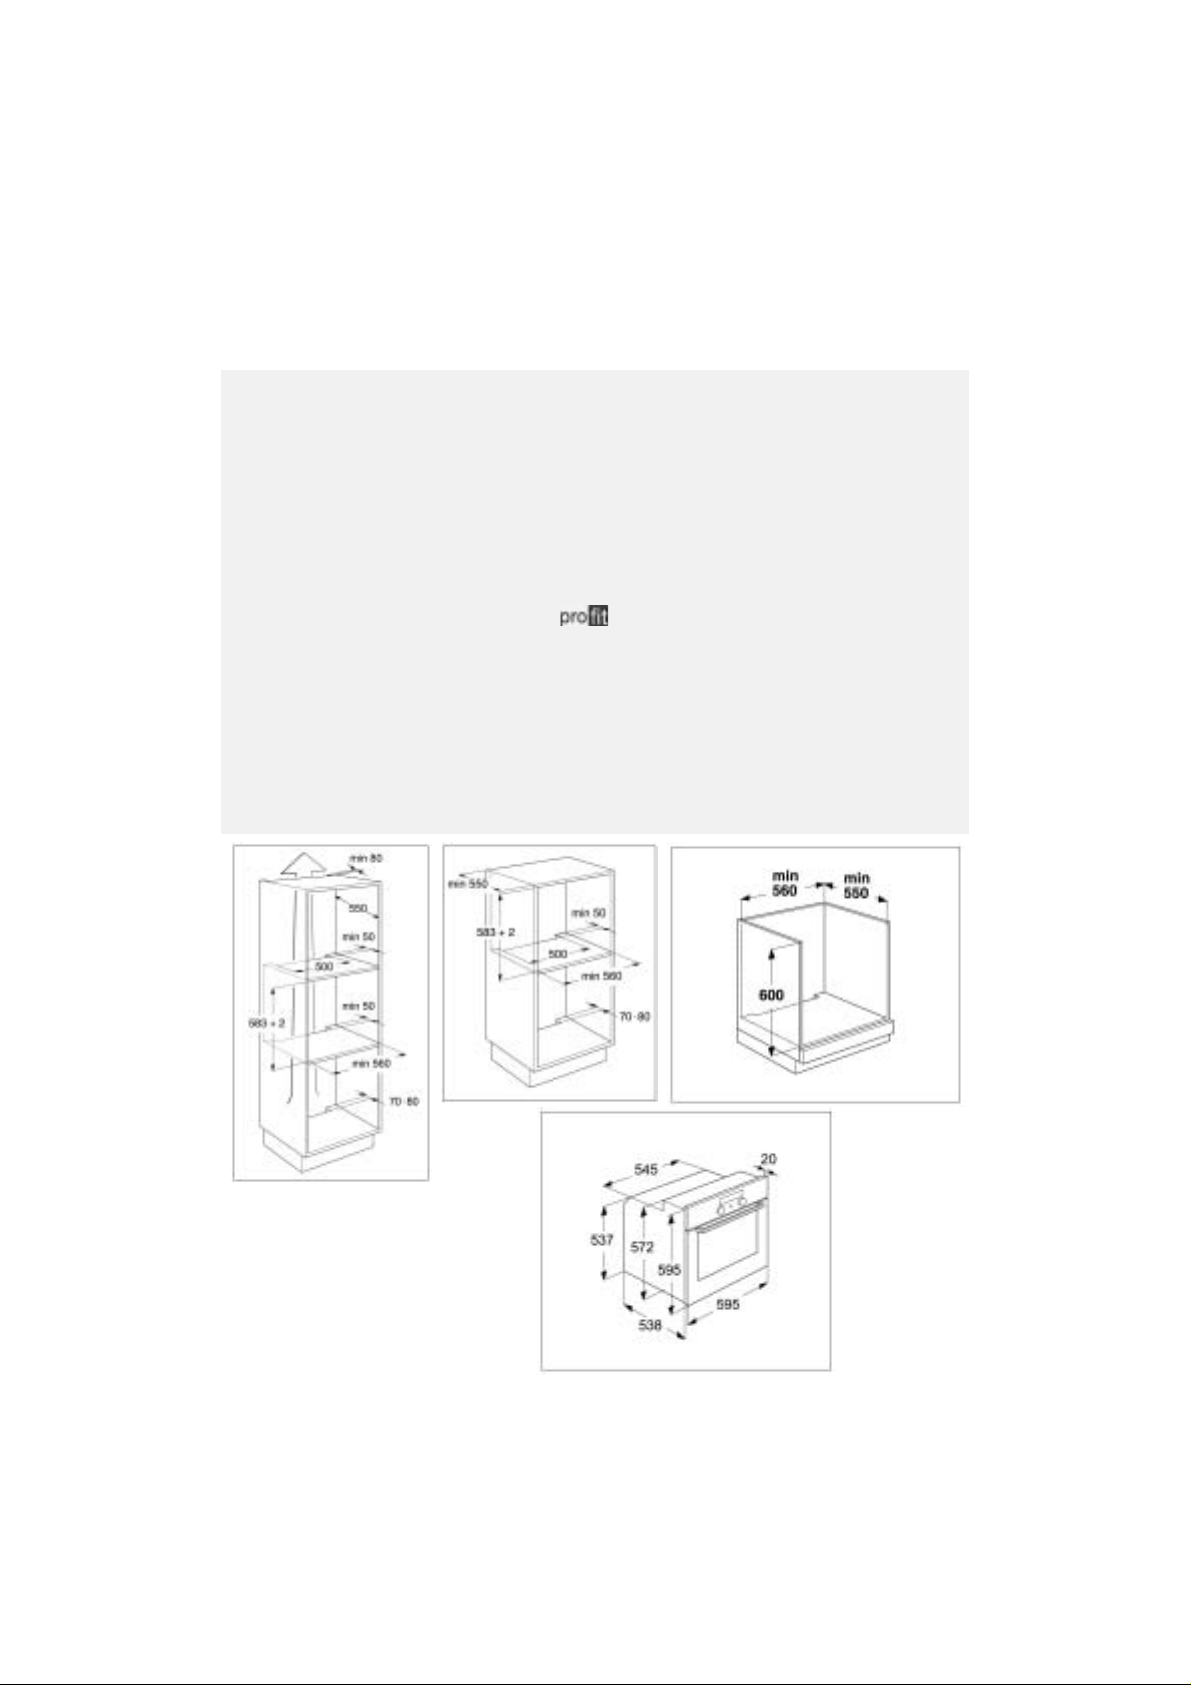
The dimensions of the housing units in which the oven can be installed are shown in figures 1, 2 and 3.
•
The dimensions of the oven are shown in figure 4.
To allow for proper ventilation, an opening should be left at the bottom of the housing unit. Pay
•
attention to the dimensions. The bottom of the oven must not be accessible after installation.
During installation make sure that the sides of the oven do not touch the adjacent units.
•
2
3
1
4
17
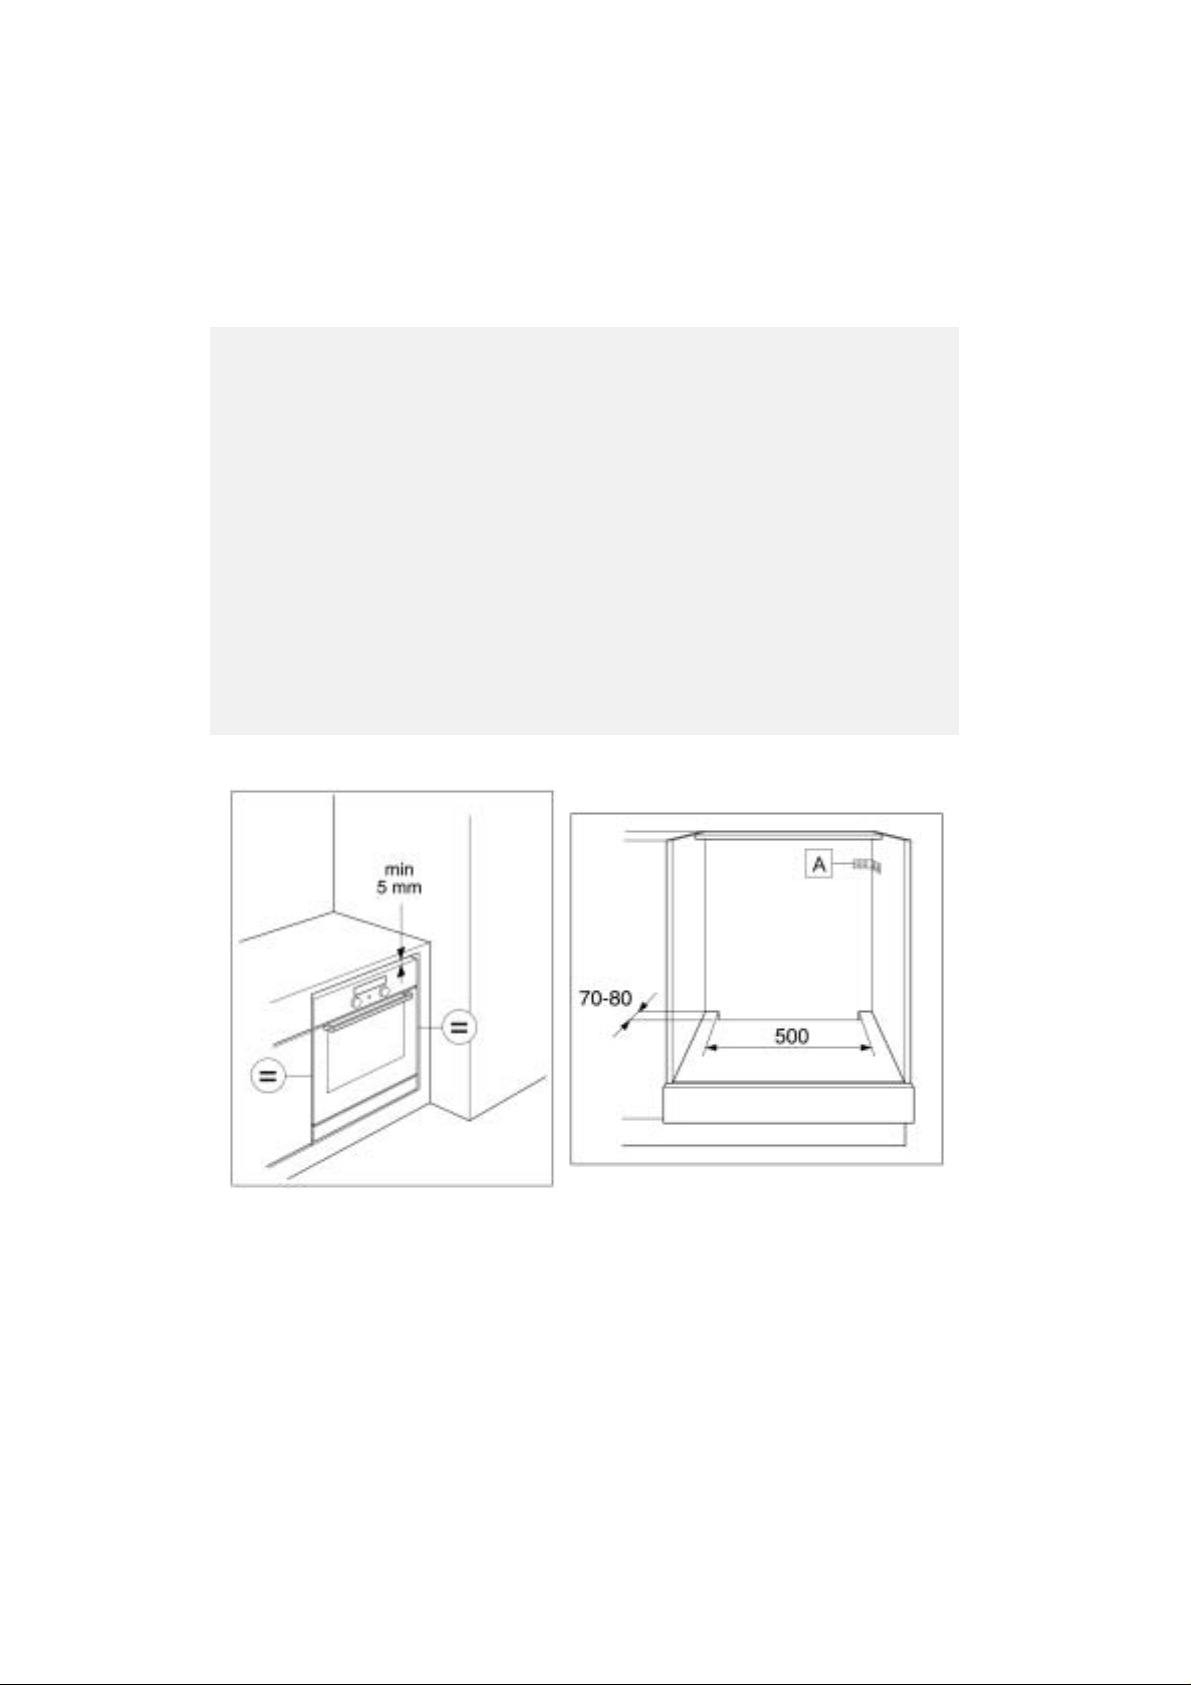
For ovens installed under the worktop, leave a minimum clearance of 5 mm between the upper edge
•
of the oven and the lower edge of the worktop (fig. 5). For correct operation of the appliance, this
clearance must always be unobstructed.
If the kitchen unit is not securely fixed to the wall, it must be anchored with standard brackets (A)
•
(fig. 6).
Electrical connection
Regulations req u ire tha t the appliance be earthed.
Connection to the mains must be carri ed out by a qualified electrician in accordance with the
•
manufacturer's instructions and in compliance with local regulations.
The installer is responsible for connecting appliances correctly to the mains and for observing the safety
•
regulations.
The oven power cable must be long enough to connect the built-in oven to the mains.
•
Observanc e of s afet y di rec tives re quir es th at a mult i-po le s wit ch wi th a mini mum c onta ct ga p of 3mm
•
be used for the installation.
Do not use multiple plug ada pt er s or exten sio n lead s.
•
After the oven has been installed, the electrical components must be inaccessible.
•
18
6
5

Connecting the oven to the power supply
Make sure that the voltage indicate d on the rating plate is the same as the mains voltage.
•
The rating plate is on the front edge of the oven (visible when the door is open).
If the power cable is not present proceed as follows:
•
1. Remove the two fa ste ning screws of the terminal box co ve r loca ted on the bottom part of the
oven's rear covering.
2. Remove the cover to gain access to the terminal box and insert the power cable (see table) through
the opening located on the bottom of the oven.
Power supply cable table
N° of leads Type of cable
1N+
3. Connect the cable to the terminal box, tighten the screws as far as they will go and secure it to the
cable fastener.
4. Put the cover back on by inserting the two blades in the slots and fasten it with the two screws.
~
H05 RR-F 3 X 1,5 mm²
Securing the oven
Lift up the oven getting hold of it by the handles (B) on the sides and insert it into the housing
•
unit, being careful no t to trap the power supply cable (f ig. 8).
Center the oven in the housing unit before securing it.
•
The oven comes with spacers already fitted to facilitate the anchoring of the oven to the
•
housing unit with the screws provided (as shown in fig. 9).
7
8
9
19
 Loading...