

WHIRLPOOL AKR 809 MR User Manual
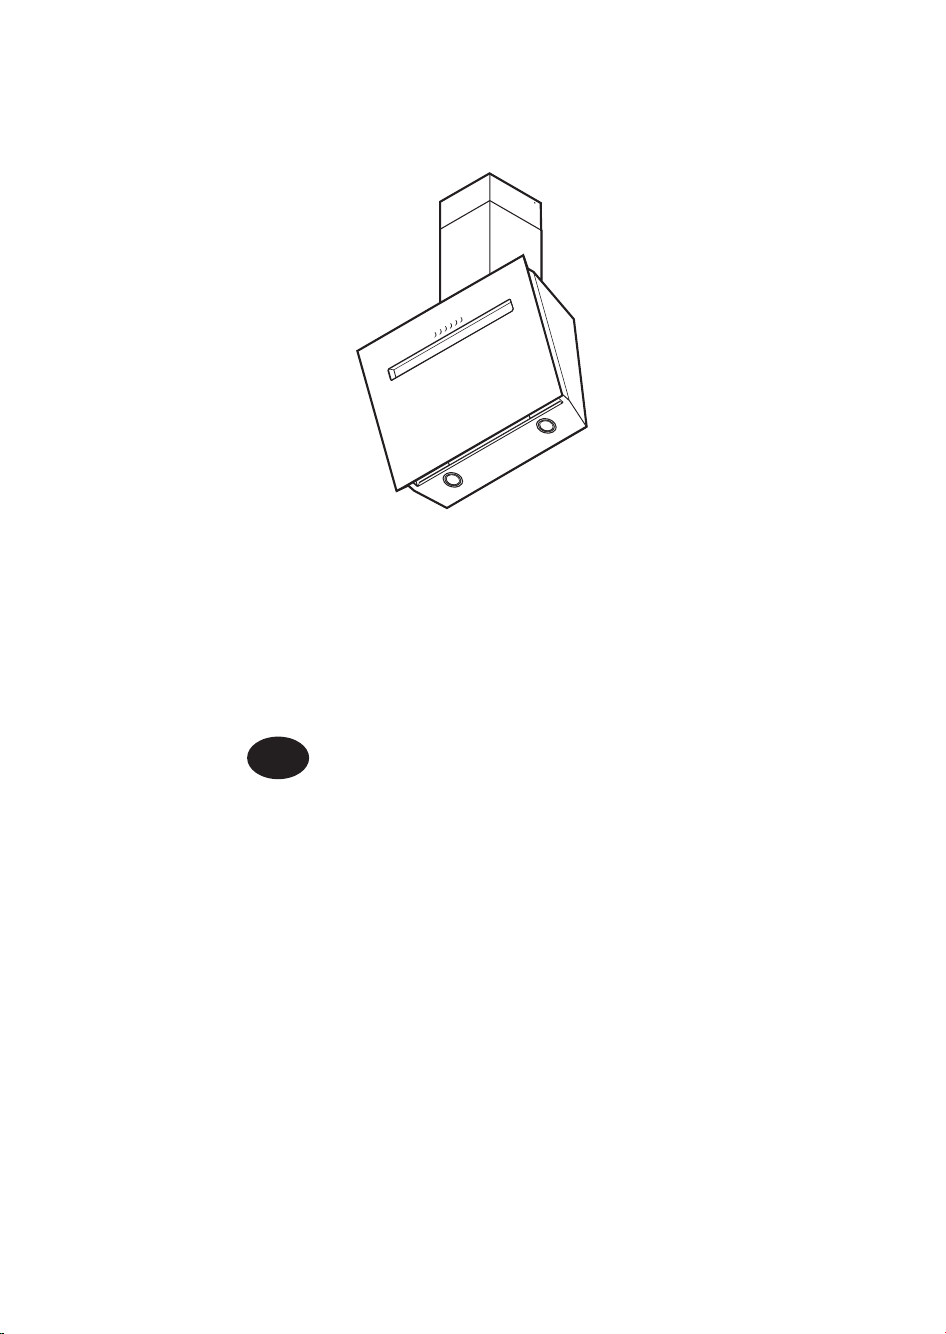
User and maintenance manual
EN

IMPORTANT SAFETY INSTRUCTIONS
These instructions are also available on the website: docs.whirlpool.eu
YOUR SAFETY AND THAT OF OTHERS IS PARAMOUNT.
This manual and the appliance itself provide important safety warnings that must be read and heeded at all
times.
This is the safety warning symbol, which alerts users to potential hazards to themselves and others.
All safety messages are preceded by the warning symbol and the following words:
DANGER
indicates a hazardous situation which, if not avoided, will cause
serious injury.
WARNING
indicates a hazardous situation which, if not avoided, could cause
serious injury.
All safety messages indicate the nature of the potential hazard/warning and how to reduce the risk of injury,
harm and electric shock resulting from improper use of the appliance. Always comply with the following
instructions:
• Installation and maintenance must be carried out by a qualied technician, in compliance with the
manufacturer’s instructions and the local safety regulations. Do not repair or replace any part of the
appliance unless specically stated in the user manual.
• The appliance must be disconnected from the mains before carrying out any kind of installation work.
• It is compulsory to earth the appliance (however, it is not necessary for class II hoods identied by the
symbol on the specications label).
• The power cable must be long enough to connect the appliance to the power supply socket.
• Do not pull on the power cable to unplug the appliance.
• After installation, the electrical components must not be accessible to the user.
• Do not touch the appliance with wet hands and do not operate it when barefoot.
• This appliance may not be used by children (aged 8 and above), persons with any physical, sensory or
mental impairment, or persons lacking experience or knowledge of the appliance, unless they are
supervised or given instruction on how to use it safely and are made aware of the hazards its use might
entail. Children must not play with the appliance. Cleaning and user maintenance must not be carried out
by children unless they are under adult supervision.
• Do not repair or replace any part of the appliance unless specically recommended in the manual. Any
defective parts must be replaced with original spare parts. All other maintenance work must be carried
out by a qualied technician.
• Children must be supervised to ensure that they do not play with the appliance.
• When drilling holes into the wall or ceiling, take care not to damage any electrical wiring and/or
pipework.
• Ventilation ducts must always discharge exhaust air to the outside.
• Exhaust air must not be discharged through a ue used for extracting fumes produced by gas-burning or
any other fuel-burning appliances; it must have a separate outlet. All national exhaust air regulations
must be observed.
EN3

• If the hood is used at the same time as other appliances that use gas or other fuels, the negative pressure
-5
of the room must not exceed 4Pa (4x10
bar). Please ensure, therefore, that the room is adequately
ventilated.
• The manufacturer does not accept any liability for inappropriate use of the appliance or for incorrect
setting of the controls.
• Regular maintenance and cleaning ensure that the appliance works correctly and achieves optimum
performance. Regularly clean all stubborn surface dirt, to avoid a build-up of grease. Regularly remove
and then clean or replace the lters.
• Failure to observe the instructions for cleaning the hood and cleaning and replacing the lters may result
in a re.
• The extractor hood must never be opened without the grease lters tted and should be regularly
monitored.
• When using the extractor hood above a gas appliance, ensure that any burners in use are covered by a
pan.
• If three or more gas cooking zones are in use, the hood should be set at power setting 2 or higher. This
prevents the build-up of excess heat in the appliance.
• Before touching any lamps, ensure that they are cold.
• The hood must not be used or left without properly tted lamps, as this may cause electric shock.
• Wear protective gloves when carrying out any installation and maintenance work.
• This product is not suitable for outdoor use.
• When the hob is in use, accessible parts of the hood may become hot.
KEEP THESE INSTRUCTIONS
EN4

Declaration of Conformity
• This product has been designed, manufactured and marketed in compliance with:
- the ecodesign requirements of European Regulations n. 66/2014, n. 327/2011, n. 244/2009, n. 245/2009, n. 1194/2012, n. 2015/1428.
The appliance's electrical safety can only be guaranteed if it is correctly connected to an approved earthing system.
Energy saving tips
• Switch on the hood at the lowest speed setting when you start cooking and allow it to run for a few minutes after you have nished cooking.
• Only increase the speed if there is a lot of smoke or steam and only use the "Boost" setting(s) in extreme situations.
• Replace the carbon lter(s) when necessary, to maintain ecient odour reduction.
• Clean the grease lter(s) when necessary, to maintain eciency.
• Use a pipe with the maximum diameter specied in this manual, to optimise eciency and reduce noise levels to a minimum.
INSTALLATION
After unpacking the appliance, check that it has not been damaged in transit. In the event of problems, contact the dealer or your nearest After-sales Service. To
prevent any damage, only remove the appliance from its polystyrene base at the time of installation.
PREPARING FOR INSTALLATION
WARNING
The minimum distance between the pan support on the hob and the bottom of the hood must be no less than 40 cm for electric hobs and 65cm for gas or mixed
hobs.
Before installation, also check the minimum distances specied in the hob manual.
If the installation instructions for the hob specify a greater distance between the hob and the hood, this distance must be observed.
ELECTRICAL CONNECTION
Check that the voltage specied on the appliance identication plate is the same as the mains voltage.
This information is found on the inside of the hood, under the grease lter.
The power cable (type H05VV-F 3x0.75mm
If the hood is tted with an electric plug, connect the appliance to a socket which complies with current regulations and which is in an accessible location. If no plug
is tted (direct wiring to the mains), or if the socket is not in an accessible location, install a standardised two-pole circuit breaker that will allow complete isolation
from the mains in the event of category III overvoltage, in compliance with the wiring regulations.
If the cable is not tted with a plug, connect the wires according to the following table:
Mains voltage and
frequency
220-240V – 50Hz
GENERAL RECOMMENDATIONS
Before use
Remove any protective cardboard, transparent lm and adhesive labels from the accessories. Check whether the appliance has been damaged in transit.
During use
Do not place heavy items on the appliance as this may cause damage. Do not expose the appliance to atmospheric agents.
Wire connection
: yellow/green
N : blue
L : brown
this appliance is heavy; the hood must be lifted and installed by two or more people.
2
) must only be replaced by an authorised electrician. Contact an authorised Service Centre.
EN5
SAFEGUARDING THE ENVIRONMENT
Disposing of packaging material
The packaging material is 100% recyclable and is marked with the recycling symbol (
responsibly and in full compliance with local authority regulations governing waste disposal.
Scrapping the product
- This appliance is marked in compliance with European Directive 2012/19/EU on Waste Electrical and Electronic Equipment (WEEE).
- By ensuring that this product is disposed of correctly, you will help prevent potentially negative consequences for the environment and human health.
- The
symbol on the product or on the accompanying documentation indicates that it should not be treated as domestic waste but must be taken to an
appropriate collection centre for the recycling of electrical and electronic equipment.
Scrapping household appliances
• This appliance is manufactured using recyclable or reusable materials. Scrap the appliance in accordance with local regulations on waste disposal. Before
scrapping, cut o the power cable so that the appliance cannot be connected to the mains.
• For further information on the treatment, recovery and recycling of household appliances, contact the competent local authority, the domestic waste
collection service or the shop where you purchased the product.
). Do not dispose of the various packaging carelessly, but do so
TROUBLESHOOTING GUIDE
The appliance does not work:
• Check the mains voltage and whether the appliance is connected to the power supply;
• switch the appliance o and on again to see if the fault persists.
The hood is not extracting air suciently:
• Check that the air extraction speed is set to the desired level;
• Check that the lters are clean;
• Check the air vents for any obstructions.
The lamp does not work:
• Check the bulb and replace if necessary;
• Check that the bulb has been tted correctly.
AFTER-SALES SERVICE
Before calling the After-sales Service:
1. Check whether you can solve the problem yourself by following the suggestions given in the “Troubleshooting guide”.
2. Switch the appliance o and on again to see if the fault persists.
If the fault persists after carrying out the above checks, contact the nearest After-sales Service.
Always provide:
• A brief description of the fault;
• The type and exact model of the appliance;
• The Service number (the number after the word "SERVICE" on the identication plate), located on the inside of the appliance. The Service number is also stated
in the warranty booklet;
• Your full address;
• Your telephone number;
If any repairs are required, please contact an authorised After-sales Service Centre (to ensure that original spare parts are used and repairs are carried out correctly).
EN6
CLEANING
WARNING
IMPORTANT: Do not use corrosive or abrasive detergents. If any such products unintentionally come into contact with the appliance, clean the
appliance immediately with a damp cloth.
• Clean the surfaces with a damp cloth. If it is very dirty, add a few drops of washing-up detergent to the water. Finish o with a dry cloth.
IMPORTANT: Do not use abrasive sponges or metallic scrapers or scourers. Over time, these can ruin the enamel surfaces.
• Use detergents specically designed for cleaning the appliance and follow the manufacturer's instructions.
IMPORTANT: Clean the lters at least once a month to remove oil and grease residue.
-Do not use steam-cleaning equipment.
- Disconnect the appliance from the mains.
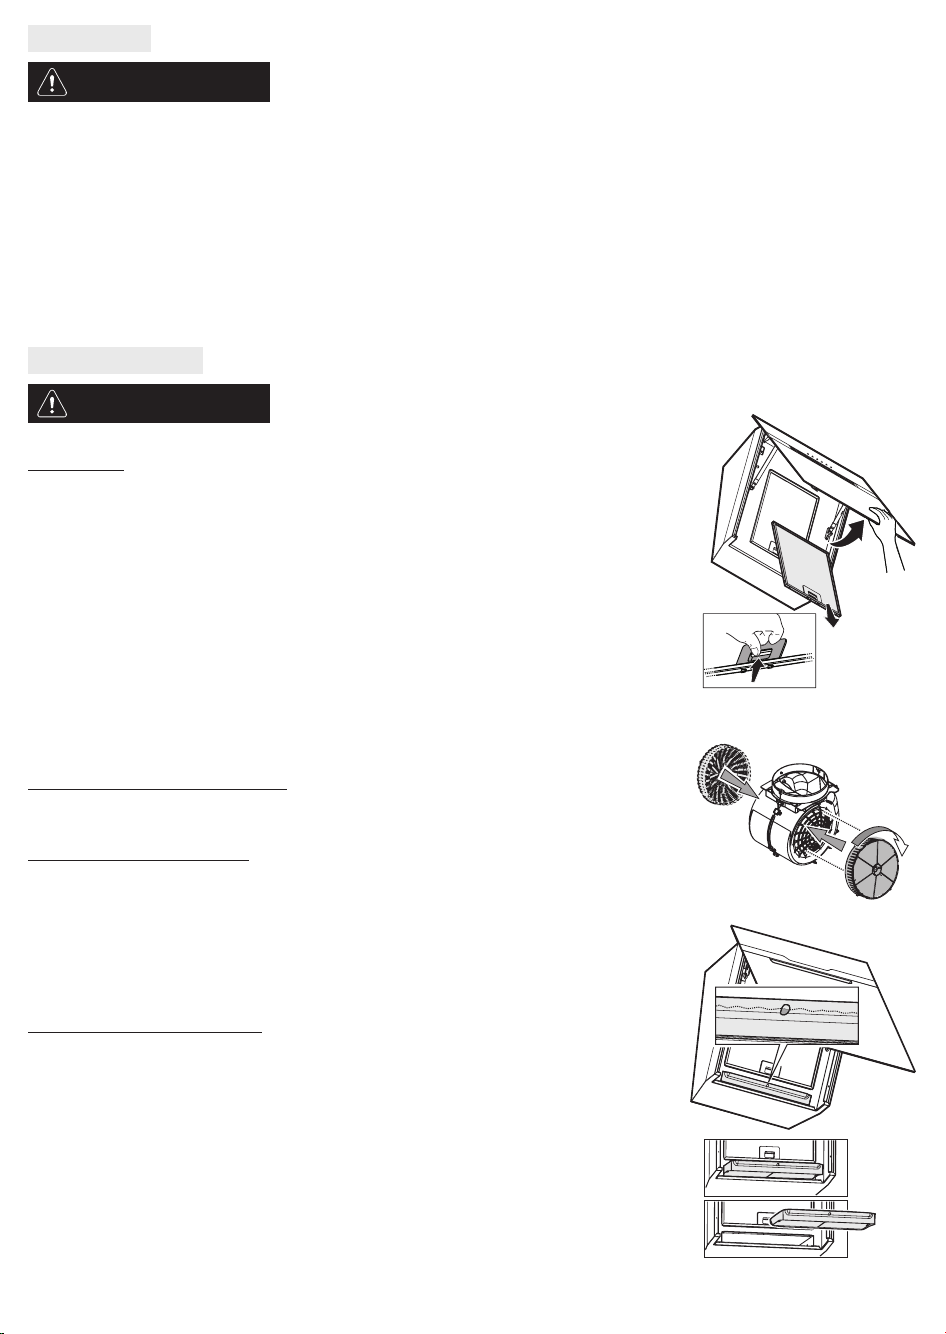
MAINTENANCE
WARNING
GREASE FILTERS
The metal grease lter has an unlimited service life and must be washed once a month by hand or in a dishwasher at low
temperatures on a short cycle. Cleaning in a dishwasher may cause discolouration of the grease lter, but its ltering
eciency is unaected.
Open the extractor panel (turn upwards).
Please note: It is not necessary to remove the panel.
Pull out the handle to remove the lter.
Once the lter has been washed and left to dry, proceed in reverse order to ret the lter.
-Wear protective gloves.
- Disconnect the appliance from the mains.
CARBON FILTER (for ltration models only)
This lter retains the unpleasant odours produced during cooking.
Replace the carbon lter every 4 months.
Fitting or replacing the carbon lter
1. Disconnect the hood from the mains.
2. Open and remove the extractor panel from its housing.
3. Remove the grease lters.
4. Fit one carbon lter on each side, covering both protective grilles for the motor impeller.
Turn the lters clockwise to secure them to the central pins.
Proceed in reverse order to remove.
Ret the grease lters and extractor panel.
Maintenance of the condensation pan
The inspection window at the front of the condensation collection pan allows you to check if the pan is full, or being
drained or cleaned.
In any event, the pan must be drained and cleaned AT LEAST once a week, or more frequently, based on the level of usage
of the hood.
The pan can be cleaned by hand or in a dishwasher at low temperatures on a short cycle.
EN7
REPLACING THE LAMPS
The hood is equipped with an LED lighting system.
LEDs ensure excellent illumination, have a service life up to 10 times longer than traditional bulbs, and oer up to 90%
energy savings.
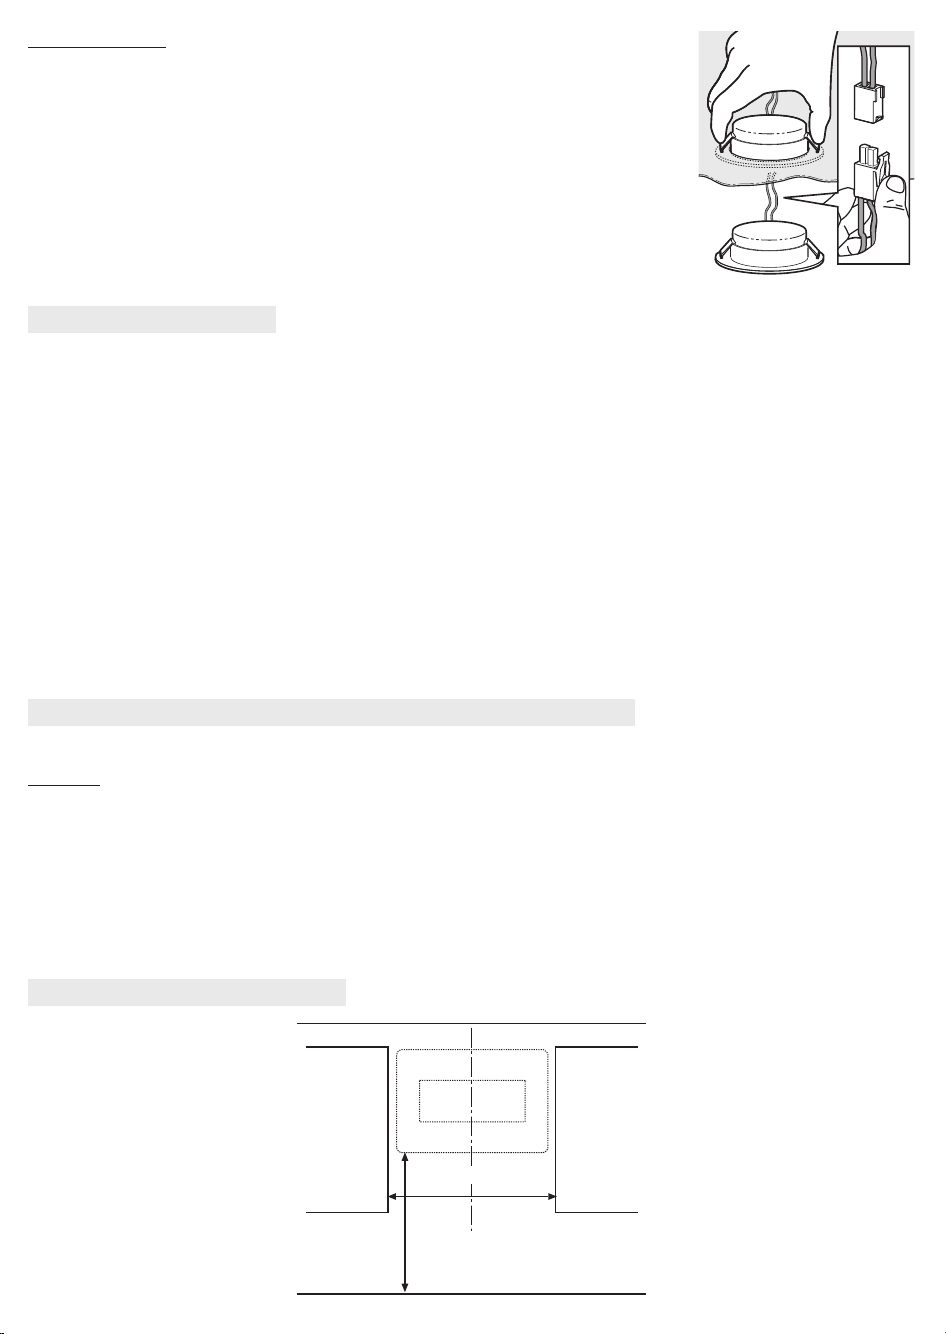
To replace a lamp, proceed as follows:
1. Remove the grease lters.
2. Access the lamps from inside the hood.
3. Press the release clips to release the lamp.
4. Remove the lamp from the hood frame.
5. Disconnect the terminal.
Proceed in reverse order to t the replacement lamp.
NB: To purchase an LED lamp, please contact the Technical After-sales Service Centre.
MATERIALS SUPPLIED
Remove all the components from the packages. Check that all the components are included.
• Assembled hood with motor, bulbs and grease lters tted (1 or 2 grease lters depending on the model).
• Installation and operating instructions
• 1 x mounting template
• 1 x Torx T10 adapter
• 1 x Torx T20 adapter
• 1 x deector
• 5 x wall plugs, dia. 8 mm
• 5 x screws dia. 5x45
• 3 x screws dia. 3.5x9.5
• 1 x washer dia. 5.3x2
• 1 x cable clamp
• Power cable
• 2 x deectors
• 1 x telescopic chimney section
• 1 x chimney support bracket
INSTALLATION – PRELIMINARY FITTING INSTRUCTIONS
The hood is designed for installation in "lter mode".
Filter mode
The air is ltered as it passes through one or more carbon lters and is recycled back into the atmosphere.
IMPORTANT: Check that the air recirculation process runs smoothly.
If the hood does not have the carbon lter(s), order one/them and t before use.
The hood must be tted away from very dirt y areas, windows, doors and sources of heat.
The hood comes with all the materials necessary for installation on the majority of walls/ceilings. However, a qualied technician must ensure that the materials are
suitable for the type of wall/ceiling in question.
INSTALLATION DIMENSIONS
Side units Side units
65 cm (gas or mixed stoves)
40 cm (electric stoves)
min. 880 mm
Central line
Hob surfaces
EN8
 Loading...