How it Works
Log In / Sign Up
Buy Points
How it Works
FAQ
Contact Us
Questions and Suggestions
Users
WHIRLPOOL
Loading...
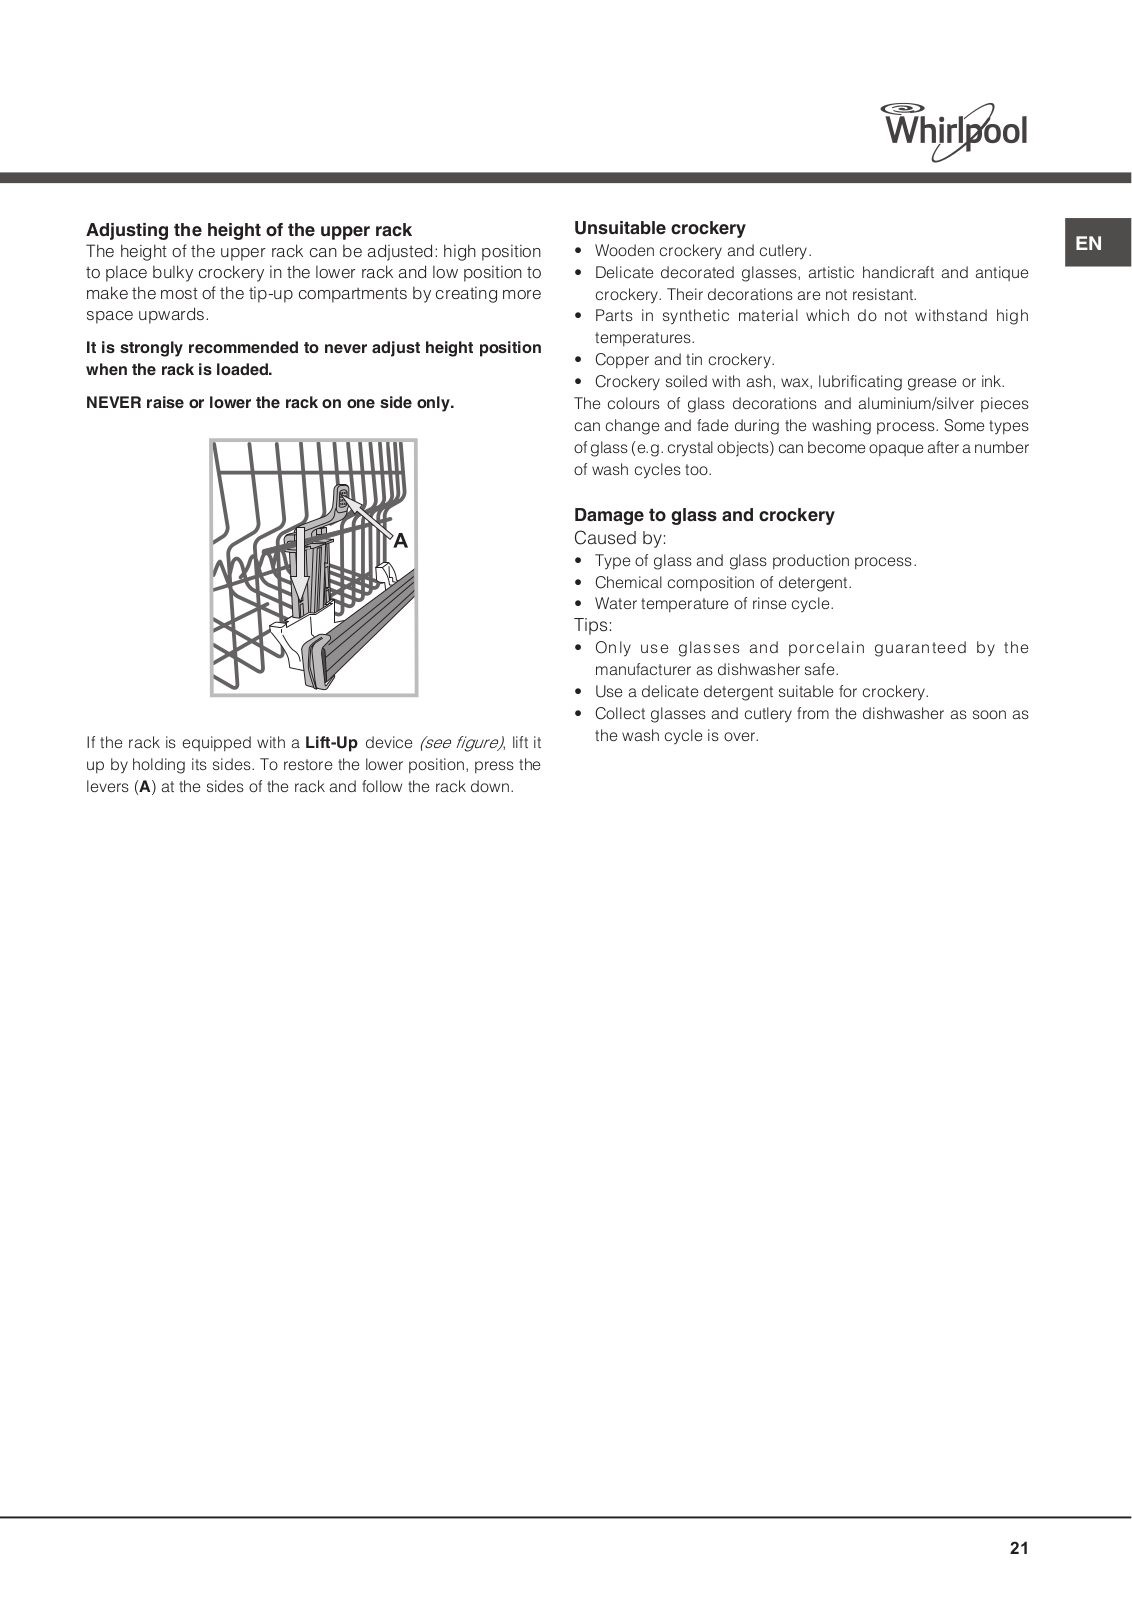
A
ADG 352
ADG 352/1 IX
5
ADG 352 AV
6
ADG 352 ME
6
ADG 352 S AV
3
ADG 352 S IX
ADG 352 S WH
ADG 352 WH
7
ADG 3540
5
ADG 3540 IX
5
ADG 3540 NB
5
ADG 3540 WH
4
ADG 3550
5
ADG 3550 AV
8
ADG 3550 IX
10
ADG 3550 NB
9
ADG 3550 WH
3
ADG 3552
2
ADG 3552 AV
3
ADG 3552 IX
3
ADG 3552 NB
2
ADG 3552 WH
3
ADG 3554
2
ADG 3554 AVM
10
ADG 3554 IXM
6
ADG 3554 WHM
8
ADG 3556
4
ADG 3556 AVM
11
ADG 3556 IXM
11
ADG 3556 NBM
9
ADG 3556 WHM
11
ADG 361
ADG 3756
2
ADG 3756 IXM
5
ADG 3756 NBM
3
ADG 3800
10
ADG 3960
ADG 3960 AV
3
ADG 3960 NB
3
ADG 3960 WH
3
ADG 3962
ADG 3966
2
ADG 3966 IXM
10
ADG 3966 IXM/1
2
ADG 3966 NBM
8
ADG 3966 WHM
8
ADG 4000
2
ADG 4000/1
3
ADG 400 IX
ADG 402
5
ADG 422
13
ADG 422 IX
7
ADG 4340
6
ADG 4440
2
ADG 4440 FD
4
ADG 4440 IX
3
ADG 4440 NB
3
ADG 4440 WH
2
ADG 450
6
ADG 4500
10
ADG 4500 IX
ADG 450/3
4
ADG 4540
10
ADG 455
2
ADG 4550
5
ADG 4550/1 IX
5
ADG 4550/1 NB
5
ADG 4550/1 WH
5
ADG 4550/2 IX
16
ADG 4550/2 NB
8
ADG 4550/2 WH
8
ADG 4550 IX
ADG 4551
ADG 4551 IX
5
ADG 4551 NB
4
ADG 4551 WH
5
ADG 4552
4
ADG 4554
2
ADG 4556
5
ADG 4556 M
12
ADG 455 IX
2
ADG 455 WH
ADG 4562
9
ADG 4620
2
ADG 4620 FD
2
ADG 4620 IX
ADG 4620 NB
2
ADG 4620 WH
3
ADG 4624
ADG 4624 FD
2
ADG 4624 IX
2
ADG 4624 NB
ADG 4624 WH
ADG 4756
ADG 4756 M
5
ADG 4800
11
ADG 4820
2
ADG 4820 FD A
2
ADG 4952
ADG 4952/1
2
Loading...
Loading...
Nothing found
ADG 422
Operating Instructions
36 pgs
948.63 Kb
0
User Manual
18 pgs
644.9 Kb
0
User Manual
1 pgs
715.1 Kb
0
User Manual
1 pgs
55.87 Kb
0
User Manual
84 pgs
16.13 Mb
0
User Manual
84 pgs
17.99 Mb
0
User Manual
24 pgs
4.32 Mb
0
User Manual [cz]
11 pgs
2.4 Mb
0
User Manual [hu]
11 pgs
2.35 Mb
0
User Manual [kk]
14 pgs
2.6 Mb
0
User Manual [ru]
32 pgs
6.66 Mb
0
User Manual [sk]
11 pgs
2.41 Mb
0
User Manual [uk]
11 pgs
2.61 Mb
0
Table of contents
Loading...
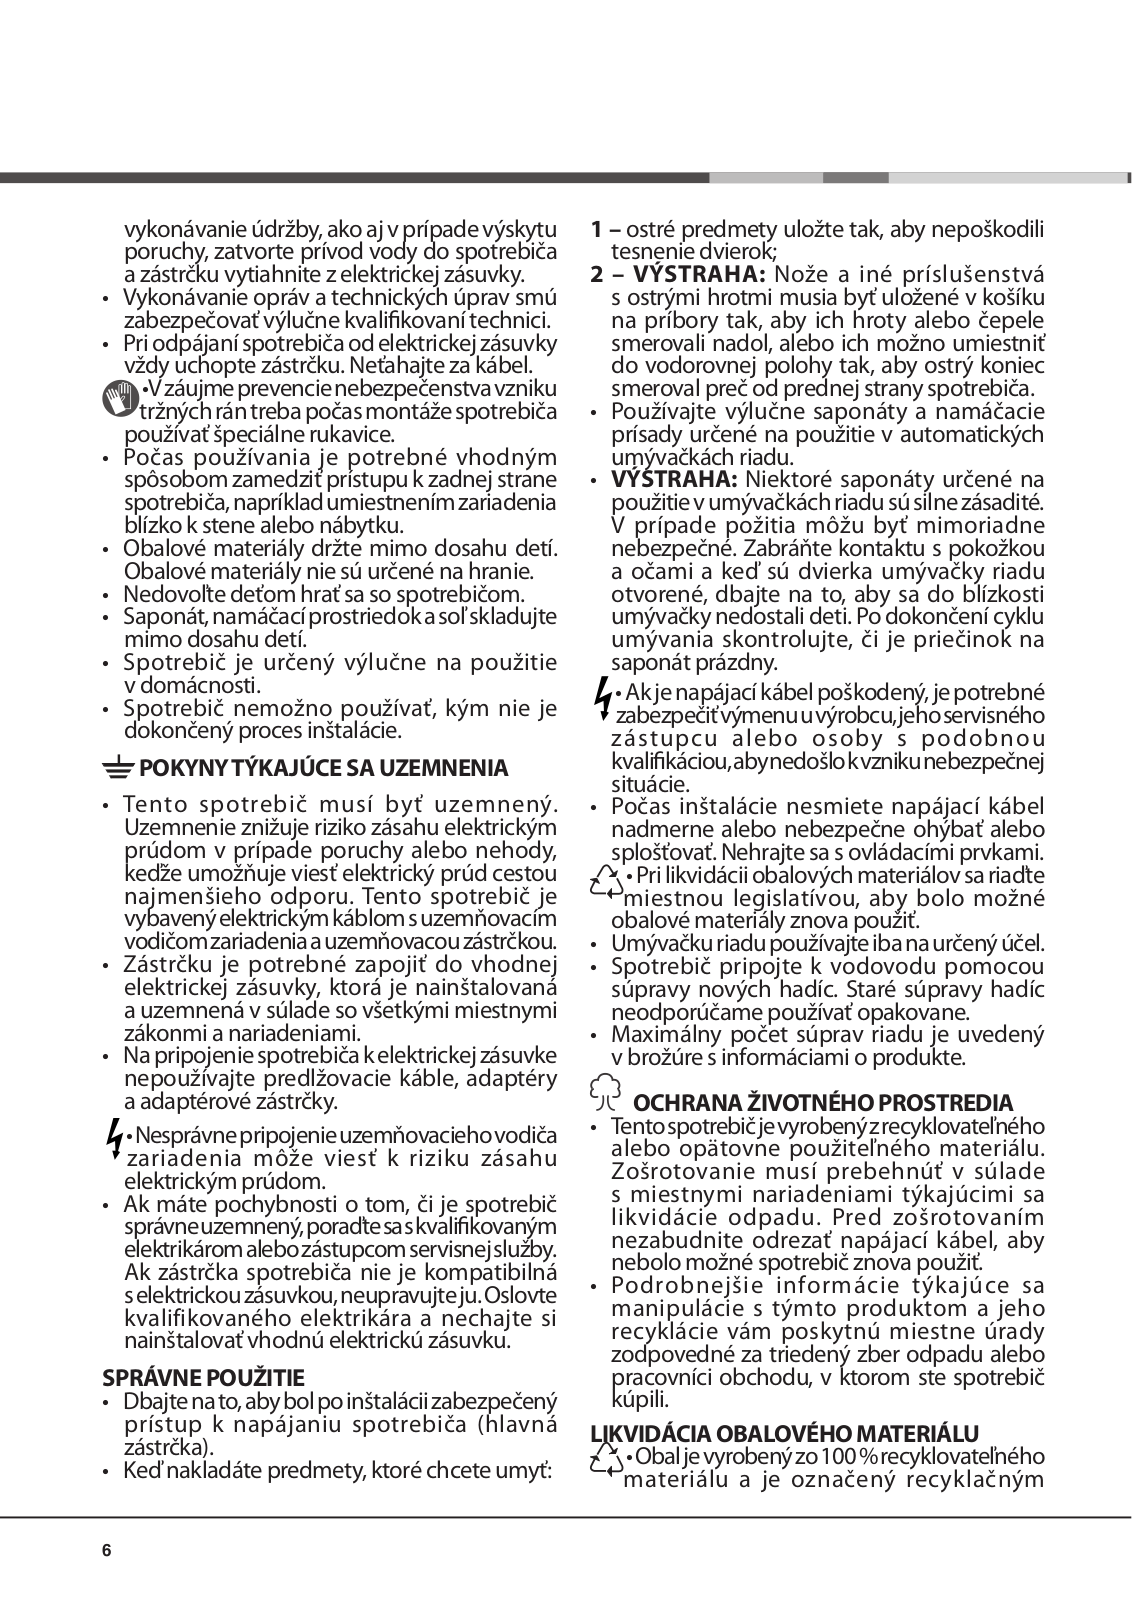
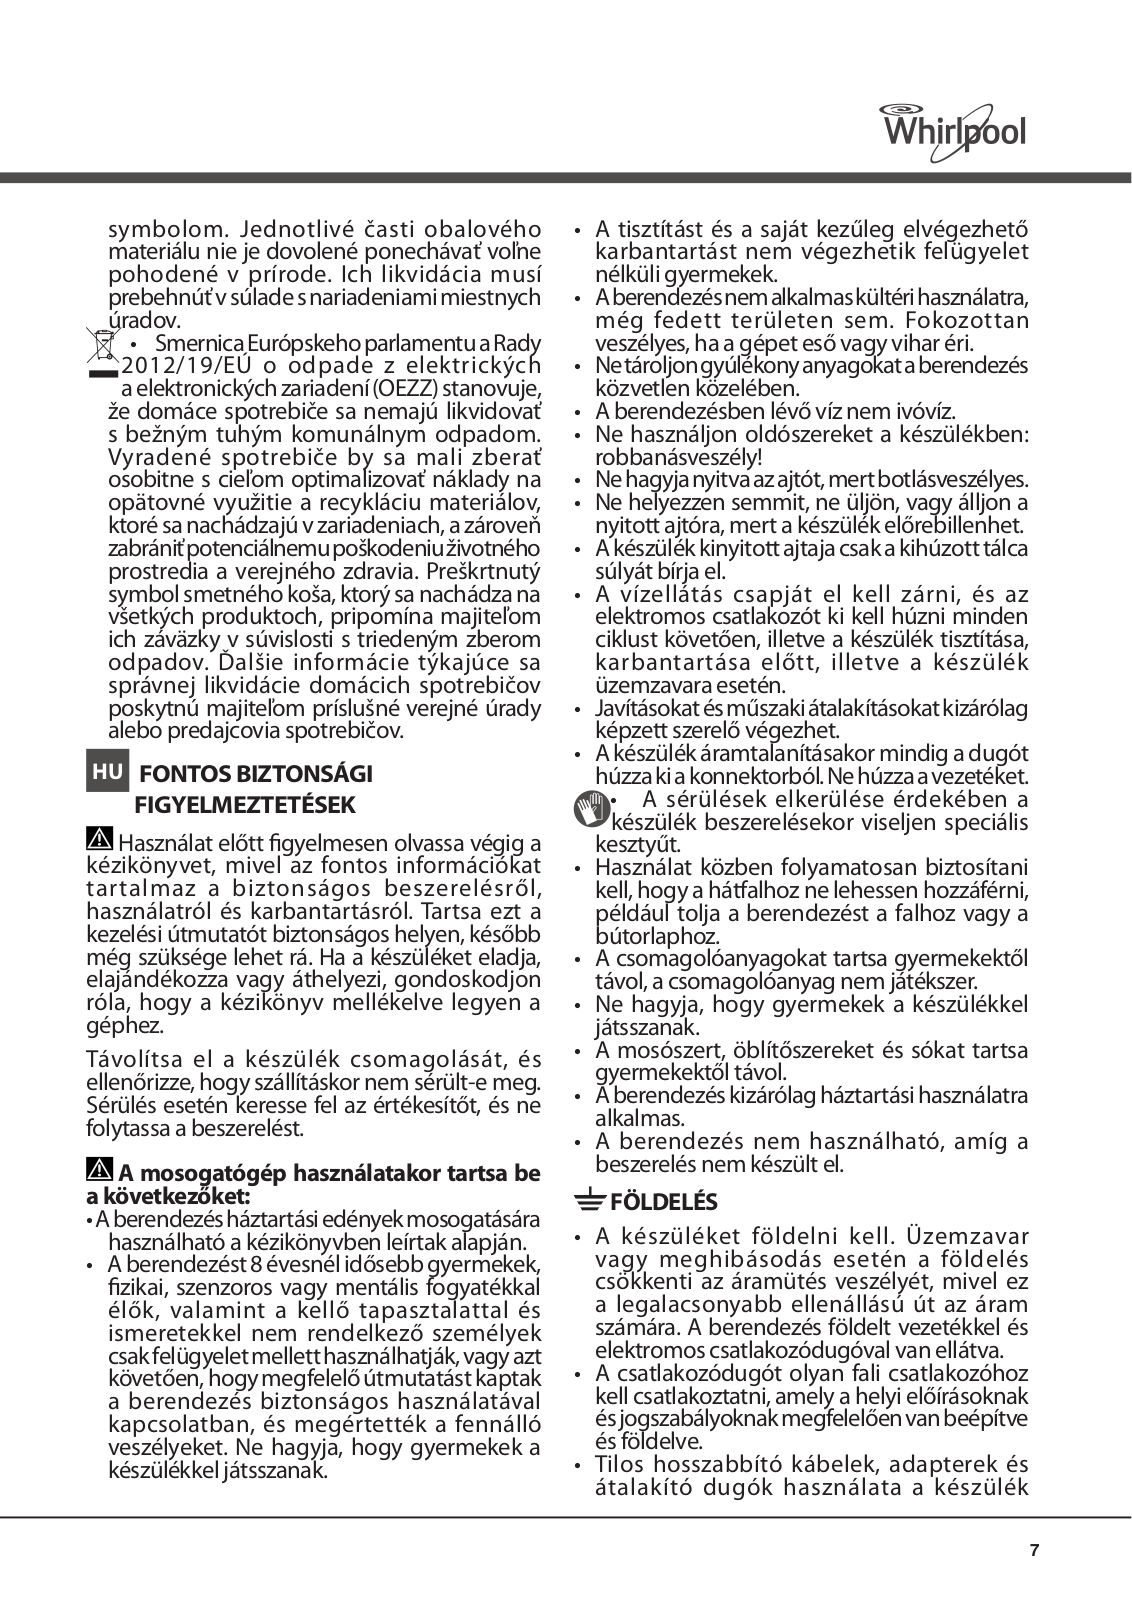
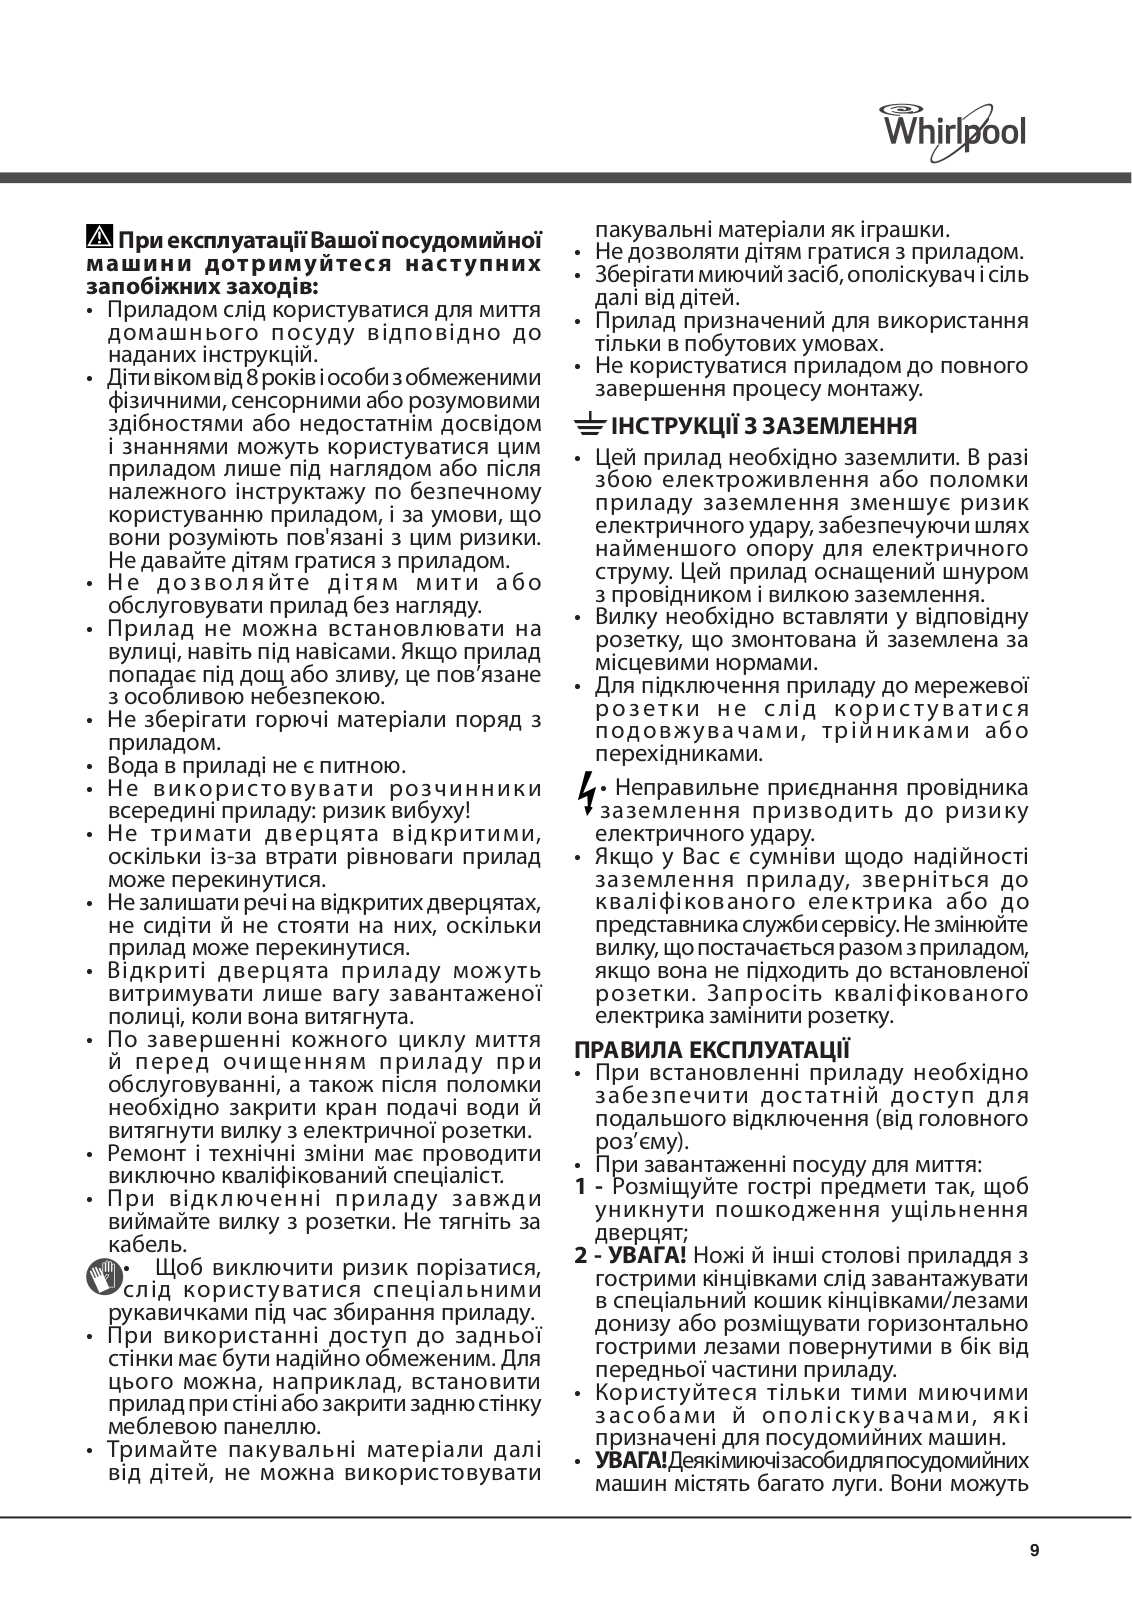
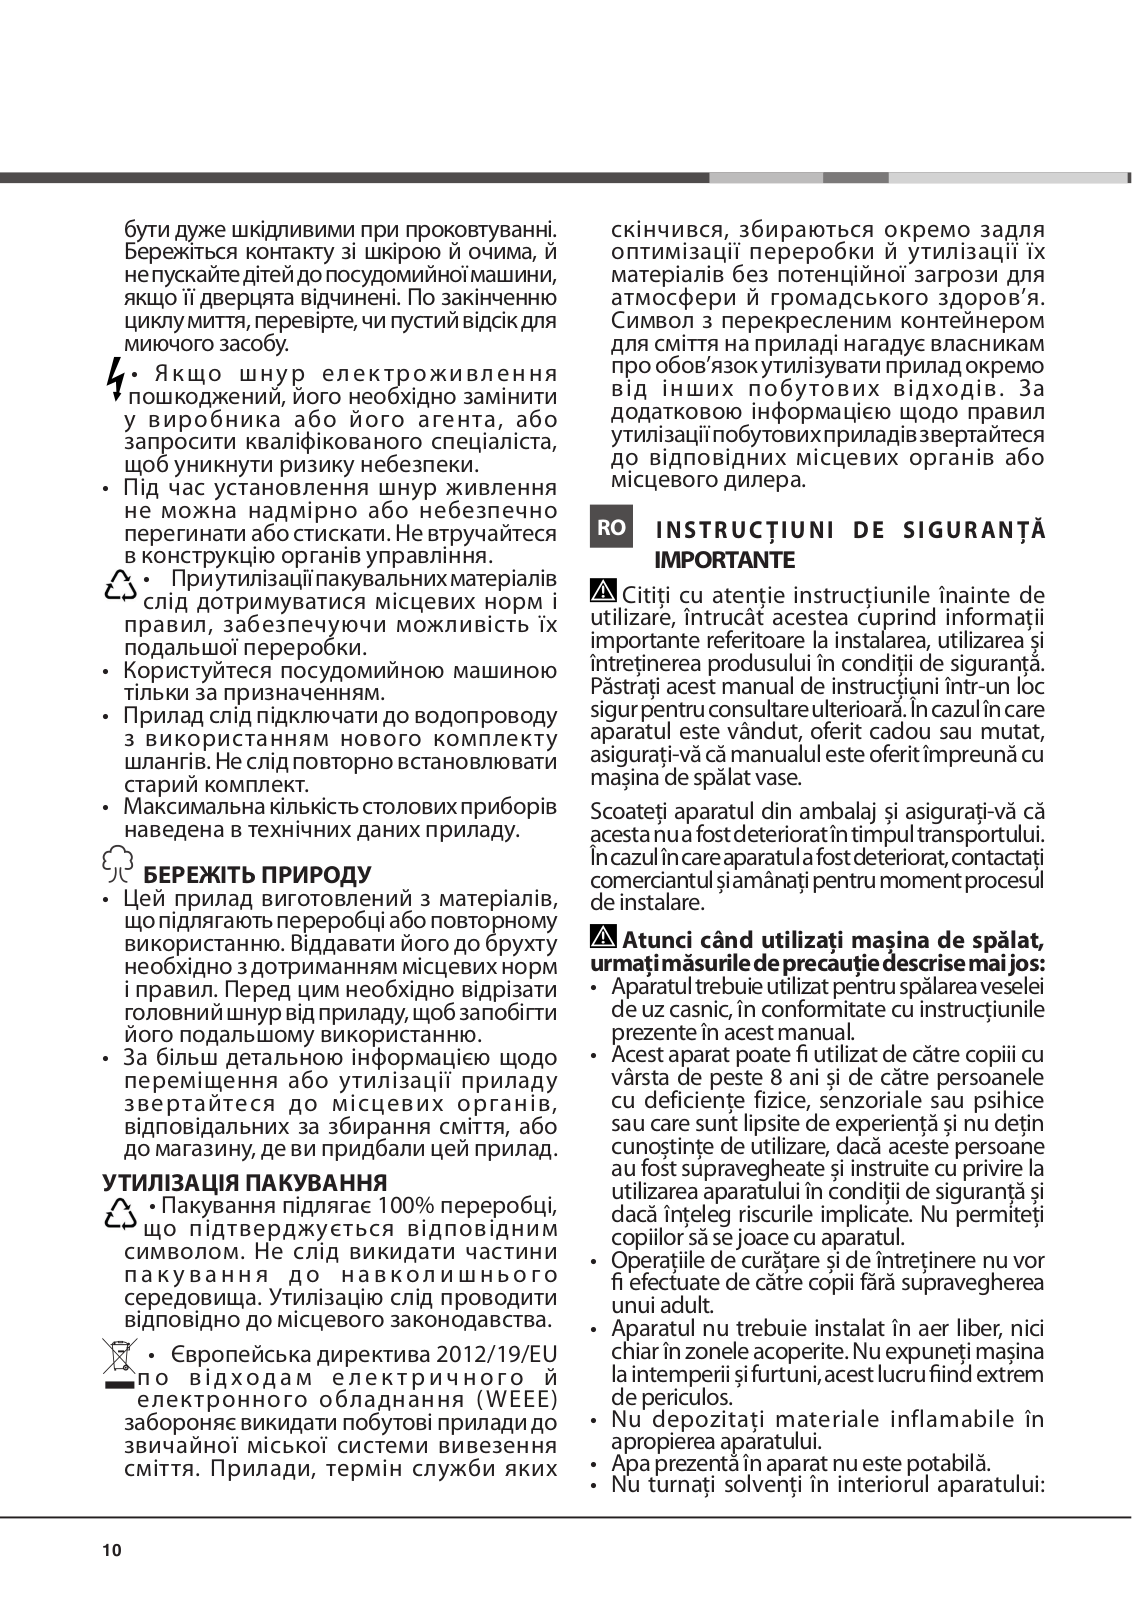
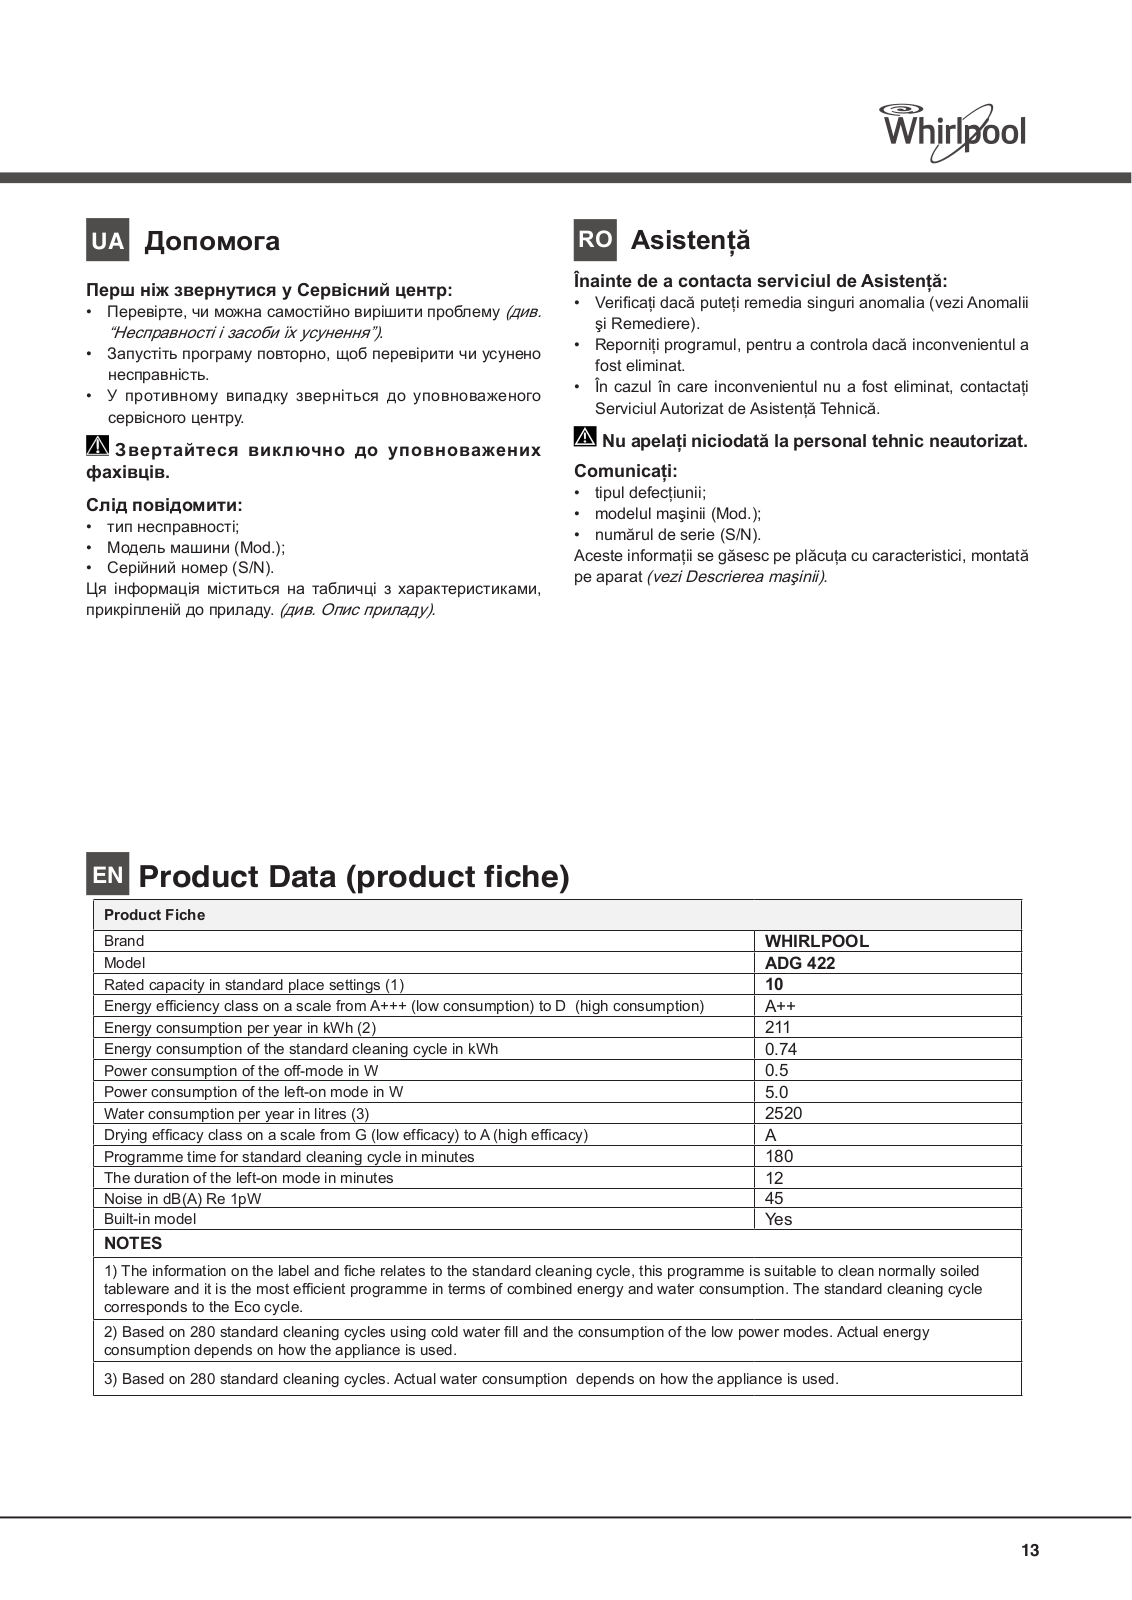
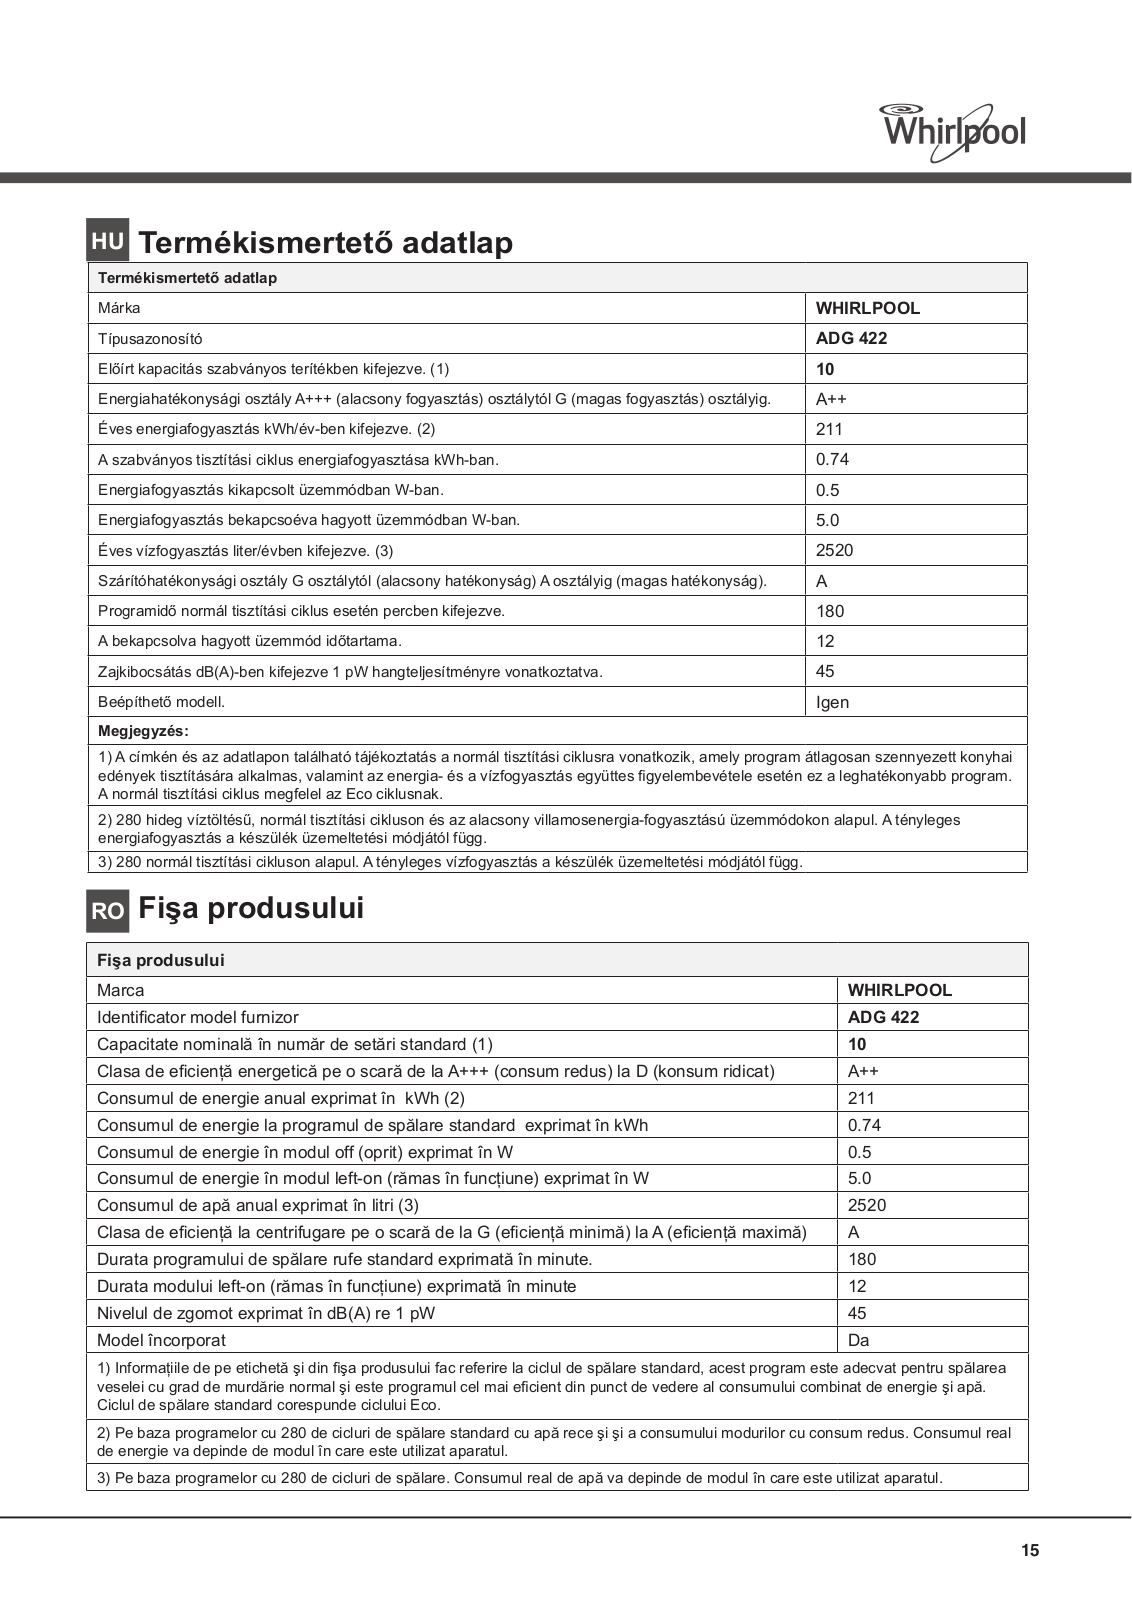
WHIRLPOOL ADG 422 User Manual
...
WHIRLPOOL User Manual
Download
Specifications and Main Features
Frequently Asked Questions
User Manual
Download
Loading...
+
58
hidden pages
Unhide
You need points to download manuals.
1 point = 1 manual.
You can buy points or you can get point for every manual you upload.
Buy points
Upload your manuals
 Loading...