

Whirlpool AD0402XS0 User Manual
use&care guide
DEHUMIDIFIERS
ol
ry ers fr ee/e rs Ref rig era tor -Fr eez ers . I ce Mak ers . D ish wa she rs, Bu ill In Ov ens an d Su rfa ce Uni ts. Ra nge s. Mic ro wav e O ven s, Tra sh Com pac tor s, Roo m A ir Con diti one rs, De hu r

Please read this
Use and Care Guide
before you do anything else.
This booklet tells you how to install your de
humidifier, use it and clean it. Treat your new de
humidifier with care. Use it only to do what home
dehumidifiers are designed to do.
Contents
Parts and Features
Before Using Your Dehumidifiet Adjustment
Install Properly Water Disposal
Electrical Requirements
Using Your Dehumidifier
15 Pint Capacity Model
All Other Models
To Operate
Parts and features
Setting the Water Level
. Caring for Your Dehumidifier
Dehumidifier De-Icer Control
It You Need Service or Assistance
Whirlpool Dehumidifier
Warranty
:1988 Whirlpool Corporation
ige
6
i
9
9
12
REAR GRILLE
Thank you for buying a Whirlpool appliance. Please complete and mail the Owner Registration
Card provided with this product. Then complete 'he 'orm below. Hove this information ready if you
need service or coll with o question.
• Copy model and serial numbers from label iun
der the water pan on the base of the unit) one
purchase date from sales slip.
• Keep this book and sales slip together in a handv
Diace.
Model Number
Serial Number
Purchase Date
Service Company
Phone Number
Before using your dehumidifier
It is your personal responsibility and obligation to make sure your dehumidifier:
Has been properly installed on a floorthat is rea
sonably level.
is the right size for the area you want to
dehunnidify.
is oonnected to the right kind of outlet, with the
proper electrical supply and grounding. (Refer
to “Electrical Requirements" on page 4.)
Is used only to do what home dehumidifiers are
designed to do.
Install Properly...
• Is not used by anyone unable to operate it
properly.
• Is properly maintained.
• Is used in an area where the room temperature
will not fall below 65 F (18.3 C).[48,40 and 30 pint
models will operate in temperatures down to
50 F (10 C).]
• Do not remove Tech Sheet which is inside the
cabinet. Your service technician needs this
information.
1. On most models, two rollers let you easily move
the dehumidifier. Remove the water pan. Tilt unit
forward and roll to another position.
If your model does not have rollers, pick up the
unit to move it to another position.
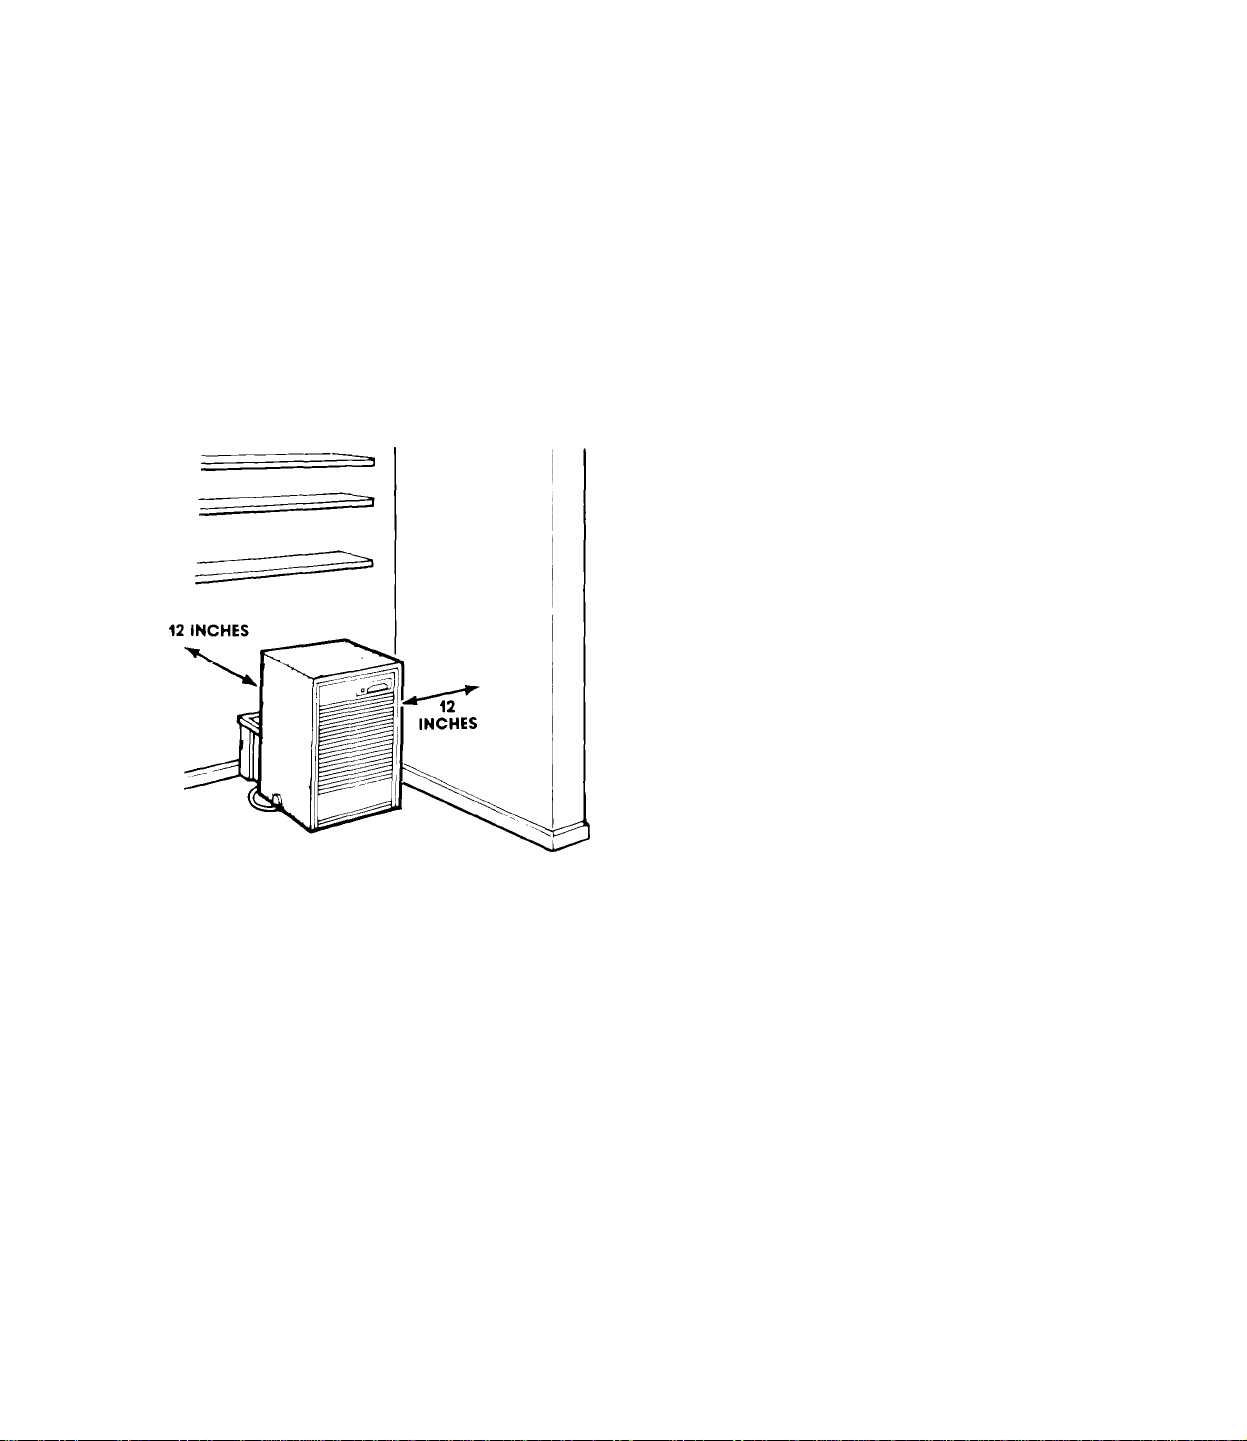
2. Allow at lease 12 inches (30.5 cm) of space
around the unit for good air circulation.
3. Keep all outside doors, windows and other
openings closed when dehumidifier is operat
ing, Humid outdoor air will add to the de
humidifier's operating load.
4. Water pan must be properly positioned on the
hangers inside the cabinet when dehumidifier
is operating.
Electrical Requirements
OBSERVE ALL GOVERNING CODES AND ORDINANCES.
Electrical ground is required on this appliance.
A115 volt, 60 Hz., AC only, 15 or 20 ampere fused electrical supply is required, (Time
delay fuse or circuit breaker is recommended.) It is recommended that a separate circuit
serving only this appliance be provided. Do not use an extension cord.
DO NOT UNDER ANY CIRCUMSTANCES, REMOVE THE POWER SUPPLY CORD GROUND PRONG.
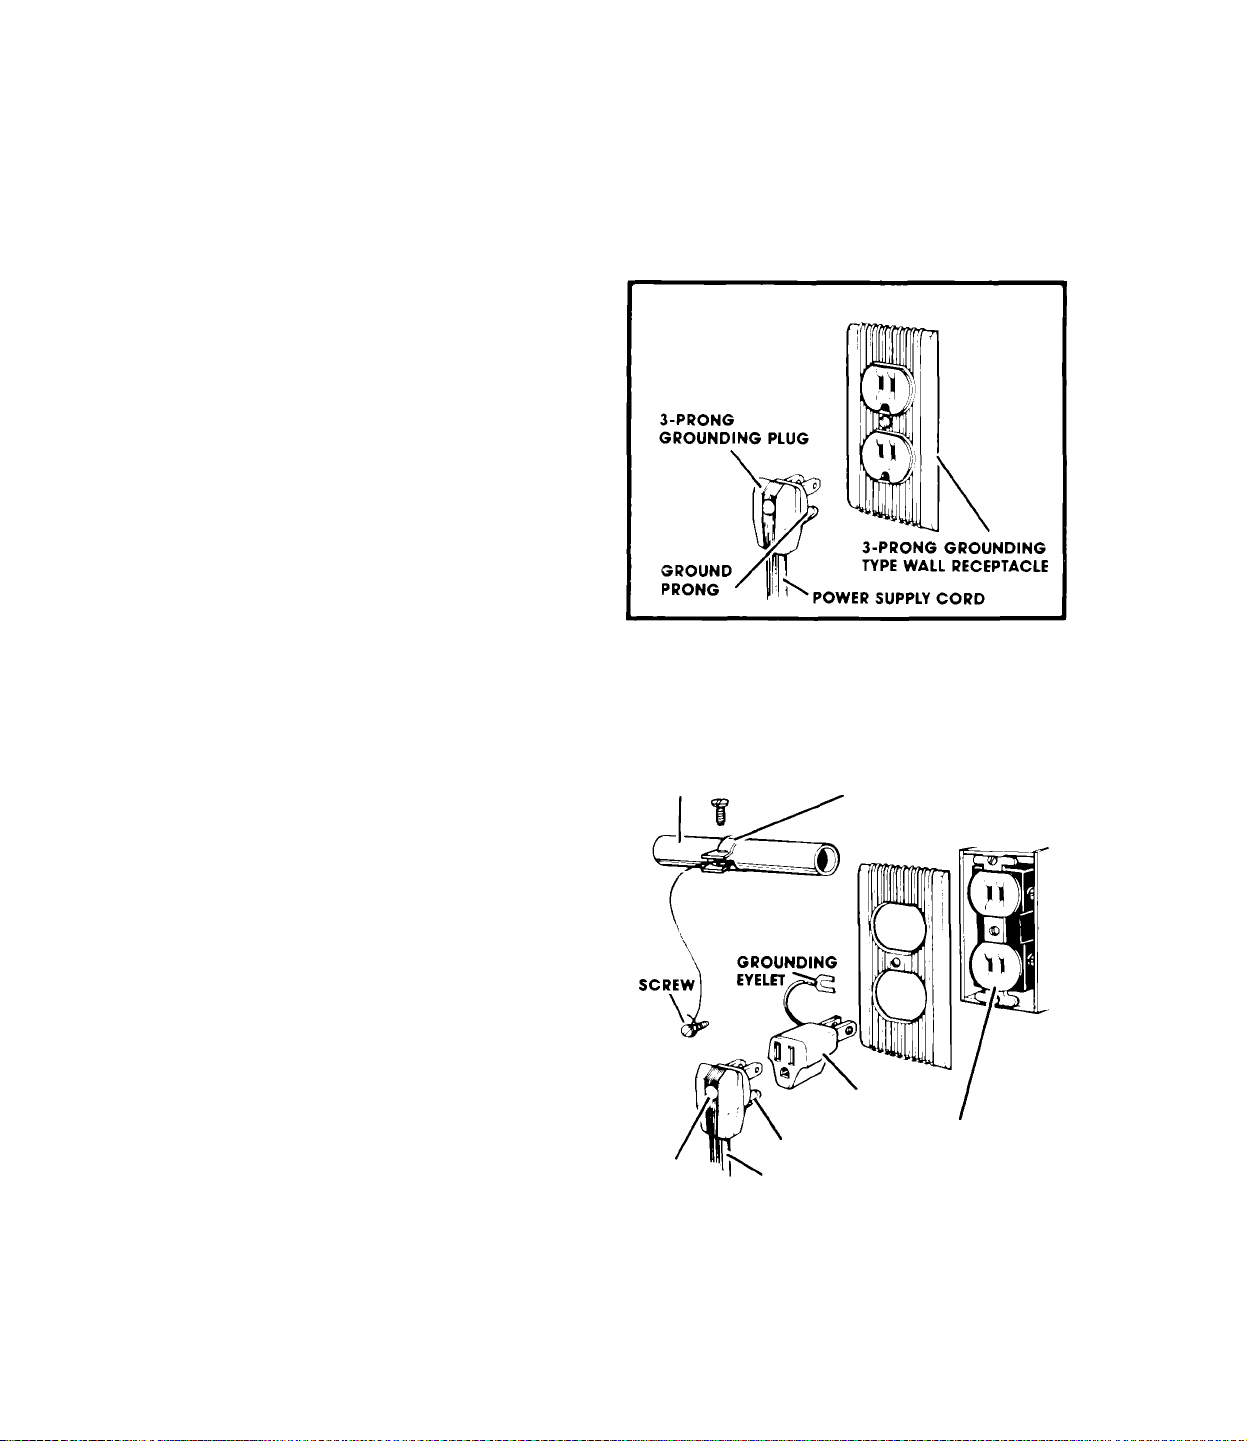
RECOMMENDED GROUNDING METHOD
For your personal safety, this appliance must be
grounded. This appliance is equipped with a
power supply cord having a 3-prong grounding
plug. To minimize possible shock hazard, the cord
must be plugged into a mating 3-prong ground
ing type wall receptacle, grounded in accord
ance with the National Electrical Code and local
codes and ordinances. If a mating wall recepta
cle is not available, it is the personal responsibility
and obligation of the customerto have a properly
grounded 3-prong wall receptacle installed by a
qualified electrician.
TEMPORARY GROUNDING METHOD
If changing and properly grounding the wall re
ceptacle is impossible and where local codes
permit (consultyourelectrical inspector), a tempo
rary adaptor may be plugged into the existing 2-
prong wall receptacle to mate with the 3-prong
power supply cord THIS HOWEVER, IS NOT
RECOMMENDED.
If this is done, you must connect the grounding
eyelet on the ada pter to the wall receptacle cover
plate screw and from this same screw, you must
connect a separate copper ground wire (#14 mini
mum) to a grounded cold water pipe.* Do not
ground to a gas supply pipe. Do not connect to
electrical supply until appliance is perma
nently grounded.
ELECTRICALLY
GROUNDED METAL
COLD-WATER PIPE
(REMOVE PAINT, ETC.)
GROUND PRONG
3-PRONG
GROUNDING
PLUG
POWER SUPPLY CORD
GROUND ASSEMBLY
(AnACH TO GROUNDED
METAL COLD-WATER PIPE)
ADAPTER
WALL
RECEPTACLE
*Cold water pipe must have metal continuity to electrical ground and not be interrupted
by plastic, rubber or other electrically insulating connectors (including water meter or
pump) without adding a jumper wire at these connections.
 Loading...