

Page 1
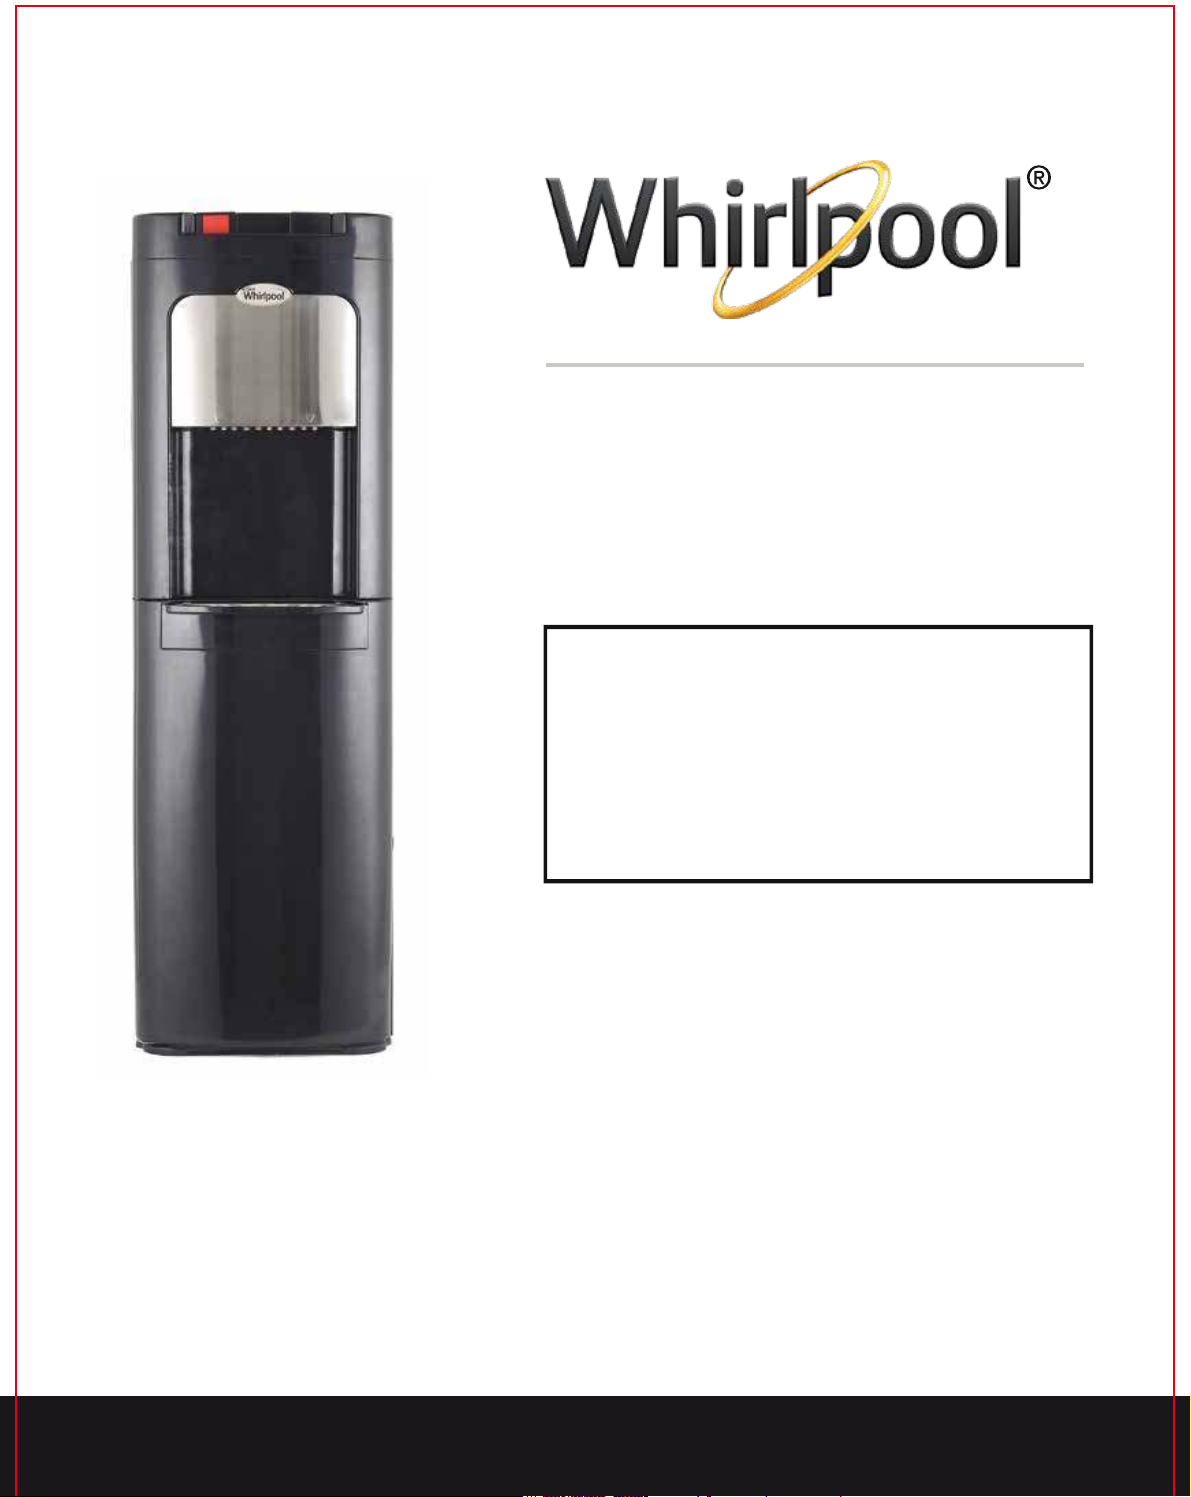
Hot & Cold Hidden
Bottled Water Cooler
Model No. : 8LIECH-BP-WL
For spring water users,
please follow the instructions shown in the
"Descaling" section.
USER MANUAL
SAVE THIS MANUAL FOR
FUTURE USE
The appearance of your product may
differ from the above illustration.
For service, call: 1-855-594-4755
or E-mail [email protected]
8LIECH-BP-WL PN: 5M012563XX00(E)
Page 2

Model # 8LIECH-BP-WL: Page 2
TABLE OF CONTENTS
Safety Precautions........................................................................
Safety Precautions-Electrical Requirements ...................................
Product Features .......................................................................
Specifications ..............................................................................
Parts & Features .........................................................................
Unpacking and Assembly ..........................................................
Installation ...................................................................................
Clean Out Of The Box,
No Need For Cleaning Prior To Initial Use ......................................
Operation ....................................................................................
Proper Care & Descaling ............................................................
Troubleshooting ..........................................................................
Limited Warranty .........................................................................
3
4
4
5
5
6
6
7
8
11
13
15
IMPORTANT: Do NOT Return Dispenser To Store.
If you have a question or problem, please contact 1-855-594-4755 for assistance.
Page 3
Model # 8LIECH-BP-WL: Page 3
IMPORTANT: Do NOT Return Dispenser To Store.
If you have a question or problem, please contact 1-855-594-4755 for assistance.
SAFETY PRECAUTIONS
IMPORTANT SAFETY INSTRUCTIONS
WARNING:
To reduce the risk of fire, electric shock, or other injury when using your water cooler, follow these basic precautions:
■ Plug it into a grounded 3-prong outlet.
■ Do not remove the ground prong.
■ Do not use an adapter.
■ Disconnect power before servicing.
■
Never allow children to dispense hot water without proper supervision. Unplug unit to prevent
unsupervised use by children.
■ All of the parts and panels must be in place before use.
■ Do not use an extension cord.
■ Two or more people should move and install the water cooler
and the bottles.
WARNING
DANGER
All safety instructions will inform you what the potential hazard is, how to reduce the chance of injury, and what can
happen if the instructions are not followed.
Your safety and the safety of others are very important.
We have provided many important safety messages in this manual and your appliance. Always read and follow all
safety messages.
This is the safety alert symbol.
This symbol alerts you to potential hazards that can kill or injure you and others.
All safety messages will follow the safety alert symbol and either the word “DANGER”or “WARNING”
These words mean:
You can be killed or seriously injured if you don′t immediately
follow the instructions.
When operating this dispenser, please observe the following:
• Prior to use, this dispenser must be properly assembled and installed in accordance with
this manual.
• This dispenser is intended to dispense water only. Do NOT use other liquids. Do NOT
use for other purposes. Never use other liquids in the dispenser other than known and
microbiologically safe bottled water. Warranty is void if used with any other liquids,
including but not limited to coffee, tea, juices, beer or wine.
Location Requirements:
• Install the unit in an area where it is protected from the elements, including direct sun.
• Install and use only on a hard, flat and level surface.
• Do NOT place the dispenser inside an enclosed space or cabinet.
• Position the dispenser no closer than 4 inches from the wall. Leave at least 4 inches of
clearance on all sides to permit free airflow.
• Service should only be performed by a certified technician. Please call 1-855-594-4755
for assistance.
SAVE THESE INSTRUCTIONS
Page 4
Model # 8LIECH-BP-WL: Page 4
SAFETY PRECAUTIONS ---Electrical Requirements
A 120 volt, 60 Hz., AC only, 15 amp, fused electrical supply is required. A time-delay fuse or
circuit breaker is recommended.
If codes permit and a separate ground wire is used, it is recommended that a qualified
electrician determine that the ground path is adequate.
Check with a qualified electrician if you are not sure whether the water cooler is properly
grounded. The proprietary design of the hot water tank assures availability of hot water and
efficient energy use.
PRODUCT FEATURES
IMPORTANT: Do NOT Return Dispenser To Store.
If you have a question or problem, please contact 1-855-594-4755 for assistance.
Congratulations! You have chosen a technology advanced, state-of-the-art water
cooler.
To provide consistently cold water, this water cooler forms an "Ice Bank" in the cold tank.
Formation of the initial "Ice Bank" can take up to 1 hour.
WHEN THE UNIT IS PLUGGED IN FOR THE FIRST TIME, IT CAN TAKE OVER AN HOUR
BEFORE THE "ICE BANK " FORMS AND THE UNIT CAN PROVIDE THE COLDEST
WATER.
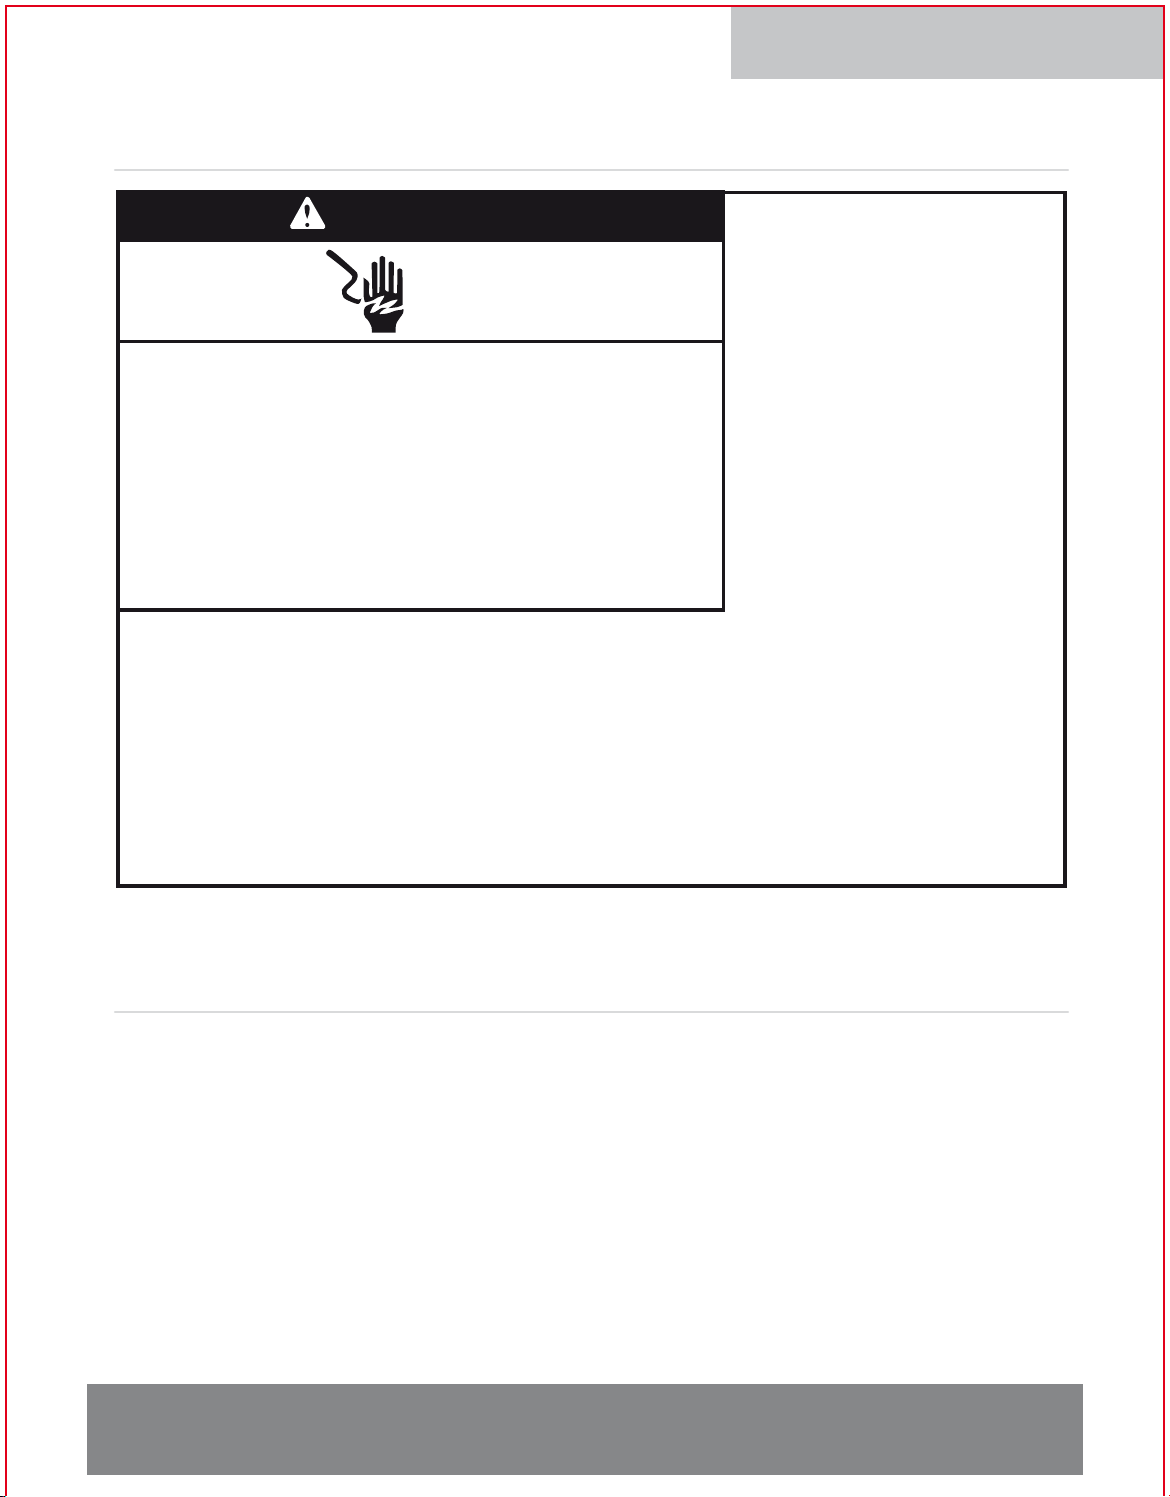
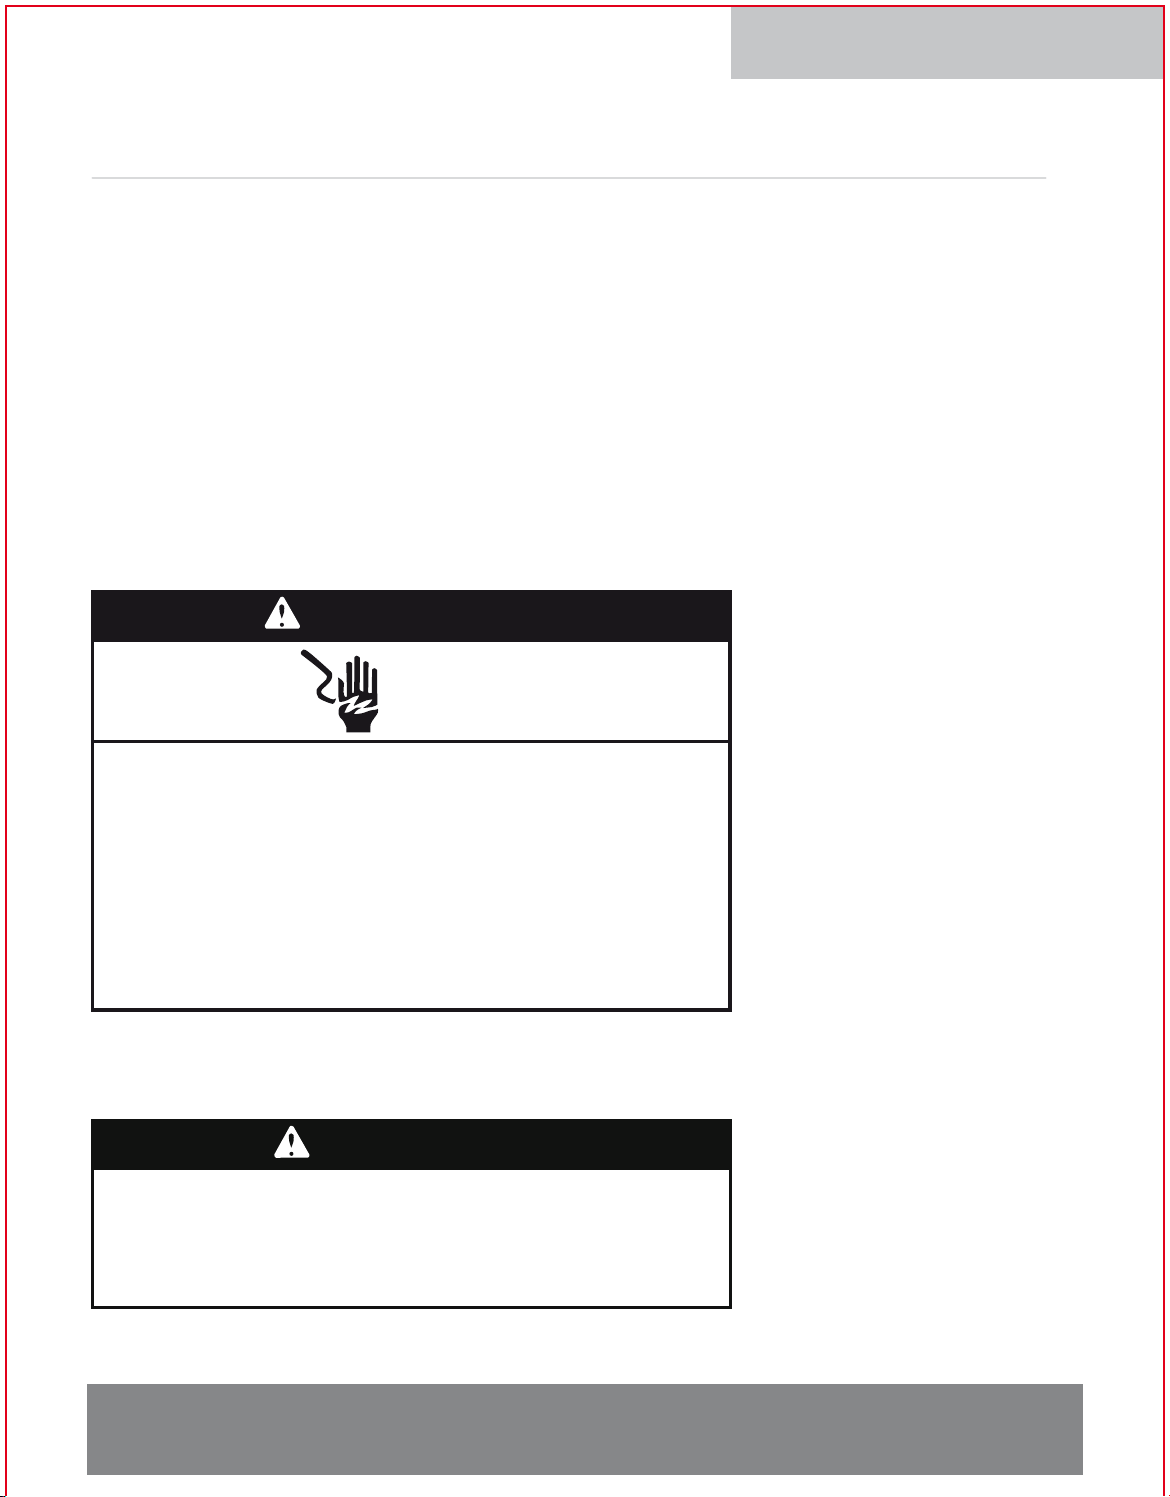
Electrical shock Hazard
Plug into a grounded 3 prong outlet.
Do not remove ground prong.
Do not use an adapter.
Do not use an extension cord.
Failure to follow these instructions can result in
serious injury, fire, or electrical shock.
WARNING
Page 5
Model # 8LIECH-BP-WL: Page 5
SPECIFICATIONS
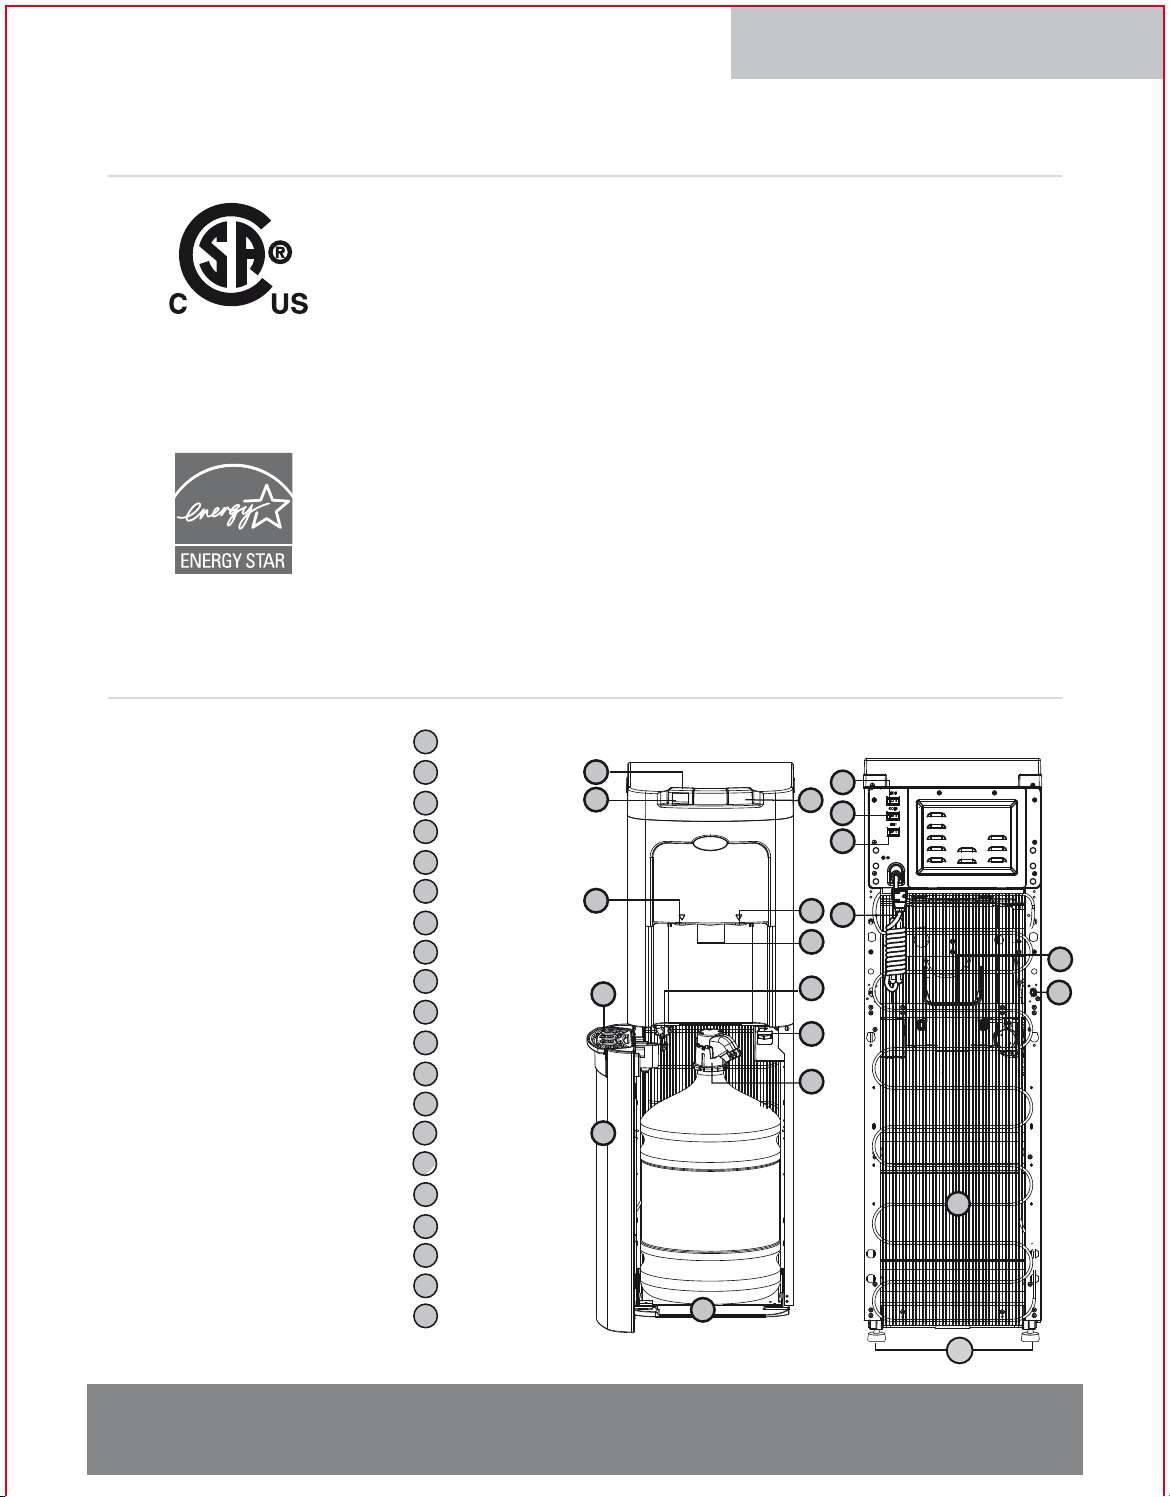
PARTS & FEATURES
Power Supply
Refrigerant Type
Cold Water Power
Cold Capacity / Hour
Cold Temperature
Hot Water Power
Hot Capacity / Hour
Hot Temperature
Dimensions
Net Weight
AC 120V / 60Hz / 5Amp
R-134A
< 100Watts
4 Liters / 1.06 Gallon
3°C - 10°C / 37.4°F - 50°F
425 Watts
4 Litres / 1.06 Gallon
80°C - 92°C / 176°F - 197.6°F
102.8cm H x 32cm W × 38.2cm D
40.5inch H x12.6inch W × 15inch D
15.8 Kg / 34.8 Ibs
Version 2.0
IMPORTANT: Do NOT Return Dispenser To Store.
If you have a question or problem, please contact 1-855-594-4755 for assistance.
1
2
3
4
5
6
7
8
9
10
11
12
13
14
15
16
17
18
19
20
Control: Hot Water
Hot Water Release
Control: Cold Water
Hidden Faucet or Tap: Hot Water
Hidden Faucet or Tap: Cold Water
LED Night lights
Drip Tray
Door
Bottle Tray
Water Pump
Door Switch
Bottle Probe
Cold Power Switch(Energy Saving)
Hot Power Switch (Energy Saving)
Switch for LED Night Light
Power Cord
Carry Handle
Drain Plug
Condenser
2 leveling feet
Energy
Verified
20
Front Back
3
1
2
11
12
10
4
6
5
7
8
9
17
18
14
13
16
15
19
Page 6
Model # 8LIECH-BP-WL: Page 6
INSTALLATION
UNPACKING AND ASSEMBLY
IMPORTANT: Do NOT Return Dispenser To Store.
If you have a question or problem, please contact 1-855-594-4755 for assistance.
Remove the dispenser from packaging:
1. Lay the box containing the unit on its side.
2. Open bottom flaps of the cardboard box.
3. Stand cooler upright, with box flaps unfolded.
4. Pull box straight up.
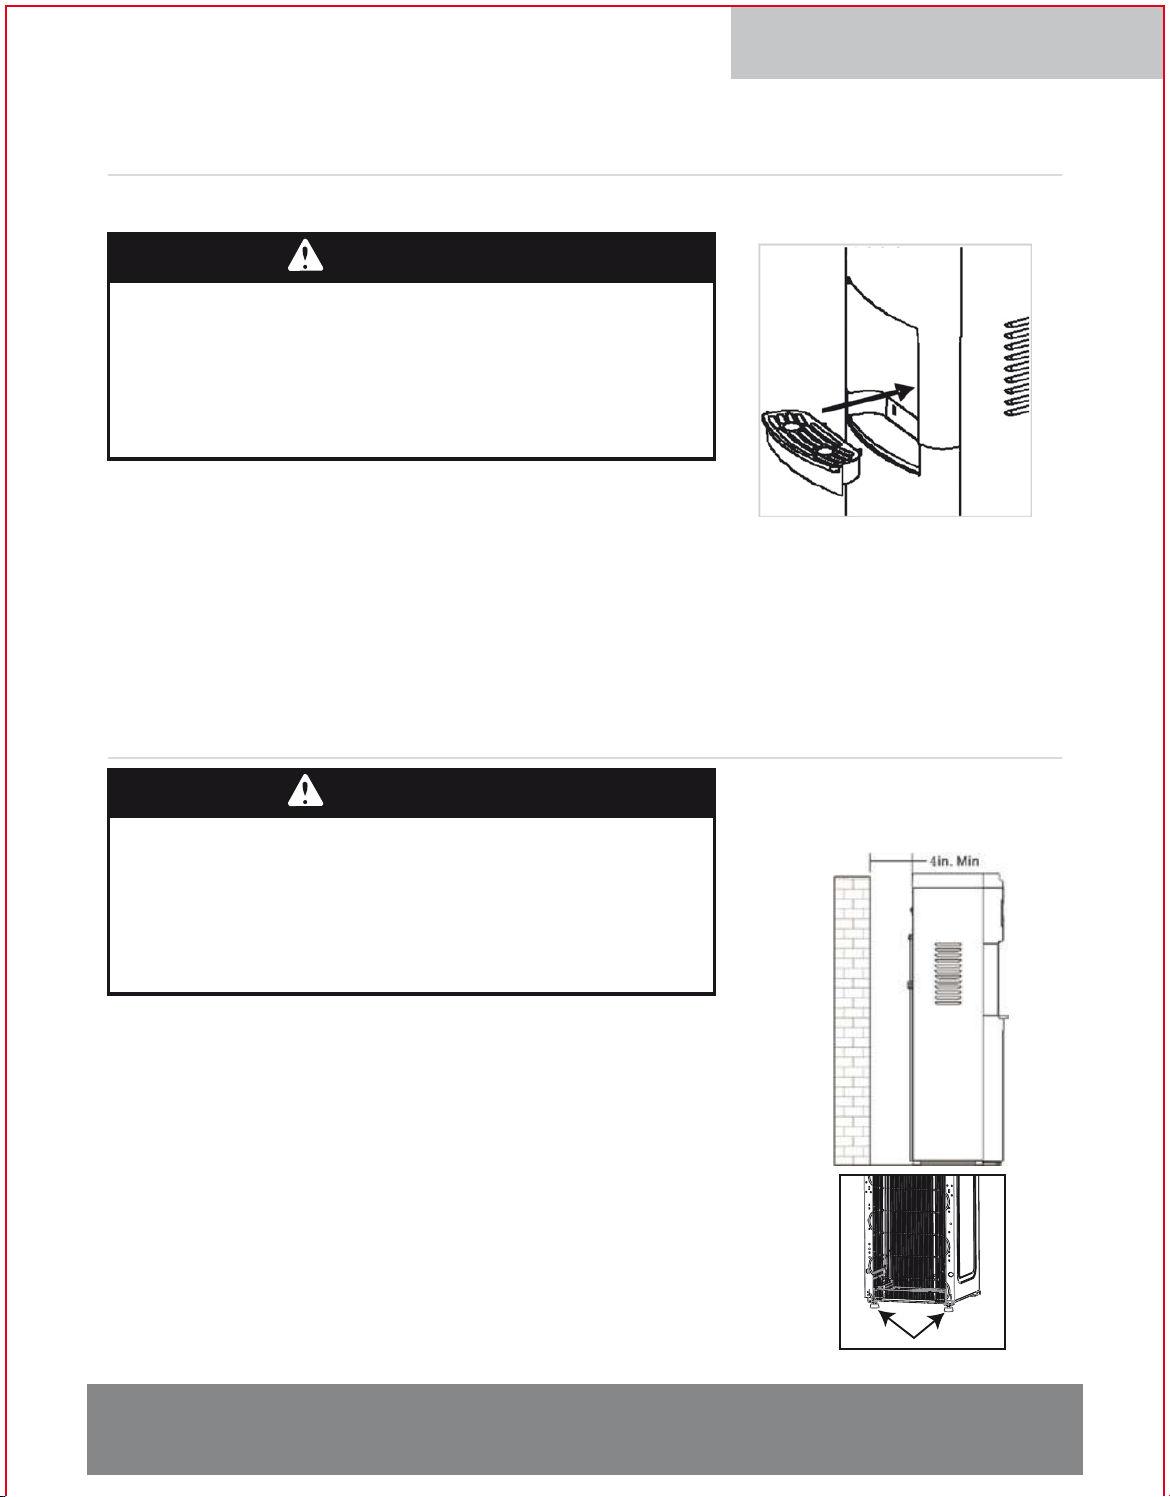
5. Unpack the drip tray and insert it into the dispenser.
6. Keep original packing for the duration of warranty.
Note: Do NOT plug in the power cord until told to do so.
1. Place the dispenser on a hard and level surface in a cool,
shaded location, free of kitchen grease and oil, near a
grounded wall outlet.
2. Position dispenser so that the back is at least 4 inches from
the wall, and there are at least 4 inches of clearance on
both sides.
3. Level the water cooler as shown below to prevent vibration.
There are two leveling feet at the back of the water cooler.
Please adjust them one at a time until the water cooler sits
levelly and does not rock. Failure to level the water cooler
can cause vibrational noise when the compressor runs.
2 levelling feet
Excessive Weight Hazard
Use two or more people to move and install the
water cooler and the bottles.
Failure to do so can result in back or other injury.
WARNING
Excessive Weight Hazard
Use two or more people to move and install the
water cooler and the bottles.
Failure to do so can result in back or other injury.
WARNING
Page 7

Model # 8LIECH-BP-WL: Page 7
IMPORTANT: Do NOT Return Dispenser To Store.
If you have a question or problem, please contact 1-855-594-4755 for assistance.
CLEAN OUT OF THE BOX,
NO NEED FOR CLEANING PRIOR TO INITIAL USE
Your water cooler is Clean Out of The Box. Cleaning described below is not required. However if
you choose to clean your water cooler for any reason, please follow the instructions below.
Time Required: 30 minutes.
Notice: Unplug the power cord.
1. Remove the air filter and wash it in soapy water.
2. Submerge the probe head in the soapy water and rinse properly.
3. Spray the dispensing nozzles of water faucets with chlorine solution (one teaspoon of
unscented bleach composition (I.E.5.25% sodium hypochlorite) in one glass of water).
4. Reattach air filter of the probe assembly.
5. Fill bottle with chlorine solution ( 60 ml of unscented bleach) per 3 liters of water) and activate
the pump. Allow chlorine solution to wash probe inside. Shut off after 3 liters of solution is
pumped through.
6. Place a 2 gallon or larger bucket under the drain plug in the rear of the cooler.
7. Once the unit has been drained, replace the drain plug and drain cap.
8. Remove the remaining water from the reservoirs by dispensing it from the cold tap into a
pitcher.
Rinsing
9. Fill bottle with 2 gallons of tap water.
10. Insert probe assembly, place bottle into water cooler and close the door.
11. Allow cooler to be filled with water.
12. Drain water out as in steps 6, 7 and 8.
13. If chlorine taste persists repeat rinsing procedure or leave it sit for a few days and chlorine
taste will disappear.
14. You may use a 10% vinegar solution instead of chlorine solution.
15. Complete the installation and follow the operation instructions indicated in this manual. If your
water has an off taste do not return the cooler to the store, call 1-855-594-4755 for assistance.
Page 8
Model # 8LIECH-BP-WL: Page 8
OPERATION
This unit is intended for use with high-quality bacteriologically safe bottled water only. Do NOT
use other liquids. Do NOT use for other purposes. Warranty is void if unit is used with any other
liquids, including tap water, coffee, tea, juices, beer, or wine.
This dispenser has been designed to use with standard water bottles with a 3, 5, or 5.2 gallon
capacity. Do NOT use alternative bottles.
Initial Set Up
Do NOT plug in until steps 1-3 are completed.
1. If unit was transported on its side, make sure unit is in the OFF
position and is upright for at least 4 hours prior to plugging the unit in.
2. This model uses a pump to deliver water from the bottle to the reservoirs:
i. Clean the bottle cap and neck.
ii. Remove the entire plastic cap from the bottle.
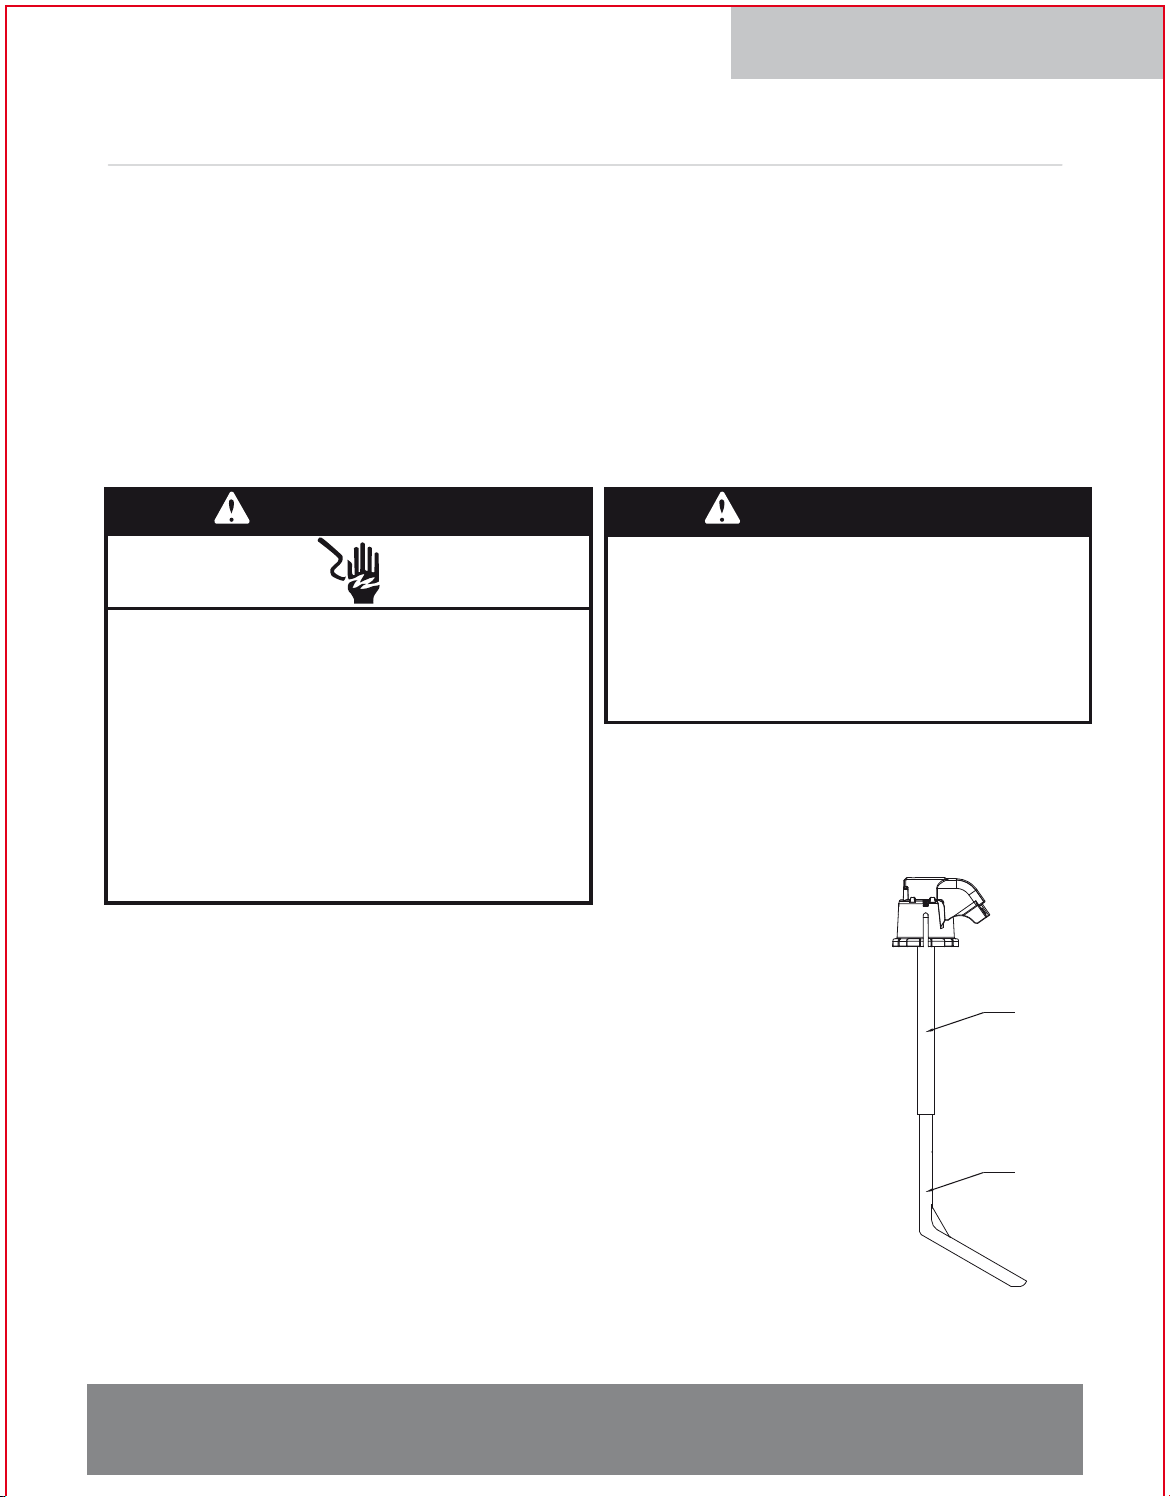
iii. Adjust the length of the probe by pulling the B portion of the tube to
its maximum extension. Insert the probe into the bottle and push it
down. The probe will self-adjust to its appropriate length. (See
illustration on right).
iv. Push down the probe head until it is seated.
v. Plug power cord into the wall outlet.
Note: At initial set-up, it will take less than 3 minutes to fill reservoirs
with water. If pump stops prematurely, please open and close the door to activate reset
using door switch.
IMPORTANT
IMPORTANT: Do NOT Return Dispenser To Store.
If you have a question or problem, please contact 1-855-594-4755 for assistance.
A
B
Electrical shock Hazard
Plug into a grounded 3 prong outlet.
Do not remove ground prong.
Do not use an adapter.
Do not use an extension cord.
Failure to follow these instructions
can result in serious injury, fire, or
electrical shock.
WARNING
Excessive Weight Hazard
Use two or more people to move and
install the water cooler and the bottles.
Failure to do so can result in back or
other injury.
WARNING
Page 9
Model # 8LIECH-BP-WL: Page 9
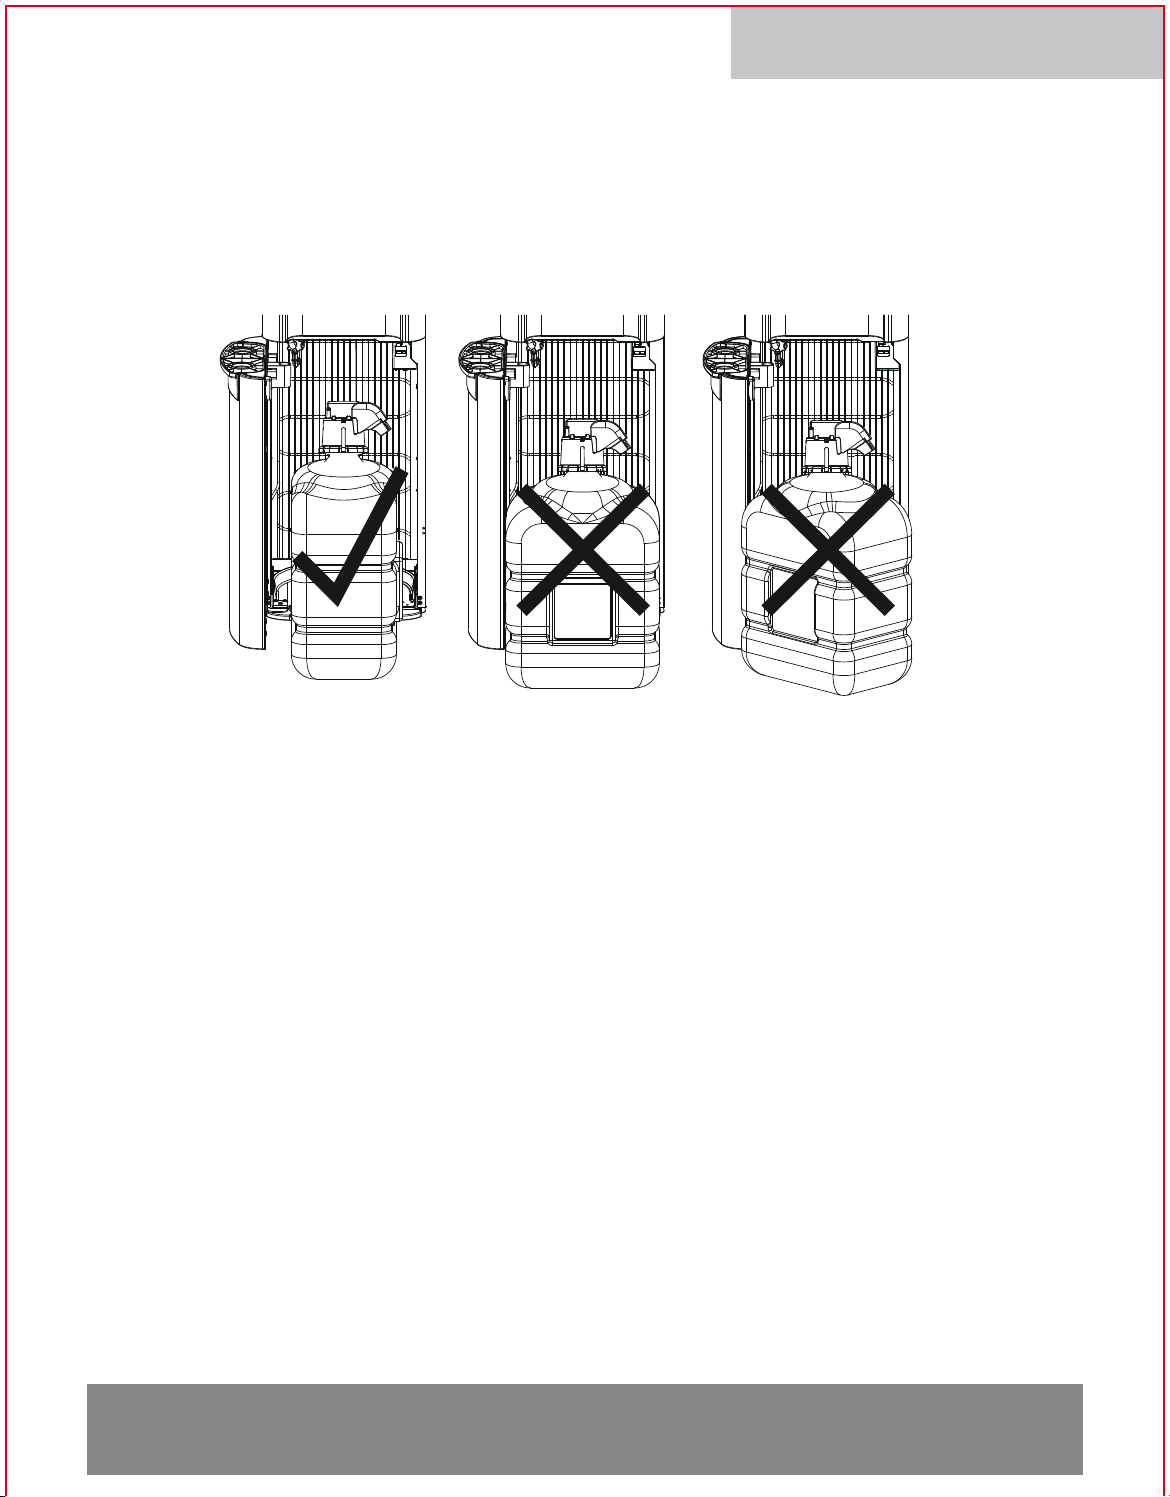
NOTE: Fit all round bottles. When using a 5 gallon rectangular bottle, slide it into place as shown in
the illustration below.
• If the probe tube A and B are not sealed(see previous page), the pump will run a few minutes
and the night lights will flash. To correct, open the door, re-attach the probe, and close the door.
• If the lights continue to flash, your bottle may be empty or there may be an issue with the water
tube lines. Call 1-855-594-4755 for assistance.
3. Turn the switches at the back of the dispenser to ON.
• The red switch controls the hot water. If you do not want hot water, leave this switched OFF.
• The blue switch controls the cold water. If you do not want cold water, leave this switched OFF.
• The yellow switch controls the LED night lights. Turn it ON or OFF as desired.
• For the unit to operate properly, the probe head must seal on the bottle and the door must be
fully closed.
•
It will take less than 3 minutes to fill reservoirs with water. During this time, it is normal for the
pump to run on and off.
• If water fill stops before reservoirs are full, please open and close the door to reset door activated switch.
• Each time you dispense water from the taps, the pump will turn on to refill the tanks.
Dispensing Cold Water
Note: After setup, it will take up to 1 hour to get the water to its coldest temperature. During this
time, the compressor may run continuously as the refrigeration system builds the Ice Bank as noted
in the "Product Features" section.
1. Position the container you wish to fill with water securely below the cold-water tap.
• The right triangle below the cold water control indicates the location of the cold water tap
(See the "Parts & Features" section on page 5).
• The circular shapes in the drip plate help align the flow of water. This unit dispenses water
quickly. To avoid splashes, hold the cup as close to the tap as possible.
IMPORTANT: Do NOT Return Dispenser To Store.
If you have a question or problem, please contact 1-855-594-4755 for assistance.
Page 10
Model # 8LIECH-BP-WL: Page 10
IMPORTANT: Do NOT Return Dispenser To Store.
If you have a question or problem, please contact 1-855-594-4755 for assistance.
2. Press the right control downward to start dispensing water.
3. Release the control once desired fill level is achieved.
Dispensing Hot Water
Note: After setup, hot water will be available in 15-20 minutes.
1. Position the container you wish to fill with water securely below below the hot-water tap.
• The left triangle below the hot water control indicates the location of the hot water tap
(See the "Parts & Features" section on page 5).
• The circular shapes in the drip plate help align the flow of water. To avoid splashes,
hold the cup as close to the tap as possible.
2. Push the hot water release button (red) inward and press the control downward to start
dispensing water.
3. Release the control once desired fill level is achieved.
Replacing an Empty Bottle
Note: When your water bottle is empty, the dispenser will beep intermittently and the LED
night lights will blink until a fresh bottle is connected.
You may also hear a sucking sound when the bottle is empty and needs changing. This is
normal and is another way to be alerted that your bottle is empty and needs to be replaced.
Replace the bottle as soon as you notice that it is empty. If a new bottle is unavailable, leave
the door ajar or unplug the cooler to stop the beeping noise and flashing lights.
There may be a small amount of water left in the bottle. This is normal.
1. Open the door and slide the bottle out.
2. Remove the probe by pulling it straight up until it is completely out of the bottle.
3. To install fresh bottle:
• Place the fresh bottle in front of the tray.
• Clean the fresh bottle using a soft cloth and warm soapy water .
• Remove the entire plastic cap from the top of the bottle.
• Insert the probe into the bottle.
• Push the probe down until it is seated.
• Slide the bottle onto the tray and close the door completely.
Excessive Weight Hazard
Use two or more people to move and install bottles.
Failure to do so can result in back or other injury.
WARNING
Page 11

Model # 8LIECH-BP-WL: Page 11
PROPER CARE & DESCALING
General Cleaning
Perform: As needed
Time Required: 5 minutes.
Note: Do NOT use abrasive materials or chemical cleaners.
1. Clean cabinet surfaces with a soft cloth and warm soapy water
2. Wipe dust from back of dispenser to improve efficiency.
3. Remove drip tray assembly by sliding it forward. Remove cover. Place tray and cover in dish-
washer or wipe parts clean with a soft cloth and warm soapy water.
4. Reattach drip tray assembly.
IMPORTANT: Do NOT Return Dispenser To Store.
If you have a question or problem, please contact 1-855-594-4755 for assistance.
Descaling
If you use spring (mineral) water you will need to de-scale your hot water tank.
Heated spring (mineral) water will cause minerals to fall out. Eventually they will plug up your water-
ways, resulting in a gradual slowdown of the flow rate, leaking faucets, and other problems.
Descaling Solutions
Cooking vinegar is proven to remove calcium deposits efficiently.
Depending on the frequency of decalcification treatments, please use the following proportions of
White Vinegar.
- For descaling once every three months, use two cups (500 ml) of white vinegar with 2.5 liters of hot
water.
- For descaling once every six months, use a mixture of six cups (1500 ml) of white vinegar with two
liters of hot water.
- For descaling once every year, use 12 cups (3000 ml) of white vinegar and one liter of hot water.
- For descaling less frequently than once a year, use undiluted white vinegar.
Descaling Procedure
1. Turn off hot & cold switches.
2. Unplug the cooler from the wall.
3. Using rear drain plug, drain the water from the cooler into a bucket and discard the water.
a.Locate the white plastic cap at the back of the cooler.
b.Remove the screw.
c.Remove the clear silicone drain plug and allow water to drain out.
Page 12

Model # 8LIECH-BP-WL: Page 12
IMPORTANT: Do NOT Return Dispenser To Store.
If you have a question or problem, please contact 1-855-594-4755 for assistance.
d.Re-attach the drain plug and plastic cap before proceeding.
4. Fill a bucket or empty 5-gallon water bottle with solution of white vinegar. For proportions, refer to
"Descaling Solutions" section. Choose quantity in accordance with the frequency of your treatments.
5. Attach or insert the probe to the bucket/bottle.
6. Place the bucket/bottle into the cooler and close the door. The water will be pumped up into the holding
tanks.
7. Wait for 1 hour.
8. Using rear drain plug, drain the water from the cooler into a bucket and discard the water.
a.Locate the white plastic cap at the back of the cooler.
b.Remove the screw.
c.Remove the clear silicone drain plug and allow water to drain out.
d.Re-attach the drain plug and plastic cap before proceeding.
9. Fill the bucket/bottle with tap water and place into the machine.
10. Plug the cooler back into the wall, do not turn hot or cold switches ON, close the door and wait for 10
minutes.
11. Dispense water from both cold and hot faucets until smell from cleaning substances disappears.
12. Open drain plug and cap once again and drain all tap water.
13. Replace the drain plug and cap.
14. Place a fresh bottle of water into the machine and operate as usual.
15. This procedure must be repeated every 3 to 6 months, depending on mineral content and usage of
water cooler.
Page 13
Model # 8LIECH-BP-WL: Page 13
IMPORTANT: Do NOT Return Dispenser To Store.
If you have a question or problem, please contact 1-855-594-4755 for assistance.
TROUBLESHOOTING
Call 1-855-594-4755 for service.
Problem: Stainless steel surfaces are smudgy or fingerprinted.
Solution: Use paper towel to wipe excess oils until surface feels dry to the touch.
• To maintain beauty of stainless steel, oil it periodically using a stainless steel cleaning
solution available at hardware stores, or use mineral oil (unscented baby oil).
Problem: The buttons for dispensing water are slow-moving or jammed.
Solution: Dust and cooking oils might cause slow moving push buttons. Add mineral oil (unscented
baby oil) between the gaps of buttons to clear dirt.
Problem: Dispenser is not operating.
Solution: Make sure that the power cord is properly connected to a working outlet.
Problem: Water is leaking.
Solution: Replace water bottle. The most common cause of this issue is a cracked bottle. If the
leak remains, unplug unit and call 1-855-594-4755 for assistance.
Excessive Weight Hazard
Use two or more people to move and install bottles.
Failure to do so can result in back or other injury.
WARNING
Electrical shock Hazard
Plug into a grounded 3 prong outlet.
Do not remove ground prong.
Do not use an adapter.
Do not use an extension cord.
Failure to follow these instructions can result in
serious injury, fire, or electrical shock.
WARNING
Page 14

Model # 8LIECH-BP-WL: Page 14
IMPORTANT: Do NOT Return Dispenser To Store.
If you have a question or problem, please contact 1-855-594-4755 for assistance.
Problem: Buttons are stuck.
Solution: Apply mineral oil (unscented baby oil) to the button slides to reduce friction.
Problem: No water is coming from the taps.
Solution:
Make sure the water bottle is not empty. If it is, replace it. If not, adjust the probe to an
appropriate length.
• Make sure that you fully press the water controls.
• Make sure that the probe connection with the water bottle forms a complete seal.
• Make sure that the door is closed.
Problem:
Water dispensed is not cold.
Solution: Note that it takes up to 1 hour after setup to dispense cold water.
• Make sure that the back of the dispenser is at least 4 inches from a wall and that air is
free to flow on all 4 sides of the dispenser.
• Make sure that the cold-water switch is ON.
Problem:
Water dispensed is not hot.
Solution: Note that it takes 15-20 minutes after setup to dispense hot water.
• Make sure that the power cord is properly connected to a working outlet.
• Make sure that the hot water switch is ON.
Problem:
LED night lights are flashing and the dispenser is making beeping noises.
Solution:
Replace the empty bottle. If you cannot replace the empty bottle immediately, leave the
door ajar or unplug the cooler to stop the beeping noise and the flashing lights.
Problem: The dispenser is noisy.
Solution:
Make sure the cooler is properly levelled using the two adjustable feet at the back of the
unit.
Problem:
Pump is not pumping water into cooler.
Solution: Make sure that tubing is properly inserted into quick connectors on the pump.
Problem: Does the night light in the front of the cooler stay on?
Solution: There is a switch at the top back of the water cooler to turn the LED lights on or off.
Page 15

Model # 8LIECH-BP-WL: Page 15
LIMITED WARRANTY
Electrotemp Technologies Inc., (“Vendor”) warrants to the original purchaser of this dispenser, and to no
other person, that if this dispenser is assembled and operated in accordance with the printed instructions
accompanying it, then for a period of one (1) year from the date of purchase, all parts in such dispenser
shall be free from defects in material and workmanship. Vendor may require reasonable proof of your date
of purchase from an authorized retailer or distributor. Therefore, you should retain your sales slip or
invoice. The Limited Warranty shall be limited to repair or replacement of parts, which prove defective
under normal use and service and which Vendor shall determine in its reasonable discretion upon examination to be defective. Before returning any parts, you should contact Vendor’s Customer Service Department using the contact information listed below. If Vendor confirms, after examination, a defect covered by
this Limited Warranty in any returned part, and if Vendor approves claim, Vendor will replace such defec-
tive part without charge. If you return defective parts, transportation charges must be prepaid by you.
Vendor will return replacement parts to original purchaser, freight or postage prepaid.
The Limited Warranty does not cover any failures or operating difficulties due to accident, abuse, misuse,
alteration, misapplication, improper installation or improper maintenance or service by you or any third
party, or failure to perform normal and routine maintenance on the dispenser, as set out in the User’s
Manual. In addition, the Limited Warranty does not cover damages to the finish, such as scratches, dents,
discoloration or rust after purchase.
The Limited Warranty is in lieu of all other express warranties. Vendor disclaims all warranties for products
that are purchased from seller other than authorized retailers or distributors. AFTER THE PERIOD OF
THE ONE (1) YEAR EXPRESS WARRANTY, VENDOR DISCLAIMS ANY AND ALL IMPLIED WARRANTIES, INCLUDING WITHOUT LIMITATION THE IMPLIED WARRANTIES OF MERCHANTABILITY AND
FITNESS FOR A PARTICULAR PURPOSE. FURTHER, VENDOR SHALL HAVE NO LIABILITY WHATSOEVER TO PURCHASER OR ANY THIRD PARTY FOR ANY SPECIAL, INDIRECT, PUNITIVE, INCIDENTAL, OR CONSEQUENTAL DAMAGES. Vendor assumes no responsibility for any defects caused by
third parties. This Limited Warranty gives the purchaser specific legal rights; a purchaser may have other
rights depending upon where he or she lives. Some jurisdictions do not allow exclusion or limitation of
special, incidental or consequential damages, or limitations on how long a warranty lasts, so the above
exclusion and limitations may not apply to you.
Warranty is void if the electrical outlet is improperly wired to incorrectly sized circuit breaker or fuse, if not
grounded properly, or wires do not have correct polarity.
Use of this cooler confirms Purchasers agreement with the conditions of this warranty.
Electrotemp Technologies Inc.
406 Watline Avenue
Mississauga, Ontario, L4Z-1X2
1-844-926-6537
www.electrotemp.com
IMPORTANT: Do NOT Return Dispenser To Store.
If you have a question or problem, please contact 1-855-594-4755 for assistance.
Page 16

®/™ ©2018 Whirlpool. All rights reserved.
Manufactured under license by
Electrotemp Technologies Inc.,
Mississauga, ON. Canada
Limted warranty provided by manufacturer.
 Loading...