

Whirlpool 814091 Instruction Sheet
INSTRUCTION SHEET
for Anti-Tip Kit 814091
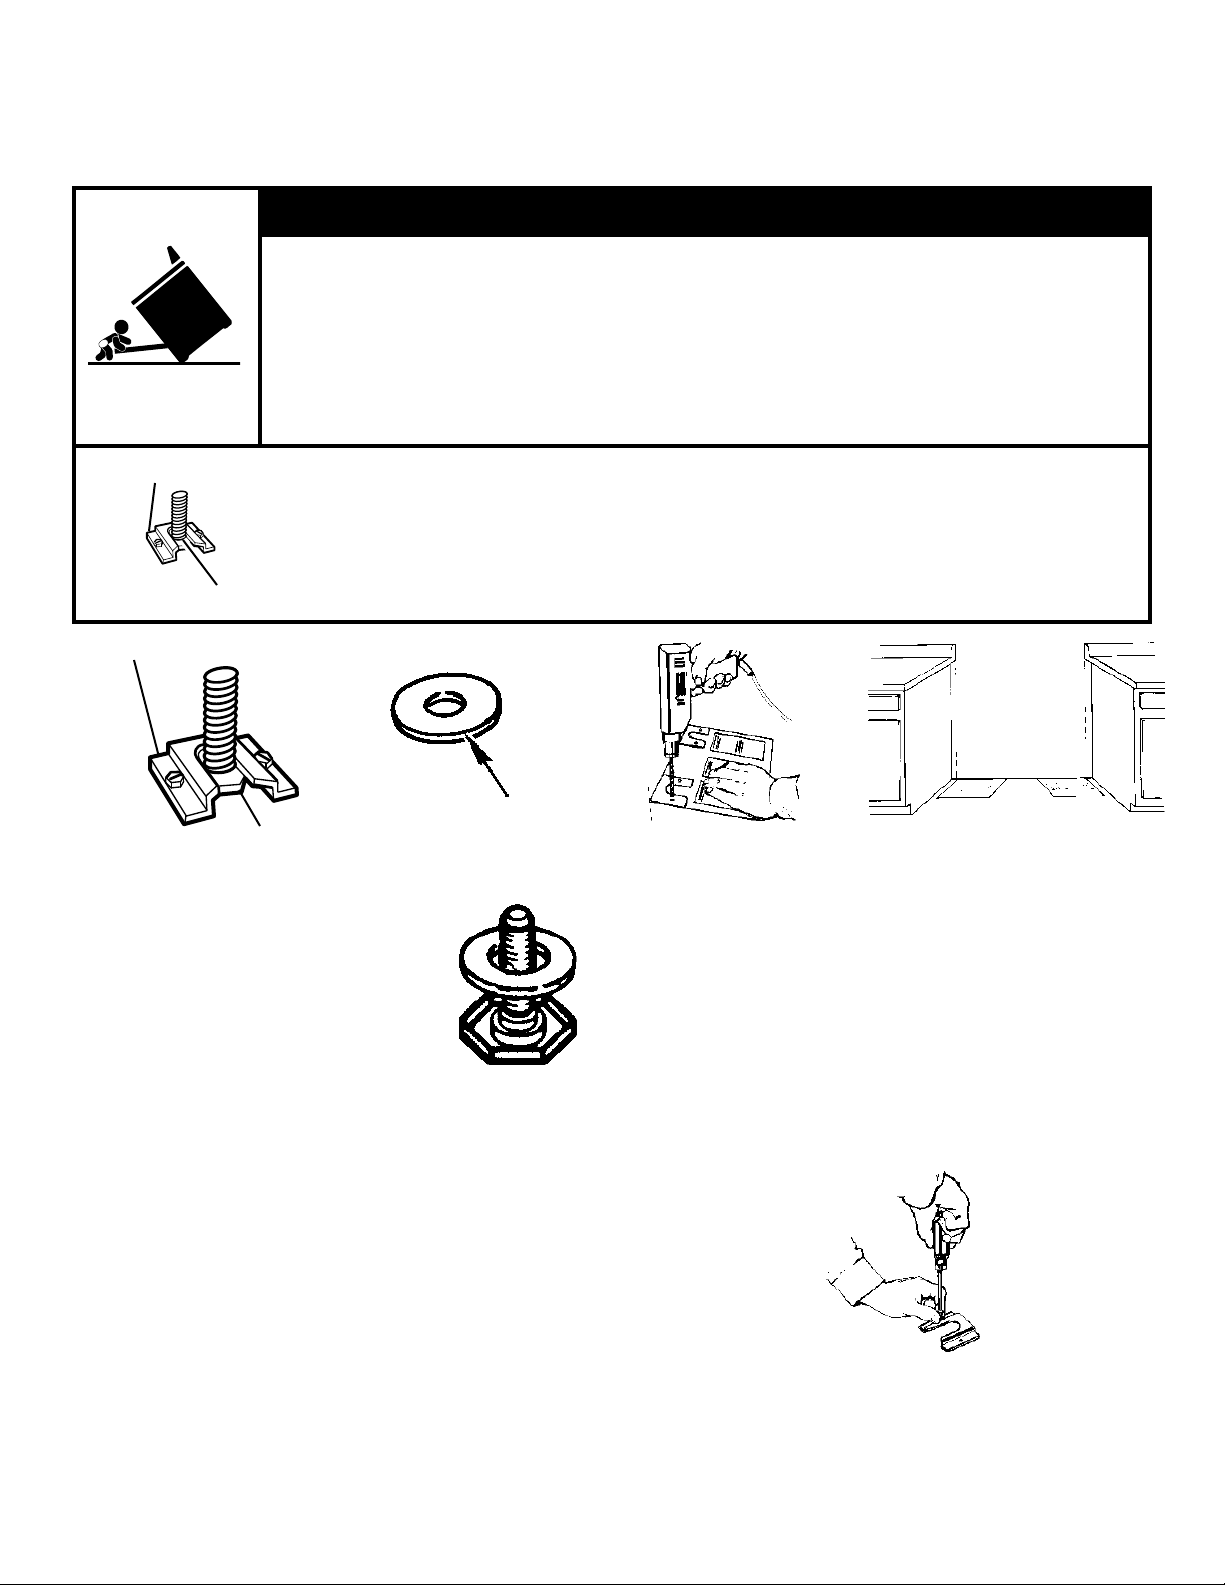
wWARNING
Tip Over Hazard
A child or adult can tip the range and be killed.
Connect anti-tip bracket to rear range foot.
Reconnect the anti-tip bracket, if the range is moved.
See the installation instructions for details.
Failure to follow these instructions can result in death or serious burns to children and
adults.
Anti-Tip Bracket
Range Foot
Anti-Tip Bracket
Range Foot
*NOTE: Washer not used with plastic feet. Use only with
metal feet.
1. Disconnect power or unplug range.
Making sure the anti-tip bracket is installed:
• Slide range foward.
• Look for the anti-tip bracket securely attached to floor.
• Slide range back so rear range foot is under anti-tip bracket.
*Washer
Metal Feet Models Only
2. Remove one of the rear metal leveling
feet.
3. Place the flat washer over the metal
foot and replace foot onto the unit. See
Figure 1.
Figure 1
Installation Procedure
1. The anti-tip bracket can be installed to hold either the
right or left rear leg of range. Determine which leg to
anchor. Place template on the floor in the range
opening so that the top edge is against the rear wall,
molding or cabinet and the bracket template you need
is in the location where the anti-tip bracket will be
installed. Tape the sheet in place. See Figure 2.
Figure 2
If the countertop is not flush with the cabinet opening
edge, align the template to allow for the overhang.
2. To mount anti-tip bracket to wood floor, use the bracket template to mark where to drill mounting holes. Use
a drill with a 1⁄8" drill bit to drill the two (2) holes.
Remove instruction sheet from floor. Line up holes in
anti-tip bracket with holes in floor. Use the two (2)
screws provided to fasten anti-tip bracket.
3. To mount anti-tip bracket to concrete or ceramic floor,
use the bracket template to mark where to drill mounting holes. Use a drill with 3⁄16" drill bit to drill the two (2)
holes. Remove instruction sheet from floor.
(All Rights Reserved)
Tap plastic anchors into mounting holes in floor with
hammer. Line up holes in anti-tip bracket with holes in
floor. Use the two (2) screws provided to fasten anti-tip
bracket to floor.
Instruction Sheet 814120 Rev. B 9/00© Whirlpool Corporation 2000
1
NOTE: Contact a qualified carpet installer for the best
procedure of drilling mounting holes through your type of
carpet.
Before moving, slide range onto cardboard or hardboard.
4. Move range close to opening.
5. Reconnect power or plug in range.
6. Remove cardboard shipping piece from under range.
Move range into position making sure rear leveling leg
slides into anti-tip bracket. See Figure 3.
7. Continue installing your range by using the range
installation instructions. Start at the step that
describes how to level the range.
“E” LINE TEMPLATE
Figure 3
Hole in
bracket
bracket
Hole in
Use this
template to
anchor left
rear leg of
range.
range.
rear leg of
anchor left
template to
Use this
Hole in
bracket
Hole in
bracket
"E" LINE MODELS AND NEWER
1996 MODELS AND OLDER
bracket
Hole in
Use this
template to
anchor right
rear leg of
range.
bracket
Hole in
Hole in
bracket
range.
rear leg of
anchor left
template to
Use this
bracket
Hole in
814120- B
“D” LINE TEMPLATE
2
 Loading...