

Page 1
HOW TO MAKE A HOME RUN.""
Use And Care
A Note to You
Washer Safety
Parts and Features
Operating Your Washer
Starting your washer
Stopping/restarting
your washer........................7
Selecting a cycle and time ... 8
Using rinse and spin
Using drain and spin
Understanding normal
washer sounds
Understanding what
happens in each cycle
MAGIC CLEAN® lint filter.... 10
Adding liquid chlorine
bleach...............................11
Adding liquid fabric
softener
Caring for Your Washer.........12
Laundry Tips..........................13
Removing Stains
Troubieshooting
Requesting Assistance
or Service
Warranty
..........................
.........................
..................
..........
.........
..........
..........
...................
.....
............................
...................
.....................
..............................
................................
10
11
17
20
22
2
3
5
6
6
9
9
9
24
PART NO. 3363569
1-800-253-1301
Call us with questions or comments.
TWO SPEED AUTOMATIC WASHERS
WITH QUICK WASH 9 / 9 r
D-Line
Page 2

A Note to You
Thank you for buying a WHIRLPOOL® appliance.
Because your life is getting busier and more complicated, WHIRLPOOL washers are easy
to use, save time, and help you manage your home better. To ensure that you enjoy years
of trouble-free operation, we developed this Use and Care Guide. It contains valuable infor
mation about how to operate and maintain your washer properly and safely. Please read it
carefully.
Also, please complete and mail in the Ownership Registration Card provided with your
appliance. The card helps us notify you about any new information on your appliance.
Please record your model's information.
Whenever you call to request service on
your appliance, you need to know your
complete model number and serial number.
You can find this information on the model
and serial number plate (see diagram on
page 5 for location of plate).
Please also record the purchase date of
your appliance and your dealer’s name,
address, and telephone number.
Keep this book and the sales slip together in a safe place for future reference.
Model Number
Serial Number.
Purchase Date.
Dealer Name
Dealer Address
Dealer Phone
Our Consumer Assistance Center number is toll-free 24 hours a day.
1-800-253-1301
Page 3

Washer Safety
Your safety is important to us. i
This guide contains safety statements under |
warning symbols. Please pay special
attention to these symbols and follow any
instructions given. Here is a brief explana
tion of the symbol.
IMPORTANT SAFETY INSTRUCTIONS
AWARNING
This symbol will help alert you to such
dangers as fire, electrical shock, burns,
and personal injury.
▲WARNING
• Read all instructions before using your
washer.
• Do not machine wash or machine dry
items cleaned, washed, soaked in, or
spotted with wax, paint, gasoline, oil, or
other flammable fluids. The fumes can
create a fire hazard or explosion. Always
hand wash and line dry items containing
these materials.
• Flammable fluids (dry-cleaning solvents,
kerosene, gasoline, etc.) should not be
used or stored in or near your washer. Do
not add flammable fluids to your wash
water. These substances give off vapors
that can create a fire hazard or explosion.
• Do not allow children to operate, play
with, or crawl on or inside your washer.
Supervise children closely when your
washer is used near them.
• Before your washer is removed from
service or discarded, remove the lid to
prevent accidental entrapment.
•After starting a cycle, do not reach into
the basket unless the Cycle Control
Knob is pushed in and all motion stops.
• Do not tamper with the controls.
To reduce the risk of fire, eiectricai shock, or
injury when using your washer, follow basic
precautions including the following:
- SAVE THESE INSTRUCTIONS -
• If your hot water has not been used
recently (usually two weeks or longer),
hydrogen gases may build up in your
water heater and your hot water pipes.
HYDROGEN GAS IS EXPLOSIVE.
To prevent injury or damage, before
using your washer, turn on all hot water
faucets and allow water to run for several
minutes. This will allow gases to escape.
Do not smoke or use any open flame
near your faucet while it is open.
Please...
• Have only a qualified person install,
repair, or replace parts on washer.
• Maintain washer properly.
• Protect washer from the weather and
keep it where the temperature will not fall
below freezing.
• Install and level washer on a floor that
can support the weight.*
• Connect washer to the correct 3-prong
outlet, electrical supply, water supply,
and drain.*
•Ground washer properly.*
• See the Installation Instructions.
Page 4

WASHER SAFETY
Understanding your responsibilities
• store laundry aids and other materials In a
cool, dry place where children cannot reach
them (in a locked cabinet if possible).
• Read and follow instructions on packages of
detergent and laundry aids, especially
warnings and precautions.
• Do not wash or dry items that are soiled with
vegetable or cooking oil. These Items may
contain some oil after laundering. Due to the
remaining oil, the fabric may smoke or catch
fire by itself.
• Do not use chlorine bleach and ammonia
or acids (such as vinegar or rust remover)
in the same wash. Hazardous fumes can
form.
• Unplug power supply cord before attempt
ing to service your washer.
• Do not machine wash fiberglass materials.
Small particles can stick to fabrics washed
in following loads and cause skin irritation.
Page 5
Parts and Features
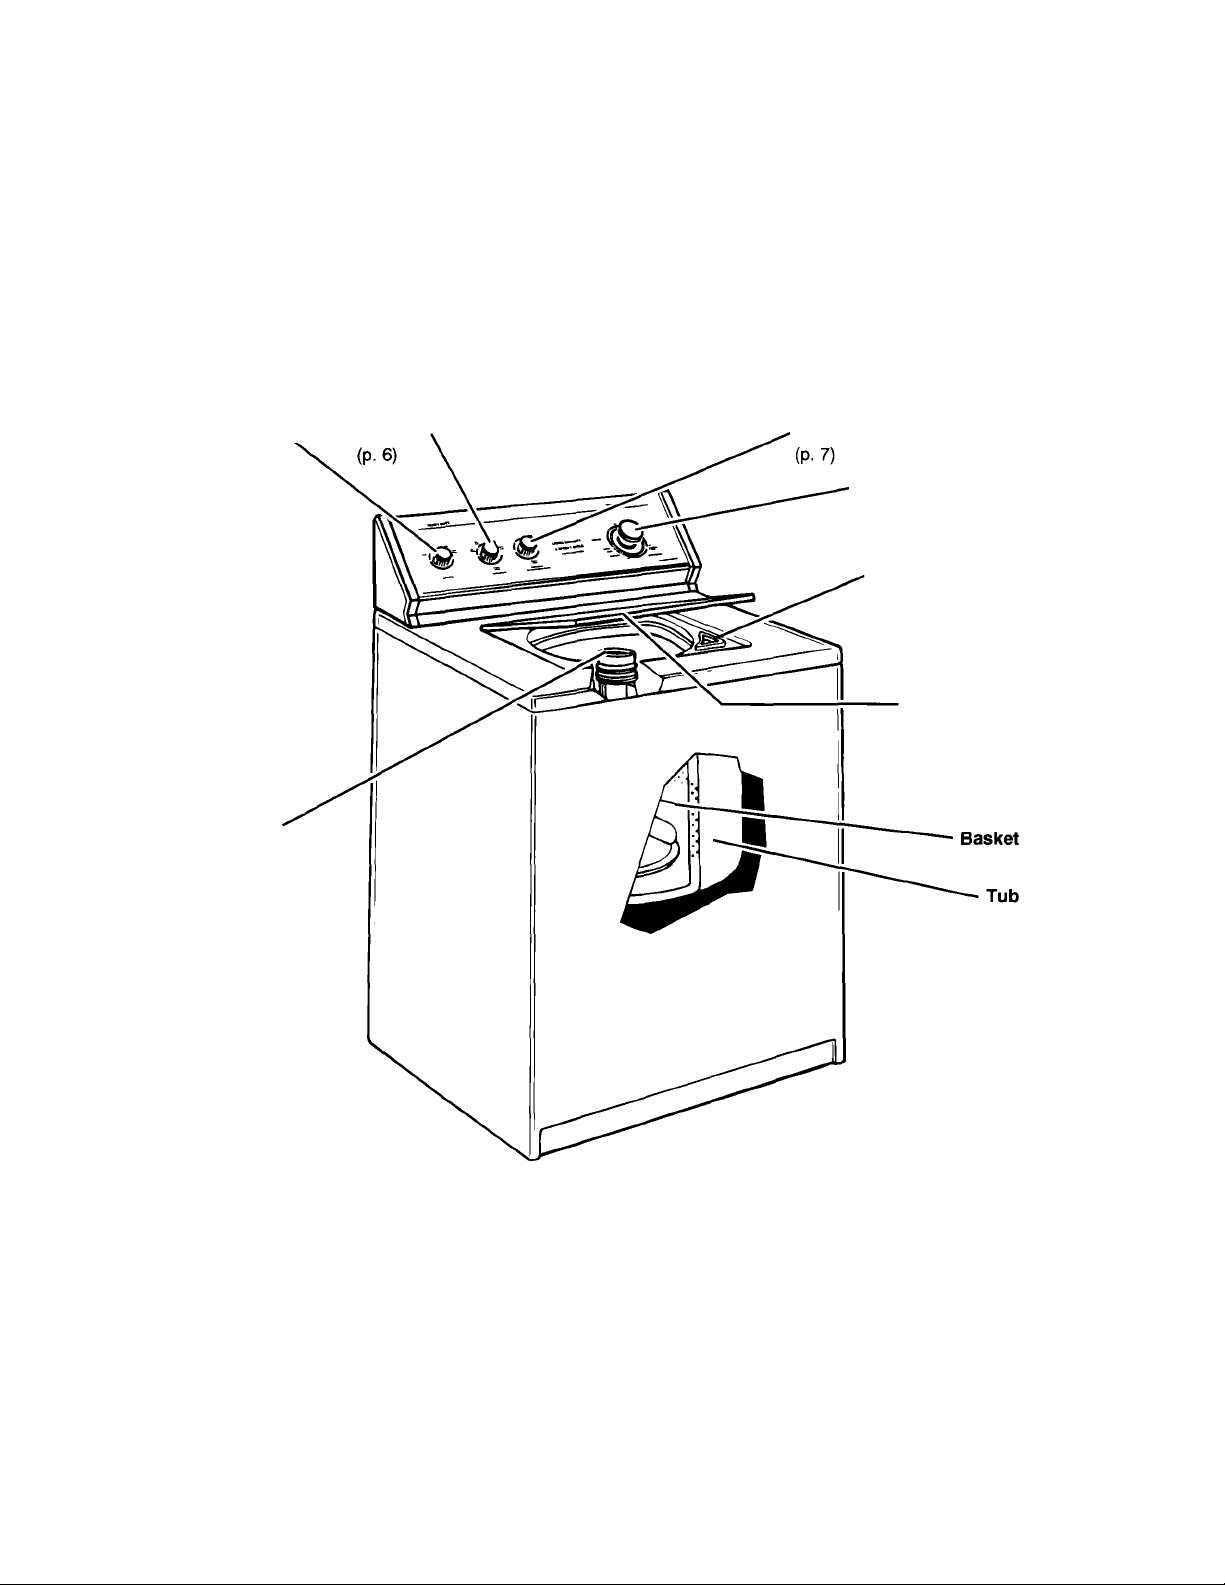
The parts and features of your washer are illustrated on this page. Become familiar with all
parts and features before using your washer.
Page references are included next to some features. Refer to those pages for more
information about the features.
Load size
selector
(p. 6)
Liquid fabric
softener
dispenser
(P. 11)
Water temperature
selector
Extra rinse
selector
Cycle control knob
(pp. 7-9)
Liquid chlorine
bleach dispenser
(P.11)
Model and serial
number plate
(under lid)
MAGIC CLEAN®
lint filter
(bottom of washer basket)
(p. 10)
Page 6

Operating Your Washer
To obtain the best washing results, you must operate your washer properly. This section
gives you this important information. Page references are included for more information.
Starting your washer
1. Add measured detergent to the
washer. Then place a sorted load of
clothes In the washer.
• Sort and load clothes as described on
pages 13 and 14.
• If desired, you may also add color safe
bleach or extra detergent for the Super
Wash cycle.
2. (OPTIONAL STEP) If desired, add
measured liquid chlorine bleach to the
liquid bieach dispenser. See page 11.
• Use only liquid chlorine bleach in the
bleach dispenser.
3. (OPTIONAL STEP) If desired, pour
measured liquid fabric softener into
the dispenser. See page 11.
4. Close the washer lid.
5. Turn the Load Size Selector to the
setting that corresponds with the size
of your wash load and the type of
fabric being washed.
• The Load Size Selector is a rotary
knob. Your washer has five load size
settings
• To change the load size setting after
the washer has started to fill, turn the
Selector to the desired new setting.
dispenser
6. Select a wash-rinse temperature with
the Water Temperature Selector. Match
the water temperatures with the type of
fabric and soils being washed.
• See page 15 for water temperature
guidelines.
Wirm Cold
Cold Cold
WMh
Rina*
Temperature
Page 7
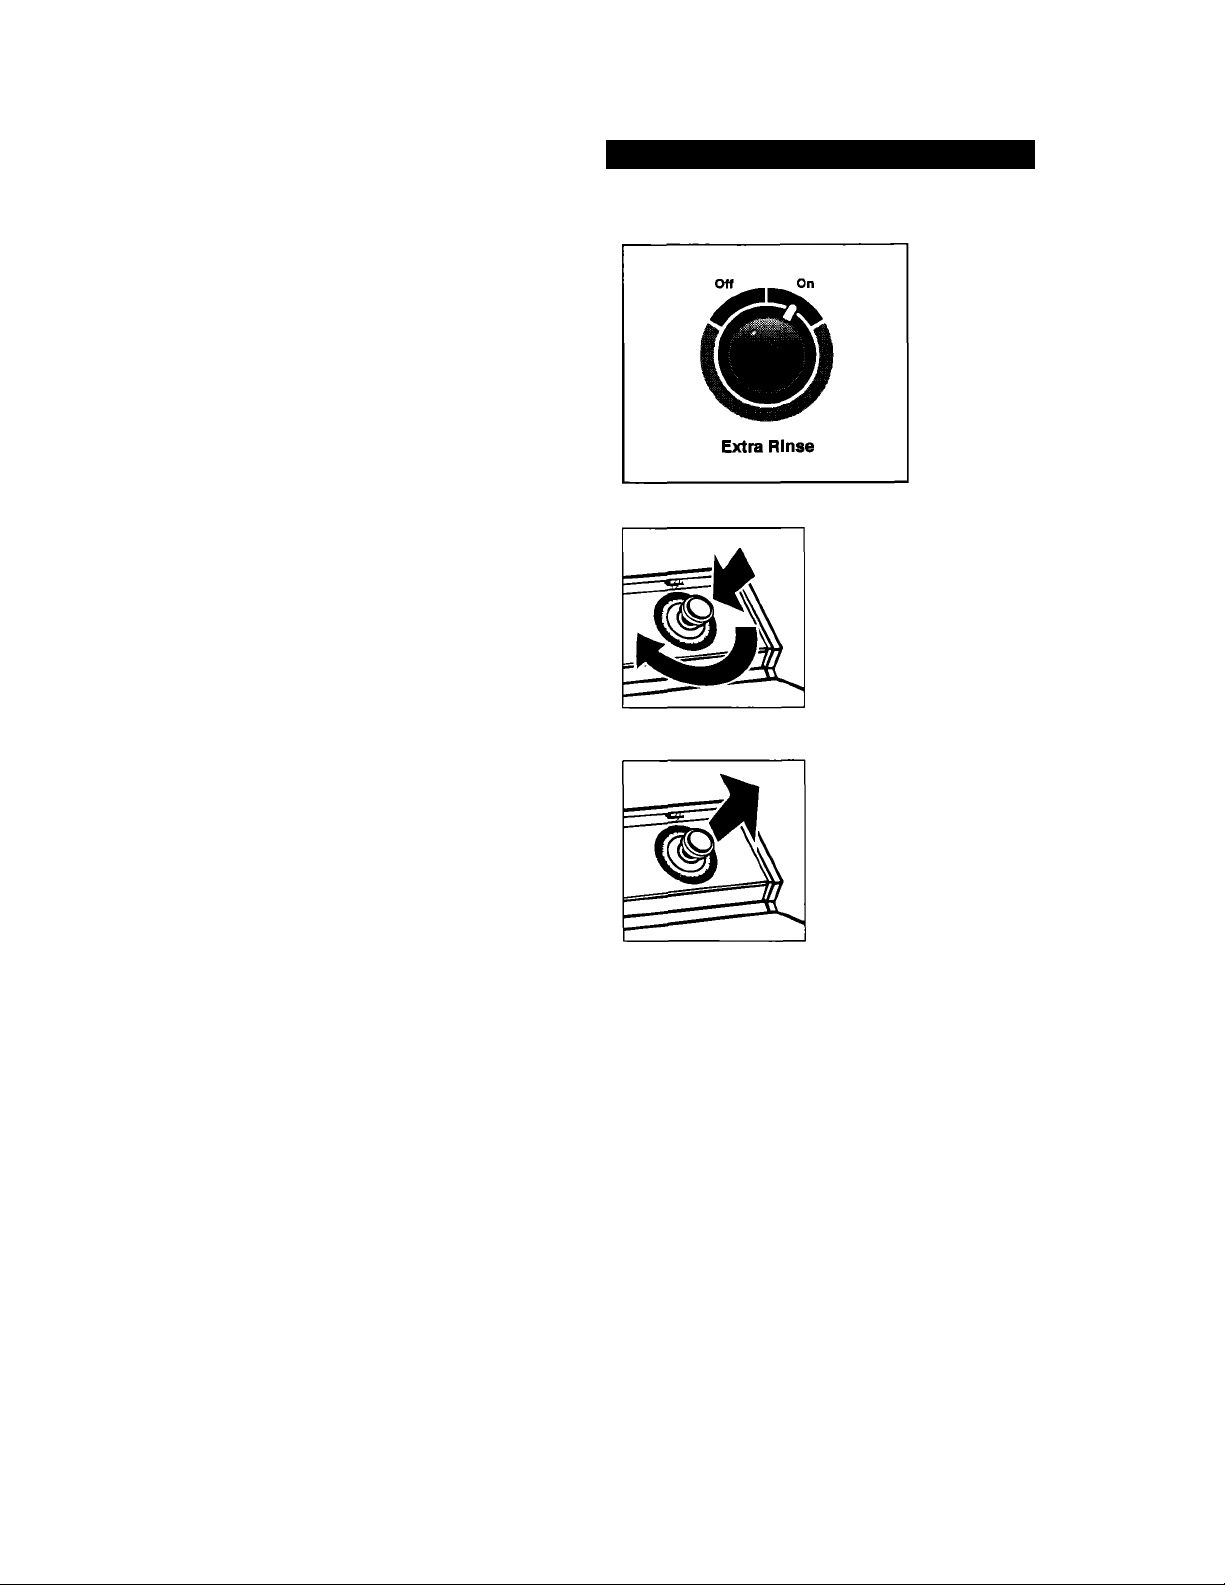
7. (OPTIONAL STEP) If desired, set the
Extra Rinse Selector to On to add an
additional rinse and spin to the end of
the wash cycle.
8. Push in the Cycle Control Knob and
turn it clockwise to the wash cycle you
want. See pages 8 and 9.
OPERATING YOUR WASHER
9. Pull out the Cycle Control Knob to
start the washer.
Stopping/restarting your washer
• To stop the washer at any time, push in
the Cycle Control Knob.
• To restart the washer, close the lid (if
necessary) and pull out the Cycle Control
Knob.
Page 8
OPERATING YOUR WASHER
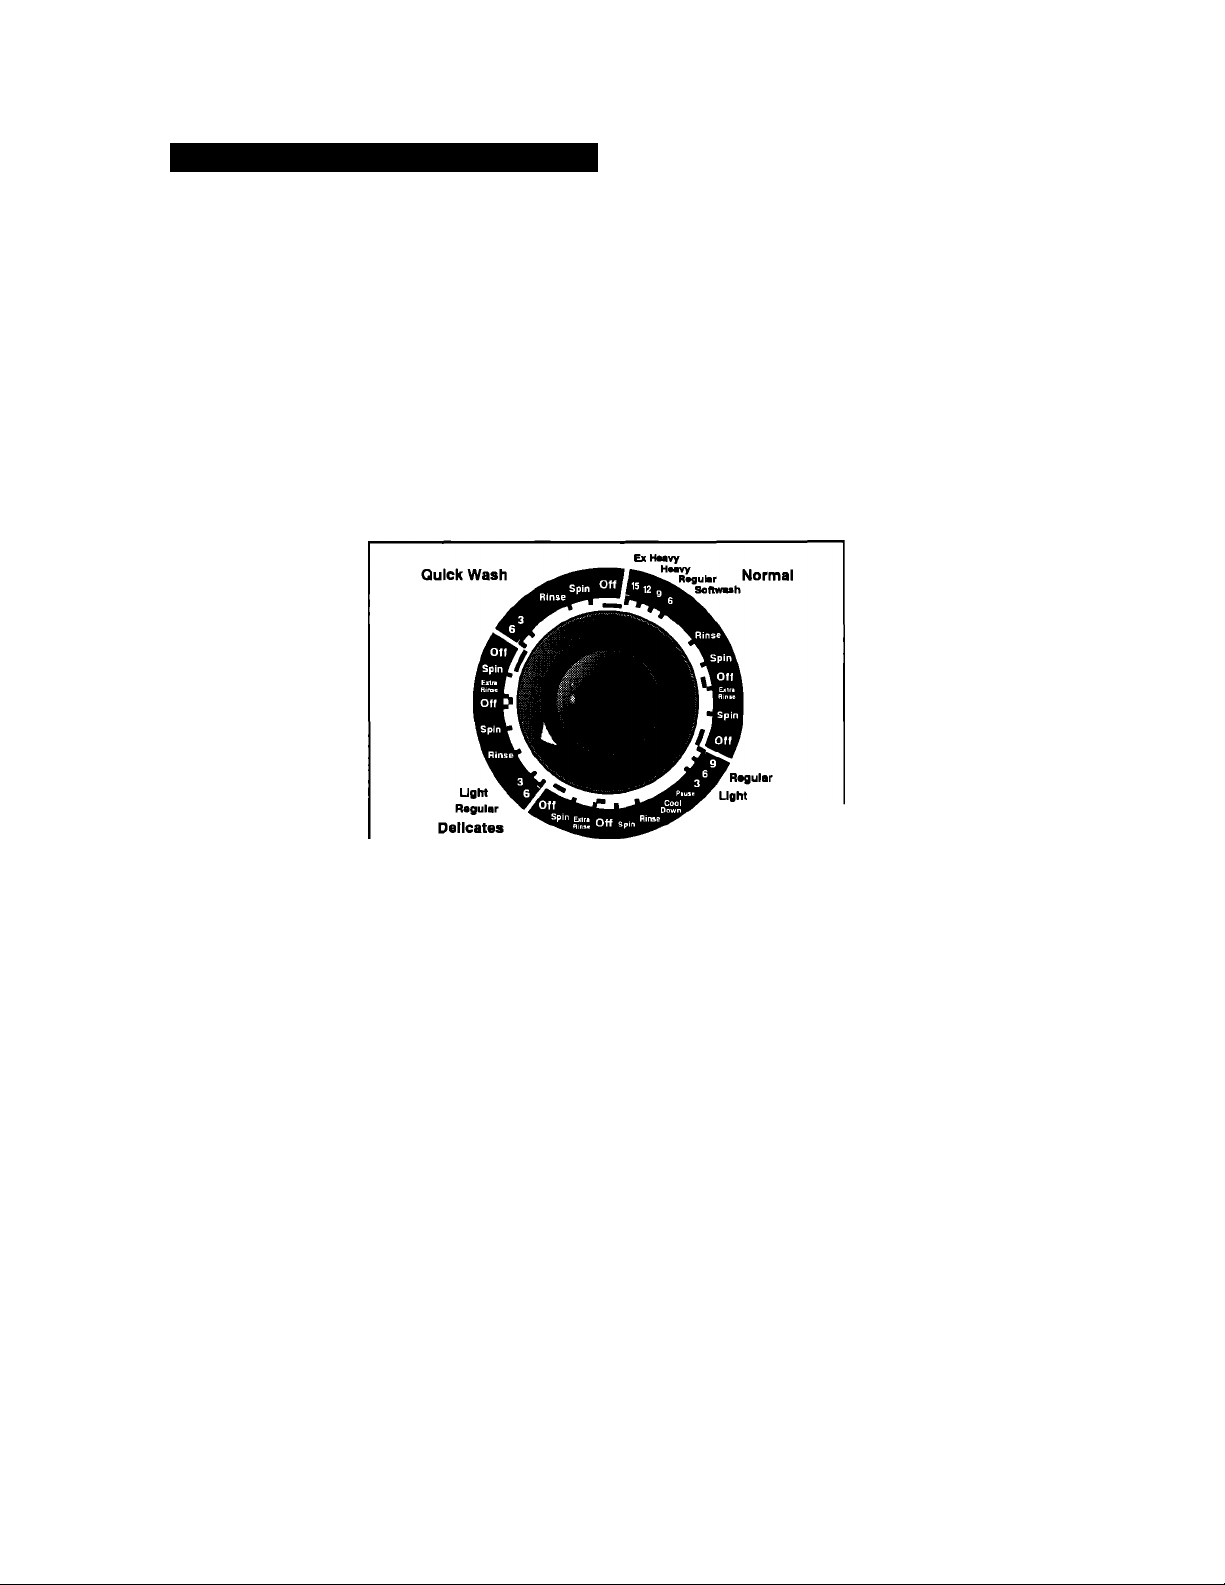
Selecting a cycle and time
This section iiiustrates and describes the
wash cycles you can select with the Cycie
Control Knob. Use this information to heip
you make the best cycle selections for your
wash ioads. Each cycle is designed for
different types of fabrics and soil levels.
• The washer pauses briefly throughout
each cycle. These pauses are normal for
washer operation.
Refer to page 9 to learn more about the
sounds you may hear during a wash cycle.
Refer to page 10 to help you understand
what happens during a wash cycle.
Normal Cycle
The Normal cycle features the Gentle Wash
system, high agitation speeds, and longer
spin speeds to shorten drying time. Use this
cycle for cleaning cotton and linen fabrics.
Select 9 (REGULAR), 12 (HEAVY), or 15
(EX HEAVY) minutes of wash time, depend
ing on whether your load is moderately or
heavily soiled.
For lightly soiled cotton and linen fabrics,
use the 6-minute SOFTWASH setting.
Permanent Press Cycle
The Permanent Press cycle features the
Gentle Wash system, a cool-down rinse,
and low spin speeds to reduce wrinkling.
Use this cycle for cleaning permanent press
and some synthetic fabrics. Select 6 (LIGHT)
or 9 (REGULAR) minutes of wash time,
depending on whether your wash load Is
lightly or moderately soiled.
Permanent
Press
Delicate Cycle
The Delicate cycle features a reduced
agitation speed for gentle soil removal. Low
spin speeds reduce wrinkling. Use 3
(LIGHT) or 6 (REGULAR) minutes of wash
time for cleaning lightly to moderately soiled
delicate items and washable knits.
Quick Wash Cycle
The Quick Wash cycle features a reduced
agitation speed for gentle soil removal while
providing high spin speeds to shorten drying
times. Select this cycle for lightly soiled
items and use small load sizes. This cycle is
especially suited for cotton and polyester
blends.
Page 9
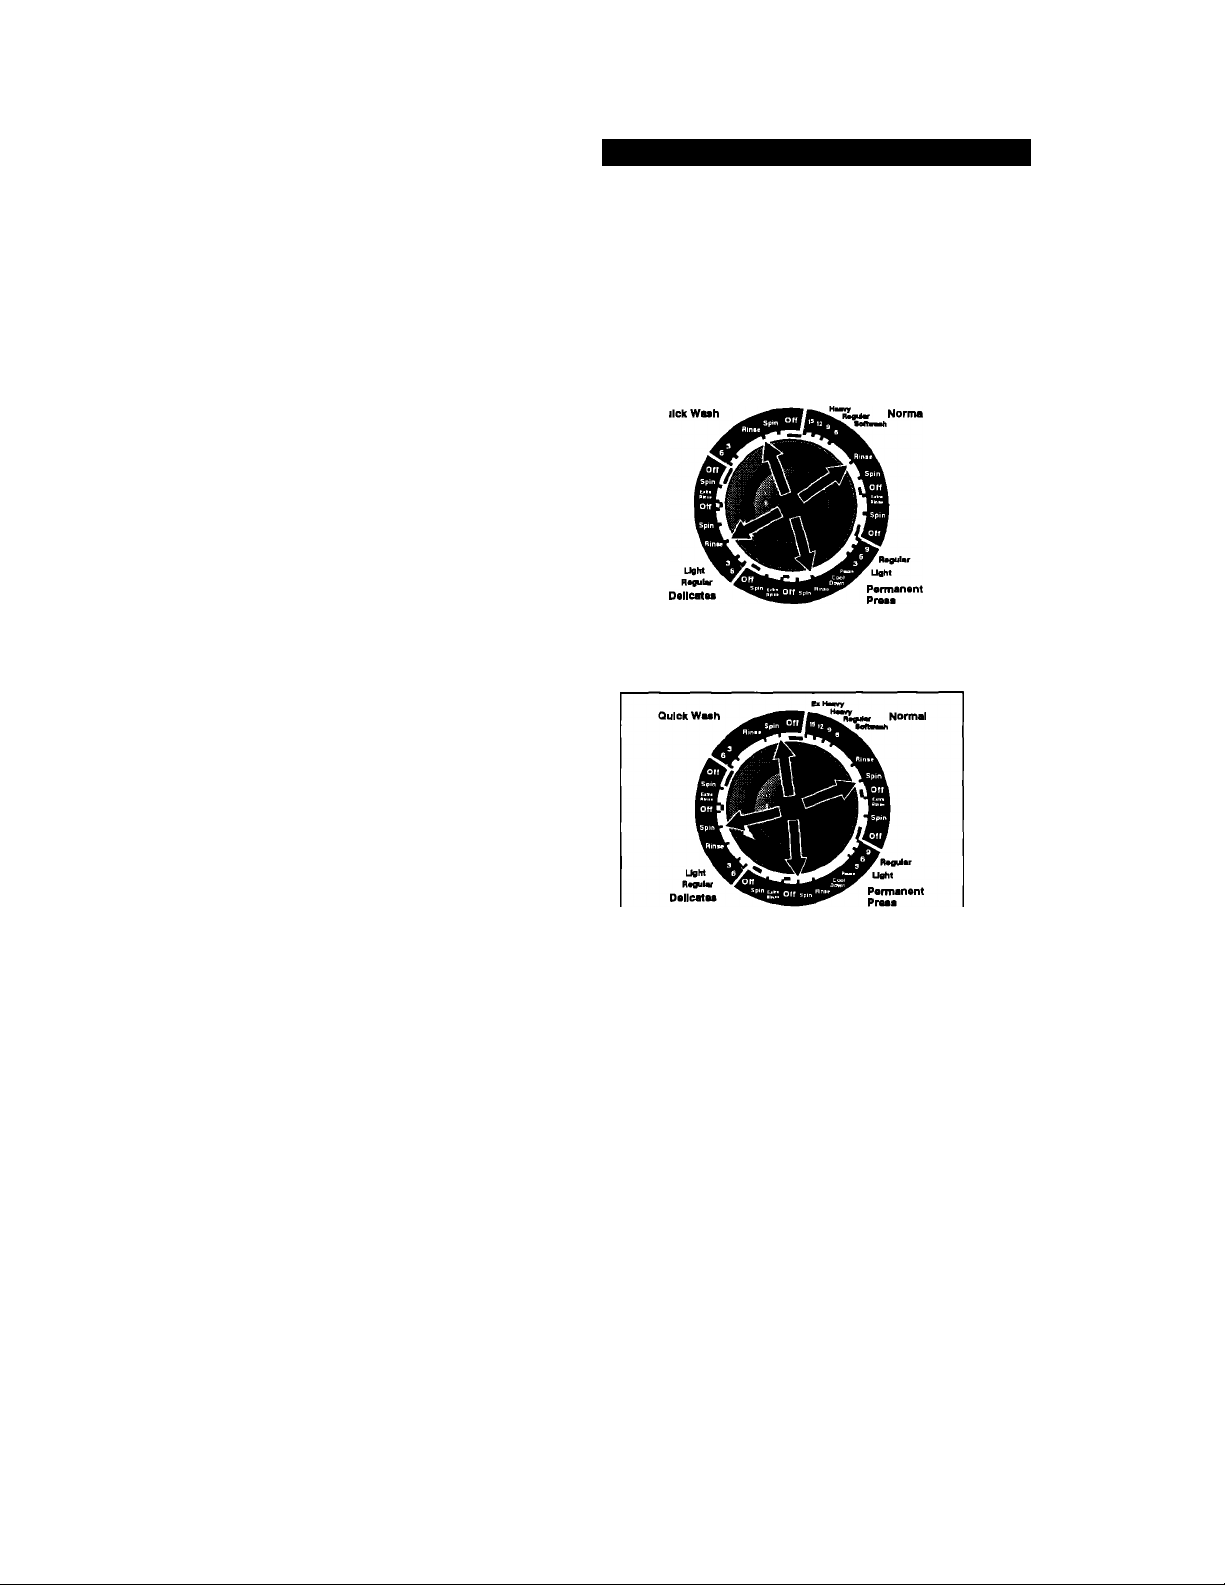
Using rinse and spin
NOTE: An Extra Rinse option is available in
some cycles. See page 7.
When using extra detergent for heavily
soiled clothes, or washing special-care
items, you may find an extra rinse and spin
is needed.
1. To add an additional rinse, push in the
Cycle Control Knob and turn clockwise to
RINSE, as illustrated.
2. Pull out the Cycle Control Knob. The
washer fills to selected load size,
agitates, drains, and spins.
Using drain and spin
A drain and spin may help shorten drying
times for some heavy fabrics or special-care
items by removing excess water.
1. Push in the Cycle Control Knob and turn
clockwise to SPIN, as illustrated.
2. Pull out the Cycle Control Knob. The
washer drains, then spins.
OPERATING YOUR WASHER
Understanding normal washer sounds
Your new washer may make sounds that
your old one didn’t. Because the sounds are
unfamiliar, you may be concerned about
them. Don’t be; most of them are normal.
The following describes some of the
sounds you may hear and what causes
them.
During washing
When you select a small load size setting for
a small wash load, your washer has a lower
water level. With this lower water level, you
may hear a clicking sound from the upper
portion of the agitator.
During drain
The rate that water is drained from your
washer depends on your installation. If water
is drained quickly from the washer, you may
hear air being pulled through the pump. This
happens during the end of draining.
After drain and before spin
When the cycle changes from draining to
spinning, you may hear gears engaging.
Page 10
OPERATING YOUR WASHER
Understanding what happens in each cycle
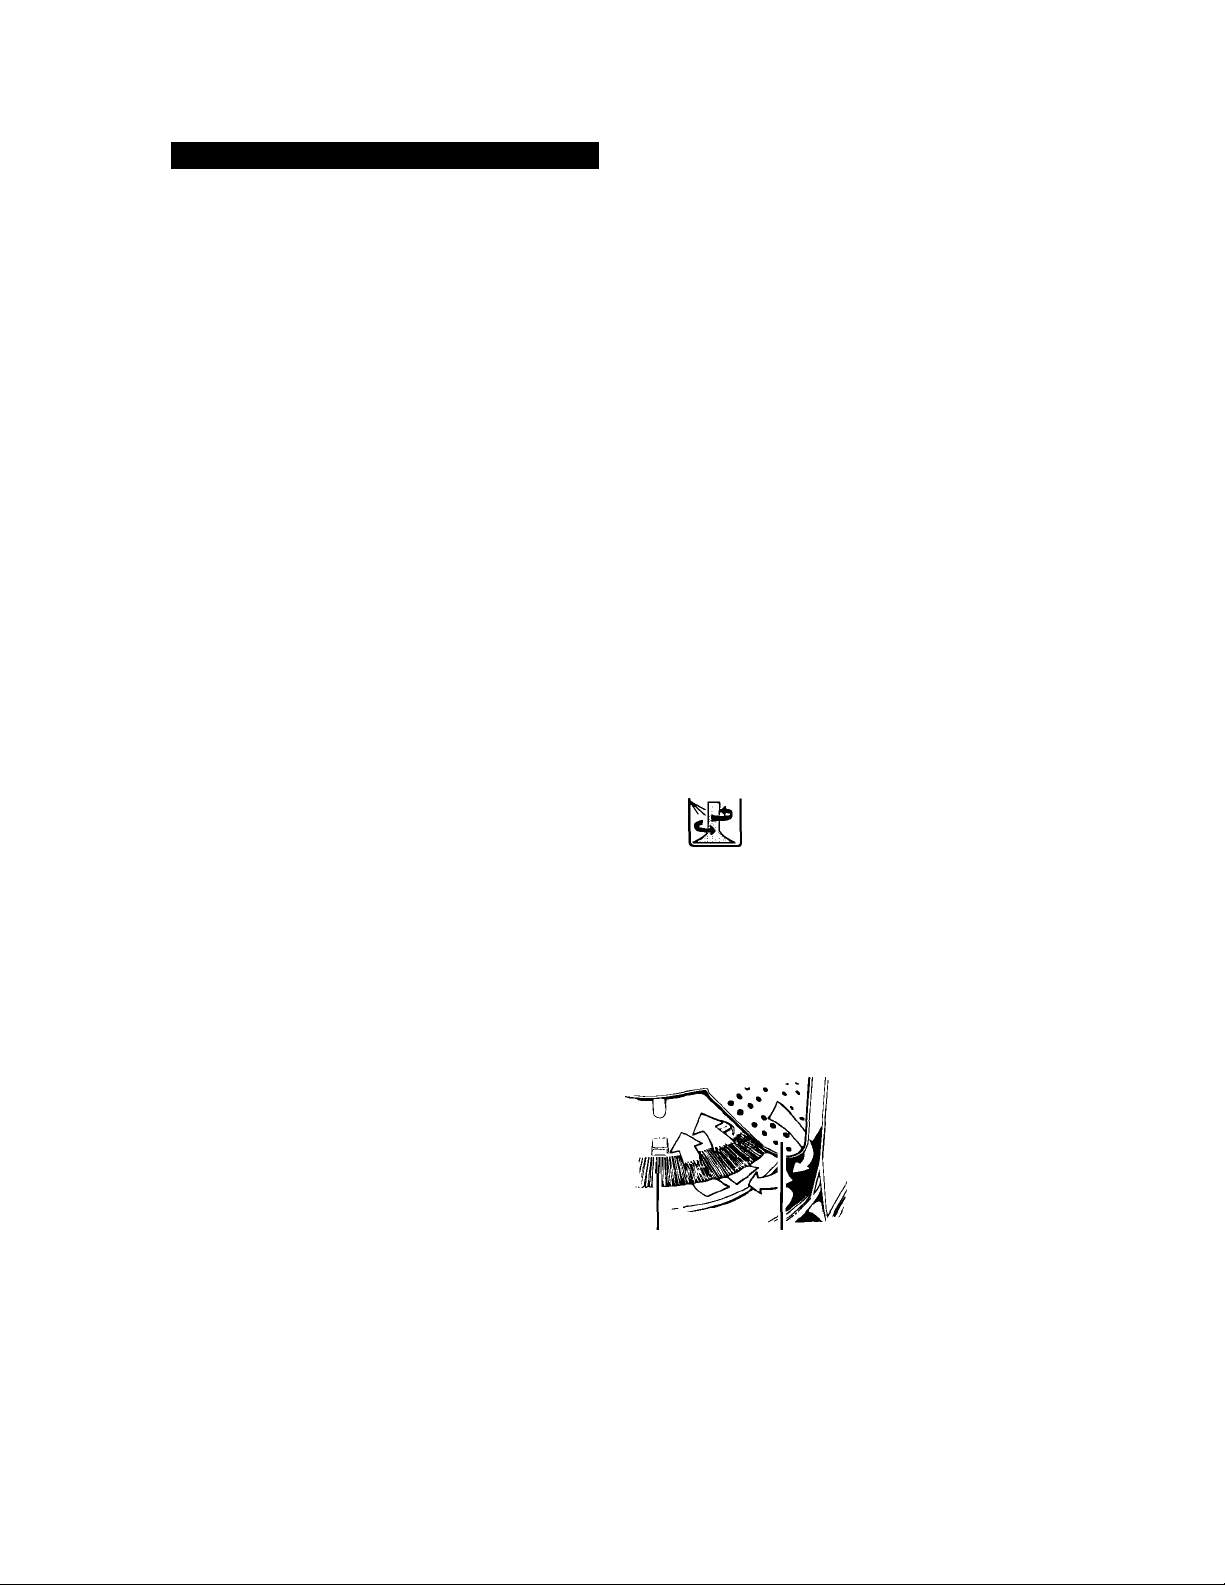
When the Cycle Control Knob is set to a
number and pulled out, the washer fills (to
the selected load size) before agitation and
timing start. The washer begins agitating
immediately after filling; agitation occurs with
the washer lid up or down.
After agitation starts, the Cycle Control Knob
turns clockwise until it points to an OFF area
and the cycle ends.
NOTES:
• The washer pauses briefly throughout
each cycle. These pauses are normal for
washer operation.
• A Gentle Wash system helps protect your
fabrics by reducing wash agitation speed
during the last few minutes of wash
agitation in the Normal and Permanent
Press cycles.
WASH
Fill
Wash selected time
Drain*
No agitation
*The Permanent Press cycle partially
drains, fills, agitates briefly, and drains.
Spin
MAGIC CLEAN® lint filter
The lint filter at the bottom of the washer
basket cleans itself. During agitation, wash
and rinse water passes over the filter,
separating the lint from the water. The lint is
then spun away from the filter and out of the
system during the spin part of the cycle.
If your washer drains into a tub, remove
any lint collected In the tub or strainer.
MAGIC CLEAN
lint filter
RINSE
Fill
Rinse
Drain-No agitation
Spin-Spray rinse
Spin
Off
Basket
interior
10
Page 11
OPERATING YOUR WASHER
Adding liquid chlorine bleach
Use your washer’s liquid chlorine bleach
dispenser to add bleach to the wash load.
Always measure liquid chlorine bleach. Do
not guess. Never use more than 1 cup
(250 mL) for a full load. Use less with lower
water level settings. Follow manufacturer’s
directions for safe use. Use a cup with a
pouring spout to avoid spilling.
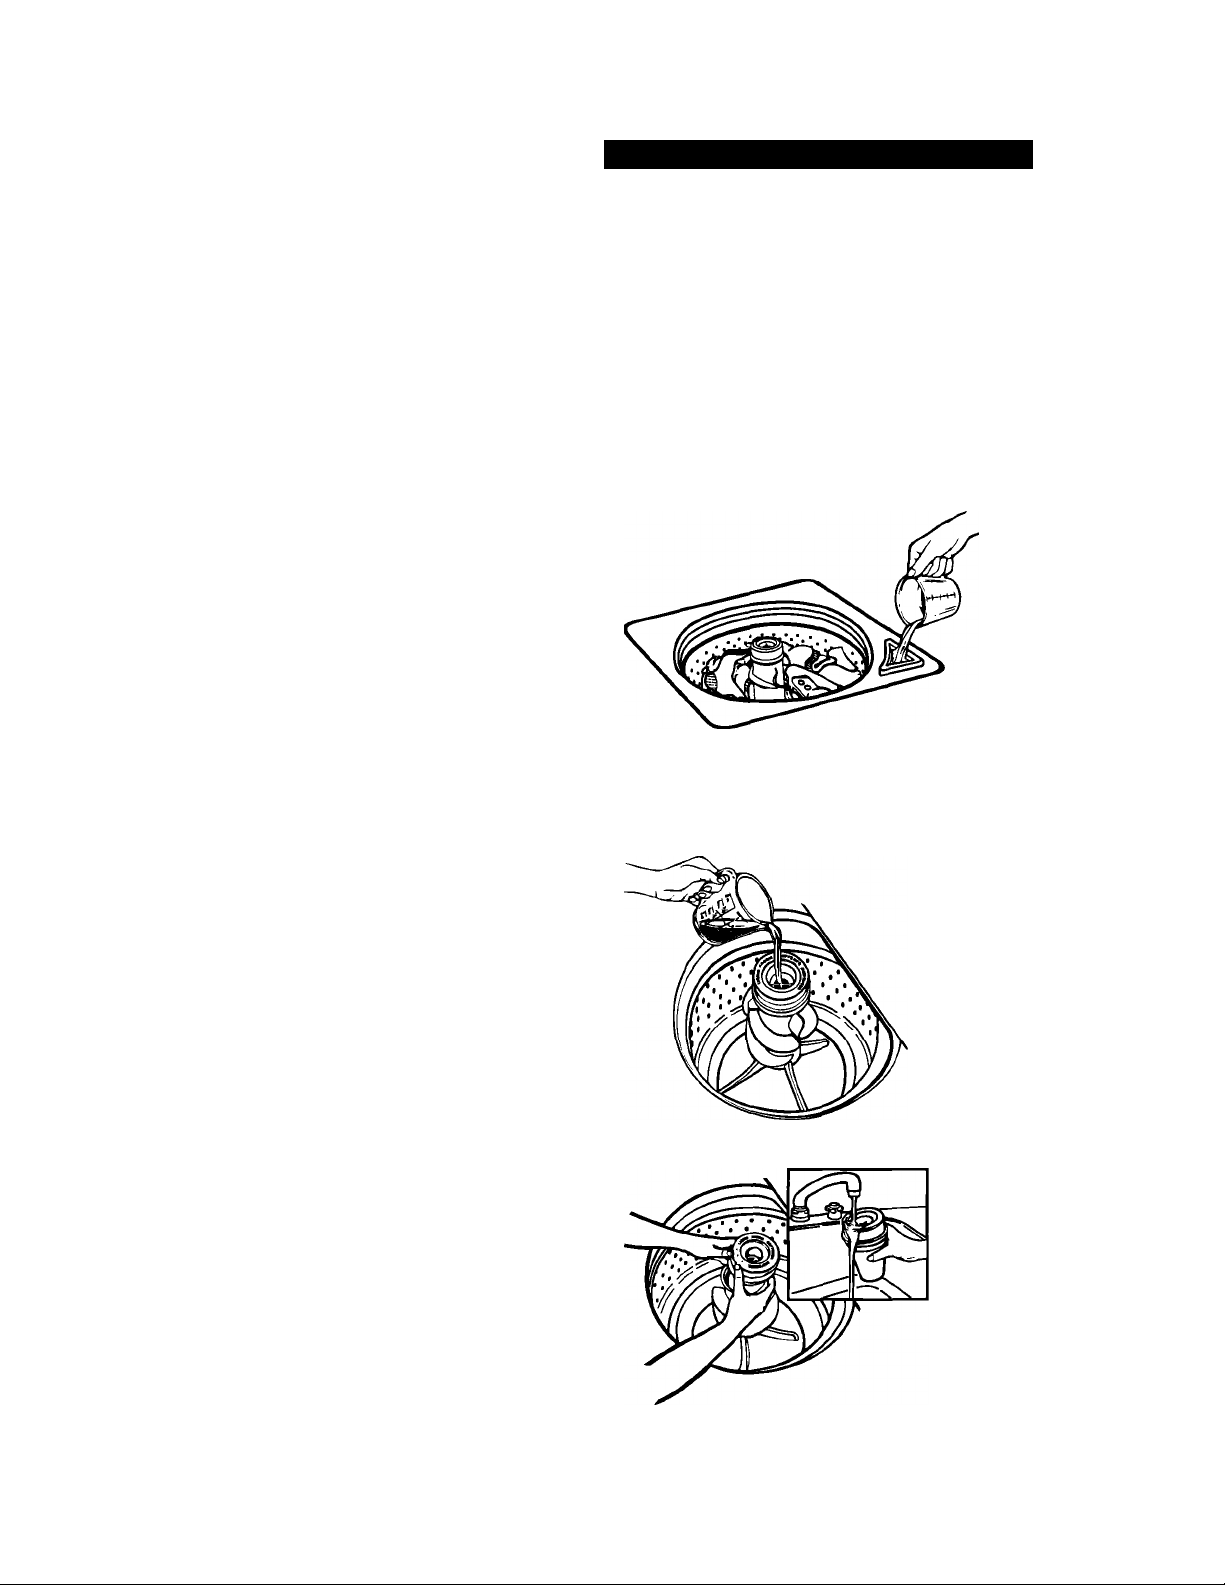
1. Load the washer.
2. Pour measured chlorine bleach carefully
into the dispenser. Do not let bleach
splash, drip, or run down into washer
basket. Undiluted bleach will damage any
fabric it touches.
3. Start the washer. Bleach will be diluted
automatically during wash part of cycle.
NOTE: Do not use this dispenser to add
powdered chlorine or color safe bleach to
your wash load. The dispenser is for liquid
chlorine bleach use only.
Adding liquid fabric softener
1. Add detergent and load clothes into the
basket.
2. Pour liquid fabric softener into the dis
penser using the amount recommended
on the package. Avoid dripping or spilling
any fabric softener on the load.
3. Dilute fabric softener with warm water.
Fill dispenser with warm water until liquid
reaches the cross bar in the opening.
4. Start the washer. Diluted fabric softener
will be added to the load during the final
rinse.
NOTE: Do not stop the washer before the
rinse part of the cycle begins. Staining
can occur.
5. Flush dispenser periodically with warm
water, as illustrated.
• To remove the dispenser, grasp the top
of the dispenser with both hands.
Squeeze and push upward with thumbs
to remove.
• Clean dispenser by holding under water
faucet. Replace after cleaning.
NOTE: Do not wash clothes with this
dispenser removed. Do not add detergent
or bleach to dispenser. The dispenser is
for liquid fabric softener use only.
11
Page 12
Caring for Your Washer
Proper care of your washer can extend its life. This section explains how to care for your
washer properly and safely.
Cleaning your washer
Exterior
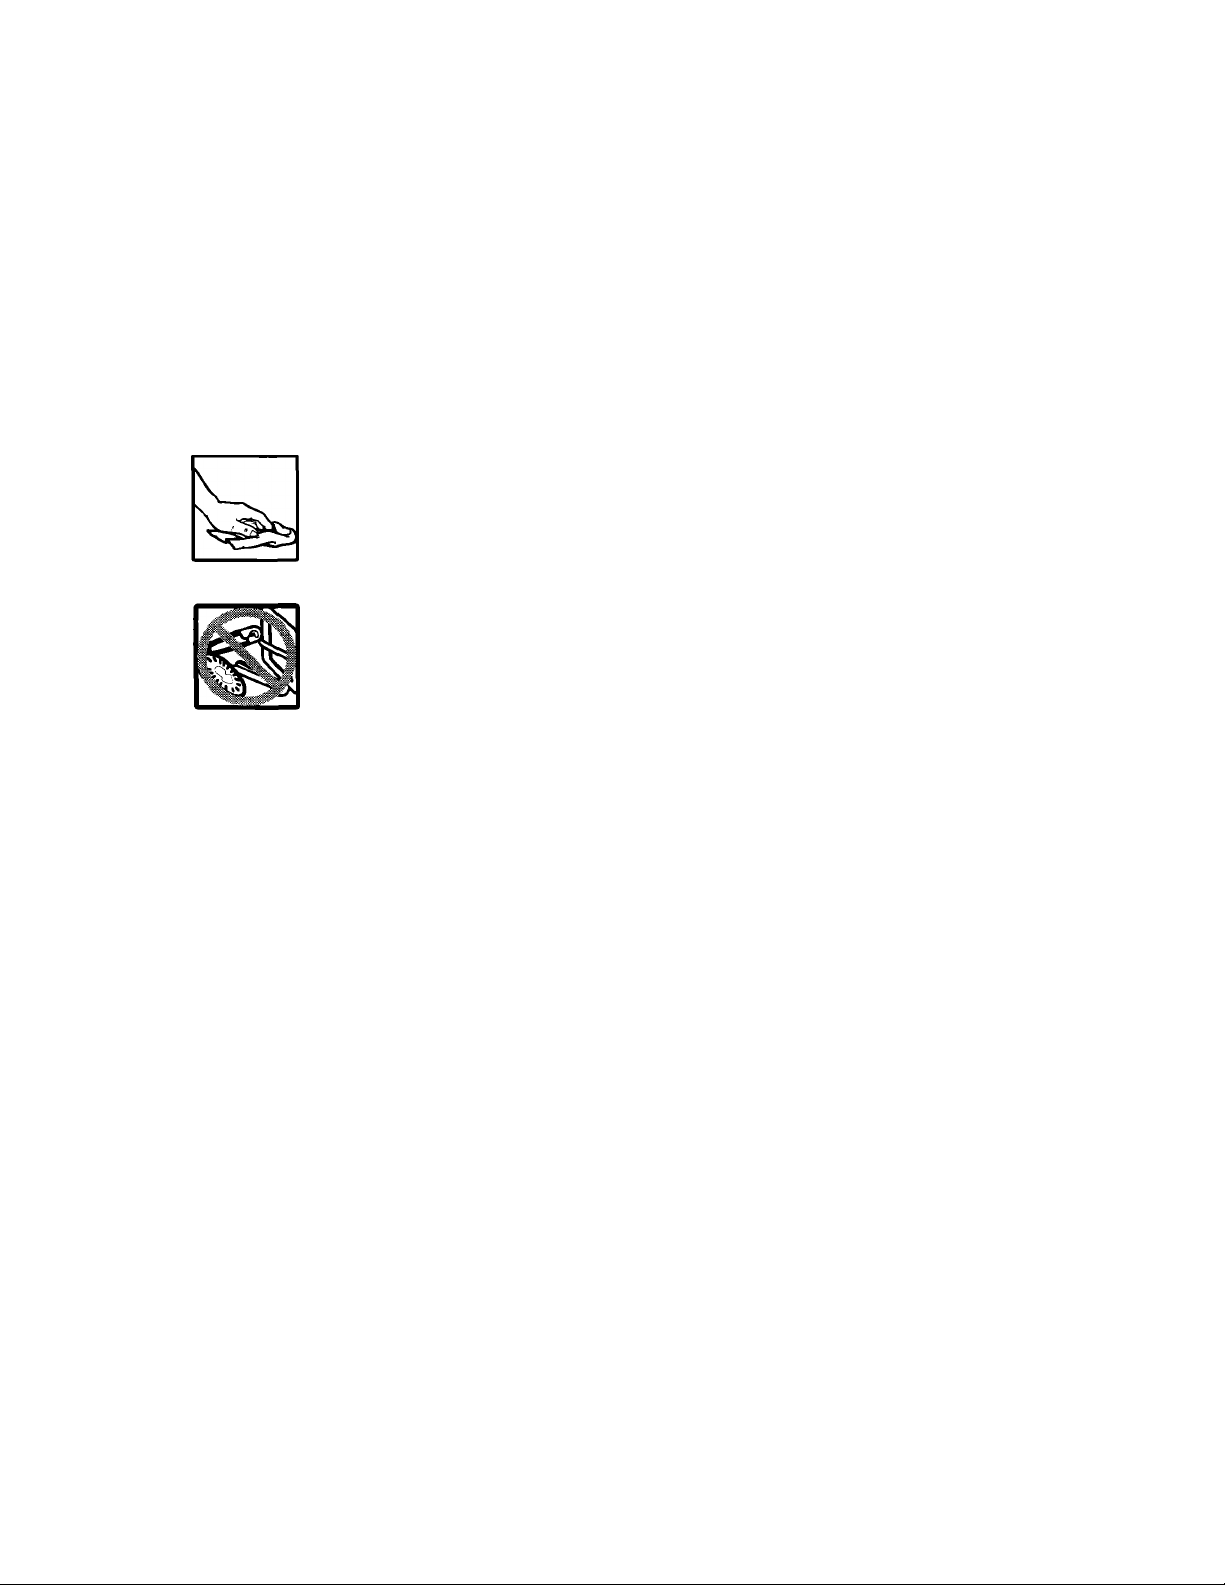
Wipe up detergent, bleach, and other spills
with a soft, damp cloth or
sponge as they occur. Occa
sionally wipe the outside of the
washer to keep it looking like
new.
Do not put sharp or metal objects in your
washer. They can damage the
finish. Check all pockets for
pins, clips, money, bolts, nuts,
etc. Do not lay these objects
on your washer after emptying
pockets.
Winter storage or moving care
Install and store your washer where it will not freeze. Because some water may stay in the
hoses, freezing can damage your washer. If storing or moving your washer during freezing
weather, winterize it.
To winterize washer:
1. Shut off both water faucets.
2. Disconnect and drain water inlet hoses.
3. Put 1 quart (1L) of R.V.-type antifreeze in
the basket.
4. Run washer on a drain and spin setting
(see page 9) for about 30 seconds to mix
the antifreeze and water.
5. Unplug the power supply cord.
Interior
Clean interior with 1 cup (250 ml) of chlo
rine bleach mixed with 2 cups (500 mL) of
detergent. Run washer through a complete
cycle using hot water. Repeat process if
necessary.
NOTE: Remove hard water deposits using
only cleaners labeled as washer safe.
To use washer again:
1. Flush water pipes and hoses.
2. Reconnect water inlet hoses.
3. Turn on both water faucets.
4. Reconnect power supply cord.
5. Run the washer through a complete cycle
with 1 cup (250 mL) of detergent to clean
out antifreeze.
Non-use or vacation care
Operate your washer only when you are at
home. If you will be on vacation or not using
your washer for an extended period of time,
you should:
• Unplug the power supply cord or turn off
electrical power to the washer.
12
' Turn off the water supply to the washer.
This helps avoid accidental flooding (due
to a water pressure surge) while you are
away.
Page 13
Laundry Tips
This section reviews proper laundering techniques and gives you additional washing
information.
Preparing clothes for washing
' Close zippers, snaps, and hooks to avoid
snagging other items. Remove
pins, buckles, and other hard
objects to avoid scratching the
washer interior. Remove non
washable trim and ornaments.
• Empty pockets and turn them inside out.
• Turn down cuffs, brush away lint and dirt.
• Turn synthetic knits inside out to avoid pilling.
Sorting
Separate heavily soiled items from lightly
soiled ones, even if they would
normally be washed together.
Separate lint givers (towels,
chenille) from lint takers
(corduroy, synthetics, perma
nent press). When possible, turn lint givers
inside out.
' Tie strings and sashes so they will not
tangle.
• Mend tears, loose hems, and seams.
• Treat spots and stains. (See “Removing
Stains” on pages 17-19.)
• Stained or wet garments should be
washed promptly for best results.
’ Separate dark colors from light colors,
colorfast items from noncolorfast items.
’ Sort by fabric and construction (sturdy
cottons, knits, delicate items).
Loading
Drop items into washer loosely. Fill to the
— ^ I top of the basket (top row of
C holes). Do not wrap items
/ \ around the agitator. Items
should move easily through
wash water for best cleaning
and wrinkle-free results. Items should sink
and reappear later.
• Load washer properly and select correct
load size setting. Overloading or packing
the machine, and selecting a setting too
small for the wash load can:
- cause poor cleaning.
- increase wrinkling.
- create excessive lint.
- wear out items faster (because of pilling).
Load by the amount of space items take
up, not by their weight.
Mix large and small items in each load.
Load evenly to maintain
washer balance. An off
balance load can make the
washer vibrate during spin.
Use a large load size setting to reduce
wrinkling with permanent press clothes and
some synthetic knits. These items should
have more room to move in the water than
heavy items (towels, jeans).
' Reduce wash time when using a small
load size setting. Loads with only a few
small items need less wash time.
13
Page 14
LAUNDRY TIPS
Loading suggestions
For these suggested full-sized loads, set the Load Size Selector to the highest load size
setting.
LARGE CAPACITY WASHERS
Heavy Work Permanent
Clothes
Press
2 pair pants 1 double sheet
3 shirts
3 pair jeans
1 coverall
Knits
2 slacks
2 blouses
4 shirts
4 tops
1 tablecloth
1 dress
1 blouse
2 slacks
3 shirts
2 pillowcases
2 dresses
Mixed Load
2 double or
1 king size
sheet(s)
4 pillowcases
6 T-shirts
6 pair shorts
2 shirts
2 blouses
6 handkerchiefs
Towels
8 bath towels
8 hand towels
10 wash cloths
1 bath mat
Delicates
2 camisoles
4 slips
4 panties
2 bras
2 nighties
Saving energy
• Use warm or cold wash water for most
loads. Use hot water only when washing
heavy, greasy soils or whites.
• Use cold rinses.
• Wash full loads.
• Use lower water levels when washing
small loads.
• Avoid rewashing. Use enough detergent
and pretreat stains or heavy soils. Use the
cycles and wash times recommended for
the fabric and soil.
• Use your washer during off-peak hours usually early morning and late evening.
(Ask your power company.)
14
Page 15
Water guidelines
Selecting water temperatures
WASH WATER
TEMPERATURE*
HOT
130°F (54°C)
or above
WARM
90-110°F
(32-44°C)
COLD
70-90° F
(21-32°C)
SUGGESTED FABRICS
• Work clothes
• Sturdy whites/colorfast
pastels
• Diapers
• Dark/noncolorfast coiors
• Permanent press items
• Nylon, polyester, acrylics.
silks, woolens
• Knits/delicate fabrics
• Extra-sensitive colors
• Noncolorfast items
• Hand washables
LAUNDRY TIPS
COMMENTS
• Best cleaning for heavily soiled items
• Removes oils, perspiration, greasy
soils, and stains
• Prevents graying or yellowing
• Best for moderately soiled to lightly
soiled items
• Safe for most fabric finishes
• Less fading and dye bleeding
• Reduces wrinkling
• Best for very lightly soiled items
• Saves hot water
• Best rinse water temperature
* The washer features cold rinses for all wash temperatures. In addition, warm rinses are
available with warm washes. Warm rinse water provides better water extraction than cold
rinse water and shortens drying times. However, warm rinse water may increase wrinkling
when line drying. In cold climates, warm rinse water also provides a more comfortable
temperature for handling the wash load.
Checking hot water
temperature
Your hot water should be 130°F (54°C) or
above. If you do not know your hot water
temperature, you can check it easily. You
may need to raise the temperature of your
water heater. To check your hot water:
1. Fill a pan with the hottest water available
from the faucet that fills your washer.
NOTE: If you do not have a faucet at your
washer site, collect the water from the
faucet closest to your washer.
2. Place a candy thermometer or cooking
thermometer in the water to check the
temperature.
NOTE: In wash water temperatures colder
than 70°F (21 °C), detergents do not dissolve
well. Also, soils may be difficult to remove,
and some fabrics may retain wear wrinkies
and may have increased pilling.
Water hardness
Many poor washing results can be traced to
the hardness of the wash water. To check
your water hardness;
• City water - ask the city water company.
• Well water - ask the local water authority.
Ask for the mineral content in grains/gallon
or parts/million. If your water is more than
8 grains/gallon or more than 137 parts/
million, you should consider:
• Installing a water softener.
• Using more detergent.
• Using a packaged water conditioner.
• Not using soap.
15
Page 16
LAUNDRY TIPS
Washing special-care items
Most garments and household textiles have care labels with laundering instructions. Always
follow care label directions when they are available. Below are general washing instruc
tions for some special washables.
ITEM
Blankets
(electric or woolen)
Curtains, drapes,
slipcovers
Diapers When using chlorine bleach for soaking, add extra detergent to the
Elastic, spandex Elastic picks up oil from the body. Oil can damage elastic. Wash
Flame-retardant
clothing
Knits Knits are comfortable to wear because they stretch. However, this
CARE INSTRUCTIONS
Pretreat spots and stains. Select water temperature, cycle, and
time according to the type of blanket being washed. Two rinses
may be necessary. Check care label to see if manufacturer
recommends machine washing.
Wash small loads. Crowding may cause wrinkling. Replace
slipcovers while still slightly damp. They will dry to fit tightly.
NOTE: Sun-damaged curtains and draperies will tear whether
hand or machine washed.
load. Avoid overuse of fabric softeners - absorbency will be
reduced.
often to reduce the damage. Use warm water and sufficient
detergent to remove oils. Do not use chlorine bleach.
Items will be clearly labeled as flame-retardant. Follow
manufacturer’s instructions to retain flame-retardant qualities.
means that knits are more likely to be stretched and damaged
when washed (especially bulky knits). Knits made of synthetic
fabrics such as polyester, nylon, and acrylic tend to keep their
original shape more than knits made of cotton or ramie.
Pillows, stuffed
toys
Plastic, rubber
items
Quilts, bedspreads Do not wash cotton-filled comforters unless they are quilted or
Scatter rugs
Snowsuits, jackets
16
Washing feather pillows is not recommended unless they will be
dried in a dryer.
Treat as delicate items. Wash in warm water. Wash small items in
a mesh bag.
stitched. Tucked cotton batting tends to slip and become lumpy.
An extra rinse may be necessary.
Shake or vacuum rugs to remove loose dirt. Wash more than one
rug at a time. If washing only one rug, add bath towels to balance
the load.
Wash only one or two items at a time. You may need to stop the
washer occasionally to press air from the items being washed. An
extra rinse may be necessary.
Page 17
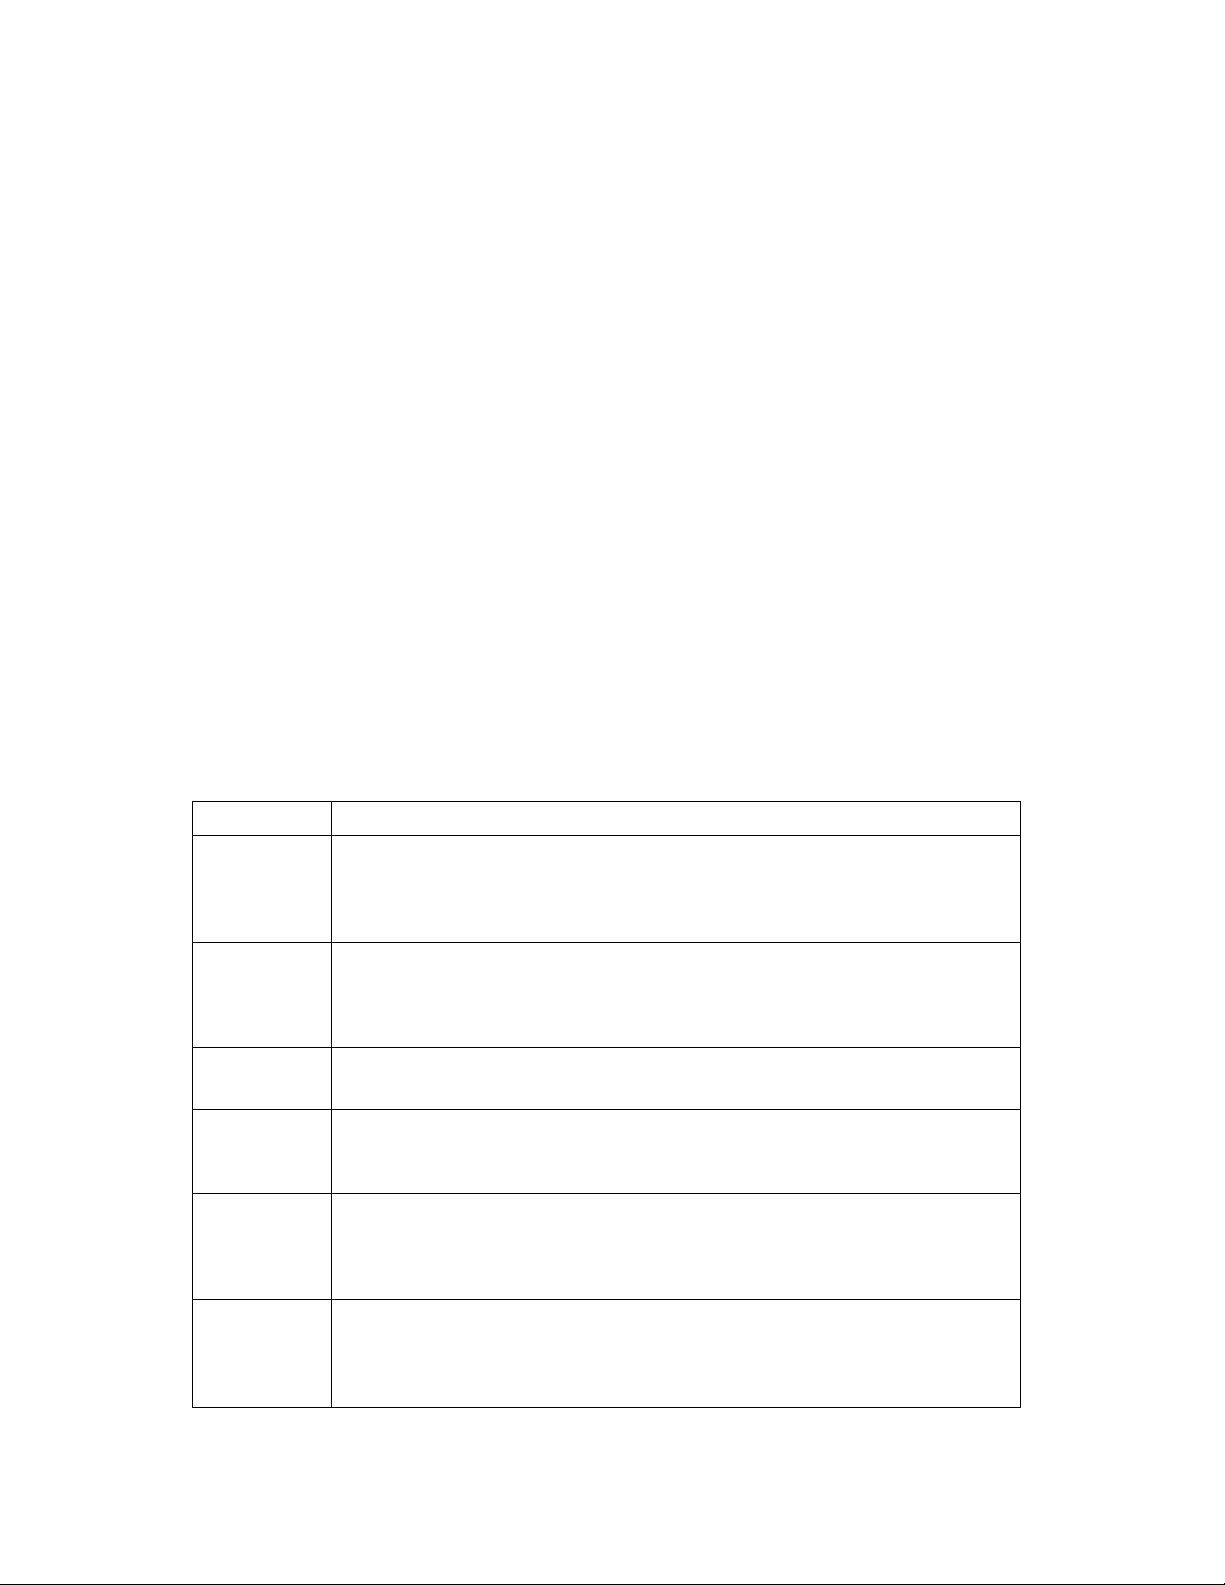
Removing Stains
stained, heavily soiled, or greasy items may need to be prewashed or soaked for best
results. Soaking helps remove protein-type stains like blood, milk, or grass. Prewashing helps
loosen soil before washing.
Stain removal rules
• Use warm water for soaking or prewashing
stained laundry. Hot water can set stains.
• Most stains are easier to remove when
they are fresh. Old or set stains may not
come out. Follow package directions for
pretreatment products.
• Before treating any stain, find out what
kind of stain it is, how old the stain is, what
kind of fabric it is, and if the fabric is
colorfast. (Check the care label.)
• Washing and drying can set some stains.
• Start with cold or warm water. Hot water
can set some stains.
Stain removal guide
• When bleach is recommended, use a
bleach that is safe for the fabric.
• Test stain removers on an inside seam or
hidden corner of the item to see if the color
is removed.
• Put the stained area face down on a paper
towel or white cloth. Apply the stain
remover to the back of the stain. This
forces the stain off the fabric instead of
through it.
• Meat tenderizer or enzyme presoaks help
break down some protein stains so they
are easier to remove.
STAIN
Alcoholic
beverage
Blood
Chewing
gum
Chocolate
or coffee
Crayon and
candle wax
Cream,
milk, or
ice cream
TO REMOVE
These stains turn brown with age, so treat immediately. Sponge or soak
fresh stains with cold water. Wash. If stain remains, soak 15 minutes in a
solution of lukewarm water, liquid detergent, and a few drops of white
vinegar. Rinse. Wash.
Rinse immediately or soak in cold water with enzyme presoak for 30
minutes or longer. Rinse. Rub detergent into any remaining stains. Rinse.
If stain remains, put a few drops of 3% hydrogen peroxide on stain for
three - five minutes. Rinse thoroughly. Wash.
Use ice to make gum hard. Scrape off what you can. Sponge with a
nonflammable fabric cleaner. Let dry. Wash.
Sponge immediately with a nonflammable fabric cleaner or apply a prewash
soil and stain remover. Rinse. Wash. If stain remains, apply a liquid deter
gent to stain or soak in warm water with an enzyme presoak. Rewash.
Scrape off excess with a dull knife. Place fabric between two blotters or
facial tissue. Press with warm iron. Remove color stain with nonflammable
fabric cleaner. Hand wash until stain is gone. If full load is crayon stained,
take to cleaners or coin-operated dry cleaning machine.
Sponge with a nonflammable fabric cleaner, or a prewash soil and stain
remover. Rinse. Wash. Repeat if necessary. If stain remains, apply a few
drops of liquid detergent and a few drops of ammonia. Blot dry and rinse.
If stain remains, soak in an enzyme presoak. Wash.
continued on next page 17
Page 18
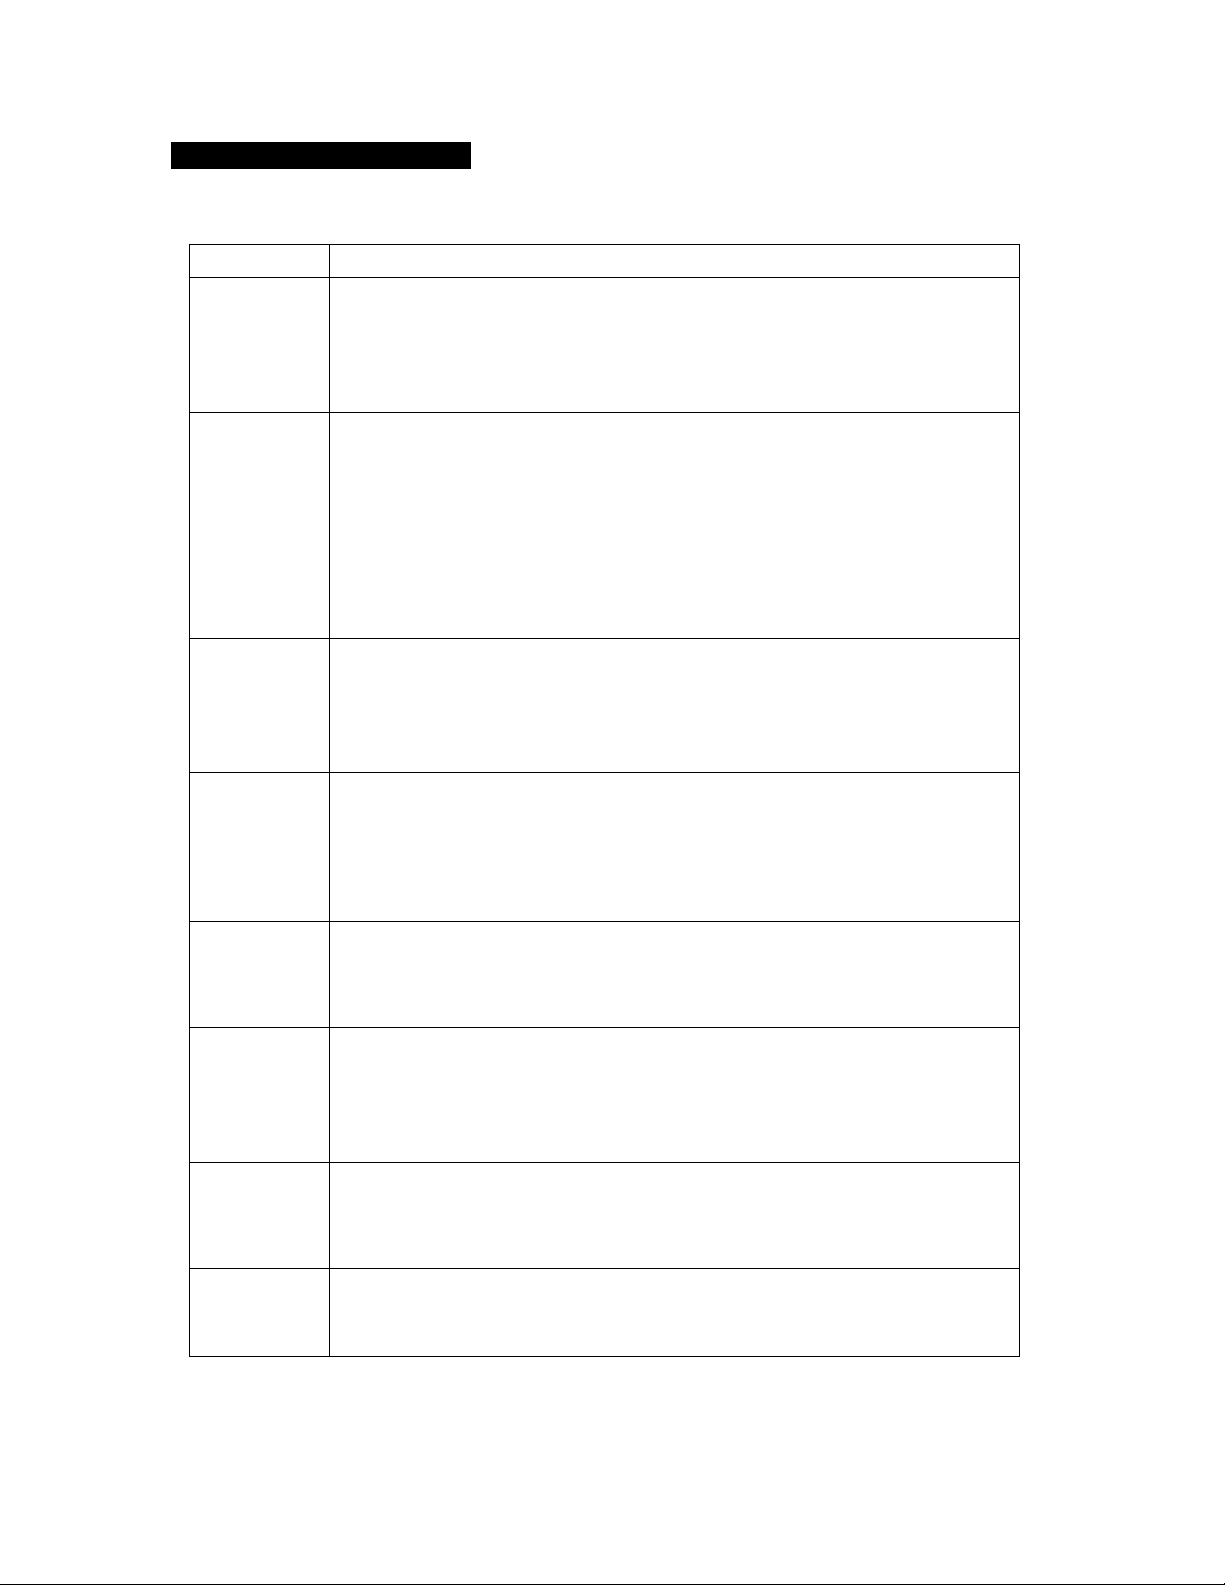
REMOVING STAINS
STAIN
Deodorants
and antiperspirants
Fat, grease,
or oil
Fruit stains
Grass or
green
vegetabies
TO REMOVE
Light stain: Treat with liquid detergent or your regular laundry detergent.
Wash in hottest water safe for fabric.
Heavy stain: Place face down on towel and treat with a paste of ammo
nia and color safe bleach. Let stand for 30 minutes. Wash in hottest water
safe for fabric.
Items soiled with vegetable or cooking oil should not be washed or dried.
See vegetable/cooking oil Warning on page 3. For other types of greasy
stains, use one of the methods below:
• Use pretreatment stain remover. Follow label directions. Wash in hottest
water safe for fabric.
• Use talcum powder to absorb as much grease as possible. Sponge with
a nonflammable fabric cleaner. Rinse. Wash.
• Treat with liquid detergent or rub a detergent paste on the stain. Wash
using hottest water safe for fabric.
Fresh stains: Soak immediately in cool water. Wash. If stain remains,
cover area with a paste made of color safe bleach, a few drops of hot
water, and a few drops of ammonia. Wait 15 to 30 minutes. Wash.
Old stains: Sponge with white vinegar. Rinse. Repeat procedure for
fresh stains.
Soak in warm or cold water with an enzyme presoak for at least 30
minutes, or sponge with denatured alcohol. Wash in water temperature
and bleach safe for the fabric. For colored fabrics, check colorfastness
before applying alcohol. For acetate, sponge with a nonflammable fabric
cleaner. If stain remains, bleach with 3% hydrogen peroxide. Rinse.
Rewash.
ink or
balipoint
pen ink
iron or rust
Ketchup or
tomato
products
Lipstick
18
Spray stain with an aerosol hair spray or rubbing alcohol. Sponge stain
continuously until all bleeding stops. Let dry. Repeat if necessary. Wash.
If stain remains, bleach if safe for fabric. (India and other indelible inks
are almost impossible to remove completely.)
Colored or noncolorfast items: Apply lemon juice and salt. Place in the
sun to dry. Rinse thoroughly. Repeat if necessary.
White or coiorfast items: Try a rust remover. Test first on inside seam
or hem. Some rust removers are not washer safe. Follow package
directions.
Sponge immediately with a nonflammable fabric cleaner or apply a
prewash soil and stain remover. Rinse. Wash. If stain remains, apply a
liquid detergent to stain or soak in warm water with an enzyme presoak.
Rewash.
Apply nonflammable fabric cleaner or prewash soil and stain remover.
Blot with absorbent material. Repeat if necessary. Rinse. If stain still
remains, rub with liquid detergent. Wash.
Page 19
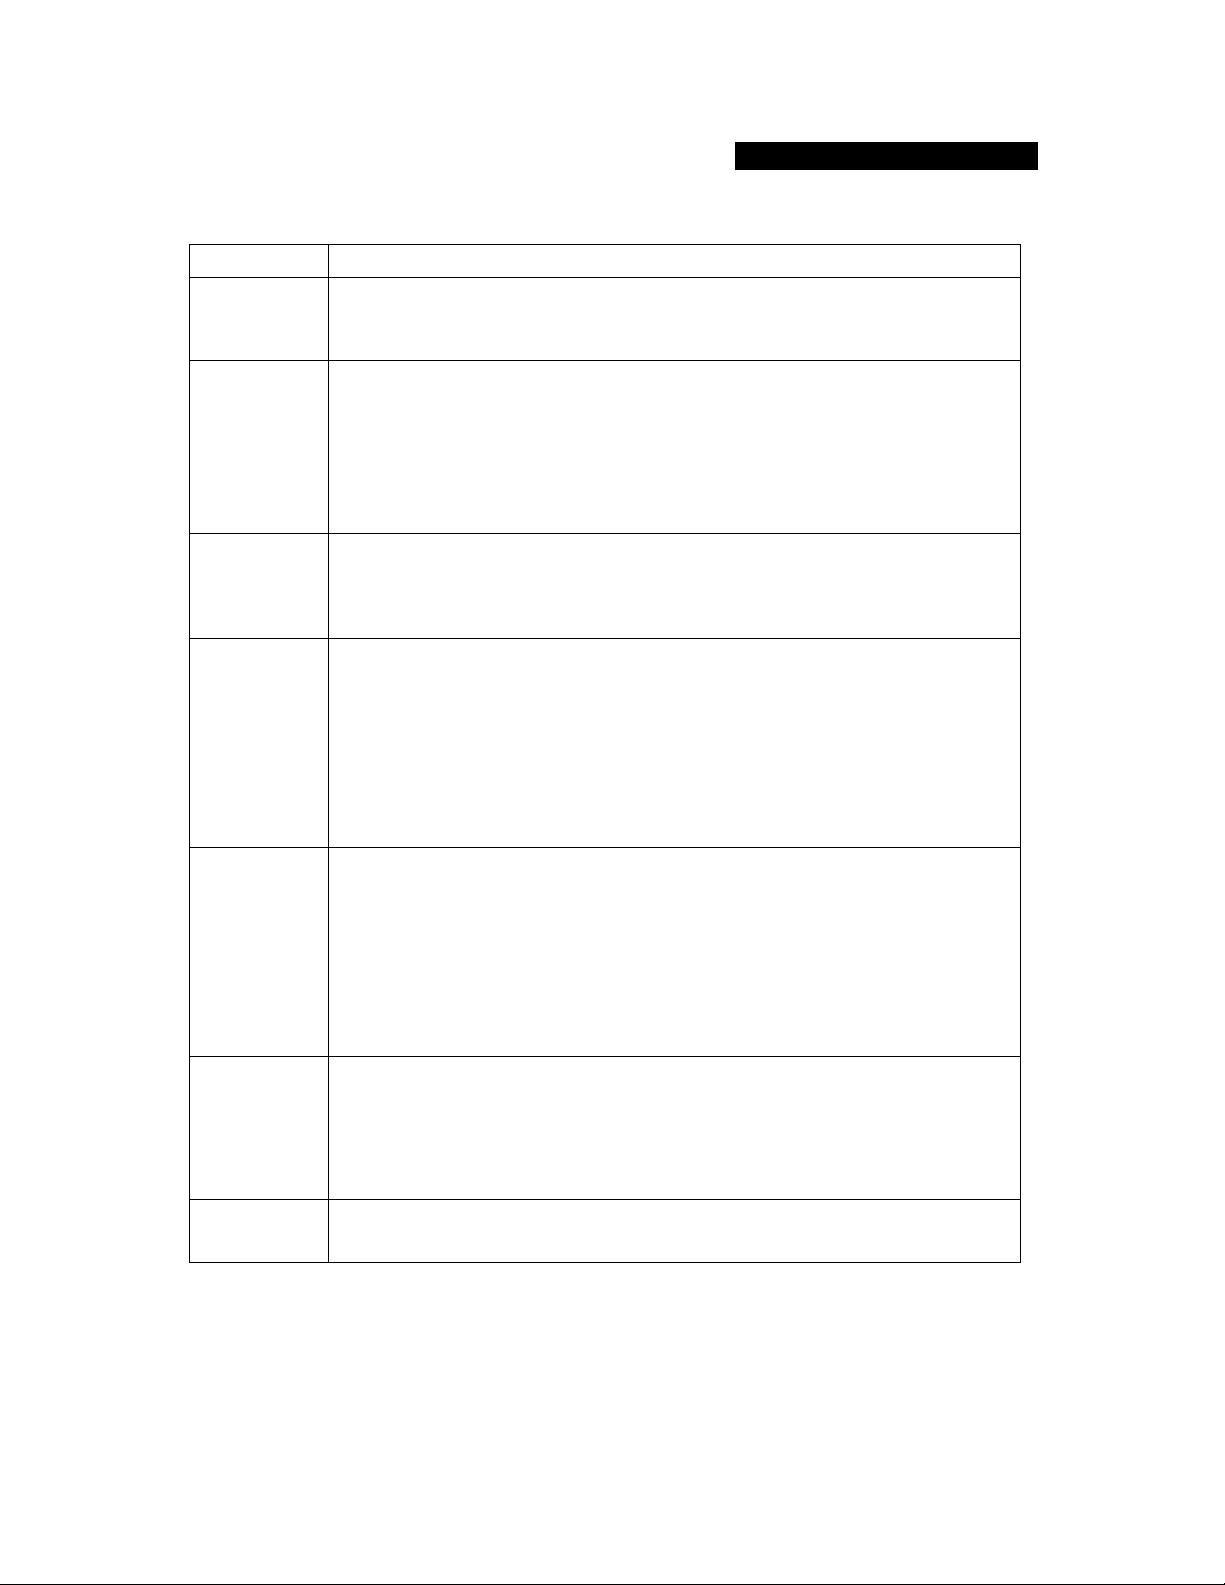
REMOVING STAINS
STAIN
Meat juice,
egg
Mildew
Mustard
Paint
TO REMOVE
Scrape off excess with a dull knife. Soak In cold or warm water with
enzyme presoak at least 30 minutes, or treat stains with a nonflammable
fabric cleaner. Wash.
Wash in hottest water safe for fabric. If stain remains, soak in warm water
and a color safe bleach for 15 to 30 minutes. Rewash. (Old mildew stains
are almost impossible to remove. Mildew fungus destroys or weakens
fabrics.) An alternative to bleach is to treat with salt and lemon juice and
dry in direct sunlight. Rinse and rewash. Mildew may form if wet or damp
laundry remains in your washer for extended periods of time. To prevent
mildew, promptly dry laundry after washing.
Treat immediateiy. Scrape off excess mustard. Sponge with a nonflam
mable fabric cleaner or a prewash soil and stain remover. Rinse. Work
liquid detergent and a few drops of vinegar into stain. Rinse. If stain
remains, apply 3% hydrogen peroxide. Rinse and wash.
Hand wash paint-stained items.
Water base: Treat stains while still wet. (These paints cannot be removed
after they have dried.) Rinse in warm water to flush out paint. Sponge with
a nonflammable fabric cleaner. Rinse. Wash.
Oil base: Scrape off fresh paint. Sponge with a nonflammable fabric
cleaner or treat stain with recommended thinner. While stain is still wet
with solvent, rub liquid detergent into it. Wash with hottest water safe
for fabric.
Perspiration
Scorch
Soft drinks
Remove stains before ironing. Perspiration stains may weaken fabric.
Wash or sponge stain thoroughly with detergent and warm water. If
perspiration has changed the color of the fabric, use one of the following
treatments:
Fresh stains: Apply ammonia to stain. Rinse. Launder to remove
ammonia odor.
Old stains: Apply white vinegar to stain. Rinse. Launder to remove
vinegar odor.
Severe scorch cannot be removed. Wet stain with 3% hydrogen peroxide.
Cover with a dry cloth and press with an iron as hot as is safe for fabric.
Rinse well. Wash.
OR
Wet with lemon juice and spread in the sun to dry. Wash.
Sponge immediately with cold water and alcohol. Heat and detergent may
set stain.
19
Page 20
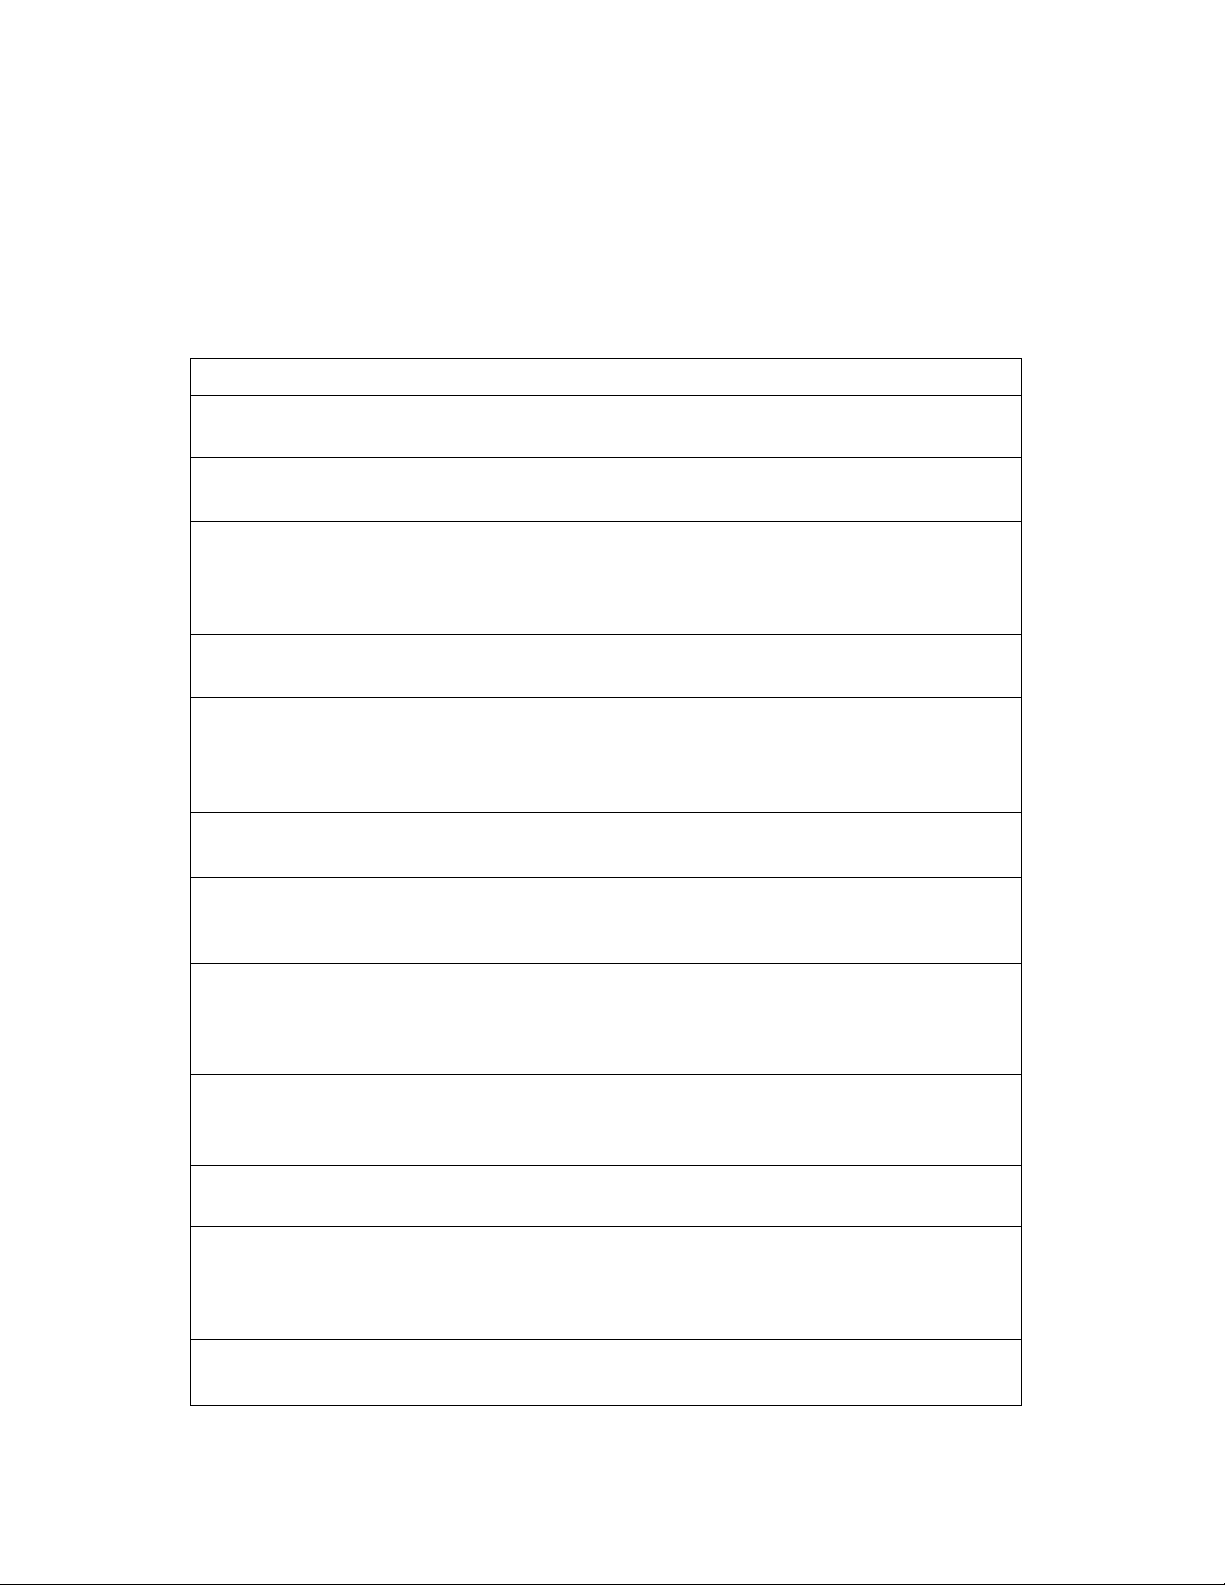
Troubleshooting
Most laundering problems are easily solved if you understand the cause. Check the following
list for common laundry problems and the next page for common washer problems. If you
need further assistance, see page 22.
Common laundry problems
PROBLEM
Brown, yellow
stains
Dye transfer
Gray whites,
dingy coiors
Greasy iooking
spots
Lint
Load too wet
after spin
Shrinking
CAUSE
• Chlorine staining
• Iron in water heater or pipes; iron and manganese in water
• Improper sorting
• Load not immediately removed from washer after end of cycle
• Improper sorting
• Water temperature too low
• Not enough detergent
• Using soap in very hard water (use detergent in hard water)
• Fabric softener poured directly on clothes
• Not enough detergent, or dispenser not used
• Improper sorting
• Paper or tissue in pockets
• Pilling being mistaken for lint
• Not enough detergent
• Cold rinses
• Cycle stopped before spinning is complete
• Fabric type (some knits stretch during manufacturing laundering returns fabric to original size)
• Care label directions not followed
Snags, rips,
and hoies
Stiff, rough
fabrics
Twisting/
Tangiing
Wrinkiing
Yeiiow areas
(from body oils)
20
• Items damaged before washing
• Misuse of chlorine bleach (do not pour directly on clothes);
dispenser not used
• Sharp items not removed from pockets; fasteners not fastened
• Using soap in very hard water (use detergent in hard water)
• Not enough detergent
• Line drying
• Overloading
• Clothes wrapped around agitator
• Overloading (leave more room for permanent press and knits)
• Load not immediately removed from washer after cycle
• Warm rinse water
• Cycle selection incorrect
• Water temperature too low
• Not enough detergent
Page 21
Common washer problems
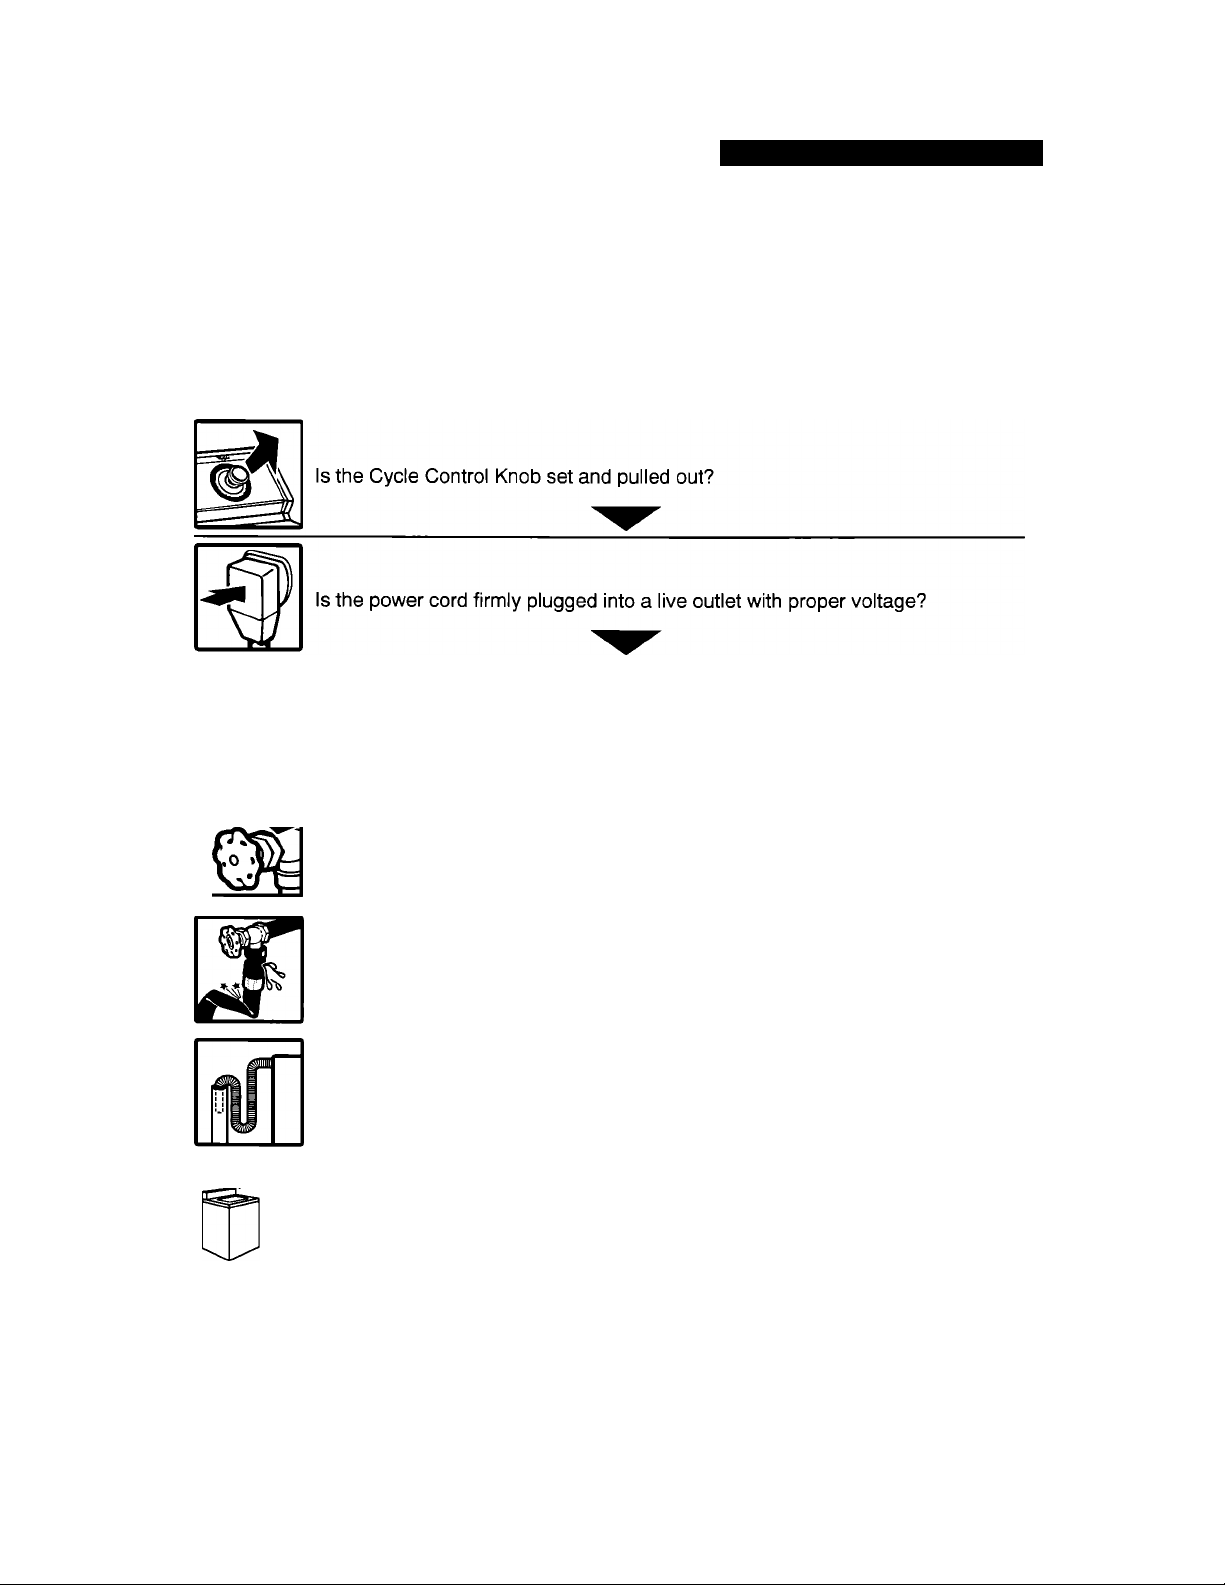
Before calling for service, check these:
Is the lid closed?
Have you blown a household fuse or tripped a circuit breaker?
TROUBLESHOOTING
Are both the hot and cold water faucets turned on?
Are the water hoses kinked or clogged?
Is the drain hose lower than the water level in the washer? It must be higher.
Is the washer making noises (see page 9), or vibrating?
Is the wash load properly distributed around the agitator?
NOTE: Washer stops briefly during a wash cycle. These pauses are normal.
If none of these items was causing your problem, see “Requesting Assistance or Service” on
page 22.
21
Page 22
Requesting Assistance or Service
Before calling for assistance or service, please check “Troubleshooting” on pages 20 and 21.
It may save you the cost of a service call. If you still need help, follow the instructions below.
1. If you need assistance* ...
Call the Whirlpool Consumer Assistance
Center telephone number.
Dial toll-free from anywhere
in the U.S.A.:
1-800-253-1301
and talk with one of our trained
consultants. The consultant can instruct you
in how to obtain satisfactory operation from
your appliance or, if service is necessary,
recommend a qualified service company in
your area.
If you prefer, write to:
Mr. William Clark
Consumer Assistance Representative
Whirlpool Corporation
2000 North M-63
Benton Harbor, Ml 49022-2692
Please include a daytime phone number in
your correspondence.
2. If you need service* ...
Whirlpool has a nationwide network of
^ authorized Whirlpool service
!
--------/SERVICE^ technicians are trained to fulfill
^ the product warranty and
anywhere in the United States. To locate the
authorized Whirlpool service company in
your area, call our Consumer Assistance
Center telephone number (see Step 1) or
look in your telephone directory Yellow
Pages under:
- See: Whirlpool Appliances or
Authorized Whirlpool Service
{Example: XYZ Service Co.)
^ companies. Whirlpool service
provide after-warranty service,
•APPLIANCE-HOUSEHOLDMAJOR, SERVICE & REPAIR
•WASHING MACHINES &
DRYERS, SERVICE & REPAIR
- See: Whirlpool Appliances or
Authorized Whirlpool Service
{Example: XYZ Service Co.)
3. If you need FSP®
replacement parts ...
FSP is a registered trademark of Whirlpool
Corporation for quality parts. Look for this
symbol of quality whenever you need a
replacement part for your WHIRLPOOL®
appliance. FSP replacement parts will fit
right and work right, because they are made
to the same exacting specifications used to
build every new WHIRLPOOL appliance.
To locate FSP replacement parts in your
area, refer to Step 2 or call the Whirlpool
Consumer Assistance Center number in
Step 1.
4. If you are not satisfied
with how the problem
was solved ...
• Contact the Major Appliance Consumer
Action Program (MACAP). MACAP is a
group of independent consumer experts
that voices consumer views at the highest
levels of the major appliance industry.
• Contact MACAP only when the dealer,
authorized servicer, and Whirlpool have
failed to resolve your problem.
Major Appliance Consumer Action Program
20 North Wacker Drive
Chicago, IL 60606
• MACAP will in turn inform us of your
action.
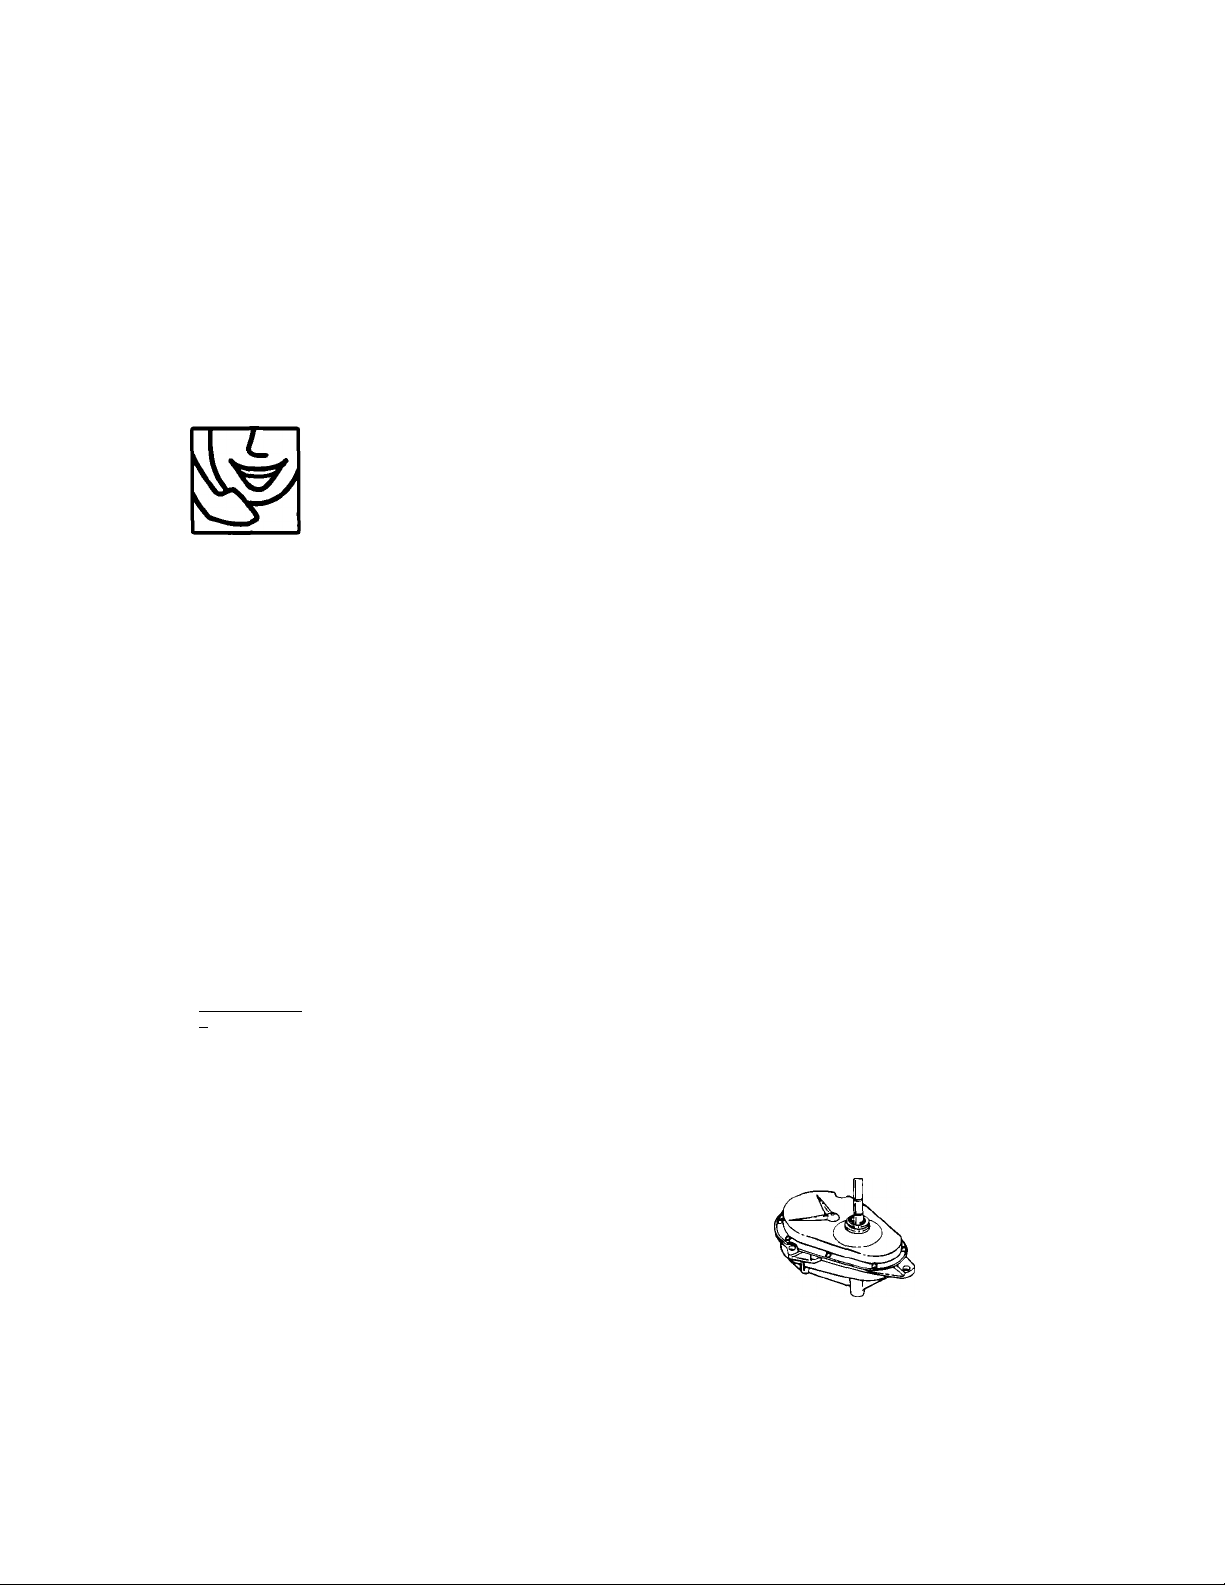
Gearcase assembly
covered by your
warranty
* When asking for help or service:
Please provide a detailed description of the problem, your appliance’s complete model
and serial numbers, and the purchase date. (See page 2.) This information will help us
respond properly to your request.
22
Page 23
WHIRLPOOL^
Automatic Washer Warranty
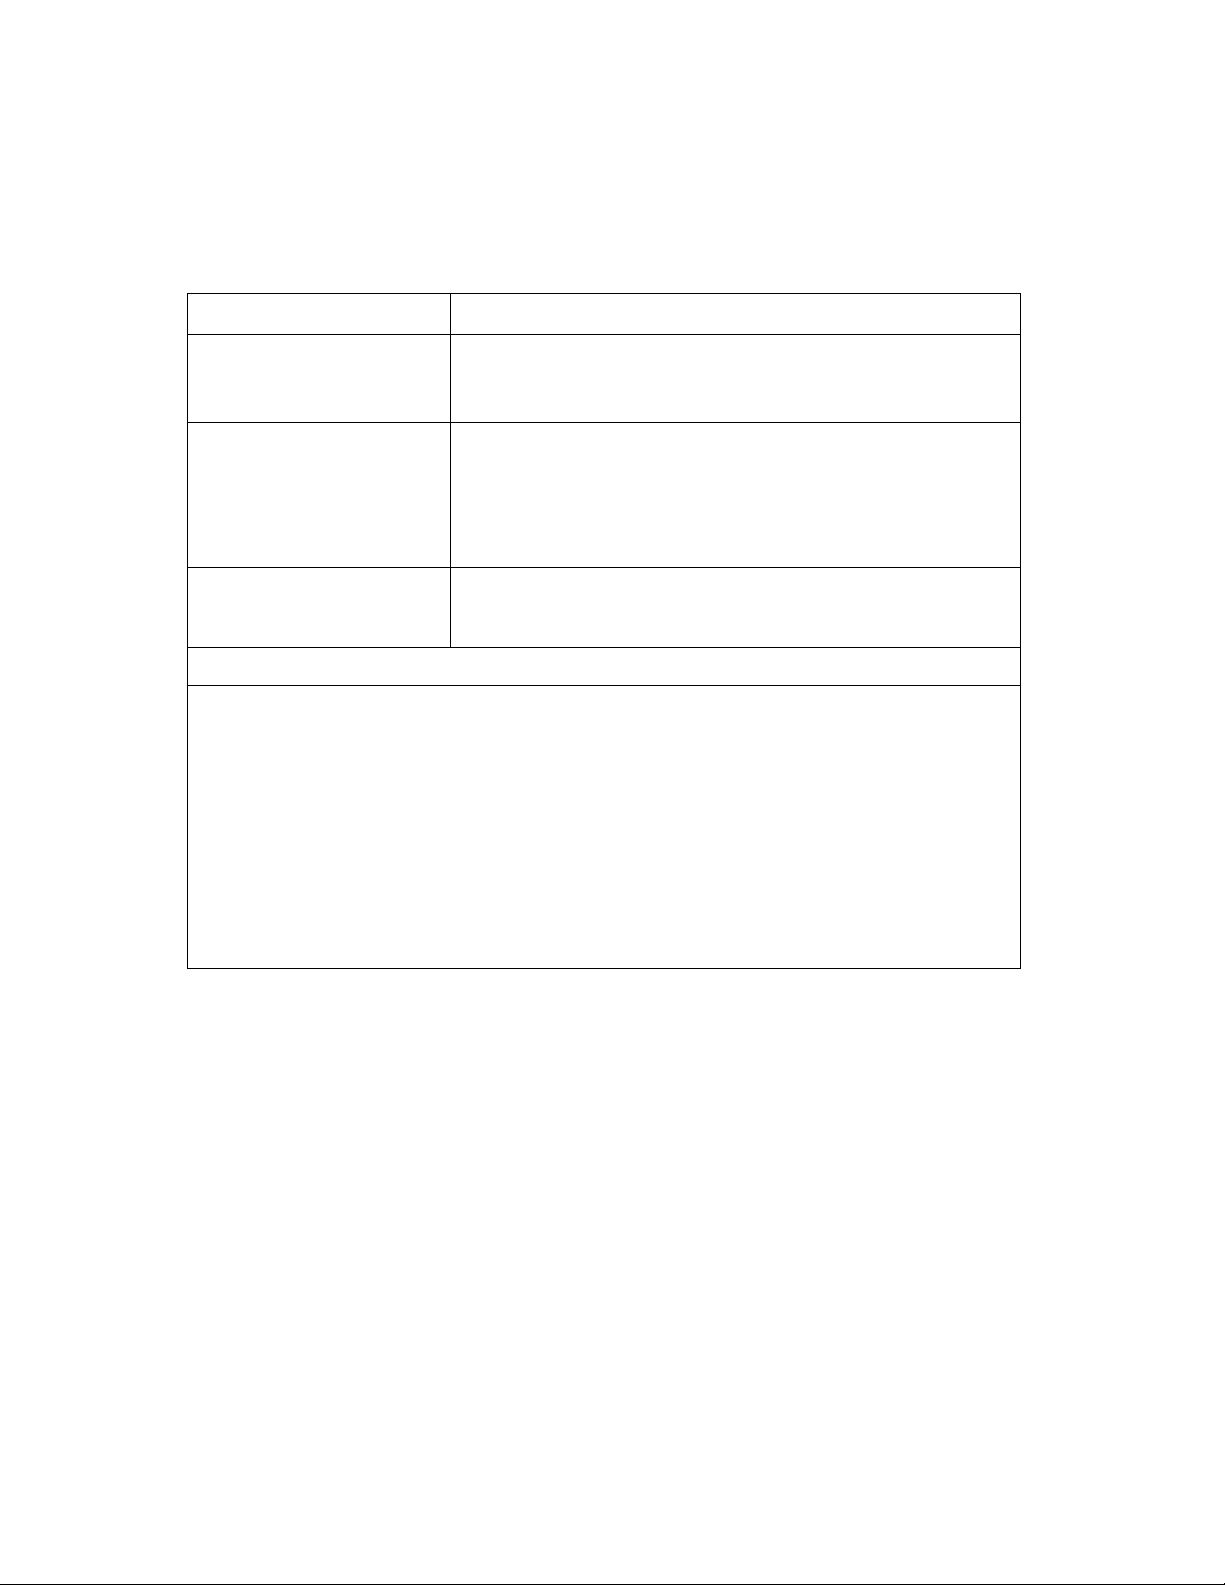
LENGTH OF WARRANTY WHIRLPOOL WILL PAY FOR
FULL ONE-YEAR
WARRANTY
From Date of Purchase
LIMiTED FIVE-YEAR
WARRANTY
From Date of Purchase
LIMITED TEN-YEAR
WARRANTY
From Date of Purchase
WHIRLPOOL WILL NOT PAY FOR
A. Service calls to:
1. Correct the installation of your washer.
2. Instruct you how to use your washer.
3. Replace house fuses or correct house wiring or plumbing.
B. Repairs when your washer is used in other than normal, single-family household use.
C. Pickup and delivery. Your washer is designed to be repaired in the home.
D. Damage to your washer caused by accident, misuse, fire, flood, acts of God, or use of
products not approved by Whirlpool.
E. Any labor costs during the limited warranties.
F. Repairs to parts or systems caused by unauthorized modifications made to the
appliance. 6-94
FSP® replacement parts and repair labor to correct defects in
materials or workmanship. Service must be provided by an
authorized Whirlpool service company.
FSP replacement parts for any part of gearcase assembly if
defective in materials or workmanship. The gearcase assembly
is shown in the “Requesting Assistance or Service” section of
this book.
FSP replacement parts for any top and lid rust.
FSP replacement of outer tub should It crack, or fail to contain
water, due to defective materials or workmanship.
WHIRLPOOL CORPORATION SHALL NOT BE LIABLE FOR INCIDENTAL OR CONSE
QUENTIAL DAMAGES. Some states do not allow the exclusion or limitation of incidental or
consequential damages, so this exclusion or limitation may not apply to you. This warranty
gives you specific legal rights, and you may also have other rights which vary from state
to state.
Outside the United States, a different warranty may appiy. For detaiis, piease contact
your authorized Whiripool distributor or miiitary exchange.
If you need service, first see the “Troubleshooting” section of this book. After checking
“Troubleshooting,” additional help can be found by checking the “Requesting Assistance or
Service” section, or by calling our Consumer Assistance Center telephone number,
1-800-253-1301, from anywhere in the U.S.A.
PART NO. 3363569 D-Line
© 1995 Whirlpool Corporation
D Registered Trademark of Whirlpool, U.S.A.
Printed in U.S.A.
9/95
 Loading...