

INSTALLATION INSTRUCTIONS
for the Rear Drum Seal
Disconnect power before servicing.
Replace all panels before operating.
Failure to do so can result in death or electrical shock.
Rear drum seal mounting procedure:
1. Unplug dryer or disconnect power.
2. Remove the drum assembly from the machine.
3. Remove the old seal from the drum assembly.
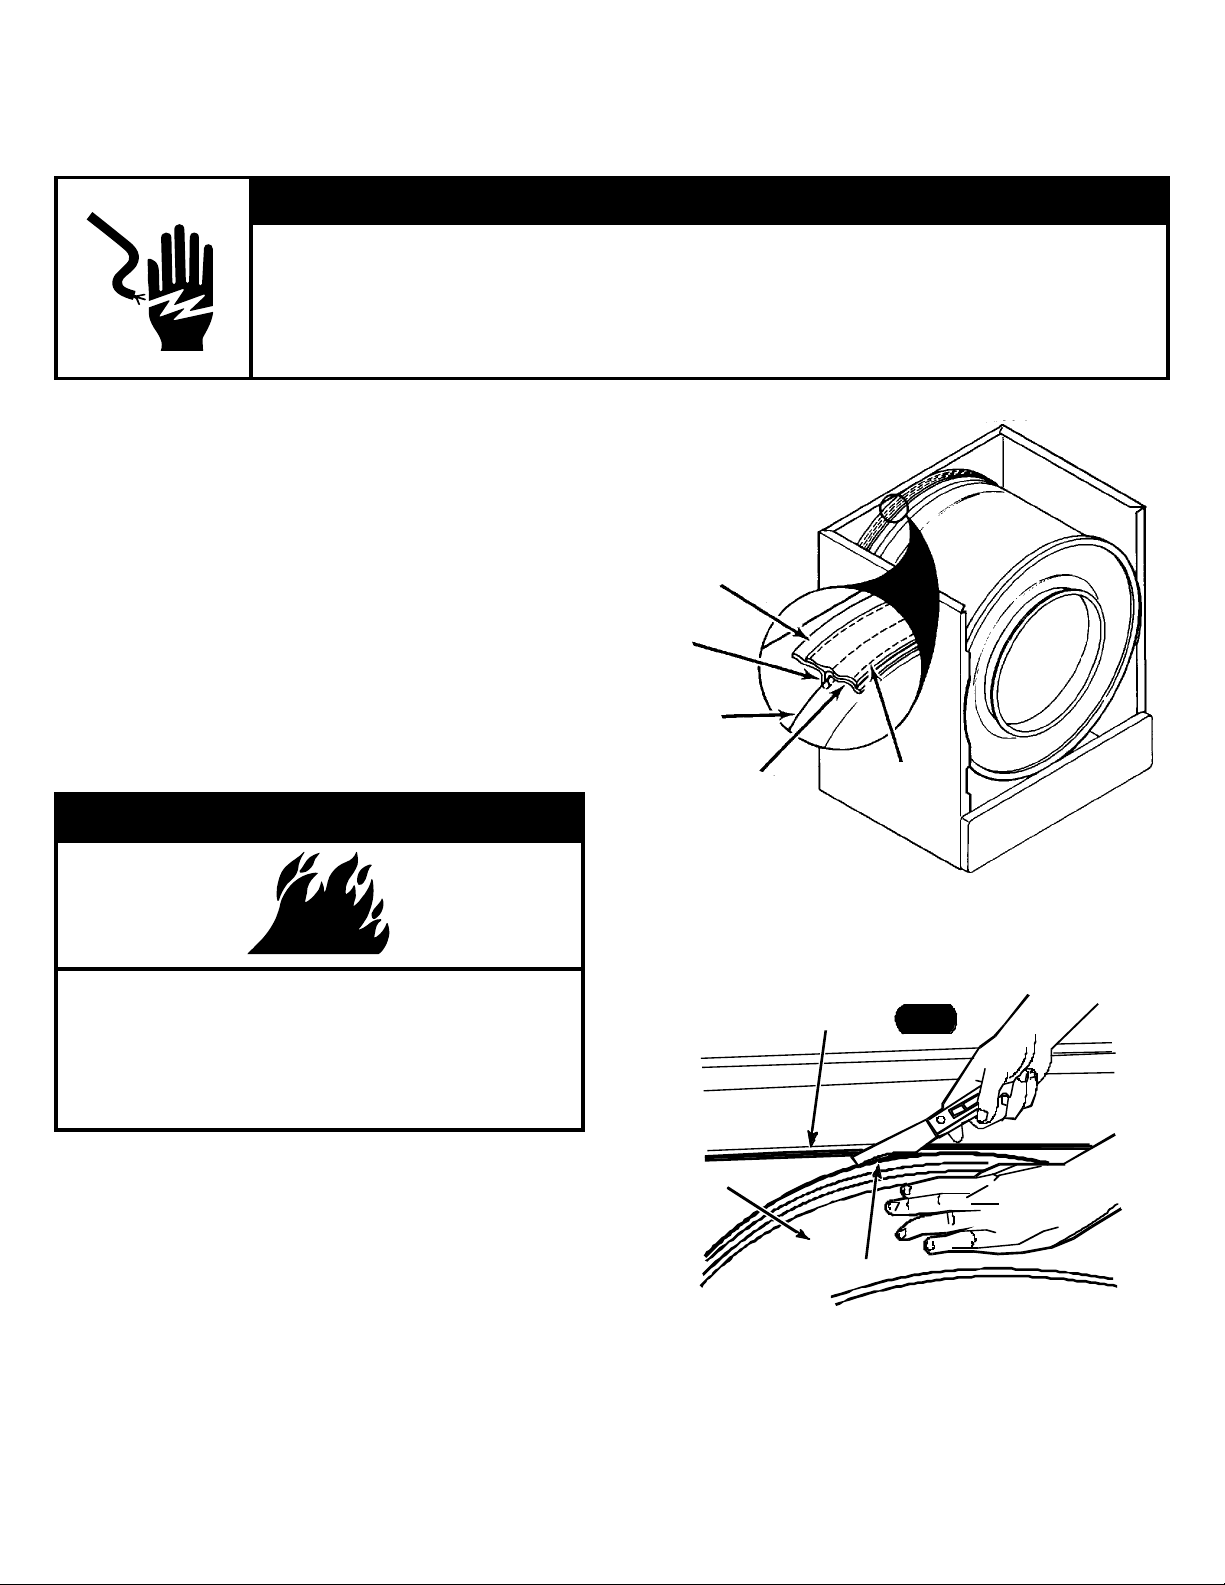
4. Install new seal with stitched edge toward the front
of drum. See Figure 1.
NOTE: Make sure the white felt side of seal is on
the drum surface. See Figure 1.
5. Raise the seal to position it with the center fold against
the drum edge.
6. Apply adhesive on drum under seal. Allow adhesive to
set. Press down seal to assure a good bond.
7. Reinstall the drum. Reinstall the front panel.
wWARNING
wWARNING
Electrical Shock Hazard
Drum rear seal
Seal center
fold
Drum rear
edge
White felt side
of seal on drum
surface
Stitched
edge
Fire Hazard
Never operate dryer without rear drum seal in place.
Align rear drum seal as shown below.
Failure to follow these instructions can result
in death or fire.
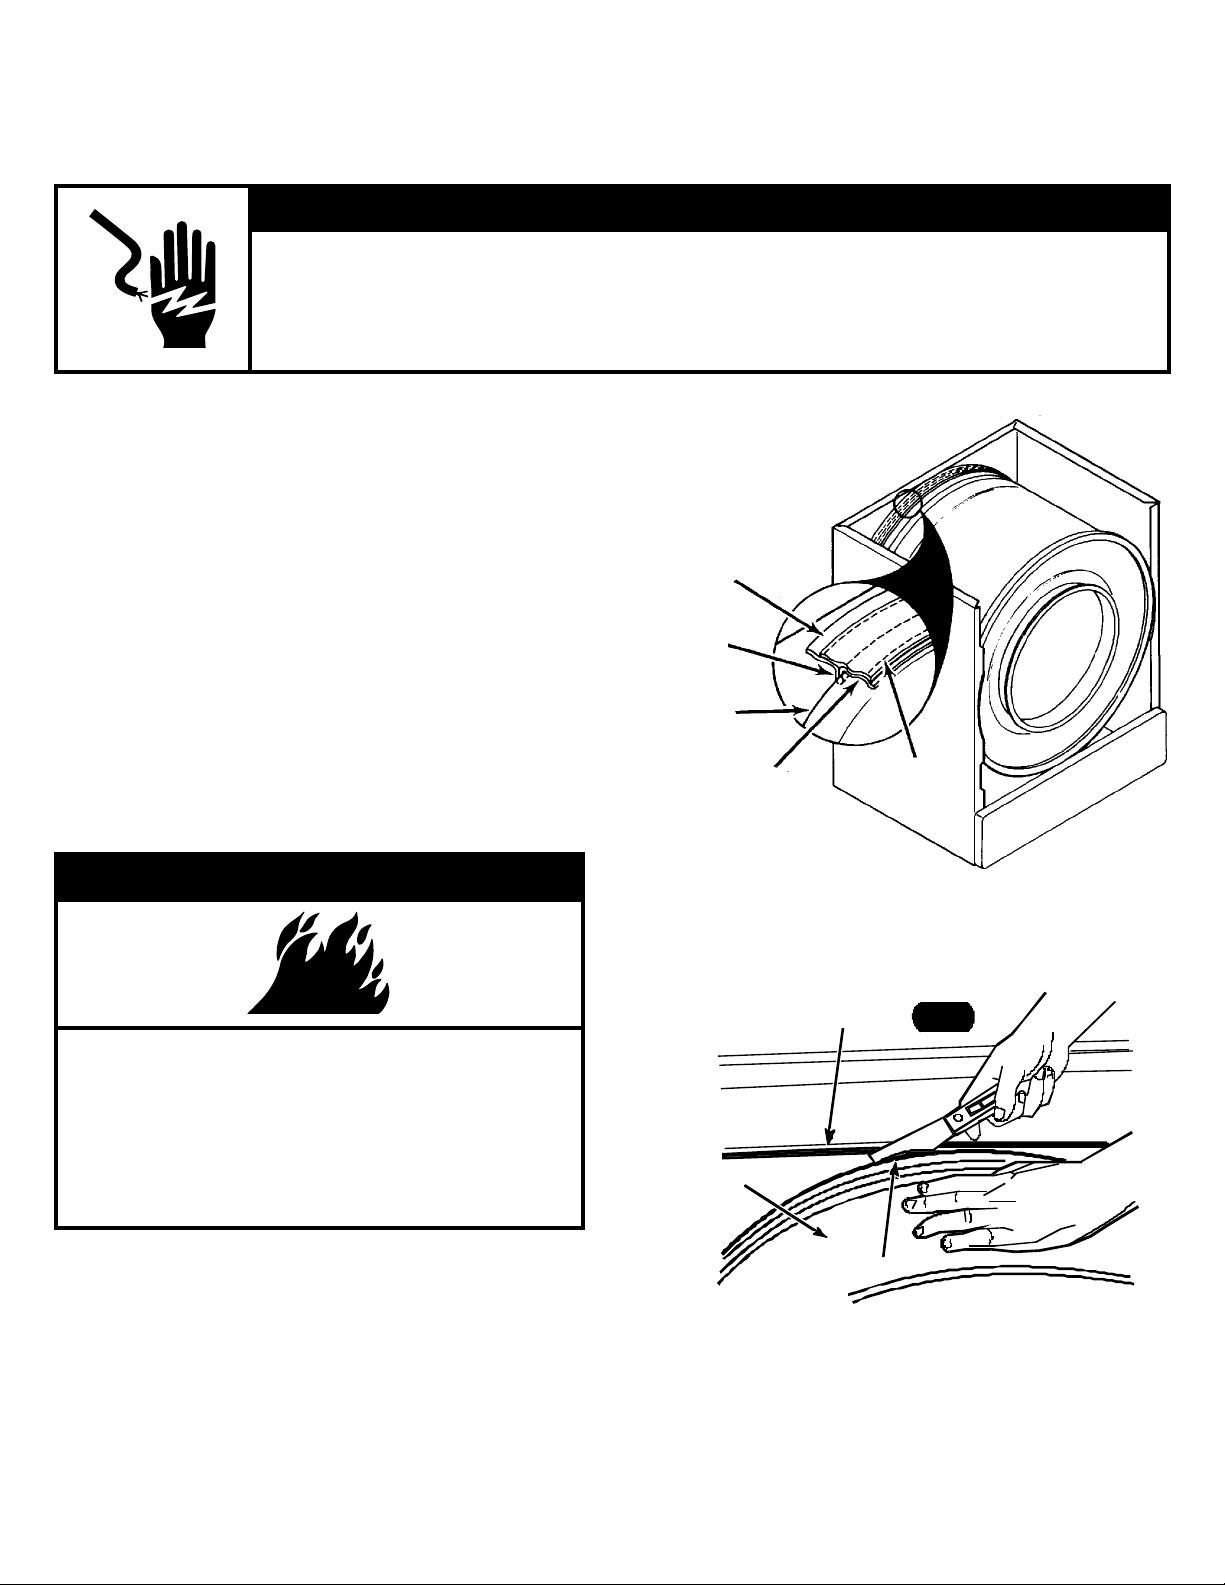
8. Place a small screwdriver or putty knife under the seal
and on top of the bulkhead.
9. Turn the drum by hand one full turn, (counterclockwise)
making sure the rear seal is riding on top of the ridge on
the bulkhead and not turned under. See Figure 2.
10. Reassemble dryer.
11. Plug in dryer or reconnect power.
Figure 1
Bulkhead
Drum
Rear drum seal
Figure 2
© Whirlpool Corporation 1997
(All Rights Reserved)
Instruction Sheet 239088 Rev. I 11/97
INSTRUCTIONS D’INSTALLATION
du joint du tambour arrière
wAVERTISSEMENT
Risque de choc électrique
Déconnecter la source de courant électrique avant l’entretien.
Replacer tous les panneaux avant de faire la remise en marche.
Le non-respect de ces instructions peut causer un décès ou un choc électrique.
Méthode de montage du joint du
tambour arrière :
1. Débrancher la sécheuse ou couper le courant.
2. Déposer le tambour de la sécheuse.
3. Déposer l’ancien joint du tambour.
4. Poser le joint neuf, le bord cousu étant orienté vers
l’avant du tambour. Voir la Figure 1.
NOTA : S’assurer que le côté en feutre blanc du joint
repose bien sur la surface du tambour. Voir la Figure 1.
5. Lever le joint pour le positionner avec le rabat central
contre le bord du tambour.
6. Appliquer l’adhésif sur le tambour, sous le joint.
Laisser durcir l’adhésif, puis appuyer sur le joint pour
s’assurer qu’il colle bien.
7. Reposer le tambour. Reposer le panneau avant.
Joint du tambour
arrière
Rabat central
du joint
Bord
arrière du
tambour
Côté en feutre
blanc du joint sur
la surface du
tambour
Bord
cousu
wAVERTISSEMENT
Risque d’incendie
Ne jamais faire fonctionner la sécheuse si
le joint arrière du tambour n’est pas en place.
Aligner le joint arrière du tambour comme à
l’illustration ci-dessous.
Le non-respect de ces instructions peut causer
un décès ou un incendie.
8. Glisser un petit tournevis ou un couteau à mastic sous
le joint et en haut de la cloison.
9. Tourner le tambour à la main d’un tour complet
(à gauche) en s’assurant que le joint arrière repose
bien en haut du rebord de la cloison, et non pas
dessous. Voir la Figure 2.
10. Remonter la sécheuse.
11. Reconnecter la source de courant électrique ou
rebrancher la sécheuse
Figure 1
Cloison
Tambour
Joint du tambour
arrière
Figure 2
© Whirlpool Corporation, 1997
(Tous droits réservés)
Feuille d’instructions 239088 Rév. I 11/97
 Loading...