

Read this manual before using product. Failure
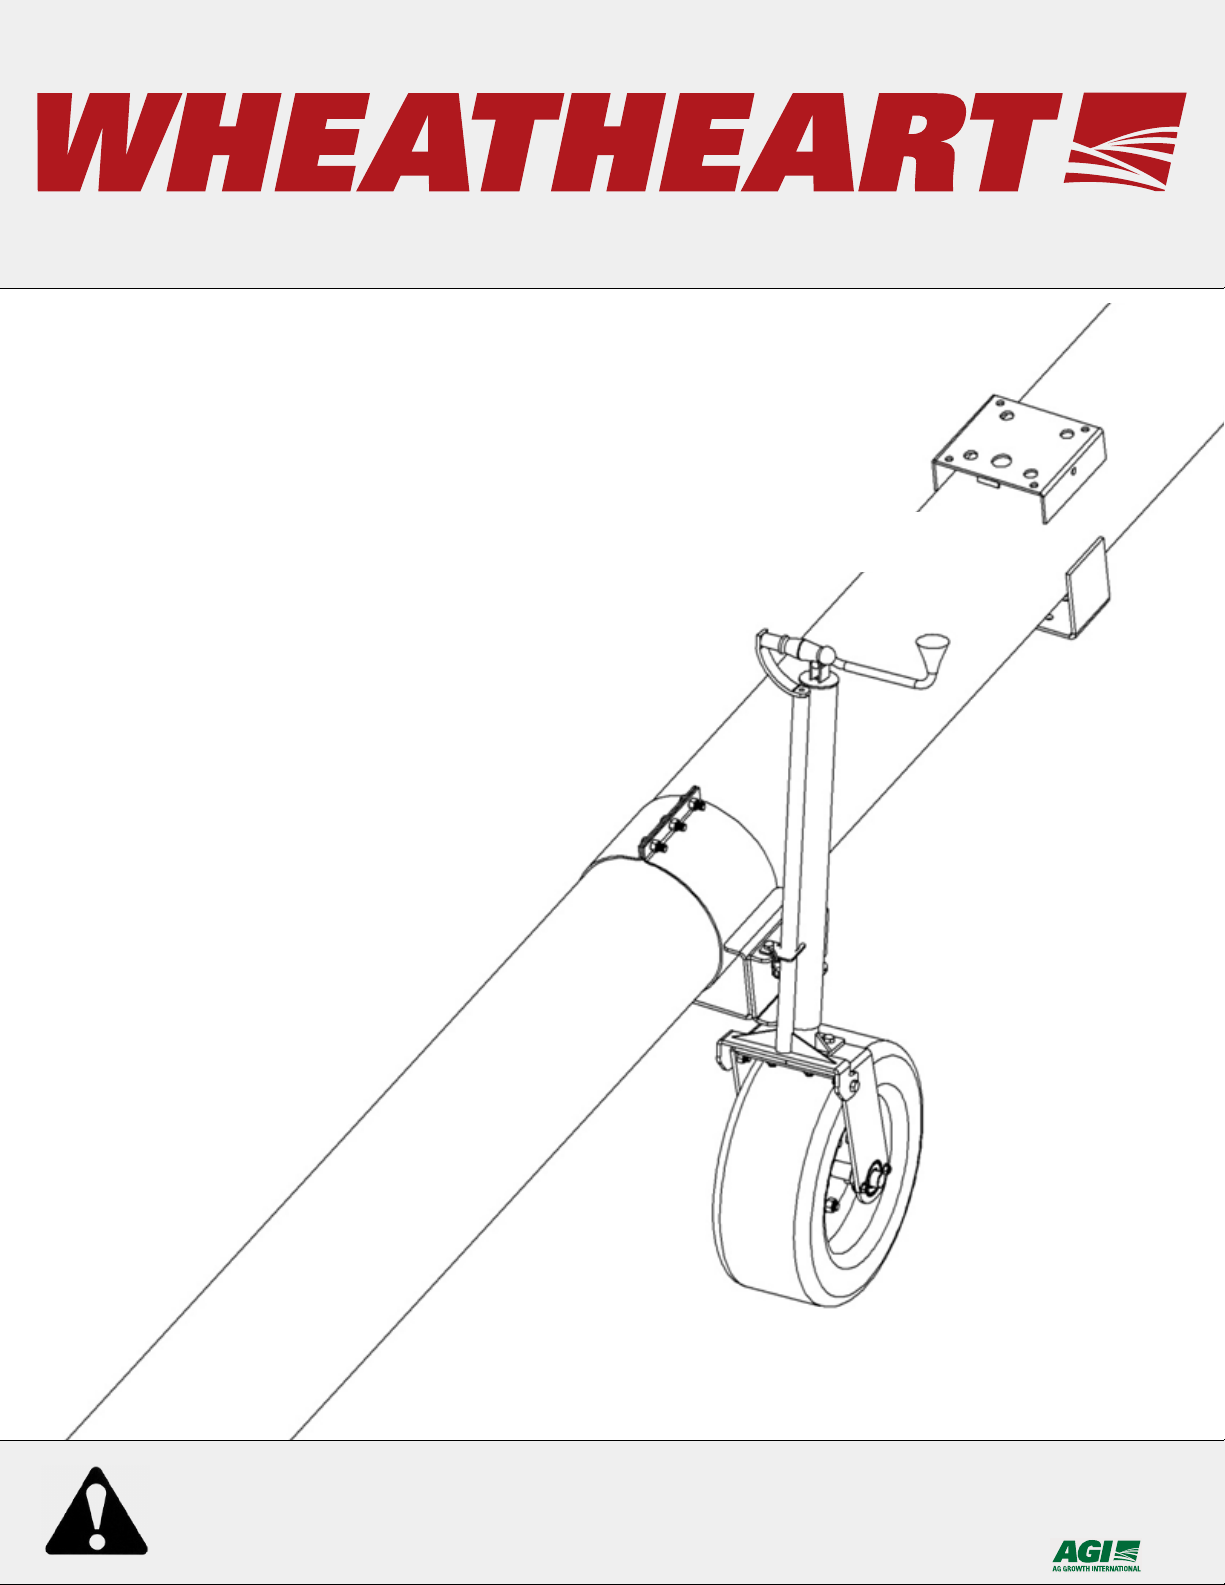
WHEEL KIT
BH/GHR AUGERS
OPERATOR AND ASSEMBLY MANUAL
to follow instructions and safety precautions can
result in serious injury, death, or property
damage. Keep manual for future reference.
Part Number: 30736 R1
Revised: Nov/11

This product has been designed and constructed according to general engineering
standardsa. Other local regulations may apply and must be followed by the operator.
We strongly recommend that all personnel associated with this equipment be trained
in the correct operational and safety procedures required for this product. Periodic
reviews of this manual with all employees should be standard practice. For your
convenience, we include this sign-off sheet so you can record your periodic reviews.
Date Employee Signature Employer Signature
a. Standards include organizations such as the American Society of Agricultural and Biological Engineers,
American National Standards Institute, Canadian Standards Association, International Organization for
Standardization, and/or others.

WHEATHEART - WHEEL KIT
BH/GHR AUGERS
TABLE OF CONTENTS
1. Safety .................................................................................................................................... 5
1.1. Safety Decal Locations............................................................................................. 5
1.1.1. Decal Installation/Replacement .................................................................. 5
1.1.2. Decal Locations .......................................................................................... 5
2. Assembly .............................................................................................................................. 7
2.1. Assembly Procedure ................................................................................................ 7
3. Operation and Transport ................................................................................................... 11
3.1. Operation................................................................................................................ 11
3.2. Transport ................................................................................................................ 12
4. Maintenance and Storage.................................................................................................. 13
4.1. Off-Season Storage................................................................................................ 13
4.2. To Prepare for Use After Storage........................................................................... 13
4.3. Maintenance........................................................................................................... 13
Limited Warranty ..................................................................................................................... 15
30736 R1 3

WHEATHEART - WHEEL KIT
BH/GHR AUGERS
4 30736 R1

WHEATHEART - WHEEL KIT 1. SAFETY
BH/GHR AUGERS 1.1. SAFETY DECAL LOCATIONS
1. Safety
Refer to your auger manual for complete safety instructions.
1.1. SAFETY DECAL LOCATIONS
• Keep safety decals clean and legible at all times.
• Replace safety decals that are missing or have become illegible. See decal
location figures that follow.
• Replaced parts must display the same decal(s) as the original part.
• Safety decals are available from your distributor, dealer, or factory.
1.1.1. DECAL INSTALLATION/REPLACEMENT
1. Decal area must be clean and dry, with a temperature above 50°F (10°C).
Use a solvent to remove all traces of oil from manufacturing before applying
decal.
2. Decide on the exact position before you remove the backing paper.
3. Align the decal over the specified area and carefully press the small portion
with the exposed sticky backing in place.
4. Slowly peel back the remaining paper and carefully smooth the remaining
portion of the decal in place.
5. Small air pockets can be pierced with a pin and smoothed out using the sign
backing paper.
1.1.2. DECAL LOCATIONS
Replicas of the safety decals that are attached to the equipment are shown in the
figure(s) that follow. Proper safety procedures require that you familiarize
yourself with the various safety decals and the areas or particular functions that
the decals apply to as well as the safety precautions that must be taken to avoid
serious injury, death, or equipment damage.
30736 R1 5

1. SAFETY WHEATHEART - WHEEL KIT
DECAL 17113
DECAL 19960
DECAL 17096
DECAL 17109
1.1. SAFETY DECAL LOCATIONS BH/GHR AUGERS
Figure 1.1
6 30736 R1

WHEATHEART - WHEEL KIT 2. ASSEMBLY
BH/GHR AUGERS 2.1. ASSEMBLY PROCEDURE
2. Assembly
Note: GHR Series only: Ensure that frame stabilizer brackets are installed, refer to
operator manual.
2.1. ASSEMBLY PROCEDURE
1. Bolt the wheel jack assembly to the castor wheel assembly using four 7/16" x
1-1/4" bolts and locknuts. The sandwich plate connects under the two castor
plates. Tighten and secure. See Figure 2.1.
Figure 2.1
2. Attach transport handle to castor plates. Use two 7/16" x 1-1/4" bolts and
locknuts. Tighten snug only; these bolts act as pivot points. See Figure 2.2.
30736 R1 7

2. ASSEMBLY WHEATHEART - WHEEL KIT
2.1. ASSEMBLY PROCEDURE BH/GHR AUGERS
Figure 2.2
3. Place wheel kit onto tube and attach with half clamp. Loosely secure these
half clamps with six (for 8”/10”) or eight (13”) 7/16" x 1-1/4" bolts and
locknuts.
4. Position wheel kit as shown by "x" as defined in Table 2.1. Position half
clamps so that auger jack (wheel kit) is vertical. See Figure 2.3. Tighten the
7/16" locknuts.
Table 2.1
Auger x (in.) Auger x (in.) Auger x (in.)
BH 80-36 60 GHR 80-51 69 GHR 130-31 45.5
BH 80-41 72 GHR 80-56 80 GHR 130-36 45
BH 80-46 72 GHR 80-61 88 GHR 130-41 47
BH 80-51 72 GHR 80-71 94 GHR 130-51 49
BH 100-36 52 GHR 100-31 69 GHR 130-61 45
BH 100-41 65 GHR 100-41 63 GHR 130-71 50
GHR 80-31 69 GHR 100-51 63
GHR 80-36 76 GHR 100-61 89
GHR 80-41 69 GHR 100-71 88
GHR 80-46 76
8 30736 R1

WHEATHEART - WHEEL KIT 2. ASSEMBLY
BH/GHR AUGERS 2.1. ASSEMBLY PROCEDURE
Figure 2.3
30736 R1 9

2. ASSEMBLY WHEATHEART - WHEEL KIT
2.1. ASSEMBLY PROCEDURE BH/GHR AUGERS
10 30736 R1
WHEATHEART - WHEEL KIT 3. OPERATION AND TRANSPORT
BH/GHR AUGERS 3.1. OPERATION
3. Operation and Transport
3.1. OPERATION
1. Place wheel kit in operation position by disengaging spring-loaded lock pin
and turn wheel kit counterclockwise.
2. Secure wheel kit in hole in mounting bracket so that it is roughly perpendicular to the ground.
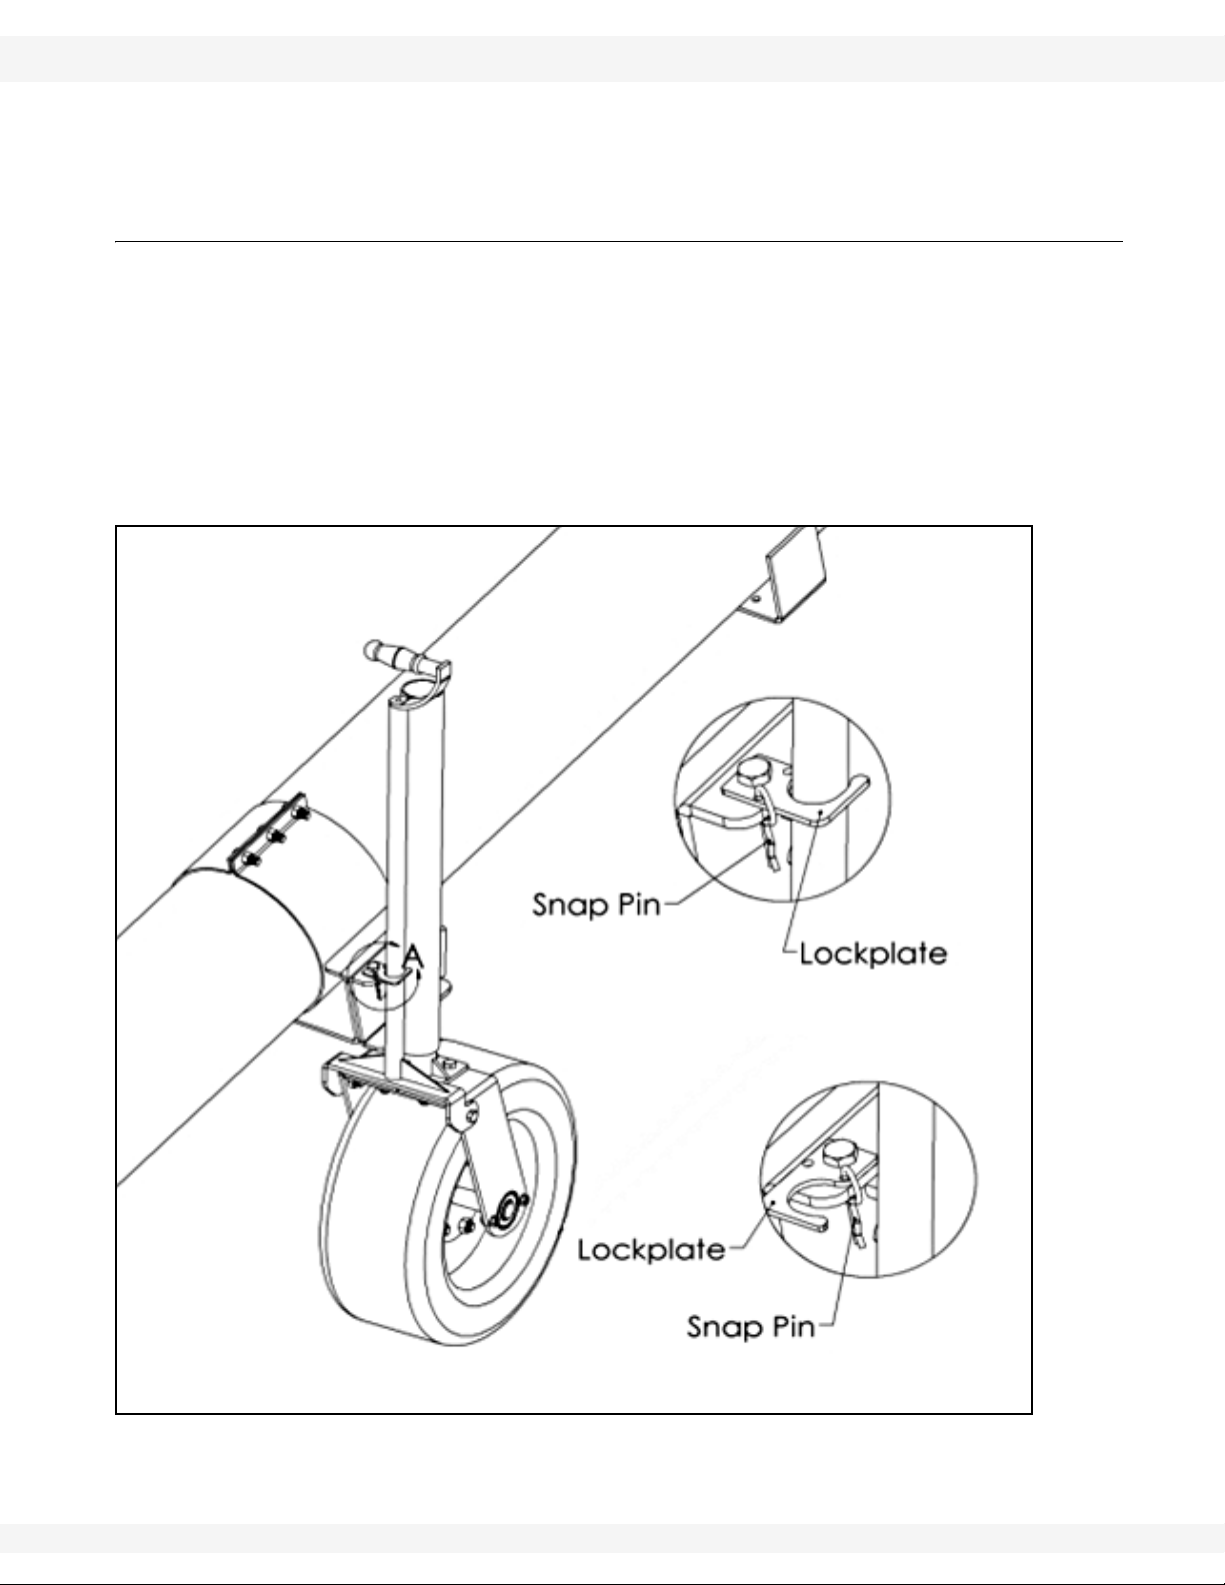
3. Disengage transport handle by removing snap pin and lock plate and
reinserting snap pin, see Figure 3.1.
4. Lower wheel to ground by turning jack handle and lift auger hopper to desired
height.
Figure 3.1
5. Move auger to desired position using transport handle.
30736 R1 11

3. OPERATION AND TRANSPORT WHEATHEART - WHEEL KIT
3.2. TRANSPORT BH/GHR AUGERS
3.2. TRANSPORT
1. Place the wheel kit in transport position by disengaging spring-loaded lockpin
and turn wheel kit clockwise. Secure wheel kit in second hole in half clamp
mounting bracket. See Figure 3.2.
NOTICE
Damage to equipment could result from not placing wheel
kit in transport position prior to transport.
2. Place jack handle in transport position, use snap pin and lock plate to secure
jack handle. See Figure 3.2.
Figure 3.2
Important: Wheel kit and jack handle must be in transport position before transporting
auger.
12 30736 R1

WHEATHEART - WHEEL KIT 4. MAINTENANCE AND STORAGE
BH/GHR AUGERS 4.1. OFF-SEASON STORAGE
4. Maintenance and Storage
4.1. OFF-SEASON STORAGE
1. Raise wheel to full up and secure in transport position.
2. Inspect unit for damage and note any repairs required. Order replacement
parts from your dealer.
3. Check tire pressure and inflate to 45 psi (310 kPa).
4.2. TO PREPARE FOR USE AFTER STORAGE
1. Check tire pressure and inflate according to recommendation if necessary,
see Maintenance section.
2. Keep decals clean. Replace any decal that is damaged or not clearly visible.
3. Conduct general maintenance procedure before using auger.
Important: Use only genuine Wheatheart replacement parts or equivalent. Replacement
parts MUST meet ASABE standards or serious injuries may result. Use of
unauthorized parts will void warranty. If in doubt, contact Wheatheart or your
local Wheatheart dealer. Do not modify any components of the Auger Jack
(Wheel Move).
4.3. MAINTENANCE
Please follow the guideline below:
Area Maintenance Procedures Frequency
Check with pressure gauge. Recom-
Tire Pressure
mended pressure is 40 to 45 psi (276 to
310 kPa).
Monthly, or as
required
30736 R1 13

4. MAINTENANCE AND STORAGE WHEATHEART - WHEEL KIT
4.3. MAINTENANCE BH/GHR AUGERS
14 30736 R1

LIMITED WARRANTY
Wheatheart warrants to the buyer that the new machinery is free from defects in material and workmanship.
This warranty is only effective for any new machinery that has not been altered, changed, repaired, or
treated since its delivery to the buyer, other than by Wheatheart or its authorized dealers or employees, and does not apply to accessories, attachments, tools, or parts sold or operated with the new
machinery if they have not been manufactured by Wheatheart.
Wheatheart shall only be liable for defects in the material or workmanship attributed to faulty material
or bad workmanship that can be proved by the buyer, and specifically excludes liability for repairs arising as a result of normal wear and tear of the new machinery or in any other manner whatsoever, and
without limiting the generality of the foregoing, excludes application or installation of parts not completed in accordance with Wheatheart operation manual, specifications, or printed instructions.
A Warranty Registration Form and Inspection Report must be completed at the time of delivery and
returned to Wheatheart Manufacturing within thirty (30) days.
Warranty Period
Private Farm Use One (1) year from date of purchase.
Commercial, Custom, or Rental Use Ninety (90) days from date of purchase.
Replacement Parts Ninety (90) days from date of replacement
Defective parts are subject to inspection by a Wheatheart representative prior to approval of a warranty claim. All returned parts must be sent to the factory, freight pre-paid, in order to qualify for warranty replacement. Repaired or replaced parts will be returned freight collect.
If these conditions are fulfilled, Wheatheart shall at its own cost and its own option either repair or
replace any defective parts provided that the buyer shall be responsible for all expenses incurred as a
result of repairs, labor, parts, transportation, or any other work, unless Wheatheart has authorized such
expenses in advance. Normal wear and service items such as belts, hoses, flashing, etc. are excluded
from warranty.
The warranty shall not extend to any repairs, changes, alterations, or replacements made to the new
equipment other than by Wheatheart or its authorized dealers or employees.
This warranty extends only to the original owner of the new equipment.
This warranty is limited to the terms stated herein and is in lieu of any other warranties whether
expressed or implied, and without limiting the generality of the foregoing, excluded all warranties,
expressed or implied, or conditions whether statutory or otherwise as to quality and fitness for any purpose of the new equipment, Wheatheart disclaims all liability for incidental or consequential damages.
This machine is subject to design changes and Wheatheart shall not be required to retro-fit or
exchange items on previously sold units except at its own option.
WARRANTY VOID IF NOT REGISTERED

Wheatheart
Part of the Ag Growth International Inc. Group
P.O. Box 39
Rosenort, Manitoba, Canada R0G 1W0
Phone: (866) 467-7207 (Canada & USA)
Fax: (866) 768-4852
website: www.wheatheart.com
email: sales@wheatheart.com
© Ag
Growth International Inc. 2013
Printed In Canada
 Loading...