

Page 1
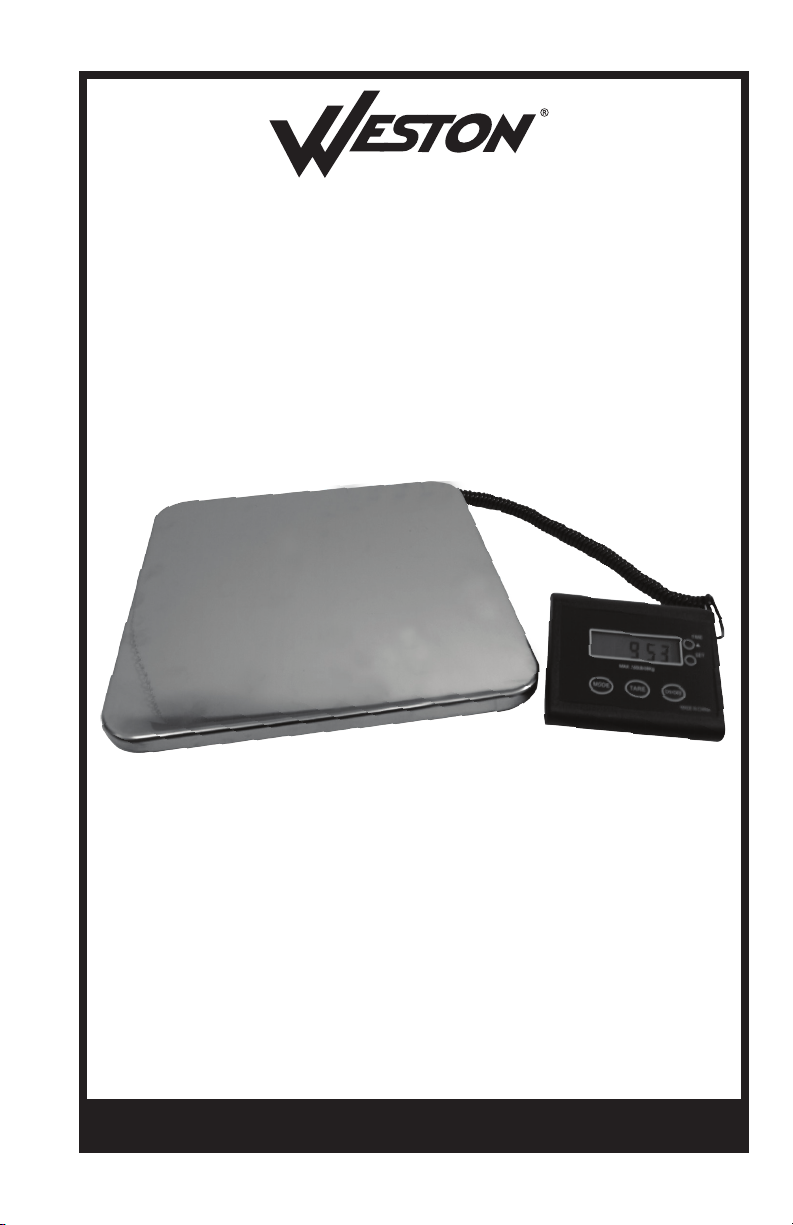
330 LB CAPACITY
DIGITAL SCALE
Model No.24-1001-W
Due to constant factory improvements, the product pictured might differ slightly from the product received.
INFORMATION ON THE WARRANTY FOLLOW THE INSTRUCTIONS IN THIS BOOKLET.
REV020714
Page 2
Scale Platform
Cable
Mode
Digital Control
Tare
Set
ON/OFF
Time
AC Adapter
COMPONENT LIST
PART MODEL NO.
DESCRIPTION
AC Adapter 24-1002
If any components of this unit are broken, the unit does not operate properly or you
need a replacement instruction manual, visit us on the web at
WestonProduct.com/support
Or call Weston Products LLC Toll Free at 1-800-814-4895
Monday thru Friday 8:00am-5:00pm EST. Outside the U.S. call 440-638-3131
-2-
Page 3
GENERAL SAFETY RULES
READ AND FULLY UNDERSTAND ALL INSTRUCTIONS
AND WARNINGS PRIOR TO USING THIS PRODUCT.
YOUR SAFETY IS MOST IMPORTANT! FAILURE TO
COMPLY WITH PROCEDURES AND SAFEGUARDS MAY
RESULT IN SERIOUS INJURY OR PROPERTY DAMAGE.
WARNING!
1. READ ALL INSTRUCTIONS
BEFORE USING THE APPLIANCE.
2. This item should only be used on a
level surface. Do not attempt to move or
shake the scale when weighing an item.
3. Do not exceed the scale’s max
capacity (150 Kg/330 LB). Doing so may
result in permanent damage to the scale.
4. To protect against risk of electrical
shock, do not submerge or use this
appliance near water or other liquid.
Serious injury and electric shock could
result.
5. Unplug this appliance from the
electrical outlet when not in use, before
putting on or taking off parts and before
cleaning.
6. Close adult supervision is necessary
when any appliance is used near
children. This appliance is NOT to be
used by children.
7. NEVER use any accessories or parts
from other manufacturers. Doing so will
VOID YOUR WARRANTY and may
cause re, electrical shock or injury.
8. DO NOT operate any appliance with
a damaged power cord, plug or after the
appliance malfunctions, or is dropped
or damaged in any manner. Return the
appliance to the nearest authorized
service facility for repair or adjustment.
9. Check if the voltage indicated on
the appliance corresponds to the local
voltage before you connect the appliance.
REMEMBER: YOUR PERSONAL SAFETY IS YOUR
RESPONSIBILITY!
10. Thoroughly clean the parts that will
come into contact with food before you
use the appliance for the rst time.
11. DO NOT let the cord hang over the
edge of the table or counter.
12. DO NOT let the cord come in contact
with a hot surface. DO NOT use on an
oven or stove.
13. The AC adapter has a polarized
plug (one blade of the plug is wider than
the other). To reduce the risk of electric
shock, this plug will t in a polarized
outlet only one way. If the plug does not
t fully in the outlet, reverse the plug.
If it still does not t, contact a qualied
electrician. DO NOT modify the plug in
anyway.
14. CHECK FOR DAMAGED PARTS.
Before using the scale, check that all
parts are operating properly and perform
the intended functions. DO NOT use if
the power cord is damaged or frayed.
DO NOT operate any appliance with a
damaged power cord, plug or after the
appliance malfunctions, or is dropped
or damaged in any manner. Return the
appliance to the nearest authorized
service facility for repair or adjustment.
15. DO NOT use while under inuence of
drugs or alcohol.
16. Household use only.
SAVE THESE INSTRUCTIONS!
Refer to them often and use them to instruct others.
-3-
Page 4
CLEANING INSTRUCTIONS
1. To clean the scale thoroughly wipe clean
with a soft damp cloth and mild detergent.
Wipe with clear water and dry immediately.
DO NOT IMMERSE THE SCALE IN
WATER OR LIQUIDS.
NOTE: No parts on this appliance are
dishwasher safe.
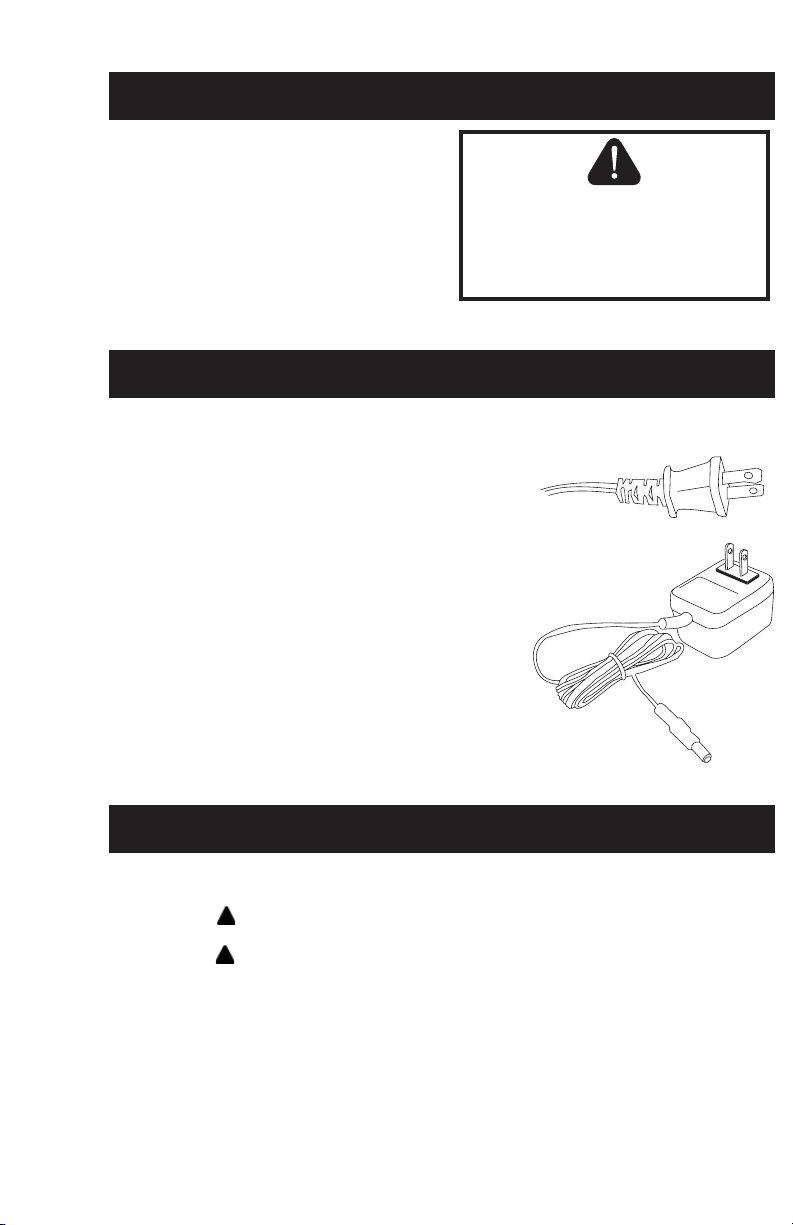
OUTLET INSTRUCTIONS
WARNING!
WARNING! Before cleaning,
assembling or disassembling the
appliance, make sure the appliance is
off and the PLUG IS REMOVED FROM
THE OUTLET/POWER SOURCE!
This scale comes with an AC Adapter with a
Polarized Plug (one blade of the plug is wider than
the other blade). To reduce the risk of electrical
shock, this plug must t fully into the outlet. If the
blades do not t into the outlet, try turning the plug
around. If the plug still does not t into the outlet,
contact a qualied electrician. DO NOT attempt to
modify the plug in any way.
TIME SETTING/CLOCK INSTRUCTIONS
1. When the scale is off, the Digital Control Display functions as a clock.
2. Press the “SET” button. The “hour” will begin to ash.
3. Press the to adjust the hour.
4. Press the “SET” button again. The “minute” will begin to ash.
5. Press the to adjust the minute.
Figure 1
-4-
Page 5

OPERATING INSTRUCTIONS
1. Open the battery cover on the back side
of the Digital Control Display. Insert (1) 9V
battery and replace the battery cover. You
can also connect the 9V AC adapter to
connect the scale to an outlet (Follow the
outlet instructions outlined in this instruction
manual) (Figure 1).
2. Place the scale on a level surface and
press the “ON/OFF” button to turn on the
scale. The Digital Control Display will
illuminate, displaying all controls. When
stabilized, it will display “0.00” (Figure 2).
3. Press the “MODE” button to change the unit of measure (Figure 3).
Figure 2
Figure 3
(LB) (LB:oz) (Kg)
4. If the Digital Control Display does not display “0.00 LB / 0 LB 0 oz / 0.00 Kg”,
press the “TARE” button to reset the display to “0.00”.
5. When the display shows or “Lo”, this is an indication that the battery
running low and will need to be changed soon (Figure 4).
Figure 4
Figure 4
Low Voltage
-5-
Page 6

OPERATING INSTRUCTIONS
6. When weighing an item that exceeds
the scale’s overload or max capacity
(150 Kg/330 LB), the display will show an
“Err” message (Figure 5). To eliminate
the message, remove the item from the
scale and try again, using an item within
the connes of the scale’s capacity. If the
scale’s max capacity is exceeded for an
extended period of time, there is a risk of
permanent damage to the scale. Promptly
remove the over-capacity item when you
see the scale displays the “Err” message.
NOTE: To accurately weigh an item, place the item in the middle of the scale
platform. This will ensure the most accurate weight reading.
Figure 5
CALIBRATION INSTRUCTIONS
1. To calibrate the scale, press the “MODE” button for 3-5 seconds. The display will
show random digits, “CAL” and then “50.00 Kg” (Figure 6). Place a 50 Kg/110 LB
weight in the middle of the scale platform.
Figure 6
2. Press the “MODE” button again. The display will show “100.00 Kg” (Figure 7).
Place a 100 Kg/242.5 LB” in the middle of the scale platform.
3. Press the “MODE” button again. The display will show “150 Kg” (Figure 8). Place
a 150 Kg/ LB” weight in the middle of the scale platform.
4. Press the “MODE” button again. The display will show “----“ (Figure 9). This
indicates that the calibration is nished and the scale will display the time/clock.
Figure 7 Figure 8 Figure 9
Note: If the scale is not stable during the calibration, the display will only show the
calibration weight and the scale will then automatically power off after two minutes
and will display the time/clock.
-6-
Page 7

WESTON WARRANTY INFORMATION
SAVE THIS WARRANTY INFORMATION FOR YOUR RECORDS!
Weston Products LLC warrants to the ORIGINAL RETAIL PURCHASER of this product that if operated in accordance
with the printed instruction accompanying it, then for a period of 1 year from the date of purchase, the product shall be free
The Warranty Card, along with a copy of the original receipt, must be received by Weston Products LLC within 30
days from purchase date for the warranty to apply. Failure to send the completely lled out Warranty Card, along with a
The product must be delivered to or shipped freight prepaid to Weston Products LLC for warranty services, in either
its original packaging or similar packaging affording an equal degree of protection. Damage due to shipping is not the
responsibility of the company. Weston Products LLC charges a $35.00 per hour bench charge. NOTE: No repairs will
be started without the authorization of the customer. The return shipping cost to the customer will be added to the repair
Prior to returning the product for Warranty Repair, the product must be thoroughly cleaned and free from any food
particles or other debris. Failure of the purchaser to comply with this standard will result in the unit being returned without
Weston Products LLC will repair (or at its discretion, replace) the product free of charge, if in the judgment of the
company, it has been proven to be defective as to seller’s labor and material, within the warranty period.
New or rebuilt replacements for factory defective parts will be supplied for one (1) year from the date of purchase.
For non-warranty repairs, contact Weston Products LLC’s Customer Service at 1-800-814-4895 M-F 8am-5pm EST
(outside of the United States 440-638-3131) to obtain a Return Merchandise Authorization Number (RMA Number).
Weston Products LLC will refuse all returns that do not contain this number. DO NOT RETURN THE UNIT WITHOUT
LIMITATIONS: The warranty is void if the product is used for any purpose other than that for which it is designed.
The product must not have been previously altered, repaired, or serviced by anyone else other than Weston Products
LLC. If applicable, the serial number must not have been altered or removed. The product must not have been subjected
to accident in transit or while in the customer’s possession, misused, abused, or operated contrary to the instructions
contained in the instruction manual. This includes failure caused by neglect of reasonable and necessary maintenance,
improper line voltage and acts of nature. This warranty is not transferable and applies only to U.S. and Canadian sales.
Except to the extent prohibited by applicable law, no other warranties whether expressed or implied, including
warranty merchantability and tness for a particular purpose, shall apply to this product. Under no circumstances shall
Weston Products LLC be liable for consequential damages sustained in connection with said product and Weston
Products LLC neither assumes nor authorizes any representative or other person to assume for it any obligation or liability
other than such as is expressly set forth herein. Any applicable implied warranties are also limited to the one (1) year
This warranty covers only the product and its specic parts, not the food or other products processed in it. Weston is
not responsible for missing or damaged parts on discounted/clearance, resale or nal sale items where the seller may not
CUT ALONG THE DOTTED LINE AND SEND THE WARRANTY CARD ALONG WITH A COPY OF YOUR
Replacement parts are warranted for the remainder of the original warranty period.
PROPER AUTHORIZATION FROM WESTON PRODUCTS LLC.
20365 Progress Drive, Strongsville, OH 44149 U.S.A.
from defects in material and workmanship.
copy of the original receipt, will void the warranty.
invoice.
repair. In some cases, a $50 cleaning surcharge may apply.
period of the limited warranty.
be able to guarantee full functionality or completeness of the unit.
ORIGINAL PURCHASE RECEIPT TO:
Weston Products LLC / WARRANTY
WESTON WARRANTY CARD
SEND THIS CARD ALONG WITH A COPY OF YOUR ORIGINAL PURCHASE RECEIPT TO:
WESTON PRODUCTS LLC / WARRANTY, 20365 PROGRESS DRIVE, STRONGSVILLE, OH 44149 U.S.A.
Customer Name: _____________________________________
Address: ___________________________________________
City/State/Zip/Country: ________________________________
Telephone Number: (_________) ________________________
E-Mail Address: ______________________________________
Original Date of Purchase: ____/______/_____
Product Model #: _____________________________________
Serial # (if applicable): _________________________________
I have read the warranty information. Initial here: ____________
Copy of Receipt
Included
Page 8

BALANZA DIGITAL DE 330
LIBRAS DE CAPACIDAD
Modelo No.24-1001-W
Debido a constantes mejoras en la fábrica, el producto que se muestra puede ser ligeramente diferente del
LA INFORMACIÓN DE LA GARANTÍA SE APEGA A LAS INSTRUCCIONES DE ESTE FOLLETO.
producto recibido.
REV020714
Page 9

Cable
Plataforma de
la balanza
Control digital
Hora
Ajustar
Encendido/
Apagado
Adaptador AC
Modo
Tara
LISTA DE COMPONENTES
DESCRIPCIÓN MODELO N°
DE LA PIEZA
Adaptador AC 24-1002
Si cualquier componente de esta unidad está roto, si no funciona debidamente, o si necesita un instructivo
O llame a Weston Products LLC larga distancia sin costo 1-800-814-4895
De lunes a viernes, de 8:00 am a 5:00 pm tiempo del ESTE. Fuera de Estados Unidos llame al 440-638-3131
de repuesto, visítenos en la Web
en WestonProduct.com/support
-9-
INSTRUCCIONES EN ESPAÑOL
Page 10

REGLAS GENERALES DE SEGURIDAD
LEA Y ENTIENDA COMPLETAMENTE TODAS LAS
INSTRUCCIONES Y ADVERTENCIAS ANTES DE UTILIZAR
ESTE PRODUCTO. ¡SU SEGURIDAD ES LO MÁS
IMPORTANTE! NO SEGUIR LOS PROCEDIMIENTOS Y
PRECAUCIONES PUEDE PROVOCAR LESIONES GRAVES
¡ADVERTENCIA!
1. LEA TODAS LAS INSTRUCCIONES
ANTES DE USAR EL APARATO.
2. Este elemento debe utilizarse sólo
sobre una supercie nivelada. No intente
mover ni agitar la balanza mientras pesa
algo
3. No exceda la capacidad máxima de
la balanza (150 Kg/330 libras). Hacerlo
puede dañar la balanza de forma
permanente.
4. Para protegerse de choques
eléctricos, no sumerja este aparato en
el agua ni lo use cerca de agua u otros
líquidos.
5. Desconecte este aparato del
tomacorriente cuando no lo use, ante
de ponerle o quitarle piezas y antes de
lavalo.
6. Es necesaria la supervisión cercana
INSTRUCCIONES EN ESPAÑOL
de un adulto cuando se use cualquier
aparato cerca de niños. Este aparato NO
DEBE ser usado por niños.
7. NUNCA use accesorios o partes de
otros fabricantes. Hacerlo INVALIDA LA
GARANTÍA y puede causar incendios,
choques eléctricos y lesiones.
8. NO OPERE ningún aparato con el
cable o enchufe dañados, ni después
de que funcione mal, se haya caído o
se haya dañado de cualquier manera.
Envíe el aparato a un centro de servicio
autorizado para su reparación o ajuste.
9. Revise si el voltaje indicado en el
Y DAÑOS MATERIALES. RECUERDE: ¡SU SEGURIDAD
PERSONAL ES RESPONSABILIDAD DE USTED!
aparato corresponde al voltaje de su
localidad antes de conectarlo.
10. Lave cuidadosamente las piezas que
entren en contacto con alimentos antes
de usar el aparato por primera vez.
11. NO deje que el cable cuelgue por el
borde de la mesa o mostrador.
12. NO deje que el cable haga contacto
con supercies calientes. NO lo use
encima de un horno o estufa.
13. El adaptador AC tiene una clavija
polarizada con una pata más ancha
que la otra. Para reducir el peligro de
choque eléctrico, esta clavija solo entra
en un tomacorriente polarizado en un
solo sentido. Si la clavija no entra bien
en el tomacorriente, dele la vuelta. Si aún
así no entra, consulte con un electricista
calicado. NO modique la clavija de
ninguna manera.
14. REVISE SI TIENE PARTES
DAÑADAS. Before using the scale,
check that all parts are operating properly
and perform the intended functions. Para
reducir el peligro de choque eléctrico, esta
clavija solo entra en un tomacorriente
polarizado en un solo sentido. Si la clavija
no entra bien en el tomacorriente, dele la
vuelta. Si aun así no entra, consulte con
un electricista calicado. NO modique la
clavija de ninguna manera.
15. NO lo use bajo los efectos de drogas
o alcohol.
16. Para uso doméstico únicamente
¡GUARDE ESTAS INSTRUCCIONES!
Consúltelas con frecuencia y úselas para enseñarles a otros.
-10-
Page 11

INSTRUCCIONES DE LIMPIEZA
1. Para limpiar la balanza limpie bien con
un paño suave y húmedo y detergente
suave. Frote con agua limpia y seque de
inmediato. NO SUMERJA LA BALANZA
EN AGUA O LÍQUIDOS
NOTA: Ninguna pieza de este aparato
puede lavarse en lavavajillas.
¡ADVERTENCIA!
Antes de limpiar, ensamblar o
desarmar el aparato, cerciórese
de que esté APAGADO y que LA
CLAVIJA ESTÉ RETIRADA DEL
TOMACORRIENTE O FUENTE DE
ENERGÍA.
INSTRUCCIONES PARA LA CORRIENTE
Esta balanza viene con un adaptador AC con clavija
polarizada (una pata es más ancha que la otra). Para
reducir el riesgo de choque eléctrico, esta clavija
debe estar bien metida en el tomacorriente. Si las
patas no entran en el tomacorriente, dele vuelta a
la clavija. Si aun así no entran en el tomacorriente,
consulte con un electricista calicado. NO trate de
modicar la clavija de ninguna manera.
Figura 1
AJUSTE DE HORA/INSTRUCCIONES DEL RELOJ
1. Cuando la balanza está apagada, la pantalla de control digital funciona como
reloj.
2. Presione el botón “AJUSTAR” (“SET”) La “hora” comenzará a parpadear.
3. Presione el
4. Presione nuevamente el botón “AJUSTAR” (“SET”) El “minuto” comenzará a
parpadear.
5. Presione el
para ajustar la hora.
para ajustar el minuto.
INSTRUCCIONES EN ESPAÑOL
-11-
Page 12

INSTRUCCIONES DE OPERACIÓN
1. Abra la tapa de la batería en la parte posterior de la pantalla de
control digital. Inserte una (1) batería de 9V y vuelva a colocar la tapa
de la batería. También puede conectar el adaptador de 9V AC para
conectar la balanza a un tomacorriente (Siga las instrucciones para
el tomacorriente que se describen en este manual de instrucciones)
(Figura 1).
2. Coloque la balanza sobre una supercie
nivelada y presione el botón de encendido/
apagado (“ON/OFF”) para encender la
balanza. Se ilumina la la pantalla de control
digital mostrando todos los controles. Una vez
estabilizada, mostrará “0.00” (Figura 2).
3. Presione el botón “MODO” (“MODE”) para cambiar la unidad de medida
INSTRUCCIONES EN ESPAÑOL
(Figura 3).
Figura 2
Figura 3
(LB) (LB:oz) (Kg)
4. Si la pantalla de control digital no muestra “0.00 LB / 0 LB 0 oz / 0.00 Kg”,
presione el botón de TARA (“TARE”) para volver a ajustar la pantalla “0.00”.
5. Cuando la pantalla muestre
batería está baja y debe cambiarse pronto (Figura 4).
o “Lo”, esto es un indicador de que la
Voltaje bajo
-12-
Figure 4
Figura 4
Page 13

INSTRUCCIONES DE OPERACIÓN
6. Cuando se pesa un elemento que
excede la carga o capacidad máxima de
la balanza (150 Kg/330 libras), la pantalla
muestra un mensaje de error (“Err”)
(Figura 5). Para eliminar el mensaje,
retire el elemento de la balanza e intente
nuevamente, utilizando un elemento
dentro de los límites de la capacidad de
la balanza. Si se excede la capacidad
máxima de la balanza por un periodo de
tiempo prolongado, existe un riesgo de
daños permanentes a la balanza. Retire
con prontitud el elemento que excede la
capacidad de la balanza cuando vea que
ésta muestra un mensaje de error (“Err”).
NOTA: Para pesar un elemento de manera exacta, colóquelo en el centro de la
plataforma de la balanza. Esto garantiza una lectura de peso más exacta.
Figura 5
INSTRUCCIONES PARA LA CALIBRACIÓN
1. Para calibrar la balanza, presione el botón “MODO” (“MODE”) por 3-5 segundos.
La pantalla mostrará dígitos aleatorios, “CAL” y luego “50.00 Kg” (Figura 6). Coloque
un peso de 50 Kg/110 libras en el centro de la plataforma de la balanza.
Figura 6
INSTRUCCIONES EN ESPAÑOL
2. Presione nuevamente el botón “MODO” (“MODE”) La pantalla mostrará “100.00
Kg” (Figura 7). Coloque un peso de 100 Kg/220 libras en el centro de la plataforma
de la balanza.
3. Presione nuevamente el botón “MODO” (“MODE”) La pantalla mostrará “150 Kg”
(Figura 8). Coloque un peso de 150 Kg/ 330 libras en el centro de la plataforma de
la balanza.
4. Presione nuevamente el botón “MODO” (“MODE”) La pantalla mostrará “----”
(Figura 9). Esto indica que la calibración está terminada y la balanza mostrará la
hora/reloj.
Figura 7 Figura 8 Figura 9
Nota: Si la balanza no está estable durante la calibración, la pantalla sólo mostrará
el peso de calibración y se apagará automáticamente después de dos minutos para
mostrar la hora/reloj.
-13-
Page 14

INFORMACIÓN DE GARANTÍA WESTON
¡GUARDE ESTA INFORMACIÓN DE GARANTÍA PARA SUS REGISTROS!
Weston Products LLC garantiza al COMPRADOR AL DETALLE ORIGINAL de este producto que si funciona en cumplimiento con
las instrucciones impresas adjuntas, entonces por un período de 1 año desde la fecha de compra, el producto se considerará libre de
La Tarjeta de Garantía, junto con una copia del recibo original debe ser recibida por Weston Products LLC dentro de 30 días desde la
fecha de compra para hacer efectiva la garantía. Si no se envía la Tarjeta de Garantía completamente llena, junto con una copia del
El producto debe ser enviado o despachado mediante ete prepagado a Weston Products LLC para efectuar los servicios establecidos
en la garantía, en su envase original o en un envase similar que garantice igual grado de protección. El daño producto del despacho no
es responsabilidad de la compañía. Weston Products LLC cobra $35.00 por concepto de mesón por hora. NOTA: Las reparaciones no
se iniciarán sin la autorización del cliente. El costo por despacho de devolución al cliente se agregará a la factura por reparación.
Antes de devolver el producto para la Reparación según la Garantía, el producto debe estar completamente limpio y libre de partículas
de alimentos u otros fragmentos. El incumplimiento del comprador respecto de esta norma resultará en el envío de la unidad sin
Weston Products LLC reparará (o a su decisión, cambiará) el producto sin cobro, si a juicio de la compañía, se ha demostrado que está
Los cambios de productos nuevos o reacondicionados por partes defectuosas de fábrica serán suministrados por un (1) año desde la
Para las reparaciones que no estén cubiertas en la garantía, comuníquese con Servicio al Cliente de Weston Products LLC al 1-800-
814-4895 de lunes a viernes, desde las 8 a.m. hasta las 5pm EST (Desde fuera de los Estados Unidos comuníquese al 440-638-3131)
para solicitar un Número de Autorización de Devolución de la Mercadería (Número RMA). Weston Products LLC rechazará todo envío
que no contenga este número. NO DEVUELVA LA UNIDAD SIN LA AUTORIZACIÓN DE WESTON PRODUCTS LLC.
LIMITACIONES: La garantía queda invalidada si el producto se utiliza para algún objetivo que no sea aquél para el cual está diseñado.
El producto no debe haber sido previamente alterado, reparado, ni tampoco se le debe haber hecho servicio técnico por cualquier
otra persona que no sea de Weston Products LLC. Si corresponde, no se debe alterar o eliminar el número de serie. El producto no
debe estar sujeto a accidentes durante el transporte o estando en posesión del cliente, no debe ser mal usado, mal tratado, u operado
en forma contraria a las instrucciones de este manual. Esto incluye toda falla causada por negligencia de mantención razonable o
necesaria, voltaje de línea inadecuado o actos de la naturaleza. Esta garantía es intransferible y sólo se aplica a ventas realizadas en
Salvo en la medida en que lo prohíba la ley correspondiente, ninguna otra garantía expresa o implícita, incluyendo comerciabilidad o
aptitud de la garantía para un objetivo en particular, aplicará a este producto. Bajo ninguna circunstancia Weston Products LLC será
responsable de daños emergentes sostenidos en conexión con dicho producto y Weston Products LLC no asume ni autoriza a ningún
representante u otra persona a asumir por él ninguna obligación o responsabilidad que no sea aquella expresamente establecida en
esta tarjeta de garantía. Toda garantía correspondiente implícita también se limita a un período de un (1) año de la garantía limitada.
Esta garantía cubre sólo el producto y sus partes especícas, no cubre los alimentos u otros productos procesados en él.
CORTE POR LA LÍNEA PUNTEADA Y ENVÍE LA TARJETA DE GARANTÍA JUNTO CON UNA COPIA DE SU RECIBO DE COMPRA
reparación. En algunos casos, podría aplicar un sobrecargo de $50 por concepto de limpieza.
defectuoso respecto de la mano de obra y material del vendedor, dentro del período de garantía.
fecha de compra. Las partes cambiadas están garantizadas por el resto del período original de garantía.
defectos respecto del material y mano de obra.
recibo original, anulará la garantía.
Estados Unidos y Canadá.
Weston Products LLC / WARRANTY
20365 Progress Drive, Strongsville, OH 44149 U.S.A.
ORIGINAL A
TARJETA DE GARANTÍA WESTON
ENVÍE ESTA TARJETA JUNTO CON UNA COPIA DE SU RECIBO DE COMPRA ORIGINAL A: WESTON
PRODUCTS LLC/WARRANTY, 20365 PROGRESSS DRIVE. STRONGSVILLE, OH 44149 U.S.A
Nombre del Cliente: _______________________________
Dirección: ______________________________________
Ciudad/Estado/Código Zip/País: ______________________
Número Telefónico: (_________) ____________________
Dirección de Correo Electrónico: _____________________
Fecha de Compra Original: ______/________/___________
Modelo del Producto #: _____________________________
# de Serie (Si corresponde): ________________________
Page 15

BALANCE NUMÉRIQUE
D’UNE CAPACITÉ DE 149 KG
Modèle nº24-1001-W
Parce que nos produits bénécient de perfectionnements constants apportés en usine, les illustrations
LE INFORMATION SUR LA GARANTIE PRÉCÈDENT LES INSTRUCTIONS DANS CE LIVRET.
présentes peuvent être légèrement différentes du produit reçu.
REV020714
Page 16

Câble
Plate-forme de
la balance
Commande
numérique
Temps
INSTRUCTIONS EN FRANÇAIS
Adaptateur CA
Mode
Tare
Régler
Marche/Arrêt
DESCRIPTION DE LA PIÈCE
DESCRIPTION MODÈLE Nº
DE LA PIÈCE
Adaptateur CA 24-1002
N’hésitez pas à visiter notre site Web WestonProduct.com/support si un composant est cassé,
Veuillez appeler Weston Products, LLC au numéro sans frais : 1-800-814-4895
Du lundi au vendredi: de 8h00 à 17h00 EST. En dehors des États-Unis, veuillez appeler le 440-638-3131
l’outil fonctionne mal, ou pour commander un nouveau mode d’emploi.
WestonProduct.com/support
-16-
Page 17

IMPORTANTES RÈGLES DE SÉCURITÉ
LIRE ET COMPRENDRE COMPLÈTEMENT TOUTES
LES DIRECTIVES ET AVERTISSEMENTS AVANT
D’UTILISER CE PRODUIT. LE PLUS IMPORTANT EST
VOTRE SÉCURITÉ! LE DÉFAUT D’OBSERVER LES
PROCÉDURES ET MISES EN GARDE PEUT ENTRAINER
WARNING!
1. LIRE TOUTES LES DIRECTIVES
AVANT D’UTILISER L’APPAREIL.
2. Ce produit doit être utilisé uniquement
sur une surface plane. Ne pas déplacer
ni secouer la balance pendant la pesée
d’un article.
3. Ne pas dépasser la capacité
maximum de la balance (150 kg/330 lb).
La balance risque effectivement de subir
des dommages permanents.
4. Pour se protéger contre les risques
de choc électrique, ne pas plonger ou
utiliser cet appareil près de l’eau ou tout
autre liquide.
5. Débrancher cet appareil de la prise
de courant lorsqu’il n’est pas utilisé ou
avant d’y mettre ou de retirer des pièces
et avant le nettoyage.
6. La surveillance attentive d’un adulte
est nécessaire quand tout appareil est
utilisé à proximité d’enfants. Cet appareil
ne doit PAS être utilisé par des enfants.
7. Ne JAMAIS utiliser des accessoires
ou des pièces d’autres fabricants. Le
faire ANNULERA VOTRE GARANTIE et
pourrait entraîner un incendie, un choc
électrique ou des blessures.
8. NE PAS utiliser un appareil avec un
cordon ou une che endommagée ou
après un mauvais fonctionnement ou une
chute ou un dommage quel qu’il soit. De
l’appareil. Retourner l’appareil au service
de réparation agréé le plus proche pour
la réparation ou le réglage.
9. Vérier si la tension indiquée sur
l’appareil correspond à la tension locale
DES BLESSURES GRAVES OU DES DOMMAGES
MATÉRIELS. N’OUBLIEZ PAS : VOTRE SÉCURITÉ
PERSONNELLE EST VOTRE RESPONSABILITÉ!
avant de brancher l’appareil.
10. Bien nettoyer les pièces qui viennent
en contact avec les aliments avant
d’utiliser l’appareil pour la première fois.
11. NE PAS laisser pendre le cordon du
bord d’une table ou d’un comptoir.
12. NE PAS laisser le cordon entrer en
contact avec une surface chaude. NE
PAS utiliser sur un four ou une cuisinière.
13. L’adaptateur CA dispose d’une
che polarisée (une lame est plus large
que l’autre). Pour réduire les risques
de choc électrique, cette che entrera
dans une prise de courant d’une seule
manière seulement. Si la che n’entre
pas complètement dans la prise de
courant, tournez-la dans l’autre sens. Si
elle ne rentre toujours pas entièrement,
contactez un électricien qualié. NE PAS
modier la che de quelque façon que ce
soit.
14. INSPECTER POUR DÉTECTER
TOUTE TRACE DE DOMMAGES DES
PIÈCES. Before using the scale, check
that all parts are operating properly
and perform the intended functions. Ne
pas utiliser de cordon d’alimentation
endommagé ou efloché. NE PAS
utiliser un appareil avec un cordon ou
une che endommagée ou après un
mauvais fonctionnement ou une chute
ou un dommage quel qu’il soit. De
l’appareil. Retourner l’appareil au service
de réparation agréé le plus proche pour
la réparation ou le réglage.
15. NE PAS utiliser sous l’effet d’alcool et
de drogue.
16. Utilisation domestique uniquement.
INSTRUCTIONS EN FRANÇAIS
CONSERVER CES
INSTRUCTIONS!
Se reporter souvent à ces instructions et les communiquer aux autres.
-17-
Page 18

INSTRUCTIONS DE NETTOYAGE
Pour nettoyer la balance essuyez
soigneusement avec un chiffon humide et
un détergent doux. Rincez avec de l’eau
fraîche et séchez immédiatement. NE
JAMAIS IMMERGER LA BALANCE DANS
DE L’EAU OU TOUT AUTRE LIQUIDE.
REMARQUE: Aucune pièce de cet appareil
ne peut être lavé dans une machine à laver
la vaisselle.
DIRECTIVES CONCERNANT LES PRISES DE COURANT
AVERTISSEMENT!
TOUJOURS DÉBRANCHER la
trancheuse à viande de sa source
d’alimentation avant d’en faire
l’entretien, de la nettoyer, de changer
des accessoires ou encore lorsqu’elle
n’est pas utilisée.
Cette balance est livrée avec un adaptateur CA doté
d’une che polarisée (une lame est plus large que
l’autre) pour réduire les risques de choc électrique.
La che doit entrer complètement dans une prise
de courant. Si la che ne rentre pas, tourner-la dans
l’autre sens et essayer de nouveau. Si elle ne rentre
toujours pas entièrement, contactez un électricien
qualié pour inspecter et/ou mettre à jour les prises
de courants dans votre maison. Ne pas modier
la che de quelque façon que ce soit pour la faire
rentrer dans une prise de courant incompatible.
INSTRUCTIONS EN FRANÇAIS
Figure 1
INSTRUCTIONS DE RÉGLAGE DE L’HEURE/HORLOGE
1. Lorsque la balance est désactivée, l’afchage de la commande numérique
fonctionne comme une horloge.
2. Appuyez sur la touche « SET » (RÉGLER). « L’heure » se met à clignoter.
3. Appuyez sur la pour régler l’heure.
4. Appuyez à nouveau sur la touche « SET » (RÉGLER). « Les minutes » se
mettent à clignoter.
5. Appuyez sur la pour régler les minutes.
-18-
Page 19

INSTRUCTIONS D’UTILISATION
1. Ouvrez le couvercle de la batterie située à l’arrière de l’afchage de commande
numérique. Insérez (1) pile de 9 V et replacez le couvercle de la batterie. Vous
pouvez également utiliser l’adaptateur CA de 9 V pour connecter la balance à une
prise (suivez les instructions stipulées dans ce manuel d’instructions) (Figure 1).
2. Placez la balance sur une surface plane et
appuyez sur le bouton de Marche/Arrêt (ON/
OFF) pour mettre la balance sous tension.
L’écran de la commande numérique s’allume
afchant toutes les commandes. Une fois
stabilité, l’écran afche « 0.00 » (Figure 2).
Figure 2
3. Appuyez sur le bouton « MODE » pour changer l’unité de mesure (Figure 3).
Figure 3
(LB) (LB:oz) (Kg)
4. Si l’écran de commande numérique n’afche pas le message « 0,00 LB/0 LB 0
oz/0,00 Kg », appuyez sur le bouton « TARE » pour remettre l’afchage à « 0.00
».
5. Lorsque l’écran afche « » ou « Lo », la batterie est faible et devra être
changée rapidement (Figure 4).
Figure 4
Figure 4
Basse tension
-19-
INSTRUCTIONS EN FRANÇAIS
Page 20

INSTRUCTIONS D’UTILISATION
6. Lors de la pesée d’un élément qui
dépasse la surcharge de la balance ou
la capacité max (150 Kg/330 LB), l’écran
afche un message « Err » (Figure 5).
Pour effacer le message, retirez l’article
de la balance et essayez à nouveau en
plaçant un article dans les limites de la
capacité de la balance. Si la capacité max
de la balance est dépassée pendant une
période prolongée, la balance risque de
subir des dommages permanents. Retirez
promptement l’article dont le poids dépasse
la capacité maximum lorsque vous voyez le
message « Err » s’afcher sur la balance.
REMARQUE: Pour peser avec précision un article, placer l’article au centre de la
plate-forme de la balance. La lecture de la pesée sera plus précise.
Figure 5
INSTRUCTIONS EN FRANÇAIS
1. Pour calibrer la balance, appuyez sur la touche « MODE » pendant 3 à 5
secondes. L’écran afche des chiffres au hasard, « CAL » puis « 50,00 kg » (Figure
6). Placez un poids de 50 Kg/110 LB au centre de la plate-forme de la balance.
2. Appuyez à nouveau sur le bouton « MODE ». L’écran afchera « 100,00 Kg
» (Figure 7). Placez un poids de 100 Kg/220 LB au centre de la plate-forme de la
balance.
3. Appuyez à nouveau sur le bouton « MODE ». L’écran afchera « 150 Kg » (Figure
8). Placez un poids de 150 Kg/330 LB au centre de la plate-forme de la balance.
4. Appuyez à nouveau sur le bouton « MODE ». L’écran afchera « ---- » (Figure 9).
Ce message indique que le calibrage est terminé et la balance afchera le temps/
l’horloge.
INSTRUCTIONS DE CALIBRAGE
Figure 6
Figure 7 Figure 8 Figure 9
-20-
Page 21

INFORMATION SUR LA GARANTIE
CONSERVEZ CETTE INFORMATION SUR LA GARANTIE POUR VOS DOSSIERS!
Weston Products LLC garantit à l’ACHETEUR AU DÉTAIL D’ORIGINE de ce produit contre tout défaut en
matériau et en main-d’œuvre pendant un (1) an a partir de la date d’achat à condition qu’il soit utilisé conformément
La Carte de Garantie, avec une copie du reçu original, doivent être reçus par Weston Products LLC dans les
trente (30) jours à partir de la date d’achat pour que la garantie puisse s’appliquer. Le manque d’envoyer la Carte de
Le produit doit être livré à ou expédié franco de port à Weston Products LLC pour les services de garantie, soit
dans son emballage d’origine ou un emballage similaire offrant un degré de protection équivalent. Les dommages
causés par l’expédition ne sont pas la responsabilité de la société. Weston Products LLC charge 35,00 $ par heure
pour frais de service. REMARQUE : Aucune réparation ne sera commencée sans l’autorisation du client. Les frais
Avant de renvoyer le produit pour une réparation sous garantie, bien nettoyer le produit pour qu’il soit exempt de
toute particule alimentaire ou autres débris. Si l’acheteur ne respecte pas cette consigne, le produit lui sera renvoyé
Weston Products LLC réparera (ou à sa discrétion, remplacera) le produit sans frais, si à l’opinion de la société, il
Des remplacements neufs ou remis en état pour les pièces d’usine défectueuses seront fournis pendant un (1)
an à partir de la date d’achat. Les pièces de remplacement sont garanties pour le reste de la période de garantie
Pour les réparations non garanties, veuillez contacter le Service à la clientèle de Weston Products LLC au numéro
sans frais 1-800-814-4895, du lundi au vendredi, de 8h00 à 17h00 EST (en dehors des États-Unis : 440-638-3131)
pour obtenir une Autorisation de retour d’article (Numéro RMA). Weston Products LLC refusera tous les retours qui
ne contiennent pas ce numéro. NE PAS RENVOYER CET APPAREIL SANS L’AUTORISATION CORRECTE DE
LIMITATIONS : La garantie est annulée si le produit est utilisé pour toute raison autre que pour laquelle il est
conçu. Le produit ne doit pas avoir été antérieurement modié, réparé, ou entretenu par quelqu’un autre que
Weston Products LLC. Le cas échéant, le numéro de série ne doit pas être modié ou enlevé. Le produit ne doit
pas avoir été soumis à un accident en transit ou pendant qu’il est en la possession du client, mal utilisé, mal traité,
ou utilisé contrairement aux directives contenues dans le manuel d’utilisation. Ceci comprend la défaillance causée
par la négligence d’un entretien raisonnable et nécessaire, une tension de secteur incorrecte et des catastrophes
naturelles. Cette garantie n’est pas transférable et s’applique seulement aux ventes américaines et canadiennes.
À l’exception des cas où la loi en vigueur l’interdit, aucune autre garantie, expresse ou implicite, y compris les
garanties relatives au caractère adéquat pour la commercialisation ou un usage particulier, ne s’appliquera à ce
produit. Weston Products LLC ne sera en aucun cas responsable des dommages indirects liés au dit produit
et Weston Products LLC n’a aucune obligation ni responsabilité autre que celles expressément établies dans la
présente, et n’autorise aucun représentant ou autre personne à les assumer pour lui. Toutes garanties implicites
Cette garantie couvre seulement le produit et ses pièces spéciques, pas les aliments ou autres produits traités
dans celui-ci. Weston n’est pas responsable des pièces manquantes ou endommagées pour les articles réduits/
en solde ou les articles naux de vente où le vendeur peut ne pas être en mesure de garantir l’ensemble de la
DÉCOUPEZ LE LONG DE LA LIGNE POINTILLÉE ET ENVOYEZ CETTE CARTE DE GARANTIE AVEC UNE
Garantie complètement remplie avec une copie du reçu original annulera la garantie.
sans avoir été réparé. Dans certains, la somme de 50 dollars sera facturée pour le nettoyage.
a été prouvé être défectueux en matériau et en main d’œuvre dans la période de garantie.
applicables sont aussi limitées à la période d’un (1) an de la garantie limitée.
aux directives imprimées qui y sont jointes.
d’expédition de retour seront ajoutés à la facture de réparation.
originale.
Weston Products LLC.
fonctionnalité ou l’intégralité de l’unité.
COPIE DE VOTRE REÇU D’ACHAT ORIGINAL À :
Weston Products LLC / WARRANTY
20365 Progress Drive, Strongsville, OH 44149 U.S.A.
CARTE DE GARANTIE
ENVOYEZ CETTE CARTE DE GARANTIE AVEC UNE COPIE DE VOTRE REÇU D’ACHAT ORIGINAL À :
WESTON PRODUCTS LLC / WARRANTY, 20365 PROGRESS DRIVE, STRONGSVILLE, OH 44149 U.S.A.
Nom du Client: _______________________________________
Adresse: ___________________________________________
Province/Code postal/Région: ____________________________
Numéro de téléphone: (_________) ________________________
Adresse de courrier électronique: __________________________
Date d’achat d’origine: ____/______/_____
No de modèle du produit: _______________________________
No de série (s’il y a lieu): _______________________________
J’ai lu les informations relatives à la garantie. Initiales ici:
Copie du reçu
incluse
____________
Page 22

NOTES
Page 23

NOTES
Page 24

If any components of this unit are broken, do not operate properly, or for product returns,
Phone: 1-800-814-4895 (Outside the U.S. 440-638-3131)
Mail: 20365 Progress Drive, Strongsville, Ohio 44149
E-Mail: CustomerService@WestonProducts.com
All Trademarks and Registered Trademarks are property of the respective companies.
SAVE THESE INSTRUCTIONS!
Refer to them often and use them to instruct others.
ATTENTION!
please contact Weston Products LLC
Web Site: WestonProducts.com
Revise completamente el envase y compruebe que no falten partes o que algún producto esté dañado.
Para todas aquellas preguntas referentes al uso del producto, partes faltantes, daño del producto, dicultad
o activación de la garantía, comuníquese con el equipo de servicio al cliente de weston products:
Línea de Servicio al Cliente para Residentes de EE.UU.: 1.800.814.4895 (Fuera de EE.UU., llame al:
NO devuelva este artículo al vendedor minorista antes de comunicarse con Servicio al Cliente de Weston
Si des pièces ont été endommagées pendant le transport, veuillez communiquer avec le détaillant pour
Pour toutes les autres questions concernant l’utilisation du produit, les pièces manquantes, les problèmes
ou l’activation de la garantie, veuillez communiquer avec l’équipe du service clientèle des produits Weston:
Veuillez communiquer avec le service clientèle des produits Weston AVANT de retourner cet appareil au
si el producto está dañado por el transporte, solicite asistencia al distribuidor.
desde las 8:00 am hasta las 5:00 pm est, de lunes a viernes
1.440.638.3131) Weston Products LLC, 20365 Progress Drive, Strongsville, Ohio 44149
Consulte estas instrucciones y úselas para enseñar sobre el uso de este producto a otras personas.
¡GUARDE ESTAS INSTRUCCIONES!
Veuillez inspecter cet emballage avec soin pour y détecter
Numéro de téléphone du service clientèle pour les résidents des É.-U. : 1.800.814.4895
Numéro de téléphone à l’extérieur des É.-U. : 1.440.638.3131
Weston Products LLC, 20365 Progress Drive, Strongsville, Ohio 44149
¡ATENCIÓN!
CustomerService@WestonProducts.com
WestonProducts.com
Products.
ATTENTION!
toute pièce manquante ou endommagée.
obtenir de l’aide.
de 8:00 à 17:00 HNE, du lundi au vendredi.
CustomerService@WestonProducts.com
WestonProducts.com
détaillant.
CONSERVER CES DIRECTIVES!
Veuillez les consulter fréquemment et les utiliser pour la formation.
 Loading...