

Westinghouse RTS Setup Manual
RTS Setup Guide
Menu Buttons
M - The M button stands for Menu and is used to activate the
menu, select menu options and to save changes.
Up and Down Arrow – These buttons are used to scroll through
menu options.
E - The E button stands for Exit and is used to exit individual
menu options. (Exception: When setting date ranges for Access
Control, E is used to initiate the “Save” prompt).
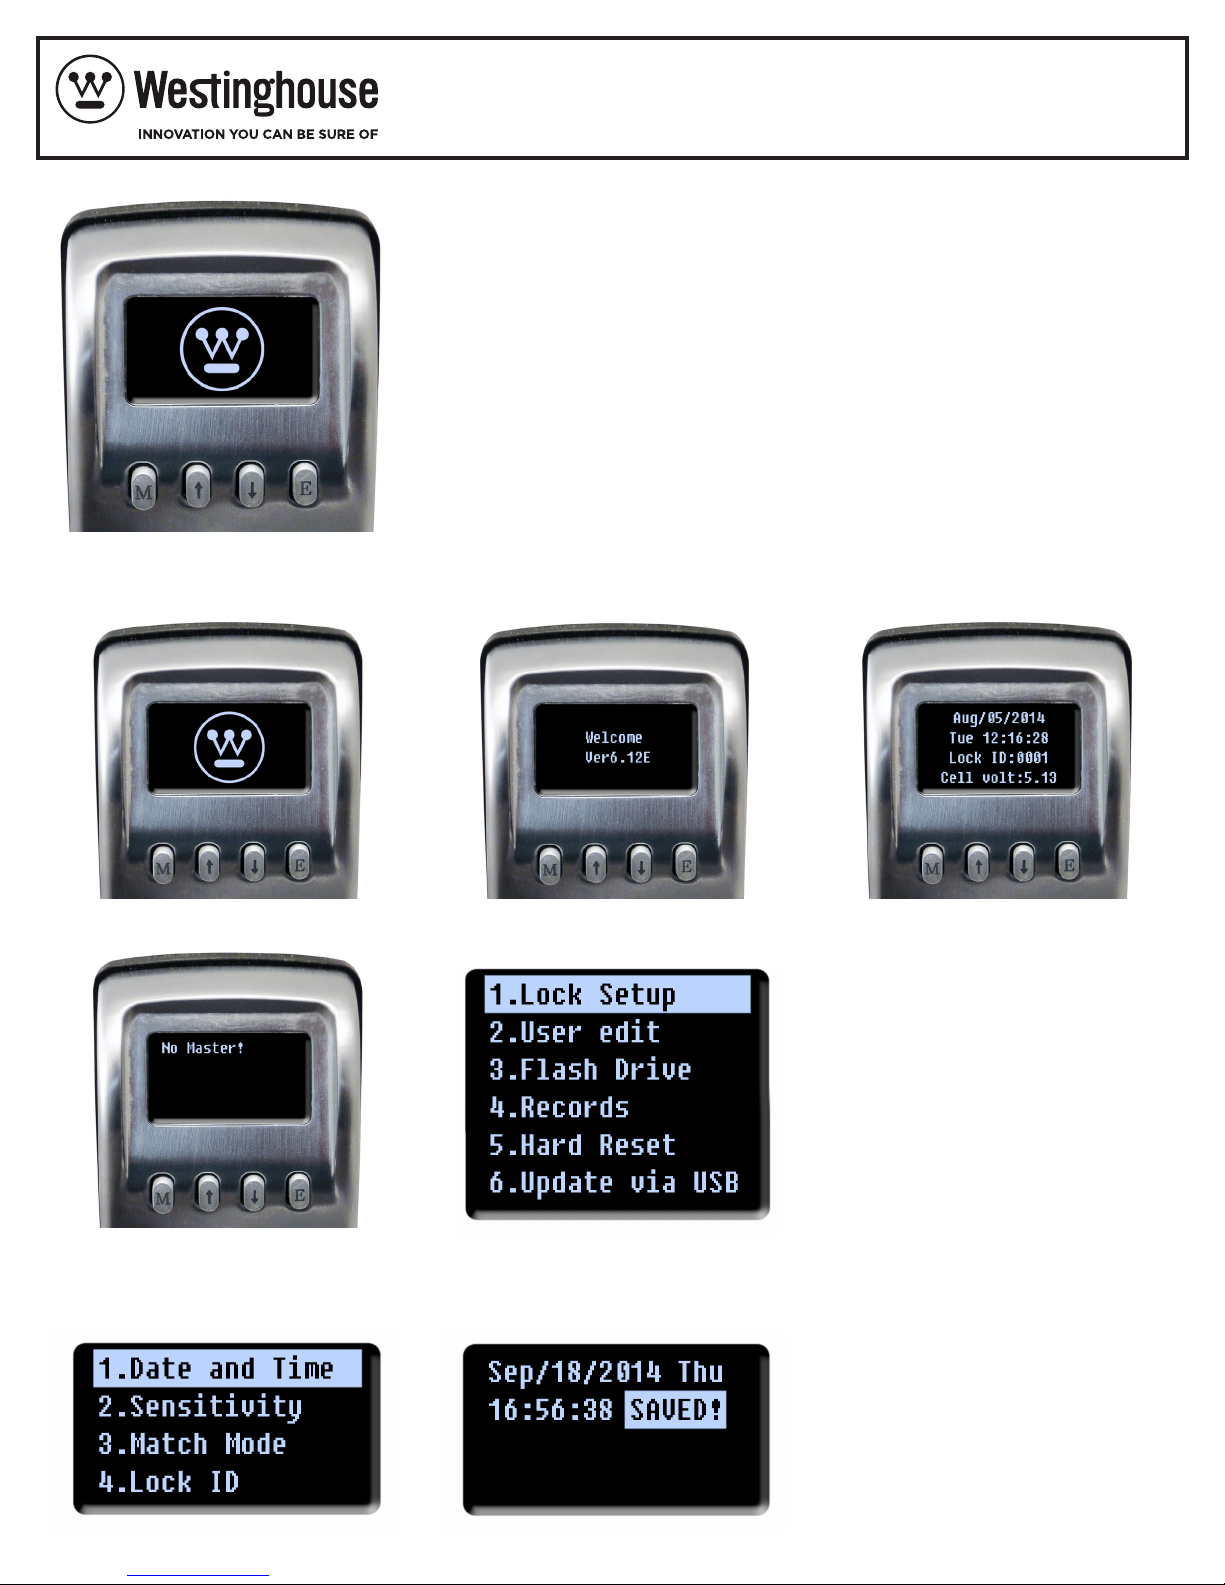
1. Welcome Menu – Press M to access the Welcome Menu. The Unit will then display the screens shown below.
Westinghouse Logo
No Master
Welcome/Version
Lock Setup
Date/Time/ID/Voltage
Note that the Start-up screen will
be displayed for about 5 seconds.
None of the buttons will be active
during this time. The Lock Setup
menu will only display the first 4
choices. Press Down Arrow for
choices 5 and 6.
2. Set Date/Time – With “Lock Setup” highlighted, press M. The lock will show the Date/Time Screen.
Use the arrow keys to select values
for Month, Day, Year, Hour, Minute
and Second. Press M after each
selection to save that value and
move to the next item.
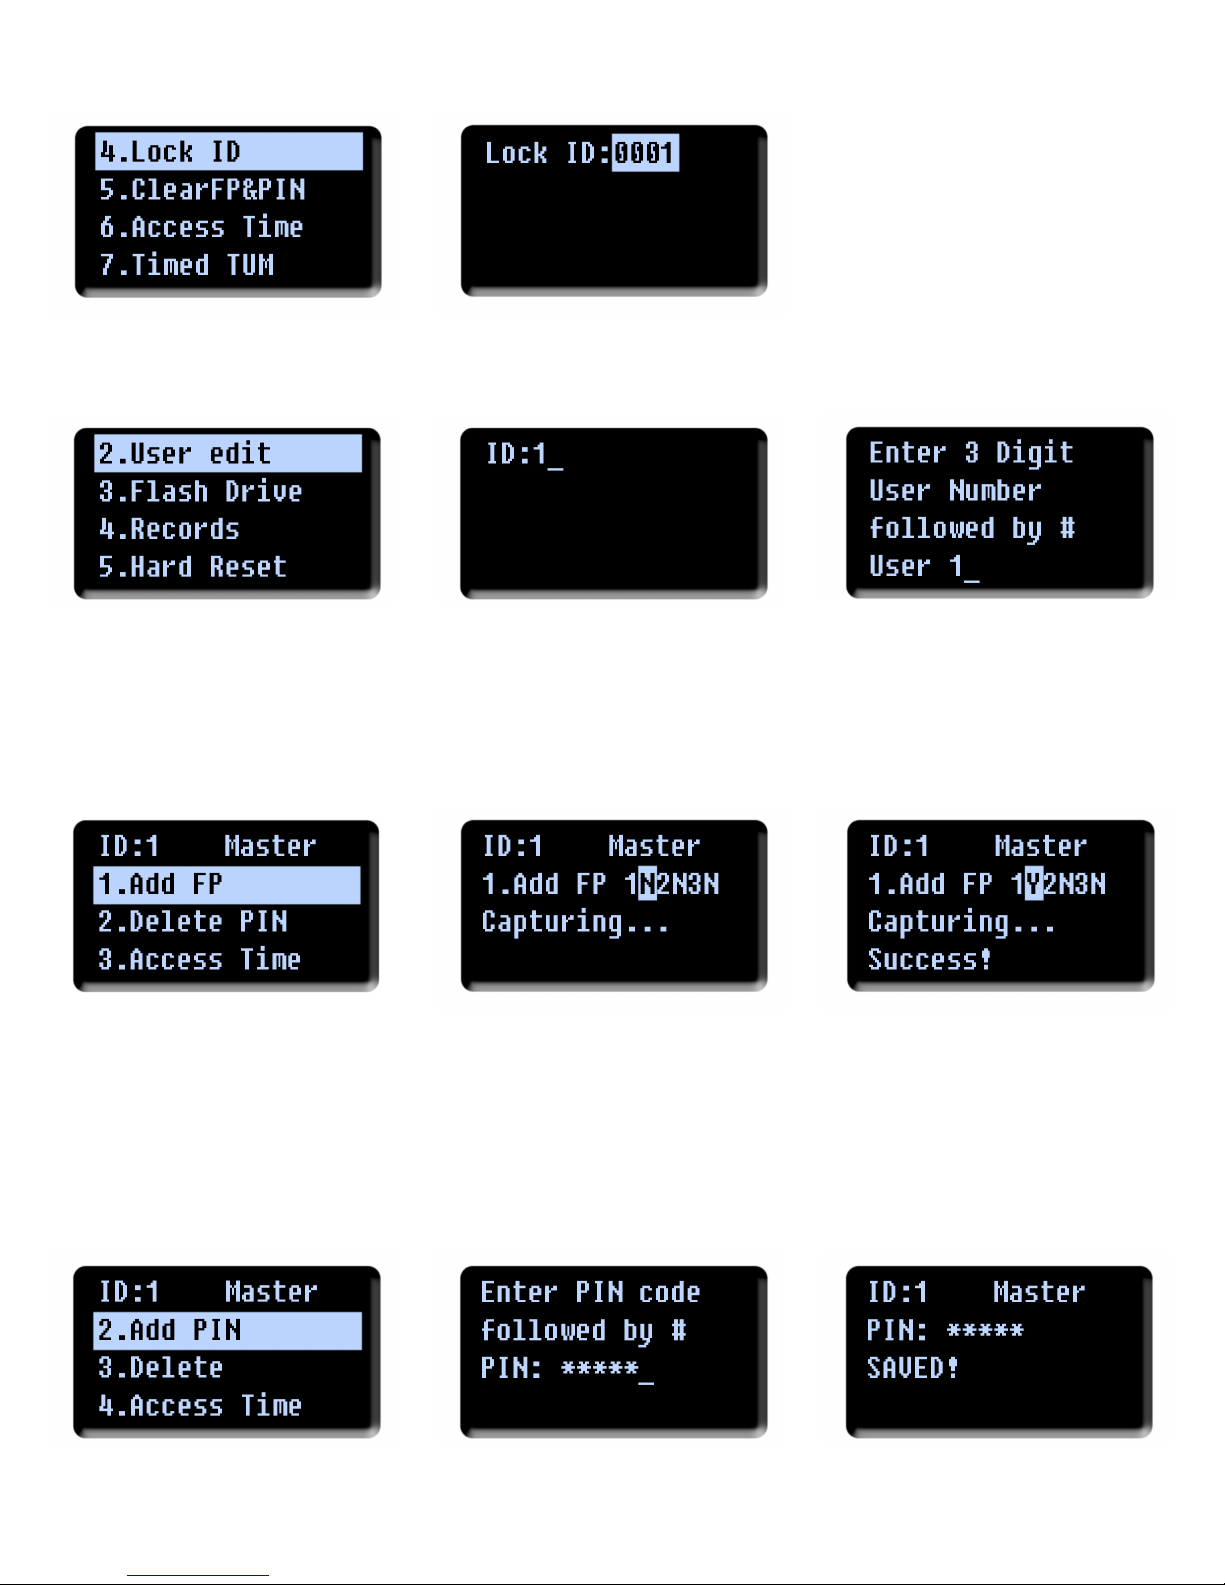
3. Set Lock ID – Use the arrow keys to highlight “4. Lock ID.” Press M. The unit will display the screen shown below.
Using the arrow keys, set the
Lock ID. This is a 4 digit number
between 0001 and 9999. Note:
The Lock ID is critical when using
the MS1 Management Program for
programming and audit trail. The
Lock ID set here must correspond
with the Lock ID set with the MS1
software.
4. Creating Users – Use the arrow keys to highlight “2. User Edit.” Press M. The unit will display the screens
shown below.
Inside Display
Outside Display
Use the outside keypad to enter
a user ID. This is a 3 digit number
between 001 and 999. Press the
digits and then # to save.
5. Enrolling Fingerprints – After entering the User ID, use the arrow keys to highlight “1. Add FP.” and press M.
The unit will display the screens shown below. Use the arrow keys to select 1, 2, or 3,
place finger on scanner and press M.
Note that it may take several seconds after “Add FP” is selected before “1N2N3N” appears. Three fingerprints may be
enrolled per user. “N” signifies that no fingerprint has been enrolled in this slot. “Y” signifies that a fingerprint has been
enrolled in this slot.
Be sure to place the finger center in the center of the scanner window and place the finger flat in the window.
Security Warning: Admin 1 must enroll at least one fingerprint to prevent the lock from opening without a fingerprint
if the # is pressed.
6. Enrolling PIN – After entering the User ID, use the arrow keys to highlight “2. Add PIN.” and press M. The unit will
display the screens shown below. Use the outside keypad to enter a 3-10 digit PIN. Press # to save.
NOTE: When finished, either allow the unit to time out or press the E key until the inside display shows “BYE”
Outside Display
Outside Display
 Loading...