

Page 1
User Guide
4100-22000
WeConfig
Westermo Teleindustri AB
©
Westermo Configuration and
Management Tool, version 1.2
www.westermo.com
Page 2

License Information
This device contains public available software which is under the GPL license.
For more information see legal.pdf included with all firmware releases.
This product includes software developed by the OpenSSL Project for use in the
OpenSSL Toolkit. http://www.openssl.org
Legal information
The contents of this document are provided “as is”. Except as required by applicable
law, no warranties of any kind, either express or implied, including, but not limited to,
the implied warranties of merchantability and fitness for a particular purpose, are made
in relation to the accuracy and reliability or contents of this document. Westermo
reserves the right to revise this document or withdraw it at any time without prior
notice.
Under no circumstances shall Westermo be responsible for any loss of data or income
or any special, incidental, and consequential or indirect damages howsoever caused.
More information about Westermo can be found at the following Internet address:
http://www.westermo.com
2
WeConfig
Page 3

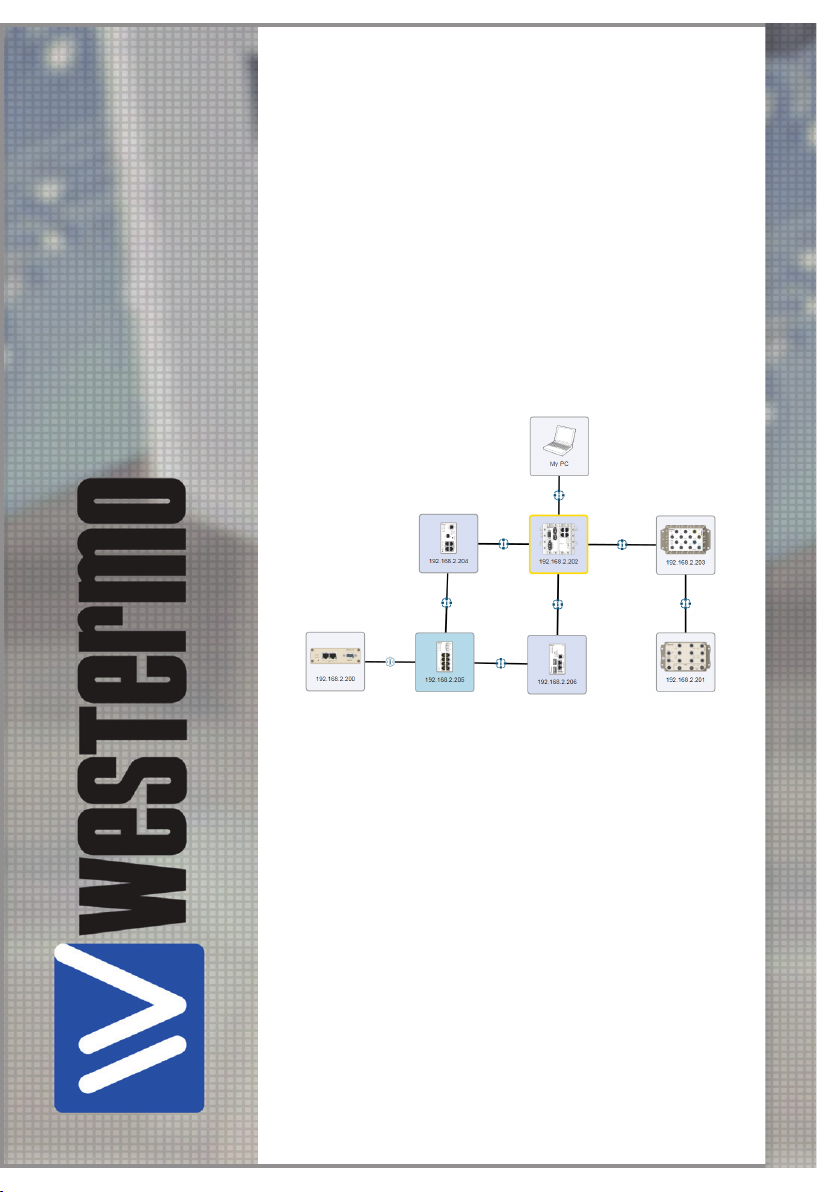
WeConfig Quick Start Guide
The Westermo configuration and management tool, WeConfig, is used for basic
configuration and maintenance of Westermo WeOS products.
Installation
The following prerequisites has to be fulfilled to successfully install and execute
WeConfig:
• Microsoft .NET framework 4.0 installed
• When installing on a XP, Windows Vista or Windows 7 PC:
* .NET 4 security patch KB2898855 installed
• When installing on a Windows XP PC:
* Windows installer 4.5 installed
* Service Pack 3 (SP3)
To be able to locate the connection to the WeConfig PC, install:
• WinPCAP 4.1.3
It is possible to use Microsoft .NET framework 4.5 on other systems than Windows
XP. In that case the above mentioned security patch is not needed. Install WeConfig by
executing the WeConfig msi and follow the instructions.
WeConfig
3
Page 4

Device Requirements
The WeConfig tool is designed for handling Westermo devices running WeOS version
4.13 or later.
The tool will however find and try to display some information about other types of
devices too. Regarding earlier WeOS versions, some features might be functional, though
not supported.
To following functionality must be enabled on the managed switches/routers to get the
most out of the tool:
• IPConfig protocol
• HTTPS (Web) must be enabled on port 433. Administrator password must be setup
in the WeConfig project settings dialogue.
• SNMP protocol.
* The read community has to be set. The same read community has to be setup
in WeConfig procect settings dialogue.
* The SNMP trap host has to be set to the IP-address of the WeConfig PC if
traps should be listed in WeConfig. For full functionality MS Windows Trap Host
server needs to be disabled. WeConfig has its own built in trap host server.
• LLDP protocol
• SSH must be enabled
The functionality dependent on the respective item above is described below.
• Information gathering from the device, including topology information to be able to
draw a device map is performed using SNMP. The topology information gathered
using SNMP requires the LLDP protocol to be enabled on the devices.
• Link information and automatic unit discovery may be performed if SNMP traps are
set up on the devices. The topology map will mark link status based on link traps
received, and new devices connected may be automatically discovered through link
traps.
• Basic Setup uses the IPConfig protocol to configure devices. IPConfig protocol must
be enabled on the devices to use Basic Setup.
• Backup, restore and firmware upgrade all use the HTTPS interface.
• Upgrade with HTTPS-upload method uses the HTTPS interface.
• All configuration functions are performed using SSH; hence, SSH has to be enabled
on the target devices.
To be able to launch an interactive SSH session to the devices (e.g. via context menu), an
external SSH client must be set up in the tool settings.
4
WeConfig
Page 5
Basic Usage
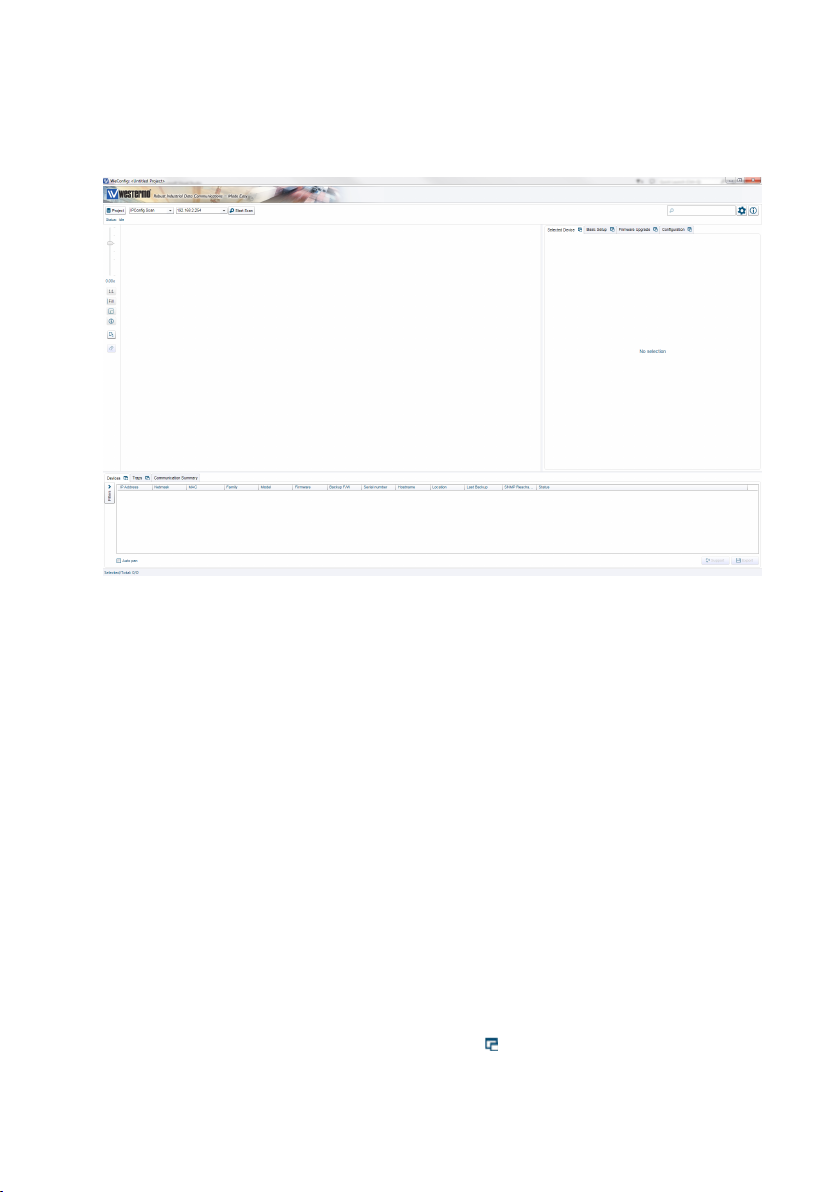
User Interface
The different areas of the WeConfig user interface are described below.
In the top section, the global operations are present. There is a drop down list to select
between:
• Device scan, either using:
* Westermo IPConfig protocol (only supported by Westermo devices), or
* ICMP ping protocol
• Update of device information using SNMP
In this section there is a button for project management, a search field used to search for
devices, users guide, tool settings and an about-button.
The large empty area is the topology view, where the topology map will be drawn. To
the left in this area are display options for the topology view, e.g. zoom and auto-layout
functionality. The ‘i’ icon gives more information about links in the topology map. The
‘brush’ icon (also available via the Project menu) clears the project from devices but
keeps settings and configuration backup files.
The area to the right, the operations panel, contains different tabs for information display
and configuration and maintenance.
The bottom panel main view is the list view where all detected devices will be listed
after a scan (Devices tab). It also contains a Traps tab and a Communication Summary
tab. The ‘Filters’-button to the left in the Devices tab shows/hides a filter panel where
predefined filters can be applied to the device list and the topology map. The Devices tab
and the Traps tab can be undocked (by pressing the icon) and resized. When undocked,
just close the window to dock it again.
WeConfig
5
Page 6

Scan for Devices
First operation to use is one of the scan operations. To get as much information as
possible using the scan operations, the SNMP read community string should first be set
in the project settings dialogue to allow automatic SNMP queries to collect information
about the units, e.g. topology information for drawing the topology map.
When performing a re-scan, any newly found devices will be located at a fixed position
on the topology map, slightly overlapping each other. An auto-layout performance or
positioning them by hand is necessary. Each newly detected device will also be marked
with a ‘New’ icon; this icon will be removed in next scan or when saving the project.
Devices will not be automatically removed at any time. They may be deleted by using
context menu on devices in topology map or in the device list. Links between devices can
also be removed manually; just press the ‘i’ icon on the left to show the information icon
on all links, press the information icon for link of interest and operate on displayed info.
IPConfig Scan
The IPConfig scan is recommended when scanning units if they are new (factory
default settings) or has an unknown configuration. This allows the user to find them and
configure an IP-address for further operations e.g. using the web management interface.
Note, the IPConfig protocol may be turned off on the Westermo devices, and they will in
that case not be identified using IPConfig protocol.
Select an IP address in the drop-down to scan using the associated network interface.
The subnet mask for the IP address should be 255.255.255.0. If a different subnet mask is
used, an alternative IP address for scanning can be added, see section Alternative IP Setting.
Ping Scan
The ping (ICMP) scan is recommended for scanning units when they are configured, since
it will also find other units in the network, and thus get a more complete map of the
network. If devices from other vendors supply topology information in the same manner
as WeOS devices, the topology map will also be able to display their connections in the
topology view.
Enter a start address and end address for the IP-range to ping.
6
WeConfig
Page 7

Alternative IP Setting
Due to a shortcoming in the IPConfig protocol, an address with subnet mask
255.255.255.0 has to be used for scanning. If no subnet is available, add an additional
address for smoother operation. Make sure the address selection does not interfere with
other devices in the network.
Open Network Settings using the Windows control panel in the TCP/IP properties
dialogue, click Advanced button.
Now click the Add button and enter an alternative address with subnet mask
255.255.255.0. There should now be two addresses available.
WeConfig
7
Page 8

Projects
Management
Projects may be saved, renamed or deleted by using the options found under the Project
button in the top panel.
Settings
Project settings are also found under the Project button in the top panel.
General
SNMP read community, admin password, settings for scheduled backup and settings
for firmware upgrade are available via the General menu option. The community and
password are used as default for all devices in the project.
WeConfig may perform automatic backup based on a schedule.
Scheduled backups will only be performed when WeConfig application is running and
only for currently loaded project.
Device Access
SNMP read community and admin password can be set per device on project level, via
the Device access menu option. These settings are used for device access and ar not
actually applied on device level. To actually change the community valid on the device, use
the functionality under Configuration/SNMP. To change the password, access the device via
the context meny (using HTTP/HTTPS/SSH).
Configuration Manager
The Configuration Manager can be used to manage all configuration files contained in the
project.
8
6642-22521
Page 9

Operations Panel
The tabs Selected Device, Basic Setup, Firmware Upgrade and Configuration can be undocked
(by pressing the icon) and resized. When undocked, just close the window to dock it
again.
Selected Device
Properties
When selecting a device, device information will be displayed on the Selected Device tab in
the operations panel. The information is collected using SNMP.
Information is updated when a device is selected, or when performing the global
operation SNMP update.
Configuration Files
When selecting a device, currently available configuration file backups will be listed (in
local time order) on the Configuration Files tab in the operations panel. Configuration may
be backed up, restored, edited, imported, exported or deleted.
Configuration files may also be copied between units using the copy/paste functionality
found in the device context menus in topology map or device list.
When a listed configuration backup file differs from previous entry int he list, an ‘i’ icon is
shown to the left of the entry. Press the icon to show actual file differences in a separate
window. WeConfig uses an internal diff viewer. This viewer can be changed to any other
viewer via the tools settings (upper right corner of WeConfig).
Communication Details
When selecting a device, and selecting a port on the device in the Communication
Summary tab (found in the bottom panel), a detailed view of communication information
is displayed in this tab.
The information may be automatically updated by select an interval option in the Auto
refresh drop-down found on the Communication Summary tab in the bottom panel.
6642-22521
9
Page 10

Basic Setup
Select devices in the topology map (CTRL + click device to select devices in desired
order) or device list view (CTRL-A in the list selects all devices) and click the Add button
in the Basic Setup tab to add them to the working selection for the basic setup of devices.
IP address, subnet mask, default gateway, hostname and location may be set.
Using the fill functionality an IP-series may be generated. Use the sorting feature to
order the units in desired order before filling, or select them in the desired order before
adding.
Leaving one or more fields empty, fill will leave the field as is when filling.
Firmware Upgrade
To be able to use this feature, download the firmware packages to the WeConfig
computer. The folder where the files will be placed has to be configured in the toolsettings dialogue.
The default upgrade protocol is HTTPS. If selecting TFTP/FTP, a TFTP or FTP server must
be installed on the WeConfig computer.
NOTE: Use the same folder for all firmware packages whether HTTPS or TFTP/FTP is
used.
Select devices in the topology map (CTRL + click device to select devices in desired
order) or list view (CTRL-A in the list selects all devices) and click the Add button in the
Firmware Upgrade tab to add them to the working selection for the basic setup of devices.
Use the sorting feature to order the units in desired order before upgrading, or select
them in the desired order.
Configuration
Backup
Select devices in the topology map or list view and click the Add button in the Backup
tab to add them to the working selection for performing backup of devices. Files are
saved with UTC time stamp.
SNMP
Select devices in the topology map or list view and click the Add button in the SNMP tab
to add them to the working selection for performing SNMP configuration of the devices.
Edit the fields directly in the list or use the Fill functionality (above the list); to use a field
when filling, just check the checkbox to the left of the field. To clear all fields in the list
press the Clear button.
The configuration will be applied on the devices in the list when pressing Apply.
10
6642-22521
Page 11

FRNT
Select devices in the topology map (CTRL + click device to select devices in desired
order) or list view (CTRL-A in the list selects all devices) and click the Add button in the
FRNT tab to add them to the working selection for performing FRNT configuration of
the devices.
Use the sorting feature to order the units in desired order before applying configuration,
or select them in the desired order before adding.
Edit the fields directly in the list. The configuration will be applied on the devices in the
list when pressing Apply.
Note that connection will be lost if configured ports are the same as those currently
connected; hence, to avoid this issue, connect using other ports (when possible) than
those being configured for FRNT.
RSTP
Select devices in the topology map (CTRL + click device to select devices in desired
order) or list view (CTRL-A in the list selects all devices) and click the Add button in the
RSTP tab to add them to the working selection for performing RSTP configuration of the
devices.
Use the sorting feature to order the units in desired order before applying configuration,
or select them in the desired order before adding.
Edit the fields directly in the list. To enable RSTP or to set Admin Edge on port level
press the ‘down-arrow’ icon to the left of each device in the list. The configuration will be
applied on the devices in the list when pressing Apply.
Note that the network might be instable when applying the configuration and connection
might be lost.
VLAN
Select devices in the topology map (CTRL + click device to select devices in desired
order) or list view (CTRL-A in the list selects all devices) and click the Add button in the
VLAN tab to add them to the working selection for performing VLAN configuration of
the devices.
The VLAN tab is divided in two sub tabs, Ports and Interfaces. In the Ports tab, the VLAN is
applied on the actual ports as tagged, untagged or not a member. Edit the fields directly
in the list.
When adding a new VLAN it is tagged, for all devices in the list, on all ports having a
connection to another WeOS device and for all ports having FRNT or RSTP (non Admin
Edge) configured. It is important to remember that this is only a suggestion and that it is
the responsibility of the user to decide which ports shall be tagged.
In the Interface tab the actual VLAN interfaces can be configured. Edit the fields directly in
the list or use the Fill functionality by pressing the ‘down-arrow’ icon above the list.
The configuration will be applied on the devices in the list when pressing Apply.
6642-22521
11
Page 12

Ports
Select devices in the topology map (CTRL + click device to select devices in desired
order) or list view (CTRL-A in the list selects all devices) and click the Add button in the
Ports tab to add them to the working selection for performing Ports configuration of the
devices.
Use the sorting feature to order the units in desired order before applying configuration,
or select them in the desired order before adding.
To set specific speed/duplex on ports, just uncheck the Auto checkbox.
Edit the fields directly in the list. The configuration will be applied on the devices in the
list when pressing Apply.
General
Select devices in the topology map (CTRL + click device to select devices in desired
order) or list view (CTRL-A in the list selects all devices) and click the Add button in the
General tab to add them to the working selection for performing General configuration
of the devices.
Use the sorting feature to order the units in desired order before applying configuration,
or select them in the desired order before adding.
The General tab is divided in four sub tabs; Logging, Network, Time/date and Alarm. To
configure, check the checkbox to the left of the field of interest and provide desired data.
The configuration, from all General sub tabs, will be applied on the devices in the list
when pressing Apply.
• Logging
Configure Syslog Server 1 and 2.
• Network
Configure default gateway, enable/disable routing and DNS server 1 and 2.
• Time/date
Either configure time/date using current host time or SNTP.
Configure time zone, NTP server address and NTP poll interval.
• Alarm
Disable link alarm on all ports, enable on all tagged ports, enable on all
untagged ports, enable on all FRNT ports, enable on all RSTP ports (non
Admin Edge) or enable on all ports currently having link status up (link to
PC excluded).
12
6642-22521
Page 13

Bottom Panel
Devices
Lists all devices found when scanning.
To automatically pan the topology map to the device selected in this list, check the Auto
pan checkbox found below the list. Click on the headings to sort the list.
The list can be exported t a CSV file by pressing the Export button. Tech support files can
be uploaded from selected device by pressing the Support button.
Traps
Lists traps received from SNMP agents. Requires configuration of trap host address on
the devices.
WeConfig uses Windows trap host when enabled. For full functionality, the Windows trap
host must be disabled; in that case WeConfig will use its own trap host server.
The list can be exported to a CSV file by pressing the Export button. The list can be
cleared by pressing the Clear button.
Communication Summary
Lists a summary of communication information for ports on selected device.
When selecting a port in the list, detailed information will be available in the
Communication Details tab found under the Selected Device tab in the operations panel to
the right.
The communication information may be automatically updated every 5, 10, 30 or 60
seconds by selecting an option in the drop-down found below the communication
summary list.
The list can be exported to a CSV file by pressing the Export button.
6642-22521
13
Page 14

14
6642-22521
Page 15

6642-22521
15
Page 16

Westermo • SE-640 40 Stora Sundby, Sweden
Tel +46 16 42 80 00 Fax +46 16 42 80 01
Sales Units
Westermo Data Communications
E-mail: info@westermo.com
www.westermo.com
China
sales.cn@westermo.com
www.cn.westermo.com
France
infos@westermo.fr
www.westermo.fr
Germany
info@westermo.de
www.westermo.de
For complete contact information, please visit our website at www.westermo.com/contact or scan the QR code.
REV.B 4100-22000 2015-04 Westermo Teleindustri AB, Sweden – A Beijer Electronics Group Company
North America
info@westermo.com
www.westermo.com
Singapore
sales@westermo.com.sg
www.westermo.com
Sweden
info.sverige@westermo.se
www.westermo.se
United Kingdom
sales@westermo.co.uk
www.westermo.co.uk
Other Offices
 Loading...