

Page 1
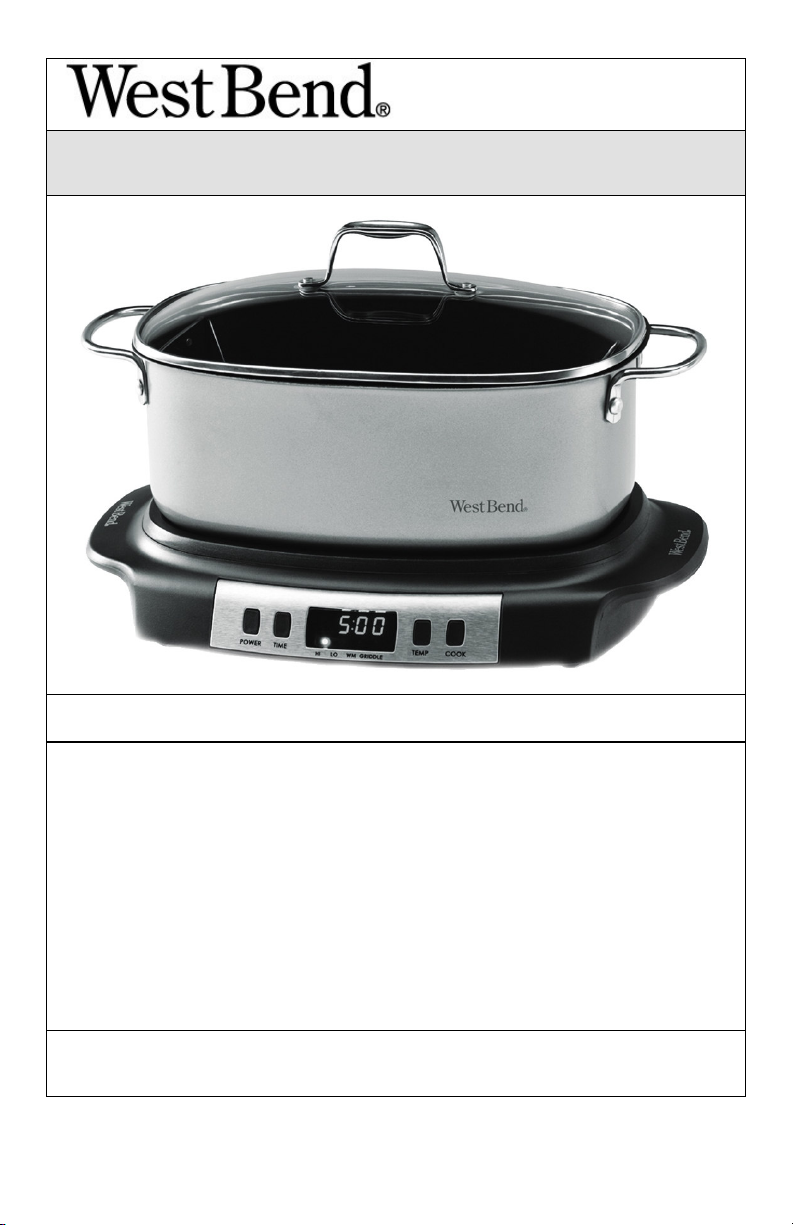
6 QT. V
ERSATILITY™ COOKER
Instruction Manual
Register this and other Focus Electrics products through our website:
www.registerfocus.com
Important Safeguards ............................................................................................... 2
Before Using for the First Time ................................................................................ 3
Using Your 6 Qt. Versatility™ Cooker ...................................................................... 4
Helpful Hints ............................................................................................................. 6
Cleaning Your 6 Qt. Versatility™ Cooker ................................................................. 8
Recipes .................................................................................................................... 8
Warranty ................................................................................................................. 13
SAVE THIS INSTRUCTION MANUAL FOR FUTURE REFERENCE
2009 West Bend®, a Brand of Focus Electrics, LLC.
www.focuselectrics.com
Page 2

IMPORTANT SAFEGUARDS
To prevent personal injury or property damage, read and follow all instructions
and warnings.
When using electrical appliances, basic safety precautions should always be
followed including:
• Read all instructions, including these important safeguards and the care and use
instructions in this manual.
• Do not touch hot surfaces. Use handles or knobs and hot pads or oven mitts.
• Always unplug from outlet when not in use and before cleaning. Allow to cool
before putting on or taking off parts and before cleaning.
• Close supervision is necessary when this appliance is used by or near children.
• Do not operate any appliance with a damaged cord or plug, after the appliance
malfunctions, or has been damaged in any manner. For service information see
warranty page.
• The use of accessory attachments not recommended by Focus Electrics may
cause fire, electric shock, or injury.
• Do not use this appliance outdoors.
• Do not let cord hang over the edge of the table or counter, or touch hot surfaces.
• Do not place on or near a hot gas or electric burner, or in a heated oven.
• Extreme caution must be used when moving an appliance containing hot oil or
other hot liquids.
• Always attach plug to appliance first, then plug cord into the wall outlet. To
disconnect, turn any control to “OFF,” then remove plug from wall outlet.
• Do not use appliance for other than intended use.
• To protect against electric shock, do not immerse cord, plugs, or other electric
parts in water or other liquids.
• Do not attempt to repair this appliance yourself.
• A short power-supply cord is provided to reduce risks resulting from becoming
entangled in or tripping over a longer cord.
• Longer extension cords are available, but care must be exercised in their use.
While use of an extension cord is not recommended, if you must use one,
ensure that the marked electrical rating of the extension cord is equal to or
greater than that of the appliance. If the plug is of the grounded type, the
extension cord must be a grounding-type 3-wire cord. To avoid pulling, tripping
or entanglement, position the extension cord so that it does not hang over the
edge of the counter, table or other area where it can be pulled on by children or
tripped over.
2
Page 3
• This appliance has a polarized plug (one blade is wider than the other). To
reduce the risk of electric shock, this plug is intended to fit into a polarized outlet
only one way. If the plug does not fit fully into the outlet, reverse the plug. If it
still does not fit, contact a qualified electrician. Do not attempt to modify the plug
in any way.
• Do not use an outlet or extension cord if the plug fits loosely or if the outlet or
extension cord feels hot.
• For household use only.
SAVE THESE INSTRUCTIONS
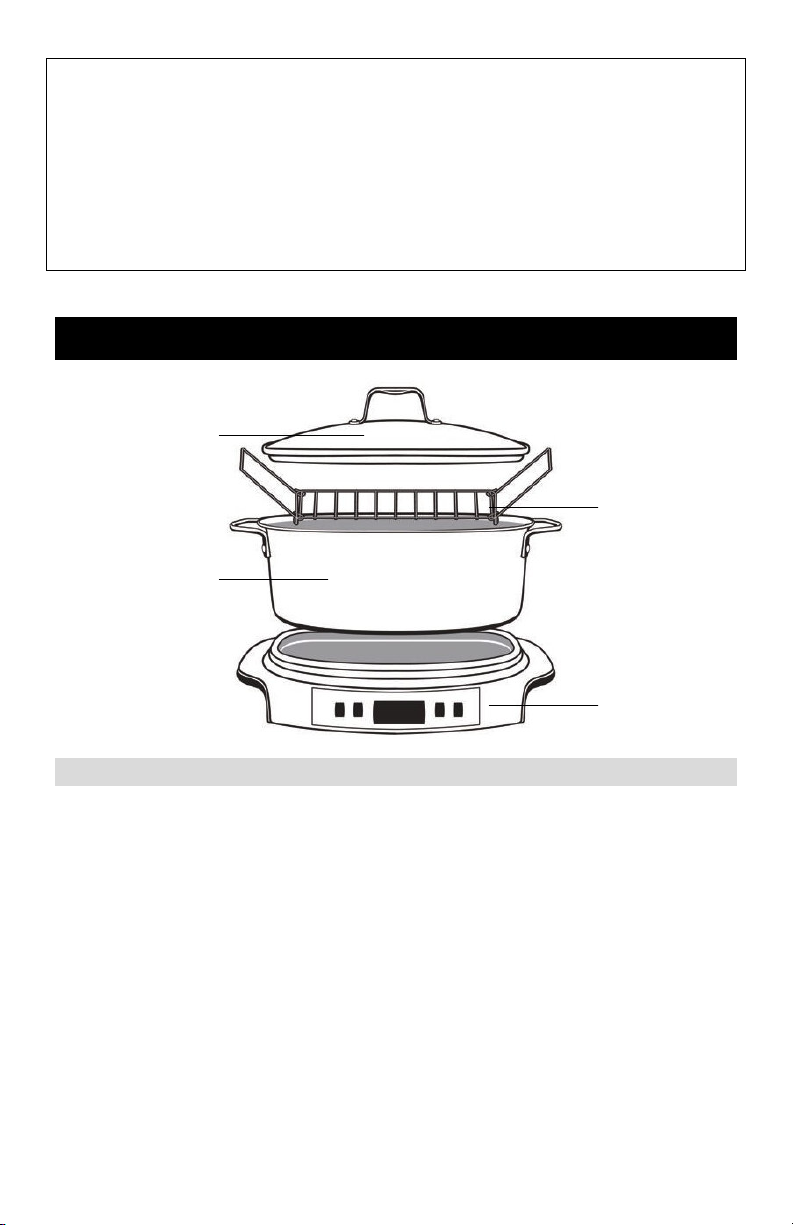
Cooking Pot
Please check all packaging material carefully before discarding. Accessory
parts may be contained within the packaging material.
Before using, wash the cooking pot, cover, and roasting rack as directed in the
“Cleaning your 6 Qt. Versatility™ Cooker” section of this manual. Wipe the non-stick
finish of the slow cooker heating base with a damp cloth and dry.
Using paper towel, wipe the non-stick interior of the cooking pot with a teaspoon of
vegetable oil. This will condition the non-stick finish to prevent sticking. NOTE: Do
NOT use shortening or butter to condition the finish. Leave a light film of oil on the
finish. The cooking pot’s non-stick interior will need to be reconditioned after each
time the cooking pot is 1) cleaned in an automatic dishwasher; 2) the finish is treated
with a special cleaner; 3) the finish is cleaned with lemon juice or vinegar to remove
a mineral film; or 4) when sticking becomes a problem during use. DO NOT
CONDITION THE NON-STICK SURFACE OF THE HEATING BASE BEFORE
USING IT AS A SLOW COOKER. The non-stick finish of heating base should only
be conditioned before it is used as a
Cover
B
EFORE USING FOR THE FIRST TIME
griddle.
Roasting Rack
Heating Base
3
Page 4

U
SING YOUR 6 QT. VERSATILITY™ COOKER
To Use as a Slow Cooker:
1. Place heating base on dry, level, heat-resistant surface away from any edge.
2. Place foods into cooking pot, cover and place cooking pot onto heating base. If
you wish to brown or precook any foods before slow cooking, place cooking pot
directly on range top over medium heat. After foods are browned or cooked,
transfer cooking pot to heating base. NOTE: Use only plastic, rubber, wooden,
or non-metal cooking tools in the cooking pot. Use of metal cooking tools will
scratch the non-stick surface.
3. Attach cord to base, then plug cord into a 120 volt, AC electric outlet only. The
heating base will beep when plugged in. Nothing will show on the display until
the “POWER” button is pressed.
4. Press the “POWER” button. “SEL” will be displayed and “LO” temperature
setting is indicated with a flashing light. If you do not select a setting within 5
seconds, the slow cooker will default to “LO,” 9 hours.
5. Press “TEMP” to select “HI,” “LO,” keep warm “WM” or “Griddle” setting. Note:
Only “HI” or “LO” settings are available for programmed cooking times. Any time
the “TEMP” button is pressed, the time will reset to the default for that setting;
“LO,” 9 hours and “HI,” 5 hours.
6. Press ”TIME” button to scroll up to desired cooking time. You cannot program
the Versatility™ Slow Cooker to cook for longer than 12 hours. Note: The time
can be cycled from 1-12 hours. The clock starts at the default time; press the
“TIME” button past 12 hours to cycle to 1 hour.
• The timer, once set, will count down in minutes. If the “TIME” button is
pressed at any point, the time will cycle up to the next whole hour, and
then will increase in 1 hour increments.
7. Press “COOK” to start the cooking cycle. If “COOK” hasn’t been pressed within
5 seconds, the base will beep 5 times, indicating that it has begun the cooking
cycle. When the cooking cycle is completed, the program will shift to the keep
warm “WM” setting and timer will count up from zero showing the elapsed time
on warm. Note: The keep warm “WM” setting will automatically shut off after 24
hours of heating.
8. Press the “POWER” button to turn the appliance off. Pressing “POWER” at any
point in any cooking cycle, or keep warm “WM,” will turn the appliance off. All
settings will then be reset back to default when power is turned back on. No
previous settings are saved when the 6 Qt. Versatility™ Cooker is powered off.
9. Slow cooker base offers heat settings of keep warm “WM,” “LO,” “HI,” and
“GRIDDLE.” “WM” should only be used to keep cooked foods warm for serving,
whereas “LO” and “HI” are to be used for actual cooking of foods. NOTE: DO
NOT USE THE KEEP WARM “WM” SETTING FOR ACTUAL COOKING OF
RAW FOODS AS THE SLOW COOKER WILL NOT GET HOT ENOUGH TO
COOK FOODS. DO NOT USE THE GRIDDLE SETTING FOR SLOW
COOKING AS OVERCOOKING WILL OCCUR.
4
Page 5

10. Select heat setting and cook food for recommended time as given in recipe or
the temperature guide below. As a general guideline, most meat and vegetable
combinations need 7 to 10 hours of cooking at “LO,” or 4 to 6 hours of cooking
at “HI.” Meats will become most tender when cooked for the longer time at the
lower heat setting. Avoid removing cover when slow cooking as cooking time will
be increased due to loss of heat. Remove cover only when needed to stir
occasionally or when adding ingredients.
To Use as a Griddle:
The heating base can be used as a light duty griddle.
1. Before using the heating base as a griddle, condition the non-stick surface
with vegetable oil.
2. Press the “TEMP” button until “GRIDDLE” is selected. Press the “COOK”
button to start the griddle, or wait 5 seconds, and the base will beep 5
times, indicating that the “GRIDDLE” setting has been selected and the
griddle has started heating. For best results, preheat base for about 8 - 10
minutes, then cook foods to desired doneness. Please refer to the
“TEMPERATURE GUIDE” below. The heating base will perform only as a
light duty griddle. “GRIDDLE” setting should NEVER be used as a slow
cooker setting.
3. When food is done cooking, press “POWER” to turn the appliance off.
Unplug the cord from the outlet, and allow to cool completely. Follow
cleaning instructions in the “Cleaning Your 6 Qt. Versatility™ Cooker”
section of this manual.
Note: The timer cannot be used on this setting, and will not shift to
keep warm “WM” at any point. The griddle will remain on indefinitely
until “POWER” is pressed, or the appliance is unplugged.
Do not strike utensils against vessel or cover rim. Glass cover may shatter as
a result.
• A small amount of smoke and/or odor may occur upon heating due to the
release of manufacturing oils – this is normal.
• Some minor expansion/contraction sounds may occur during heating and
cooling – this is normal.
T
EMPERATURE GUIDE
Be sure to cook foods to recommended food-safe temperatures. Always check with a
meat thermometer to ensure that the center is cooked completely.
MEAT
Beef Rare 140°F/60°C
Medium 160°F/71°C
Well 170°F/76°C
Pork Fresh 170°F/76°C
Smoked 160°F/71°C
Canned 140°F/60°C
Lamb 170°F to 180°F/76°C to 82°C
Veal 170°F/76°C
Poultry 180°F/82°C
INTERNAL TEMPERATURES
5
Page 6

H
ELPFUL HINTS
• Adapting Recipes to Slow Cooking: Many of your favorite oven and range top
recipes can be adapted to slow cooking with a few minor changes. Here are
some important points to remember:
Amount of Liquid: Because little moisture evaporates during slow cooking,
reduce amount of liquid in your recipe by one-half (1 cup of liquid is enough
for most recipes). For soup recipes, add all ingredients except water or
broth to vessel; add only enough liquid to cover ingredients.
Amount of Seasoning: Reduce amount of seasoning in proportion to
reduced amount of liquid. Use whole or leaf herbs and spices rather than
crushed or ground forms.
Slow Cooking Meat: Less tender, less expensive cuts of meat are better
suited to slow cooking than expensive cuts of meat. Remove excess fat
before slow cooking if desired. Meat can be browned in the cooking pot on
top of the range before slow cooking.
Slow Cooking Vegetables: Add partially frozen vegetables, Chinese
vegetables and fresh mushrooms during the last hour of cooking. Strongflavored vegetables such as spinach, eggplant, okra and collard greens
should be precooked before adding to cooker. The amount of onion
normally used in your recipe should be reduced because its flavor gets
stronger during cooking. In most cases, fresh vegetables take longer to
cook than meats because liquid simmers rather than boils.
Slow Cooking Raw Meats and Vegetables: Most raw meat and vegetable
combinations need at least 4 to 6 hours of cooking at “HI” or 7 to 10 hours
at “LO.”
Slow Cooking Fish and Seafood: Fresh or thawed seafood and fish fall
apart during long hours of cooking. Add these ingredients an hour before
serving and cook at “HI.”
Slow Cooking Milk, Sweet or Sour Cream and Cheese: Because milk,
sour or sweet cream and cheese break down during long hours of cooking,
add these ingredients just before serving or substitute undiluted condensed
canned soups or evaporated milk. Processed cheese tends to give better
results than aged cheese.
Rice and Pasta: Rice and pasta may either be cooked separately, or
added uncooked during last hour of cooking time. If added uncooked, make
sure there is at least 1 to 1½ cups of liquid in vessel and heat is set at “LO”
or higher.
Dumplings: Dumplings may be cooked in broth or gravy at “HI.” Drop by
spoonfuls on simmering broth or gravy. Cook covered for 30 minutes.
Thickening Juices for Gravies and Sauces: To thicken juices for gravies
and sauces, add 2 to 3 tablespoons of quick cooking tapioca at start, or
thicken after cooking by adding a smooth paste made of 2 to 4 tablespoons
cornstarch or flour and ¼ cup cold water. Bring to a boil at “HI.” Solid foods
may be removed first.
• Don’t Remove Cover During Cooking: To retain heat, moisture and food
flavor, don’t remove cover during cooking unless necessary for adding additional
ingredients.
6
Page 7

• Using Cooking Tools on Non-Stick Finish: The following types of cooking
tools may be used on the non-stick finish: plastic, rubber or wooden. Do not use
sharp edged metal cooking tools (forks, knives, mashers) as these could scratch
the non-stick finish.
• Using Cooking pot on Top of Range: The cooking pot (without heating base)
can be used for range top cooking. Place vessel on large range unit. Use
medium to low heat. The use of low to medium heat will prevent foods from
overcooking, reduce spattering and help retain natural juices. Do not use high
heat except for bringing liquids to a boil. If cooking on a gas range, do not let
flame extend up side of cooking pot. ALWAYS USE OVEN MITTS WHEN
USING COOKING POT AND COVER ON RANGE UNIT.
• Cooking Meats: When cooking meats, preheat empty cooking pot over medium
to medium-low heat for 2 to 3 minutes or until a drop of water sizzles in cooking
pot. To prevent sticking of lean meats, you may wish to add a small amount of
cooking oil. Add meat and brown as desired. Cover cooking pot and reduce heat
to low for cooking on range top OR transfer cooking pot to heating base and
cook at desired setting. The shortest cooking time will be at “HI.”
• Using Cooking pot in Oven: The cooking pot (without heating base) can be
used in a conventional or convection oven up to preheated temperatures of
350°F/177°C. Cooking pot may be covered with aluminum foil for oven use.
ALWAYS USE OVEN MITTS WHEN USING COOKING POT IN OVEN.
• DO NOT USE THE COOKING POT IN A MICROWAVE OVEN, OVER A
CAMPFIRE OR UNDER AN OVEN BROILER UNIT TO PREVENT DAMAGE
TO THE COOKING POT OR OVEN.
• Using a Roasting Rack: Your slow cooker includes a small wire rack for
roasting meats and poultry. To use the rack, simply place into bottom of cooking
pot and place roast, chicken, or ham onto rack. Add a small amount of liquid to
cooking pot before cooking. If you wish, the meat can be browned in cooking pot
on top of range before roasting. The rack can also be used for steaming fresh
vegetables such as broccoli and corn-on-the-cob. Add 1 cup of water to cooking
pot to steam vegetables. Cook on top of range over medium to medium-low heat
or on heating base at “HI” to desired doneness.
• Bread, Cakes & Desserts: Use an 8 x 4-inch or a 9 x 5-inch loaf pan. Place the
roasting rack in the pan before placing the loaf pan. Check to ensure that your
pan fits completely into the cooking pot before mixing any ingredients. To
prevent condensation from dripping onto food while baking, place double layer
of paper toweling and single layer of aluminum foil across top of cooking pot.
Cover and bake according to recipe.
7
Page 8

C
LEANING YOUR 6 QT. VERSATILITY™ COOKER
1. Press “POWER” to turn the appliance off. Unplug the cord from the outlet and
allow the entire appliance (base, cooking pot, rack, cover) to cool completely
before cleaning. Set the cooking pot and cover on a dry, heat-protective surface
for gradual cooling. NOTE: Do not run cold water over hot glass cover as it
may crack or shatter if cooled suddenly.
2. Wipe heating base and cord with a damp cloth.
3. The cooking pot, rack, and glass cover may be washed using warm, soapy
water by hand or cleaned in the dishwasher. If dishwasher cleaning, avoid
contact between pieces to prevent damage. The non-stick surface of the
cooking pot must be reconditioned with cooking oil after it is cleaned in a
dishwasher to restore the non-stick properties. Do not use metal scouring pads
or cleansers as damage can occur. Wipe with distilled vinegar to remove water
spots or mineral deposits. Rewash with warm, soapy water, rinse and dry.
Cleaning Heating Base: Always unplug cord from electrical outlet and allow base to
cool completely before cleaning. With a spoon or baster, remove any fat or grease
that has collected on the griddle surface. Wipe oil residue from base with paper
towel. Wipe non-stick finish with a damp, soapy dishcloth or nylon-scouring pad
recommended for non-stick finishes. Clean finish thoroughly, wiping base several
times with a clean, damp cloth to remove soap residue.
If a tacky oil film forms on the non-stick finish of base, wipe with a dry cloth to
remove. If this residue is not removed, it will adhere to the finish when reheated and
become impossible to remove.
R
ECIPES
Beef Vegetable Soup
1½ lbs. Beef soup bones or 1 pound beef
short ribs
1½ qt. Water
1 tsp. Salt
¼ tsp. Pepper
2 Carrots, chopped
1. Place soup bone, water, salt, pepper, carrots, celery, potatoes, onion and
bay leaf into cooking pot. Cover and slow cook at “LO” for 6 to 7 hours.
2.
Remove soup bone and cool slightly. Remove meat from bones and return
to soup with tomatoes. Cover and slow cook an additional hour. Noodles or
barley may be added, if desired.
2 Ribs celery, chopped
2 Potatoes, peeled and chopped
1 Small onion, chopped
1 Bay leaf
1 16 oz Can whole tomatoes, undrained
8
Page 9

Herb Pork Roast
1 tsp. Salt
1 tsp. Thyme
½ tsp. Sage
½ tsp. Ground cloves
1 tsp. Grated lemon peel
1. In small bowl combine salt, thyme, sage, cloves and lemon peel. Rub into
pork roast. Cut 16 small pockets into roast and insert garlic pieces.
2. Place roast in cooking pot. Cover and cook at “LO” for 7 to 9 hours or
at ”HI” for 4 to 5 hours. Insert meat thermometer into roast to ensure
internal temperature is 170°F/77°C or higher before serving. Allow roast to
stand 10-15 minutes before carving. Remove garlic pieces. Juices may be
thickened for gravy, if desired. Dissolve 2 tablespoons cornstarch in 2
tablespoons water. Stir slowly into juices until thickened at “HI.”
4-5 lbs. Pork roast, boneless or bone-in
4 Large cloves garlic, quartered
2 tbsp. Water, optional
2 tbsp. Cornstarch, optional
Pepper Steak
1½ lbs Round steak, cut into thin strips
1 Clove garlic, minced
1 cup Chopped onion
½ tsp. Salt
¼ tsp. Pepper
¼ tsp. Ginger
1 tsp. Sugar
½ cup Soy sauce
1. Brown steak in cooking pot on range unit over medium heat. Transfer
cooking pot to heating base using hot pads.
2. In a small bowl, combine garlic, onion, salt, pepper, ginger, sugar and soy
sauce. Pour over steak. Cover and slow cook at “LO” for 6 to 8 hours or “HI”
for 4 to 5 hours.
3. Add green peppers, tomatoes, and bean sprouts, stir to blend. Slow cook
an additional hour. Just before serving, increase heat to “HI.” Combine
cornstarch and water. Gradually add to pepper steak, stirring until
thickened. Reduce to keep warm (“WM”) for serving.
1 Large green pepper, cut into thin
strips
4 Tomatoes, cut into eighths, or 1 1pound can whole tomatoes, undrained
1 lb. Can bean sprouts, drained
1 tbsp. Cornstarch
½ cup Cold water
Corned Beef and Cabbage
3 - 4 lb. Corned beef brisket
1 Medium onion, sliced
½ tsp. Celery seed
½ tsp. Mustard seed
1.
Place brisket with liquid and spices from package in cooking pot. Add onion,
celery seed, mustard seed, garlic and bay leaf. Add just enough water to
cover brisket (about 4 cups). Cover and cook at “LO” for 7 to 9 hours or until
brisket is fork tender.
2. During last hour of cooking, add cabbage wedges and continue cooking at
“LO.” Discard cooking liquid and spices.
1 Clove garlic, minced
1 Bay leaf
Water
1 Small head cabbage, cut into wedges
9
Page 10

Hearty Chicken Noodle Soup
2 lbs. Chicken parts, skinned if desired
5 cups Water
1 Medium onion, chopped
4 Carrots, cut into ½-inch pieces
4 Ribs celery, cut into ½-inch pieces
1 16 oz. Can whole tomatoes, cut up
1. Combine all ingredients, except egg noodles, in cooking pot. Cover and
cook at “LO” for 6 to 8 hours or at “HI” for 3 to 4 hours or until chicken and
vegetables are tender.
2.
Remove chicken pieces from cooking pot and set aside to cool slightly.
Increase heat to “HI” and add noodles, stirring to blend. Cover and continue
to cook for 30 minutes.
3.
Meanwhile, remove chicken from bones and cut into bite-size pieces.
Return meat to cooking pot to heat as noodles finish cooking. Reduce heat
to keep warm (“WM”) for serving.
1 tbsp. Instant chicken bouillon
1 tbsp. Minced parsley
1 tsp. Salt
½ tsp. Dried rosemary
¼ tsp. Pepper
1 cup Uncooked fine egg noodles
Chili
1½ lbs. Ground beef
1 cup Onion, chopped
1 cup Green pepper, chopped
1 Clove garlic, minced
1 28 oz. Can whole tomatoes, undrained
1. Brown ground beef with onion and green pepper in cooking pot over
medium heat of range unit. Remove excess grease.
2. Transfer cooking pot to heating base using hot pads. Add remaining
ingredients, stir to blend. Cover and slow cook at “LO” for 7 to 8 hours.
Reduce heat to keep warm (“WM”) for serving.
1 16 oz Can kidney beans, undrained
1½ tbsp. Chili powder
1 tsp. Salt
1 tsp. Ground cumin
½ tsp. Pepper
Fish Chowder
2 lbs. Fresh or frozen fish fillets (haddock,
perch, cod, flounder)
2 tbsp. Lemon juice
4 Slices bacon
1 cup Chopped onion
¼ cup Diced celery
4 Medium potatoes, cut into cubes
1. Cut fish into chunks and remove bones. Sprinkle with lemon juice. Cover
and refrigerate.
2. Fry bacon in cooking pot on range top over medium heat until crispy. Drain
on paper towel, crumble and set aside.
3. Sauté onion and celery in bacon drippings until brown. Transfer cooking pot
to heating base using hot pads. Add potatoes, water, tomatoes, carrots, salt
and pepper to cooking pot. Stir to combine. Cover and cook at “LO” for 4 to
5 hours or at “HI” for 2 to 3 hours.
4.
Drain lemon juice from fish. Add fish, Worcestershire sauce and sherry to
cooking pot. Simmer for 1 hour or until fish flakes easily with fork. Reduce
heat to keep warm (“WM”) for serving. Garnish with crumbled bacon.
4 cups Hot water
1 16 oz Can stewed tomatoes
1 cup Diced carrots
2 tsp. Salt
¼ tsp. Pepper
1 tbsp. Worcestershire sauce
2 tbsp. Dry sherry, optional
10
Page 11

German Beef Stew
1½ lbs. Beef chuck, cut into 2-inch cubes
2 tbsp. Flour
½ tsp. Celery salt
¼ tsp. Garlic powder
½ tsp. Ground ginger
¼ tsp. Pepper
1. Place beef in cooking pot. In a small bowl, combine flour, celery salt, garlic
powder, ground ginger and pepper. Sprinkle over beef.
2. In a bowl, combine tomatoes, carrots, wine and molasses. Pour over beef.
3. Cover and place cooking pot on base. Simmer at “LO” for 6 to 8 hours. Add
raisins 30 minutes before serving. Reduce heat to keep warm (“WM”) for
serving. Serve over hot cooked noodles.
1 lb. Can whole tomatoes, undrained
2 cups Thinly sliced carrots
¼ cup Sherry cooking wine
¼ cup Dark molasses
¼ cup Raisins
Cheese Curried Entree
2 10 oz. Packages frozen chopped
broccoli, partially thawed
3 cups (¾ pound) diced cooked ham,
turkey or chicken
1 11 oz Can condensed cheddar
cheese soup
1. Place broccoli evenly in bottom of cooking pot. Add ham, turkey or chicken.
2. Combine soup, water, mayonnaise, onion, lemon juice and curry powder in
small mixing bowl; stir to blend. Pour soup mixture into cooking pot.
3. Place cooking pot on base, cover and simmer at “HI” for 2 hours or “LO” for
3 to 4 hours; or until broccoli is fork tender. Reduce heat to keep warm
(“WM”) for serving. Serve over toast or hot biscuits.
1 cup Water
½ cup Salad dressing or mayonnaise
¼ cup Finely chopped onion
1 tbsp. Lemon juice
½ tsp. Curry powder
Country Ribs with Apples ‘N Kraut
3 lbs. Lean country-style pork ribs,
trimmed of any excess fat
Salt and pepper
1 16 oz Can sauerkraut, undrained
1 Medium onion, thinly sliced and
separated into rings
1. Preheat cooking pot on electric or gas range top heating unit over medium
heat. Add ribs in batches to brown. Season with salt and pepper.
2. Return all ribs to cooking pot. Layer sauerkraut, onion, mushrooms, apple
wedges and brown sugar over ribs. Sprinkle with celery seed.
3. Place cooking pot on base, cover and cook at “LO” for 7 to 9 hours or at
“HI” for 3 to 4 hours until meat is tender. Reduce heat to keep warm (“WM”)
for serving.
1 8 oz Can mushrooms stems and
pieces, drained
1 Large or 2 small apples, cored and
cut into wedges
¼ cup Brown sugar
½ tsp. Celery seed
11
Page 12

Carrot Cake
2 cups Flour
2 cups Sugar
1 tsp. Baking soda
1 tsp. Salt
1. Grease bottom only of a 9 x 5-inch or 8 x 4-inch loaf pan with solid
hydrogenated shortening. Dust with flour and shake out excess. Set
covered cooking pot on base and preheat at “HI” while mixing ingredients.
2. In mixing bowl, sift flour, sugar, baking soda and salt. Add vegetable oil and
stir until ingredients are moistened. Add eggs one at a time, beating well
after each egg is added. Stir in grated carrots and cinnamon until evenly
mixed. Pour batter into pan. Place pan in cooking pot.
3. Cover and bake at “HI” for 2 hours. Do not remove cover during this time.
To test for doneness at end of recommended baking time, insert a metal
cake tester in several places including center of cake. If cake tester comes
out clean, cake is done. If batter clings to cake tester, continue baking in
15-minute intervals. Remove cake from pan and cool on rack. Frost with
softened cream cheese, if desired. Makes a 1½-pound cake.
1 cup Vegetable oil
4 Eggs
3 cups Grated carrots
1 tsp. Cinnamon
Cranberry Nut Bread
2 cups (8-ounces) fresh or frozen
cranberries
½ cup Walnuts
2 cups Flour
1 cup Sugar
1½ tsp. Baking powder
1. Grease 9 x 5-inch or 8 x 4-inch loaf pan with solid hydrogenated shortening.
Dust with flour and shake out excess. Set covered cooking pot on base and
preheat at “HI” while mixing ingredients.
2. Grind cranberries and walnuts with coarse blade of food chopper. In a large
mixing bowl, combine flour, sugar, baking powder, baking soda and salt.
Cut in butter or margarine to form a coarse mixture. Make an indentation in
mixture and add egg, orange peel and orange juice. Beat only until lumps
disappear. Add chopped cranberries and walnuts. Stir until evenly mixed.
Pour batter into pan. Place pan in cooking pot.
3. Cover and bake at “HI” for 3 hours. Do not remove cover during this time.
To test for doneness at end of recommended baking time, insert a metal
cake tester in several places including center of bread. If cake tester comes
out clean, bread is done. If batter clings to cake tester, continue baking for
15-minute intervals. Remove bread from pan and cool on rack. Makes a
1½-pound loaf.
½ tsp. Baking soda
½ tsp. Salt
6 tbsp. Butter or margarine
1 Egg
1 tbsp. Grated orange peel
½ cup Orange juice
12
Page 13

P
RODUCT WARRANTY
Appliance 1 Year Limited Warranty
Focus Electrics, LLC (“Focus Electrics”) warrants this appliance from failures in the material
and workmanship for one (1) year from the date of original purchase with proof of purchase,
provided the appliance is operated and maintained in conformity with the provided Instruction
Manual. Any failed part of the appliance will be repaired or replaced without charge at Focus
Electrics’ discretion. This warranty applies to indoor household use only.
This warranty does not cover any damage, including discoloration, to any non-stick surface of
the appliance. This warranty is null and void, as determined solely by Focus Electrics if the
appliance is damaged through accident, misuse, abuse, negligence, scratching, or if the
appliance is altered in any way.
THIS WARRANTY IS IN LIEU OF ALL IMPLIED WARRANTIES, INCLUDING WARRANTIES
OF MERCHANTABILITY, FITNESS FOR A PARTICULAR PURPOSE, PERFORMANCE, OR
OTHERWISE, WHICH ARE HEREBY EXCLUDED. IN NO EVENT SHALL FOCUS
ELECTRICS BE LIABLE FOR ANY DAMAGES, WHETHER DIRECT, INDIRECT,
INCIDENTAL, FORSEEABLE, CONSEQUENTIAL, OR SPECIAL, ARISING OUT OF OR IN
CONNECTION WITH THIS APPLIANCE.
If you think the appliance has failed or requires service within its warranty period, please
contact the Focus Electrics Customer Service Department at (866) 290-1851, or e-mail us at
service@focuselectrics.com. A receipt proving the original purchase date will be required for all
warranty claims, hand written receipts are not accepted. You may also be required to return
the appliance for inspection and evaluation. Return shipping costs are not refundable. Focus
Electrics is not responsible for returns lost in transit.
Replacement parts, if available, may be ordered directly from Focus Electrics, LLC several
ways. Order online at www.focuselectrics.com, e-mail service@focuselectrics.com, over the
phone by calling (866)290-1851, or by writing to:
Focus Electrics, LLC
Attn: Customer Service
P. O. Box 2780
West Bend, WI 53095
To order with a check or money order, please first contact Customer Service for an order total.
Mail your payment along with a letter stating the model or catalog number of your appliance,
which can be found on the bottom or back of the unit, a description of the part or parts you are
ordering, and the quantity you would like. Your check should be made payable to Focus
Electrics, LLC.
Your state/province’s sales tax and a shipping fee will be added to your total charge. Please
allow two weeks for processing and delivery.
This manual contains important and helpful information regarding the safe use and care of your
new Focus Electrics product. For future reference, attach dated sales receipt for warranty proof
of purchase and record the following information:
Date purchased or received as gift: _______________________________________________
Where purchased and price, if known: _____________________________________________
Item number and Date Code (shown bottom/back of product):___________________________
Valid only in USA and Canada
R
EPLACEMENT PARTS
L5800 01/10 West Bend®, una Marca de Focus Electrics, LLC. Impreso en China
13
Page 14

N
OTES
Page 15

M
(5.7L
.)
IJOTEUSE VERSATILITY™ 6 QT.
Mode d’emploi
Enregistrez ce produit et les autres produits Focus Electrics sur notre site Internet :
www.registerfocus.com
Précautions Importantes .......................................................................................... 2
Avant la Première Utilisation .................................................................................... 3
Utilisation de votre Mijoteuse Versatility™ 6 Qt. (5.7Lt.) .......................................... 4
Astuces .................................................................................................................... 6
Nettoyage de votre Mijoteuse Versatility™ 6 Qt. (5.7Lt.) .......................................... 8
Recettes ................................................................................................................... 9
Garantie ................................................................................................................. 14
T
CONSERVEZ CE MANUEL D’INSTRUCTIONS POUR RÉFÉRENCE FUTURE
2009 West Bend®, une Marque de Focus Electrics, LLC.
www.focuselectrics.com
Page 16

PRECAUTIONS IMPORTANTES
Pour empêcher toute blessure physique ou tout dommage matériel, lisez et
suivez toutes les consignes et mises en garde.
Lorsque vous utilisez des appareils électriques, les précautions de sécurité
élémentaires devraient toujours être respectées, notamment :
• Lisez toutes les instructions, notamment les présentes précautions importantes,
ainsi que les consignes pour l’entretien de ce manuel.
• Ne touchez pas les surfaces à haute température. Utilisez les poignées carrées
ou rondes et des maniques ou des gants de cuisine.
• Débranchez toujours l’appareil du secteur lorsque vous ne l’utilisez pas et avant
de le nettoyer. Laissez refroidir avant de mettre en place ou de retirer des pièces
ainsi qu’avant de procéder au nettoyage.
• Une surveillance rapprochée est nécessaire en cas d’utilisation d’un appareil par
des enfants ou en présence d’enfants.
• N’utilisez aucun appareil dont le cordon ou la fiche sont endommagés, si
l’appareil a dysfonctionné ou s’il a été détérioré de quelque manière que ce soit.
Pour des renseignements sur les réparations, voir la page de garantie.
• L'utilisation des accessoires non recommandés par Focus Electrics risque de
provoquer le feu, la décharge électrique ou la blessure.
• N’utilisez pas cet appareil à l’extérieur.
• Ne laissez pas le cordon pendre depuis l’extrémité de la table ou du plan de
travail, ou ne le laissez pas entrer en contact avec une surface à haute
température.
• Ne placez pas l’appareil sur ou à proximité d’une gazinière chaude ou d’un
brûleur électrique, ou dans un four chaud.
• Vous devez faire preuve d’une extrême prudence lorsque vous déplacez un
appareil contenant de l’huile ou d’autres liquides à haute température.
• Fixez toujours la fiche à l’appareil en premier, avant de brancher la fiche dans la
prise secteur. Pour débrancher l’appareil, tournez toute commande sur « OFF »
puis retirez la fiche de la prise murale.
• N’utilisez pas l’appareil pour un usage autre que celui pour lequel il a été conçu.
• Pour vous protéger contre tout choc électrique, n’immergez pas le cordon, les
fiches ni aucune autre pièce électrique dans l’eau ni dans tout autre liquide.
• Ne tentez pas de réparer cet appareil vous-même.
• Le cordon d’alimentation fourni est court pour réduire les risques qu’une
personne se prenne les pieds ou trébuche sur un cordon plus long.
• Des cordons de rallonge plus longs sont disponibles, mais vous devez faire
preuve de prudence lors de leur utilisation. Bien que l’utilisation d’un cordon de
rallonge ne soit pas recommandée, si vous devez en utiliser un, assurez-vous
que la puissance nominale indiquée pour le cordon de rallonge est égale ou
supérieure à celle de l’appareil. Si la fiche est raccordée à la terre, le cordon de
rallonge doit lui aussi proposer un raccordement à la terre. Pour éviter de tirer
sur le cordon, de trébucher ou de s’emmêler dedans, positionnez le cordon de
rallonge de sorte qu’il ne pende pas depuis l’extrémité du plan de travail, de la
table ou de toute zone où des enfants pourraient tirer dessus ou trébucher.
2
Page 17

• Cet appareil est pourvu d’une fiche polarisée (une lame est plus large que
l’autre). Pour réduire le risque d’électrocution, cette fiche est conçue pour
s’encastrer dans une prise secteur polarisée dans un sens uniquement. Si la
fiche ne s’insère pas complètement dans la prise secteur, retournez la fiche. Si
elle ne s’encastre toujours pas, contactez un électricien qualifié. Ne tentez pas
de modifier la fiche de quelque manière que ce soit.
• N’utilisez pas une prise secteur ou un cordon de rallonge si la fiche s’adapte
avec un jeu ou si la prise secteur ou le cordon de rallonge vous semblent
chauds.
• Pour une utilisation domestique uniquement.
CONSERVEZ CES CONSIGNES
Couvercle
Marmite
Veuillez vérifier la totalité de l’emballage attentivement avant de le jeter. Il est
possible que l’emballage contienne des accessoires.
Avant la première utilisation, lavez la marmite, le couvercle et la grille à rôtir en
suivant les instructions de la section « Nettoyage de votre Mijoter Versatility™ 6 Qt.
(5.7Lt.) » de ce manuel. Essuyez la finition antiadhésive du socle chauffant de la
cocotte mijoteuse avant un chiffon humide puis séchez. À l’aide d’une serviette en
papier, enduisez l’intérieur antiadhésif de la marmite avec le contenu d’une cuiller à
café d’huile végétale. Ceci va conditionner la finition antiadhésive pour l’empêcher
de coller. REMARQUE : Veuillez ne PAS utiliser de matière grasse ou de beurre
pour conditionner la finition. Laissez une fine pellicule d’huile sur la finition.
L’intérieur antiadhésif de la marmite aura besoin d’être reconditionné à chaque fois
que 1) la marmite sera nettoyée u lave-vaisselle; 2) la finition sera traitée avec un
nettoyant spécial; 3) la finition sera nettoyée avec du jus de citron ou du vinaigre
pour éliminer une pellicule minérale; ou 4) lorsque l’adhérence des aliments à la
finition posera problème pendant l’utilisation. NE CONDITIONNEZ PAS LA
SURFACE ANTIADHÉSIVE DU SOCLE CHAUFFANT AVANT D’UTILISER
L’APPAREIL EN TANT QUE COCOTTE MIJOTEUSE. La finition antiadhésive du
socle chauffant devrait être conditionnée uniquement avant son utilisation en tant
que grille de cuisson.
A
VANT LA PREMIÈRE UTILISATION
Grille à Rôtir
Socle Chauffant
3
Page 18

U
TILISATION DE VOTRE MIJOTEUSE VERSATILITY™ 6 QT.
(5.7LT.)
Pour une Utilisation en tant que Mijoteuse :
1. Placez le socle chauffant sur une surface résistante à la chaleur plane et sèche,
à l’écart de toute extrémité.
2. Placez les aliments dans la marmite, couvrez-la et placez la marmite sur le socle
chauffant. Si vous souhaitez dorer ou précuire des aliments avant de les faire
mijoter, placez la cocotte mijoteuse directement sur la gazinière à feu moyen. Une
fois que les aliments ont doré ou cuit, transférez la marmite sur le socle chauffant.
REMARQUE : Utilisez uniquement des ustensiles de cuisine en plastique, en
caoutchouc, en bois ou des ustensiles non métalliques dans la marmite.
L’utilisation d’ustensiles métalliques risque de rayer la surface antiadhésive.
3. Fixez le cordon d’alimentation au socle, puis branchez le cordon sur une prise
secteur 120 volts AC uniquement. Le socle chauffant va émettre une sonnerie
une fois branché. Rien ne s’affiche à l’écran tant que le bouton « POWER »
(Marche) n’a pas été enfoncé.
4. Appuyez sur le bouton « POWER » (Marche). « SEL » s’affiche et le réglage de
température « LO » (Faible) est indiqué par une lumière clignotante. Si vous ne
sélectionnez aucun réglage au bout de 5 secondes, la cocotte mijoteuse passe
au réglage par défaut « LO » (Faible), 9 heures.
5. Appuyez sur « TEMP » (Température) pour sélectionner le réglage « HI »
(Élevé), « LO » (Faible), maintien au chaud « WM » ou « GRIDDLE » (Grille).
Remarque : Seuls les réglages « HI » (Élevé) ou « LO » (Faible) sont
disponibles pour les temps de cuisson programmés. À chaque fois que vous
appuyez sur le bouton « TEMP » (Température), la température revient au
réglage par défaut ; « LO » (Faible), 9 heures et « HI » (Élevé), 5 heures.
6. Appuyez sur le bouton « TIME » (Temps) pour faire défiler les propositions
jusqu’au temps de cuisson souhaité. Vous ne pouvez pas programmer la
Cocotte mijoteuse Versatility™ pour une cuisson de plus de 12 heures.
Remarque : La durée peut faire un cycle de 1-12 heures. L’horloge démarre à
la durée par défaut ; appuyez sur le bouton « TIME » (Temps) après 12 heures
pour revenir à 1 heure.
• Le minuteur, une fois réglé, commencera à décompter les minutes. Si
vous appuyez sur le bouton « TIME » (Temps), quel que soit le moment,
le décompte du temps reprendra jusqu’à la prochaine heure complète,
puis augmentera par incrémentations d’une heure.
7. Appuyez sur « COOK » (Cuisson) pour démarrer le cycle de cuisson. Si vous
n’appuyez pas sur le bouton « COOK » (Cuisson) au bout d’une durée de 5
secondes, le socle émet 5 bips, indiquant que le cycle de cuisson a commencé.
Une fois le cycle de cuisson terminé, le programme passe au réglage de
maintien au chaud « WM » et le minuteur commence un décompte à partir de
zéro pour indiquer le temps écoulé dans la fonction de maintien au chaud.
Remarque: La fonction de maintien au chaud « WM » se désactive
automatiquement après 24 heures de chauffe.
8. Appuyez sur le bouton « POWER » (Marche) pour mettre l’appareil hors
tension. Le fait d’appuyer sur « POWER » (Marche) à tout moment pendant le
4
Page 19

cycle de cuisson, ou sur le bouton de maintien au chaud « WM », mettra
l’appareil hors tension. Tous les paramètres seront alors réinitialisés aux
paramètres par défaut lorsque l’appareil sera remis sous tension. Aucun
paramètre antérieur ne sera conservé lorsque la Mijoteuse Versatility™ 6 Qt.
(5.7Lt.) sera mise hors tension.
9. Le socle de la cocotte mijoteuse propose des réglages de température qui sont
le maintien au chaud « WM », « LO » (Faible), « HI » (Élevé) et « GRIDDLE »
(Grille). Le réglage « WM » devrait être utilisé uniquement pour maintenir au
chaud des aliments cuits prêts pour le service, tandis que « LO » (Faible) et
« HI » (Élevé) sont censés être utilisés pour véritablement cuire des aliments.
REMARQUE : N’UTILISEZ PAS LA FONCTION DE MAINTIEN AU CHAUD
« WM » POUR CUIRE DES ALIMENTS CRUS CAR LA COCOTTE
MIJOTEUSE NE VA PAS ATTEINDRE UNE TEMPÉRATURE
SUFFISAMMENT ÉLEVÉE POUR CUIRE LES ALIMENTS. N’UTILISEZ PAS
LE RÉGLAGE GRILLE POUR MIJOTER DES ALIMENTS CAR CEUX-CI
SERAIENT TROP CUITS.
10. Sélectionnez le réglage de température puis cuisez les aliments pendant la
durée recommandée comme indiqué dans la recette. En règle générale, la
plupart des combinaisons de viandes and de légumes ont besoin de 7 à 10
heures de cuisson sur « LO » (Faible), ou de 4 à 6 heures de cuisson sur « HI »
(Élevé). Les viandes deviendront très tendres lorsque vous les cuisinerez
pendant la durée la plus longue sur le réglage de température le plus faible.
Évitez de retirer le couvercle pendant que les aliments mijotent car cela
allongera la durée de cuisson en raison de la déperdition de chaleur. Retirez le
couvercle uniquement lorsque cela se révèle nécessaire pour mélanger de
temps en temps ou lorsque vous ajoutez des ingrédients.
Pour une utilisation en tant que Grille de cuisson :
Le socle chauffant peut être utilisé comme grille de cuisson pour des cuissons légères.
1. Avant d’utiliser le socle chauffant comme une grille de cuisson,
conditionnez la surface antiadhésive avec de l’huile végétale.
2. Appuyez sur le bouton « TEMP » (Température) jusqu’à ce que vous ayez
sélectionné « GRIDDLE » (Grille). Appuyez sur le bouton « COOK »
(Cuisson) pour lancer la cuisson sur la grille, ou patientez 5 secondes, et le
socle va émettre 5 bips, indiquant que le réglage « GRIDDLE » (Grille) a
été sélectionné et que la grille a commencé à chauffer. Pour un résultat
optimal, laissez le socle préchauffer pendant 8 à 10 minutes, puis cuisez
les aliments jusqu’au niveau de cuisson souhaité. Veuillez consulter le
« GUIDE DES TEMPÉRATURES » ci-dessous. Le socle chauffant se
comportera uniquement comme une grille de cuisson pour des usages
légers. Le réglage « GRIDDLE » (Grille) ne devrait jamais être utilisé
comme un réglage pour faire mijoter des aliments.
3. Lorsque la cuisson des aliments est terminée, appuyez sur « POWER »
(Marche) pour mettre l’appareil hors tension. Débranchez le cordon de la
prise secteur, et laissez l’appareil refroidir complètement. Suivez les
instructions pour le nettoyage fournies dans la section “Nettoyage de votre
Mijoteuse Versatility™ 6 Qt. (5.7Lt.)” de ce manuel.
Remarque : Le minuteur ne peut pas être utilisé avec ce réglage, et il ne
passera à aucun moment à la fonction de maintien au chaud « WM ». La
grille demeurera en marche indéfiniment jusqu’à ce que vous appuyez
sur « POWER » (Marche) ou que vous débranchiez l’appareil.
Ne frappez pas des ustensiles contre la marmite ou sur l’extrémité du
couvercle. Le couvercle de verre risque de se briser en conséquence.
5
Page 20

TEMPÉRATURES
• Il est possible qu’un peu de fumée et une légère odeur se dégagent
pendant le chauffage en raison de la diffusion des huiles de fabrication :
c’est tout à fait normal.
•
De petits bruits d’expansion/contraction peuvent être produits pendant le
chauffage et le refroidissement : c’est out à fait normal.
G
UIDE DE TEMPERATURE
Assurez-vous de cuire les aliments aux températures recommandées pour une
cuisson sans danger. Vérifiez toujours à l’aide d’un thermomètre à viande pour vous
assurer que le centre est complètement cuit.
VIANDE
Bœuf Saignant 140°F/60°C
A Point 160°F/71°C
Bien Cuit 170°F/76°C
Porc Frais 170°F/76°C
Fumé 160°F/71°C
En Conserve 140°F/60°C
Agneau 170°F à 180°F/76°C à 82°C
Veau 170°F/76°C
Volaille 180°F/82°C
INTERNES
A
STUCES
• Un grand nombre de vos recettes favorites au four et sur le feu peuvent être
adaptées à une cuisson lente moyennant quelques modifications mineures. Voici
quelques points importants à ne pas oublier.
Volume de Liquide: Comme peu de vapeur s’évapore durant une cuisson lente,
réduisez de moitié le volume de liquide indiqué dans votre recette (1 tasse de
liquide suffit à la plupart des recettes). Pour les recettes de soupe, placez tous les
ingrédients sauf l’eau ou le bouillon dans le récipient de cuisson ; ajoutez juste
assez de liquide pour couvrir les ingrédients.
Assaisonnement: Réduisez la quantité d’assaisonnement proportionnellement à
la réduction du volume de liquide. Utilisez des épices et des fines herbes fraîches
entières plutôt que sous forme moulue ou hachée.
Cuisson Lente des Viandes: Les morceaux de viande moins tendres et moins
chers sont mieux adaptés à une cuisson lente que les morceaux de choix. Retirez
préalablement l’excédent de gras, au besoin. La viande peut être dorée dans le
récipient de cuisson sur la cuisinière, avant de mijoter.
Cuisson Lente des Légumes: Ajoutez les légumes partiellement surgelés, les
légumes chinois et les champignons frais au cours de la dernière heure de
cuisson. Les légumes au goût prononcé comme les épinards, l’aubergine, l’okra et
les feuilles de chou vert doivent être précuits avant d’être placés dans la
mijoteuse. La quantité d’oignon normalement utilisée dans votre recette doit être
réduite, car son goût se renforce en cours de cuisson. Dans la plupart des cas, les
légumes frais mettent plus longtemps à cuire que les viandes, car le liquide frémit
au lieu de bouillir.
Cuisson Lente des Viandes Crues et des Légumes: La plupart des
combinaisons viandes crues/légumes nécessitent au moins 4 à 6 heures de
cuisson sur « HI » (Élevé) ou 7 à 10 heures sur « LO » (Faible).
6
Page 21

Cuisson Lente du Poisson et des Fruits de Mer: Le poisson et les fruits de mer
frais ou surgelés s’émiettent durant de longues heures de cuisson. Ajoutez ces
ingrédients une heure avant de servir et cuisez sur “HI.”
Cuisson Lente du Lait, de Crème et de Fromage: Comme le lait, la crème
fraîche et le fromage se décomposent durant de longues heures de cuisson,
ajoutez ces ingrédients juste avant de servir ou remplacez-les par des soupes en
boîte condensées non diluées ou du lait concentré. Le fromage pasteurisé a
tendance à donner de meilleurs résultats que le fromage au lait cru.
Riz et Pâtes: Le riz et les pâtes peuvent être cuits séparément ou ajoutés crus au
cours de la dernière heure de cuisson. S’ils sont ajoutés crus, assurez-vous que le
récipient contient au moins 1 à 1½ tasse de liquide et que le thermostat est sur «
LO » (Faible) minimum.
Dumplings: Les dumplings peuvent être cuits dans du bouillon ou une sauce sur
« HI » (Élevé). Déposez à la cuillère sur le bouillon ou la sauce qui frémit. Faites
cuire à couvert pendant 30 minutes.
Épaississement du Jus de Cuisson pour les Sauces: Pour épaissir le jus en
une sauce, ajoutez 2 à 3 cuillères à soupe de tapioca à cuisson rapide au départ
ou épaississez après cuisson en ajoutant une pâte lisse composée de 2 à 4
cuillères à soupe de maïzena ou de farine diluées dans ¼ tasse d’eau froide.
Portez à ébullition sur « HI » (Élevé). Les aliments solides pourront être retirés en
premier.
• Ne Retirez pas le Couvercle en Cours de Cuisson: Pour piéger la chaleur et les
arômes et empêcher l’évaporation, ne retirez pas le couvercle en cours de cuisson,
sauf nécessité pour ajouter des ingrédients.
• Utilisation d’ustensiles de Cuisson sur un Revêtement Anti-adhésif: Les types
suivants d’ustensiles de cuisson pourront être utilisés sur le revêtement anti-adhésif :
plastique, caoutchouc et bois. N’utilisez pas d’ustensiles métalliques à bord coupant
(fourchettes, couteaux, presse-purée) sous peine de rayer le revêtement.
• Utilisation de la Marmite sur une Gazinière: La marmite (sans le socle chauffant)
peut être utilisée pour une cuisson sur la gazinière. Placez l’appareil sur un appareil
à grand rayon d’action. Utilisez un feu moyen à faible. L’utilisation d’un feu moyen à
faible empêchera les aliments de trop cuire, réduira les éclaboussures et aidera à
conserver les jus naturels de vos aliments. N’utilisez pas une chaleur élevée sauf
pour porter les liquides à ébullition. Si vous cuisinez sur une gazinière à gaz, ne
laissez pas la flamme monter le long du côté de la marmite. UTILISEZ TOUJOURS
DES GANTS DE CUISINE LORSQUE VOUS UTILISEZ LA MARMITE SUR UNE
GAZINIÈRE.
• Cuisson des Viandes: Pendant la cuisson des viandes, préchauffez la marmite vide
sur feu moyen à moyen-faible pendant 2 à 3 minutes ou jusqu’à ce qu’une goutte
d’eau frémisse dans la marmite. Pour empêcher les viandes maigres de coller, vous
souhaiterez peut-être ajouter une petite quantité d’huile de cuisson. Ajoutez la viande
et dorez-la jusqu’à l’obtention du résultat souhaité. Couvrez la marmite et réduisez la
chaleur jusqu’à un niveau faible pour la cuisson sur la gazinière OU transférez la
marmite vers le socle chauffant et cuisez avec le réglage souhaité. La durée de
cuisson la plus courte sera obtenue avec le réglage « HI » (Élevé).
• Utilisation de la Marmite au Four: La marmite (sans le socle chauffant) peut être
utilisée dans au traditionnel ou dans un four à convection jusqu’à des températures
de préchauffage de 350°F/177°C. La marmite peut être couverte de papier
aluminium pour une utilisation au four. UTILISEZ TOUJOURS DES GANTS DE
CUISINE LORSQUE VOUS UTILISEZ LA MARMITE DANS LE FOUR. N’UTILISEZ
PAS LA MARMITE DANS UN FOUR À MICRO-ONDES, SUR UN FEU DE CAMP
OU SOUS UNE RÔTISSOIRE DE FOUR POUR ÉVITER TOUTE DÉTÉRIORATION
DE LA MARMITE OU DU FOUR.
• Utilisation d’une Grille à Rôtir: Votre cocotte à mijoter inclut une petite grille
métallique pour rôtir des viandes et de la volaille. Pour utiliser la grille, placez-la
7
Page 22

simplement au fond de la marmite, puis placez le rôti, le poulet ou le jambon sur la
grille. Ajoutez une petite quantité de liquide à la marmite avant la cuisson. Si vous le
souhaitez, vous pouvez dorer la viande dans la marmite sur une gazinière avant de la
rôtir. La grille peut également être utilisée pour cuire à la vapeur des légumes frais
comme des brocolis et du maïs entier. Ajoutez une tasse d’eau à la marmite pour
cuire à la vapeur les légumes. Cuisez sur la gazinière sur feu moyen à moyen-faible
ou sur le socle chauffant sur « HI » (Élevé) jusqu’au niveau de cuisson souhaité.
•
Pain, Gâteaux & Desserts: Utilisez un moule à pain de 8 x 4 pouces ou un moule à
pain de 9 x 5 pouces. Placez la grille à rôtir dans le moule avant de placer le moule à
pain. Vérifiez pour vous assurer que votre moule entre complètement dans la
marmite avant de mélanger les ingrédients. Pour empêcher la condensation de
s’écouler sur les aliments pendant la cuisson, placez une double couche de
serviettes en papier et une seule couche de papier aluminium à travers le haut de la
marmite. Couvrez et cuisez, en suivant la recette.
N
ETTOYAGE DE VOTRE MIJOTEUSE VERSATILITY™ 6 QT.
1.
Appuyez sur « POWER » (Marche) pour mettre l’appareil hors tension. Débranchez
le cordon d’alimentation de la prise secteur et laissez la totalité de l’appareil (socle,
marmite, grille, couvercle) refroidir complètement avant de procéder au nettoyage.
Placez la marmite et le couvercle sur une surface résistante à la chaleur sèche pour
un refroidissement progressif. REMARQUE : Ne faites pas couler d’eau froide sur
le couvercle de verre lorsque celui-ci est chaud car il risque de se fendre ou de
se briser s’il est refroidi subitement.
2.
Essuyez le socle chauffant et le cordon d’alimentation avec un chiffon humide.
3.
La marmite, la grille et le couvercle de verre peuvent être lavés à la main avec de
l’eau savonneuse chaude ou au lave-vaisselle. En cas de nettoyage au lavevaisselle, évitez tout contact entre les pièces afin d’éviter toute détérioration de
celles-ci. La surface antiadhésive de la marmite doit être reconditionnée avec de
l’huile de cuisson après avoir été nettoyée au lave-vaisselle pour restaurer ses
propriétés antiadhésives. N’utilisez pas de tampons à récurer métalliques car cela
risque de détériorer l’appareil. Essuyez avec du vinaigre distillé pour éliminer les
taches d’eau ou les dépôts de tartre. Lavez à nouveau à l’eau savonneuse chaude,
rincez et séchez.
Nettoyer le socle chauffant : Débranchez toujours le cordon électrique de la prise
secteur et laissez le socle refroidir complètement avant de procéder au nettoyage. À
l’aide d’une cuiller ou d’un pinceau, retirez tout résidu de matière grasse ou de graisse
accumulé à la surface de la grille. Essuyez les résidus d’huile sur le socle à l’aide d’une
serviette en papier. Essuyez la finition antiadhésive avec un torchon à vaisselle humidifié
avec de l’eau savonneuse ou un tampon à récuré en nylon recommandé pour les finitions
antiadhésives. Nettoyez méticuleusement la finition, en essuyant le socle plusieurs fois à
l’aide d’un torchon propre humide pour éliminer les résidus de savon.
Si une pellicule d’huile poisseuse se forme sur la finition antiadhésive du socle, essuyez
avec un chiffon sec pour l’éliminer. Si ce résidu n’est pas éliminé, il adhèrera à la finition
lorsqu’il sera réchauffé et il deviendra impossible de l’éliminer.
(5.7LT.)
8
Page 23

R
ECETTES
Soupe Bœuf-Légumes
1½ livre (.7kg) Os à soupe ou 1 livre
(.45kg) de plat de côtes de bœuf
1½ litre Eau
1 c. à thé Sel
¼ c. à thé Poivre
2 Carottes, hachées
1. Placez l’os à soupe, l’eau, le sel, le poivre, les carottes, le céleri, les pommes de
terre, l’oignon et la feuille de laurier dans le récipient de cuisson. Couvrez et
faites cuire sur « LO » (Faible) pendant 6 à 7 heures.
2. Retirez l’os à soupe et laissez légèrement refroidir. Retirez la viande des os et
remettez-la dans la soupe avec les tomates. Couvrez et faites mijoter une heure
supplémentaire. Si vous le voulez, vous pouvez ajouter des nouilles ou de
l’orge.
Rôti de Porc aux Fines Herbes
1 c. à thé Sel
1 c. à thé Thym
½ c. à thé Sauge
½ c. à thé Clous de girofle en poudre
1 c. à thé Zeste de citron râpé
1. Dans un petit bol, mélangez le sel, le thym, la sauge, les clous de girofle et le
zeste de citron. Frottez le rôti de porc avec ce mélange. Piquez d’ail le rôti en
16 endroits.
2. Placez le rôti dans le récipient de cuisson. Couvrez et faites cuire sur
« LO » (Faible) de 7 à 9 heures ou sur « HI » (Élevé) pendant 4 à 5 heures.
Insérez un thermomètre à viande dans le rôti pour vous assurer que la
température interne est de 170 °F/77 °C minimum avant de servir. Laissez
reposer le rôti de 10 à 15 minutes avant de le couper en tranches. Retirez les
morceaux d’ail. Si vous le désirez, vous pouvez épaissir le jus de cuisson. Diluez
2 cuillères à soupe de maïzena dans 2 cuillères à soupe d’eau. Mélangez
lentement dans le jus de cuisson jusqu’à épaississement sur « HI » (Élevé).
Steak au Poivre
1½ livre (.7kg) Bifteck de ronde, coupé en
fines lanières
1 Gousse d’ail haché
1 tasse Oignon haché
½ c. à thé Sel
¼ c. à thé Poivre
¼ c. à thé Gingembre
1 c. à thé Sucre
½ tasse Sauce soja
1. Faites dorer le steak dans le récipient de cuisson sur feu moyen (cuisinière).
Transférez le récipient de cuisson au socle chauffant en vous munissant de
maniques.
2. Dans un petit bol, combinez l’ail, l’oignon, le sel, le poivre, le gingembre, le
sucre et la sauce soja. Versez sur le steak. Couvrez et faites cuire sur
« LO » (Faible) de 6 à 8 heures ou sur « HI » (Élevé) de 4 à 5 heures.
3. Ajoutez le poivron vert, les tomates et les germes de soja, puis mélangez.
Couvrez et faites mijoter une heure supplémentaire. Juste avant de servir,
montez le feu à « HI » (Élevé). Combinez la maïzena et l’eau. Ajoutez
progressivement au steak au poivre, en mélangeant jusqu’à épaississement.
Baissez le feu à maintien au chaud « WM » pour le service.
2 Côtes de céleri, hachées
2 Pommes de terre, épluchées et hachées
1 Petit oignon, haché
1 Feuille de laurier
1 453 g Boîte de tomates entières, égouttées
4-5 livres (1.8-2.3kg) Rôti de porc – désossé
ou sur l’os
4 Grosses gousses d’ail coupées en 4
2 c. à soupe Eau - facultatif
2 c. à soupe Maïzena, facultative
1 Gros poivron vert, coupé en fines lanières
4 Tomates, coupées en huitièmes ou une
boîte de tomates entières d’une livre, non
égouttées
1 livre (.5kg) Boîte de germes de soja,
égouttés
1 c. à soupe Maïzena
½ tasse Eau froide
9
Page 24

Pot-au-Feu de Bœuf Sale
3 - 4 livres (1.4-1.8kg) Poitrine de bœuf
salé
1 Oignon moyen haché
½ c. à thé Graines de céleri
1. Placez la poitrine, le liquide et les épices du paquet dans le récipient de
cuisson. Ajoutez l’oignon, les graines de céleri, les graines de moutarde, l’ail et
la feuille de laurier. Ajoutez juste assez d’eau pour couvrir la poitrine (4 tasses
environ). Couvrez et laissez cuire sur « LO » (Faible) pendant 7 à 9 heures ou
jusqu’à ce que la poitrine se détache à la fourchette.
2. Durant la dernière heure de cuisson, ajoutez les quartiers de chou et continuez la
cuisson sur « LO » (Faible). Jetez le liquide de cuisson et les épices.
Soupe Consistante au Poulet et aux Nouilles
2 livres (.9kg) Morceaux de poulet - sans
la peau si désiré
5 tasses Eau
1 Oignon moyen haché
4 Carottes en dés de 1 cm
4 Côtes de céleri en dés de 1 cm
1 453 g Boîte de tomates entières,
hachées
1. Mélangez tous les ingrédients, sauf les nouilles aux œufs, dans la mijoteuse.
Couvrez et faites cuire sur « LO » (Faible) pendant 6 à 8 heures ou sur « HI »
(Élevé) pendant 3 à 4 heures, ou jusqu’à ce que le poulet et les légumes soient
tendres.
2. Retirez les morceaux de poulet du récipient et mettez-les de côté pour les
laisser légèrement refroidir. Montez le feu à « HI » (Élevé) et ajoutez les
nouilles, en mélangeant. Couvrez et poursuivez la cuisson pendant 30 minutes.
3. Pendant ce temps, désossez le poulet et coupez la chair en petits morceaux.
Remettez la viande dans le récipient de cuisson pour chauffer pendant que les
nouilles finissent de cuire. Baissez le feu à maintien au chaud « WM » pour le
service.
Chili
1½ livre (.7kg) Bœuf haché
1 tasse Oignon, haché
1 tasse Poivron vert, haché
1 Gousse d’ail haché
1 793 g Boîte de tomates entières,
égouttées
1. Faites dorer le bœuf haché avec l’oignon et le poivron vert dans le récipient de
cuisson sur feu moyen (cuisinière). Égouttez l’excès de graisse.
2. Transférez le récipient de cuisson au socle chauffant en vous munissant de
maniques. Ajoutez les ingrédients restants; mélangez. Couvrez et faites cuire
sur « LO » (Faible) pendant 7 à 8 heures. Baissez le feu à maintien au chaud
« WM » pour le service.
½ c. à thé Graines de moutarde
1 Gousse d’ail, émincée
1 Feuille de laurier Eau
1 Petit chou pommé, coupé en quartiers
1 c. à soupe Bouillon de poulet
instantané
1 c. à soupe Persil haché
1 c. à thé Sel
½ c. à thé Romarin sec
¼ c. à thé Poivre
1 tasse Nouilles aux œufs fines crues
1 453 g Boîte de haricots en grains, non
égouttés
1½ c. à soupe Chili en poudre
1 c. à thé Sel
1 c. à thé Cumin en poudre
½ c. à thé Poivre
10
Page 25

Chaudrée de Poisson
2 livres (.9kg) Filets de poisson frais ou
surgelés (haddock, perche, morue,
limande-sole)
2 c. à soupe Jus de citron
4 Tranches de bacon
1 tasse Oignon haché
¼ tasse Céleri en dés
4 Pommes de terre moyennes, en dés
1. Coupez le poisson en morceaux et retirez les arêtes. Aspergez de jus de citron.
Couvrez et réfrigérez.
2. Faites dorer le bacon dans le récipient de cuisson sur feu moyen (cuisinière)
jusqu’à ce qu’il soit croustillant. Égouttez sur du papier absorbant, réduisez en
miettes et mettez de côté.
3. Faites sauter l’oignon et le céleri dans la graisse dégagée par le bacon jusqu’à
ce qu’il soit doré. Transférez le récipient de cuisson au socle chauffant en vous
munissant de maniques. Ajoutez les pommes de terre, l’eau, les tomates, les
carottes, le sel et le poivre dans le récipient de cuisson. Mélangez. Couvrez et
faites cuire sur « LO » (Faible) de 4 à 5 heures ou sur « HI » (Élevé) de 2 à 3
heures.
4. Égouttez le poisson. Ajoutez le poisson, la sauce Worcestershire et le xérès
dans le récipient de cuisson. Faites mijoter pendant 1 heure ou jusqu’à ce que
le poisson se détache facilement avec une fourchette. Baissez le feu à maintien
au chaud « WM » pour le service. Garnissez de bacon en miettes.
Ragoût de Bœuf à L’allemande
1½ livre (.7kg) Bloc d’épaule de bœuf,
coupé en dés de 5.8cm
2 c. à soupe Farine
½ c. à thé Sel de céleri
¼ c. à thé Ail en poudre
½ c. à thé Gingembre en poudre
¼ c. à thé Poivre
1. Placez les morceaux de bœuf dans le récipient. Dans un petit bol, combinez la
farine, le sel de céleri, l’ail en poudre, le gingembre moulu et le poivre.
Saupoudrez sur le bœuf.
2. Dans un bol, combinez les tomates, les carottes, le vin et la mélasse. Versez
sur le bœuf.
3. Couvrez le récipient et placez le récipient sur le socle. Faites mijoter sur
« LO » (Faible) de 6 à 8 heures ou jusqu’à la fin de la cuisson. Ajoutez les
raisins secs 30 minutes avant de servir. Baissez le feu à le maintien au chaud
« WM » pour le service.
4 tasses Eau chaude
1 453 g Boîte de tomates à l’étuvée
1 tasse Carottes en dés
2 c. à thé Sel
¼ c. à thé Poivre
1 c. à soupe Sauce Worcestershire
2 c. à soupe Xérès sec, facultatif
1 livre (.5kg) Boîte de tomates entières,
égouttées
2 tasses Carottes coupées en fines
rondelles
¼ tasse Xérès
¼ tasse Mélasse
¼ tasse Raisins secs
11
Page 26

Curry au Fromage
2 283g Paquets de brocolis hachés
surgelés, partiellement dégelés
3 tasses (¾ livre) de jambon, dinde ou
poulet cuits en dés
1 311g Boîte de soupe au cheddar
condense
1 tasse Eau
1. Disposez les brocolis uniformément au fond du récipient. Ajoutez le jambon, la
dinde ou le poulet
2. Combinez la soupe, l’eau, la mayonnaise, l’oignon, le jus de citron et la poudre
de curry dans un petit bol à mélanger; mélangez bien. Versez le mélange dans
le récipient de cuisson.
3. Placez le récipient sur son socle, couvrez et laissez mijoter sur « HI »
(Élevé) pendant 2 heures ou sur « LO » (Faible) de 3 à 4 heures jusqu’à ce que
les brocolis soient tendres à la fourchette. Au besoin, ajoutez les amandes juste
avant de servir. Baissez le feu à maintien au chaud « WM » pour le service.
Servez sur du pain grillé ou des biscuits chauds.
Côtes de Porc à la Paysanne avec Pommes et Choucroute
3 livres (1.4kg) Côtes de porc maigres,
dégraissées
Sel et poivre
1 453 g Boîte de choucroute, non égouttée
1 Oignon moyen, finement émincé et
séparé en rondelles
1. Placez le récipient sur la cuisinière (gaz ou électrique) et faites chauffer sur feu
moyen. Faites dorer les côtes en plusieurs fois. Salez et poivrez.
2. Remettez toutes les côtes dans le récipient. Disposez en couches la choucroute,
l’oignon, les champignons, les quartiers de pommes et le sucre roux sur les côtes.
Saupoudrez de graines de céleri.
3. Placez le récipient sur son socle, couvrez et faites cuire sur « LO »
(Faible) de 7 à 9 heures ou sur « HI » (Élevé) de 3 à 4 heures, jusqu’à ce que la
viande soit tendre.
Gâteau de Carottes
2 tasses Farine
2 tasses Sucre
1 c. à thé Bicarbonate de soude
1 c. à thé Sel
1. Huilez le fond d’un moule à cake de 22,8 cm x 12,7 cm ou 20,3 cm x 10 cm en
utilisant de la graisse végétale hydrogénée solide. Saupoudrez de farine et
secouez l’excédent. Placez le récipient couvert sur son socle et préchauffez sur
« HI » (Élevé) tout en mélangeant les ingrédients.
2. Dans un grand bol mélangeur, combinez la farine, le sucre, le bicarbonate de
soude et le sel. Ajoutez l’huile végétale et mélangez jusqu’à ce que les ingrédients
soient humectés. Ajoutez les œufs un à un, en fouettant bien après l’ajout de
chacun. Mélangez les carottes râpées et la cannelle jusqu’à obtention d’un
mélange uniforme. Versez la pâte dans le plat. Placez le plat dans le récipient.
3. Couvrez et faites cuire sur « HI » (Élevé) pendant 2 heures. Ne retirez pas le
couvercle durant tout ce temps. Pour vérifier si le gâteau est cuit à la fin de la durée
de cuisson recommandée, insérez la lame d’un couteau en plusieurs endroits, y
compris au centre. Si la lame ressort propre, il est cuit. Si la pâte colle à la lame,
poursuivez la cuisson par intervalles de 15 minutes. Démoulez le gâteau et laissez
refroidir sur la grille. Servez avec du fromage à la crème, selon votre goût. Donne un
gâteau de 1½ livre (.7kg).
½ tasse Assaisonnement à salade ou
mayonnaise
¼ tasse Oignon finement haché
1 c. à soupe Jus de citron
½ c. à thé Poudre de curry
½ tasse Amandes effilées, facultatives
1 227g Boîte de champignons (tiges et
têtes) égouttés
1 grosse pomme ou 2 petites, évidées et
coupées en quartiers
¼ tasse Sucre roux
½ c. à thé Graines de céleri
1 tasse Huile végétale
4 Œufs
3 tasses Carottes râpées
1 c. à thé Cannelle
12
Page 27

Cake aux Airelles Rouges et Aux Noix
2 tasses Airelles rouges fraîches ou
surgelées (226 g)
½ tasse Noix
2 tasses Farine
1 tasse Sucre
1½ c. à thé Levure chimique
1. Huilez un moule à cake de 22.8 cm x 12.7 cm ou 20.3 cm x 10 cm en utilisant de
la graisse végétale hydrogénée solide. Saupoudrez de farine et secouez
l’excédent. Placez le récipient couvert sur son socle et préchauffez sur « HI »
(Élevé) tout en mélangeant les ingrédients.
2. Broyez les airelles et les noix avec la lame épaisse d’un mixeur. Dans un grand bol
mélangeur, combinez la farine, le sucre, la levure chimique, le bicarbonate de soude
et le sel. Ajoutez le beurre ou la margarine en dés pour former un mélange grossier.
Creusez un puits dans le mélange et ajoutez l’œuf, le zeste d’orange et le jus
d’orange. Fouettez seulement jusqu’à ce que les grumeaux disparaissent. Ajoutez
les airelles et les noix. Mélangez intimement. Versez la pâte dans le plat. Placez le
plat dans le récipient.
3. Couvrez et faites cuire sur « HI » (Élevé) pendant 3 heures. Ne retirez pas le
couvercle durant tout ce temps. Pour vérifier si le gâteau est cuit à la fin de la
durée de cuisson recommandée, insérez la lame d’un couteau en plusieurs
endroits, y compris au centre. Si la lame ressort propre, il est cuit. Si la pâte colle
à la lame, poursuivez la cuisson par intervalles de 15 minutes. Démoulez le
gâteau et laissez refroidir sur la grille. Donne un cake de 1½ livre (.7kg).
½ c. à thé Bicarbonate de soude
½ c. à thé Sel
6 c. à soupe Beurre ou margarine
1 Œuf
1 c. à soupe Zeste d’orange râpée
½ tasse Jus d’orange
13
Page 28

G
ARANTIE DU PRODUIT
Garantie limitée de 1 an de l’appareil
Focus Electrics, LLC (« Focus Electrics ») garantit cet appareil contre tout défaut de pièces et
de main d’ œuvre pendant un (1) an à compter de la date d’achat d’origine avec un justificatif
d’achat, à condition que l’appareil soit utilisé et entretenu conformément aux recommandations
du Mode d’emploi fourni. Toute pièce défaillante de l’appareil sera réparée ou remplacée sans
frais à la discrétion de Focus Electrics. La présente garantie s’applique pour une utilisation
domestique à l’intérieur uniquement.
Cette garantie ne prend pas en charge les dégâts, y compris la décoloration, subis par toute
surface antiadhésive de l’appareil. Cette garantie est nulle et non avenue, tel que défini
uniquement par Focus Electrics si l’appareil est détérioré par accident, mauvaise utilisation,
utilisation abusive, négligence, rayure, ou si l’appareil est détérioré de quelque manière que ce
soit.
LA PRÉSENTE GARANTIE ANNULE ET REMPLACE TOUTES LES GARANTIES INDUITES,
NOTAMMENT LES GARANTIES DE COMMERCIALISATION, D’ADAPTATION À UN USAGE
PARTICULIER, DE PERFORMANCE, OU AUTRE, QUI SONT ICI EXCLUES. EN AUCUN
CAS FOCUS ELECTRICS NE POURRA ÊTRE TENUE POUR RESPONSABLE DE TOUT
DÉGÂT, QUE CELUI-CI SOIT DIRECT, INDIRECT, SECONDAIRE, PRÉVISIBLE, INDUIT OU
PARTICULIER, RÉSULTANT DE OU EN RAPPORT AVEC CET APPAREIL.
Si vous pensez que cet appareil est défectueux ou a besoin d’être réparé pendant la durée de
sa garantie, veuillez contacter le Service clientèle de Focus Electrics au (866) 290 –1851 ou
nous adresser un e-mail à service@focuselectrics.com
non remboursables. Un justificatif prouvant la date d’achat d’origine sera exigé pour toutes les
demandes de prise en charge dans le cadre de la garantie, les factures manuscrites ne sont
pas acceptées. Focus Electrics n’est pas responsable pour les retours perdus pendant le
transport.
Valable uniquement aux USA et au Canada
P
IÈCES DE RECHANGE
Les pièces de rechange, lorsque celles-ci sont disponibles, peuvent être commandées
directement auprès de Focus Electrics en ligne sur www.focuselectrics.com, ou vous pouvez
téléphoner ou envoyer un e-mail au service entretien au numéro/à l’adresse e-mail ci-dessus,
ou vous pouvez nous écrire à :
Focus Electrics, LLC
Attn : Service clientèle
P. O. Box 2780
West Bend, WI 53095
Assurez-vous d’inclure le numéro de catalogue/modèle de votre appareil (situé sur le
dessous/à l’arrière de l’appareil) accompagné d’une description et de la quantité de la pièce
que vous souhaitez commander. Ajoutez également votre nom, votre adresse postale, un
numéro de carte Visa/MasterCard, une date d’expiration ainsi que le nom tel qu’il apparaît sur
la carte. Vous pouvez payer par chèque à l’ordre de Focus Electrics, LLC. Appelez le Service
clientèle pour obtenir le montant de l’achat. La taxe de vente de votre état ainsi que des frais
d’expédition/de traitement seront ajoutés au total de la facture. Veuillez patienter deux (2)
semaines pour la livraison.
Ce manuel contient des informations importantes et utiles concernant l’utilisation sans danger et l’entretien
de votre nouveau produit Focus Electrics. Pour une consultation ultérieure, fixez le ticket de caisse daté pour
servir de justificatif d’achat et inscrivez les informations suivantes :
Date d’achat ou de réception en cadeau : _______________________________________________
Lieu d’achat et prix, si connus : _____________________________________________
Numéro de l’article et Code de date (dessous/arrière de l’appareil) :___________________________
. Les frais d’expédition de retour sont
L5800 01/10 West Bend®, una Marca de Focus Electrics, LLC. Impreso en China
14
Page 29

N
OTES
Page 30

O
(5.7L
LLA DE COCIMIENTO LENTO 6 QT.
V
ERSATILITY
Manual de instrucciones
Registre éste y otros productos de Focus Electrics en nuestro sitio:
w w w .r e g i s t er f o cu s . co m e n I n te r n et
Precauciones Importantes ........................................................................................ 2
Antes de Usar por Primera Vez ................................................................................ 3
Como Usar la Olla de Cocimiento Lento 6 Qt. (5.7Lt.) Versatility™ ......................... 4
Consejos Prácticos................................................................................................... 6
Como Limpiar la Olla de Cocimiento Lento 6 Qt. (5.7Lt.) Versatility™ ..................... 8
Recetas .................................................................................................................... 9
Garantía ................................................................................................................. 14
™
T.)
CONSERVE ESTAS INSTRUCCIONES COMO REFERENCIA PARA EL FUTURO
2009 West Bend®, una Marca de Focus Electrics, LLC.
www.focuselectrics.com
Page 31

PRECAUCIONES IMPORTANTES
Para evitar lesiones personales o daños materiales, lea y acate todas las
instrucciones y advertencias.
Al utilizar artefactos electrodomésticos, siempre deben acatarse las precauciones
básicas de seguridad incluyendo las siguientes:
• Lea todas las instrucciones en este manual, incluso estas importantes
precauciones, así como las instrucciones de uso y cuidado.
• No toque las superficies calientes. Use las asas o las perillas y almohadillas
aislantes o guantes térmicos.
• Desenchúfelo siempre del tomacorriente cuando no esté en uso y antes de
limpiarlo. Permita que se enfríe antes de colocarle o quitarle piezas o antes de
limpiarlo.
• Debe estarse muy pendiente de los niños cuando se use un artefacto
electrodoméstico sea usado por ellos o cerca de ellos.
• No opere ningún artefacto electrodoméstico con un cordón eléctrico o enchufe
dañado o si el artefacto electrodoméstico funciona mal o ha sido dañado de
cualquier manera. Para información relativa al servicio de reparaciones vea la
página de garantías.
• El uso de accesorios no recomendados por Focus Electrics puede ser causa de
fuego, descargas electricas, o lesiones personales.
• No use este artefacto electrodoméstico al aire libre.
• No deje que el cordón eléctrico cuelgue sobre el borde de la mesa o encimera, ni
que toque superficies calientes.
• No lo coloque sobre o cerca de un calentador eléctrico o a gas, o en un horno
caliente.
• Debe tenerse extremo cuidado al mover cualquier artefacto electrodoméstico
que contenga aceite caliente u otros líquidos calientes.
• Siempre conecte primero el enchufe al aparato electrodoméstico, y luego
enchufe el cordón eléctrico al tomacorriente. Para desconectar, coloque
cualquier control en la posición "OFF" (apagado), y luego desenchufe del
tomacorriente.
• No utilice el artefacto electrodoméstico para usos distintos del indicado.
• Para protegerse contra descargas eléctricas no sumerja el cable, enchufes, u
otras partes eléctricas en agua u otros líquidos.
• No trate de reparar este artefacto electrodoméstico usted mismo.
• Se suministra un cordón eléctrico corto para reducir los riesgos que resultan de
enredarse o tropezarse con un cordón eléctrico más largo.
2
Page 32

• Hay disponibles cables de extensión más largos, pero debe tenerse cuidado al
usarlos. Aunque no se recomienda utilizar cables de extensión, si debe utilizar
uno, asegúrese de que la capacidad eléctrica indicada del cable de extensión
sea igual o mayor a la del artefacto. Si el enchufe es del tipo conectado a tierra,
el cable de extensión deberá ser un cordón eléctrico de 3 hilos con conexión a
tierra. A fin de impedir lesiones que resulten del halar, tropezarse o enredarse en
el mismo, coloque el cable de extensión de tal modo que no cuelgue del borde
de un mostrador, mesa u otra superficie donde pueda ser halado por niños o se
pueda tropezar con él.
• Este artefacto tiene un enchufe polarizado (una clavija es más ancha que la
otra). Para reducir el riesgo de descarga eléctrica, este enchufe está diseñado
para encajar de una sola manera en un tomacorriente polarizado. Invierta el
enchufe si éste no encaja completamente en el tomacorriente o en el cable de
extensión. Si todavía no encaja, póngase en contacto con un electricista
calificado. No trate de modificar el enchufe de manera alguna.
• No use un tomacorriente o cable de extensión en el cual el enchufe calza
flojamente, o si el tomacorriente o el cable de extensión se calientan.
•
Sólo para uso doméstico.
CONSERVE ESTAS INSTRUCCIONES
Tapa
Olla de Cocción
Rejilla de Asar
Base de
Calentamiento
A
NTES DE USAR POR PRIMERA VEZ
Sírvase revisar con cuidado todo el material de empaque antes de desecharlo.
Podría haber accesorios dentro del material de empaque.
Antes de utilizarse, lávese la olla de cocción, la tapa y la rejilla de asar según las
indicaciones en la sección "Limpieza de la Olla de Cocimiento Lento 6 Qt. (5.7Lt.)
Versatility™" de este manual. Pásele un paño húmedo al acabado anti-adherente de
la base de calentamiento de la olla de cocimiento lento y luego séquelo.
Utilizando una toalla de papel, aplique una cucharadita de aceite vegetal al interior
anti-adherente de la olla de cocción. Esto acondicionará la superficie anti-adherente
para evitar que se peguen los alimentos NOTA: NO utilice manteca o mantequilla
para acondicionar el acabado. Deje una ligera película de aceite sobre el acabado.
El interior anti-adherente de la olla de cocción necesitará volver a acondicionarse
3
Page 33

cada vez que la olla 1) se lave en un lavavajillas automático; 2) el acabado sea
tratado con un limpiador especial; 3) el acabado sea limpiado con zumo de limón o
vinagre para eliminar una película mineral; o 4) cuando la adherencia se convierta
en un problema durante el uso. NO ACONDICIONE LA SUPERFICIE ANTIADHERENTE DE LA BASE DE CALENTAMIENTO ANTES DE UTILIZARLA COMO
UNA OLLA DE COCIMIENTO LENTO. El acabado anti-adherente de la base de
calentamiento solamente deberá acondicionarse antes de utilizarse como plancha
de asar.
C
OMO USAR LA OLLA DE COCIMIENTO LENTO 6 QT.
V
ERSATILITY
™
(5.7LT.)
Para Utilizarla como una Olla de Cocimiento Lento:
1. Coloque la base de calentamiento sobre una superficie seca, nivelada, y
resistente al calor, lejos de cualquier borde.
2. Coloque los alimentos dentro de la olla de cocción, tape la olla y colóquela
sobre la base de calentamiento. Si desea dorar o precocinar cualquier alimento
antes de la cocimiento lento, coloque la olla de cocción directamente sobre una
estufa a calor medio. Una vez se hayan dorado o cocido los alimentos,
transfiera la olla de cocción a la base de calentamiento. NOTA: En la olla de
cocción utilice solamente utensilios de cocinar plásticos, de goma, de madera o
no metálicos. El uso de utensilios de cocina metálicos rayará la superficie antiadherente.
3. Conecte el cordón eléctrico a la base y luego enchúfelo a un tomacorriente de
120 V CA solamente. La base de calentamiento sonará un bip al enchufarse.
Nada se mostrará en la pantalla hasta que el botón de encendido "POWER"
sea pulsado.
4. Pulse el botón de encendido/apagado "POWER." Se mostrará "SEL" y se
indicará el ajuste de temperatura "LO" (Baja) con una luz centellante. Si no
selecciona un ajuste dentro del lapso 5 cinco segundos, la olla de cocimiento
lento seleccionará por omisión el ajuste "LO" (Baja), de 9 horas.
5. Pulse “TEMP” (Temperatura) para seleccionar la temperatura alta “HI,” la
temperatura baja "LO," (Baja) para mantener caliente "WM" o para asar a la
plancha "Griddle.” Nota: Solamente los ajustes "HI" (Alta) o "LO" (Baja) están
disponibles para tiempos de cocción programados. Siempre que se pulse el
botón "TEMP," (Temperatura) se reajustará el tiempo en el valor preestablecido
para dicho ajuste. “LO,” 9 horas y “HI,” (Alta) 5 horas.
6. Pulse el botón "TIME" (Tiempo) para desplazarse al tiempo de cocción
deseado. No se puede programar la Olla de Cocimiento Lento 6 Qt. (5.7Lt.)
Versatility™ para que cocine por más de 12 horas. Nota: El tiempo puede ser
ajustado entre 1 y 12 horas. El temporizador comienza con el tiempo
preestablecido; pulse el botón "TIME" (Tiempo) más allá de las 12 horas para
regresar a 1 hora.
• Una vez ajustado, el temporizador indicará la cuenta regresiva en minutos.
Si el botón "TIME" (Tiempo) es pulsado en cualquier momento, el tiempo
4
Page 34

se incrementará hasta la siguiente hora entera, y de allí en adelante se
incrementará en incrementos de 1 hora.
7. Pulse "COOK" (Cocinar) para comenzar el ciclo de cocción. Si el botón "COOK"
(Cocinar) no ha sido presionado en el lapso de 5 segundos, la base sonará bip
5 veces, indicando que esta ha comenzado el ciclo de cocción. Al completarse
el ciclo de cocción, el programa se moverá al ajuste para mantener caliente
"WM" y el temporizador comenzará a contar desde cero para indicar el tiempo
que ha transcurrido en dicho ajuste. Nota: El ajuste "WM" para mantener en
caliente se apagará automáticamente tras 24 horas de calentamiento.
8. Pulse el botón "POWER" (Encendido/Apagado) para apagar el artefacto. El
pulsar el botón "POWER" (Encendido/Apagado) en cualquier momento durante
el ciclo de cocción, o mientras esté en el ajuste "WM" de mantener caliente,
apagará el artefacto. Todos los ajustes serán restablecidos a su valor
predeterminado al volverse a encender el artefacto. Ningún ajuste previo es
guardado al apagarse la Olla de Cocimiento lento 6 Qt. (5.7Lt.) Versatility™.
9. La base de la olla de cocimiento lento ofrece ajustes de temperatura para
mantener caliente "WM," para calor bajo "LO," para calor alto "HI" y para asar a
la plancha “GRIDDLE.” El ajuste para mantener caliente "WM" deberá utilizarse
solamente para mantener calientes los alimentos cocidos antes de servirlos,
mientras que los ajustes de calor bajo y alto, “LO” y “HI,” deben utilizarse para
la cocción en sí de los alimentos. NOTA: NO UTILICE EL AJUSTE DE
MANTENER CALIENTE "WM" PARA LA COCCIÓN EN SÍ DE ALIMENTOS
CRUDOS PUESTO QUE LA OLLA DE COCIMIENTO LENTO NO SE
CALENTARÁ LO SUFICIENTE PARA COCINAR LOS ALIMENTOS. NO
UTILICE EL AJUSTE PARA ASAR A LA PLANCHA "GRIDDLE" PARA EL
COCIMIENTO LENTO PUESTO QUE LOS ALIMENTOS QUEDARÁN
SOBRECOCIDOS.
10. Seleccione el ajuste de calor y cocine los alimentos durante el tiempo
recomendado por la receta. Como pauta general, la mayoría de las
combinaciones de carnes y vegetales requerirán 7 a 10 horas de cocción en el
ajuste "LO" (Baja) o 4 a 6 horas de cocción en el ajuste "HI" (Alta). Las carnes
quedarán más tiernas al cocinarse durante un mayor tiempo al ajuste de
temperatura menor. Evite retirar la tapa mientras esté cocinando a fuego lento
puesto que ello incrementará el tiempo de cocción debido a la pérdida de calor.
Retire la tapa solamente cuando sea necesario para agitar ocasionalmente o
para agregar ingredientes.
Para Utilizarse como Plancha de Asar:
La base de calentamiento puede utilizarse como una plancha de asar de uso liviano.
1. Antes de utilizar la base de calentamiento como plancha de asar,
acondicione la superficie anti-adherente con aceite vegetal.
2. Pulse el botón “TEMP” (Temperatura) hasta seleccionar "GRIDDLE"
(Plancha de Asar). Pulse el botón "COOK" (Cocinar) para encender la
plancha de asar, o espere 5 segundos, y la base hará bip 5 veces,
indicando que el ajuste "GRIDDLE" (Plancha de Asar) ha sido seleccionado
y que la plancha ha comenzado a calentarse. Para óptimos resultados,
precaliente la base durante 8-10 minutos, y luego cocine los alimentos
hasta el grado de cocción deseado. Sírvase consultar la "GUÍA DE
TEMPERATURAS" más abajo. La base de calentamiento sólo sirve como
una plancha de asar de uso liviano. El ajuste “GRIDDLE” (Plancha de Asar)
JAMÁS deberá ser utilizado como un ajuste para cocimiento lento.
3. Al terminarse de cocinar los alimentos, pulse “POWER”
(Encendido/Apagado) para apagar el artefacto. Desenchufe el cordón
5
Page 35

TEMPERATU
RAS
eléctrico del tomacorriente, y permita que se enfríe por completo. Siga las
instrucciones de limpieza en la sección "Limpieza de la Olla de Cocimiento
Lento 6 Qt. (5.7Lt.) Versatility™" de este manual.
Nota: El temporizador no puede utilizarse en este ajuste, y en ningún
momento se cambiará a la posición de mantener caliente "WM." La
plancha permanecerá encendida indefinidamente hasta que se pulse
el botón “POWER” (Encendido/Apagado) de apagado/encendido, o el
artefacto sea desenchufado.
No golpee utensilios contra el recipiente o el borde de la tapa. La tapa de
vidrio podría resquebrajarse como resultado de ello.
• Una pequeña cantidad de humo y/o olor puede ocurrir al calentarse debido a la
liberación de aceites usados en la fabricación – esto es normal.
Algunos sonidos menores de expansión/contracción pueden ocurrir durante el
calentamiento y enfriamiento – esto es normal.
• Al calentar la plancha podrá emitirse una pequeña cantidad de humo y/o un leve olor a
causa de la emanación de los aceites usados en la fabricación de ésta - esto es
normal.
• Durante el calentamiento y enfriamiento pudieran ocurrir algunos ruidos menores de
expansión y contracción - esto es normal.
G
UÍA DE TEMPERATURAS
Asegúrese de cocinar los alimentos a las temperaturas seguras recomendadas.
Siempre verifíquelas con un termómetro de carne para asegurarse de que el centro
esté completamente cocinado.
CARNE
Carne de Res
Término Medio 160°F/71°C
Bien Cocido 170°F/76°C
Carne de Cerdo Fresco 170°F/76°C
Ahumado 160°F/71°C
Enlatado 140°F/60°C
Cordero 170°F a 180°F/76°C a 82°C
Ternera 170°F/76°C
Carnes de Ave 180°F/82°C
• Muchas de sus recetas favoritas que cocina regularmente en la estufa o cocina
puede prepararlas en su olla de cocimiento lento, tras hacer ligeros cambios. He
aquí algunos puntos importantes que debe recordar.
Cantidad de Líquido: Debido a que durante la cocimiento lento se evapora
poca humedad, reduzca a la mitad la cantidad de líquido que se indica en la
receta (1 taza de líquido es suficiente para la mayoría de las recetas). Para
recetas de sopas, agregue en la olla todos los ingredientes excepto el agua o el
caldo; agregue líquido, pero sólo lo suficiente como para cubrir los ingredientes.
Vuelta y
Vuelta
C
ONSEJOS PRÁCTICOS
INTERNAS
140°F/60°C
6
Page 36

Cantidad de Aliño: Reduzca la cantidad de aliño en proporción a la cantidad
de líquido. Use hierbas y especias con hojas enteras en vez de molidas o en
polvo.
Carne a Fuego Lento: Los cortes de carne menos blandos y de menor costo
se cocinan mejor a fuego lento que los cortes de mejor calidad. Elimine el
exceso de grasa antes de cocer la carne a fuego lento. Puede dorar la carne en
la olla de cocción en una estufa o cocina antes de cocerla a fuego lento.
Verduras a Fuego Lento: Agregue las verduras parcialmente congeladas,
verduras chinas y champiñones frescos durante la última hora de cocción. Las
verduras de sabores fuertes tales como espinacas, berenjenas, quimbombó y
col rizada deben precocerse antes de agregarlas a la olla. Reduzca la cantidad
de cebolla que usa en las recetas, ya que su sabor se intensifica durante la
cocción. En la mayoría de los casos, las verduras crudas tardan más en
cocerse que las carnes, ya que el líquido no hierve, sino que se somete a una
cocimiento lento.
Cocción Lenta de Carnes y Verduras Crudas: La mayoría de las carnes y
verduras crudas requieren al menos 4 a 6 horas de cocción en el ajuste “HI” ó 7
a 10 horas en el ajuste “LO.”
Cocción Lenta de Pescados y Mariscos: Los mariscos y pescados crudos o
deshelados se desmenuzan por sí solos tras largas horas de cocción. Agregue
estos ingredientes una hora antes de servir y cocine en el ajuste “HI.”
Cocción Lenta de Leche, Crema Dulce o Agria y Queso: Debido a que la
leche, la crema agria y el queso natural se desintegran durante las horas de
cocción prolongadas, agregue estos ingredientes justo antes de servirlos o
sustitúyalos por sopas de crema condensada enlatadas o leche evaporada. El
queso procesado tiende a dar mejores resultados que el queso envejecido.
Arroz y Fideos: Pueden cocerse por separado o agregarse crudos durante la
última hora de cocción. Si los agrega crudos, cerciórese de que la olla contenga
al menos 1 a 1½ tazas de líquido y cocine en el ajuste “LO” (Bajo) o más alto.
Bolas de Masa: Pueden cocerse en caldo o salsa de carne en el ajuste “HI”
(Alta). Agréguelas en cda. sobre el caldo o la salsa a fuego lento. Cocine con la
olla tapada durante 30 minutos.
Espesamiento de Jugos para Salsas de Carne: Para espesar el jugo, agregue 2
a 3 cda. de tapioca de cocción rápida al principio, o espese el jugo después de la
cocción agregando una pasta suave hecha de 2 a 4 cucharadas de maicena o
harina y ¼ taza de agua. Hierva en el ajuste “HI” (Alto). Los alimentos sólidos
pueden retirarse primero.
• No Retire la Tapa Durante la Cocción: Para conservar el calor, la humedad y el
sabor del alimento, no destape la olla durante la cocción, a menos que deba hacerlo
para agregar ingredientes.
• Uso de Utensilios de Cocina en el Acabado Anti-adherente: Use utensilios de
plástico, caucho y madera en el acabado anti-adherente. No use utensilios metálicos
con bordes filosos (tenedores, cuchillos, moledores) ya que podrían rayar el
acabado.
• Uso de la Olla de Cocción en la Hornilla de una Estufa: La olla de cocción (sin la
base de calentamiento) puede utilizarse para cocinar en una estufa. Coloque el
recipiente sobre una estufa grande. Utilice calor medio a bajo. El uso de calor bajo a
medio prevendrá que los alimentos se cocinen de más, reduce el salpicado y ayuda
a retener los jugos naturales. No utilice temperaturas altas excepto para llevar los
líquidos al hervor. Si se está cocinando en una cocina de gas, no permita que la
llama se extienda por los lados de la olla de cocción. SIEMPRE UTILICE GUANTES
TÉRMICOS AL UTILIZAR LA OLLA DE COCCIÓN Y TAPA EN UNA ESTUFA
• Cocción de las Carnes: Al cocinar carnes, precaliente la olla de cocción vacía en
calor medio a medio-bajo durante 2 a 3 minutos o hasta que una gota de agua
chisporrotee en la olla. Para prevenir que se peguen las carnes magras, quizás
7
Page 37

desee agregarle una pequeña cantidad de aceite de cocina. Agregue la carne y dore
al gusto. Tape la olla de cocción y reduzca el calor a calor bajo para cocinar en la
estufa O transfiera la olla de cocción a la base de calentamiento y cocine con el
ajuste deseado. El tiempo más corto de cocción se obtendrá con el ajuste "HI" de
alta temperatura.
• Uso de la Olla de Cocción en el Horno: La olla de cocción (sin la base de
calentamiento) puede utilizarse en un horno convencional o de convección hasta
temperaturas precalentadas de 350°F/177°C. La olla de cocción puede taparse con
papel de aluminio al usarse en el horno. SIEMPRE UTILICE GUANTES TÉRMICOS
AL UTILIZAR LA OLLA DE COCCIÓN EN EL HORNO.
• NO UTILICE LA OLLA DE COCCIÓN EN UN HORNO DE MICROONDAS, SOBRE
UNA FOGATA O DEBAJO DE UNA PARRILLA DE HORNO A FIN DE EVITAR
DAÑOS A LA OLLA O AL HORNO.
• Uso de la Rejilla de Asar: La olla de cocimiento lento incluye una pequeña rejilla de
alambres para asar carnes y aves. Para utilizar la rejilla, simplemente colóquela en
el fondo de la olla de cocción y coloque el asado, pollo o jamón sobre la misma.
Agregue una pequeña cantidad de líquido a la olla de cocción antes de comenzar a
cocinar. Si lo desea, puede dorar la carne en la misma olla de cocción sobre una
estufa antes de comenzar a asarla. La rejilla también puede utilizarse para cocer al
vapor vegetales frescos como brócoli y mazorcas de maíz. Agregue una taza de
agua a la olla de cocción para cocer los vegetales al vapor. Cocine sobre una estufa
a calor medio a medio-bajo o sobre la base de calentamiento con el ajuste "HI" (Alta)
hasta el grado de cocción deseado.
• Pan, Pasteles y Postres: Utilice un molde de pan de 8 x 4 pulgadas (20.3 x 10.1cm)
o a 9 x 5 pulgadas (22.9 x 12.7cm). Coloque la rejilla de asar dentro del molde antes
de colocar el molde de pan. Asegúrese de que el molde encaje completamente
dentro de la olla de cocción antes de mezclar cualquier ingrediente. Para
prevenir que la condensación gotee sobre los alimentos mientras se estén
horneando, coloque una doble capa de toallas de papel y una sola capa de papel de
aluminio encima de la olla de cocción. Cubra y hornee de acuerdo a la receta.
C
OMO LIMPIAR LA OLLA DE COCIMIENTO LENTO 6 QT.
(5.7LT.) V
ERSATILITY
™
1. Pulse el botón de “POWER” (Encendido/Apagado) para apagar el artefacto.
Desenchufe el cordón eléctrico del tomacorriente y permita que el artefacto
entero (base, olla de cocción, rejilla, tapa) se enfríe antes de limpiarlo. Coloque
la olla de cocción y la tapa sobre una superficie seca protegida contra el calor
para que se enfríen gradualmente. NOTA: No vierta agua fría sobre la tapa
de vidrio caliente puesto que esta podría rajarse o hacerse añicos si se
enfría de manera repentina.
2. Limpie la base de calentamiento y el cordón eléctrico con un paño húmedo.
3. La olla de cocción, la rejilla y la tapa de vidrio pueden lavarse a mano utilizando
agua tibia jabonosa o pueden lavarse en el lavavajillas. Si se lavan en el
lavavajillas, evite el contacto entre las partes para prevenir cualquier daño. La
superficie anti-adherente de la olla de cocción debe reacondicionarse con aceite
de cocina después de limpiarse en un lavavajillas a fin de restaurar las
propiedades anti-adherentes. No utilice esponjas de metal abrasivas o
limpiadores puesto que pueden causar daños. Para eliminar las manchas de
agua o los depósitos minerales pase un trapo humedecido con vinagre
destilado. Vuelva a lavar con agua tibia y jabonosa, enjuague y seque.
Limpieza de la Base de Calentamiento: Siempre desenchufe el cordón eléctrico
del tomacorriente y permita que la base se enfríe por completo antes de limpiarla.
8
Page 38

Con una cuchara o jeringa, saque cualquier grasa que se haya acumulado sobre la
superficie de la plancha de asar. Con toallas de papel, elimine el residuo de aceite
en la base. Limpie el acabado anti-adherente con un paño o una esponja de nylon
(recomendada para usarse en acabados anti-adherentes) mojados con agua
jabonosa. Limpie el acabado a fondo pasando varias veces un paño limpio y
húmedo sobre la base para eliminar cualquier residuo de jabón.
Si se formase una película pegajosa de aceite sobre el acabado anti-adherente,
pásele un paño seco para eliminarlo. Si este residuo no se elimina, se pegará al
acabado al recalentarse y será imposible eliminarlo.
R
ECETAS
Sopa de Res con Verduras
1½ lbs (.7kg) de Huesos de Res para
Sopa o 1 libra (.5kg) de Costilla de Res
1½ Qt. (1.4 L) Agua
1 cdta. de Sal
¼ cdta. de Pimienta
1 lata de 16 oz (.5 L) de tomates enteros sin drenar
1. Coloque en la olla de cocimiento lento los huesos para sopa, el agua, la sal, la
pimienta, las zanahorias, el apio, las papas, la cebolla y la hoja de laurel. Tape
la olla y cocine en el ajuste “LO” (Bajo) durante 6 a 7 horas.
2. Retire los huesos y deje que se enfríen un poco. Quite la carne de los huesos y
vuelva a ponerla en la sopa con los tomates. Tape la olla y cocine a fuego lento
una hora más. Si lo desea, puede agregar fideos o cebada.
Asado de Cerdo a las Hierbas
1 cdta. de Sal
1 cdta. de Tomillo
½ cdta. de Salvia
½ cdta. de Clavos de especia molidos
4-5 lbs (1.8-2.3kg) de Asado de cerdo
1. En un recipiente pequeño combine la sal, el tomillo, la salvia, los clavos de
especia y la cáscara de limón. Introdúzcalos en el asado de cerdo frotándolos.
Corte 16 cavidades pequeñas en el asado e introduzca los trozos de ajo.
2. Coloque el asado en la olla de cocimiento lento. Tápela y cocine en el ajuste
“LO” (Bajo) durante 7 a 9 horas o “HI” (Alto) durante 4 a 5 horas. Antes de
servir, inserte un termómetro para carne en el asado para cerciorarse de que la
temperatura interna sea de 170°F/77°C o más alta. Deje reposar el asado
durante 10 a 15 minutos antes de cortarlo. Retire los trozos de ajo. Si lo desea
espese los jugos para preparar salsa. Disuelva 2 cucharadas de maicena en
2 cucharadas de agua. Revuelva lentamente los jugos en el ajuste “HI” (Alto)
hasta que alcancen el espesor que desee.
2 Zanahorias picadas
2 Palitos de apio picados
2 Papas peladas y picadas
1 Cebolla pequeña picada
1 Hoja de laurel
1 cdta. de Cáscara de limón rallada
4 Dientes grandes de ajo cortados en
cuadrados
2 cda. de Agua - optativo
2 cda. de Maicena, optativo
9
Page 39

Bistec al Pimiento
1½ lbs (.7kg) de Bistec redondo cortado
en tiras delgadas
1 Diente de ajo picado
1 taza de Cebolla picada
½ cdta. de Sal
¼ cdta. de Pimienta
¼ cdta. de Jengibre
1 cdta. de Azúcar
½ taza de Salsa de soya
1. Dore el bistec en la olla de cocimiento lento a fuego mediano sobre la estufa o
cocina. Use los tomaollas y transfiera la olla a la base de calentamiento.
2. En un recipiente combine el ajo, la cebolla, la sal, la pimienta, el jengibre, el
azúcar y la salsa de soya. Vierta la mezcla sobre el bistec. Tape la olla y cocine
en el ajuste “LO” (Bajo) durante 6 a 8 horas o “HI” (Alto) durante 4 a 5 horas.
3. Agregue el pimiento verde, los tomates y los brotes de soya, revuélvalos para
mezclarlos bien. Cocine a fuego lento una hora más. Justo antes de servir,
aumente la temperatura al ajuste “HI” (Alto). Combine la maicena y el agua.
Agregue la mezcla gradualmente al bistec, revolviéndola hasta que quede
espesa. Reduzca la temperatura al ajuste mantener caliente "WM" para servir.
Pecho de Res Curado y Col
3 - 4 lbs (1.4-1.8kg) de Pecho de res
curado
1 Cebolla mediana rebanada
½ cdta. de Semilla de apio
1. Coloque en la olla de cocimiento lento el pecho de res con el líquido y las
especias. Agregue la cebolla, las semillas de apio, la mostacilla, el ajo y la hoja
de laurel. Agregue suficiente agua para cubrir la carne (aproximadamente 4
tazas). Tape la olla y cocine en el ajuste “LO” (Bajo) durante 7 a 9 horas o hasta
que la carne esté blanda al pincharla con el tenedor.
2. Agregue las tajadas de col durante la última hora de cocción y continúe
cocinando en el ajuste “LO” (Bajo). Elimine los líquidos y especias de la
cocción.
Nutritiva Sopa de Pollo con Fideos
2 lbs (.9kg) de trozos de pollo sin piel si
lo desea
5 tazas de Agua
1 Cebolla mediana picada
4 Zanahorias cortadas en trocitos de ½
pulgada
4 Palitos de apio cortados en trocitos de ½
pulgada
1. Combine en la olla de cocimiento lento todos los ingredientes, excepto los
fideos de huevo. Tape la olla y cocine en el ajuste “LO” (Bajo) durante 6 a 8
horas o “HI” (Alto) durante 3 a 4 horas o hasta que el pollo y las verduras estén
blandos.
2. Retire los trozos de pollo de la olla y apártelos para que se enfríen un poco.
Aumente la temperatura al ajuste “HI” (Alto) y agregue los fideos revolviéndolos
para mezclarlos bien. Tape la olla y continúe cocinando durante 30 minutos.
3. Mientras tanto retire de los huesos la carne de pollo y córtela en trozos
comestibles. Vuelva a poner la carne en la olla para calentarla a medida que los
fideos terminan de cocerse. Reduzca la temperatura al ajuste mantener caliente
"WM" para servir.
1 Pimiento verde grande cortado en tiras
delgadas
4 Tomates, cortados en octavos, o 1 lata
de 1 lb. (.5kg) de Tomates enteros sin
drenar
1 lata de 1 lb (.5kg) de Brotes de soya
drenados
1 cda. de Maicena
½ taza de Agua fría
½ cdta. de Mostacilla
1 diente de Ajo picado
1 hoja de Laurel agua
1 col Pequeña cortada en tajadas
1 lata de 16 oz (.5L) de Tomates enteros
cortados en trozos
1 cda. de Caldo de pollo instantáneo
1 cda. de Perejil picado
1 cdta. de Sal
½ cdta. de Hojas secas de romero
¼ cdta. de Pimienta
1 taza de Fideos finos de huevo sin
cocer
10
Page 40

Chile
1½ lbs (.7kg) de Carne molida
1 taza de Cebolla picada
1 taza de Pimiento verde picado
1 Diente de ajo picado
1 lata de 28 oz. (.8kg) de tomates enteros
sin drenar
1. Dore a fuego mediano la carne molida con la cebolla y el pimiento verde en la
olla de cocimiento lento sobre una estufa o cocina. Elimine el exceso de grasa.
2. Use los tomaollas y transfiera la olla a la base de calentamiento. Agregue el
resto de los ingredientes; revuélvalos para mezclarlos bien. Tape la olla y
cocine en el ajuste “LO” (Bajo) durante 7 a 8 horas. Reduzca la temperatura al
ajuste mantener caliente "WM" para servir.
Sopa de Pescado
2 lbs (.9kg) de Filete de pescado fresco o
congelado (abadejo, perca, bacalao,
lenguado)
2 cda. de Jugo de limón
4 Rebanadas de tocino
1 taza de Cebolla picada
¼ taza de Apio cortado en cubos
4 Papas medianas cortadas en cubos
1. Corte el pescado en trozos grandes y retire las espinas. Agregue el jugo de
limón. Cúbralo y refrigérelo.
2. Fría el tocino en la olla de cocción a fuego mediano sobre la estufa o cocina
hasta que quede crujiente. Drénelo en toallas de papel, desmenúcelo y
apártelo.
3. Saltee la cebolla y el apio en el jugo del tocino hasta que queden dorados. Use
los tomaollas y transfiera la olla a la base de calentamiento. Agregue a la olla
de cocción las papas, el agua, los tomates, las zanahorias, la sal y la pimienta.
Revuelva para combinarlos. Tape la olla y cocine en el ajuste “LO” (Bajo)
durante 4 a 5 horas o “HI” (Alto) durante 2 a 3 horas.
4. Drene el jugo de limón del pescado. Agregue el pescado, la salsa
Worcestershire y el jerez a la olla de cocción. Cueza a fuego lento durante 1
hora o hasta que el pescado pueda descamarse con el tenedor. Reduzca la
temperatura al ajuste mantener caliente "WM" para servir. Aderece con tocino
desmenuzado.
Puchero de Res Alemán
1½ lbs (.7kg) de Asado de res, cortado en
cubos de 2 pulgadas (5.8cm)
2 cda. de Harina
½ cdta. de Sal de apio
¼ cdta. de Ajo en polvo
½ cdta. de Jengibre molido
¼ cdta. de Pimienta
1. Coloque la carne en la olla. En un recipiente pequeño combine la harina, la sal
de apio, el ajo en polvo, el jengibre molido y la pimienta. Espolvoréelos sobre la
carne
2. En un recipiente combine los tomates, las zanahorias, el jerez y la melaza.
Vierta la mezcla sobre la carne
3. Tape la olla y colóquela en la base. Cueza a fuego lento en el ajuste “LO” (Bajo)
durante 6 a 8 horas o hasta que este listo. Agregue las pasas 30 minutos antes
de servir. Reduzca la temperatura al ajuste mantener caliente "WM" para servir.
Sirva sobre fideos calientes.
1 lata de 16 oz (.5L) de Frijoles rojos sin
drenar
1½ cda. de Chile en polvo
1 cdta. de Sal
1 cdta. de Comino molido
½ cdta. de Pimiento
4 tazas de Agua caliente
1 lata de 16 oz (.5L) de tomates cocidos
1 taza de Zanahorias cortadas en cubos
2 cdta. de Sal
¼ cdta. de Pimienta
1 cda. de Salsa Worcestershire
2 cda. de Jerez seco, optativo
1 lata de 1 lb (.5kg) de Tomates enteros
sin drenar
2 tazas de Zanahorias rebanadas finas
¼ taza de Jerez de cocina
¼ taza de Melaza negra
¼ taza de Pasas
11
Page 41

Guiso de Cueso al Curry
2 paquetes de 10 oz. (.3L) de Brócoli
picado congelado, parcialmente
deshelado
3 tazas de (¾ de libra, .3kg) Jamón, pavo
o pollo cocidos y cortados en cubos
1 lata de 11 oz. (.3L) de Sopa
condensada de queso cheddar
1. Coloque el brócoli uniformemente en el fondo de la olla. Agregue el jamón,
pavo o pollo.
2. En un recipiente pequeño combine la sopa, el agua, la mayonesa, la cebolla, el
jugo de limón y el curry en polvo; revuélvalos bien para mezclarlos. Vierta la
mezcla en la olla.
3. Coloque la olla en la base, tápela y cueza a fuego lento en el ajuste “HI” (Alto)
durante 2 horas o “LO” (Bajo) durante 3 a 4 horas hasta que el brócoli esté
blando al pincharlo con el tenedor. Si lo desea agregue las almendras justo
antes de servir. Reduzca la temperatura al ajuste mantener caliente "WM" para
servir. Sirva sobre tostadas o bollos calientes.
Costillas con Manzanas y Chucrut estilo Americano
3 lbs (1.4kg) de Costillas de cerdo magras
estilo americano, sin exceso de grasa
Sal y pimienta
1 lata de 16 oz.(.5L) de Chucrut sin drenar
1 Cebolla mediana, rebanada fina y
separada en anillos
1. Precaliente la olla a fuego lento en una estufa o cocina eléctrica o a gas.
Agregue las costillas en lotes para dorarlas. Alíñelas con sal y pimienta.
2. Vuela a poner todas las costillas en la olla. Coloque sobre las costillas el
chucrut, la cebolla, los champiñones, las tajadas de manzana y el azúcar rubio.
Espolvoree semillas de apio.
3. Coloque la olla en la base, tápela y cocine en el ajuste “LO” (Bajo) durante 7 a 9
horas o “HI” (Alto) durante 3 a 4 horas hasta que la carne esté blanda. Reduzca
la temperatura al ajuste mantener caliente "WM" para servir.
Pastel de Zanahorias
2 tazas de Harina
2 tazas de Azúcar
1 cdta. de Bicarbonato de sodio
1 cdta. de Sal
1. Engrase sólo el fondo de una fuente para hogaza de 9 x 5 (22.9cm x 12.7cm) u 8 x
4 (20.3cm x 10.2cm) pulgadas con manteca sólida hidrogenada. Espolvoree con
harina y elimine el exceso. Coloque la olla tapada en la base y precaliente en el
ajuste “HI” (Alto) mientras mezcla los ingredientes.
2. En un recipiente cierne la harina, el azúcar, el bicarbonato de sodio y la sal.
Agregue aceite vegetal y revuelva hasta que todos los ingredientes se
humedezcan. Agregue los huevos de uno a la vez, batiendo bien tras
agregarlos. Agregue revolviendo las zanahorias ralladas y la canela hasta
obtener una mezcla uniforme. Vierta la mezcla en la fuente, coloque la fuente
en la olla.
3. Tape la olla y hornee en el ajuste “HI” (Alto) durante 2 horas. No retire la tapa
por ahora. Para revisar la cocción al concluir el tiempo de horneado
recomendado, introduzca un probador de pasteles metálico en diversos lugares
incluyendo el centro del pastel. Si el probador sale limpio, significa que el pastel
está cocido. Si la mezcla se adhiere al probador, continúe horneando durante
intervalos de 15 minutos. Retire el pastel de la fuente y enfríelo en la rejilla. Si lo
desea, cúbralo a modo de betún con queso crema reblandecido. Rinde un
pastel de 1 ½ lb (.7kg).
1 taza de Agua
½ taza de Mayonesa o aderezo para
ensalada
¼ taza de Cebolla picada fina
1 cda. de Jugo de limón
½ cdta. de Curry en polvo
½ taza de Almendras partidas, optativo
1 lata de 8 oz. (.24L) de Tallos y trozos
de champiñones drenados
1 Manzana grande o 2 pequeñas, sin
corazón y cortada en tajadas
¼ taza de Azúcar rubio
½ cdta. de Semilla de apio
1 taza de Aceite vegetal
4 Huevos
3 tazas de Zanahoria rallada
1 cdta. de Canela
12
Page 42

Pan de Nuez con Arándanos
2 tazas (8 onzas, .24L) de Arándanos
frescos o congelados
½ taza de Nueces
2 tazas de Harina
1 taza de Azúcar
1½ cdta. de Polvo de hornear
1. Engrase una fuente para hogaza de 9 x 5 (22.9cm x 12.7cm) u 8 x 4 (20.3cm x
10.2cm) pulgadas con manteca sólida hidrogenada. Espolvoree con harina y
elimine el exceso. Coloque la olla tapada en la base y precaliente en el ajuste
“HI” (Alto) mientras mezcla los ingredientes.
2. Muela los arándanos y las nueces con la cuchilla gruesa de un procesador de
alimentos. En un recipiente grande combine la harina, el azúcar, el polvo de
hornear, el bicarbonato de sodio y la sal. Agregue la mantequilla o margarina
cortándola para formar una mezcla gruesa. Haga una hendidura en la mezcla y
agregue el huevo, la cáscara y el jugo de naranja. Bata sólo hasta que
desaparezcan los grumos. Agregue los arándanos y nueces picados. Revuelva
hasta obtener una mezcla uniforme. Vierta la mezcla en la fuente. Coloque la
fuente en la olla.
3. Tápela y hornee en el ajuste “HI” (Alto) durante 3 horas. No retire la tapa por
ahora. Para revisar la cocción al concluir el tiempo de horneado recomendado,
introduzca un probador de pasteles metálico en diversos lugares incluyendo el
centro del pan. Si el probador sale limpio, significa que el pan está cocido. Si la
mezcla se adhiere al probador, continúe horneando durante intervalos de 15
minutos. Retire el pan de la fuente y enfríelo en la rejilla. Rinde una hogaza de
1½ libras (.7kg).
½ cdta. de Bicarbonato de sodio
½ cdta. de Sal
6 cda. de Mantequilla o margarina
1 Huevo
1 cda. de Cáscara de naranja rallada
½ taza de Jugo de naranja
13
Page 43

G
ARANTÍA DEL PRODUCTO
Garantía Limitada de 1 Año del Artefacto Electrodoméstico
Focus Electrics, LLC (“Focus Electrics”) garantiza que este aparato no presentará fallas de
material ni fabricación durante un (1) año a partir de la fecha original de compra con prueba de
dicha compra, siempre y cuando el aparato sea operado y mantenido tal como se indica en el
manual de instrucciones provisto. Toda pieza del aparato que presente fallas será reparada o
reemplazada sin costo alguno a criterio de Focus Electrics. Esta garantía rige solamente para
el uso domestico dentro de la casa.
Esta garantía no cubre ningún daño, incluyendo la decoloración, de superficie anti-adherente
alguna del aparato electrodoméstico. Esta garantía es nula y sin valor, según lo determine
exclusivamente Focus Electrics si el artefacto electrodoméstico es dañado a causa de
accidente, mal uso, abuso, negligencia, rayaduras, o si el artefacto electrodoméstico es
cambiado de algún modo.
ESTA GARANTÍA REEMPLAZA A TODAS LAS DEMÁS GARANTÍAS IMPLÍCITAS,
INCLUYENDO AQUÉLLAS DE COMERCIABILIDAD, IDONEIDAD PARA UN FIN O USO EN
PARTICULAR, DESEMPEÑO, U OTROS TIPOS, LAS CUALES QUEDAN EXCLUIDAS
MEDIANTE EL PRESENTE DOCUMENTO. FOCUS ELECTRICS, LLC RECHAZA TODA
RESPONSABILIDAD POR DAÑOS, YA SEAN DIRECTOS, INDIRECTOS, INCIDENTALES,
PREVISIBLES, CONSECUENTES O ESPECIALES QUE SURJAN DE ESTE APARATO
ELECTRODOMÉSTICO O GUARDEN RELACIÓN CON EL MISMO.
Si piensa que el artefacto electrodoméstico se ha dañado o requiere de servicio dentro de su
período de garantía, por favor póngase en contacto con el Departamento de Atención al
Cliente de Focus Electrics por el (866) 290-1851 o contáctenos por correo electrónico a la
service@focuselectrics.com. Los gastos de devolución no son reembolsables. Para todas las
reclamaciones de garantía, se requerirá un recibo que demuestra la fecha de compra original,
los recibos escritos a mano no son aceptados. Focus Electrics, LLC no se hace
responsable de las devoluciones perdidas en tránsito.
Válido sólo en EE.UU. y Canadá
R
EPUESTOS
Las partes de repuestos, si están disponibles, pueden pedirse directamente en línea a Focus
Electrics en www.focuselectrics.com, o puede llamar o enviar un correo electrónico al
departamento de servicio al número telefónico o dirección de correo electrónico arriba
indicados, o escribiéndonos a:
Focus Electrics, LLC
Attn: Customer Service
P. O. Box 2780
West Bend, WI 53095
Cerciórese de incluir el número de catálogo/modelo del aparato electrodoméstico (situado en la
parte inferior/posterior de la unidad) así como la descripción y la cantidad de repuestos que
necesita. Junto con esta información, incluya su nombre, dirección postal, número de tarjeta
de crédito Visa o MasterCard, la fecha de vencimiento y el nombre tal como aparece en la
tarjeta. Los cheques pueden ser pagaderos a Focus Electrics, LLC. Llame al Departamento
de Atención al Cliente para obtener el monto de la compra. Se sumará al total el impuesto de
venta estatal que corresponda, más un cargo por despacho y procesamiento. La entrega
tarda dos (2) semanas.
Este manual contiene información importante y útil sobre el uso seguro y el cuidado de su
nuevo producto Focus Electrics. Para su propia referencia, archive aquí el recibo fechado que
sirve de comprobante de compra para la garantía, y anote la siguiente información:
Fecha en que compró o recibió la unidad como regalo: _______________________________
Dónde se efectuó la compra y el precio, si lo sabe: ___________________________________
Número y código de fecha del producto (aparece en la parte inferior/posterior de la unidad):
___________________________________
L5800 01/10 West Bend®, una Marca de Focus Electrics, LLC. Impreso en China
14
Page 44

N
OTAS
 Loading...