

Page 1
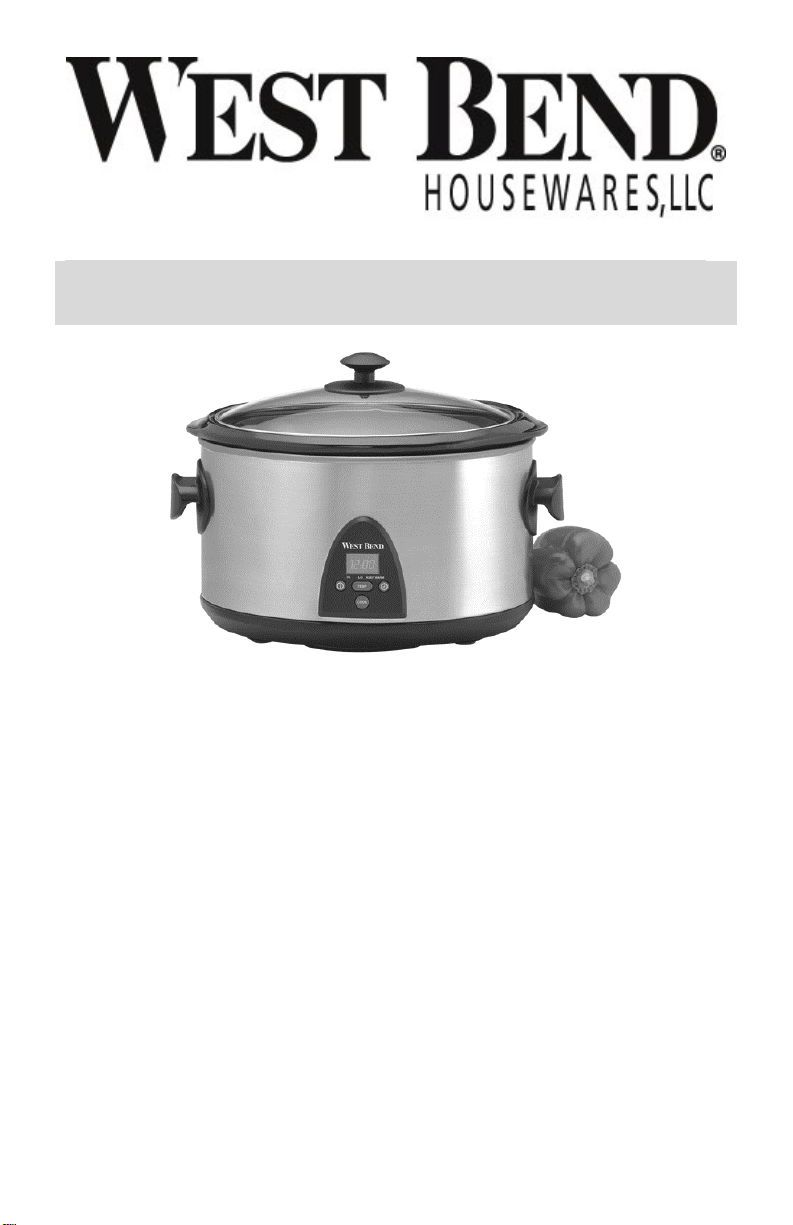
6-QUART ELECTRONIC CROCKERY™ COOKER
Instruction Manual
Register this and other West Bend® Housewares products through our website:
www.westbend.com
Important Safeguards...............................................................................................2
Heat Precautions...................................................................................................... 2
Electricity Precautions.............................................................................................. 3
Precautions For Use Around Children...................................................................... 4
Using Your Crockery Cooker....................................................................................4
Cleaning Your Crockery Cooker...............................................................................5
Helpful Hints.............................................................................................................5
Recipes....................................................................................................................7
Warranty.................................................................................................................12
SAVE THIS INSTRUCTION MANUAL FOR FUTURE REFERENCE
Page 2
IMPORTANT SAFEGUARDS
To prevent personal injury or property damage, read and follow all instructions
and warnings.
When using electrical appliances, basic safety precautions should always be
followed including the following:
• Read all instructions, including these important safeguards and the care and use
instructions in this manual.
• Do not use appliance for other than intended use.
• The use of accessory attachments not recommended by West Bend®
Housewares may cause injuries.
• Do not use ceramic cooking pot or glass cover if it is chipped or has deep
scratches. Weakened glass and ceramic can shatter during use. Discard
immediately. See Replacement Part section in this booklet on how to obtain a
replacement part.
• Do not set glass cover on oven burner or oven heat vent. Sudden temperature
changes may cause the cover to shatter.
• Glass and ceramic are breakable. Care should be taken not to drop or impact
the ceramic cooking pot or glass cover. If the cover breaks it will do so in many
pieces. Avoid or discard any foodstuffs exposed to cracked pot or broken cover.
• Do not attempt to repair this appliance yourself.
• For household use only.
To prevent burns, personal injury or property damage, read and follow all
instructions and warnings.
HEAT PRECAUTIONS
• Do not touch hot surfaces. Use hot pads or oven mitts if you lift or carry the
ceramic pot or cover when it is hot.
• Do not move an appliance containing hot oil or other hot liquids.
• Lift cover slowly, directing steam away from you.
• Set ceramic pot and cover on hot pad, trivet or other heat protective surface. Do
not set hot ceramic pot or cover directly on the counter, table or other surface.
• Do not preheat the heating base.
• Do not add frozen/cold foods or liquids into heated ceramic pot. Sudden
temperature change may cause the cover or ceramic pot to crack or shatter.
• Do not use the ceramic pot or cover on the stove top, under the broiler, in the
freezer, or in the oven. You may use the ceramic pot in the microwave oven, but
do not place the glass cover in the microwave oven as it has a metal ring.
2
Page 3
To prevent electrical shock, personal injury or property damage, read and
follow all instructions and warnings.
ELECTRICITY PRECAUTIONS
• To protect against electric shock do not immerse cord, plugs, or other electric
parts in water or other liquids.
• Do not operate any appliance with a damaged cord or plug.
• Do not operate when the appliance is not working properly or when it has been
damaged in any manner. For service information see warranty page.
• Do not use electric parts outdoors, or place them on or near a gas or electric
burner, in a heated oven, or in the refrigerator.
• Always turn control to OFF and unplug the appliance from outlet when not in use
and before cleaning. Allow to cool before putting on or taking off parts.
• Your crockery cooker has a short cord as a safety precaution to avoid pulling,
tripping or entanglement. To avoid pulling, tripping or entanglement, position the
cord so that it does not hang over the edge of the counter, table or other flat
surface areas or touch hot surfaces.
• While use of an extension cord is not recommended, if you must use one, make
sure the cord has the same or higher wattage as the crockery cooker (wattage is
stamped on the underside of the crockery cooker base). To avoid pulling, tripping
or entanglement, position the cord so that it does not hang over the edge of the
counter, table or other flat surface areas or touch hot surfaces.
• Use an electrical outlet that accommodates the polarized plug on the crockery
cooker. On a polarized plug, one blade of the plug is wider than the other. To
reduce the risk of electric shock, this plug is intended to fit into a polarized outlet
only one way. If the plug does not fit fully into the outlet or extension cord,
reverse the plug. If the plug still does not fit fully, contact a qualified electrician.
Do not alter the plug.
• Do not use an outlet or extension cord if the plug fits loosely or if the outlet or
extension cord feels hot.
• Keep the cord away from hot parts of the appliance and hot surfaces during
operation.
3
Page 4
To prevent burns or other personal injuries to children, read and follow all
instructions and warnings.
PRECAUTIONS FOR USE AROUND CHILDREN
• Always supervise children.
• Do not allow children to operate or be near the crockery cooker, as the outside
surfaces are hot during use.
• Do not allow cord to hang over any edge where a child can reach it. Arrange cord
to avoid pulling, tripping or entanglement.
SAVE THESE INSTRUCTIONS
USING YOUR CROCKERY COOKER – EVERYDAY USE
• Before using for the first time, wash the ceramic pot and cover with hot soapy
water, rinse and dry.
1. Place heating base on dry, level, heat-resistant surface, away from any edge.
2. Place foods into ceramic pot, cover and place into heating base. If you need to
brown or precook foods – you must use a separate skillet or pan. Direct heat
from the stovetop or oven will break the ceramic pot. Plug cord into a 120 volt
AC electric outlet only.
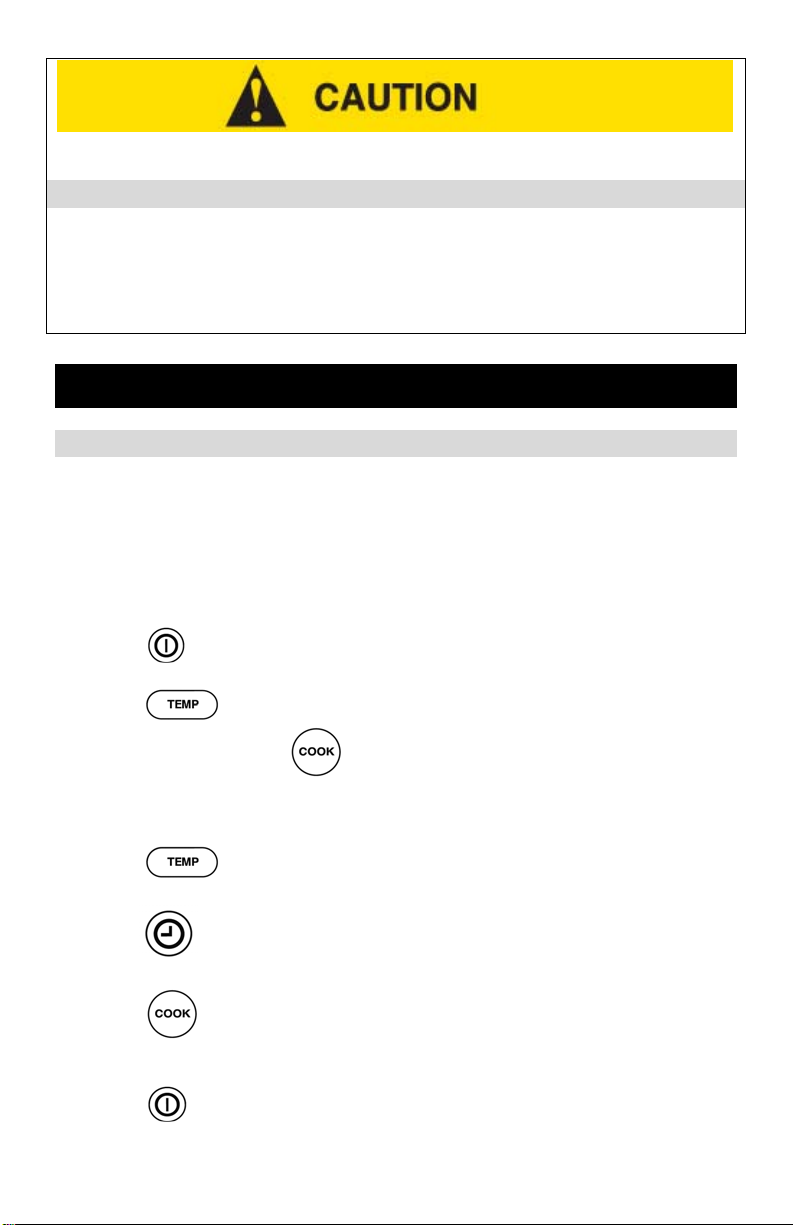
3. Press
indicated with a flashing green light.
4. Press to select HI, LO, or WARM setting.
5. To turn cooker on press
time.
To program cooking time:
1. Press
cooking time.
2. Press
hours).
On/Off button. SEL will be displayed and HI temperature setting is
. Display will count up, showing elapsed cooking
. Note: Only HI or LO settings are available for programmed
(time) button to scroll up to desired cooking time (between 4 to 12
3. Press to start cooking cycle. When the cycle is completed the crockery
cooker will shift to the WARM setting and timer will count up from zero showing
the elapsed time on warm.
4. Press
On/Off button to turn off your crockery cooker.
4
Page 5

CLEANING YOUR CROCKERY COOKER
1. Allow the entire unit (base, ceramic pot and cover) to cool before cleaning. Set
ceramic pot and cover on dry, heat-protective surface for gradual cooling.
2. Wipe heating base and cord with a damp cloth after it has been unplugged and
the base is cool.
3. Ceramic pot and cover may be washed using hot soapy water by hand or
cleaned in the dishwasher. Avoid contact between pieces to prevent damage.
• Do not run cold water over hot ceramic pot or cover, as they may crack if cooled
suddenly.
• Do not immerse heating base, cord, plugs or other electric parts in water or other
liquid.
• Use a non-abrasive cleanser or baking soda paste to remove stains. Do not use
metal scouring pads or cleansers. Wipe with distilled vinegar to remove water
spots or mineral deposits. Rewash with hot soapy water, rinse and dry.
HELPFUL HINTS
• The thermostat may temporarily lose calibration due to temperature changes
resulting in an E01 error message on the display. Repeat the following steps to
reset the unit.
1. Unplug the unit from the wall socket for approximately 10 seconds.
2. Plug the unit back into the wall socket.
3. Press the POWER button once. Within one second, press the COOK button
once. The unit should now be reset.
• To extend or change cooking cycle time, press time button and scroll to new
cycle time. Press Cook to initiate cycle.
• To change temperature setting, press the TEMP button at any time. Changing
temp to WARM will automatically shift timer to show elapsed time.
Programmable cooking is not available with WARM setting.
• The Cook button confirms your suggested settings and turns on the crockery
cooker. If you fail to press the cook button, the display will beep and flash to
alert you. After approximately 10 seconds, the crockery cooker will start in the
displayed mode.
• The crockery cooker will automatically shut off after 20 hours of total cooking
time. To disable this feature, press the COOK and TIMER buttons
simultaneously when the unit is on. If the colon separating the numeric digits on
the display is not flashing, the auto shutoff feature has been disabled. You will
now be able to cook longer than 20 hours. Press the On/Off button to turn off
the cooker.
• Some smoke and/or odor may occur upon heating due to the release of
manufacturing oils – this is normal.
• Some expansion/contraction sounds may occur during heating and cooling –
this is normal
5
Page 6

• If your crockery cooker has a Warm function, do NOT cook foods on this setting
as the temperature does not get hot enough to cook foods. Use Warm setting
only to keep hot, cooked foods warm for serving.
• Avoid removing the cover when cooking. Cooking time will be increased due to
loss of heat. Remove cover only when necessary to stir or add ingredients.
Always lift cover slowly, directing steam away from you.
• After food is cooked, set to lowest setting for serving or turn control to OFF position.
• Unplug cord from electric outlet after use and allow the crockery cooker to cool
before cleaning.
• Do not allow children to use the crockery cooker or be around the crockery
cooker, as the outside surfaces of the crockery cooker are hot during use.
• Use only plastic, rubber, wooden or non-metal cooking tools with ceramic pot.
Use of metal cooking tools may scratch the ceramic pot.
• Stir foods occasionally to reduce sticking to sides of ceramic pot.
• Foods will be brought to a simmer at all cooking settings. The setting determines
the time needed to reach a simmer.
• If the ceramic pot is filled less then half full, suggested cooking times should be
reduced.
• Less tender, less expensive cuts of meat are better suited to slow cooking then
expensive cuts of meat. Remove excess fat from meat when possible before
cooking. Remove skin from poultry, if desired, before cooking.
• Raw vegetables take longer to cook than meats as the liquid simmers rather than
boils. Cut vegetables into uniform, bite-size pieces to cook evenly.
• You may fill the ceramic pot with food the night before cooking and refrigerate.
When ready, place ceramic pot into the heating base and cook. The gradual
warming will not harm the ceramic pot.
• Insert a meat thermometer into roast, hams or whole chickens to ensure meats
are cooked to recommended temperature. Fresh or thawed fish and seafood fall
apart during long hours of cooking. Add these ingredients an hour before serving.
• Milk, sour cream and natural cheese break down during long hours of cooking.
Add these ingredients just before serving or substitute with undiluted condensed
creamed canned soups or evaporated milk. Processed cheese tends to give
better results than naturally aged cheese.
• Rice and pasta may be added uncooked during the last hour of cooking time. If
added uncooked, make sure there are at least two cups of liquid in the cooking
pot. Stir occasionally to prevent sticking.
• Do not strike utensils against ceramic cooking pot or cover rim. Glass cover or
ceramic cooking pot may shatter as a result.
6
Page 7
RECIPES
Many of your favorite recipes may be adapted to the West Bend® Housewares
Crockery Cooker. To do so, use the following guide.
If your recipe says to cook
for…
Cook at LO for… Cook at HI for…
30 minutes 6 to 8 hours 3 to 4 hours
35 to 60 minutes 8 to 10 hours 5 to 6 hours
1 to 3 hours 10 to 12 hours 7 to 8 hours
Try some of our favorite recipes using the West Bend® Housewares, LLC Crockery
Cooker that we have included on the following pages to get you started.
Chicken Vegetable Stew
2-2 1/2lbs chicken parts - skinned if desired
5 carrots – cut into 1/2-inch pieces
3 ribs celery – cut into 1/2-inch pieces
1 7 ounce can mushroom stems and pieces – undrained
1
onion, chopped
1 16 ounce bag frozen peas – rinsed with hot water
1 tsp salt
3
/4tsp dried thyme leaves
3
/4tsp paprika
1
/2tsp rubbed sage
1
/2tsp pepper
1 1/2cups water
1 6 ounce can tomato paste
2 10.5 ounce cans chicken broth
4 tbsp cornstarch
1
/3cup water
15 ounce jar whole small onions – undrained – OR 1 medium
Cooking Time: LO = 8 to 10 hours HI = 5 to 6 hours
1. Place chicken parts, carrots, celery, mushrooms, onions and peas in ceramic
cooking pot. In medium bowl combine salt, thyme, paprika, sage, pepper, water,
tomato paste and broth. Pour over chicken mixture.
2. Place ceramic pot into heating base, cover and cook at desired heat setting for
time given or until chicken and vegetables are tender.
3. Remove chicken pieces and set aside to cool slightly. Remove meat from bones
and cut into bite-size pieces. Return meat to cooking pot; stir to combine.
4. Set control to HI. Combine cornstarch and water; stir slowly into stew until
thickened. Serves 6 to 8. Set at LO for serving if desired.
7
Page 8
Slow Cooker Stew
2–21/2lbs beef stew meat, cut into 1-inch pieces
1 medium onion – chopped
6 carrots – cut into 1/2-inch pieces
4 ribs celery – cut into 1/2-inch pieces
5 medium potatoes – cut into 1/2-inch pieces
1 28 ounce can whole tomatoes – undrained – cut up
2 10.5 ounce cans beef broth
1 1/2tbsp worcestershire sauce
2 tbsp dried parsley flakes
2 bay leaves
1 1/2tsp salt
1
/2tsp pepper
3 tbsp quick cooking tapioca
Cooking Time: LO = 8 to 10 hours HI = 5 to 6 hours
1. Combine all ingredients in ceramic cooking pot; stir to blend.
2. Place ceramic pot into the heating base, cover and cook at desired heat setting
for time given or until meat and vegetables are tender. Remove bay leaves
before serving. Serves 6 to 8. Set at LO for serving if desired.
Chili
2 lbs lean ground beef or turkey
1 1/2cups chopped onion
1 1/2cups chopped green pepper
2 garlic cloves - minced
3 28 ounce cans whole tomatoes – undrained – cut up
1 15 ounce can kidney beans - undrain ed
2 1/2tbsp chili powder
1 1/2tsp ground cumin
1 1/2tsp salt
3
/4tsp pepper
Cooking Time: LO = 8 to 10 hours HI = 4 to 5 hours
1. Brown ground beef or turkey with onion, green pepper and garlic in skillet over
medium heat of range unit. Remove excess grease. Transfer mixture into
ceramic pot. Add remaining ingredients; stir to blend.
2. Place ceramic pot into heating base, cover and cook at de sired heat setting for
time given. Serves 6 to 8. Set at LO for serving, if desired.
8
Page 9
Hearty Chicken Noodle Soup
2–2 1/2lbs chicken parts, skinned if desired
6 cups water
1 medium onion - chopped
6 carrots – cut into 1/2-inch pieces
5 ribs of celery – cut into 1/2-inch pieces
1 14.5 ounce can whole tomatoes – undrained – cut up
1 1/2tbsp instant chicken bouillon
1 tbsp dried parsley flakes
1 tsp salt
1
/2tsp dried rosemary leaves
1
/2tsp pepper
1 cup uncooked fine egg noodles
Cooking Time: LO = 8 to 10 hours HI = 5 to 6 hours
1. Combine all ingredients, except egg noodles in the ceramic pot. Place cook ing
pot into heating base, cover and cook at desired heat setting for time given or
until chicken and vegetables are tender.
2. Remove chicken pieces from ceramic pot and set aside to cool slightly. Set
control to HI and add noodles, stirring to combine. Cover and continue to cook
30 minutes.
3. Remove chicken from bones and cut into bite-size pieces. Return meat to
cooking pot and cook until noodles are tender. Serves 6 to 8. Set at LO for
serving, if desired.
Corned Beef and Cabbage
3 – 4 lbs corned beef brisket
1 medium onion – sliced
1
/2tsp celery seed
1
/2tsp mustard seed
1 clove garlic – minced
1 bay leaf
1 small head cabbage – cut into wedges
water
Cooking Time: LO = 8 to 10 hours
1. Place brisket with liquid and spices from package into ceramic cooking pot. Add
onion, celery seed, mustard seed, garlic and bay leaf. Add just enough water to
cover brisket. Cover and cook at LO for 8 to 10 hours or until brisket is fork
tender.
2. During last hour of cooking, add cabbage wedges and continue cooking at LO.
Discard cooking liquid and spices. Serves 6.
9
Page 10
Minestrone Soup
3 cups water
2 10.5 ounce cans chicken broth
1 medium onion - chopped
3 carrots – diced
1 medium zucchini, halved and cut into 1/2 - inch slices
1 1/2cups cabbage - chopped
1 15 ounce can garbanzo beans - undrained
3 14.5 ounce cans whole tomatoes – undrained – cut-up
5 slices bacon – cooked & crumbled – optional
2 garlic cloves - minced
1 1/2tsp Italian seasoning
1 tsp salt
1
/2tsp pepper
3
/4cup small elbow macaroni or other pasta - uncooked
Cooking Time: LO = 8 to 10 hours HI = 5 to 6 hours
1. Combine all ingredients, except macaroni in the ceramic pot; stir to blend. Place
cooking pot into heating base, cover and cook at desired heat setting for time
given or until vegetables are tender.
2.
Increase heat to HI setting and add macaroni; stir to blend. Cover and cook for
30 minutes. Serves 6 to 8. Set at LO for serving, if desired.
Company Chicken
3 - 4 lbs chicken parts, skinned if desired
salt and pepper to taste
2 10.5 ounce cans condensed cream of mushroom soup
2 10.5 ounce cans condensed tomato soup
1
/4 cup flour
2 cloves garlic – minced
1
sliced and separated into rings
Cooking Time: LO = 8 to 10 hours HI = 5 to 6 hours
1. Season chicken parts with salt and pepper and place into ceramic cooking pot.
In bowl, combine remaining ingredients, stirring well to blend. Pour over chicken.
2. Cover and cook at desired heat setting for time given or until chicken is tender.
Serves 6 to 8. Set at LO for serving, if desired.
16 ounce jar small whole onions – drained, OR 1 large onion -
10
Page 11
Herbed Pork Roast
4 large garlic cloves – quartered
5 lbs pork roast – boneless or bone -in
1 tsp salt
1 tsp ground thyme
1
/2tsp rubbed sage
1
/2tsp ground cloves
1 tsp grated l emon peel
1
/2cup water
3 tbsp cornstarch - optional
3 tbsp water - optional
Cooking Time: LO = 9 to 10 hours HI = 5 to 6 hours
1. Cut 16 small pockets into roast and insert garlic pieces. In small bowl combine
salt, thyme, sage, cloves and lemon peel. Rub on pork roast.
2. Pour
3. Allow roast to stand 10 to 15 minutes before carving. Remove garlic pieces.
1
/2 cup water into the ceramic cooking pot. Add roast. Place pot into
heating base, cover and cook at desired heat setting for time given or until meat
thermometer inserted into center of roast reads 170°F or higher.
Juices may be thickened for gravy if desired. Dissolve cornstarch in water. Set
control to HI. Stir slowly into juices until thickened. Serves 6 to 8.
Beef Roast with Vegetables
3–31/2lbs beef roast
salt and pepper to taste
1 large onion – quartered or sliced
6 carrots – cut into 1-inch pieces
6 medium potatoes – quartered and halved
1
/2cup water
Cooking Time: LO = 9 to 10 hours HI = 5 to 6 hours
1. If desired, brown roast in skillet over medium heat of range unit before placing
into ceramic cooking pot. Season as desired. Place vegetables around roast.
Add water.
2. Place ceramic pot into heating base, cover and cook at de sired heat setting for
time given or until meat and vegetables are tender. (Meat thermometer should
read 170°F for well done). Thicken juices with mixture of 2 tablespoons
cornstarch and 2 tablespoons water if desired. Set control to HI and slowly stir
mixture into juices until thickened. Serves 6. Set at LO for serving, if desired.
11
Page 12

PRODUCT WARRANTY
Appliance 1 Year Limited Warranty
West Bend® Housewares, LLC warrants this appliance from failures in the material and
workmanship for 1 year from the date of original purchase, provided the appliance is operated
and maintained in conformity with the West Bend® Housewares, LLC Instruction Manual. Any
failed part of the appliance will be repaired or replaced without charge at West Bend®
Housewares, LLC discretion. This warranty applies to indoor household use only.
The West Bend® Housewares, LLC warranty does not cover any damage, including
discoloration, to any non-stick surface of the appliance. The West Bend® Housewares, LLC
warranty is null and void, as determined solely by West Bend® Housewares, LLC, if the
appliance is damaged through accident, misuse or abuse, scratching, overheating, or if the
appliance is altered in any way or if used outside of an indoor household setting.
This warranty gives you specific legal rights. You may also have other rights, which may vary
from state to state.
THIS WARRANTY IS IN LIEU OF ALL IMPLIED WARRANTIES, INCLUDING WARRANTIES
OF MERCHANTABILITY, FITNESS FOR A PARTICULAR PURPOSE, PERFORMANCE, OR
OTHERWISE, WHICH ARE HEREBY EXCLUDED. IN NO EVENT SHALL WEST BEND®
HOUSEWARES, LLC BE LIABLE FOR ANY DAMAGES, WHETHER DIRECT, IMMEDIATE,
INCIDENTAL, FORESEEABLE, CONSEQUENTIAL, OR SPECIAL, ARISING OUT OF OR IN
CONNECTION WITH ITS APPLIANCE.
If you think the appliance has failed or requires service within its warranty period, return it to the
original place of purchase. For further details please contact the West Bend® Housewares
Customer Service Department at (262) 334-6949 or e-mail us at housewares@westbend.com.
Return shipping fees are non-refundable. Hand-written receipts are not accepted. West Bend
Housewares, LLC is not responsible for returns lost in transit.
Valid only in USA and Canada
REPLACEMENT PARTS
Replacement parts may be ordered direct from West Bend® Housewares, LLC by ordering
online at www.westbend.com: Replacement Parts. Or you may call or e-mail the service
department at the number/e-mail address listed above, or by writing to us at:
West Bend Housewares, LLC
Attn: Customer Service
P.O. Box 2780
West Bend, WI 53095
Be sure to include the catalog/model number of your appliance (located on the bottom/back of
the unit) and a description and quantity of the part you wish to order. Along with this include
your name, mailing address, Visa/MasterCard number, expiration date and the name as it
appears on the card. Checks can be made payable to West Bend Housewares, LLC Call
Customer Service to obtain purchase amount. Your state’s sales tax and a shipping/processing
fee will be added to your total charge. Please allow two (2) weeks for delivery.
This manual contains important and helpful information regarding the safe use and care of your new West
Bend® Housewares, LLC product. For future reference, attach dated sales receipt for warranty proof of
purchase and record the following information:
Date purchased or received as gift: _______________________________________________________
Where purchased and price, if known: ____________________________________________________
Item Number and Date Code (shown bottom/back of product): ___________________________________________
L5617B 08/06 West Bend Housewares, LLC A Focus Products Group Company Printed in China
12
Page 13

AUTOCUISEUR ÉLECTRIQUE DE 6 QUARTS
Mode d’emploi
Enregistrez ce produit et les autres produits West Bend® Housewares sur notre site
Internet :
www.westbend.com
Précautions importantes...........................................................................................2
Précautions de sécurité à haute température...........................................................2
Précautions de sécurité relative à l’électricité...........................................................3
Précautions pour une utilisation en présence d’enfants...........................................4
Utilisation de votre autocuiseur ............................................................................... 4
Nettoyage de votre autocuiseur ...............................................................................5
Conseils utiles..........................................................................................................5
Recettes................................................................................................................... 7
Garantie .................................................................................................................12
CONSERVEZ CE MODE D’EMPLOI POUR UNE CONSULTATION ULTERIEURE
Page 14

PRÉCAUTIONS IMPORTANTES
Pour empêcher toute blessure physique ou tout dommage matériel, lisez et
suivez toutes les consignes et mises en garde.
Lorsque vous utilisez des appareils électriques, les précautions de sécurité élémentaires
devraient toujours être respectées, notamment les précautions ci-dessous :
• Lisez toutes les instructions, notamment les présentes précautions importantes, ainsi que
les consignes pour l’entretien de ce manuel.
• N’utilisez pas l’appareil pour un autre usage que celui pour lequel il a été conçu.
• L’utilisation de fixations accessoires non recommandés par West Bend® Housewares
risque de provoquer des blessures.
• N’utilisez pas de marmite en céramique ni de couvercle en verre si ceux-ci sont ébréchés
ou comportent des rayures profondes. Un verre fragilisé risquerait de se briser en cours
d’utilisation. Mettez-les au rebut immédiatement. Voir la section des « Pièces de
rechange » de ce livret pour savoir comment obtenir une pièce de rechange.
• Ne posez pas le couvercle de verre sur le brûleur du four ni sur l’évacuation de chaleur du
four. Le couvercle risquerait de se briser sous l’effet de brusques changements de
température.
• Le verre et la céramique cassent. Vous devriez veiller à ne pas laisser tomber ni heurter le
couvercle de verre. Si le couvercle se brise, il se brisera en de nombreux éclats. Evitez de
consommer ou jetez tout aliment mis en contact avec un couvercle brisé.
• N’essayez pas de réparer cet appareil vous-même.
• Pour une utilisation domestique uniquement.
Pour empêcher toute brûlure, toute blessure physique ou tout dommage
matériel, lisez et suivez toutes les consignes et mises en garde.
PRÉCAUTIONS DE SÉCURITÉ À HAUTE TEMPÉRATURE
• Ne touchez pas les surfaces à haute température. Utilisez des maniques ou des gants antichaleur si vous soulevez ou déplacez le récipient en céramique ou le couvercle lorsque
ceux-ci sont chauds.
• Ne déplacez pas un appareil contenant de l’huile ou d’autres liquides à haute température.
• Soulevez doucement le couvercle en dirigeant la vapeur loin de vous.
• Laissez reposer le récipient en céramique et le couvercle sur une manique, sur un support
de cuisson métallique ou sur toute autre surface résistant à la chaleur. Ne placez pas le
récipient en céramique ou le couvercle à haute température directement sur le comptoir, la
table ou toute autre surface.
• Ne préchauffez pas la base chauffante.
• N’ajoutez pas d’aliments surgelés/froids ni de liquides dans le récipient en céramique à
haute température. Un brusque changement de température risque de provoquer une
fissure du couvercle ou du récipient en céramique voire de le faire voler en éclats.
• N’utilisez pas le récipient en céramique ni le couvercle sur la cuisinière, sous la rôtissoire,
dans le congélateur ou au four. Vous pouvez utiliser le récipient en céramique au four à
micro-ondes mais ne placez pas le couvercle en verre au four à micro-ondes car il
comporte un anneau métallique.
2
Page 15

Pour empêcher tout choc électrique, toute blessure physique ou tout
dommage matériel, lisez et suivez toutes les consignes et mises en garde.
PRÉCAUTIONS DE SÉCURITÉ RELATIVE À L’ÉLECTRICITÉ
• Pour vous protéger contre tout choc électrique, n’immergez pas le cordon, les fiches
ni aucune autre pièce électrique dans l’eau ni dans tout autre liquide.
• N’utilisez aucun appareil électrique dont le cordon ou la fiche est en mauvais état.
• N’utilisez pas le poêlon électrique s’il ne fonctionne pas correctement ou s’il a été
détérioré de quelque manière que ce soit. Pour des renseignements concernant les
réparations, voir la page de garantie.
• N’utilisez pas les pièces électriques à l’extérieur et ne les placez pas sur ou à
proximité d’une gazinière ou d’un réchaud électrique, dans un four chaud, ni au
réfrigérateur.
• Positionnez toujours la commande sur OFF puis débranchez l’appareil électrique de
la prise secteur lorsque vous ne l’utilisez pas et avant de le nettoyer. Laissez
l’appareil refroidir avant la mise en place ou le retrait de pièces et avant tout
nettoyage.
• Le fait que votre autocuiseur dispose d’un cordon court constitue une précaution de
sécurité visant à éviter que celui-ci soit tiré, que quelqu’un s’y prenne les pieds ou
que celui-ci s’emmêle. Positionnez le cordon de rallonge de sorte qu’il ne pende pas
au-dessus du bord du plan de travail, de la table ou de toute autre surface plate et
qu’il n’entre pas en contact avec des surfaces à haute température.
• Bien que l’utilisation d’un cordon de rallonge ne soit pas recommandée, si vous
devez en utiliser un, veillez à ce que ce cordon supporte le même nombre de watts
ou un nombre de watts plus élevé que l’autocuiseur (le nombre de watts est inscrit
au-dessous de la base de l’autocuiseur). Positionnez le cordon de rallonge de sorte
qu’il ne pende pas au-dessus du bord du plan de travail, de la table ou de toute autre
surface plate et qu’il n’entre pas en contact avec des surfaces à haute température.
• Utilisez une prise secteur qui accepte la fiche polarisée de l’autocuiseur. Sur une
fiche polarisée, une des lames de la fiche est plus large que l’autre. Afin de diminuer
le risque d’électrocution, cette fiche est conçue pour s’adapter dans un sens
uniquement sur une prise secteur polarisée.
• Si la fiche ne s’enfonce pas complètement dans la prise secteur ou dans le cordon
de rallonge, retournez-la. Si la fiche ne s’enfonce toujours pas entièrement,
contactez un électricien qualifié. Ne modifiez pas la fiche.
• N’utilisez pas une prise secteur ou un cordon de rallonge si la fiche s’y adapte avec
un jeu ou si cette prise secteur ou ce cordon de rallonge vous semblent chauds.
• Maintenez le cordon à l’écart des pièces à haute température de l’appareil et de
toute surface à haute température pendant l’utilisation.
3
Page 16

Pour empêcher toute brûlure ou toute autre blessure physique des enfants,
lisez et suivez toutes les consignes et mises en garde.
PRÉCAUTIONS POUR UNE UTILISATION EN PRÉSENCE D’ENFANTS
• Ne laissez jamais les enfants sans surveillance.
• Ne laissez pas des enfants utiliser l’autocuiseur ni s’en approcher car la température
des surfaces extérieures est très élevée pendant l’utilisation.
• Ne laissez pas le cordon pendre au-dessus de toute extrémité où un enfant risquerait
de l’atteindre. Positionnez le cordon de façon à éviter qu’il soit tiré, qu’on s’y prenne
les pieds ou qu’il s’emmêle.
CONSERVEZ CES CONSIGNES
UTILISATION QUOTIDIENNE DE VOTRE AUTOCUISEUR
• Avant la première utilisation, veuillez laver le récipient en céramique et le couvercle à
l’eau savonneuse chaude, les rincer puis les sécher.
1. Placez la base chauffante sur une surface sèche, plane et résistante à la chaleur,
loin du bord.
2. Placez les aliments dans le récipient en céramique, couvrez-le puis placez-le à
l’intérieur de la base chauffante. Si vous avez besoin de faire dorer ou de précuire
les aliments : vous devez utiliser un poêlon ou une casserole séparés. La chaleur
directe de la gazinière ou du four risquerait de briser le récipient en céramique.
Branchez le cordon dans une prise secteur de 120 volts AC uniquement.
3. Appuyez sur le bouton Marche/Arrêt . SEL s’affiche et le paramétrage de
température HI est indiqué par une voyant clignotant vert.
4. Appuyez sur
5. Pour mettre l’autocuiseur en marche, appuyez sur
décompte, affichant le temps de cuisson écoulé.
Pour programmer la durée de cuisson :
1. Appuyez sur
disponibles pour la durée de cuisson programmée.
2. Appuyez sur le bouton
de cuisson souhaitée (De 4 à 12 heures).
3. Appuyez sur
terminé, l’autocuiseur passe au paramétrage WARM et le minuteur commence un
décompte à partir de zéro affichant le temps écoulé sur le réglage WARM.
4. Appuyez sur le bouton Marche/Arrêt pour éteindre votre
autocuiseur.Nettoyage de votre autocuiseur.
pour sélectionner le paramétrage HI, LO ou WARM.
. L’affichage commence un
. Remarque : Seuls les paramétrages HI ou LO sont
(heure) pour faire défiler les minutes jusqu’à la durée
pour commencer le cycle de cuisson. Lorsque le cycle est
4 5
Page 17

1. Laissez la totalité de l’appareil (base, récipient en céramique et couvercle) refroidir
avant tout nettoyage. Placez le récipient en céramique et le couvercle sur une
surface sèche, résistante à la chaleur pour un refroidissement progressif.
2. Essuyez la base chauffante et le cordon à l’aide d’un chiffon humide après l’avoir
débranché et une fois que la base a refroidi.
3. Le récipient en céramique et le couvercle peuvent être lavés à l’eau savonneuse
chaude à la main ou au lave-vaisselle. Evitez tout contact entre les pièces afin
d’éviter toute détérioration.
• Ne faites pas couler d’eau froide sur le récipient en céramique ou le couvercle à haute
température, cela risquerait de les faire se fissurer s’ils se ref r oi dissaient
brusquement.
• N’immergez pas la base chauffante, le cordon, les fiches ou toute autre partie
électrique dans de l’eau ou dans tout autre liquide.
• Utilisez un détergent non abrasif ou une pâte à soda de cuisine pour éliminer les
tâches. N’utilisez pas de tampons à récurer métalliques ni de détergents. Essuyez
l’appareil avec du vinaigre distillé afin d’éliminer les tâches d’eau ou les pépôts
minéraux. Lavez à nouveau à l’eau savonneuse chaude, rincez et séchez.
CONSEILS UTILES
• Le thermostat peut momentanément perdre son calibrage en raison de changements
de température ; ceci provoque l’affichage d’un message d’erreur E01 sur l’écran.
Répétez les étapes ci-dessous pour réinitialiser l’appareil.
1. Débranchez l’appareil de la prise secteur murale pendant environ 10 secondes.
2. Rebranchez l’appareil sur la prise secteur murale.
3. Appuyez une fois sur la touche POWER (MARCHE). Moins d’une seconde plus tard,
appuyez une fois sur la touche COOK (CUISSON). L’appareil devrait maintenant être
réinitialisé.
• Afin d’allonger ou de modifier la durée du cycle de cuisson, veuillez appuyer sur le
bouton de l’heure puis le faire défiler jusqu’à une nouvelle durée de cycle. Appuyez
sur Cook pour initier le cycle.
• Pour modifier le paramétrage de température, appuyez sur le bouton TEMP à tout
moment. La modification de la température vers WARM fait automatiquement
basculer le minuteur qui affichera la durée écoulée. La cuisson programmable n’est
pas disponible avec le paramétrage WARM.
• Le bouton Cook confirme vos suggestions de paramétrage et met l’autocuiseur en
marche. Si vous n’appuyez pas sur le bouton Cook, l’affichage émet un bip et
clignote pour vous avertir. Après approximativement de 10 seconde, l’autocuiseur
démarre dans le mode affiché.
• L’autocuiseur s’éteint automatiquement après 20 heures de durée de cuisson totale.
Pour désactiver cette fonction, enfoncez simultanément les touches COOK
(CUISSON) et TIMER (MINUTEUR) lorsque l’appareil est sous tension. Si les deux
points qui séparent les chiffres sur l’écran ne clignotent pas, la fonction de mise hors
tension automatique a été désactivée. Vous pourrez maintenant cuisiner pendant
plus de 20 heures.
(On/Off).
• Il est possible que de la fumée et une légère odeur se dégagent pendant le
chauffage en raison de la diffusion des huiles de fabrication : c’est tout à fait normal.
• Des bruits d’expansion/contraction peuvent être produits pendant le chauffage et le
refroidissement : c’est tout à fait normal.
• Si votre autocuiseur a une fonction WARM, ne cuisinez PAS les aliments sur ce
réglage car la température n’est pas suffisamment élevée pour cuire les aliments.
Utilisez le paramétrage Warm uniquement pour maintenir au chaud des aliments
déjà cuits afin qu’ils soient prêts pour le service.
Pour éteindre l’autocuiseur, appuyez sur la touche Marche/Arrêt
Page 18

• Evitez de retirer le couvercle pendant la cuisson. La durée de cuisson sera
augmentée en raison de la déperdition de chaleur. Retirez le couvercle uniquement
lorsque cela se révèle nécessaire afin de mélanger ou d’ajouter des ingrédients.
Soulevez toujours doucement le couvercle en dirigeant la vapeur loin de vous.
• Une fois que les aliments sont cuits, réglez le paramètre le plus faible pendant le service
ou tournez la commande en position Arrêt (OFF).
• Débranchez le cordon de la prise secteur après utilisation et laissez l’autocuiseur
refroidir avant de la nettoyer.
• Ne laissez pas les enfants utiliser l’autocuiseur ou se trouver à proximité de
l’autocuiseur car les surfaces externes de l’autocuiseur atteignent une température
très élevée pendant son utilisation.
• Utilisez uniquement des ustensiles de cuisine en plastique, en caoutchouc, en bois
ou non-métalliques avec le récipient en céramique. L’utilisation d’ustensiles de
cuisine métallliques risque de provoquer des rayures sur le récipient en céramique.
• Mélangez les aliments de temps en temps pour éviter qu’ils n’adhèrent aux côtés du
récipient en céramique.
• Les aliments seront mijotés quels que soient les paramètres de cuisson. Le réglage
détermine la durée nécessaire pour parvenir au mijotage.
• Si le récipient en céramique est rempli à moins de la moitié, les durées de cuisson
suggérées devraient être réduites.
• Les morceaux de viande les moins tendres et les moins chers conviennent mieux à
une cuisson lente que les morceaux de viandes plus onéreux. Retirez tout excès de
graisse de la viande lorsque cela se révèle possible avant la cuisson. Retirez la peau
de la volaille, si vous le souhaitez, avant la cuisson.
• Les légumes crus sont plus longs à cuire que les viandes car le liquide mijode plus
qu’il ne bout. Découpez les légumes en petits morceaux de tailles homogènes pour
une cuisson régulière.
• Vous pouvez remplir le récipient en céramique la nuit précédant la cuisson et le
placer au réfrigérateur. Lorsque tout est prêt, placez le récipient en céramique à
l’intérieur de la base chauffante et faites cuire. Le réchauggement progressif ne
détériorera pas le récipient en céramique.
• Insérez un thermomètre de cuisine dans les rôtis, les jambons ou les poulets entiers
pour vous assurer que les viandes sont cuites à la température recommandée. Les
poissons frais ou crus et les fruits de mert se décomposent pendant les longues
heures de la cuisson. Ajoutez ces ingrédients une heure avant de servir.
• Le lait, la crème sure et le fromage naturelle se décomposent pendant les longues
heures de cuisson. Ajoutez ces ingrédients justen avant le service ou remplacez-les
par des soupes en boite crémeuses condensées non diluées ou du lait évaporé. Les
fromages affinés ont tendance à produire de meilleurs résultats que les fromages à
vieillissement naturel.
• Du riz et des pâtes peuvent être ajoutés crus pendant la dernière heure de cuisson.
Si vous les ajoutez crus, assurez-vous qu’au moins deux mesures de liquide se
trouvent dans le pot de cuisson. Remuez de temps en temps pour éviter que les
aliments n’adhèrent aux parois du récipient.
• Ne frappez pas la marmite en céramique ni le bord du couvercle avec des ustensiles
de cuisine. Cela risquerait de provoquer l’éclatement du couvercle de verre ou de la
marmite en céramique.
6
Page 19

RECETTES
Un grand nombre de vos recettes favorites peuvent être adaptées à la mijoteuse West Bend®
Housewares. Pour ce faire, utilisez le guide suivant.
Si votre recette indique une
cuisson de :
30 minutes 6 à 8 heures 3 à 4 heures
35 à 60 minutes 8 à 10 heures 5 à 6 heures
1 à 3 heures 10 à 12 heures 7 à 8 heures
Essayez certaines de nos recettes favorites avec la mijoteuse Crockery de West Bend®
Housewares, LLC qui apparaissent aux pages suivantes.
Ragoût de poulet et de légumes
2-2 1/2livres morceaux de poulet - sans la peau si désiré
5 carottes en dés de 1 cm
3 côtes de céleri en dés de 1 cm
1 boîte de 207 ml de tiges et morceaux de champignons – non égouttés
1 boîte de 444 ml de petits oignons entiers – non égouttés – OU
1 oignon moyen haché
1 sachet de 450 g de petits pois surgelés – rincés à l’eau chaude
1 c. à thé sel
3
/4c. à thé feuilles de thym sèches
3
/4c. à thé paprika
1
/2c. à thé sauge sèche
1
/2c. à thé poivre
1 1/2tasses d’eau
1 boîte de 170 g de concentré de tomates
2 boîtes de 310 ml de bouillon de poulet
4 c. à soupe maïzena
1
/3tasse eau
Cuisez sur LO
pendant :
Cuisez sur HI
pendant :
Temps de cuisson : LO = 8 à 10 heures HI = 5 à 6 heures
1. Placez les morceaux de poulet, les carottes, le céleri, les champignons, les oignons et les
petits pois dans la mijoteuse en céramique. Dans un bol moyen, mélangez le sel, le thym,
le paprika, la sauge, le poivre, l’eau, le concentré de tomates et le bouillon. Versez sur le
mélange de poulet.
2. Placez le récipient en céramique sur le socle chauffant, couvrez et cuisez à la température
désirée pendant la durée indiquée ou jusqu’à ce que le poulet et les légumes soient tendres.
3. Retirez les morceaux de poulet et mettez-les de côté pour les faire refroidir. Pendant ce
temps, désossez le poulet et coupez-le en petits morceaux. Remettez-le dans la
mijoteuse ; mélangez intimement.
4. Réglez le thermostat à HI. Combinez la maïzena et l’eau ; mélangez lentement dans le
ragoût jusqu’à ce que la sauce épaississe. Pour 6 à 8 personnes. Réglez sur LO pour
servir au besoin.
7
Page 20

Ragoût
2–21/2livres livres de bœuf pour ragoût, en dés de 2,5 cm
1 oignon moyen – haché
6 carottes en dés de 1 cm
4 côtes de céleri en dés de 1 cm
5 pommes de terre moyennes en dés de 1 cm
1 boîte de 793 g de tomates entières – non égouttées et coupées
en morceaux
2 boîtes de 310 ml de bouillon de poulet
1 1/2c. à soupe sauce Worcestershire
2 c. à soupe flocons de persil séché
2 feuilles de laurier
1 1/2c. à thé sel
1
/2c. à thé poivre
3 c. à soupe tapioca à cuisson rapide
Temps de cuisson : LO = 8 à 10 heures HI = 5 à 6 heures
1. Mélangez tous les ingrédients dans la mijoteuse en céramique ; mélangez intimement.
2. Placez le récipient en céramique sur le socle chauffant, couvrez et cuisez à la température
désirée pendant la durée indiquée ou jusqu’à ce que la viande et les légumes soient
tendres. Retirez les feuilles de laurier avant de servir. Pour 6 à 8 personnes. Réglez à LO
au besoin pour le service.
Chili
2 livres bœuf ou dinde haché(e) maigre
1 1/2tasse oignon haché
1 1/2tasse poivron vert haché
2 gousses d’ail - émincées
3 boîte de 793 g de tomates entières – non égouttées et coupées
en morceaux
1 boîte de 425 g de haricots en grains - non égouttés
2 1/2c. à soupe chili en poudre
1 1/2c. à thé cumin en poudre
1 1/2c. à thé sel
3
/4c. à thé poivre
Temps de cuisson : LO = 8 à 10 heures HI = 4 à 5 heures
1. Faites dorer le bœuf ou la dinde avec l’oignon, le poivron vert et l’ail dans une poêle sur
feu moyen (cuisinière). Égouttez l’excès de graisse. Transférez le mélange dans le
récipient en céramique. Ajoutez les autres ingrédients ; mélangez intimement.
2. Placez le récipient en céramique sur le socle chauffant, couvrez et faites cuire à la
température souhaitée pendant la durée indiquée. Pour 6 à 8 personnes. Réglez sur LO
pour servir au besoin.
8
Page 21

Soupe au poulet et aux nouilles
2–2 1/2livres de morceaux de poulet - sans la peau si désiré
6 tasse eau
1 oignon moyen – haché
6 carottes en dés de 1 cm
5 côtes de céleri en dés de 1 cm
1 boîte de 411 g de tomates entières – non égouttées et coupées
en morceaux
1 1/2c. à soupe bouillon de poulet instantané
1 c. à soupe flocons de persil séché
1 c. à thé sel
1
/2c. à thé de feuilles de romarin sèches
1
/2c. à thé poivre
1 tasse nouilles aux œufs fines crues
Temps de cuisson : LO = 8 à 10 heures HI = 5 à 6 heures
1. Combinez tous les ingrédients, sauf les nouilles aux œufs, dans le récipient en
céramique. Placez la mijoteuse dans le socle chauffant, couvrez et faites cuire à la
température désirée pendant la durée indiquée ou jusqu’à ce que le poulet et les légumes
soient tendres.
2. Retirez les morceaux de poulet du récipient et mettez-les de côté pour les laisser
légèrement refroidir. Réglez la température sur HI et ajoutez les nouilles, en mélangeant
intimement. Couvrez et poursuivez la cuisson pendant 30 minutes.
3. Pendant ce temps, désossez le poulet et coupez-le en petits morceaux. Remettez la
viande dans la mijoteuse et faites cuire jusqu’à ce que les nouilles soient tendres. Pour
6 à 8 personnes. Réglez à LO au besoin pour le service.
Pot-au-feu de bœuf salé
3 – 4 livres poitrine de bœuf salé
1 oignon moyen – en tranches
1
/2c. à thé graines de céleri
1
/2c. à thé graines de moutarde
1 gousse d’ail – émincée
1 feuille de laurier
1 petit chou pommé – coupé en quartiers
eau
Temps de cuisson : LO = 8 à 10 heures
1. Placez la poitrine, le liquide et les épices du paquet dans le récipient de cuisson en
céramique. Ajoutez l’oignon, les graines de céleri, les graines de moutarde, l’ail et la feuille
de laurier. Ajoutez juste assez d’eau pour couvrir la poitrine. Couvrez et laissez cuire sur
LO pendant 8 à 10 heures ou jusqu’à ce que la poitrine se détache à la fourchette.
2. Durant la dernière heure de cuisson, ajoutez les quartiers de chou et continuez la cuisson
sur LO. Jetez le liquide de cuisson et les épices. Pour 6 personnes.
9
Page 22

Minestrone
3 tasses eau
2 boîtes de 310 ml de bouillon de poulet
1 oignon moyen – haché
3 carottes – en dés
1 courgette moyenne, coupée en deux dans le sens de la longueur, puis
en tranches de 6 mm de largeur
1 1/2tasse chou - haché
1 boîte de 425 g de pois chiches - non égouttés
3 boîte de 411 g de tomates entières – non égouttées et coupées
en morceaux
5 tranches de bacon – cuit et en miettes – facultatif
2 gousses d’ail - émincées
1 1/2c. à thé herbes de Provence
1 c. à thé sel
1
/2c. à thé de poivre
3
/4tasse coquillettes, macaronis ou autres pâtes - crues
Temps de cuisson : LO = 8 à 10 heures HI = 5 à 6 heures
1. Combinez tous les ingrédients, sauf les macaronis, dans le récipient en céramique ;
mélangez. Placez la mijoteuse dans le socle chauffant, couvrez et faites cuire à la
température désirée pendant la durée indiquée ou jusqu’à ce que les légumes soient tendres.
Montez le feu à HI et ajoutez les macaronis ; mélangez. Couvrez et laissez cuire
2.
30 minutes. Pour 6 à 8 personnes. Réglez à LO au besoin pour le service.
Poulet de fête
3 – 4 livres de morceaux de poulet - sans la peau si désiré
sel et poivre
2 boîtes de 310 ml de soupe aux champignons onctueuse condensée
2 boîtes de 310 ml de soupe aux tomates condensée
1
/4 tasse farine
2 gousses d’ail – émincées
1 boîte de 444 ml de petits oignons entiers – égouttés, OU 1 gros
oignon - en tranches séparées en lanières
Temps de cuisson : LO = 8 à 10 heures HI = 5 à 6 heures
1. Salez et poivrez les morceaux de poulet et placez-les dans le récipient de cuisson en
céramique. Dans un bol, combinez les autres ingrédients, en mélangeant intimement.
Versez sur le poulet.
2. Couvrez et faites cuire à la température désirée pendant la durée indiquée ou jusqu’à ce
que le poulet soit tendre. Pour 6 à 8 personnes. Réglez à LO au besoin pour le service.
10
Page 23

Rôti de porc aux herbes
4 grosses gousses d’ail – coupées en 4
5 livres rôti de porc – désossé ou sur l’os
1 c. à thé sel
1 c. à thé thym en poudre
1
/2c. à thé sauge sèche
1
/2c. à thé clous de girofle en poudre
1 c. à thé zeste de citron râpé
1
/2tasse eau
3 c. à soupe maïzena - facultatif
3 c. à soupe eau - facultatif
Temps de cuisson : LO = 9 à 10 heures HI = 5 à 6 heures
1. Piquez d’ail le rôti en 16 endroits. Dans un petit bol, mélangez le sel, le thym, la sauge, les
clous de girofle et le zeste de citron. Frottez-en le rôti de porc.
2. Versez
3. Laissez reposer le rôti pendant 10 à 15 minutes avant de le couper en tranches. Retirez les
1
/2 tasse d’eau dans le récipient de cuisson en céramique. Ajoutez le rôti. Placez la
mijoteuse dans le socle chauffant, couvrez et faites cuire à la température désirée
pendant la durée indiquée ou jusqu’à ce qu’un thermomètre à viande inséré dans le centre
du rôti affiche au moins 77 °C (170 °F).
morceaux d’ail. Les jus de cuisson peuvent être épaissis en sauce. Dissoudre la maïzena
dans l’eau. Réglez le thermostat à HI. Mélangez lentement dans les sucs de la viande
jusqu’à épaississement. Pour 6 à 8 personnes.
Rôti de bœuf aux légumes
3–31/2livres rôti de bœuf
sel et poivre
1 gros oignon coupé en quatre ou en tranches
6 carottes en dés de 2,5 cm
6 pommes de terre moyennes coupées en 4 et en 2
1
/2tasse eau
Temps de cuisson : LO = 9 à 10 heures HI = 5 à 6 heures
1. Au besoin, faites dorer le rôti dans une poêle sur feu moyen (cuisinière) avant de le
transférer dans la mijoteuse en céramique. Assaisonnez à votre goût. Disposez les
légumes autour du rôti. Ajoutez l’eau.
2. Placez le récipient en céramique sur le socle chauffant, couvrez et cuisez à la température
désirée pendant la durée indiquée ou jusqu’à ce que la viande et les légumes soient
tendres. (Un thermomètre à viande doit indiquer 170 °F pour une viande cuite à cœur).
Épaississez les jus de cuisson en ajoutant 2 c. à soupe de maïzena mélangées à 2 c. à
soupe d’eau, si désiré. Réglez le thermostat à HI et mélangez lentement jusqu’à
épaississement. Pour 6 personnes. Réglez à LO au besoin pour le service.
11
Page 24

GARANTIE DU PRODUIT
Garantie de l’appareil limitée à 1 an
West Bend® Housewares, LLC garantit le présent appareil contre tout défaut de pièce et de main
d’oeuvre pendant 1 an à compter de la date de l’achat initial, à condition que l’appareil soit utilisé et
entretenu conformément au mode d’emploi de West Bend® Housewares, LLC. Toute pièce
défectueuse de l’appareil sera réparée ou remplacée sans frais à la discrétion de West Bend®
Housewares, LLC. Cette garantie s’applique aux appareils ménagers d’intérieur uniquement.
La garantie de West Bend® Housewares, LLC ne couvre aucune détérioration, notamment la
décoloration, de toute surface anti-adhésive de cet appareil. La garantie de West Bend®
Housewares, LLC est nulle et non avenue, comme déterminé uniquement par West Bend®
Housewares, LLC, si l’appareil est détérioré en raison de tout accident, de toute mauvaise utilisation
ou de tout abus, de toute rayure, de toute surchauffe, ou si l’appareil est modifié de quelque manière
que ce soit ou s’il est utilisé à l’extérieur du cadre d’un intérieur domestique.
Cette garantie vous confère des droits particuliers. Il possible que vous ayez également d’autres
droits, qui sont susceptibles de varier d’un état à un autre.
CETTE GARANTIE ANNULE ET REMPLACE TOUTE GARANTIE INDUITE, NOTAMMENT LES
GARANTIES DE COMMERCIABILITÉ, D’ADAPTATION À UN USAGE PARTICULIER, DE
FONCTIONNEMENT OU AUTRE, QUI SONT PAR LA PRÉSENTE EXCLUES. EN AUCUN CAS WEST
BEND® HOUSEWARES, LLC NE POURRA ETRE CONSIDÉRÉ COMME RESPONSABLE DE TOUTE
DÉTÉRIORATION, QUE CELLE-CI SOIT DIRECTE, IMMÉDIATE, INDIRECTE, PRÉVISIBLE, UNE
CONSÉQUENCE OU PARTICULIÈRE, RÉSULTANT DE L’UTILISATION DE CET APPAREIL OU EN
RAPPORT AVEC SON UTILISATION.
Si vous pensez que cet appareil est défectueux ou a besoin d’être réparé pendant la durée de sa
garantie, rapportez-le au lieu de l’achat d’origine. Pour de plus amples renseignements, veuillez
contacter le Service client de West Bend® Housewares au (262) 334-6949 ou nous envoyer un e-mail
à housewares@westbend.com. Les frais de port pour le retour ne sont pas remboursables. Les
factures manuscrites ne sont pas acceptées. West Bend Housewares, LLC n’est pas responsable des
appareils retournés qui sont perdus penda nt le tr an sport.
Valable uniquement aux USA et au Canada
PIECES DE RECHANGE
Vous pouvez commander des pièces de rechange directement auprès de West Bend® Housewares,
LLC en commandant en ligne sur le site Internet : www.westbend.com: Pièces de rechange. Vous
pouvez également appelez ou envoyer un e-mail au service des réparations au numéro/à l’adresse email indiqué(e) ci-dessus ou nous écrire à :
West Bend Housewares, LLC
Attn: Customer Service
P.O. Box 2780
West Bend, WI 53095
Veillez à inclure le numéro du modèle/catalogue de votre appareil (situé au-dessous/au dos de l’appareil) et
une description ainsi que la quantité de la pièce que vous souhaitez commander. Indiquez également votre
nom, votre adresse postale, votre numéro de carte Visa/Mastercard, la date d’expiration et le nom tel qu’il
figure sur la carte. Les chèques peuvent être rédigés à l’ordre de West Bend Housewares, LLC. Appelez le
service client pour connaître le montant de votre achat. Les taxes de votre état ainsi qu’un honoraire
d’expédition/traitement seront ajoutés à votre prix total. Vous recevrez votre envoi sous deux (2) semaines.
Ce guide contient des renseignements importants et utiles concernant l’utilisation sans danger et
l’entretien de votre nouveau produit West Bend® Housewares, LLC. Pour une consultation ultérieur, fixez
le reçu de caisse daté pour la preuve d’achat nécessaire à la garantie puis inscrivez les renseignements
ci-dessous :
Date d’achat ou de réception en cadeau : __________________________________________________
Lieu d’achat et prix, si connus : ____________________________________________________
Numéro de l’article et Code de la date (indiqués au bas/dos du produit) : __________________________
L5617B 08/06 West Bend Housewares, LLC A Focus Products Group Company Printed in China
12
Page 25

OLLA ELÉCTRICA DE 6 CUARTOS
Manual de instrucciones
Registre este y otros productos West Bend® Housewares a través de nuestro sitio
web.
www.westbend.com
Precauciones importantes.................................................................................................2
Precauciones relativas al calor.......................................................................................... 2
Precauciones eléctricas.....................................................................................................3
Precauciones de uso cerca de niños.................................................................................4
Cómo usar su olla eléctrica ...............................................................................................4
Cómo limpiar su olla eléctrica............................................................................................5
Consejos útiles...................................................................................................................5
Recetas..............................................................................................................................7
Garantía...........................................................................................................................12
CONSERVE ESTE MANUAL DE INSTRUCCIONES PARA FUTURAS
CONSULTAS
Page 26

PRECAUCIONES IMPORTANTES
Para evitar lesiones personales o daños mater iales, lea y acate todas las instrucciones
y advertencias.
Al utilizar artefactos electrodomésticos, siempre deben acatarse las precauciones básicas de
seguridad incluyendo las siguientes:
• Lea todas las instrucciones, incluyendo estas precauciones importantes, así como las instrucciones de
uso y cuidado en este manual.
• No utilice el aparato para usos distintos del indicado.
• El uso de accesorios no recomendados por West Bend® Housewares, LLC puede causar lesiones.
• No use la olla de cerámica o la tapa de vidrio si están desportilladas o tienen rasguños
profundos. El vidrio y la cerámica debilitados pueden romperse durante su uso.
¡Descártelo inmediatamente! Vea en la sección de Piezas de Repuesto en este folleto cómo
obtener una pieza de repuesto.
• No coloque la tapa de vidrio sobre el quemador del horno o el orificio de ventilación del
calor del horno. Los cambios de temperaturas repentinos pueden hacer que la tapa se
rompa.
• El vidrio y la cerámica son frágiles. Debe tenerse cuidado en no dejar caer o batir la olla de
cerámica o la tapa de vidrio. Si la tapa se rompe, lo hará en muchos pedazos. Evite o
deseche cualquier alimento expuesto a la olla rajada o a la tapa rota.
• No trate de reparar este aparato electrodoméstico usted mismo.
• Sólo para uso doméstico.
Para evitar quemaduras, lesiones personales o daños materiales, lea y acate
todas las instrucciones y advertencias.
PRECAUCIONES RELATIVAS AL CALOR
• No toque las superficies calientes. Use almohadillas aislantes o guantes para
hornos si va a levantar o portar la cazuela de cerámica o la tapa mientras estén
calientes.
• No mueva artefacto electrodoméstico alguno que contenga aceite u otros líquidos
calientes.
• Levante la tapa lentamente de tal forma que el vapor salga en dirección opuesta a
usted.
• Coloque la cazuela de cerámica o la tapa sobre una almohadilla, una trébedes u
otra superficie protectora contra el calor. No coloque la cazuela de cerámica
caliente directamente sobre la encimera, la mesa u otra superficie.
• No precaliente la base de calentamiento.
• No agregue alimentos o líquidos congelados/fríos dentro de la cazuela de
cerámica ya calentada. Un cambio repentino de temperatura puede causar que la
tapa o la cazuela de cerámica se rajen o hagan añicos.
• No coloque la cazuela de cerámica o la tapa sobre la estufa, debajo de la parrilla,
en el congelador, o en el horno. Usted puede colocar la cazuela de cerámica
dentro del horno de microondas, pero no la tapa de vidrio dado que ésta lleva
puesto un aro de metal.
2
Page 27

Para evitar descargas eléctricas, lesiones personales o daños materiales, lea y
acate todas las instrucciones y advertencias.
PRECAUCIONES ELÉCTRICAS
• Para protegerse contra descargas eléctricas no sumerja el cable, enchufes, u otras
partes eléctricas en agua u otros líquidos.
• No opere aparato electrodoméstico alguno con el cordón eléctrico o el enchufe
dañado.
• No opere el artefacto cuando no funcione correctamente o haya sido dañado de
algún modo. Para información relativa al servicio vea la página de garantías.
• No use las piezas eléctricas a la intemperie, ni las coloque cerca de un quemador a
gas o eléctrico, en el horno caliente, ni en el refrigerador.
• Cuando no esté usando el artefacto o antes de limpiarlo, siempre coloque el control
en la posición OFF (apagado) y desenchufe el artefacto. Deje que se enfrie antes de
poner o quitar alguna parte, y antes de limpiar.
• Su olla eléctrica tiene un cordón eléctrico corto como medida de precaución para
impedir el halado, tropiezo o enredo accidental con el mismo. A fin de impedir que se
hale, tropiece o enrede con el cordón eléctrico, colóquelo de tal modo que no cuelgue
del borde de la encimera, mesa u otra superficie o que toque superficies calientes.
• No se recomienda usar un cable de extensión, pero si debe hacerlo, cerciórese de
que el vataje del mismo sea igual o superior al de la olla eléctrica (el vataje está
estampado debajo de la base). A fin de impedir que se hale, tropiece o enrede con el
cordón eléctrico, colóquelo de tal modo que no cuelgue del borde de la encimera,
mesa u otra superficie o que toque superficies calientes.
• Use un tomacorriente en el cual encaje el enchufe polarizado de la olla eléctrica. En
un enchufe polarizado, una hoja es más ancha que la otra. Para reducir el riesgo de
una descarga eléctrica, este enchufe está diseñado para encajar de una sola manera
dentro del tomacorriente polarizado. Invierta el enchufe si éste no encaja
completamente en el tomacorriente o el cable de extensión. Si todavía no encaja,
consulte con un electricista calificado. No altere el enchufe.
• No use un tomacorriente o cable de extensión en el cual el enchufe calza flojamente,
o si el tomacorriente o el cable de extensión se sienten calientes.
• Mantenga el cable alejado de las piezas calientes del aparato y superficies calientes
durante el uso.
3
Page 28

Para prevenir quemaduras u otras lesiones en los niños, lea y acate todas las
instrucciones y advertencias.
PRECAUCIONES DE USO CERCA DE NIÑOS
• Siempre supervise de cerca cuando haya niños.
• No permita que los niños usen o estén cerca de la olla eléctrica ya que las superficies
externas de éste se calientan al usarse.
• No permita que el cordón eléctrico cuelgue de algún borde donde pueda ser
alcanzado por los niños. Coloque el cordón eléctrico de modo que se eviten lesiones
que resulten del halar, tropezarse o enredarse en el mismo.
CONSERVE ESTAS INSTRUCCIONES
CÓMO USAR SU OLLA ELÉCTRICA – USO DIARIO
• Antes de usarla por primera vez, lave la cazuela de cerámica y la tapa con agua
jabonosa caliente, enjuáguelas y séquelas.
1. Coloque la base de calentamiento sobre una superficie seca, nivelada, y resistente
al calor, lejos de cualquier borde.
2. Coloque los alimentos en la cazuela de cerámica, tápela y colóquela sobre la base
de calentamiento. Si necesita dorar o precocinar los alimentos, debe hacerlo en una
sartén o cacerola. diferente. El calor directo de la estufa u horno romperá la cazuela
de cerámica. Enchufe el cable solamente a tomacorrientes de corriente alterna de
120 voltios.
3. Pulse el botón
(encendido) y se indicará el punto de control de temperatura alta (HI) con una luz
verde intermintente.
4. Pulse
(baja) o WARM (tibia).
5. Para encender la olla eléctrica pulse . El display mostrará el tiempo de
cocción que ha transcurrido.
Para programar el tiempo de cocción:
1. Pulse
temperatura HI (alta) y LOW (baja) para cocinar con tiempo programado.
2. Pulse el botón
4 a 12 horas.)
3. Pulse
olla eléctrica pasara al control de ajuste de temperatura WARM (tibio) y el reloj
empezará a contar a partir de cero el tiempo transcurrido bajo calentamiento en tibio.
4. Pulse el botón
de encendido/apagado. Se mostrará el display SEL
para seleccionar el punto de control de temperatura: HI (alta), LO
Nota: Solamente están disponibles los puntos de control de
(tiempo) para introducir el tiempo de cocción deseado (Entre
para iniciar el ciclo de cocción. Cuando se haya completado el ciclo, la
de encendido/apagado para apagar la olla eléctrica.
4
Page 29

CÓMO LIMPIAR SU OLLA ELÉCTRICA
1. Permita que la unidad entera (base, olla de cerámica y tapa) se enfríen antes de
empezar a limpiarla. Para que se enfríe gradualmente, coloque la cazuela de
cerámica sobre una superficie seca y que dé protección contra el calor.
2. Una vez se haya desenchufado la unidad y la base se haya enfriado, pase un trapo
húmedo sobre la base de calentamiento y el cordón eléctrico .
3. La cazuela de cerámica y la tapa pueden lavarse a mano con agua jabonosa
caliente o lavarse en el lavavajillas. Evite que las piezas hagan contacto entre sí
para prevenir cualquier daño a las mismas.
• No deje caer agua fría sobre la cazuela de cerámica o la tapa calientes, pues
pudieran rajarse si se enfrían de repente.
• No sumerja la base de calentamiento, cordón eléctrico, enchufes, u otras partes
eléctricas en agua u otro líquido.
• Para eliminar las manchas use un limpiador no abrasivo o pasta de bicarbonato de
sodio. No use esponjas o limpiadores metálicos. Para eliminar las manchas de agua
o los depósitos minerales pase un trapo humedecido con vinagre destilado. Vuelva a
lavar con agua jabonosa caliente, enjuague y seque.
CONSEJOS ÚTILES
• El termostato puede perder su calibración de manera temporal debido a cambios de
temperatura que resultases en un mensaje de error E01 en la pantalla. Repita los
siguientes pasos para reajustar la unidad:
1. Desenchufe la unidad del enchufe de la pared durante aproximadamente 10
segundos.
2. Vuelva a enchufar la unidad al enchufe de pared.
3. Presione el botón "POWER" (corriente) una vez. Acto seguido, en menos de un
segundo, presione el botón COOK (cocinar) una sola vez. La unidad deberá
haberse reajustado.
• Para alargar o cambiar el tiempo del ciclo de cocción, pulse el botón del reloj y entre
un nuevo tiempo del ciclo. Pulse COOK (cocinar) para iniciar el ciclo.
• Para cambiar el punto de ajuste de la temperatura, pulse el botón TEMP en
cualquier momento. El cambiar la temperatura a WARM (tibio) automáticamente
cambiará al reloj para mostrar el tiempo transcurrido. No hay cocción programable
disponible con el punto de ajuste WARM (tibio).
• El botón COOK (cocinar) confirma sus puntos de ajuste sugeridos y enciende la olla
eléctrica. Para desactivar esta función, pulse simultáneamente los botones COOK
(cocinar) y TIMER (temporizador) mientras la unidad esté encendida. Si los dos
puntos que separan a los dígitos numéricos en la pantalla no estuviese destellando,
la función de apagado automático ha sido desactivada. Ahora podrá cocinar por
lapsos de tiempo mayores a 20 horas.
• La olla eléctrica se apagará automáticamente tras 20 horas de tiempo de cocción
total. Para desactivar esta función, pulse simultáneamente los botones de cocinar y
del reloj. Ahora podrá cocinar por más de 20 horas, La pantalla leerá 0:00 y para
confirmar que usted está en el modo de cocción extendida los dos puntos : no
parpadearán. Al final de las 20 horas, la pantalla leerá---. Presione el botón ON/OFF
(encendido/apagado) para apagar la estufa.
• Al calentarla podrá emitirse una pequeña cantidad de humo y/o un leve olor a causa
de la emanación de aceites usados en la fabricación - esto es normal.
• Durante el calentamiento y enfriamiento pudieran ocurrir algunos ruidos menores de
expansión y contracción - esto es normal.
5
Page 30

• Si su olla eléctrica tiene incorporada la función WARM (tibio), NO cocine alimentos
en este punto de ajuste ya que la temperatura no es lo suficientemente alta para
cocinar los alimentos. Use el punto de ajuste WARM (tibio) solamente para
mantener calientes a los alimentos ya cocidos mientras se sirven.
• Evite retirar la tapa al cocinar. Se incrementará el tiempo de cocción debido a la
pérdida de calor. Retire la tapa solamente cuando sea necesario agitar o agregar
ingredientes. Siempre levante la tapa lentamente de tal forma que el vapor salga en
dirección opuesta a usted.
• Una vez cocido el alimento, coloque el ajuste de temperatura al punto más bajo
mientras sirve o gire el control a la posición OFF (apagado).
• Al terminar de usar la olla eléctrica, desenchufe el cordón eléctrico y permita que la
olla se enfríe antes de limpiarla.
• No permita que los niños usen la olla eléctrica o se mantengan alrededor de ella,
pues la superficie de la misma se mantiene caliente durante su uso.
• Con la cazuela de cerámica, use solamente utensilios de plástico, hule, madera o no
metálicos. El uso de utensilios metálicos puede rayarla.
• Ocasionalmente agite los alimentos para reducir la adhesión de los mismos a la
cazuela de cerámica.
• Los alimentos se pueden llevar al punto de hervor con todos los puntos de ajuste de
cocción. El punto de ajuste determina el tiempo requerido para llegar a hervir.
• Si la cazuela de cerámica se ha llenado a menos de la mitad, los tiempos sugeridos
de cocción deberá reducirse.
• Los cortes de carne menos tiernos y menos caros son más apropiados para ser
cocidos lentamente que los cortes de carne más caros. En lo posible, elimine el
exceso de grasa de la carne antes de cocerla. Si se desea, quítele la piel a las aves
antes de cocerlas.
• Los vegetales crudos tardan más en cocinarse que las carnes dado que el líquido
hierve con menos vigor. Pique los vegetales uniformemente en piezas tamaño
bocado para cocerlas parejamente.
• La noche anterior, usted puede llenar la cazuela de cerámica y refrigerarla. Cuando
esté lista, coloque la cazuela de cerámica dentro de la base de calentamiento y
cocine los alimentos. El calentamiento gradual no dañara a la cazuela de cerámica,
• Inserte un termómetro de carne dentro de los asados, jamones o pollos enteros para
asegurarse de que las carnes se hayan cocido hasta la temperatura recomendada.
El pescado fresco y el descongelado al igual que los mariscos se despedazan si se
cuecen durante largas horas. Agregue estos ingredientes una hora antes de servir.
• La leche, la crema agria y los queso naturales se descomponen si se cuecen
durante largas horas. Agregue estos ingredientes justo antes de servir o sustitúyalos
con sopas cremosas condensadas en lata o con leche evaporada. Los quesos
procesados tienden a dar mejores resultados que los quesos añejados
naturalmente.
• Arroz y pasta sin cocinar puede agregarse durante la última hora del tiempo de
cocción. Si se agregan sin cocinar, asegúrese de que hayan por lo menos dos tazas
de líquido en la olla eléctrica. Agite ocasionalmente para evitar que se pegue la
comida.
• No golpee utensilios contra la olla de cerámica o el borde de la tapa. La tapa de
vidrio o la olla de cerámica pueden romperse a causa de ello.
6
Page 31

RECETAS
Muchas de sus recetas favoritas puede prepararlas en su olla Crockery de West Bend®
Housewares. Para ello, use la siguiente guía.
Si la receta recomienda…
Cocinar en LO (baja)
durante…
30 minutos 6 a 8 horas 3 a 4 horas
35 a 60 minutos 8 a 10 horas 5 a 6 horas
1 a 3 horas 10 a 12 horas 7 a 8 horas
Prepare algunas de nuestras recetas favoritas con la olla Crockery de West Bend®
Housewares, LLC que hemos incluido en las siguientes páginas.
Guisado de pollo con verduras
2-2 1/
2
5 zanahorias cortadas en trocitos de 1/2 pulgada
3 palitos de apio cortados en trocitos de 1/2 pulgada
1 lata de 7 onzas de tallos y trozos de champiñones, sin drenar
1 frasco de 15 onzas de cebollas pequeñas enteras sin drenar,
O BIEN 1 cebolla mediana picada
1 bolsa de 16 onzas de arvejas congeladas, enjuagadas en
agua caliente
1 cucharadita de sal
3
/
4
3
/
4
1
/
2
1
/
2
1 1/
2
1 lata de 6 onzas de pasta de tomate
2 latas de 10.5 onzas de caldo de pollo
4 cucharadas de maicena
1
/
3
libras de trozos de pollo sin piel, si lo desea
cucharadita de hojas secas de tomillo
cucharadita de pimentón
cucharadita de salvia pulverizada
cucharadita de pimienta
tazas de agua
taza de agua
Cocinar en HI (alta)
durante…
Tiempo de cocción: LO (baja) = 8 a 10 horas HI (alta) = 5 a 6 horas
1. Coloque en la olla cerámica el pollo, las zanahorias, el apio, los champiñones, las
cebollas y las arvejas. En un recipiente mediano combine la sal, el tomillo, el pimentón, la
salvia, la pimienta, el agua, la pasta de tomates y el caldo. Viértalos en la mezcla de pollo.
2. Coloque la olla cerámica en la base calentadora, tápela y cocine en el ajuste de temperatura
deseado según el tiempo indicado o hasta que el pollo y las verduras estén blandos.
3. Retire los trozos de pollo y apártelos para que se enfríen un poco. Retire los huesos y
corte la carne en trozos comestibles. Devuelva la carne a la olla cerámica y revuelva
para combinarla.
4. Fije el control en HI (alta). Combine la maicena y el agua, y viértala lentamente en el
guisado mientras lo revuelve hasta que se torne espeso. Rinde 6 a 8 porciones. Si lo
desea, fije la temperatura en LO (baja) para servir.
7
Page 32

Guisado en olla de cocción lenta
2–21/2libras de de carne de res para guisar, cortada en trozos de 1 pulgada
1 cebolla mediana picada
6 zanahorias cortadas en trocitos de 1/2 pulgada
4 palitos de apio cortados en trocitos de 1/2 pulgada
5 papas medianas, cortadas en trocitos de 1/2 pulgada
1 lata de 28 onzas de tomates enteros, sin drenar, cortados
en trozos
2 latas de 10.5 onzas de caldo de res
1 1/2cucharadas de salsa Worcestershire
2 cucharadas de hojuelas secas de perejil
2 hojas de laurel
1 1/2cucharaditas de sal
1
/2cucharadita de pimienta
3 cucharadas de tapioca de cocción rápida
Tiempo de cocción: LO (baja) = 8 a 10 horas HI (alta) = 5 a 6 horas
1. Combine todos los ingredientes en la olla cerámica y revuélvalos para mezclarlos bien.
2. Coloque la olla cerámica en la base calentadora, tápela y cocine en el ajuste de
temperatura deseado según el tiempo indicado o hasta que la carne y las verduras estén
blandas. Retire las hojas de laurel antes de servir. Rinde 6 a 8 porciones. Si lo desea,
fije la temperatura en LO (baja) para servir.
Chile
2 libras de de carne molida magra, ya sea de res o pavo
1 1/2tazas de cebolla picada
1 1/2tazas de pimiento verde picado
2 dientes de ajo picados
3 latas de 28 onzas de tomates enteros, sin drenar, cortados
en trozos
1 lata de 15 onzas de frijoles rojos, sin drenar
2 1/2cucharadas de chile en polvo
1 1/2cucharaditas de comino molido
1 1/2cucharaditas de sal
3
/4cucharadita de pimienta
Tiempo de cocción: LO (baja) = 8 a 10 horas HI (alta) = 4 a 5 horas
1. Dore la carne molida o el pavo con la cebolla, el pimiento verde y el ajo en una sartén
sobre la estufa o cocina a fuego mediano. Elimine el exceso de grasa. Vierta la mezcla
en la olla cerámica. Agregue el resto de los ingredientes; revuélvalos para mezclarlos
bien.
2. Coloque la olla cerámica en la base calentadora, tápela y cocine en el ajuste de
temperatura deseado según el tiempo indicado. Rinde 6 a 8 porciones. Si lo desea, fije
la temperatura en LO (baja) para servir.
8
Page 33

Nutritiva sopa de fideos con pollo
2–2 1/2libras de trozos de pollo sin piel si lo desea
6 tazas de agua
1 cebolla mediana picada
6 zanahorias cortadas en trocitos de 1/2 pulgada
5 palitos de apio cortados en trocitos de 1/2 pulgada
1 lata de 14.5 onzas de tomates enteros, sin drenar, cortados
en trozos
1 1/2cucharadas de caldo de pollo instantáneo
1 cucharada de de hojuelas secas de perejil
1 cucharadita de sal
1
/2cucharadita de hojas secas de romero
1
/2cucharadita de pimienta
1 taza de fideos finos de huevo sin cocer
Tiempo de cocción: LO (baja) = 8 a 10 horas HI (alta) = 5 a 6 horas
1. Combine en la olla cerámica todos los ingredientes, excepto los fideos de huevo. Coloque
la olla cerámica en la base calentadora, tápela y cocine en el ajuste de temperatura
deseado según el tiempo indicado o hasta que el pollo y las verduras estén blandos.
2. Retire los trozos de pollo de la olla cerámica y apártelos para que se enfríen un poco. Fije
el control en HI (alta) y agregue los fideos revolviéndolos para combinarlos. Tape la olla
y continúe cocinando durante 30 minutos.
3. Retire los huesos y corte la carne en trozos comestibles. Vuelva a poner la carne en la
olla cerámica y cocine hasta que los fideos estén blandos. Rinde 6 a 8 porciones. Si lo
desea, fije la temperatura en LO (baja) para servir.
Pecho de res curado y col
3 – 4 libras de pecho de res curado
1 cebolla mediana rebanada
1
/2cucharadita de semilla de apio
1
/2cucharadita de mostacilla
1 diente de ajo picado
1 hoja de laurel
1 col pequeña cortada en tajadas
agua
Tiempo de cocción: LO (baja) = 8 a 10 horas
1. Coloque en la olla cerámica el pecho de res con el líquido y las especias. Agregue la
cebolla, las semillas de apio, la mostacilla, el ajo y la hoja de laurel. Agregue suficiente
agua para cubrir la carne. Tape la olla y cocine en LO (baja) durante 8 a 10 horas o
hasta que la carne esté blanda al pincharla con el tenedor.
2. Agregue las tajadas de col durante la última hora de cocción y continúe cocinando en
LO.Elimine los líquidos y especias de la cocción. Rinde 6 porciones.
9
Page 34

Sopa de minestrón
3 tazas de agua
2 latas de 10.5 onzas de caldo de pollo
1 cebolla mediana picada
3 zanahorias cortadas en cubos
1
1 1/2tazas de col picada
1 lata de 15 onzas de garbanzos, sin drenar
3
5 rebanadas de tocino, cocido y desmenuzado, optativo
2 dientes de ajo picados
1 1/2cucharaditas deaderezo italiano
1 cucharadita de sal
1
/2cucharadita de pimienta
1
/2taza de macarrones pequeños con forma de codo u otros fideos, sin cocer
calabacín mediano, cortado por la mitad y en rebanadas de
latas de 14.5 onzas de tomates enteros, sin drenar, cortados en
trozos
1
/2 de
Tiempo de cocción: LO (baja) = 8 a 10 horas HI (alta) = 5 a 6 horas
Combine todos los ingredientes en la olla cerámica, excepto los macarrones; revuélvalos
1.
para mezclarlos bien. Coloque la olla cerámica en la base calentadora, tápela y cocine en
el ajuste de temperatura deseado según el tiempo indicado o hasta que las verduras
estén blandas.
2. Suba la temperatura al ajuste HI (alta) y agregue los macarrones; revuélvalos para
mezclarlos bien. Tape la olla y cocine durante
desea, fije la temperatura en LO (baja) para servir.
30 minutos. Rinde 6 a 8 porciones. Si lo
Pollo para visitas
libras de trozos de pollo sin piel si lo desea
3 - 4
sal y pimienta al gusto
latas de 10.5 onzas de sopa cremosa condensada de champiñones
2
latas de 10.5 onzas de sopa condensada de tomates
2
1
taza de harina
/4
dientes de ajo picados
2
frasco de 16 onzas de cebollas pequeñas enteras, drenadas,
1
O BIEN 1 cebolla grande rebanada y separada en anillos
Tiempo de cocción: LO (baja) = 8 a 10 horas HI (alta) = 5 a 6 horas
Sazone los trozos de pollo con sal y pimienta y colóquelos en la olla cerámica. En un
1.
recipiente combine el resto de los ingredientes, revolviéndolos para mezclarlos bien.
Viértalos en el pollo.
2. Tape la olla y cocine en el ajuste de temperatura deseado según el tiempo indicado o
hasta que el pollo esté blando. Rinde 6 a 8 porciones. Si lo desea, fije la temperatura en
LO (baja) para servir.
10
Page 35

Asado de cerdo a las hierbas
4 dientes grandes de ajo cortados en cuadrados
5 libras de asado de cerdo, con o sin huesos
1 cucharadita de sal
1 cucharadita de tomillo molido
1
/2cucharadita de salvia pulverizada
1
/2cucharadita de clavos de especia molidos
1 cucharadita de cáscara de limón cernida
1
/2taza de agua
3 cucharadas de de maicena, optativo
3 cucharadas de agua - optativo
Tiempo de cocción: LO (baja) = 9 a 10 horas HI (alta) = 5 a 6 horas
1. Corte 16 cavidades pequeñas en el asado e introduzca los trozos de ajo. En un recipiente
pequeño combine la sal, el tomillo, la salvia, los clavos de especia y la cáscara de limón.
Introdúzcalos en el asado de cerdo frotándolos
1
2. Vierta
3. Deje reposar el asado durante 10 a 15 minutos antes de trincharlo. Retire los trozos de
/2 taza de agua en la olla cerámica. Agregue el asado. Coloque la olla cerámica en
la base calentadora, tápela y cocine en el ajuste de temperatura deseado o hasta que el
termómetro para carne introducido en el centro del asado indique 170°F o más.
ajo. Si lo desea espese los jugos para preparar salsa. Disuelva la maicena en agua. Fije
el control en HI (alta). Revuelva lentamente los jugos hasta que queden espesos. Rinde
6 a 8 porciones.
Asado de res con verduras
3–31/2libras de asado de res
sal y pimienta al gusto
1 cebolla grande cortada en cuadrados o rebanada
6 zanahorias cortadas en trocitos de 1 pulgada
6 papas medianas, cortadas en cuadrados y en mitades
1
/2taza de agua
Tiempo de cocción: LO (baja) = 9 a 10 horas HI (alta) = 5 a 6 horas
1. Si lo desea, dore el asado en una sartén sobre una estufa o cocina a fuego mediano
antes de colocarlo en la olla cerámica. Sazone a gusto. Coloque las verduras alrededor
del asado. Agregue el agua.
2. Coloque la olla cerámica en la base calentadora, tápela y cocine en el ajuste de
temperatura deseado según el tiempo indicado o hasta que la carne y las verduras estén
blandas. (Para que la carne quede bien cocida, el termómetro debe indicar 170°F). Si lo
desea, espese los jugos mezclando 2 cucharadas de maicena y 2 cucharadas de agua.
Fije el control en HI (alta) y revuelva lentamente la mezcla hasta que quede espesa.
Rinde 6 porciones. Si lo desea, fije la temperatura en LO (baja) para servir.
11
Page 36

GARANTÍA DEL PRODUCTO
Garantía limitada de 1 año del aparato electrodoméstico
West Bend® Housewares, LLC garantiza que este aparato no presentará fallas de material ni fabricación
durante 1 año a partir de la fecha original de compra, siempre y cuando el aparato sea operado y
mantenido tal como se indica en el manual de instr ucciones de West Bend® Housewares, LLC. To da
pieza del aparato que presente fallas ser á reparada o reemplazada sin costo alg uno a criterio de West
Bend® Housewares, LLC. Esta gara ntía rige solamen te para el uso domest ico en interiore s.
La garantía de West Bend® Housewares, LLC no cubre ningún daño, incluyendo la decoloración, de
superficie antiadherente alguna d el aparato electrodoméstico . La garantía de West Bend® Housewa res,
LLC quedará nula e inválida, según lo de termine exclusivamente West Bend® House wares, LLC, si el
aparato electrodoméstico resultase dañado debido a accidentes, uso indebido o abuso, rayas,
sobrecalentamiento o si es alterado de algún modo o no se usa en forma doméstica y en interiores.
Esta garantía le otorga derechos legales específic os. Usted también puede tener otros derechos, los
cuales pueden variar de una jurisdicción a otra.
ESTA GARANTÍA REEMPLAZA A TODAS LAS DEMÁS GARANTÍAS IMPLÍCITAS, INCLUYENDO
AQUÉLLAS DE COMERCIABILIDAD E IDON EIDAD PARA UN FIN O USO EN PARTICULAR, LAS
CUALES QUEDAN EXCLUIDAS MEDIANTE EL PRESENTE DOCUMENTO. WEST BEND®
HOUSEWARES, LLC RECHAZA TODA RESPONSABILIDAD POR DAÑOS, YA SEAN DIRECTOS,
INMEDIATOS, INCIDENTALES, PREVISIBLES, CONSECUENTES O ESPECIALES QUE SURJAN
DEL USO DEL APARATO ELECTRODOMÉSTICO O GUARDEN RELACIÓN CON EL MISMO.
Si dentro del período de garantía usted considera que el aparato electrodoméstico presenta fallas o requiere
servicio, devuélvalo al lugar de compra original. Para obtener mayores detalles comuníquese con el
Departamento de Servicio al Cliente al (262) 334-6949 o por correo electrónico a housewares@westbend.com.
Los gastos de devolución no son reembolsables. Los recibos escritos a mano no son válidos. West Bend
Housewares, LLC no se hace responsable de las devoluciones perdidas en tránsito.
Válido sólo en EE.UU. y Canadá
REPUESTOS
Solicite los repuestos a West Bend® Housewares, LLC directamente en línea en
www.westbend.com, "Replacement Parts", llamando o en viando un m ensaje de correo electrónico a l
departamento de servicios al número/dirección antedichos o escribiend o a: We st Bend Housewares,
LLC Repuestos O puede llamarnos o enviarnos un mensaje de correo electrónico al departamento
de servicios al número/dirección antedichos o escr ibiéndonos a :
West Bend Housewares, LLC
Attn: Customer Service
P.O. Box 2780
West Bend, WI 53095, EE.UU.
Cerciórese de incluir el número de catálogo/modelo del aparato electrodoméstico (situado en la
parte inferior/posterior de la unidad) así como la de scripció n y la ca ntid ad de rep uestos q ue necesit a.
Junto con esta información, incluya su nombre, dirección postal, número de tarjeta de crédito Visa o
MasterCard, la fecha de vencimiento y el nombre tal como aparece en la tarjeta. Los cheques
deben hacerse pagaderos a West Bend Housewares, LLC. Llame a Servicio a la Clientela para que
le informen el monto de la compra. Se sumará al to ta l el impue sto de venta e stata l qu e correspon da,
más un cargo por despacho y procesamiento. La entr ega tarda dos (2) semanas.
Este folleto contiene información importante y útil sobre el uso seguro y el cuidado de su nuevo
producto de West Bend® Housewares, LLC. Para su propia referencia, archive aquí el recibo
fechado que sirve de comprobante de compra para la garan tía, y anote la siguiente información:
Fecha en que compró o recibió la unidad como regalo:_________________________ _____
Dónde se efectuó la compra y el precio, si lo sabe: ________________________________
Número y código de fecha del producto (aparece en la parte inferior/posterior de la unidad): ______
L5617B 08/06 West Bend Housewares, LLC A Focus Products Group Company Printed in China
12
 Loading...