

Weldex WDAC-1212X User Manual
Operation Manual
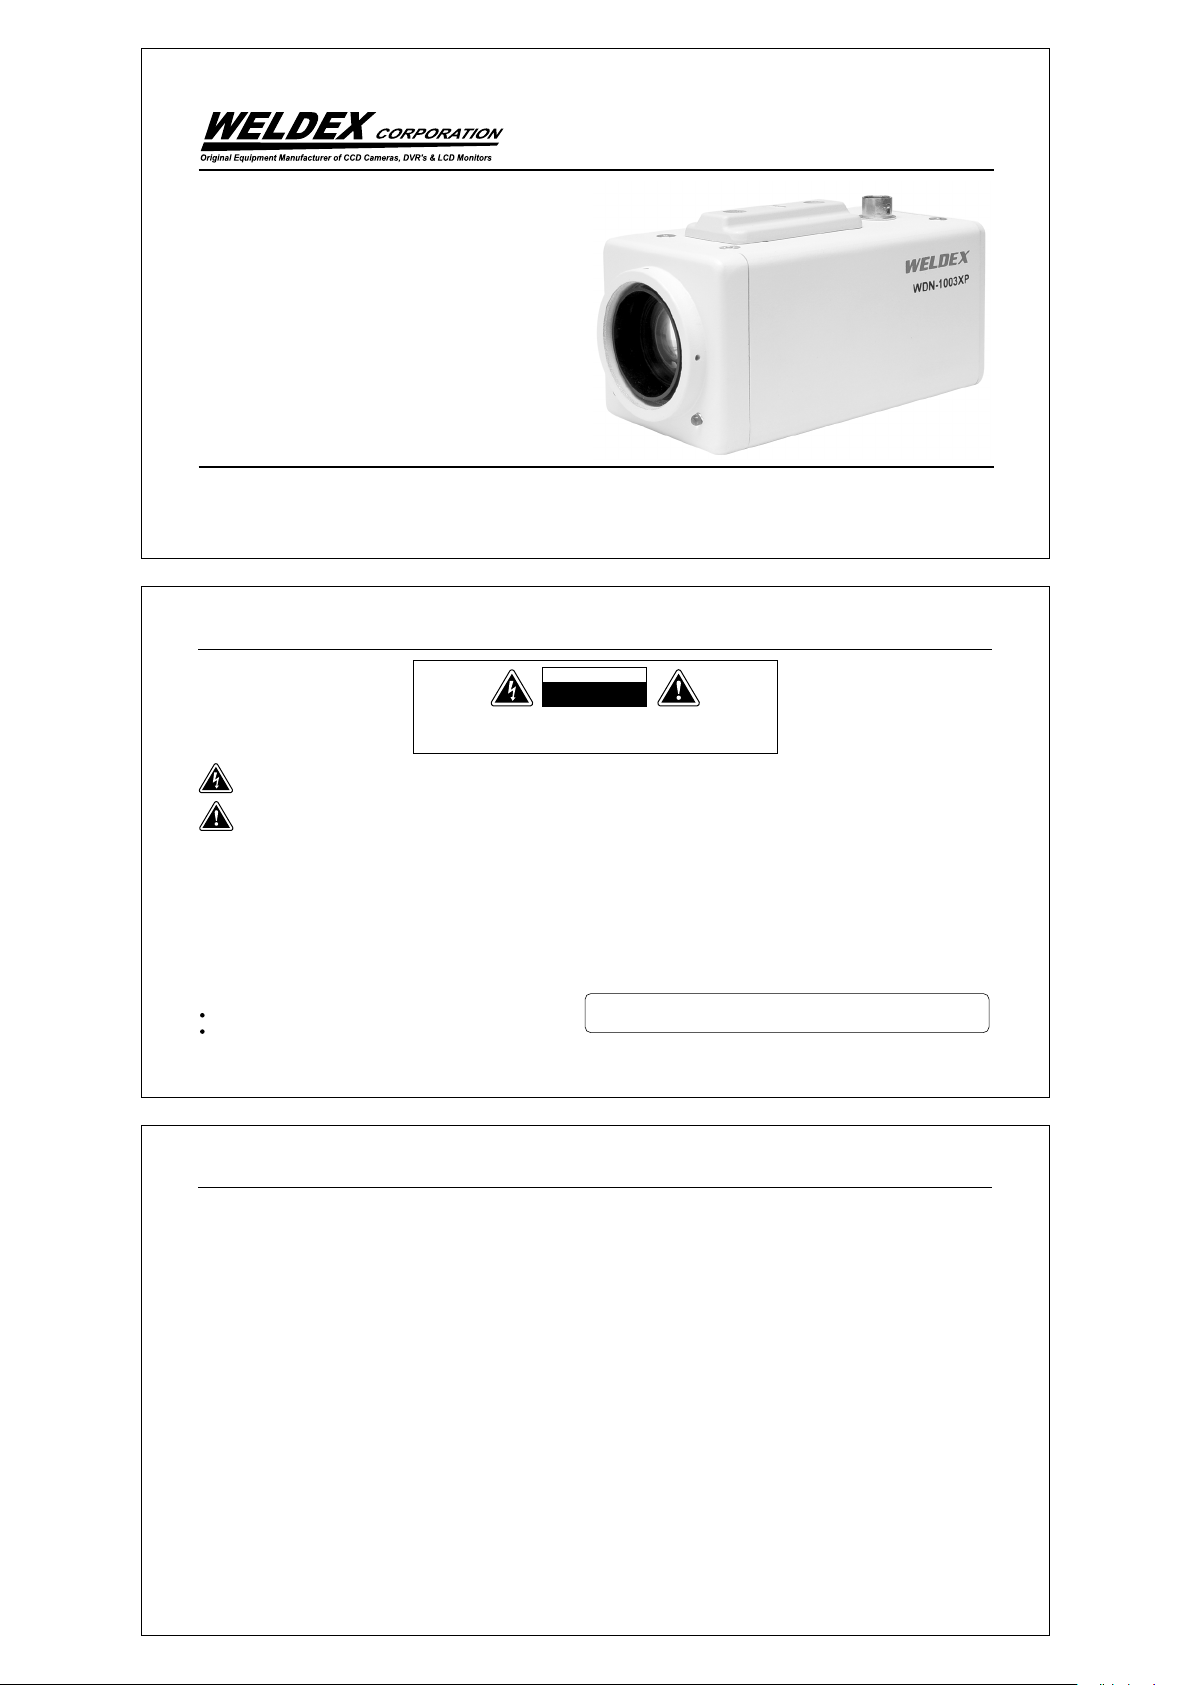
High Resolution
Day & Night 10X Zoom Camera
WDN-1003XP
Please read carefully before using and keep in a safe place.
Design and specifications are subject to change without notice.
Day & Night 10X Zoom Camera2
CAUTION
RISK OF ELECTRIC SHOCK
TO REDUCE THE RISK OF ELECTRIC SHOCK, DO NOT REMOVE COVER (OR BACK),
REFER SERVICING TO QUALIFIED SERVICE PERSONNEL.
The lightning flash with an arrowhead symbol, within an equilateral triangle is intended to alert the user to the presence of uninsulated
dangerous voltage within the product’s enclosure that may be of sufficient magnitude to constitute a risk of electric shock to persons.
The exclamation point within an equilateral triangle is intended to alert the user to the presence of important operating and maintenance
(servicing) instructions in the literature accompanying the appliance.
DO NOT OPEN
NO USER SERVICEABLE PARTS INSIDE.
INFORMATION- This equipment has been tested and found to comply with limits for a Class A digital device, pursuant to part 15 of the
FCC Rules. These limits are designed to provide reasonable protection against harmful interference when the equipment is operated in
a commercial environment.
This equipment generates, uses, and can radiate radio frequency energy and, if not installed and used in accordance with the instruction
manual, may cause harmful interference to radio communications. Operation of this equipment in a residential area is likely to cause
harmful interference in which case the user will be required to correct the interference at his own expense.
WARNING- Changes or modifications not expressly approved by the manufacturer could void the users authority to operate the equipment.
CAUTION- To prevent electric shock and risk of fire hazards:
Do NOT use power sources other than that specified.
Do NOT expose this appliance to rain or moisture.
This installation should be made by a qualified service person and
should conform to all local codes.
V.07C
Day & Night 10X Zoom Camera 3
1.0 Features
l
A/F 10x Optical Zoom
The built-in WDN-1003XP optical zoom lens is a highly durable component. It features auto focus, auto iris, and zoom functions.
l
DNR (Digital Noise Reduction)
The amount of low illuminance noise has been significantly reduced, and the signal-to-noise ratio (S/N ratio) as well as horizontal
resolution have been improved, resulting in a clear and sharp image display even in the dark.
l
High Sensitivity
The built-in high sensitivity SONY COLOR CCD enables a clear image even in 0.005Lux(Sens-up, Color) or lower illumination.
l
High Resolution
Featuring 500TV line horizontal resolution in color mode and 570TV line horizontal resolution in BW mode, the camera features
Sony's 410,000 pixel CCD and captures clean, noiseless, high-quality images.
l
DAY & NIGHT
The camera automatically determines whether it is night time or day time, selecting operating mode automatically. The camera
operates in color mode during day light conditions and BW mode in night conditions for clearer identification.
l
3-Axis camera mechanism
The WDN-1003XP is especially incredibly flexible to install with its 3-axis camera construction, which makes the camera wall or
slope mountable.
l
RS-485 Function
The camera, using a RS-485 communication can remote control relate to ZOOM/FOCUS and OSD menu functions.
l
Sub Monitor Function
The sub monitor function enables easy adjustment of the camera angle within the monitoring range during its installation.
l
Miscellaneous Functions
Othe r miscellaneous functions of the camera include privacy zone masking, digi tal zoom, line lock synchronization (INT/L L),
freeze, horizontal inversion, and user-configured presets.
Day & Night 10X Zoom Camera4
2.0 Warnings
This information is provided to ensure your safety and to prevent any losses, financial or otherwise. Please read it carefully and use
the product accordingly.
l
Warning/Attention/Special Mark Messages
Ignoring this information may result in material loss and/or serious personal injuries including death.
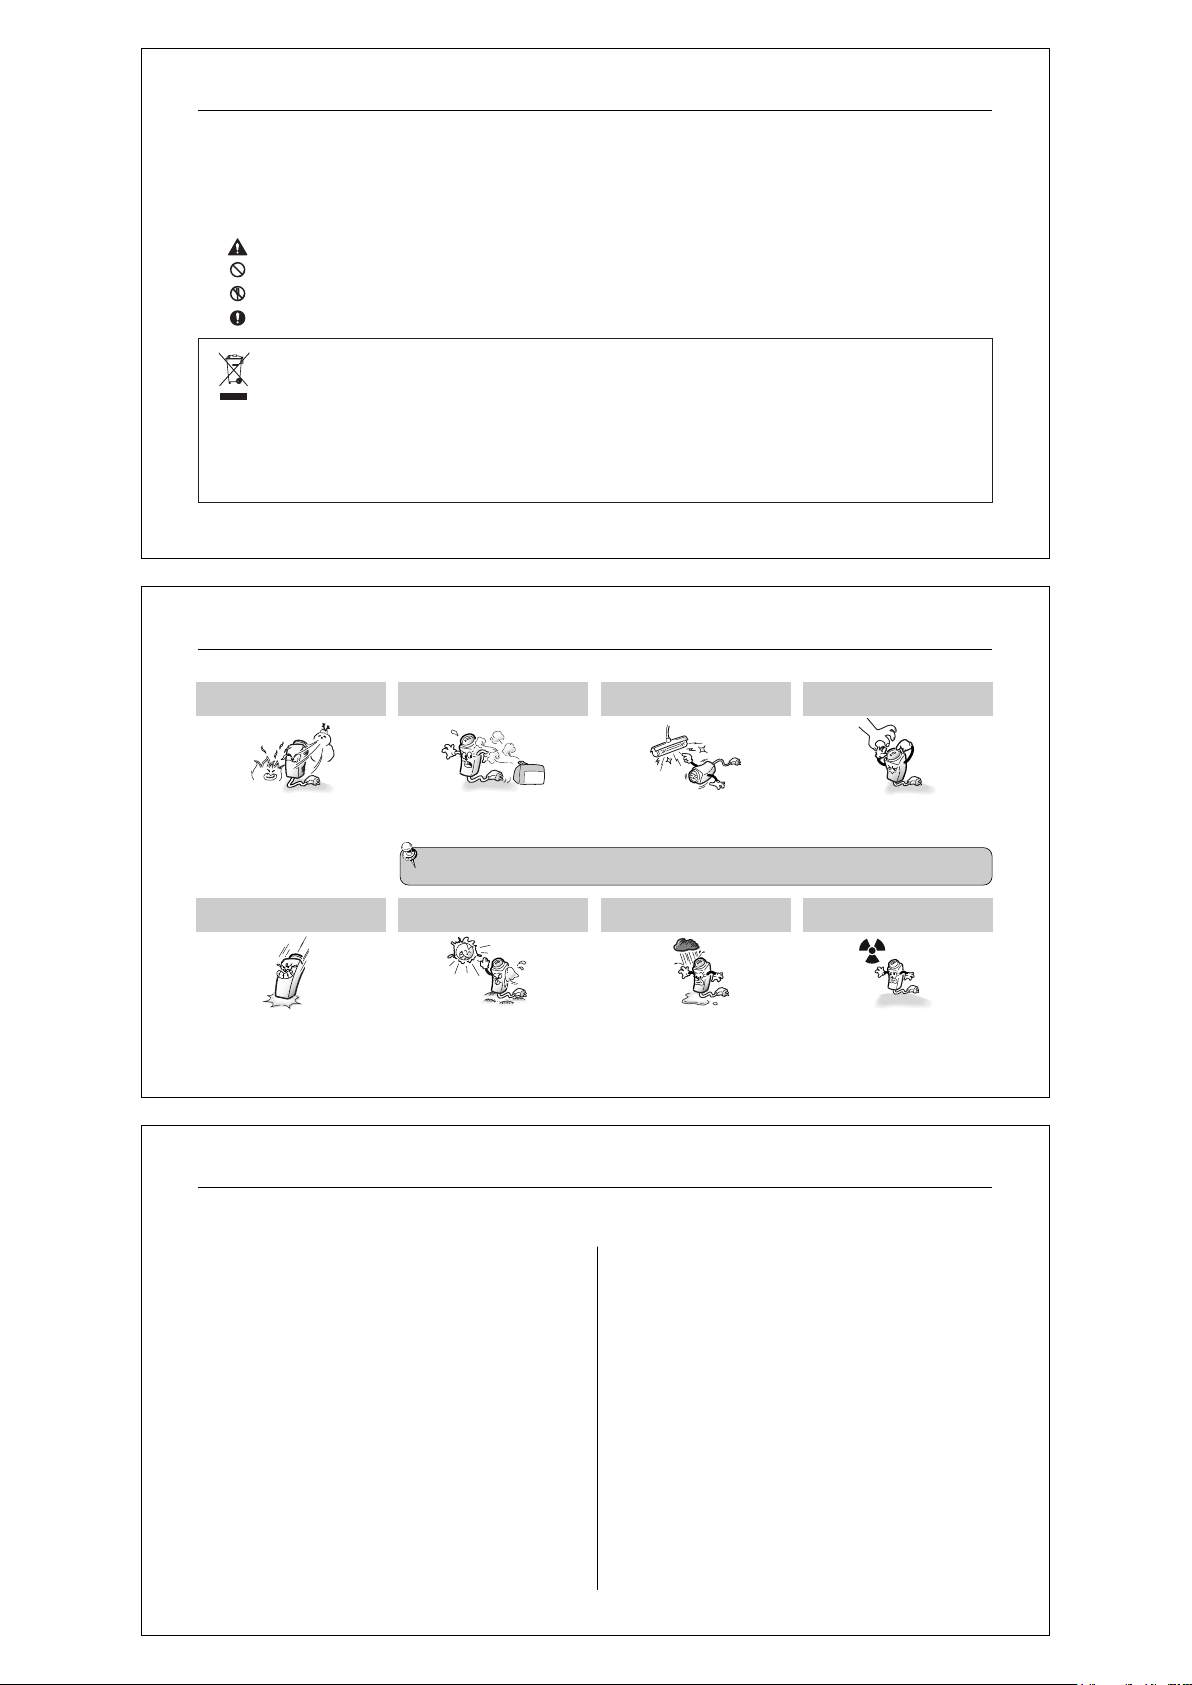
Indicates "Never Allowed."
Indicates "No Disassembling.
Indicates "Must Observe."
Correct Disposal of This Product
(Applicable in the European Union and other European countries with separate collection systems)
This marking shown on the product or its literature, indicates that it should not be disposed with other household wastes at the end of its working life. To
prevent possible harm to the environment or human health from uncontrolled waste disposal, please separate this from other types of wastes and recycle
it responsibly to promote the sustainable reuse of material resources.
Household users should contact either the retailer where they purchased this product, or their local government office, for details of where and how they
can take this items for environmentally safe recycling.
Business users should contact their supplier and check the terms and conditions of the purchase contract.
this product should not be mixed with other commercial wastes for disposal.
Day & Night 10X Zoom Camera 5
(Waste Electrical & Electronic Equipment)
3.0 Precautions
Do not install the camera in extreme
temperature conditions.
Do not ins ta ll or us e th e ca me ra in an
environment where the humidity is high.
Do not install the camera unde r
unstable lighting conditions.
Do not touch the front lens of the
camera.
Only use the camera under conditions
where temperatures are between -10
Deg. C and +50 Deg. C.(14 Deg. F and
122 Deg. F) Be especially careful to
provide ventilat ion when oper ating
under high temperatures.
Do not drop the camera or subject
them to physical shocks.
It can cause malfunctions to occur.
......................................................................
Features
1.0
Warnings
2.0
Precautions
3.0
Components
4.0
Names and Functions of Parts
5.0
Front
5.1
Top & Bottom
5.2
Rear
5.3
Connection
6.0
Connection to Monitor
6.1
Connection to Power
6.2
RS-485 Communication Control
6.3
Cam era Op eration
7.0
Key F un ction
7.1
Controlling the temporatly Protocol
7.2
.....................................................................
.................................................................
................................................................
............................................................................
...............................................................
.............................................................................
...................................................................
.................................................
....................................................
... ..... ....... ..... ....... ..... ............ ...
.... .. ..... .. ...... . .... .. ...... . ..... .. .. ..... .. ..
Ye l low LE D & Gr een LED ON / OFF
It can cause the image quality to be
poor.
l
Note
Ne v er ke e p th e cam e ra fa ce to
strong light directly.
It can damage the CCD.
If the camera is exposed to spotlight or object reflecting strong light, smear or blooming may occur.
l
Please check that the power satisfies the normal specification before connecting the camera.
Contents
3
4
5
....................................
...................................
.. . ... . ... . ... . .... .
7
8
8
8
9
11
11
11
12
13
13
14
Severe lighting change or flicker can
cause the camera to work improperly.
Do not expose the camera to rain
or spill beverage on it.
If it gets wet, wipe it dry immediately.
Liqu id s can contain mi ne ra ls that
corrode the electronic components.
Menu Configur at io n . .. .. ......... .. .. ......... .. .. .........
7.3
Menu Setup
7.4
Cam T itle
7.4.1
Wh it e Ba la nce Cont rol
7.4.2
Backlight
7.4.3
Motio n De te ct io n
7.4.4
Focus
7.4.5
Exposure
7.4.6
Special
7.4.7
RESET......................................................................
7.4.8
EXIT .........................................................................
7.4.9
Troubleshooting
8.0
Dimensions
9.0
10.0
Specifications
............ .................... .................... ...
... ....... ....... ....... ....... ....... ....... ....... .....
..................................................................
......................................................................
................................................................
.....................................................................
.............................................................
........................................................
It is one of the most important parts
of the camera. Be caref ul not to be
stained by fingerprint.
Do not e x p o se t h e c a m e r a to
radioactivity.
If it is exposed to radioa cti vit y, For
heated CCD, it will be out of order.
Day & Night 10X Zoom Camera6
.. .. ... ... .. ... ... .. ... ... .. ... ...
..... .. .. ............... .. .. ............. .. ..
.......................................................
15
16
17
19
20
21
22
26
30
35
35
36
37
38
Day & Night 10X Zoom Camera 7
4.0 Components
Operation Manual
High Resolution
Day & Night 10X Zoom Camera
WDN-1003XP
10X Zoom Camera
WDN-1003XP
Please read carefully before using and keep in a safe place.
Design and specifications are subject to change without notice.
Operation Manual
V.07C
5.0 Names and Functions of Parts
5.1 Front
Lens protection cap
u
Please cover the lens when not using it.
Green LED
v
In RS-485, LED turns ON/OFF when receiving specific data.
Yellow LED
w
In RS-485, LED turns ON/OFF when receiving specific data.
5.2 Top & Bottom
Mounting bracket screw hole
x
Mounting bracket screw hole
please use the screw hole when fixing the camera onto the mounting bracket.
please use the clamp screw as specified below.
q
The mounting bracket can be separated and attached to the top of the camera.
In this instance please do not tighten the screw to a depth of more than 5mm
otherwise serious damage can occur to the inside of the camera.
Video output & Power input terminal
y
Sends video signal and connectors to the video input terminal of the monitor.
Receives power and connectors to the video input terminal of the monitor.
ScrewMount Bracket
Cable
Day & Night 10X Zoom Camera8
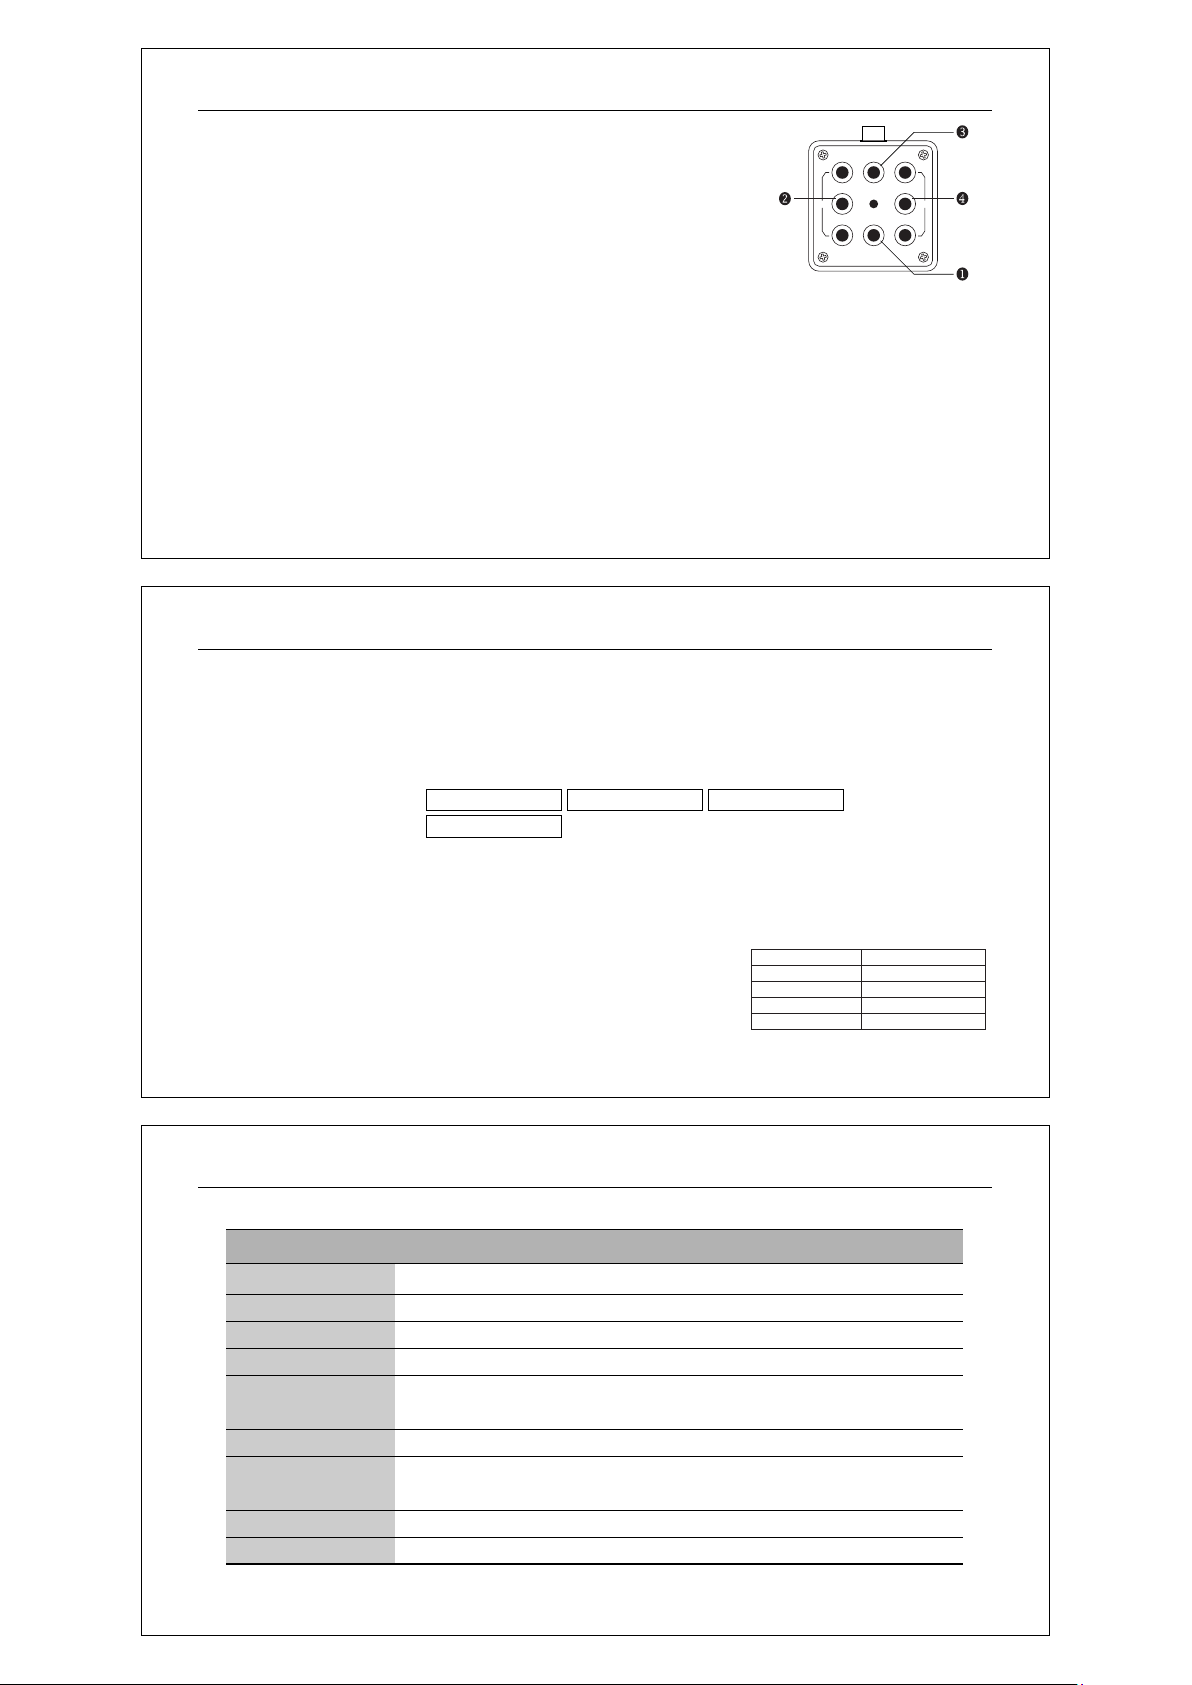
Pin
Description
1
TRX- (RS-485 -)
2
TRX+ (RX-485 +)
3
NC
4
GND
5
VIDEO
6
DC 12V
Day & Night 10X Zoom Camera 9
5.3 Rear (Key Function)
BLC Key Button
u
BLC Key operates BLC OFF-BLD HIGH in order of precedence.
NEAR Key Button
v
Press NEAR Key to focus the lens to far subject.
This button is used for right in the menu mode.
SHUTTER Key Button
w
SHUTTER speed can be changed each time when pressing the button.
Displays operates in order of percedence of ESC, 1/60, 1/100, 1/120
1/250, 1/500, 1/700, 1/1000, 1/1600, 1/2500, 1/5000, 1/7000, 1/10000.
FAR Key Button
x
Press FAR Key to focus the lens to far subject.
N B T
NEAR BLC TELE
FOCUS
S A
SHUTTER
F Z W
FAR TELE ZOOM WIDE
ZOOM
ADJUST
This button is used for left in the menu mode.
TELE ZOOM Key Button
y
When pressing TELE ZOOM key user preset 1 value displays on the screen.
After 10 second, user preset 2 value displays on the screen.
This function repeats each time when pressing the Tele zoom key.
SETTING Button
z
SET Button: Used for the menu display. This button can be used to confirm settings after changing the value of the selected
function or current conditions.
TELE & WIDE Button: Used for selecting items by moving the cursor up or down on the menu screen.
NEAR & FAR Button: Used when changing items values, by moving the cursor to the left or right on the menu screen.
Day & Night 10X Zoom Camera10
TELE Key Button
u
Press TELE (Telephoto) to zoom in.
This button is used for UP in the menu mode.
ADJUSTMENT Key Button
w
User preset 3, 4 value displays repeatly when pressing Adjustment key.
When it is User preset 3 statue, RED LED is ON and when it is suer preset 4 statue, LED is OFF.
Used user preset 3 for special purpose of night mode. Used preset 4 for break up mode.
WIDE Key Button
x
Press WIDE (Wide ange) to zoom out.
This button is used for DOWN in the menu mode.
Day & Night 10X Zoom Camera 11
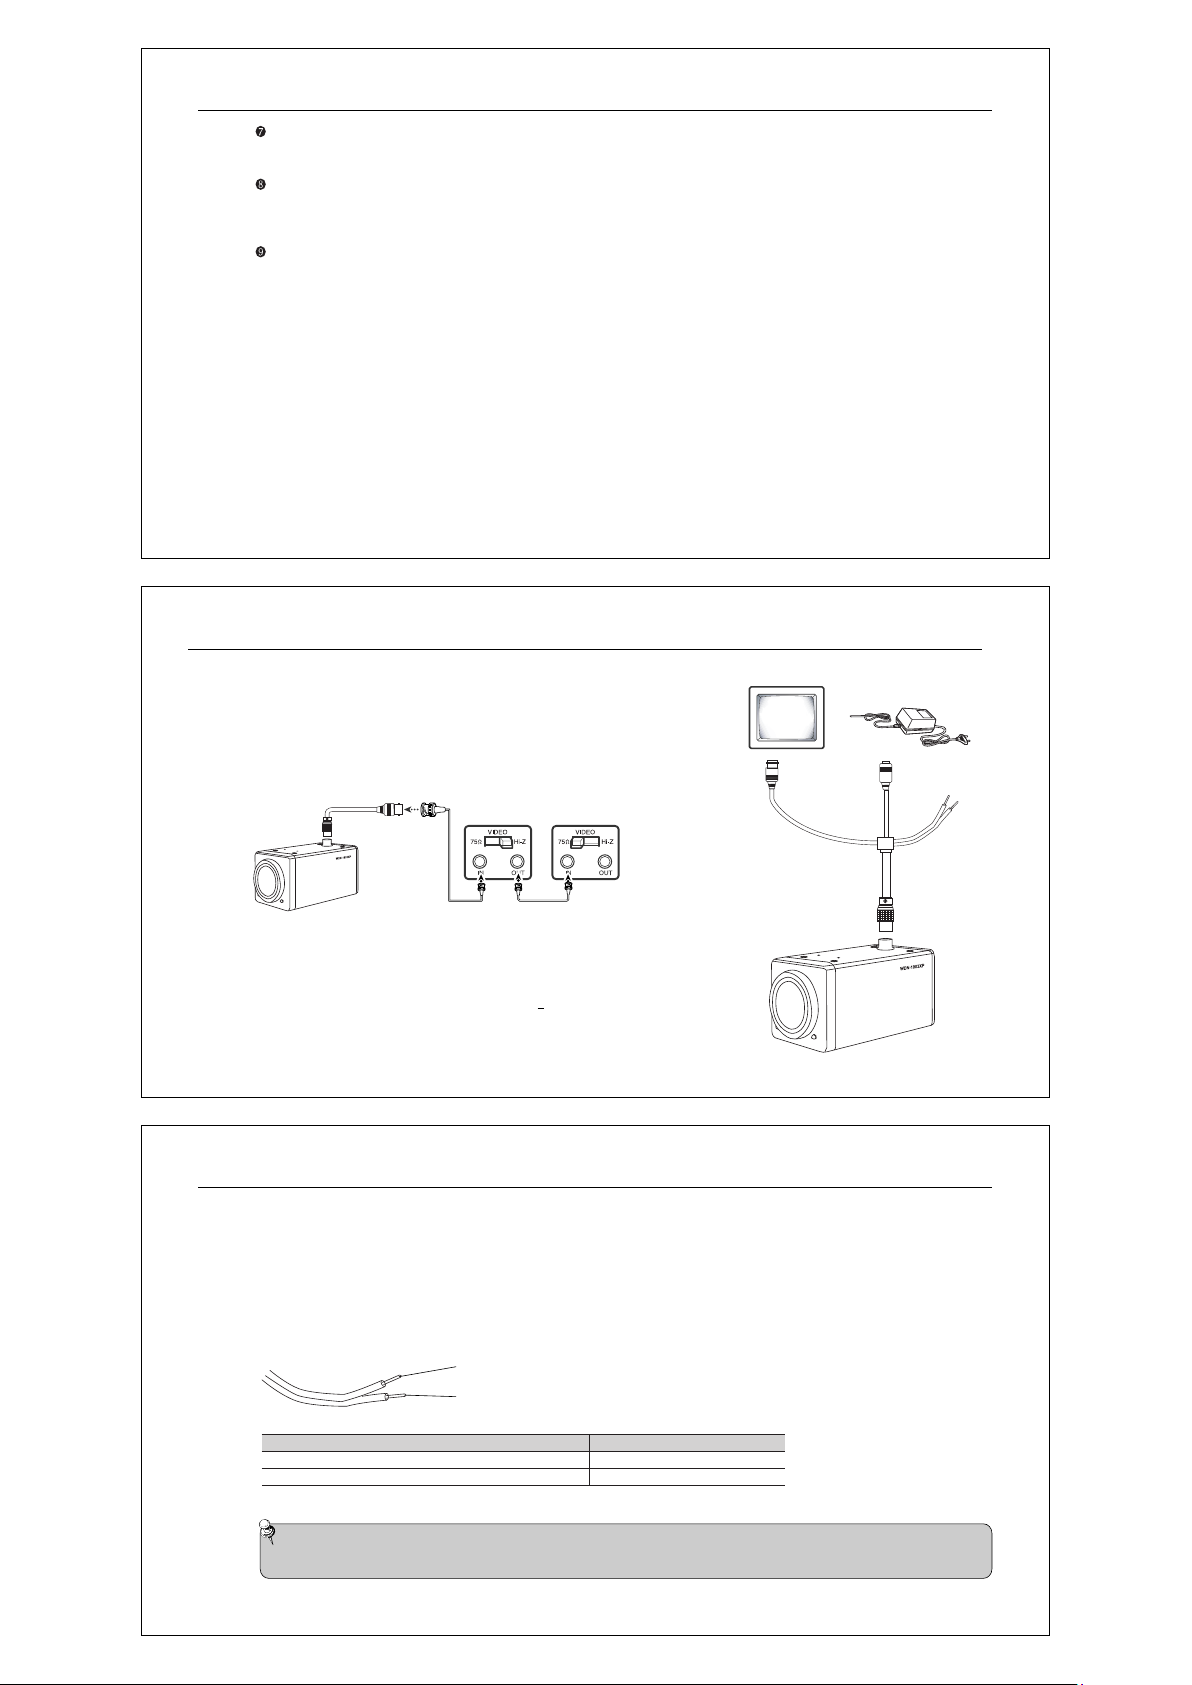
6.0 Connection
6.1 Connecting to Monitor
Connect the VIDEO-OUT jack to the VIDEO-IN jack of monitor.
q
As the connecting method varies with the instruments,
refer to the manual supplied with the instrument.
q
If necessary, you can connect the monitor to the REMOTE jack on the back of your camera.
q
Only connect the cable when the power is turned off.
q
Set the 75 Ohm / Hi-Z selection switch as shown below if you have an intermediate device.
Monitor
Adapter
Intermediate End monitor
6.2 Connecting to Power
Connect the adaptor to the power input connector as shown in the figure below.
The recommended adaptor specification for WDN-1003XP is DC 12V / 500mA.
q
Standard voltage for camera operation : DC 12V + 10%
q
There may be some deviation in voltage drop depending on the type of wire
and the manufacturer.
Day & Night 10X Zoom Camera12
6.3 RS-485 Communication Control
Using a RS-485 communication, it will be able to control the ZOOM/FOCUS and OSD menu at the Controller or DVR.
q
The case which it controls from the PC Using a RS-485 converter, It connects to RS-485 control cable outside camera and serial cable.
EX) SERIAL PORT OF THE PC(COM1) -- SERIAL CABLE -- RS-485 CONVERTER -- RS-485 CONTROL CABLE
q
The case which it controls from the DVR or System Controller .
It connects the RS-485 control cable in the connection terminal of 485 control boards which are connected with the DVR or
System Controller.
RED (TRX+): RS-485 +
WHITE (TRX-): RS-485 -
485 CONTROL BOARD CONNECTION TERMINAL
(+)CONNECTION TERMINAL
(-)CONNECTION TERMINAL
RS-485 CONTROL CABLE
RED (TRX+)
WHITE(TRX-)
l
When you construct external control systems for a camera control, please use to the PELCO-D PROTOCOL.
Note
l
When you connecting to RS-485 control cable, please peel off the outer skin inside the RS-485 control cable.
Day & Night 10X Zoom Camera 13
7.0 Camera Operation
7.1 Key Function
Use the nine key function on rear of the camera
TELE ZOOM KEY
u
When pressing TELE ZOOM KEY user preset 1 value displays on the screen.
After 10 second, user preset 2 value displays on the screen.
This function repeats each time when pressing the Tele zoom key.
Note that user preset do not work unless the value is set up.
- TELE ZOOM setting : Set user preset value 1 when pressing tele zoom key.
(USER PRESET 1 Setting)
shoud be preset before packing.
- WIDE ZOOM setting : Set user preset value 2 when pressing tele zoom key.
(USER PRESET 2 Setting)
shoud be preset before packing.
- DURATION Fixed : While tele zoom key is operating.
It will be operated in about 10 seconds after user preset 1 moves to user preset 2.
SHUTTER KEY
v
SHUTTER speed can be changed each time when pressing the button.
Setting value can be determine by user however, basic default value and optical l0x
Setting value can be determine by user however, basic default value and optical lx
Displays operates in order of percedence of ESC,1/60,1/100, 1/120, 1/250,1/500,1/700,1/1000,1/1600,1/2500,1/5000,
1/7000, 1/10000. When ESC operates RED LED is OFF, when shutter operates LED is on.
BLC KEY
w
BLC KEY operates BLC OFF- BLD HIGH in order of precedence.
When BLC operates RED LED is ON, when BLC is not operating LED turns off.
ADJUSTMENT KEY
x
When pressing this button user preset 3and 4 displays and repeats automatically.
Note that unless preset 2and 4 value is presetted, the function does not operate.
Used user preset 3 for special purpose of night mode. Used preset 4 for break up mode.
When it is User preset 3 statue, RED LED is ON and when it is user preset 4 statue, LED is OFF.
- NIGHT setting : 1) At FOCUS SETUP/ MODE AUTO, fix the ZOOM POSITION SET UP of tele to maximim 1x.
(USER PRESET 3 Setting)
2) Setting EXPOSURE at mode.
SHUTTER >> A.FLK AGC >> OFF DNR >> OFF
SENS-UP >> B/W
3) Setting ETC at mode DAY/NIGHT >> BW.
- NIGHT mode cancel setting :
At FOCUS SETUP/ MODE AUTO, fix the ZOOM POSITION SET UP of WIDE to maximum 1x.
Remaining value can be fixed according to the basic default value.
Note that the function does not operate unless user preset 3 and 4 is fixed.
N B T
NEAR BLC TELE
FOCUS
S A
SHUTTER
F Z W
FAR TELE ZOOM WIDE
Day & Night 10X Zoom Camera14
ADJUST
ZOOM
7.2 Controlling the temporatly Protocol Yellow LED & Green LED ON/OFF.
There are two different port. At RS-485,
if it receives specific data LED turns ON/OFF.
Note that,Communication speed only operates in 38400bps.
Day & Night 10X Zoom Camera 15
LED Operation
Yellow LED OFF
Yellow LED ON
Green LED OFF
Green LED ON
Protocol
C5 9E 00 00 00 63
C5 9E 01 00 00 64
C5 9F 00 00 00 64
C5 9F 01 00 00 65
7.3 Menu Configuration
SETUP SETUP MENU
CAM TITLE
WHITE BALANCE
BACKLIGHT
MOTION DETECTION
FOCUS
EXPOSURE
SPECIAL
l
OFF l ON
l
ATW(OUTDOOR) l AWC→SET l MANUAL
l
OFF l LOW l MIDDLE l HIGH
l
OFF l ON
l
MODE l ZOOM TRK l ZOOM SPEED l D-ZOOM
l
DISP ZOOM MAG l ZOOM POS INIT l LENS INIT l END
l
BRIGHTNESS l IRIS l SHUTTER l AGC l DNR l SENS-UP l END
l
USER PRESET l PRIVACY l DAY/NIGHT l SYNC
l
COMM ADJ l IMAGE ADJ l END
RESET
EXIT
 Loading...