

Page 1
Welch Allyn Stow-A-Weigh Scales
Directions for use
Models 5202, 6202, 6202D
Page 2
© 2016 Welch Allyn. All rights are reserved. To support the intended use of the product described in this
publication, the purchaser of the product is permitted to copy this publication, for internal distribution
only, from the media provided by Welch Allyn. No other use, reproduction, or distribution of this
publication, or any part of it, is permitted without written permission from Welch Allyn.
Welch Allyn assumes no responsibility for any injury to anyone, or for any illegal or improper use of the
product, that may result from failure to use this product in accordance with the instructions, cautions,
warnings, or statement of intended use published in this manual.
Software in this product is Copyright 2016 Welch Allyn or its vendors. All rights are reserved. The
software is protected by United States of America copyright laws and international treaty provisions
applicable worldwide. Under such laws, the licensee is entitled to use the copy of the software
incorporated with this instrument as intended in the operation of the product in which it is embedded.
The software may not be copied, decompiled, reverse-engineered, disassembled, or otherwise reduced
to human-perceivable form. This is not a sale of the software or any copy of the software; all right, title,
and ownership of the software remain with Welch Allyn or its vendors.
For information about any Welch Allyn product, contact your local Welch Allyn representative: http://
www.welchallyn.com/en/other/contact-us.html.
724514
DIR 80021280 Ver. A Revision date: 2016–09
Welch Allyn, Inc.
4341 State Street Road
Skaneateles Falls, NY 13153 USA
www.welchallyn.com
This manual applies to 901110 NONMASTED SCALES.
Page 3

Contents
Introduction ............................................................................................. 1
Installation and setup .............................................................................. 7
iii
Intended use ........................................................................................................ 1
Indications for use ................................................................................................ 1
Symbols ............................................................................................................... 1
About warnings and cautions ............................................................................... 2
Controls and indicators ........................................................................................ 4
Installation instructions ........................................................................................ 7
Custom setup ...................................................................................................... 9
Scale operation ...................................................................................... 13
Power options .................................................................................................... 13
Audible beeps .................................................................................................... 13
Weighing procedure ........................................................................................... 14
Print a weight measurement ............................................................................. 14
Storage, cleaning, and maintenance ................................................... 15
Storage ............................................................................................................... 15
Cleaning ............................................................................................................. 15
Battery replacement .......................................................................................... 15
Change the printer paper ................................................................................... 16
Maintenance ...................................................................................................... 17
Troubleshooting ................................................................................................. 17
Appendices ............................................................................................ 19
Specifications ..................................................................................................... 19
Product configurations ....................................................................................... 20
Approved accessories ........................................................................................ 20
Warranty ............................................................................................................ 21
Page 4

iv Contents Welch Allyn Stow-A-Weigh Scales
Page 5
Introduction
Intended use
The Welch Allyn Stow-A-Weigh Scales are intended to be used by clinicians for weighing
patients up to 660 pounds (300 kg) for model 5202, up to 880 pounds (400 kg) for model
6202, and up to 1000 pounds (450 kg) for model 6202D.
1
Indications for use
The Welch Allyn Stow-A-Weigh Scales are used by clinicians to weigh patients. An
optional height gauge is available on some models.
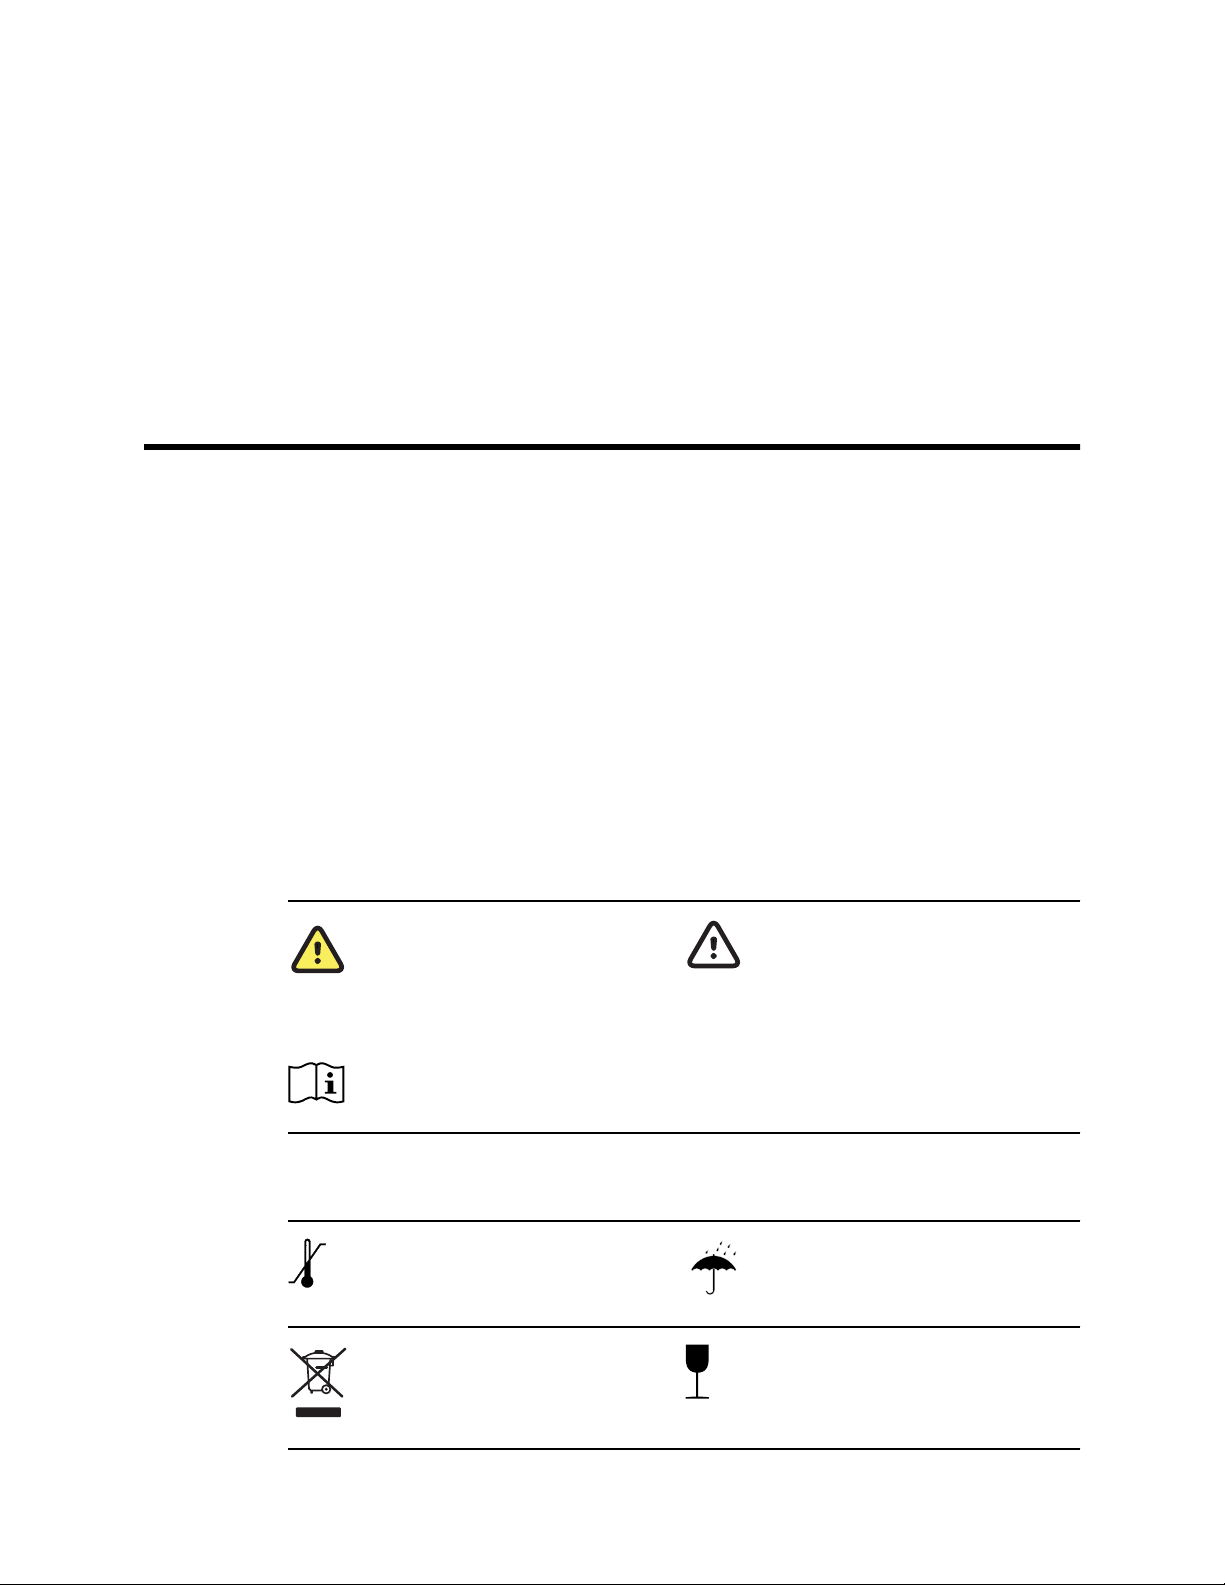
Symbols
Documentation symbols
WARNING The warning statements in
this manual identify conditions or
practices that could lead to illness, injury,
or death. Warning symbols will appear
with a grey background in a black and
white document.
Consult Directions for Use
Shipping, storing, and environment symbols
Temperature limit
Caution The caution statements in this
manual identify conditions or practices
that could result in damage to the
equipment or other property, or loss of
data.
Keep dry
Separate collection of Electrical and
Electronic Equipment. Do not dispose as
unsorted municipal waste.
Fragile
Page 6
2 Introduction Welch Allyn Stow-A-Weigh Scales
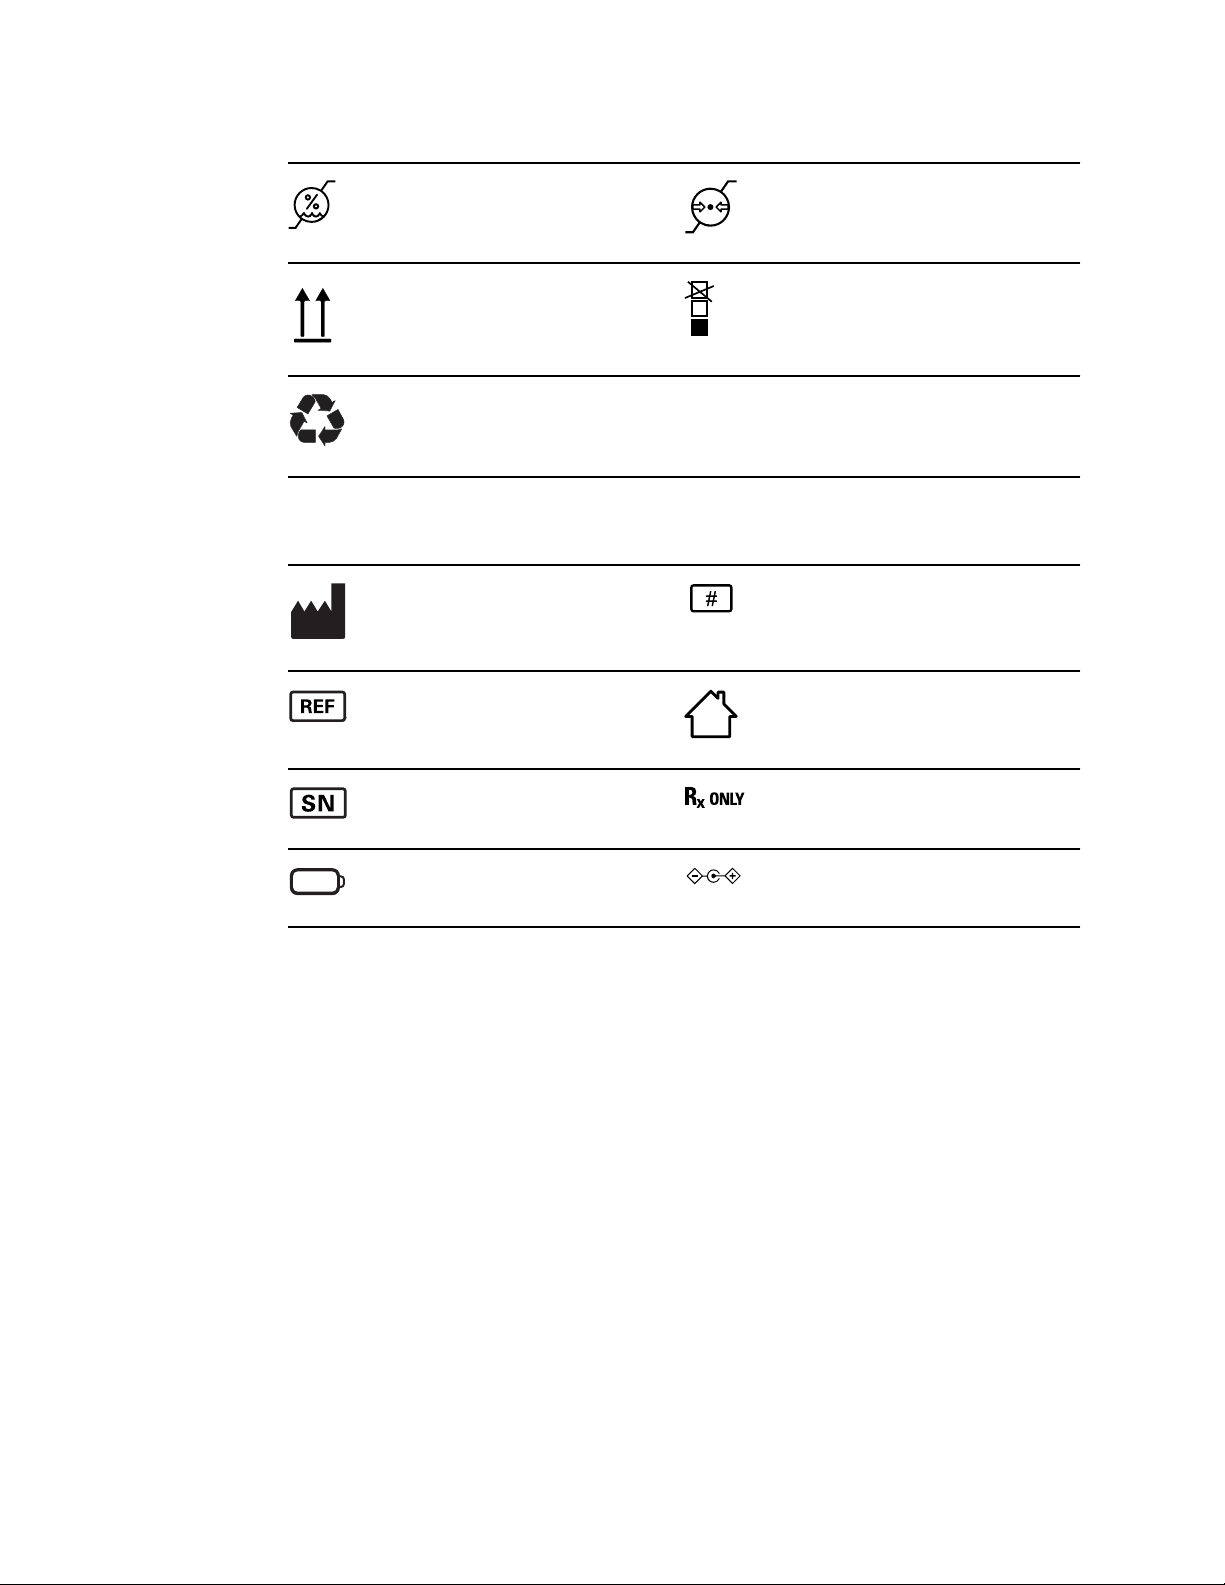
Humidity limitation
This way up Stacking limit by number
Recyclable
Miscellaneous symbols
Manufacturer
Product Identifier For indoor use only
Atmospheric pressure limitation
Reorder Number
Serial Number Prescription only or "For Use by or on the
Battery Power
About warnings and cautions
Caution statements can appear on the Welch Allyn Stow-A-Weigh Scales, the packaging,
the shipping container, or in this Directions for use.
The Welch Allyn Stow-A-Weigh Scales are safe for patients and clinicians when used in
accordance with the instructions and caution statements presented in this Directions for
use.
Before using the device, you must familiarize yourself with all cautions, with the steps to
power up the device, and with the sections of this Directions for use that pertain to your
use of the device. In addition to reviewing the general cautions presented in the next
section, you must also review the more specific cautions that appear throughout the
manual in conjunction with setup/startup, operation, and maintenance tasks.
Failure to understand and observe any warning statement in this manual could lead
•
to patient injury or illness.
• Failure to understand and observe any caution statement in this manual could lead to
damage to the equipment or other property, or loss of patient data.
order of a licensed medical professional"
Page 7

Directions for use Introduction 3
General warnings and cautions
WARNING Patient injury risk. Make sure the scale is properly cleaned
between measurements.
WARNING Patient or operator injury risk. Make sure the scale is
positioned on a stable surface and in a way to avoid shock or bumping
hazards.
CAUTION Make sure that you routinely perform general maintenance and
equipment safety checks on your scale. Remove the scale from service
when you notice damaged power cords.
CAUTION Make sure the scale is set in the proper measurement units for
your facility. Make sure you record the measurement units as they are
displayed.
CAUTION For scale model 6202D, make sure the cable connecting the
main scale and the satellite platform are connected before taking a weight
measurement.
Page 8
4 Introduction Welch Allyn Stow-A-Weigh Scales
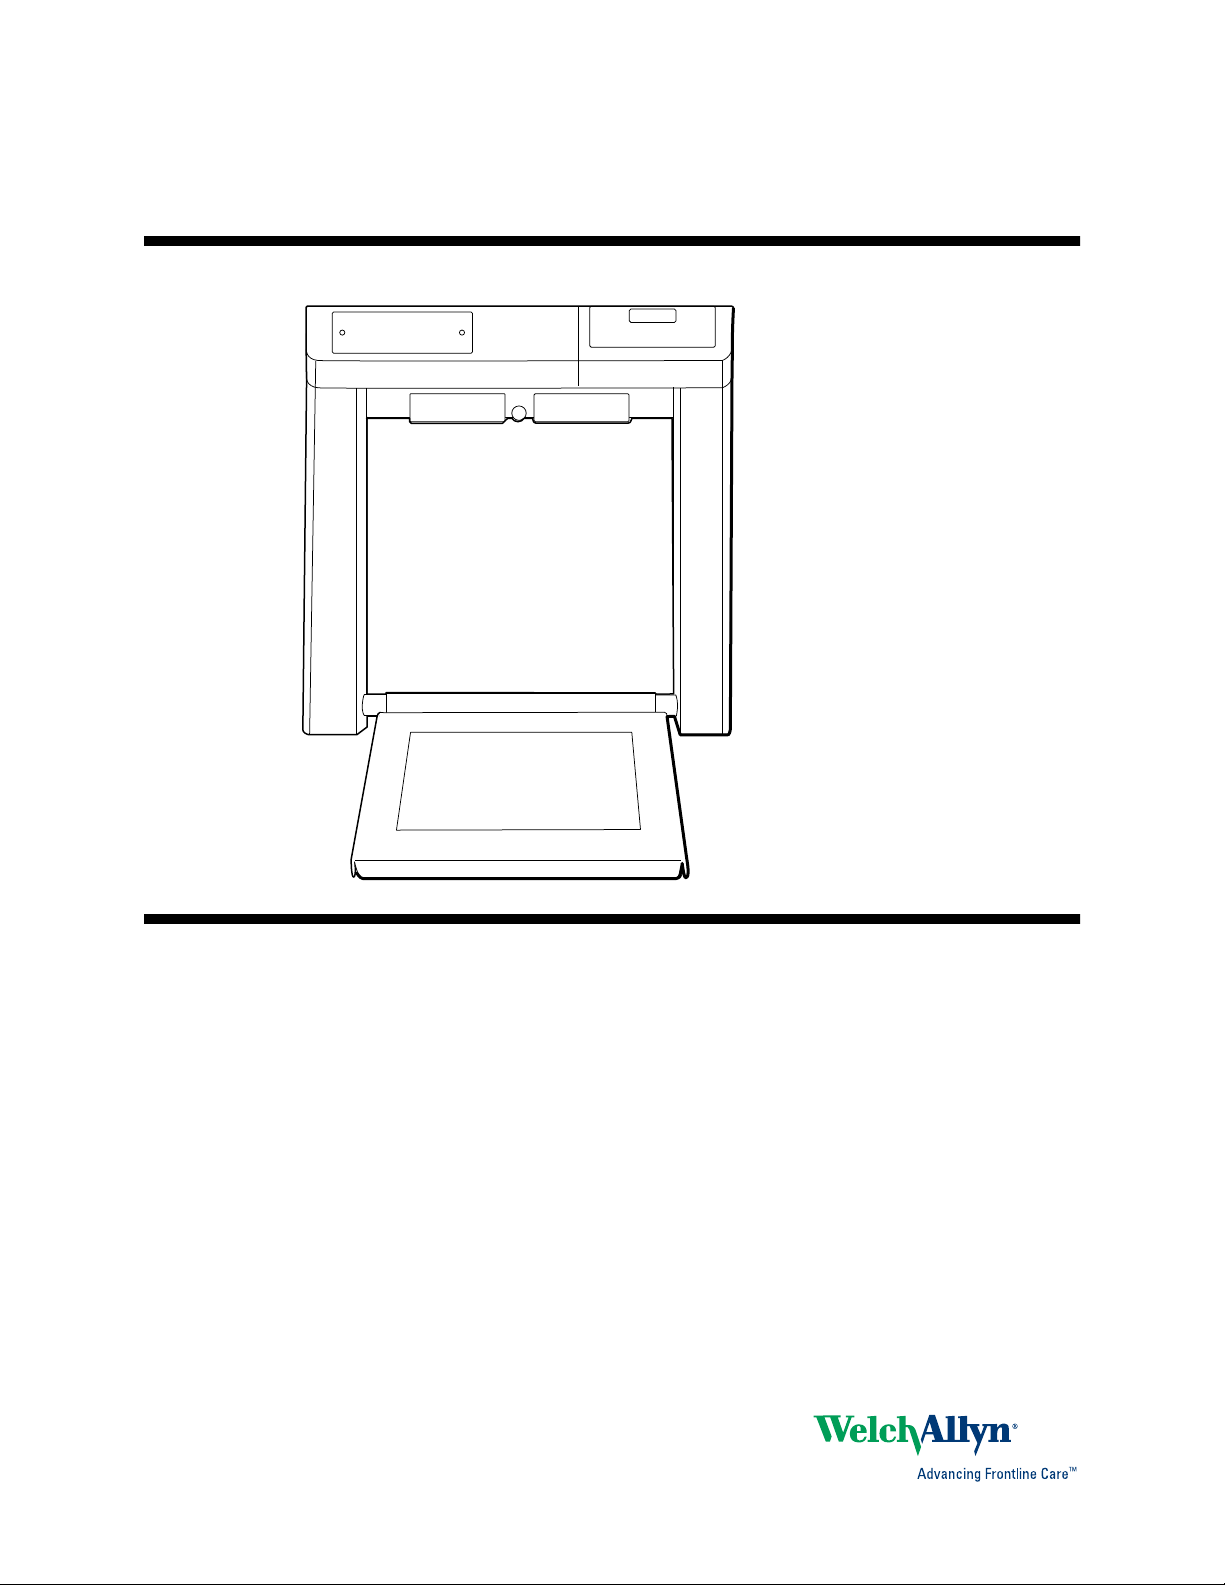
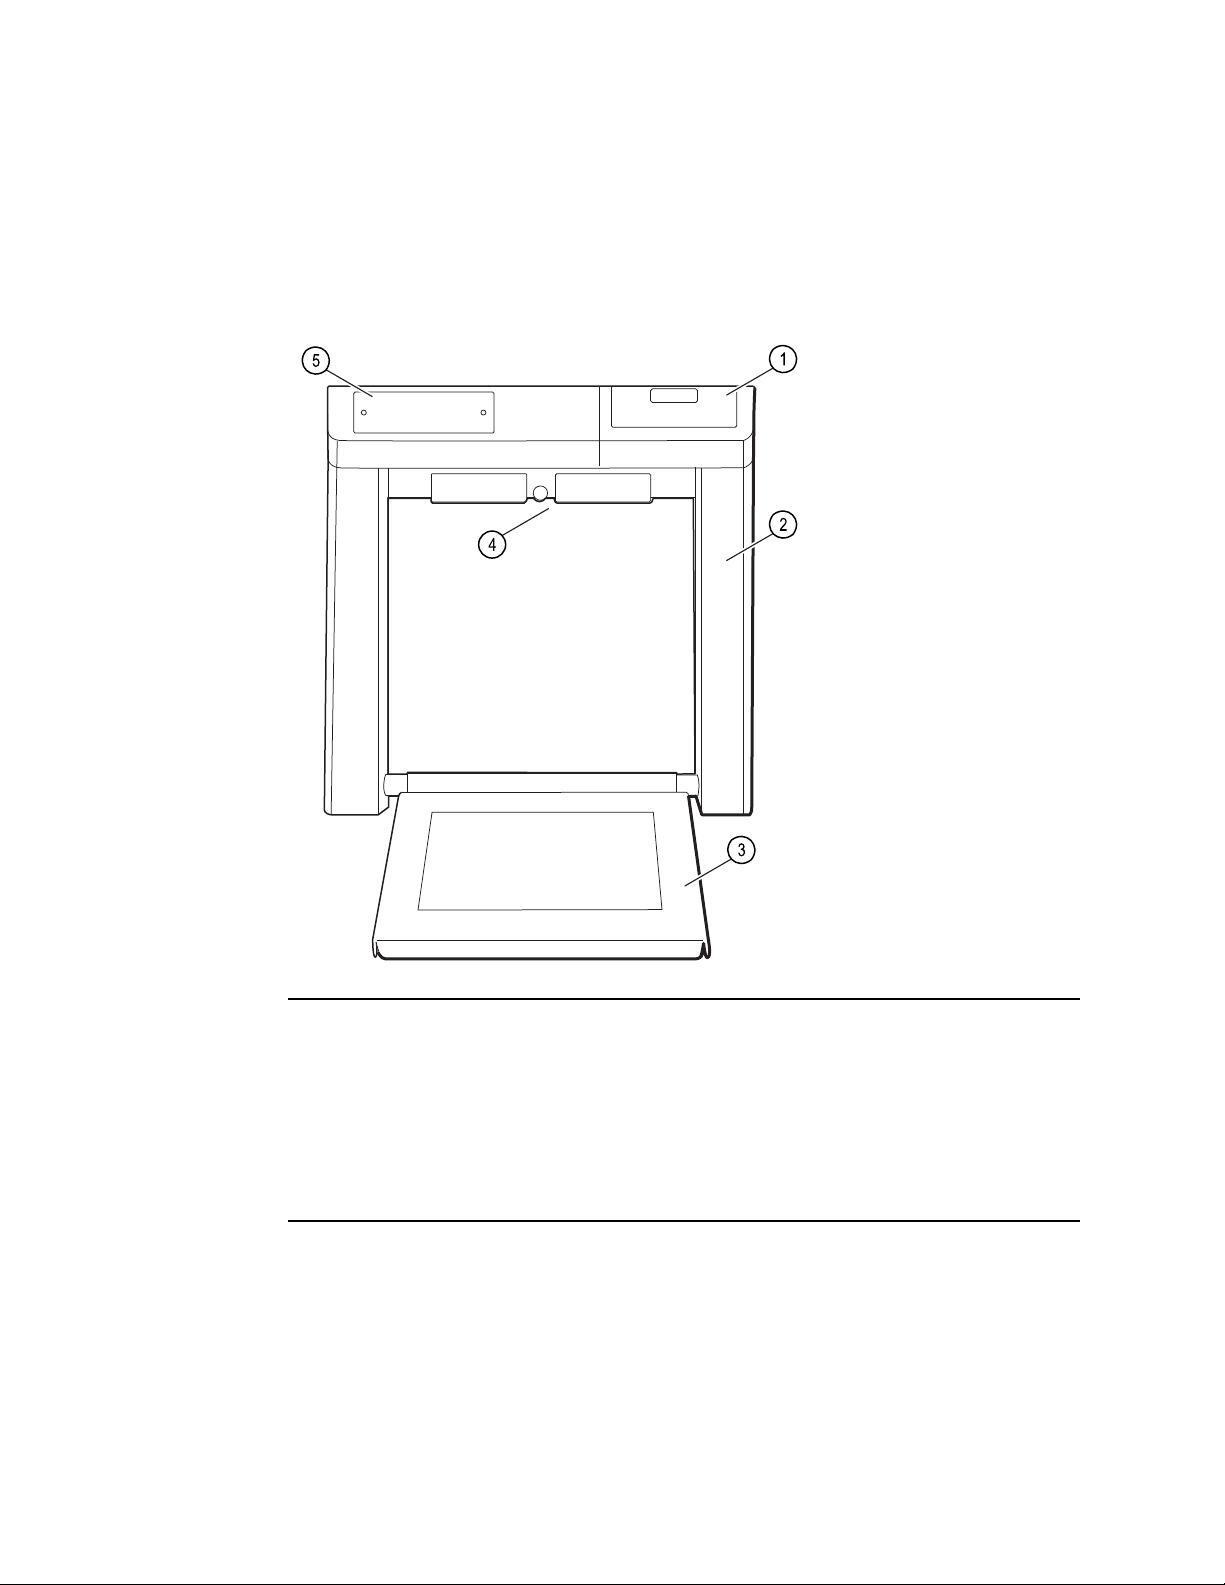
Controls and indicators
Scale
Model 5202
1 Front panel
2 Scale frame
3 Weighing platform
4 Mounting bracket
5 Battery access door
Page 9

Directions for use Introduction 5
Models 6202 and 6202D
1 Front panel
2 Scale frame
3 Weighing platform
4 Mounting bracket
5 Battery access door
6 Printer (optional)
N/A Satellite platform for model 6202D
Page 10

6 Introduction Welch Allyn Stow-A-Weigh Scales
Front panel buttons
Button Function
ZERO Press this button to reset the scale to zero.
ON Press this button to turn on the scale.
ST
RECALL Press this button to recall the previously stored scale reading.
LB Press this button to display the weight in pounds.
KG Press this button to display the weight in kilograms.
PRINT (DATA)
SEND
REWEIGH Press this button to retake the patient's weight.
Press this button in conjunction with ON to enter the setup mode.
Note
Press this button to print the current weight.
On models equipped with a RS-232 port, pressing this button when the scale is connected to a
computer sends the current measurement to the computer.
This button is not present if you purchased a scale with the kilogram-only option.
Page 11

Installation and setup
Use the following instructions to install and setup your scale for use.
Installation instructions
The scale should be installed in a location with a flat, firm floor. It can be installed over
dense, low height commercial carpeting without problem. When used with some
thicker, looser carpet piles the weighing platform might not fold down squarely against
the floor. In severe cases, a flat plastic or metal shim can be inserted under each leg of
the scale frame to better support the scale structure on carpet.
7
1.
Select a suitable location to install the scale. Make sure that the location is free from
excessive molding, guard rails, or other items that can impede installation.
2. Make sure you have selected attaching hardware suitable for the construction of
your wall.
Note Attaching hardware is not included with the scale.
3. Follow the instructions for your model and bracket size, as indicated in the following
sections.
Model 5202 with a 14-inch bracket
CAUTION The mounting bracket serves only to retain the scale against the
wall to keep it from tipping over. The mounting bracket should not support
the scale and keep the scale frame from resting on the floor.
Page 12

8 Installation and setup Welch Allyn Stow-A-Weigh Scales
1. From the floor, use a tape measure and make a mark at 21.75 in. This mark will be
the left mounting hole of the bracket.
2. Align the hole on the left side of the bracket over the mark. Using a level, ensure that
the bracket is straight horizontally, and make two marks on the wall based on the
location of the holes in the center and top right of the bracket.
Make sure that the two top holes are 13 in. apart and that the center hole is 2 in.
from the top of the bracket.
3. Drill holes through the marks you made and install the mounting hardware through
the bracket.
4. Once the bracket is mounted, lift the scale and lower it into position on the lip of the
bracket. Center the scale side to side in the bracket.
Model 6202 with a 14-inch bracket
CAUTION The mounting bracket serves only to retain the scale against the
wall to keep it from tipping over. The mounting bracket should not support
the scale and keep the scale frame from resting on the floor.
1. From the floor, use a tape measure and make a mark at 34.25 in. This mark will be
the left mounting hole of the bracket.
2. Align the hole on the left side of the bracket over the mark. Using a level, ensure that
the bracket is straight horizontally, and make two marks on the wall based on the
location of the holes in the center and top right of the bracket.
Make sure that the two top holes are 13 in. apart and that the center hole is 2 in.
from the top of the bracket.
3. Drill holes through the marks you made and install the mounting hardware through
the bracket.
4. Once the bracket is mounted, lift the scale and lower it into position on the lip of the
bracket. Center the scale side to side in the bracket.
Page 13

Directions for use Installation and setup 9
Model 6202D with two 14-inch brackets
CAUTION The mounting brackets serve only to retain the scale against the
wall to keep it from tipping over. The mounting brackets should not support
the scale and keep the scale frame from resting on the floor.
1. From the floor, use a tape measure and make a mark at 34.25 in. This mark will be
the left mounting hole of the left bracket.
2. Align the hole on the left side of the bracket over the mark. Using a level, ensure that
the bracket is straight horizontally, and make two marks on the wall based on the
location of the holes in the center and top right of the bracket.
Make sure that the two top holes are 13 in. apart and that the center hole is 2 in.
from the top of the bracket.
3. Drill holes through the marks you made and install the mounting hardware through
the bracket.
4. From the edge of the left bracket, measure 33 inches to the right and make a mark.
This mark is the location of the left edge of the right bracket.
5. Follow steps 1 through 3 to mount the right bracket. Make sure that the left edge of
the bracket aligns with the mark made in Step 4.
6. Once the brackets are mounted, lift the scales and lower them into position on the
lip of the bracket. Make sure the main platform is on the right. Center the scales side
to side in the bracket.
7. Connect the cable between the main platform and the satellite platform.
Custom setup
You can customize the scale to best suit your needs. Configurations that can be selected
include the automatic shut-off time, weighing units, weight resolution, and more.
Enter custom setup mode
1. Lower the weighing platform to the weighing position.
2. Press ON to power down the scale.
3. Press and hold ST while pressing ON.
4. Once the scale powers up, press and release ST five times.
The scale displays SEt-UP and produces a series of four long beeps.
Page 14

10 Installation and setup Welch Allyn Stow-A-Weigh Scales
Set the options
Enter the custom setup as described.
Press ST to scroll through the custom setup options.
The options displayed with each press are as follows:
Press the setup mode select button to turn these options On or OFF.
Note Options indicated with an asterisk (*) require an additional
press of ST to change the value.
Option displayed Feature
SOFt This option displays the software version of your scale.
dAtE This option displays the release date of the software. The format is MM/DD/YY.
SCALE This option displays the model number of the scale.
AutOFF* This displays the number of seconds before the scale turns off when operating on battery power.
The Cont value prevents the scale from turning off automatically.
AC con* This option causes the scale to remain on when plugged in to AC power.
rES
UnitS* This option allows you to change the displayed weight unit.
This option allows you to change the resolution of weight. Pressing ST switches between the
following options:
0.1 pounds / 0.05 kilograms
0.1 pounds / 0.1 kilograms
0.2 pounds / 0.1 kilograms
0.5 pounds / 0.2 kilograms
1 pound / 0.5 kilograms
Note Do not change the scale units if you have purchased the kilogram-only option.
KILOS* This option allows the weight to display in kilograms.
POUNDS* This option allows the weight to display in pounds.
bEEPEr* This option determines the audible signal that occurs when a front panel button is pressed.
rECALL
rS-232 Detailed instructions for this feature are available from Welch Allyn. Go to http://
OutPut* This option displays the current data port output option. Detailed instructions for this feature are
This option allows you to turn ON or OFF the RECALL button functionality.
www.welchallyn.com/en/other/contact-us.html to find your local representative.
available from Welch Allyn. Go to http://www.welchallyn.com/en/other/contact-us.html to find
your local representative.
Set the value to OFF to disable the optional internal printer or the RS-232 port.
PrtUnt*
This option determines whether pounds or kilograms are displayed on a printout.
If the pounds and kilograms indicators are illuminated on the control panel, the printed output is
determined by whichever unit is selected on the control panel.
If the kilogram indicator is illuminated, it will only print in kilograms, regardless of the unit is
selected on the control panel.
Page 15

Directions for use Installation and setup 11
If the pounds indicator is illuminated, it will only print in pounds, regardless of the unit is
selected on the control panel.
PrtOPT*
bAud*
pArity*
StPbit*
rtS.ctS*
Prtbtn*
rtEPrt*
Press RECALL to choose between the following options:
PnlPrt: The current weight is printed when PRINT is pressed on the control panel.
AutPrt: The current weight is automatically printed when a weight reading occurs.
This option allows you to set the baud rate. Values are 1200, 2400, 4800, 9600, and
19200.
This option allows you to change the parity between the following options:
Off: No parity, 8 data bits
Odd: Odd parity, 7 data bits
EuEn: Even parity, 7 data bits
This option allows you to change the stop bits between the following options:
1 bit: One stop at the end of a word
2 bits: Two stops at the end of a word
This option allows you to turn On for the printer or Off for RS232 serial transmissions.
This option allows you to turn On or Off the front panel PRINT button.
This option allows you to turn On or Off the enabling of printing from a remote location by
connecting the receive line to the ground.
PC brd*
SEt-UP
This option displays the model number of the printed circuit board. A second press of ST
displays the revision of the printed circuit board.
This option is displayed when you have cycled through all the options. Press and hold ON to
power down the scale.
Page 16

12 Installation and setup Welch Allyn Stow-A-Weigh Scales
Page 17

Scale operation
Power options
The scale can be used with battery power or with AC power.
Battery power
CAUTION Use only size D disposable alkaline batteries. The use of any
other battery will void the warranty.
13
Lower the weighing platform to power on the scale.
The scale automatically turns off after 45 seconds of non-use when operating on battery
power. Press ON to power on the scale.
The LO BATT indicator displays when the battery power is low.
bAttrY displays when the batteries are unable to properly power the scale.
Replace the batteries when either of these messages are displayed.
AC power
When plugged in, the scale continuously runs on AC power automatically when the
weighing platform is lowered.
The scale switches to battery power when AC power is not present.
Audible beeps
The following beeps occur when using the scale.
Sound Meaning
One beep Acknowledgment of a button press.
Two beeps The scale is zeroed and ready to take a measurement.
Three beeps The weight reading is obtained and displayed.
No print, four
short beeps
No print, four
long beeps
A print was requested, but valid weight is not displayed on the scale, or PRINT was pressed while
the printer is in use.
There is a problem with the printer. Contact your service department.
Page 18

14 Scale operation Welch Allyn Stow-A-Weigh Scales
Four long
beeps
Four short
beeps
The battery is too weak to operate the scale.
The scale has entered setup mode.
Weighing procedure
1. Make sure that the scale platform is down.
2. If necessary, press ON to turn on the scale.
The scale sounds one beep.
3. After two beeps have sounded, have the patient step on the scale.
4. The scale displays a series of moving dashes as it waits for stabilization and
calculates the weight.
Once the measurement is obtained, the scale beeps three times and displays the
weight on the front panel.
5. If necessary, press REWEIGH to perform another weight measurement..
6. If necessary, press RECALL to display the previously stored scale measurement.
Note A measurement is stored in the scale until a new weight is
taken and zeroes out.
A stationary display of - - indicates a negative weight. Make sure that there is nothing on
the scale and press ZERO to set the zero.
If O-LOAd is displayed, the capacity of the scale has been exceeded.
Print a weight measurement
Printers are a purchasable option for some scales. The printer will only print a valid
weight. If your printer is set up with the auto-print option, a print is automatically
generated after a measurement is taken.
1.
Take a weight measurement as described.
A single beep sounds.
2. Press PRINT (DATA) SEND.
A single beep sounds and the measurement is printed.
3. To print a previously stored scale measurement, press RECALL and then press
PRINT (DATA) SEND.
The following errors can occur:
Four short beeps indicate an invalid print request. Make sure that the weight is
•
properly displayed on the scale, or that a measurement is not already in the printing
process.
• Four long beeps indicate and internal problem with the printer. See the
Troubleshooting section.
Page 19

Storage, cleaning, and maintenance
Storage
The scale's weighing platform should be stowed in its upright position when then scale
is not in use.
Cleaning
15
1. Clean the scale at least once per day.
2. Use one of the following products when cleaning your scale:
70 percent isopropyl alcohol
PDI Sani-Cloths
Battery replacement
CAUTION Use only size D disposable alkaline batteries. The use of any
other battery will void the warranty.
1. Using a screwdriver, remove the two fasteners on the access door located on the
front of the scale and remove the door.
2. Install six new batteries in the battery holder. Make sure to follow the polarity
instructions.
3. Re-attach the access door.
®
Page 20

16 Storage, cleaning, and maintenance Welch Allyn Stow-A-Weigh Scales
Change the printer paper
The printer is a purchasable option.
1. Use a screwdriver to loosen the screw on the battery access door and remove the
printer access door.
2. Remove the spindle containing the empty printer paper roll from the printer paper
well.
3. Replace the printer paper roll in the spindle. Make sure the new printer paper is
advancing from the bottom of the roll.
4. Lift the green knob to lift the print head lever.
5. Insert the paper through the paper guide slot, and make sure it goes under and
around the black roller bar.
6. Pull the paper under the print head lever and push the green knob down to push the
print head lever down.
7. Press PAPER ADVANCE to move the paper through the printer.
Page 21

Directions for use Storage, cleaning, and maintenance 17
8. Install the printer access door, and advance the new paper through the slot on the
door.
9. Install the screw on the printer access door.
Maintenance
Routinely perform the following preventive maintenance to keep your scale in working
order.
1. Check the calibration annually or as required.
2. Inspect the scale for cracks or loose mounting hardware. Replace or repair as
necessary.
3. Visually inspect the scale enclosure for damage or loose or missing hardware.
Replace or repair as necessary.
4. If equipped, inspect the AC line cord for abrasions or other signs of wear.
5. Do not expose the scale to excessive water or moisture.
6. Do not store the scale where heavy objects can be placed on it.
7. Replace the batteries annually or as required.
8. Do not service or perform maintenance while the scale is in use with a patient.
Troubleshooting
This section presents tables of information to help you troubleshoot issues with the
scale.
To use these tables, locate the specific problem with your scale in the left column of the
table. The remainder of the row explains possible causes and suggests actions that can
resolve the issue.
Issue
The weight measurement is not
accurate
The weight measurement takes too
long to display
The scale displays O-LOAd
The measurement does not change
when weight is applied to the
scale
Possible cause Suggested action
There may be a mechanical obstruction on the
platform
The platform may be in motion Wait for the platform to settle.
The object on the scale may be larger than the
maximum value allowed
The load cell transducer, connector, or cable may
be damaged
Make sure the platform is not
touching a foreign object or has
anything restricting its downward
motion.
If the weight value is within the
specified range, contact your
service department.
Contact your service department.
The scale buttons are not
responding
The error message E-FAIL is
displayed
The buttons may be damaged Check for visible signs of
damage.
Contact your service department.
The scale's memory has failed Contact your service department.
Page 22

18 Storage, cleaning, and maintenance Welch Allyn Stow-A-Weigh Scales
Issue Possible cause Suggested action
The error message r-FAIL is
displayed
The error message A-FAIL is
displayed
The error message C-FAIL is
displayed
The scale's memory has failed. Contact your service department.
The scale's memory has failed Contact your service department.
The scale's memory has failed. Contact your service department.
Page 23

Appendices
Specifications
Item Specification
Scales 5202, 6202, 6202D
19
Resolution (factory default)
Weighing capacity 5202: 660 lb. (300 kg)
Readout
Power source
5202, 6202: 0.1 lb. / 0.1 kg (100 g)
6202D: 0.5 lb. / 0.2 kg
6202: 880 lb. (400 kg)
6202D: 1000 lb. (450 kg)
Large, bright light-emitting diode display.
Selectable weight displayed in pounds or kilograms.
Indicator light to show selected units.
Battery
• 6 D alkaline batteries
Power adapter
• Medical grade UL listed external power supply
• Nominal input voltage: 100-240V AC ±10%
• Nominal input frequency: 50/60 Hz
• Nominal input current: 0.3-0.15Arms @ max load
• Standby power consumption at UIn: 230V AC : ≤ 0.1W
• Nominal output voltage: U
• Nominal output current: I
: 12V DC +5% / -5% UBr : ≤ 150mVpp
out
: 1000mA
out
Platform dimensions 5202: 18 in. x 18 in x 1.5 in.
6202: 24 in. x 30 in. x 1.5 in.
6202D: 24 in. x 30 in. x 1.5 in. (main platform) and 12 in. x 30 in. x 1.5 in. (secondary
platform)
Page 24

20 Appendices Welch Allyn Stow-A-Weigh Scales
Product configurations
The Welch Allyn Stow-A-Weigh Scales are available in the following configurations:
Model 5202, Stow-A-Weigh Stand-On Scale
Model Description
5202-K Stow-A-Weigh Stand-On Scale, kilogram only
5202-X Stow-A-Weigh Stand-On Scale, standard weight
Model 6202, Stow-A-Weigh Wheelchair Scale
Model Description
6202-KP Stow-A-Weigh Wheelchair Scale, kilogram only, printer
6202-KX Stow-A-Weigh Wheelchair Scale, kilogram only, data port
6202-XP Stow-A-Weigh Wheelchair Scale, standard weight, printer
6202-XX Stow-A-Weigh Wheelchair Scale, standard weight, data port
Model 6202D, Dual Platform Stow-A-Weigh Wheelchair Scale
Model
6202D-KP Stow-A-Weigh Wheelchair Scale, kilogram only, printer
6202D-KX Stow-A-Weigh Wheelchair Scale, kilogram only, data port
6202D-XP Stow-A-Weigh Wheelchair Scale, standard weight, printer
6202D-XX Stow-A-Weigh Wheelchair Scale, standard weight, data port
Approved accessories
Model 5202
Part number
845010W Wall-mounted height gauge
Description
Description
Models 6202 and 6202D
Part number
845010W Wall-mounted height gauge
846202 Printer
Description
Page 25

Directions for use Appendices 21
Part number Description
23709 Thermal printer paper (box, 15 rolls)
341001 AC power adapter
Warranty
Welch Allyn will warranty the weight scale to be free of defects in material and
workmanship and to perform in accordance with manufacturer specifications for the
period of one year from the date of retail purchase.
The warranty period shall start on the date of purchase. The date of purchase is: 1) the
invoiced ship date if the device was purchased directly from Welch Allyn, 2) the date
specified during product registration, 3) the date of purchase of the product from a
Welch Allyn authorized distributor as documented from a receipt from said distributor.
This warranty does NOT cover damages caused by misuse or abuse, including but not
limited to:
• Failure caused by unauthorized repairs or modifications
• Damage caused by shock or dropping during transportation
• Damage caused by improper use of the power supply
• Failure caused by improper operation not consistent with the instructions stated in
this Directions for use
Should this device require maintenance (or replacement at our option) under warranty,
contact your local Welch Allyn representative: http://www.welchallyn.com/en/other/
contact-us.html
Page 26

Material No. 724514
 Loading...