

Welbilt ABM600 Owner's Manual
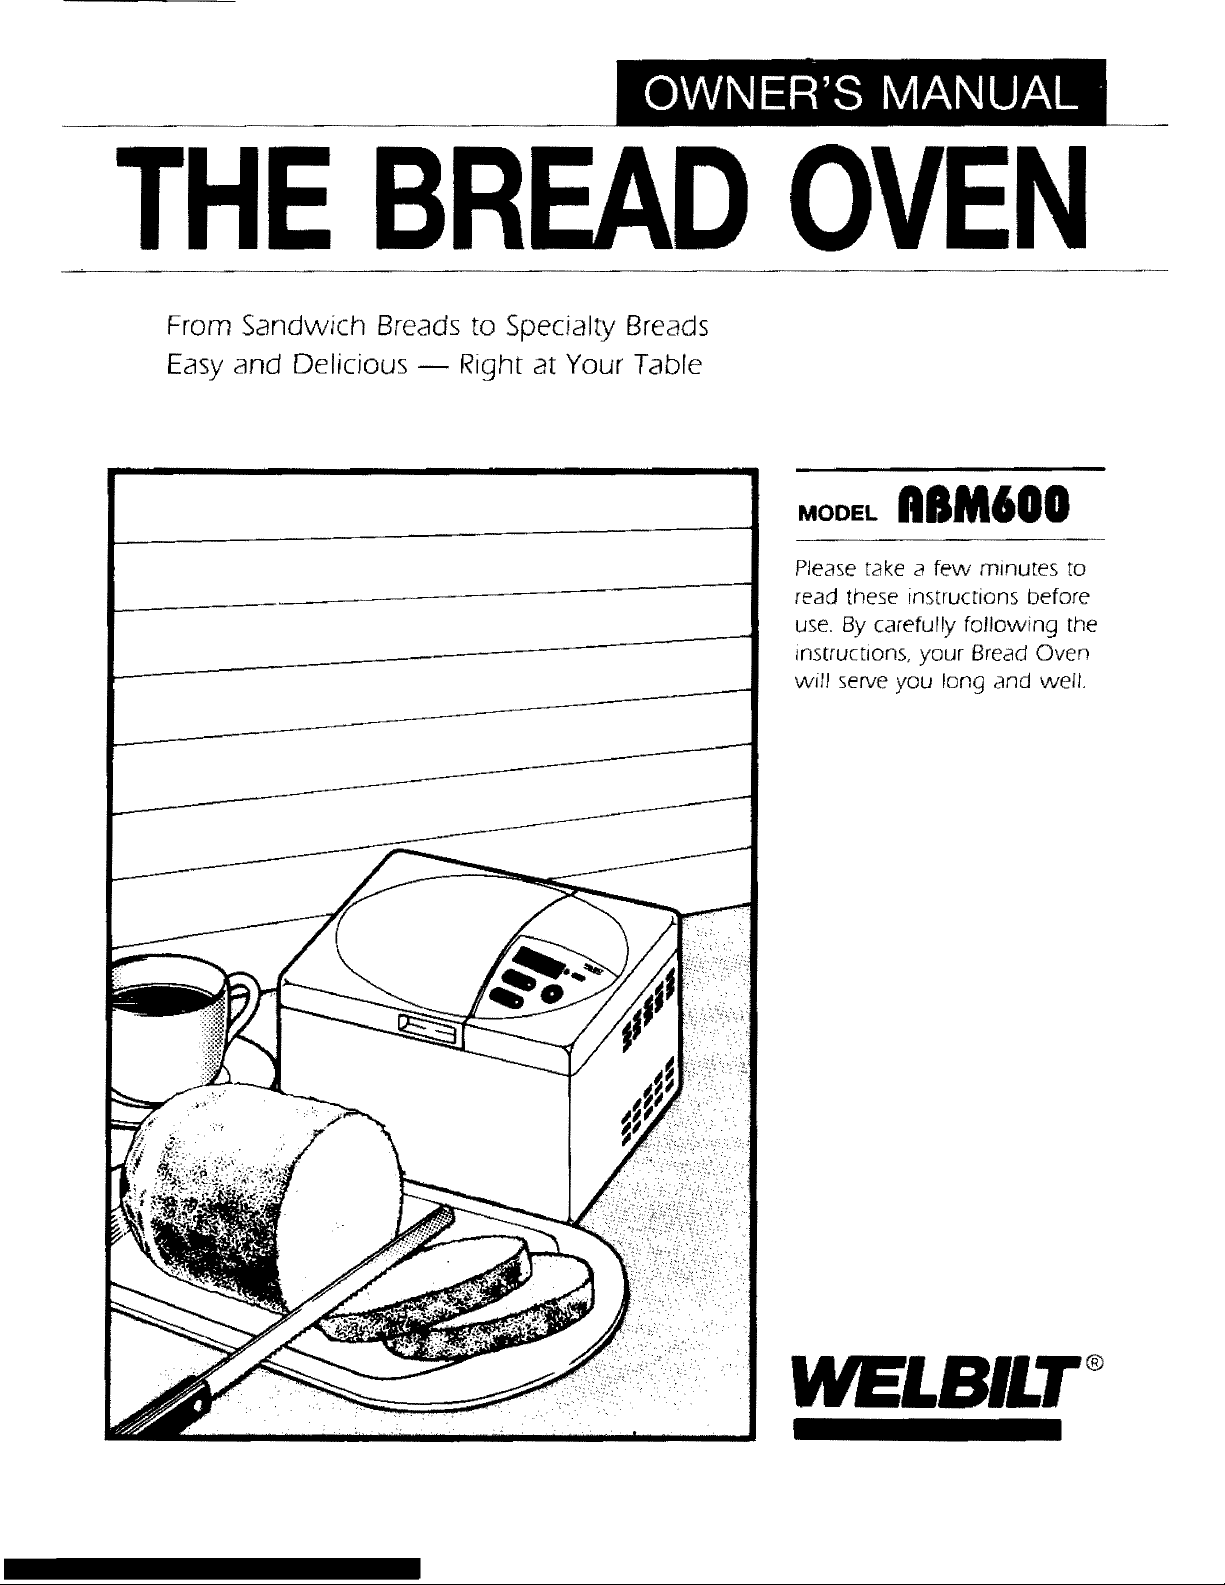
THEBREADOVEN
From Sandwich Breads to Specialty Breads
Easy and Delicious m Right at Your Table
I I I I I I
.o_, ABM600
Please take a few minutes to
read these instructions before
use. By carefully following the
instructions, your Bread Oven
will serve you long and well.
WELBILT _
CONTENTS
I
IMPORTANT SAFEGUARDS ................................ 2
PARTS AND INSTALLaTiON ............................... 3
Name and Function of Parts and
Accessories
CONTROL PANEL ................................................ 3
MOUNTING THE INNER POT .............................. 4
MENU SELECTION ............................................... 4
BREAD MAKING ................................................... 5
Full Auto Cycle ........................................................... 5
Manual Cycle for Kneading Only Option ................... 6
Removing the Bread ................................................... 7
SAFETY INSTRUCTIONS ................................ 8, 9
CARE OF YOUR BREAD OVEN ......................... 10
BEFORE CALLING FOR SERVICE .................... 11
SPECIFICATIONS ............................................... 12
FCC INFORMATION ........................................... 12
WARRANTY INFORMATION .............................. 13
IMPORTANT SAFEGUARDS
HOUSEHOLD USE ONLY
When using electrical appliances, basic safety precautions should always be followed, including the following:
1. Read all instructions belore using the appliance.
2. Do not touch hot surface.
3. To protect against electrical shock do not immerse cord, plugs, or unit in water or other liquid.
4 To prevent injuries or burns, dO not insert your hand into appliance when appliance is operating.
5. Close supervision is necessary when any appliance is used by or near children.
6. Unplug from cutlet when not in use and before cleaning. Allow to cool before putting on or taking off parts.
7. Do not operate any appliance with a damaged cord or plug or after the appliance malfunctions, or has been
damaged in any manner. Return appliance to the nearest authorized service facility for examination, repair, or
adjustment.
8. The use of accessory attachments not recommended by the appliance manufacturer may cause injuries.
9. Do not use outdoors.
10. Do not let cord hang over edge of table or counter, or touch hot surfaces.
11. Do not place on o_ near a hot gas or electric burner, or in a heated oven.
12. Extreme caution must be used when moving an appliance containing hot liquids.
13. When using an extension cord always attach plug to appliance first, then plug cord into the wall outlet. To
disconnect, turn any control to "off", then remove plug from wall outlet.
14 Do not use appliance for other than intended use.
SAVE THESE INSTRUCTIONS.
This unit has a short power supply cord" to reduce the risk resulting from becoming entangled in or tripping over a
}onger cord. An extension cord may be used if you are careful with its use. If a longer detachable power-supply cord
or extension co_d is used, (1) the marked electrical rating of the cord set or extension cord Should be at least as
great as the electrical rating of the appliance, and (2) the cord should be arranged so that itT_,,illnot drape over the
countedop or tabletop where it can be pulled on by children or tripped over unintentionally, The extension cord
should be a polarized 2-wire cord. The power cord must be kept dry and must not be bent or anything put on top
of it.
2
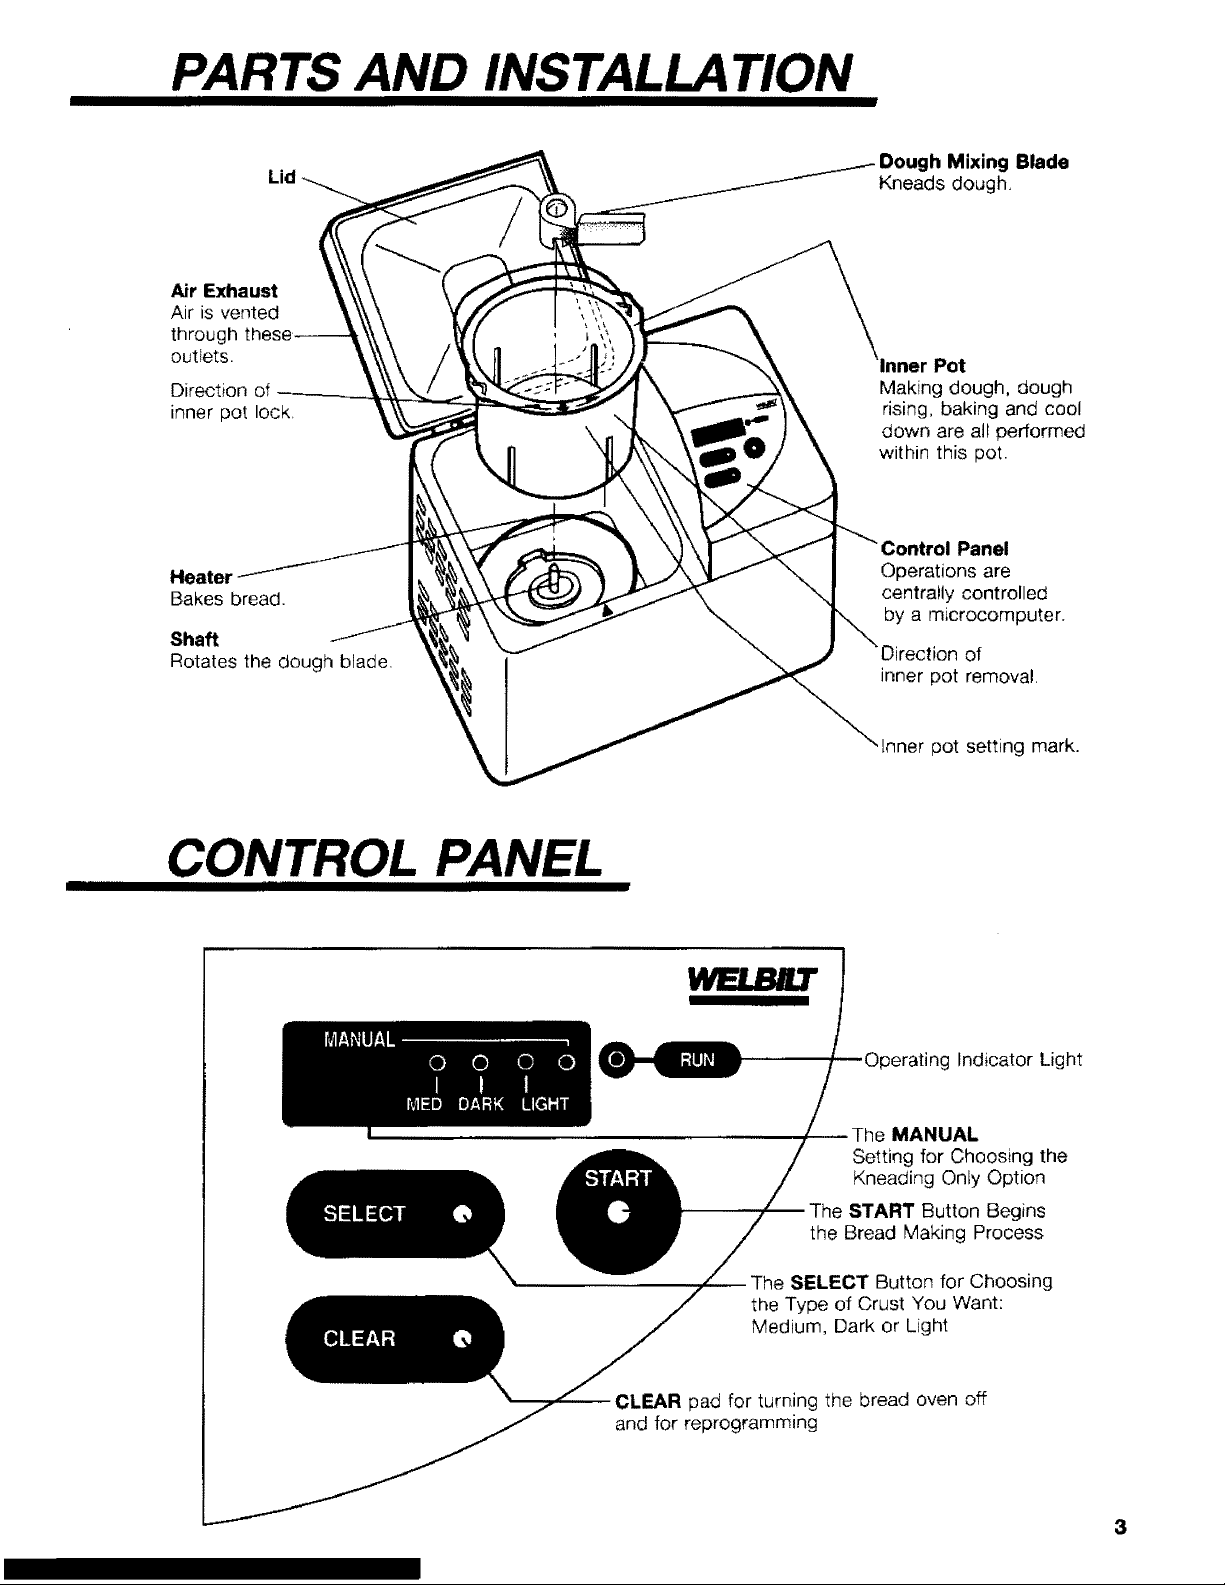
PARTS AND INSTALLATION
III
Dough Mixing Blade
Kneads dough.
Air Exhaust
Air is vented
through
outlets.
Direction
inner pot lock.
\lnner Pot
Making dough, dough
rising, baking and cool
down are al! performed
within this pot.
Heater
Bakes bread.
Shaft
Rotates the dough blade.
)1 Panel
Operations are
centrally controlled
by a mLcrocomputer.
3n of
inner pot removal.
inner pot setting mark.
CONTROL PANEL
IIIIIIIIII
Indicator Light
MANUAL
Setting for Choosing the
Kneading Only Option
The START Button Begins
the Bread Making Process
The SELECT Button for Choosing
the Type of Crust You Want:
Medium, Dark or Light
pad for turning the bread oven off
and for reprogramming
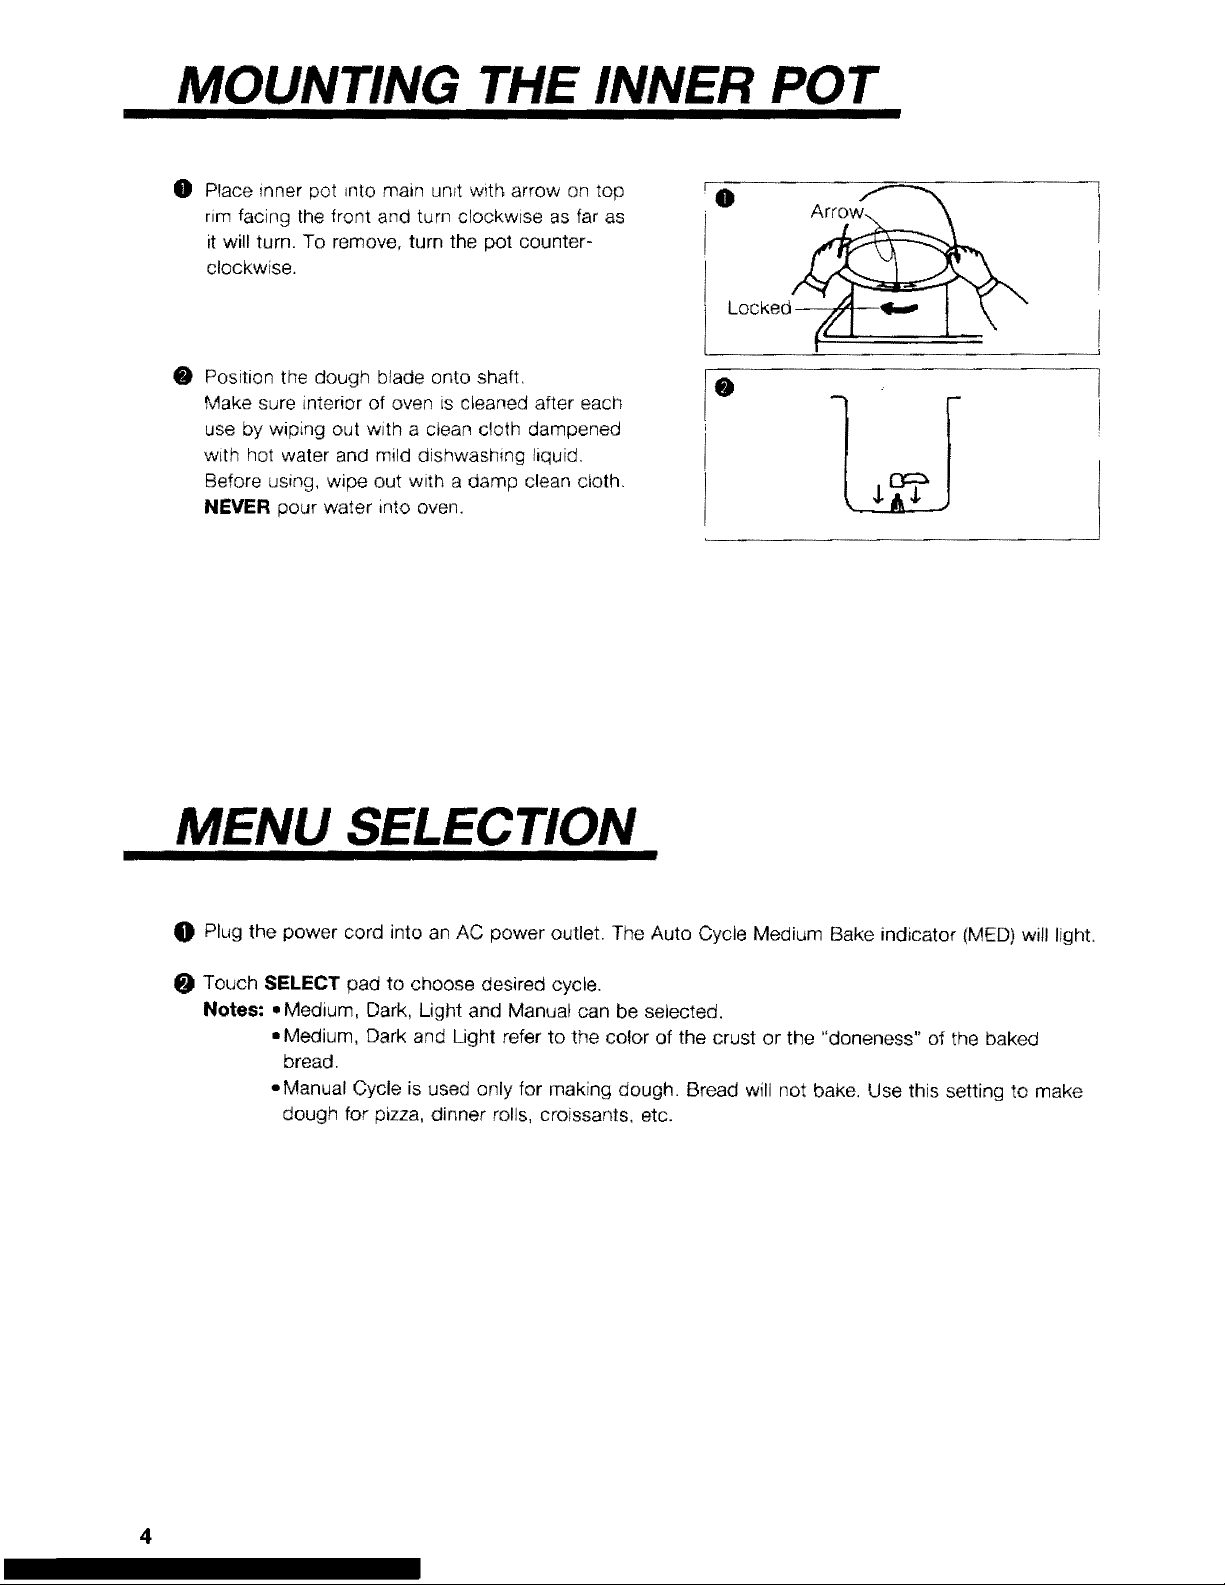
MOUNTING THE INNER POT
IIIII II II I
O Place inner pot _nto main unit with arrow on top
rim facing the front and turn clockwise as far as
it will turn. To remove, turn the pot counter-
clockwise.
Position the dough blade onto shaft,
Make sure interior of oven is cleaned after each
use by wiping out with a ctean cloth dampened
with hot water and mild dishwashing liquid,
Before using, wipe out with a damp clean ctoth,
NEVER pour water into oven.
Lockoo /b"t \ "
O
MENU SELECTION
O Plug the power cord into an AC power outlet. The Auto Cycle Medium Bake indicator (MED) will light,
O Touch SELECT pad to choose desired cycle.
Notes: • Medium, Dark, Light and Manual can be selected.
° Medium, Dark and Light refer to the color of the crust or the "doneness" of the baked
bread.
-Manual Cycle is used only for making dough. Bread will not bake, Use this setting to make
dough for pizza, dinner rolls, croissants, etc.
BREAD MAKING
Full Auto Cycle
_) Make sure the inner pot is correctly positioned.
Prepare and add the ingredients for the bread you are making as described in your recipe.
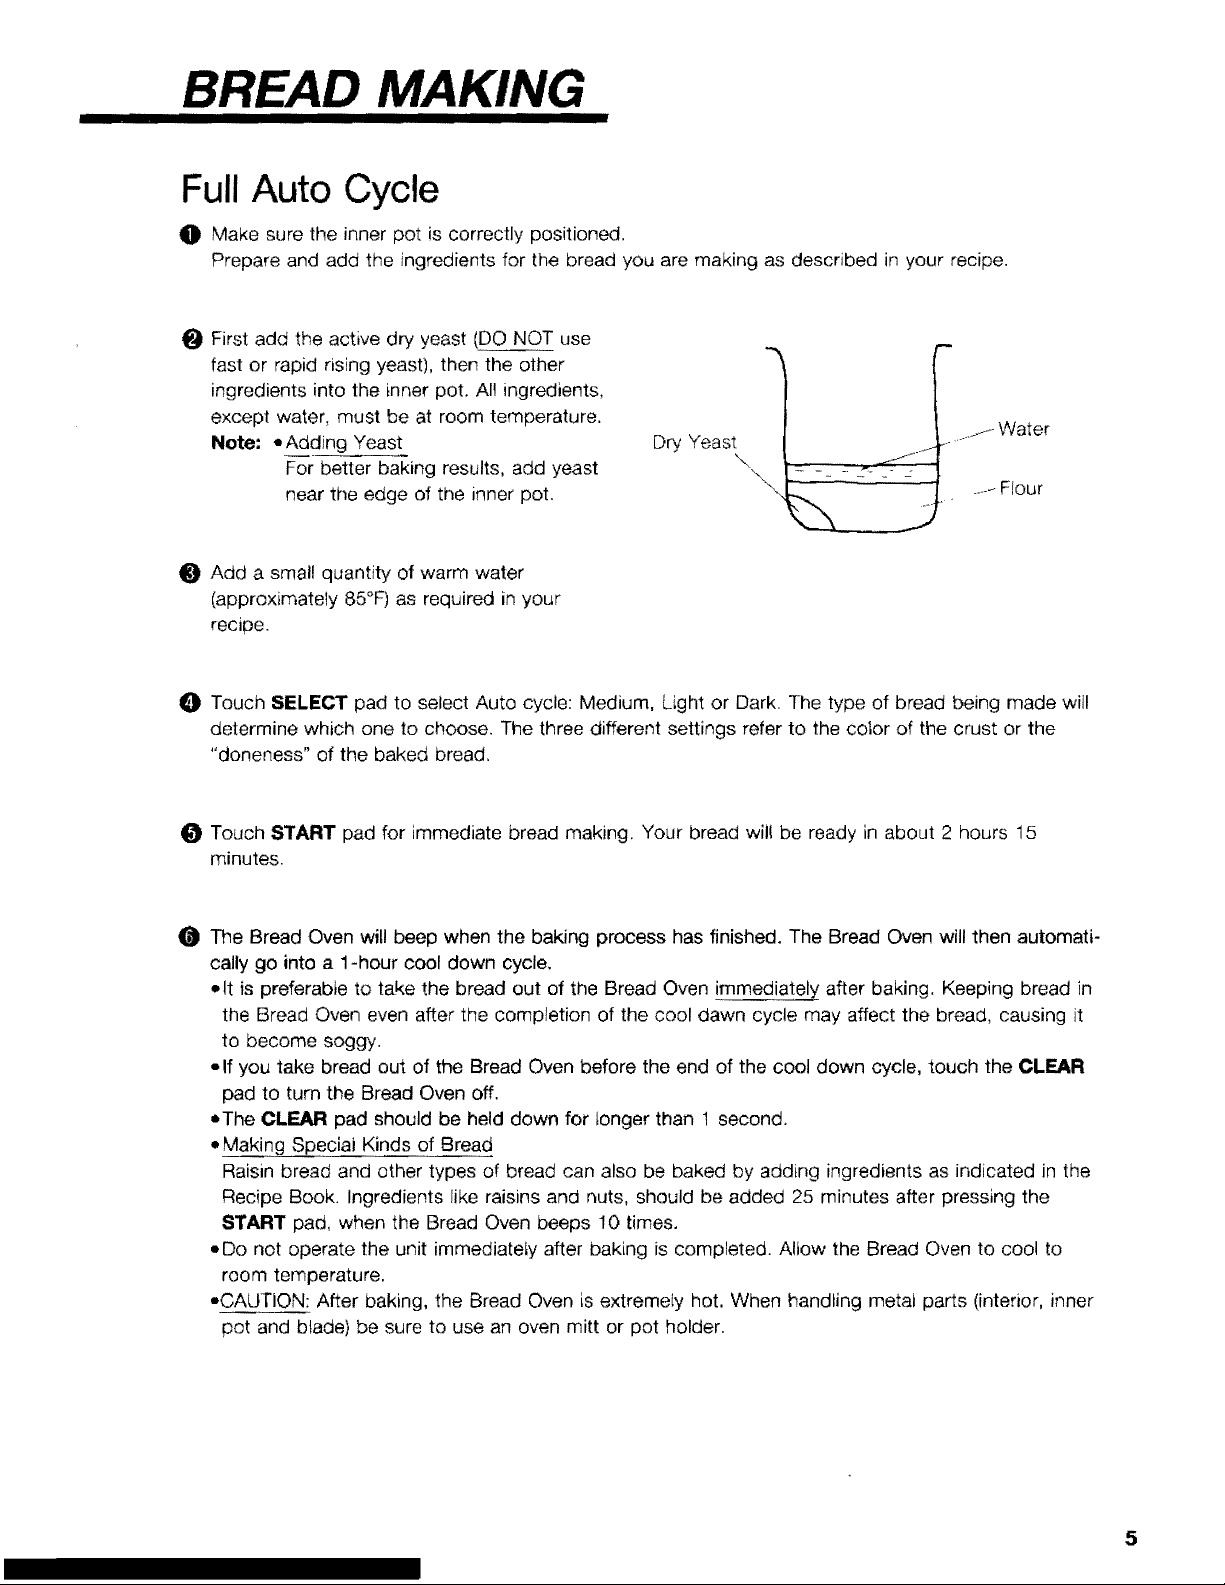
O First add the active dry yeast (DO NOT use
fast or rapid rising yeast), then the other
ingredients into the inner pot. AI! ingredients,
except water, must be at room temperature.
Note: -Adding Yeast
For better baking results, add yeast
near the edge of the inner pot.
Dry Yeast
\
\,
/- Water
F ......
.....Flour
_) Add a small quantity of warm water
(approximately 85°F) as required in your
recipe.
_) Touch SELECT pad to select Auto cycle: Medium, Light or Dark. The type of bread being made will
determine which one to choose. The three different settings refer to the color of the crust or the
"doneness" of the baked bread,
Touch START pad for immediate bread making. Your bread wilt be ready in about 2 hours 15
minutes.
The Bread Oven will beep when the baking process has finished. The Bread Oven will then automati-
cally go into a 1-hour cool down cycle.
• It is preferable to take the bread out of the Bread Oven immediately after baking. Keeping bread in
the Bread Oven even after the completion of the cool dawn cycle may affect the bread, causing it
to become soggy.
• If you take bread out of the Bread Oven before the end of the cool down cycle, touch the CLEAR
pad to turn the Bread Oven off.
oThe CLEAR pad should be held down for tonger than 1 second.
• Making Special Kinds of Bread
Raisin bread and other types of bread can also be baked by adding ingredients as indicated in the
Recipe Book. Ingredients like raisins and nuts, should be added 25 minutes after pressing the
START pad, when the Bread Oven beeps 10 times.
• Do not operate the unit immediately after baking is completed. Altow the Bread Oven to cool to
room temperature.
•CAUTION: After baking, the Bread Oven is extremely hot. When handling metat parts (interior, inner
pot and blade) be sure to use an oven mitt or pot holder.
5
 Loading...