

8"
8"
8"
8"
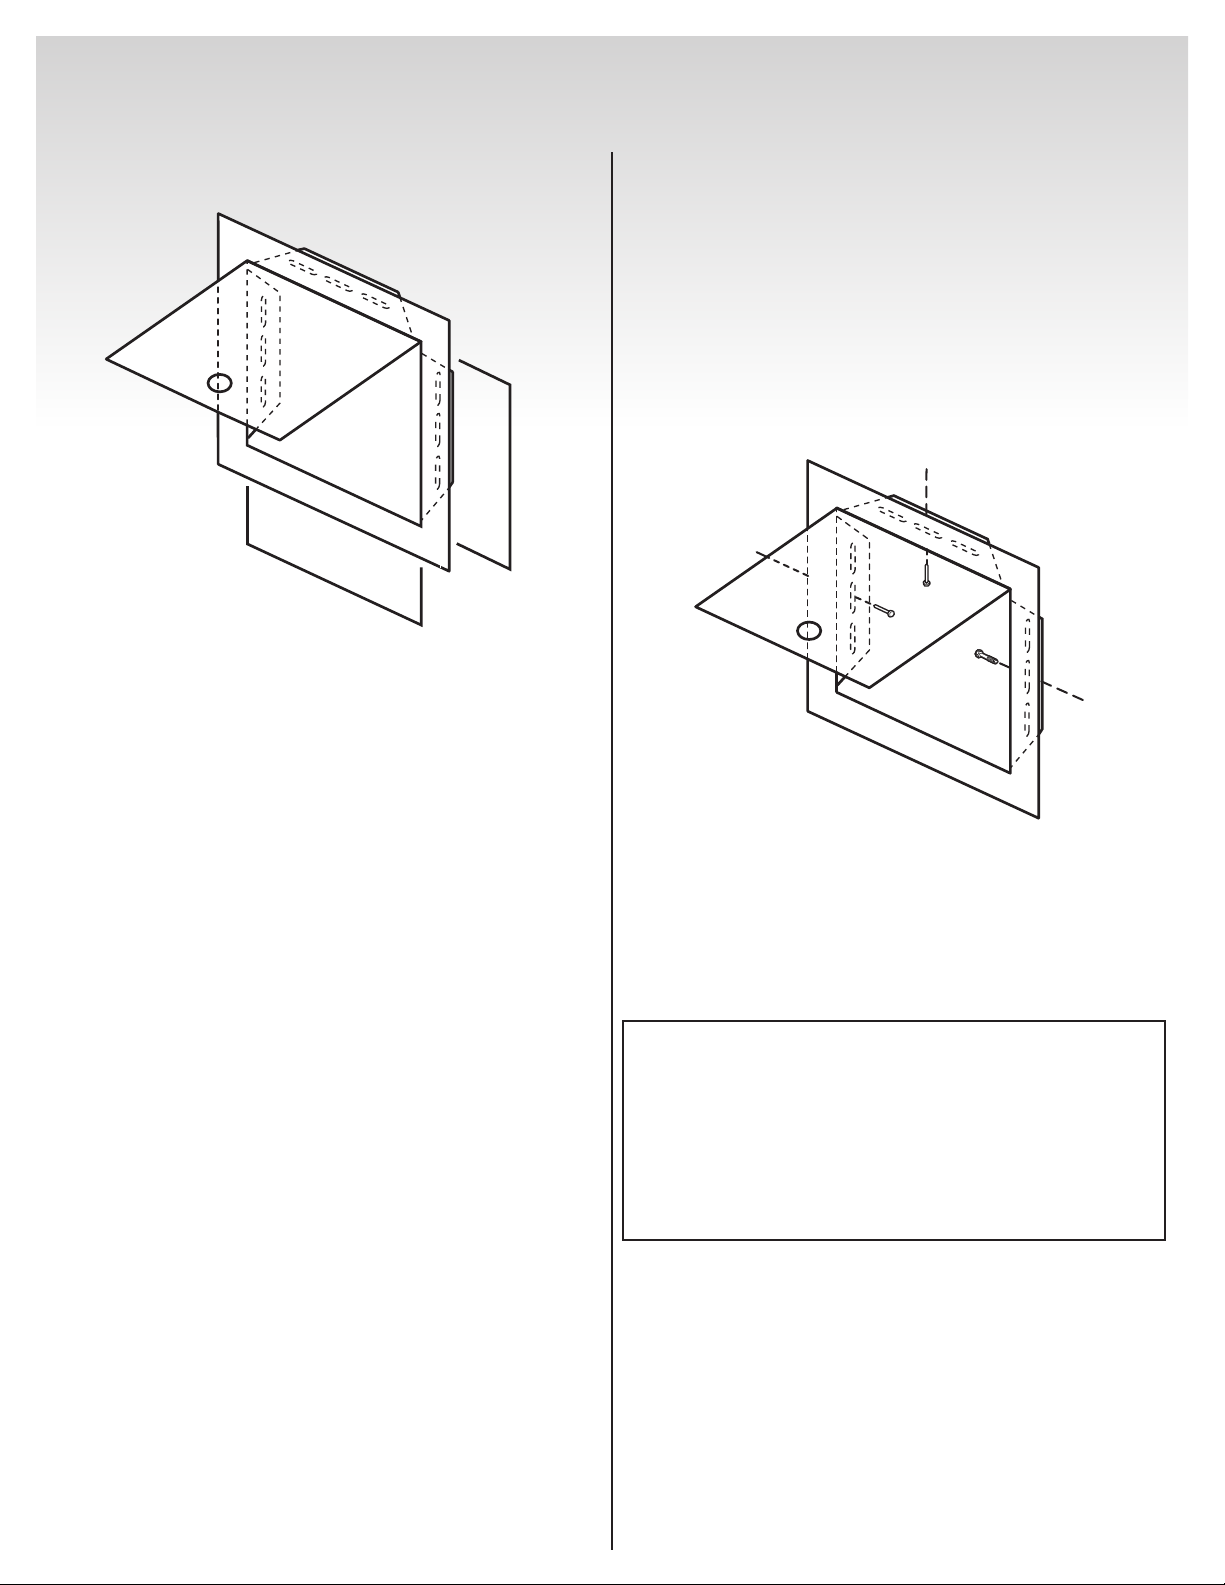
GAS LINE ACCESS DOOR INSTALLATION
ACCESS DOOR DIMENSIONS
ACCESS DOOR MOUNTING
Holes are provided that are intended for
mounting your Access Door to the “island”
structure, located inside the access door frame.
When mounting the Access Door, the door
positioning can be located in any direction.
Use non corrosive hardware when mounting
the vent(s).
Be sure to mount the Access Door before use.
WARNING: You should check all
connections for gas leaks periodically with a
soap and water solution.
DANGER:
Do not use an open ame to check for gas
leaks. Be sure there are no sparks or open
ames in the area while you check for leaks.
Sparks or open ames will result in a re or
explosion, which can cause serious bodily
injury or death and damage to property.
61426 0204
2.5"
14.5"
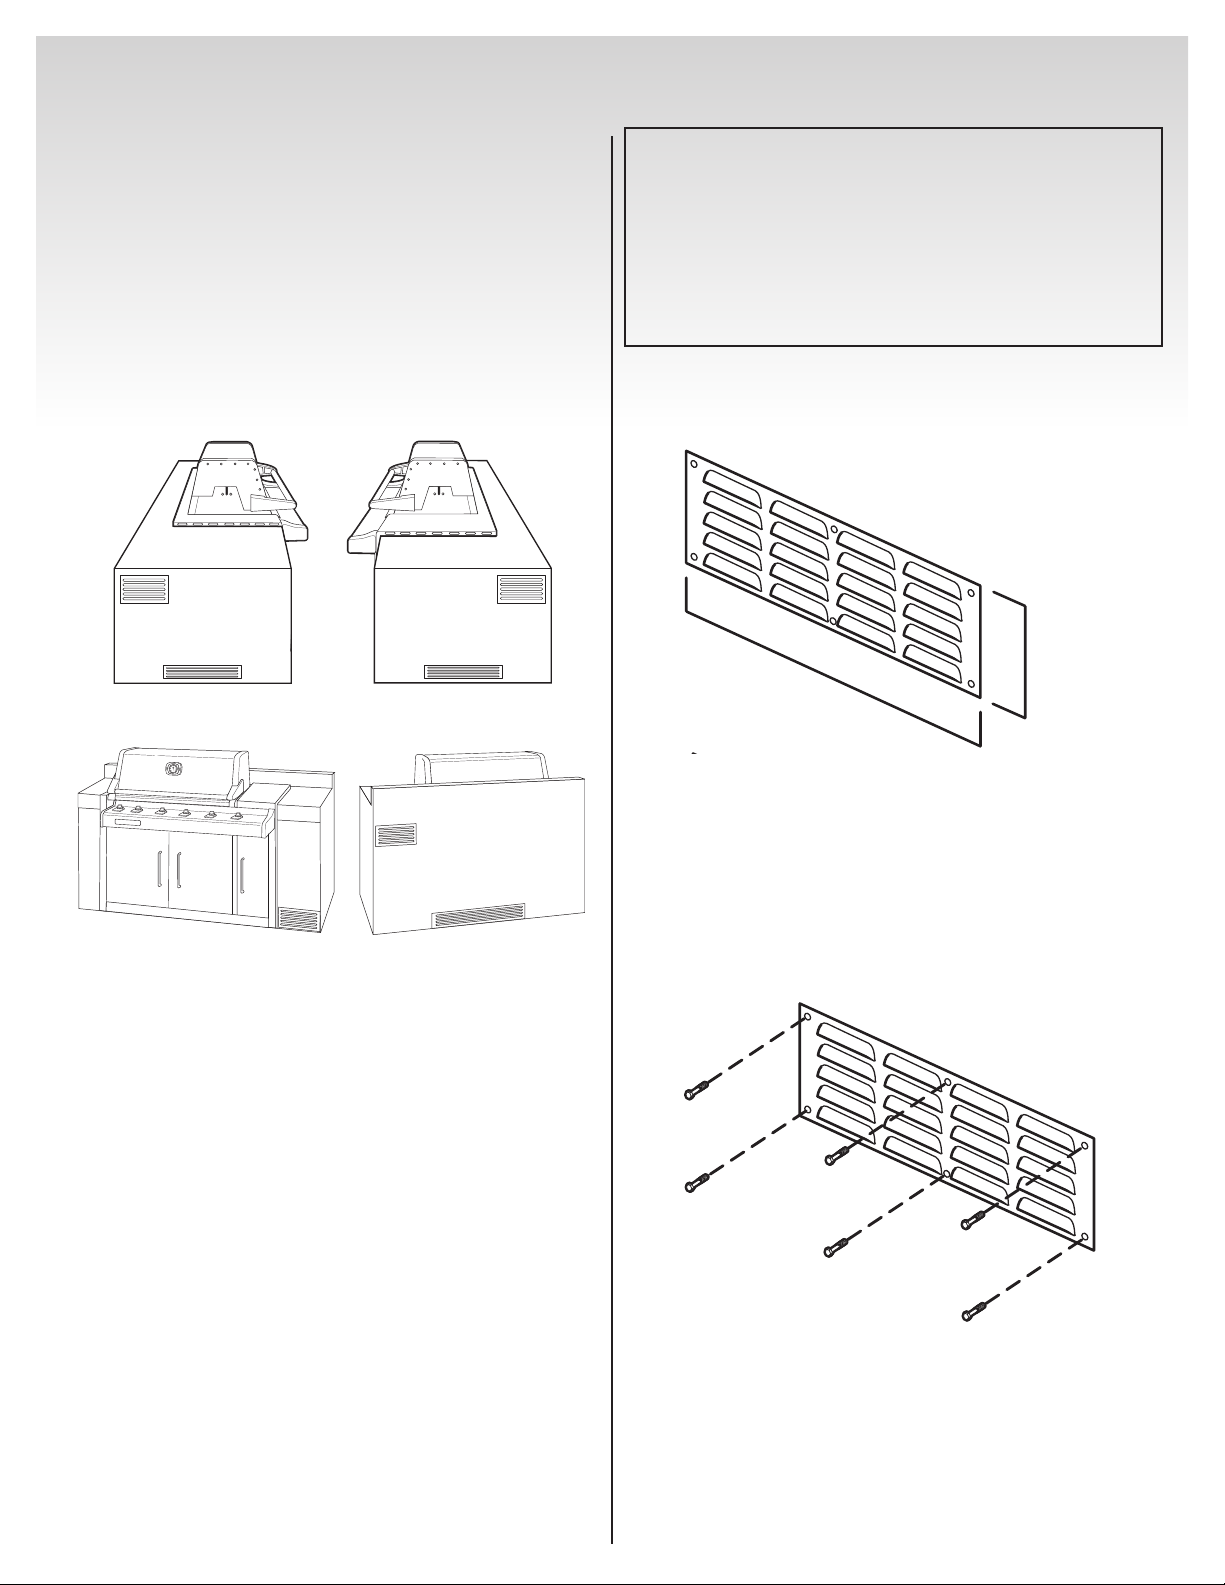
VENT INSTALLATION
2.5"
14.5"
OR
View of Right Side
View of Left Side
Front View
Back View
OR
WARNING: Air holes must be provided
in the structure at the top and bottom to
provide ventilation in the event of a gas leak.
Air holes can be located in a low visibility
area and should be protected by screening
material to prevent rodents and insects from
entering the structure. Air holes will also help
dry moisture.
Note: These drawings are only a reference.
DANGER:
Failure to follow recommended minimum
venting instructions can cause gas to collect
in the structure in the event of a gas leak.
This may result in a re or an explosion
which can cause serious bodily injury or
death, and damage to property.
VENT DIMENSIONS
• Cross ventilation must be incorporated in
the supporting structure. We recommend a
minimum of 100 square inches of venting
per side.
• Vents should be on two sides of the structure.
The above drawings are for reference only.
• Location of the vents should be from the
center, outward.
• Locate the vents at both the bottom of the
structure and at the top of the structure.
• The bottom vents should be as close to
ground level as possible. Make sure the vent
area is not blocked by interior supports of the
structure.
• We recommend vents with screens.
• Access doors to the structure are not
considered vents.
• Clean the vents periodically.
VENT MOUNTING
Located on the vent(s), holes are provided that
are intended for mounting your vent(s) to the
“island” structure.
Use non corrosive hardware when mounting
the vent(s).
Be sure to mount the vent(s) before use.
©2004 Weber-Stephen Products Co.,
200 East Daniels Road, Palatine, IL 60067-6266. U.S.A.
 Loading...