

Page 1

Australian
Cooking with
®
the Weber
TM
Family Q.
Page 2
®
®
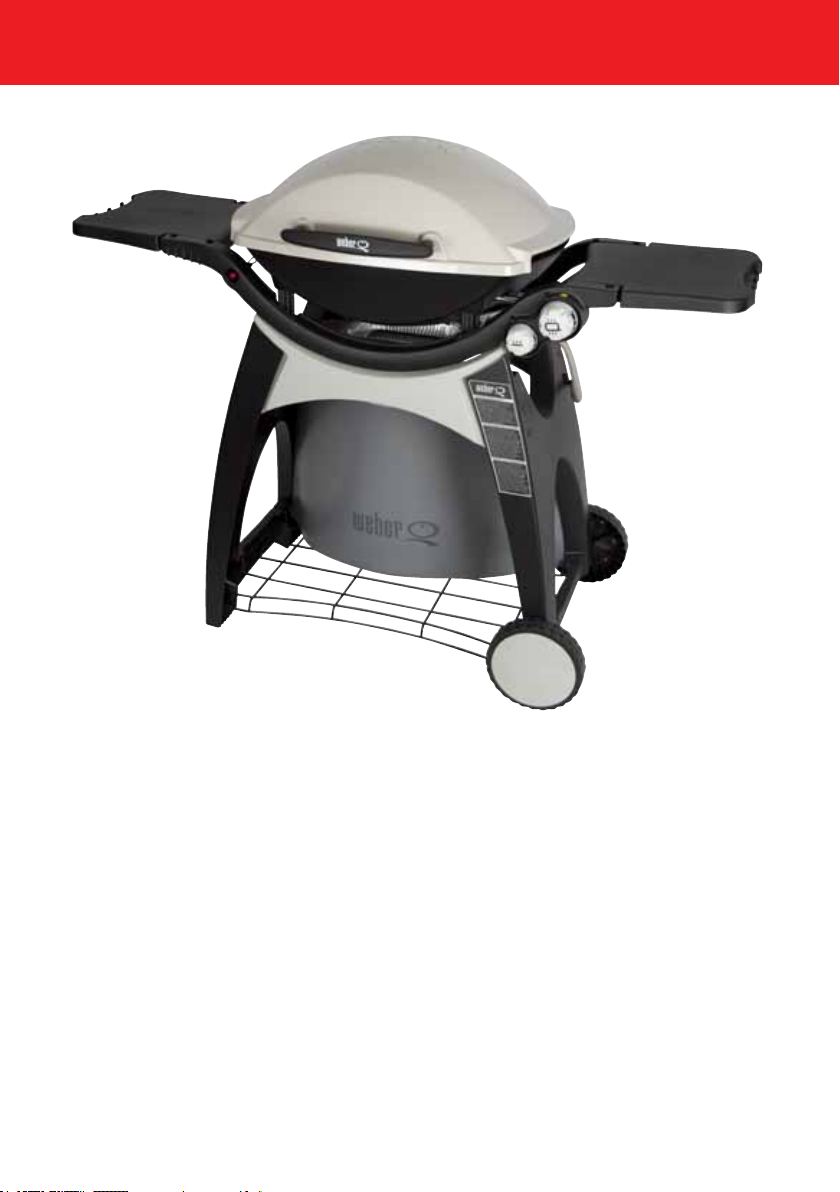
Family QTM (Q 305AU)
Weber
The shape of the Weber® QTM is a registered trademark.
Thank you for choosing one of the Weber® Family QTM barbecues. We know you will quickly
®
begin to enjoy many memorable barbecued meals on your Weber
TM
get started we’ve included this Weber Family Q
cooking guide. It includes some of our
favourite recipes. To get the best results, you need to use the correct heat settings as
shown in the barbecuing and roasting instructions. In addition to the recipes, you’ll nd
a ‘barbecuing and roasting guide’ on the last few pages. This provides an estimate of the
cooking times for many of the dishes you may like to try.
If you need advice or would like some help, you can either call us on 1300 301 290 or
e-mail us at custserv@weberbbq.com.au. You’ll nd that the people in our company will go
out of their way to try and help you. If you would like more information about any of our
barbecues or accessories, visit our website at www.weberbbq.com.au.
Thank you again, and happy Weber-Q-ing.
Family QTM. To help you
Page 3

Contents
How to get the best from your Weber® Family QTM 2
®
Helpful hints for the Weber
Sunday Breakfast 7
Crackling Pork 9
Glazed Racks of Lamb 11
Fillet Steaks with Lemon-Parsley Butter 13
Prawn Satay with Peanut Dipping Sauce 15
Salmon with Thai Cucumber Relish 17
Roast Chicken 19
Spanish Chicken Breasts Marinated in Citrus and Tarragon 21
Aussie Roast Lamb Greek-Style 23
Christmas Turkey 25
Barbecuing and Roasting Guide 26
®
Family QTM Accessories 29
Weber
Family QTM 3
Page 4
How to get the best from your Weber® Family Q
Barbecuing
TM
Your Family Q
has been designed to cook
magnicent steaks. To get the best results
with steak, cook on the grill-bars rather
than on a hotplate. Only use a hotplate
when there is the potential for a lot of fat
to come away from the meat or when cooking eggs, pancakes and the like. Where a
recipe in this cooking guide requires you
to ‘barbecue’, it is recommended that you
turn the meat only once, halfway through
cooking. Always barbecue with the lid
closed, these barbecues are not designed to
cook with the lid up. Even when cooking on
a hotplate always cook with the lid down.
Whether you are barbecuing meat on the
grill or on the breakfast plate, it is important that you pre-heat the barbecue before
cooking. The instructions for pre-heating
TM
your Family Q
follow.
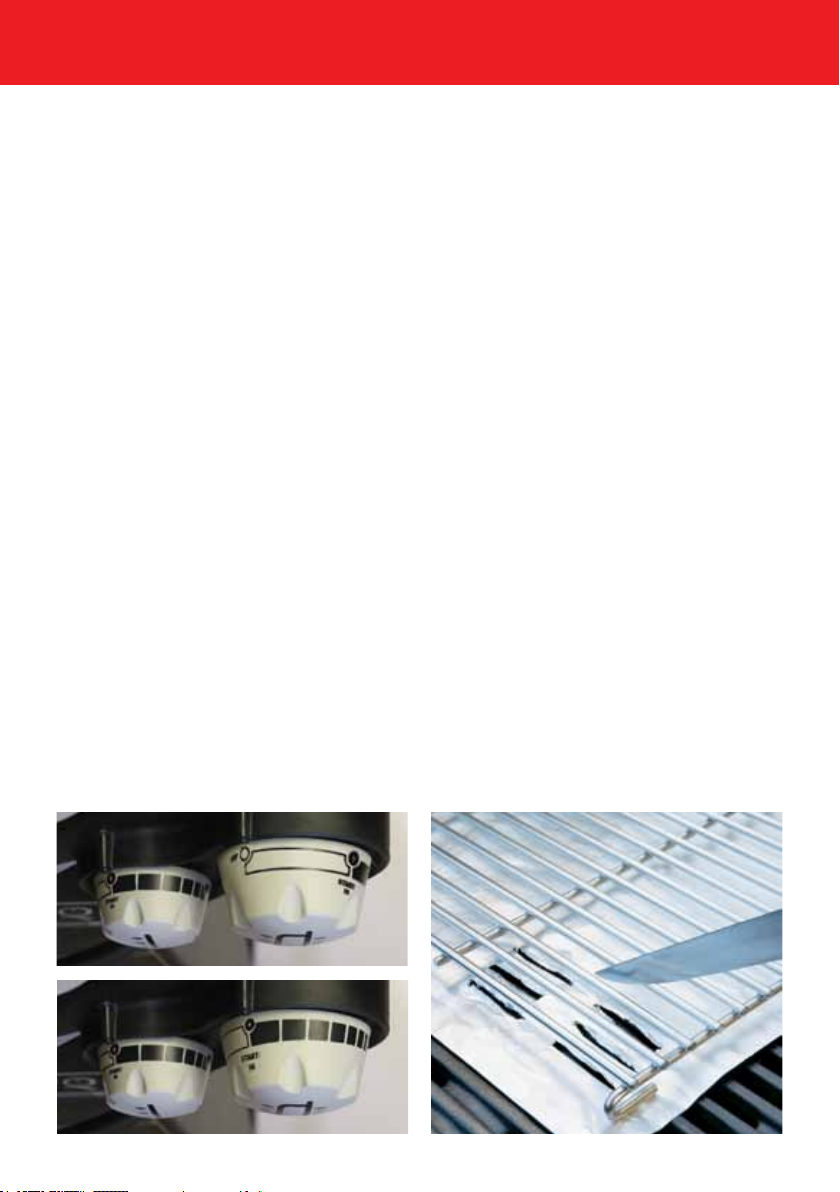
Pre-heating and Barbecuing
TM
To pre-heat your Family Q
, open the lid
and turn the small burner control knob to
START/HI (Photograph A). Press the red ignition button to light the barbecue. Once
alight, turn the large burner control knob to
START/HI (Photograph B). Close the lid and
allow the barbecue to heat up for at least
10 minutes, but no longer than 15 minutes.
TM
Your Family Q
is now pre-heated and
ready for barbecuing. Leave both burners
set on START/HI throughout the barbecuing
process when using the grill. Remember to
always cook with the lid down. If you are
cooking with a hotplate or breakfast plate
remember to allow plenty of time for it to
heat up. Always pre-heat the plate with the
lid down and test it with a droplet of water
to make sure it’s hot enough to cook on.
Roasting
Unless otherwise specied, when a recipe in
this cooking guide requires you to ‘roast’, it
is recommended that you remove your hotplate (if you have one) and use the Family
TM
roasting trivet accessory. Using this ac-
Q
cessory allows air to convect all around the
roast for more even cooking. To ensure the
bottom of the roast is not scorched by the
hot grill bars, make sure the centre burner
is left off.
You will need a sheet of foil that is folded
to produce a ‘heat-shield’ of double thickness between the grill and the base of the
trivet (double thickness creates an air gap
between the two layers of foil which assists
insulation). This foil lies on the cooking grill
directly below the roasting trivet (Photographs C & D). With the foil in position create slits in the foil so that the fat from the
roast can drain away. When doing this we
Photograph A
Photograph B
2
Photograph C
Page 5
TM
are trying to make sure that the fat doesn’t
fall onto the grill bars but drops between
them.
When you are roasting you must also pre-heat
the barbecue. The instructions for pre-heat-
TM
ing the Family Q
for roasting follow.
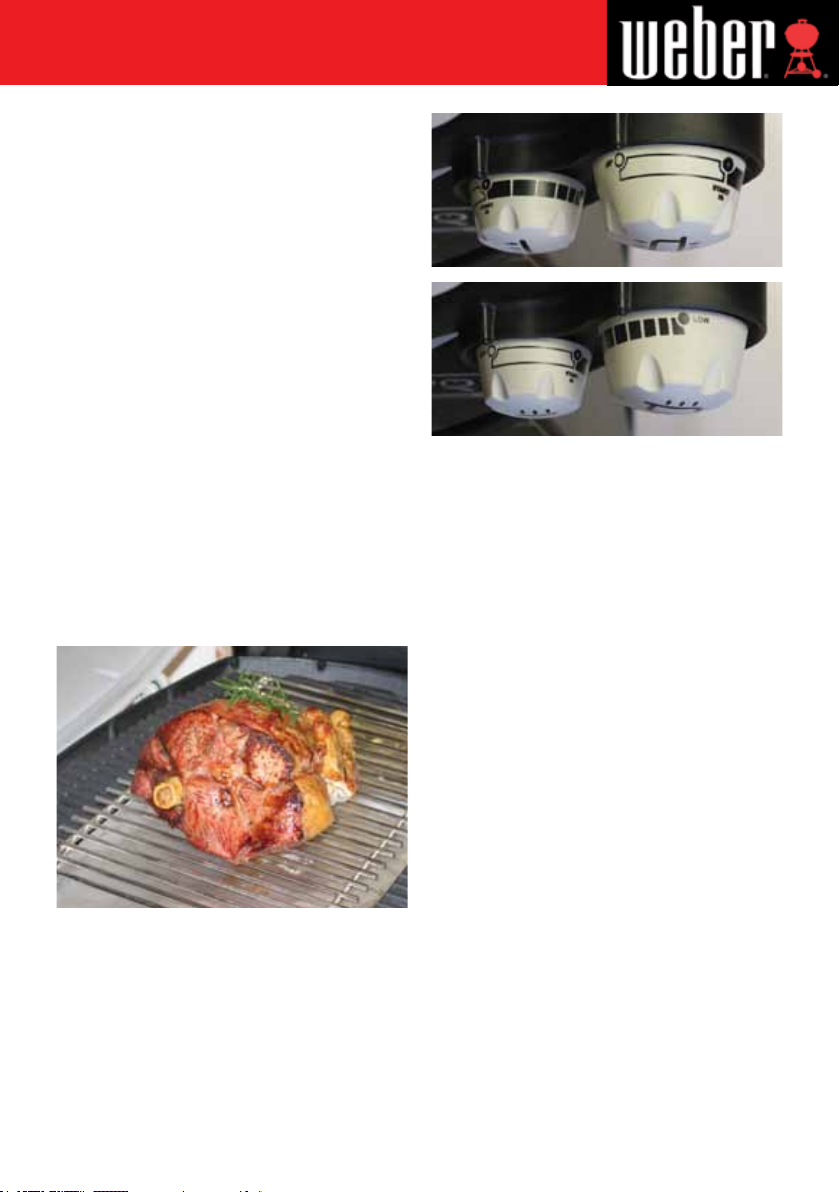
Pre-heating and Roasting
TM
To pre-heat your Family Q
, open the lid
and place the foil and roasting trivet in position. Turn the small burner control knob
to START/HI (Photograph E). Press the red
ignition button to light the barbecue. Once
alight, turn the large burner control knob
to START/HI. Turn the centre burner off. Allow the gas to run for 10 minutes with the
TM
lid closed. Now that your Family Q
is preheated, turn the large burner control knob
to the medium setting (Photograph F). Your
TM
Family Q
is ready for roasting.
You can now place your meat inside the
Family Q. Remember, there is no need to
turn the meat when roasting, so do not
open the lid unnecessarily.
Photograph D
Roasting Tip
Getting the timing right so that your roast
is cooked to your liking can be difcult at
times when cooking outside. Wind, ambient
temperature and the temperature of the
meat when you started cooking all inuence the amount of time a roast needs to
be cooked.
One of the best ways to make sure you get
your roast cooked just the way you like it is
Photograph E
Photograph F
to use a meat thermometer. With a standard meat thermometer you can read the internal temperature of the meat, so you can
tell when it’s cooked to your liking. The latest meat thermometers are digital/remote.
They really are fool-proof (how they work is
explained on the inside back cover).
Helpful hints for the Weber
®
Family Q
TM
Always cook with the lid closed
No matter whether you are cooking a roast,
a barbecue or breakfast on a plate, always
cook with the lid closed. Why?
First, cooking with the lid closed creates
natural convection of the air inside the barbecue. This results in more even cooking
with more natural juices retained.
Second, you will achieve outstanding bar-
becue avour that you can’t get by cooking
with the lid open. This is produced when
avour-giving barbecue smoke is convected
all around the meat.
Third, cooking times are greatly reduced
(about half of what you might expect on an
open barbecue), which means you can barbecue the same amount using a lot less gas.
Because less gas is required to cook foods,
you don’t need to ll the gas bottle anywhere
near as often (a 9kg gas bottle will last for
over 20 hours of cooking).
3
Page 6

Use ‘natural convection’
to get the best results
Remember, these barbecues use natural
convection to cook food perfectly. To assist convection, try not to cover more than
two thirds of the cooking grill at one time.
Whilst they will cook with the whole cooking surface covered, the results are far better if you barbecue in two or three batches
when feeding a crowd.
When roasting, make sure the height of
your food ts inside with the lid closed. To
allow the air to convect properly you should
use an accessory roasting trivet and make
sure you have clearance between your food
and the lid.
How often should you turn the meat?
TM
Your Family Q
will produce the most impressive food when you let the ‘convection
process’ do its work with minimum interruption. For this reason, resist the temptation to continually turn the food. Each time
you turn the food you have to raise the
lid, allowing the hot air to escape. When
barbecuing meat, outstanding results are
achieved if you use tongs to turn the meat
(once only) half-way through the cooking
time. Roasts, on the other hand, should
never need turning.
Food sticking to the grill
When barbecuing steaks or chops the meat
can sometimes stick to the hot grill. If the
meat is properly branded (2½ to 3 minutes)
before you turn it, it will not stick. People
trying to turn the meat too early often have
this ‘sticking’ problem. Don’t tear it, just
leave the meat where it is and it will come
free once properly branded.
Using sauces and glazes
Only apply sauces or glazes that have a high
sugar content during the last 10–15 minutes of cooking. If applied too early they
will spoil the food, because the sugar in the
glaze will caramelise and turn black.
Regular cleaning is necessary
TM
Some people never clean their Family Q
.
Allowing lots of fat to build up inside the
barbecue below the cooking grill can re-
sult in a fat re. If excess fats are cleaned
away every four or ve times the barbecue
is used this should never be a problem. If
you ever do have a fat re turn the gas off
at the gas bottle and open the lid to let
the heat escape. Remove the food. Do not
throw water on the re, just allow the re
to burn out with the lid up. It could burn for
ve or ten minutes.
®
Cleaning your Weber
Your Family Q
TM
grill is easy to clean. For
Family QTM grill
day to day cleaning the best method is to
®
use a Weber
grill brush. Immediately after
removing your food, while the grill is still
very hot, dip the grill brush in cold water
and brush along the grill bars where food
residue remains.
Troubleshooting
Problem. Meat tastes stewed and lacks
expected barbecue avour.
Solution. Temperature is not hot enough.
Make sure that you pre-heat your barbecue
as directed under ‘barbecuing’ on page 2.
Always cook all food with the lid closed.
Problem. Food does not cook in the estimated cooking time.
Solution. Temperature is not hot enough.
Make sure that you pre-heat your barbecue
as directed under ‘barbecuing’ on page 2.
Always cook all food with the lid closed.
Problem. Strong wind blows gas ame out.
Solution. Turn off gas and allow 5 minutes
before relighting. If possible move your
barbecue to a position that is protected
from the wind. If this is not possible, face
the back of your barbecue into the wind,
so that the wind cannot blow into the barbecue through the air-vents on either side.
4
Page 7

Problem. The gas will not relight after
you’ve been cooking.
Solution. The barbecue needs to cool down
a bit, so that the gas is not carried away
from the igniter by heat rising. Turn off the
gas and allow 5 minutes before relighting.
Problem. Flame doesn’t travel all the way
around the burner, therefore not producing
even heating of the grill.
Solution. Hole(s) in the burner tube may be
blocked by something that has fallen from
above. Lift out the cooking grill and use a
paper clip or safety pin to clean out any
residue from the burner holes.
Problem. Black residue from the cooking
grill sticks to the meat.
Solution. Ensure that the cooking surface is
clean before you start barbecuing. A quality
grill brush dipped in cold water and rubbed
over the grill bars, when they are very hot,
will remove the stubborn residue.
Problem. Black smoke is coming from the
barbecue.
Solution. Black smoke is a sure sign that
there is a re inside your barbecue (see
regular cleaning is necessary, page 4). Grey
smoke is ne, this grey smoke imparts avour to your food.
TM
Practise Family Q
• Follow the instructions in your Weber
TM
Family Q
owner’s manual for safe lighting
safety
®
and operating your barbecue.
• Keep your barbecue at least 60cm from
any combustible materials, including your
house, garage, deck railing, etc.
• Never use a barbecue indoors – that includes a garage or enclosed patio.
• Keep sleeves and garments at a safe distance from the heat.
• If for some reason you ever have a fat
re, turn off the gas at the bottle and open
the lid, then stand away. Never pour water
on a fat re.
• Never use the barbecue on a boat. Bottled
gas is denser than air and can accumulate in
the bottom of the boat.
• Keep children and pets a safe distance
away from the barbecue when it is hot.
• When you’ve nished cooking, turn off
the barbecue at the burner control and at
the gas bottle.
• Before you start cooking check and empty
any accumulated fat from the aluminium
tray located below the barbecue.
Food safety
• Wash your hands thoroughly with soap and
hot water before starting any meal prepa-
ration and after handling fresh meat, sh
or poultry.
• Thoroughly defrost foods in the refrigerator, not on the bench top.
• Use a clean spatula or tongs to remove
food from the barbecue.
• Never place cooked food on the platter
that was used to carry the uncooked food
to the barbecue.
• Always cook minced meats until they are
at least medium (71°C internal temperature) and poultry until well done (74°C).
Cooking times
In this cooking guide each recipe has the
estimated cooking time included. In addition, pages 26 to 28 are a general guide to
help you with cooking times for other cuts
and thicknesses of meat.
Barbecuing and roasting times listed in this
guide are approximate. You may have to allow more time or use more heat on cold or
windy days.
Try using a timer; you’ll nd it really handy.
It’ll give you a reminder when your barbecue is pre-heated, when your meat needs
turning and when the meat is likely to be
cooked.
5
Page 8
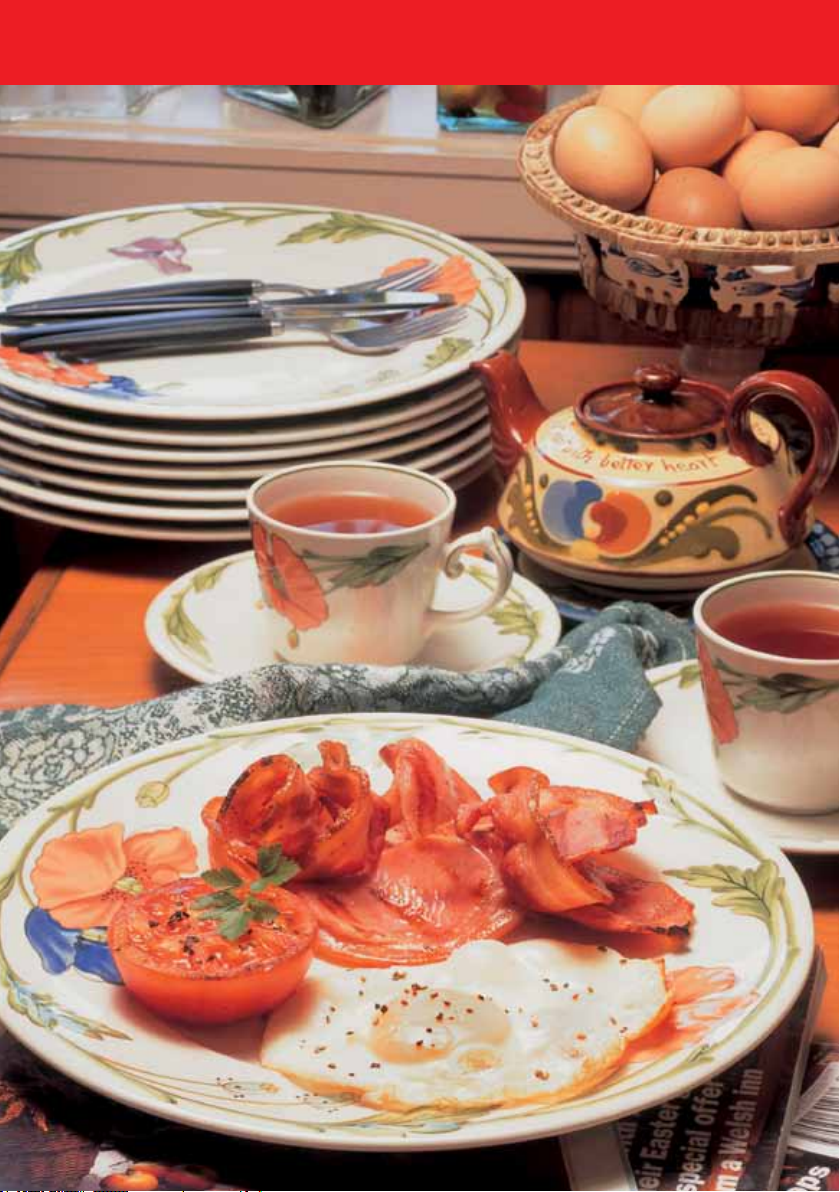
Sunday Breakfast
Page 9

Barbecue on Breakfast Plate
Eggs
Bacon rashers
Sausages (optional)
Tomato halves
You will need an oiled hotplate or breakfast plate (accessory). If cooking sausages, place
them on the pre-heated plate for 6-8 minutes with the lid down. Turn them only once or
twice. Add the eggs, bacon and the tomato halves (at-side down) and continue cooking
for 3-4 minutes, or until the eggs are cooked to your liking.
7
Page 10
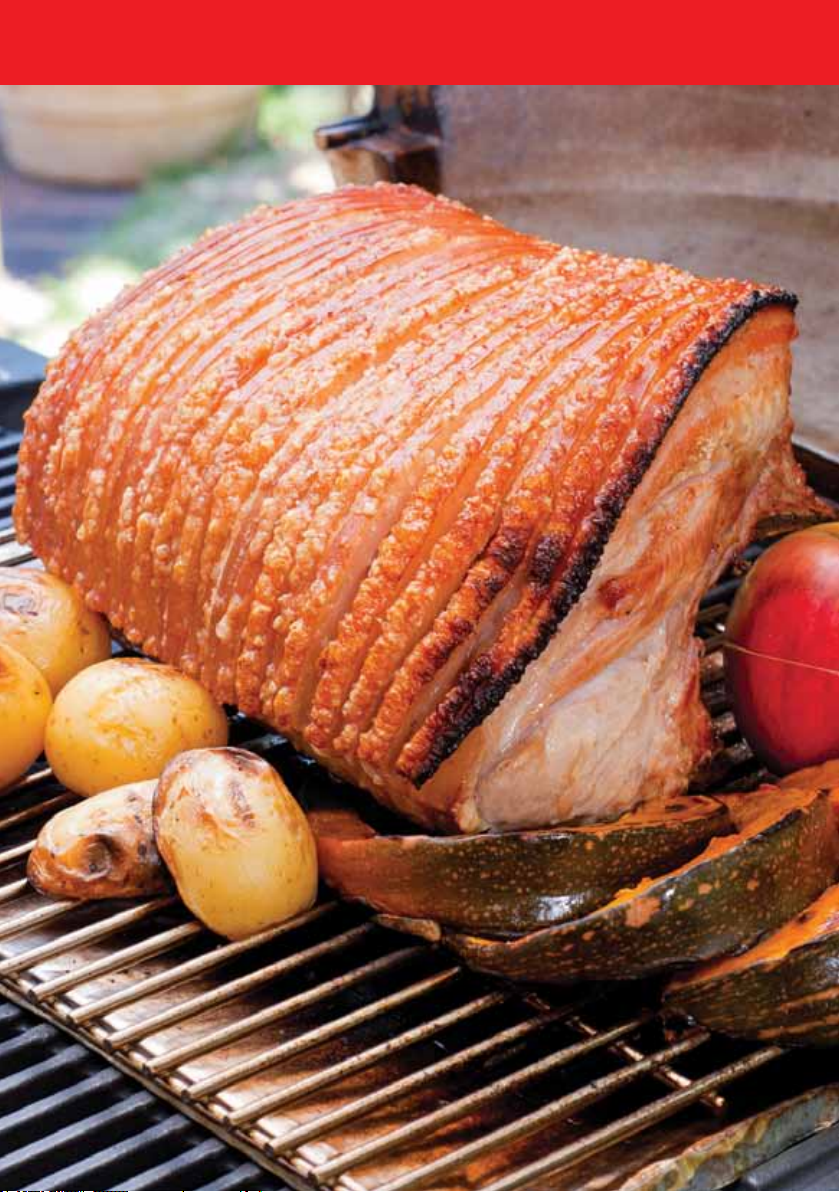
Crackling Pork
Page 11

Roast on Roasting Trivet
Butcher-prepared rack of pork on the bone (6-8 chops)
Vegetable oil
Salt
Have the pork skin scored right though the rind but not all the way through the fat. Rub
the skin with vegetable oil to coat it evenly, then rub salt over the skin and into the score
marks. Position a roasting trivet and foil (see page 2 of this guide) on the barbecue.
Light the barbecue and preheat for 15 minutes with the lid down and with both burners
set to HIGH.
After preheating, place the prepared pork on the roasting trivet and close the lid. If the
bones are to high for the lid you may have to lie the loin down to make it t and allow the
lid to close properly.
Continue cooking the pork with both burners on high for the next 25 to 35 minutes. Do
not lift the lid to see how things are going until 25 minutes have elapsed. Check at the 25
minute mark.
Once this initial “crackling” has been achieved you can turn the centre burner off and set
the outer burner to the normal roasting position. The pork should take 1½ to 2 hours to
0
cook to an internal temperature of 71
C.
Pork Crackling Tips:
1. Try to use pork that hasn’t been vaccuum packed, fresh pork is much easier to crackle.
2. Small pieces of pork crackle more easily, the loin for example is much better than a leg.
3. High temperatures are needed to crackle pork (see above). Be careful, if they are maintained for too long the pork will begin to blacken and burn.
9
Page 12

Glazed Racks of Lamb
Page 13

Roast on Roasting Trivet
Butcher-prepared lamb racks, 3-4 chops each
Salt and pepper to taste
For the glaze:
½ cup marmalade
1 teaspoon dry English mustard
Protect the ends of the bones with foil. Season the racks with salt and pepper to taste.
Place them on the roasting trivet and cook using the roast setting.
To make the glaze, place the marmalade and mustard in a saucepan and heat, stirring until
the marmalade becomes a thick liquid.
Cook the lamb for 30 to 40 minutes and then thickly brush it with the glaze. Cook for a
further 10 minutes or until cooked to your liking and serve.
11
Page 14

Fillet Steaks with Lemon-Parsley Butter
Page 15

Barbecue
Fillet steaks, about 25mm thick (one per person)
Extra-virgin olive oil
½ teaspoon salt
½ teaspoon freshly ground black pepper
For the butter:
4 tablespoons unsalted butter
1 tablespoon nely chopped fresh Italian parsley
1 teaspoon fresh lemon juice
¼ teaspoon grated lemon zest
¼ teaspoon salt
¼ teaspoon freshly ground black pepper
Using the back of a fork, mash the butter ingredients together and stir until evenly mixed.
Cover and refrigerate the butter mixture until ready to serve.
Lightly brush or spray both sides of the steak with oil. Season evenly with the salt and
pepper. Barbecue the steaks for 4 to 5 minutes each side or until they are cooked as
desired. Transfer each steak to a serving plate and place a tablespoon of the butter on
top to melt.
13
Page 16

Prawn Satay with Peanut Dipping Sauce
Page 17

Barbecue
20 large green prawns (about 450g), peeled and de-veined
1 tablespoon vegetable oil
¼ teaspoon chilli powder
¼ teaspoon curry powder
¼ teaspoon freshly ground black pepper
½ teaspoon salt
8
For the sauce:
1 tablespoon vegetable oil
1 tablespoon minced garlic
1 tablespoon minced ginger
¼ cup smooth peanut butter
1 tablespoon soy sauce
¼ teaspoon freshly ground black pepper
¼ teaspoon Tabasco sauce (or more, to taste)
1 tablespoon fresh lime juice
To make the sauce take a small saucepan and warm the oil over medium-high heat. Add
the garlic and ginger and cook until fragrant, about 1 minute, stirring occasionally. Add ½
cup of water, followed by the peanut butter, soy sauce, pepper and Tabasco sauce. Whisk
until smooth. When the sauce comes to a simmer, remove it from the heat. Just before
serving, reheat the sauce over medium heat and add the lime juice and 2 to 3 tablespoons
of water, whisking vigorously to achieve a smooth consistency.
Lightly brush or spray the prawns with oil. Season with the chilli powder, curry
powder, pepper and salt. Thread the prawns onto skewers, either one per skewer for hors
d’oeuvres or four per skewer for a main course. Barbecue for 1 to 3 minutes each side, or
until opaque. Serve with the peanut dipping sauce.
15
Page 18

Salmon with Thai Cucumber Relish
Page 19

Barbecue
Salmon steaks, 150g to 200g each and 20mm thick
3 tablespoons Asian (toasted) sesame oil
Freshly ground black pepper
For the relish:
2 tablespoons fresh lime juice
1 tablespoon sh sauce
1 tablespoon soy sauce
1 tablespoon sugar
1 tablespoon nely chopped fresh mint
1 tablespoon nely chopped fresh coriander
1 teaspoon minced fresh chilli
½ teaspoon minced garlic
1 cup nely chopped or thinly sliced cucumber
In a medium bowl, whisk together all the relish ingredients except the cucumber.
Add the cucumber, stir well and allow to stand at room temperature for at
least 15 minutes.
Lightly brush or spray the salmon all over with oil. Season with pepper to taste.
Barbecue the salmon for 4 to 5 minutes each side or until opaque throughout. Serve with
the relish spooned over the top.
17
Page 20

Roast Chicken
Page 21

Roast on Roasting Trivet
Number 22 to 24 chicken
Oil
Salt and pepper to taste
Wash the chicken thoroughly and pat it dry. Tuck the wings behind the back. Brush the
chicken with oil and season with salt and pepper.
Place the chicken on the roasting trivet inside the barbecue and cook with the lid down
for approx 1¼ to 1½ hours. The chicken will be juicy and golden brown with crispy skin.
Serve it with your favourite gravy and vegetables.
19
Page 22

Spanish Chicken Breasts Marinated in Citrus and Tarragon
Page 23

Barbecue
Boneless chicken breasts (with skin)
For the marinade:
¼ cup extra-virgin olive oil
¼ cup roughly chopped fresh tarragon
2 tablespoons white-wine vinegar
Zest and juice of 1 orange
Zest and juice of 1 lemon
2 teaspoons salt
1 teaspoon minced garlic
1 teaspoon grated ginger
½ teaspoon chilli powder
½ teaspoon freshly ground black pepper
Place all marinade ingredients into a medium bowl and whisk.
Rinse the chicken breasts under cold water, place them in a large, resealable plastic bag
and pour in the marinade. Press the air out of the bag and seal tightly. Turn the bag several
times to distribute the marinade, place the bag in a bowl and refrigerate for 3 to 4 hours.
Remove the chicken breasts from the marinade and reserve the marinade. Pour the
marinade into a small saucepan and boil for a minute. Barbecue the breasts, skin side
down rst, for 5 to 6 minutes each side or until the meat is rm and the juices run clear.
Baste with the boiled marinade once, halfway through cooking.
21
Page 24

Aussie Roast Lamb Greek-Style
Page 25

Roast on Roasting Trivet
1 leg of lamb (approx 1.8kg), boned and opened out at
2 cloves of garlic, peeled and cut into slivers
Sprigs of rosemary
½ lemon
Salt and pepper
Skewer right through the lamb lengthways with 2 or 3 skewers; this will help prevent the
meat from curling during cooking. Turn the skewered lamb over so that the skin-side is
facing up. Make incisions all over the surface of the meat on the skin-side.
Insert one sprig of rosemary and one sliver of garlic into each incision. Squeeze lemon and
smear the juice all over the skin. Sprinkle with salt and pepper to taste. Roast the lamb,
skin side up, for 55-65 minutes.
To carve, remove the skewers and cut across the skin into thin slices. Decorate with sliced
lemon, rosemary and Greek olives.
23
Page 26

Christmas Turkey
Page 27

Roast on Roasting Trivet
1 Turkey
Vegetable oil
Salt and pepper
Ensure that the turkey is fully thawed to refrigerated temperature (no ice left deep inside
the cavity).
Rub the skin with vegetable oil to coat it evenly, then season with salt and pepper to taste.
Roast the turkey allowing 20 minutes and then an additional 20 minutes per kilo (eg. for a
5 kilo turkey allow 120 minutes in total).
Allow the cooked bird to stand for ten minutes before commencing carving.
Turkey Tip:-
Turkeys cooked without stufng are less likely to dry out. This is because juices in the
cavity steam up through the breast while cooking. If you like stufng cook it in a foil pan
beside the turkey.
25
Page 28

Barbecuing and Roasting Guide
The following cuts, thicknesses, weights and barbecuing times are meant to be guidelines rather
than hard and fast rules. Cooking times are affected by such factors as altitude, wind, outside temperature and how well done you like your meat. Cooking times for beef and lamb are for medium
unless otherwise noted. Let roasts and larger cuts of meat rest for 5 to 10 minutes before carving.
Beef
Steak: rump, porterhouse, llet, T-bone, or sirloin (medium)
12mm thick barbecue 2½ to 3 minutes per side
20mm thick barbecue 3 to 4 minutes per side
25mm thick barbecue 4 to 5 minutes per side
25mm to 40mm thick 14 to 16 minutes (total) barbecue 5 minutes per side
and roast 2-3 minutes per side
Roast llet of beef
70mm to 80mm thick roast 70 to 80 minutes on roasting trivet
Rib Roast
90mm to 100mm thick roast 1½ to 1¾ hours on roasting trivet (cook bone side down)
Veal loin chop
25mm thick barbecue 5 to 6 minutes per side
Kabob
25mm to 30mm thick cubes barbecue 5 to 6 minutes per side
Minced beef patty
20mm thick barbecue 4 to 5 minutes per side
Sausages
thin barbecue 3 to 4 minutes per side
thick barbecue 4 to 5 minutes per side
Game
Quail, whole
150g roast 15 to 20 minutes on roasting trivet
Duck, whole
1.6kg - 2kg roast 1½ to 2 hours on roasting trivet
Duck breast, boneless
200g to 230g roast 10 to 15 minutes on roasting trivet
Pork
Loin chops
12mm to 15mm thick barbecue 4 to 6 minutes each side
Spare ribs
12mm to 15mm thick barbecue 4 to 6 minutes each side
Rolled loin roast
1.5kg to 2.5kg roast 1¼ to 1¾ hours on roasting trivet
(rst 25-35 minutes on higher setting)
26
Page 29

Lamb
Loin or chump chops
12mm to 15mm thick barbecue 4 to 6 minutes each side
Leg of lamb
1.5kg to 2kg roast 1½ to 2 hours on roasting trivet
Rack of lamb
450g to 650g roast 30 to 40 minutes on roasting trivet
Poultry
Chicken breast barbecue 5 to 6 minutes each side
Chicken Maryland roast 30 to 40 minutes on roasting trivet
Chicken, whole
2.2kg to 2.4kg roast approx 1¼ to 1½ hours on roasting trivet
Chicken, half
570g to 650g roast 30 to 40 minutes on roasting trivet
Rolled turkey breast
1.5kg to 1.8kg roast 1¼ to 1¾ hours on roasting trivet
Fish and Seafood
Fish: llet or steak
6mm to 13mm thick barbecue 3 to 5 minutes
13mm to 25mm thick barbecue 3 to 5 minutes each side
25mm to 32mm thick barbecue 5 to 6 minutes each side
Fish, whole
450g roast 15 to 20 minutes on roasting trivet
900g to 1.2kg roast 30 to 40 minutes on roasting trivet
Prawns barbecue 1 to 3 minutes each side
Scallop barbecue 3 to 6 minutes
Mussel barbecue 5 to 6 minutes (discard any that don’t open)
Oyster in shell barbecue 3 to 5 minutes
Fruit
Apple thick rounds barbecue 4 to 6 minutes
Banana halved lengthwise barbecue 6 to 8 minutes
Peach, pip removed halved lengthwise barbecue 8 to 10 minutes
Pear halved lengthwise barbecue 10 to 12 minutes
Pineapple rings barbecue 5 to 10 minutes
Note: Barbecuing times for fruit will vary with ripeness.
Vegetables
Artichoke:
whole steam 20 to 25 minutes; cut in half and barbecue 8 to 10 minutes
27
Page 30

Barbecuing and Roasting Guide
Capsicum:
whole barbecue 10 to 12 minutes
halved or quartered barbecue 6 to 8 minutes
Chilli barbecue 7 to 9 minutes
Corn:
husked barbecue 10 to 12 minutes
in husk barbecue 25 to 30 minutes
Eggplant:
sliced barbecue 8 to 10 minutes
halved barbecue 12 to 15 minutes
Garlic:
whole roast 45 to 60 minutes
Leek barbecue 14 to 16 minutes
Mushrooms barbecue 8 to 12 minutes
Onion, thickly sliced barbecue 8 to 12 minutes
Potato:
whole (small) roast 45 to 60 minutes
thickly sliced barbecue 14 to 16 minutes
Potato: new
halved barbecue 20 to 25 minutes
Pumpkin:
half small butternut roast 50 to 60 minutes
small pieces barbecue 20 to 30 minutes
Sweet potato:
whole roast 50 to 60 minutes
thickly sliced barbecue 8 to 10 minutes
Tomato: garden
thickly sliced barbecue 2 to 4 minutes
halved barbecue 6 to 8 minutes
Tomato: roma
halved barbecue 6 to 8 minutes
whole barbecue 8 to 10 minutes
Zucchini:
thickly sliced barbecue 6 to 8 minutes
halved barbecue 6 to 10 minutes
28
Page 31

Weber® Family Q™ Accessories
Roasting Trivet (above)
Enjoy juicier, more succulent roasts. The
®
roasting trivet creates natural
Weber
convection, allowing super-heated air to
circulate all around the meat.
Breakfast Plate (below)
Perfect for bacon, eggs, sausages and pancakes. Great for camping or a champagne
breakfast.
29
Page 32

Weber® Family Q™ Accessories
Weber® Q™ Pizza Stone
® Q™
Weber
oven and enjoy fantastic gourmet pizzas in your own backyard.
Dishwasher proof tongs and spatula are for
use with the Family Q
30
pizza stone with easy-serve pizza tray. Turn your Weber® Family Q™ into a pizza
Stainless Steel Tools
™
.
High quality heavy-gauge pans designed for
barbecue use. Can be cleaned and re-used.
Replacement Drip Trays
Page 33

3 Sided Grill Brushes
These grill brushes make it easy to get
between grill bars and other difcult
places. Available in long or short handle.
Premium Cover for Family Q
™
This full-length cover is made from heavyduty vinyl and designed to withstand the
harsh Australian climate.
The Weber® Q™ Stainless Steel Grill Pan
Ideal for ame grilling small or delicate
foods like fries, sh or vegetables.
31
Page 34

Weber® Family Q™ Accessories
AUSTRALIA’S OWN WEBER® QTM COOKBOOK
This is the second barbecue book that Ross
McDonald and Margaret Kirkwood have put
together. Those of you who own a copy of
‘The Complete Australian Barbecue Kettle
Cookbook’ will know the superb quality of
TM
their work. The Q
cookbook is the sort of
book that would make the perfect gift for
someone who ‘loves’ their Weber
® QTM
In it they show you how to use each of the
32
® QTM
Weber
models, so that you can enjoy
mouth-watering breakfasts, lunches, dinners and desserts for years and years to
come. The book is not available in book
shops. You can purchase this book (rrp
$32.95) by going to the store where
® QTM
you purchased your Weber
. If this is
inconvenient, you can purchase a copy by
.
calling 1300 301 290 with your credit card
details.
Page 35

Digital/Remote Meat Thermometer
The very latest in meat thermometers is
the digital/remote version. It beeps to
let you know when your roast is cooked
to your liking. It doesn’t even need to be
near the barbecue; you can carry it around
on your belt or leave it somewhere handy.
Weber’s digital/remote thermometers can
be purchased at Specialist dealers.
How it works.
Suppose you’re cooking a roast of tender
veal and you like to cook it to medium.
Step 1. Select veal from the various meat
choices on your digital receiver.
Step 2. Select medium from the cooking
options offered.
Step 3. Insert the meat probe into the
thickest part of the meat. Attached to
the probe is an insulated cable that leads
to the digital transmitter. This is located
outside your barbecue. The transmitter sends
signals to the digital receiver. As long as
the receiver is within 30 metres of the
barbecue (if you walk out of range the portable digital receiver will beep) it will display the internal temperature in the centre of the meat. When the meat is nearly
cooked the receiver will beep four times.
It’s now time for you to make the gravy and
to get the salads ready. A short time later,
the receiver will give a continuous beep
which indicates that your veal is perfectly
cooked to medium.
Portable digital receiver. The portable digital receiver
displays the type of roast (step 1), the cooking options
(step 2), the target temperature and the current
temperature in the centre of the meat.
Digital transmitter. The digital
transmitter is connected to the
probe by the insulated cable
so that it can be located
outside the barbecue.
Meat probe.
The tip of the probe
is inserted into the centre
of the meat (step 3).
33
Page 36

Weber-Stephen Products Co. (Aust) Pty. Ltd.
Australian Representative R. McDonald Co. Pty. Ltd.
A.C.N. 007 905 384.
104 South Terrace, Adelaide, South Australia, 5000.
Consumer information phone 1300 301 290.
To learn more or to register your Weber® barbecue
online, visit www.weberbbq.com.au
Patents, trademarks and copyright.
Weber®, the kettle shape and the kettle silhouette are registered trademarks of Weber-
TM
Stephen Products LLC, 200 East Daniels Road, Palatine, Illinois 60067. Weber® Q
TM
ber® baby Q
200 East Daniels Road, Palatine, Illinois 60067. The shape of the Weber® Q
trademark.
The Q design is covered by the following Australian patents: Patent No. 2007202420 – Weber Q grill and support frame assembly, Patent No. 2005274149 – Weber Q fuel support
apparatus, Patent No. 2004220587 – Gas burner with ame stabilization structure for Weber Q, Patent No. 2003300872 – Barbecue grill and support frame assembly for Weber Q,
Patent No. 2003297113 – Heat distributing cooking grate with grease control structure for
Weber Q and Patent No. 2003241363 – Curvilinear burner tube for Weber Q and the following pending Australian applications: Patent Application No. 2007286136 – Bayonet connec-
tion for Weber Q burner tube. An application to register the ‘Q’ logo has been led and
approved for publication. This booklet incorporates material which is copyright 2011 and
owned by © Weber-Stephen Products LLC, © R. McDonald Co. Pty. Ltd. and © McDonald-
Kirkwood Pty. Ltd.
and Weber® Family Q
TM
are trademarks of © Weber-Stephen Products LLC,
TM
is a registered
, We-
 Loading...