

Page 1
Operating Instructions
7 Day Digital Timer Model 1529
with 3 Programmable Settings
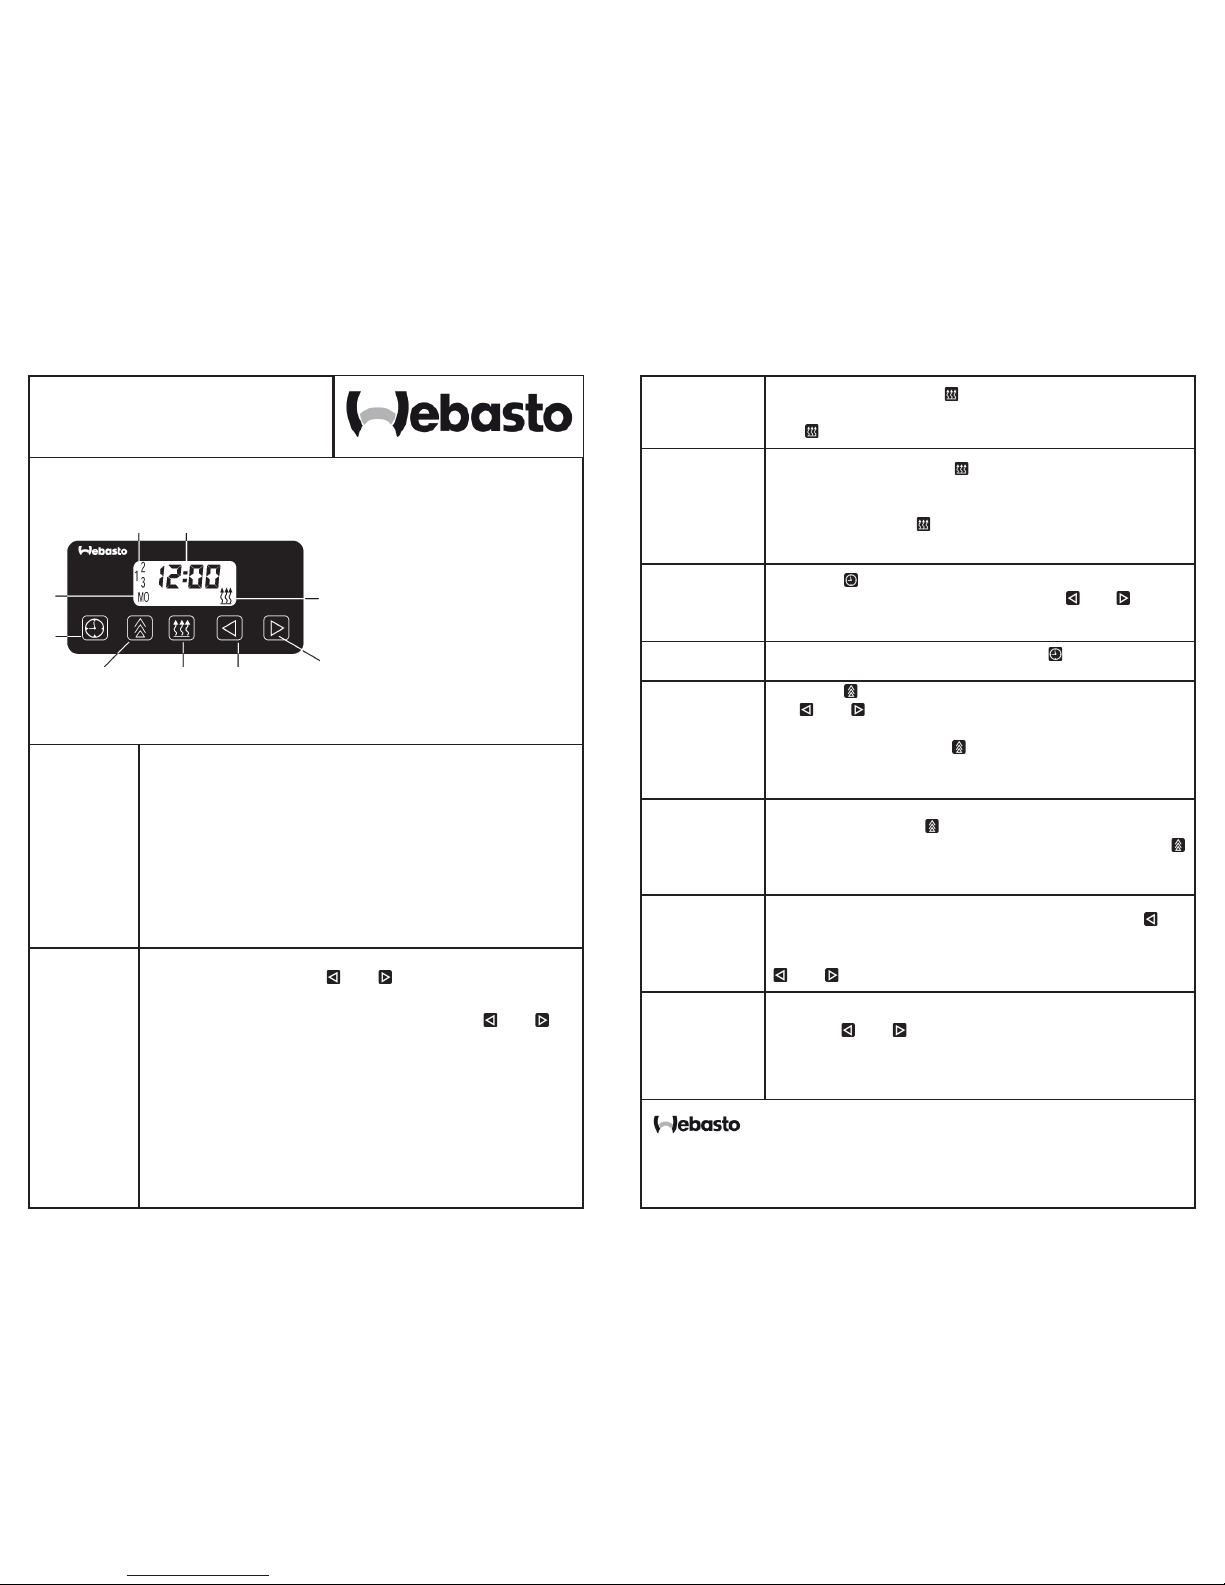
1 Program number for preset time
2 Time of day / preset time / operating
duration display
3 Day of the week display
4 Operation indicator
5 Setting / viewing the time; setting /
recalling day of the week
6 Presetting / recalling starting time;
setting / recalling day of the week
7 Heater On/Off
8 Reverse key for setting time of day or
heater start-up time; viewing and
reducing operating duration /
remaining operating time
9 Forward key for setting time of day or
heater start-up time; presetting day of
start-up; viewing and extending
operating duration / remaining
operating time
General
Operation
The 7 day timer with 3 time settings enables you to preset the
start of the heater operation up to 7 days in advance.
It is possible to program 3 different starting times, only one of
which can be activated at any one time and one event (desired
programmed event must be initiated each time required).
When the ignition is switched on, the timer displays the current
time and day of the week. When the heater is switched on,
the display and buttons are illuminated.
After the power supply has been connected, all symbols on the
display will flash. The current time and weekday must be set.
The timer can be operated in that all flashing symbols can be
adjusted by means of the and buttons.
If no adjustments are made within 5 seconds, the current
setting displayed will be stored in memory. If the and
buttons are pressed for more than 2 seconds, the fast
time-setting mode is activated.
If the ignition is switched off while the heater is operating in
the continuous mode, the remaining operating time of 15
minutes is displayed and the heater continues to operate for
this period of time.
Whenever power supply is disconnected, all programmed
settings will be lost.
Switching the
heater on
Switching the
heater off
Setting time/
day of the
week
Viewing the time
Programming
heater starting
time
Recalling/ erasing preset
times
Programming
duration of
operating time
Setting the
remaining
operating time
Manually: by pressing the
button (continuous heating mode).
Automatically: by programming the heater starting time.
The
button will be illuminated during operation.
Manually: by pressing the
button.
Automatically: after the programmed operating time has elapsed.
With the heater running: by programming the remaining
operating time. The button light and operation indicator
will extinguish.
Press the button for more than 2 seconds - time of the
day is flashing - and set the clock using the and buttons.
Day of the week is flashing - adjust the day of the week.
With the ignition switched off: press the button.
Press the button - the memory location is flashing - using
the and buttons, set start of the heater operating time.
Day of the week is flashing - set the day of the week.
By repeatedly pressing the button, memory locations 2 and 3
can be programmed or the time display mode can be reached.
Repeatedly press the button until the desired memory
location is displayed. To erase the preset time, press the
button several times until the time of the day is displayed
instead of the memory location.
The heater must be switched off. Press and hold the button for 3 seconds - operating time is flashing - and set the
desired operating time (10 to 120 minutes) using the
and buttons.
Set the desired remaining operating time (1 to 120 minutes)
using the and buttons. The remaining operating time
refers to the time the heater still continues to remain in
operation. It can only be changed while the heater is in
operation and the ignition is switched off.
Webasto Thermo & Comfort N.A., Inc.
15083 North Road
Fenton, MI 48430
Technical Assistance Hotline
USA: 1-800-860-7866
Canada: 1-810-593-6000
www.webasto.us
1 2
3
4
5
6 7 8
9
P/N 907108A Rev. 10/2014
 Loading...