

Page 1

WayteQ N770 GPS Navigator
User Manual
1.0 Ver
English Version
1
Page 2

NOTICE
USING YOUR NAVIGATOR at the first time
1. Charge completely
2. Install into your vehicle
3. Initialize software as described in the manual
4. Make sure that the car is outside the garage and it is not
covered by anything (treed, bridges, etc)
5. Normally it takes a bit longer to receive the GPS signal the first
time you turn on the unit. Your device has to locate 3 satell ites
to function. This time to find the satellites is significantly
shorter after the first time you use the device. If you move your
unit over 300km without it being used, it may need a little more
time to locate the satellites again.
2
Page 3

Contents:
Safety and Regulatory Information
1. Getting Started
1.1 Unpacking
1.2 Over View
1.3 Using Your Device in a Vehicle
1.3.1 Using the Car bracket
1.3.2 Connecting the Car Charger
1.3.3 Connecting to AC Power supply and Charging the Battery
1.3.4 Assembly
1.4 Starting up
1.5 Power saving
2. Main Menu Selection
2.1 Navigation
2.2 Music
2.3 Photo
2.4 Ebook
2.5 Video
2.6 System
3
Page 4

Safety and Regulatory Information
Important Safety Notices and Warnings
Global Positioning System
The Global Positioning System (GPS) is a satellite-based system that provides
location and timing information around the Globe.
GPS is operated and controlled under the sole responsibility of the
Government of the United States of America, who are responsible for its
availability and accuracy. Any changes in GPS availability and accuracy, or in
environmental conditions, may impact the operation of your device .We
cannot accept any liability for the availability and accuracy of GPS.
Precautions and Notices
For your own safety, do not operate the controls of the product while driving.
Use this product prudently. The product is intended to be used only as a
navigation aid. It is not for precise measurement of direction, distance,
location or topography.
The calculated route is for references only. It is the user's responsibility to
follow the traffic signs and local regulations along the roads When you get off
the car, do not leave your device on the dashboard or the car glass that is
subject to direct sunlight. The overheating of the battery can cause
malfunction and /or danger.
GPS is operated by the United States government, which is solely responsible
for the performance of GPS. Any change to the GPS system can affect the
accuracy of all GPS equipments.
GPS satellite signals can not pass through solid materials (except glass).When
you are inside a tunnel or building, GPS positioning is not available.
A minimum of 4 GPS satellite signals is needed to determine current GPS
position. Signal reception can be affected by situations such as bad weather
or dense overhead obstacles (e.g. trees and tall buildings)
The wireless devices might interfere the reception of satellite signals and
cause the reception of the signal to be unstable. For better signal reception,
it is recommended that you use a car antenna (option)
Aircraft and Hospitals
Use of devices with an antenna is prohibited on most aircraft, in many
hospitals and in many other locations. The device must not be used in these
environments.
4
Page 5

1. Getting Started
1.1 Unpacking
Unpack your device box and identify the contents. You should have:
(1) Unit. Its main features are a touch-sensitive LCD screen, 1 SD card slot. Details see
the photo below.
(2) Holder,to hold the device.
(3) Bracket, its main features is to fix the device on a car .
(4) Car Charger. With 12V cigarette lighter adapter. This is the normal way of providing
power to your device when it's in your vehicle.
(5) AC adapter (Option), included for you to charge and work with your device even
when It's not in your vehicle. When you use the adapter, please make sure it is cooled by
placing it in a ventilated area.
(6) USB data cable for connecting your device to a Windows PC
(7) User Manual.
*Note: please check optional accessories with local retailer/importer/distributor.
1.2 Over View
A. Earphone Jack
B. USB Connector
C. Stylus Pen
D. Power Switch
5
Page 6

E. Reset
F. SD/SDHC Card Slot
1.3 Using Your Device in a Vehicle
Do not expose the device to high temperatures. We recommend that you do not leave the device
in direct sunlight for long periods or in an unattended car on sunny days.
High temperatures can cause permanent damage.
Do not attempt to service the device yourself! Do not open, puncture or disassemble it.
Doing so may be dangerous and will invalidate your warranty.
1.3.1 Using the Car Bracket
Caution:
-- Select an appropriate location for the stand. Never place the stand where the driver's
field of vision is blocked.
-- If the car's windshield is tinted with a reflective coating, an external antenna (optional)
may be needed to route the roads.
1.3.2 Connecting the Car Charger
The car charger supplies power to your device when you are using the device in a car.
Caution: To protect your device against sudden surges in current, connect the car
charger only after the car engine has been started. Connect one end of the car charger
to the power connector of your device. Connect the other end to the cigarette lighter in
the car to power and charge your device.
1.3.3 Connecting to AC power supply and Charging the Battery
1. Fully charge the battery before using your device for the first time
2. Connect the adapter cable to the power connector of your device.
3. Plug the AC adapter into a wall outlet.
The charge indicator glows amber when charging is in progress. Do not disconnect your
device from AC power until the battery is fully charged, when the charge indicator turns
green. This will take a couple of hours.
1.3.4 Assembly
To get started, put the device into the holder and assemble holder with bracket. T ake off
the protected film on the bottom or the suction. Then put the bracket onto a suitable
location of your windscreen or side window, make sure the window or the suction or
windscreen is clean and without water and some dirty things inside, fixing the stand on
that position..
Note: that some newer vehicles may have a heat reflective shield embedded in the
windscreen. In some cases this can prevent proper GPS signal reception. If this turns out
to be a problem in your vehicle, you will need to purchase and install the GPS external
6
Page 7
antenna kit.
Under normal journey conditions, the suction mount is perfectly sufficient to hold the
bracket in position. Note that suction may be lost if left overnight, due to condensation
and low temperature. For this reason, and for security, we recommend Removing Both
the suction mount bracket and the device when leaving your vehicle overnight.
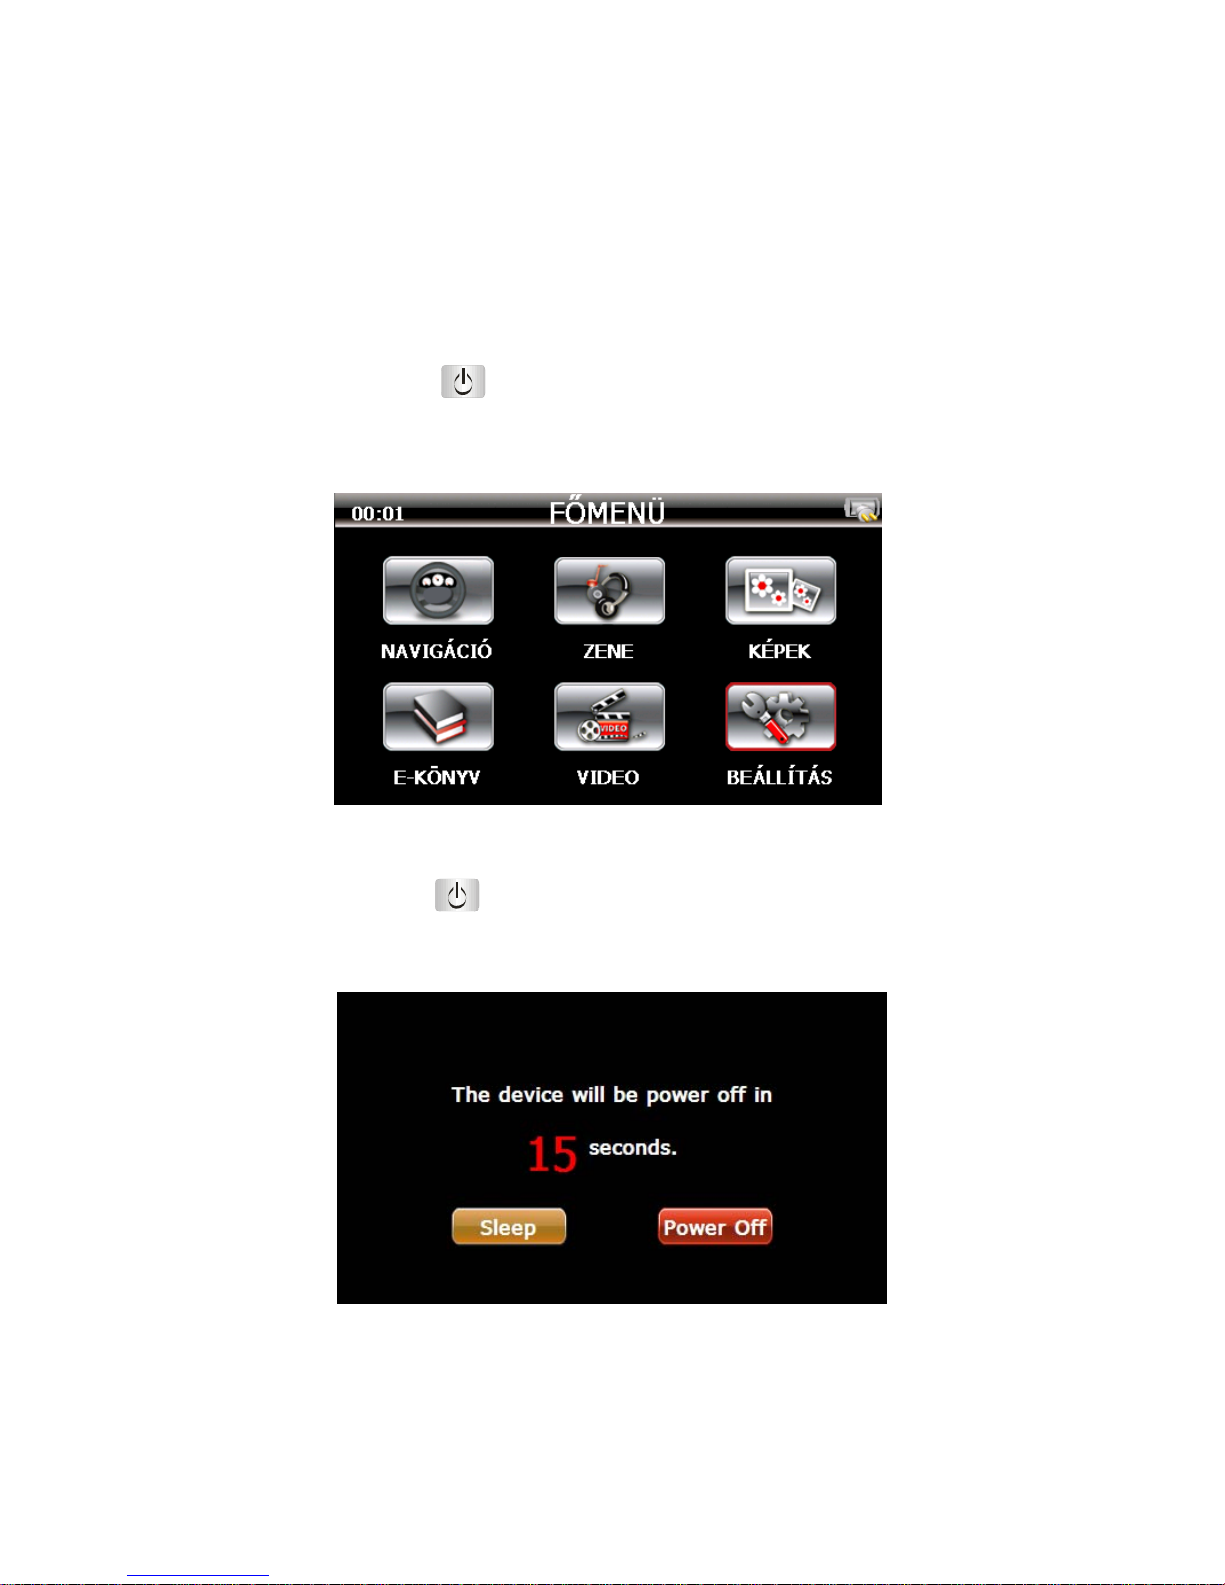
1.4 Starting up
Press the power button
on the top side of your device to turn on your device,
then enter into the "Main menu " as below.
1.5 Power saving
Press the power button
on the top side of your device to turn off your device for
saving power. the screen will be as below :
Ta p "Sleep" to enter a suspend state and the system stops operation. Once you turn on
the system again, it resumes. Tap "Power Off" to turn off the device totally. Once you
turn on the system again, it will be turn on .
7
Page 8

2. Main Menu Selection
2.1 Navigation
Please refer the navigation software user manual for the details.
2.2 Music
Tap the icon "Music" on the main menu and enter into following interface.
you can read music files in both “ResidentFlash” and “SDMMC” folder , Tap folder icon
to enter into following interface like below .
Page up
Return to previous
Page down
2) Tap your desired file and enter into the following interface.
8
Page 9
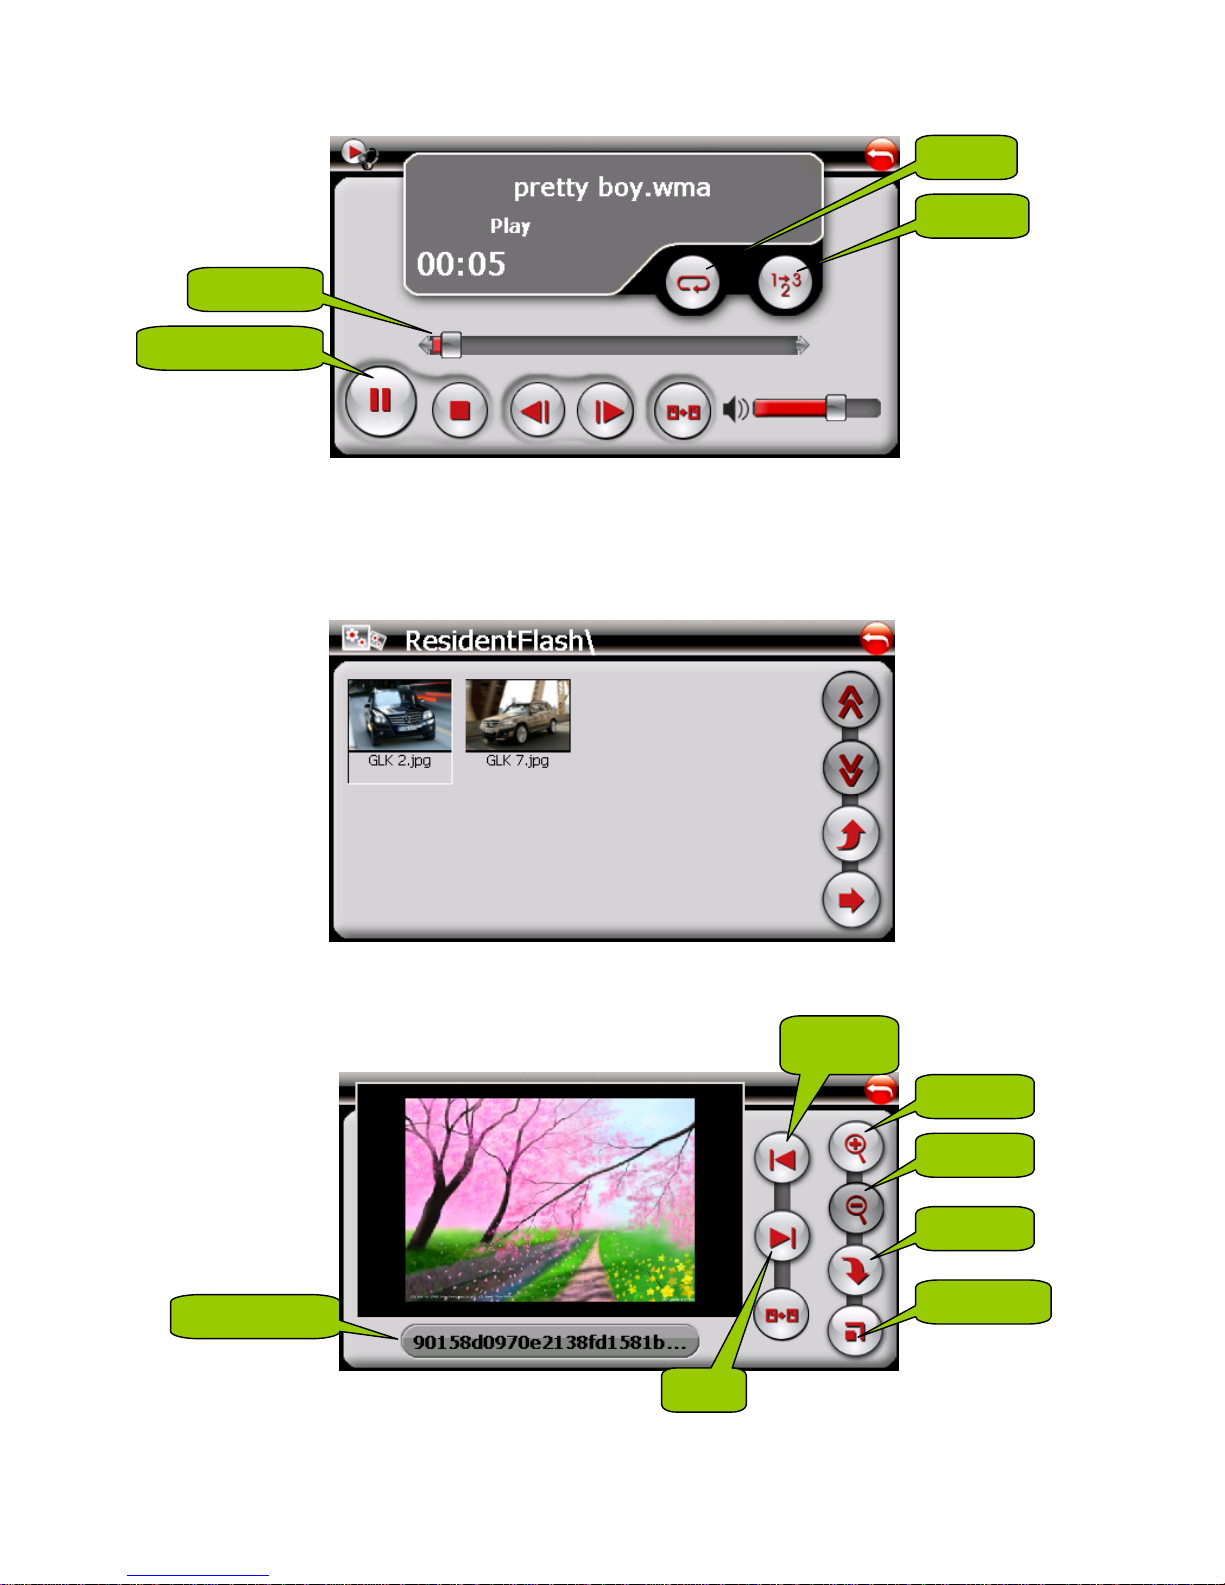
Auto play
Circle
Pause / Play
Speed bar
2.3 Photo
1) Tap the icon “ Photo” on the main menu, then tap the folder icon to enter into the
following interface like below .
2) Tap the file on the screen and enter into the following interface.
Zoom out
Previous
Zoom in
Rotate
Next
Full screen
picture name
Notes:
9
Page 10

Tap PREVIOUS or NEXT button to view the pictures. If picture is too big or the device does
not support the format, it will be dark screen or can not read.
2.4 Ebook
1) Tap the icon “ Ebook” on the main menu, then tap the folder icon to enter into the
following interface like below .
2) Tap the file on the picture and enter into the following interface.
Return to previous menu
Next
Previous
file name Pages chose
Current page / Total pages
2.5 Video
1) Tap he icon “ Video” on the main menu, then tap the folder icon to enter the following
interface like below .
10
Page 11
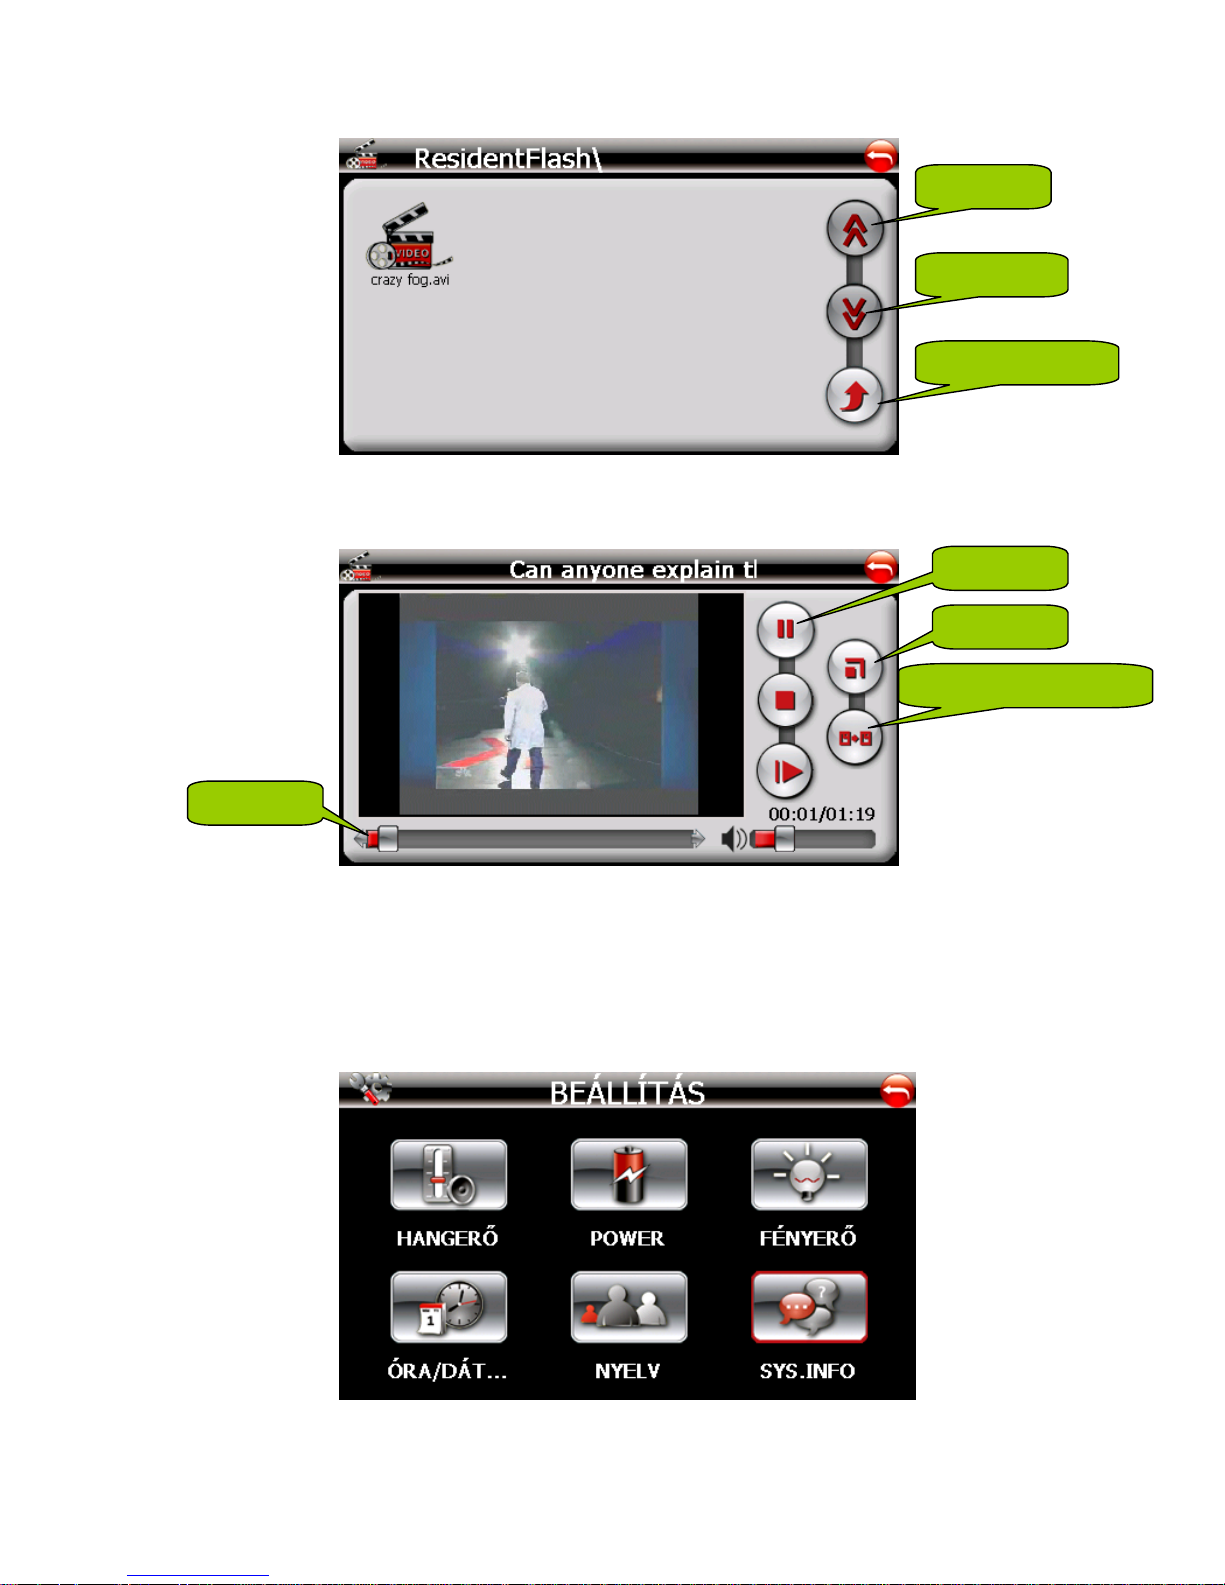
Page up
Page down
Return to previous
2) Tap the file and enter into the following interface.
Tips:
When playing in full screen, double press the screen again, it will return to original
playing size.
2.6 System
Tap the icon "System" on the main menu and enter into the following interface.
1) Backlight
Full screen
Pause / Play
Return to previous Menu
Speed bar
11
Page 12

Tap the icon "Backlight" and enter into the following display.
A. Under Backlight icon, tap "-" to weaken the backlight, and tap "+" to stronger the
backlight.
B. Under battery icon, tap < or > button to select the duration of auto power off the
backlight.
C. Under AC power icon, tap <or >to select the duration of auto power off the backlight
when using AC adaptor.
2) System Info
A. Tap the icon “USB” to set the USB working mode.
12
Page 13

B. Tap the icon "Calibration" and enter the adjustment of touch screen.
According to the information on the screen, press the right cross centre. Then take the
operation under instruction until the following screen display.
3) Language
A. Tap the icon "Language" and enter into the following display.
B. Tap "<"or ">" icon to select the language or color display.
4) Power
Tap the icon "Power" and enter into following display.
13
Page 14
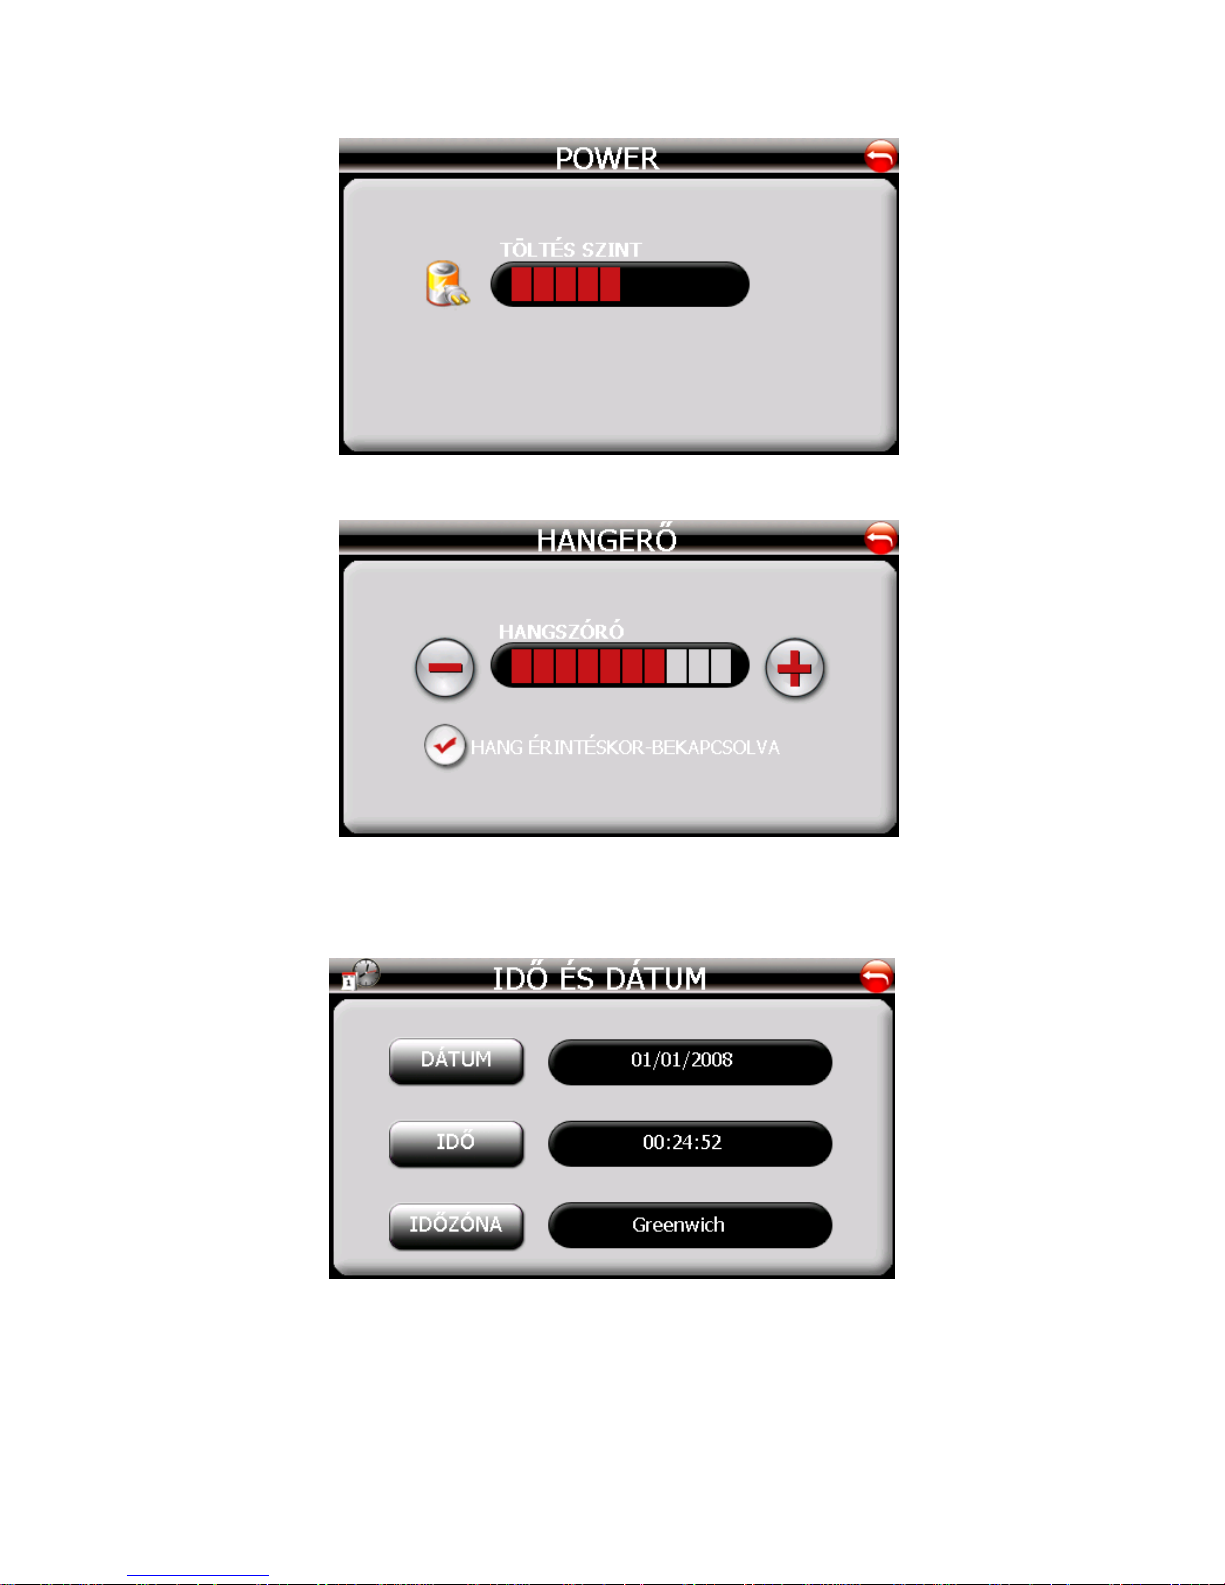
5) Volume
A. Tap the icon "Volume" and enter into volume setting display.
B. Tap"-" or "+" to adjust volume of speaker.
C. You can select "Enable sounds for taps".
6) Date and Time
A. Tap the icon "Date Time" and enter into the following display.
B. Tap "Date" icon and use "<" or ">" icon to adjust the date.
14
Page 15
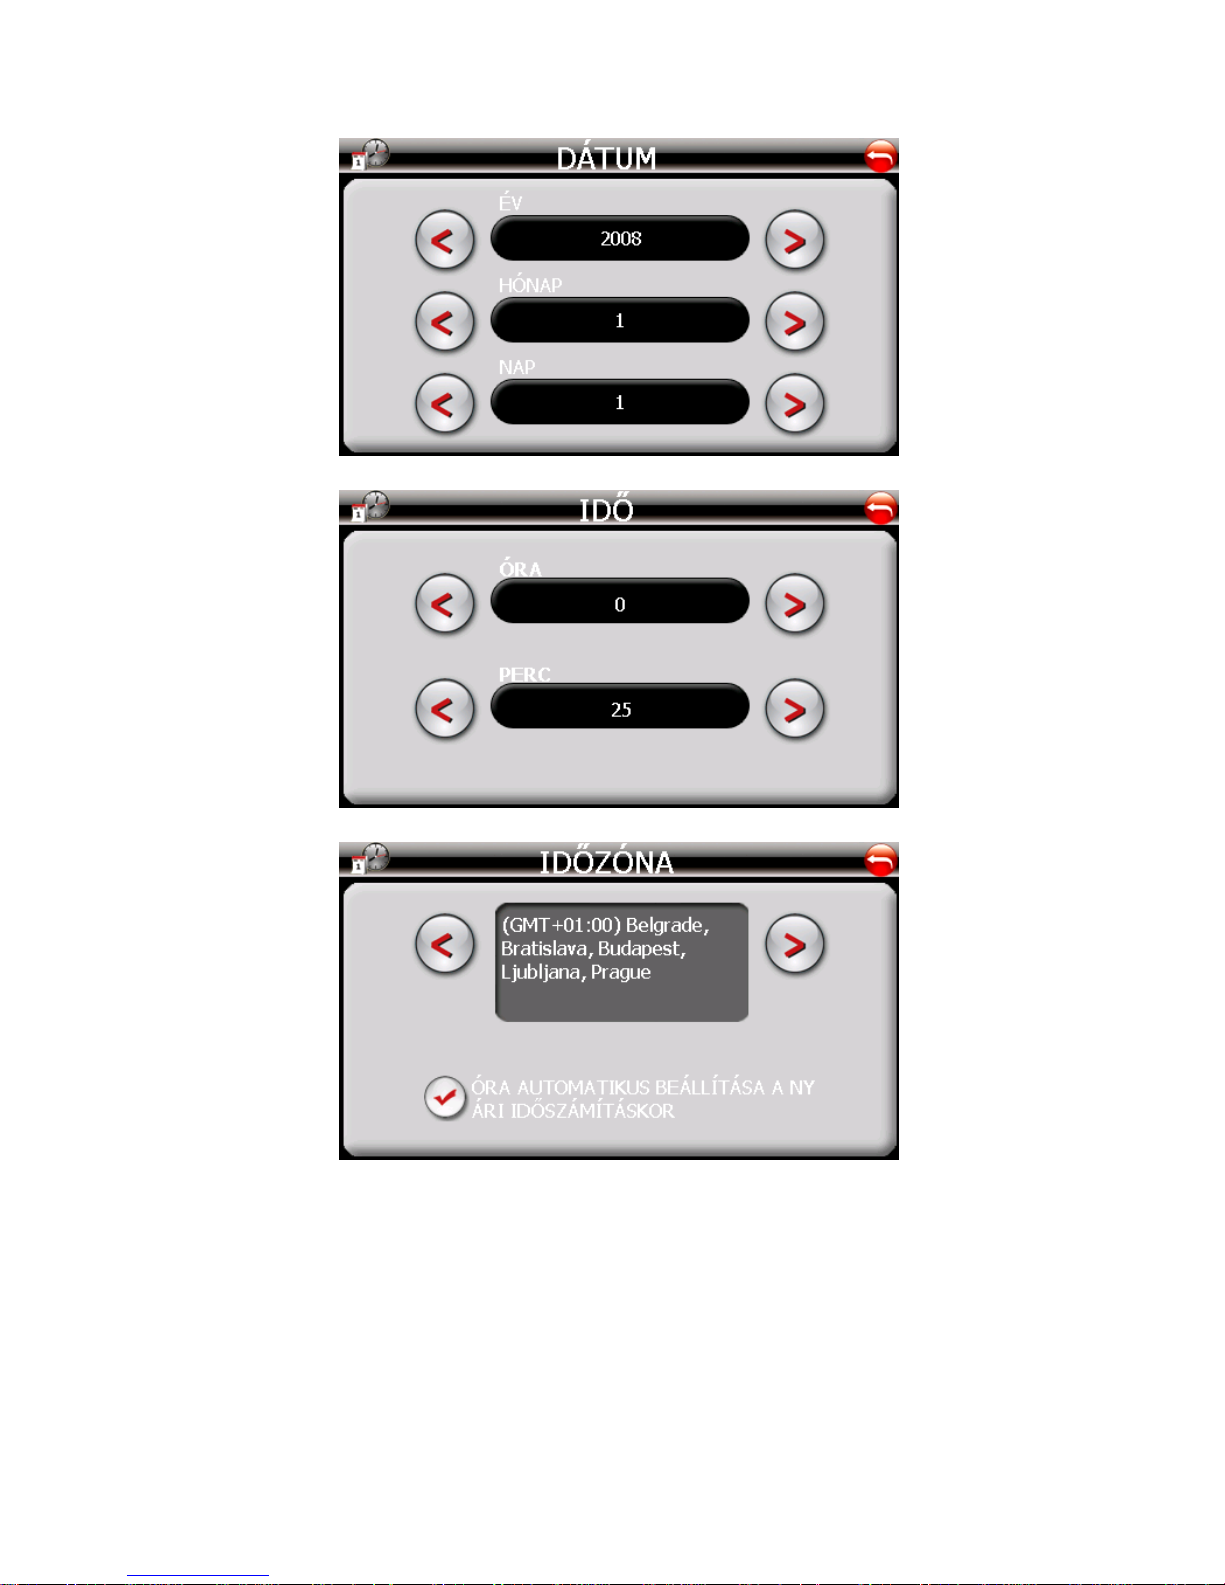
C. Tap "Time" icon and use "<" or ">" icon to adjust the time.
D. Tap "Time Zone" icon and use "<" or ">" icon to adjust the time zone.
This document is for guidance only and does not form part of any contract,
and may be subject to change without notice.
15
 Loading...